
The series “Get Crafty” features handy how-to guides that will help you tap into your passion for crafting and show you how to make all kinds of fun and inventive creations. Craft expert Julie Mulligan will provide a step-by-step tutorial for the creation process.
Who doesn’t love a good party favor, especially one that conjures up happy memories? Get creative at your next family reunion by making a parting gift for each family member in attendance.

One idea is to make individual baby spider plants by taking cuttings from a “mother” plant. As each guest departs, present them with the latest “family member” and ask them to share photos throughout the year with the rest of the family. This way, everyone can see how fast the little plants are growing.
If you’d rather not use a spider plant, then you can choose any number of other houseplants that are easy to propagate, such as pothos, prayer plants, and umbrella trees.
I find spider plants easy to create new plants from, as they’re continuously producing “baby” plants on their own. You just need to snip and root!
How to propagate a spider plant
Follow these steps to propagate a spider plant.
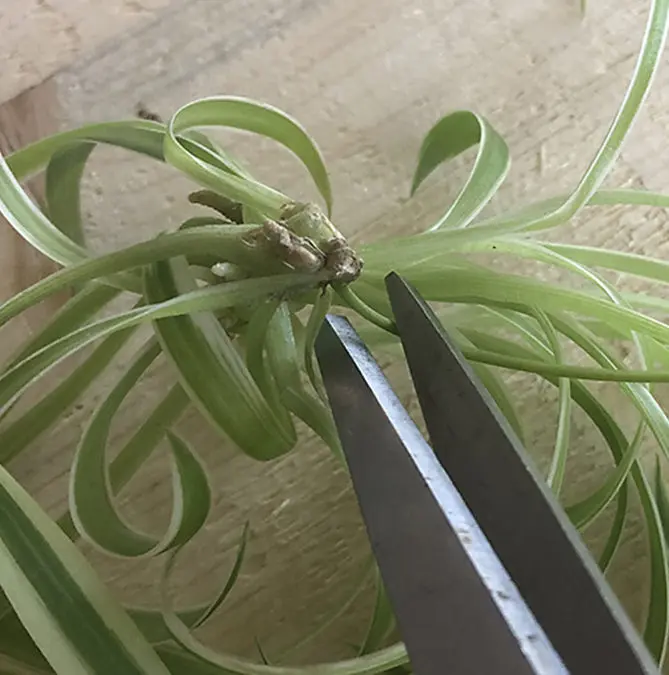
1. Look for a “baby” that has a nice nodule formed where it’s attached to the mother plant. Then, snip as close to the nodule as possible.
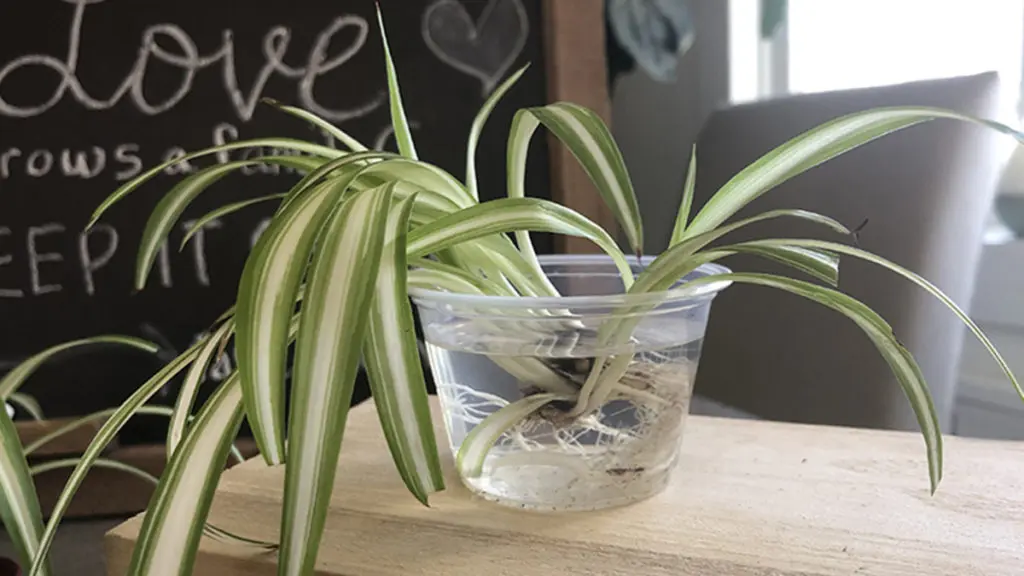
2. To form roots, place the cutting directly in either soil or water. You’ll be able to see the roots forming when you start with water, which can be exciting.
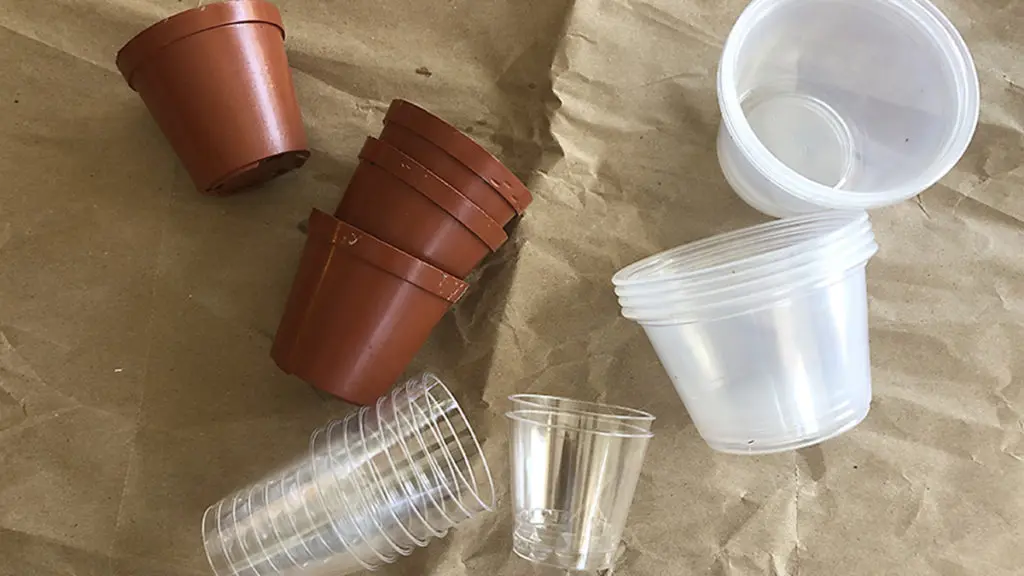
3. As for giving your plant a “home,” you can use various kinds of inexpensive and recycled containers. The small plastic condiment containers you get with take-out food are the perfect size.
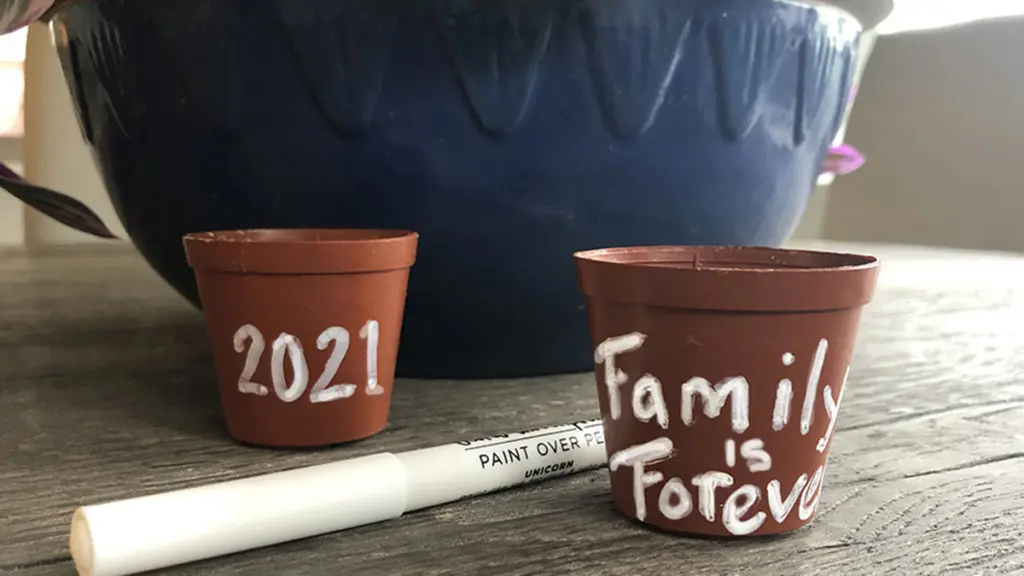
4. If you’re already a plant parent, then you may have some two-inch plastic pots; if you’re not, they’re very inexpensive. Before filling the pots with soil, jazz them up with a little creative decoration. Keep it simple, using a paint marker to write directly on the pots.
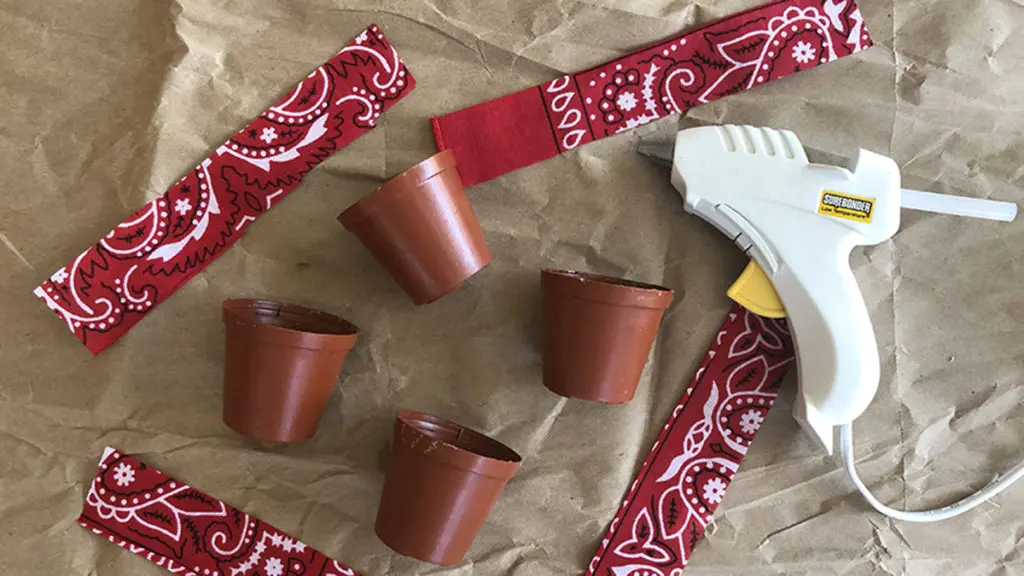
5. You can also use strips of the bandanas with which you made the garland, cut them to size, and glue them onto the pots.
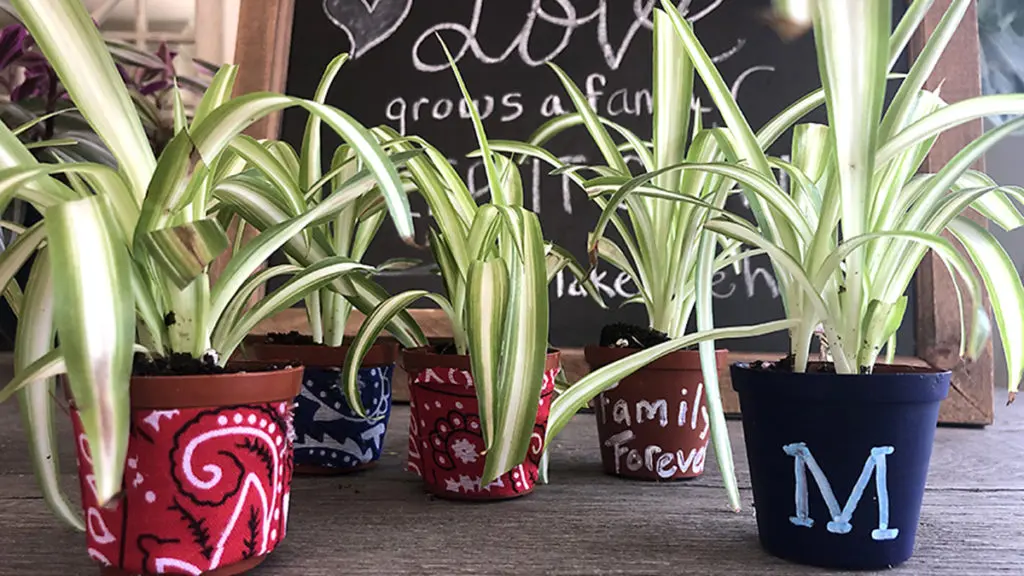
6. Don’t worry about perfection; these pots are only a temporary home for the plants until they have established a root base. Once that happens, you’ll need to replant them in a larger pot with more soil. Before long, you’ll be able to start making new plants from this cutting!
I’m sure you’ll find this DIY activity is a great way to make a family connection and keep the love growing.


Comments are closed.