
How to Paint a Flower
This simple step-by-step tutorial can turn anybody into an artist. Yes, even you.
Oct 20, 2022
Do you want to learn to be a better painter? One of the best subjects to practice with is a flower. Flowers are composed of easy shapes and pretty colors, points out Wendy Anderson, an artist and Paint Nite instructor. “You can be more playful with contrast and color, versus trying to draw a really complicated shape," she says.

Painting is a fun and relaxing activity, and it can even improve your mood. The human brain reacts positively to the aesthetics of a painting, which research suggests is a biological and neuroanatomical response dating back to prehistoric times.
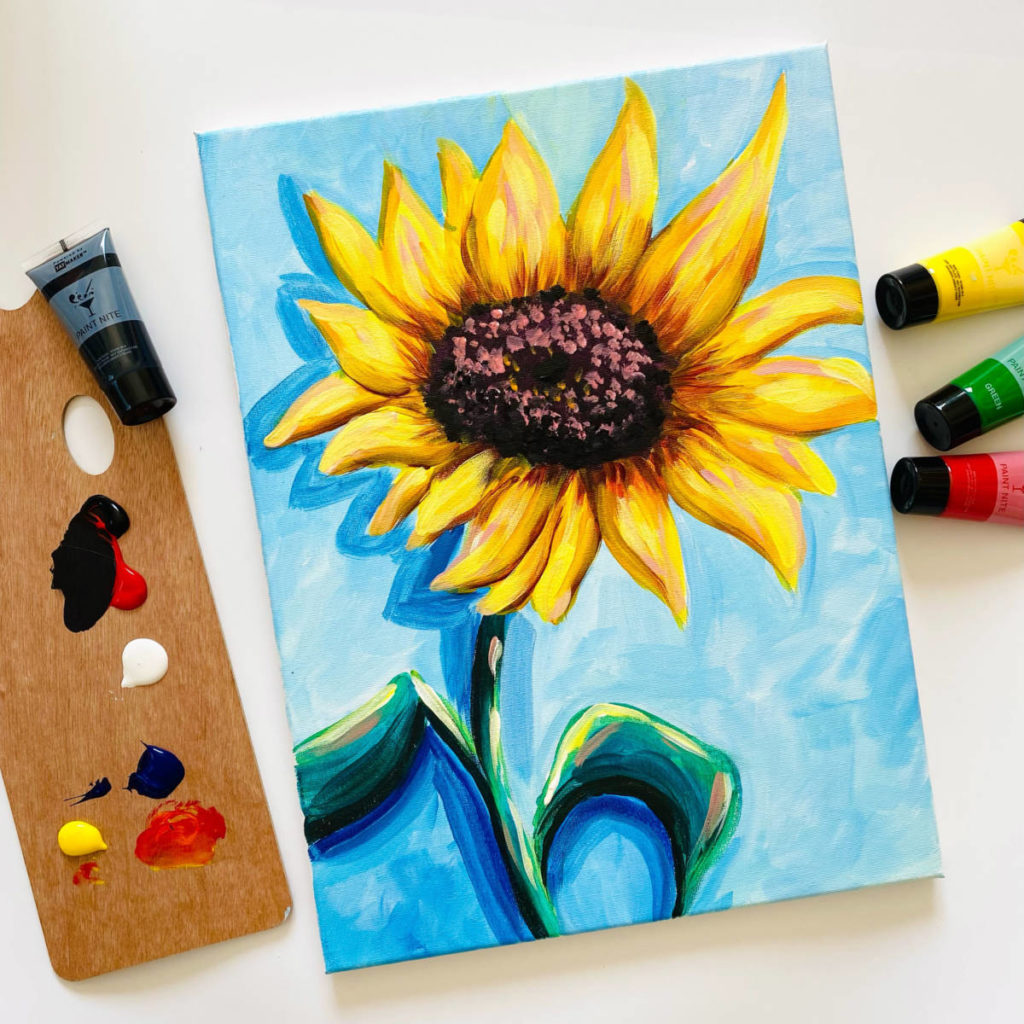
And speaking of objects that make us happy, sunflowers are probably the cheeriest blooms around — and they're easy to paint as well. Below is a step-by-step tutorial from Anderson on how to paint a large sunflower with lots of appealing highlights and shadows, using acrylic paints and a few brushes. It may look difficult, but it's not! Assemble your materials and follow these instructions.
Materials
- 12x16 stretched canvas
- Acrylic paint: black, blue, red, yellow, white, green (blue + yellow), orange (red + yellow)
- Brushes: (1) large square; (1) medium, either square or round; (1) small round
- Pencil
- Water
- Palette or mixing plate (plastic or glass)
Instructions

Step 1
Start by sketching your flower and leaves; keep it very loose and basic. Be bold and use a generous part of your canvas, as shown.
Step 2
For the background: Using a large square brush, paint the background light blue. Use white and blue mixed, then add yellow to lean toward teal blue or red for more of a cool baby blue. Add lighter colors toward the top and right side, and use a little added red in the blue to cool and darken the left side of the shape. Clean your brush in between each color application and let dry. (A little dampness is OK.)
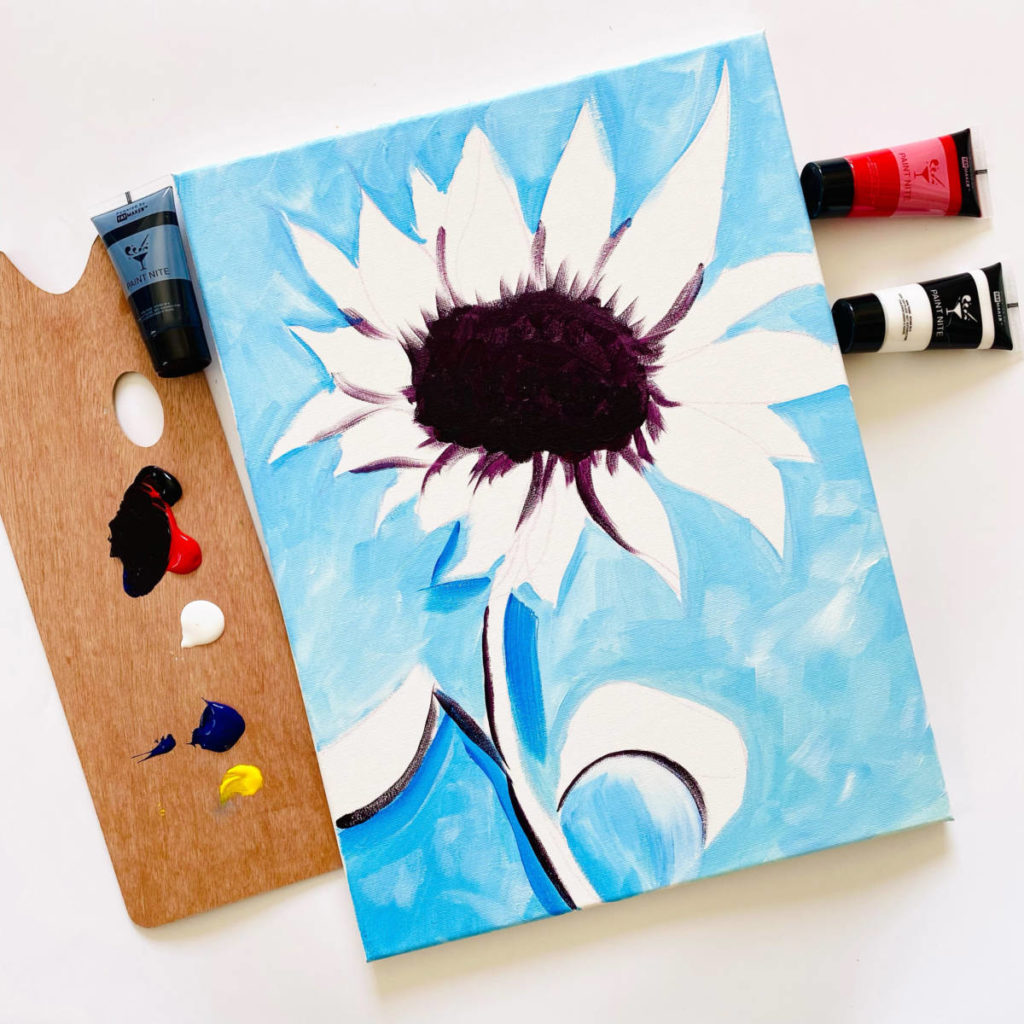
Step 3
For the center and shadowing: Use the medium round brush to mix some red and yellow, and add black until you see a dark brown. You can use any dark colors, such as dark purple (mix your red and blue together to make purple; for a darker shade, add a small amount of black if needed) or pure black, for this part. Add the dark shadows to the center and the stem and leaves. Fill the shadow for the center all the way in, even making your way into the edges and base of the petal shapes. The shadow for the stem will fall on the left side and for the leaves on the bottom. Let the layers dry.
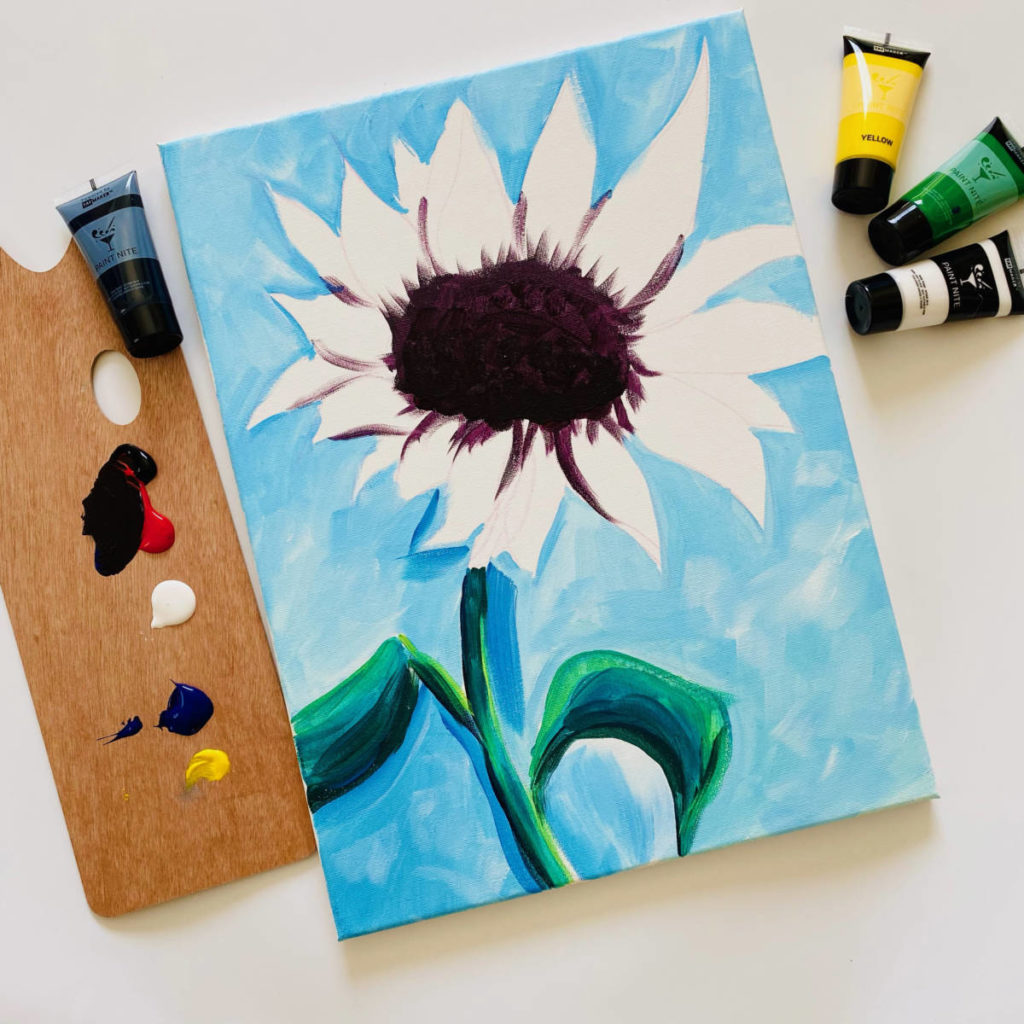
Step 4
For the leaves and stem: Use a clean, dry, medium round brush to paint in your medium green shades, using yellow and blue. Go from darker to lighter as you move up on your leaves and to the right on your stem. For a lighter shade of green, simply add more yellow.
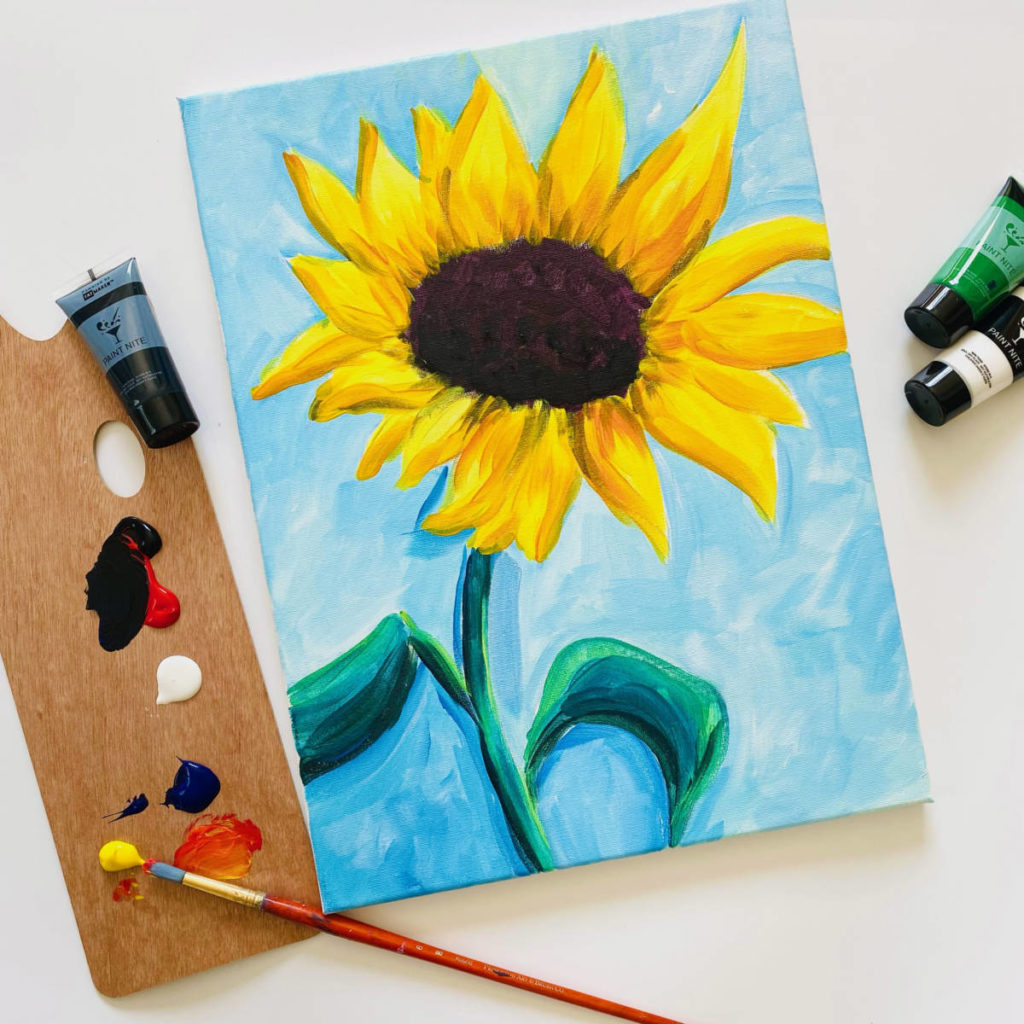
Step 5
For the petals: Clean the brush and add yellow mixed with a little white for your petal base color. Petals should be thicker at the base and come to a point at the tip. You can add some personality here by curving them this way or that and making them various sizes (not all petals are exactly the same). Using a slightly darker shade of yellow, which you can achieve by mixing a little red and yellow, add some strokes feathering from the bottom of the petals out and around the edges.
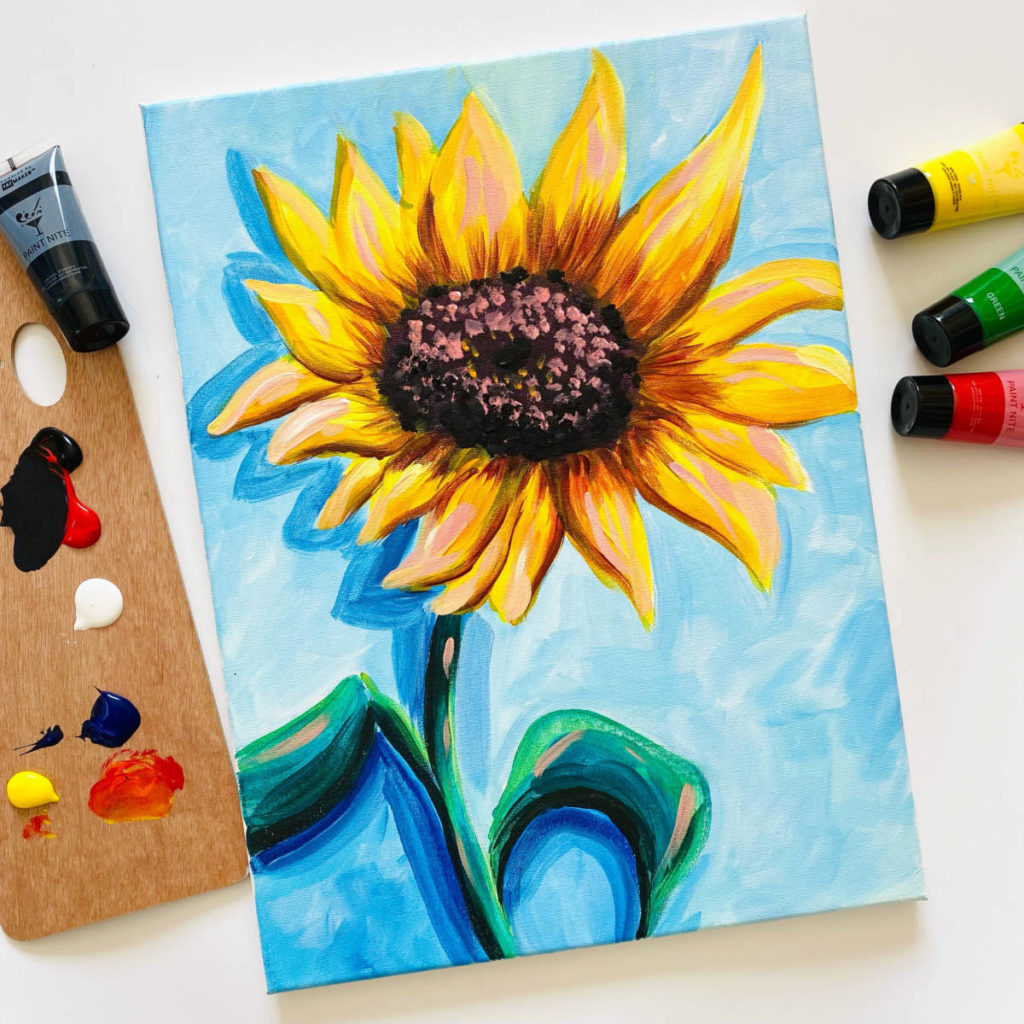
Step 6
For some layering: Create an even darker shade, mixing red into the yellow and adding a tiny amount of blue to make burgundy. Pull this shade from the edges of the center and out into the petals for some medium shadow colors. Next, use some pink (red mixed with white) or orange (red mixed with yellow) to stipple (dab) the center of the flower. Brush this lighter color onto the centers or edges of the petals, being careful not to cover them completely.
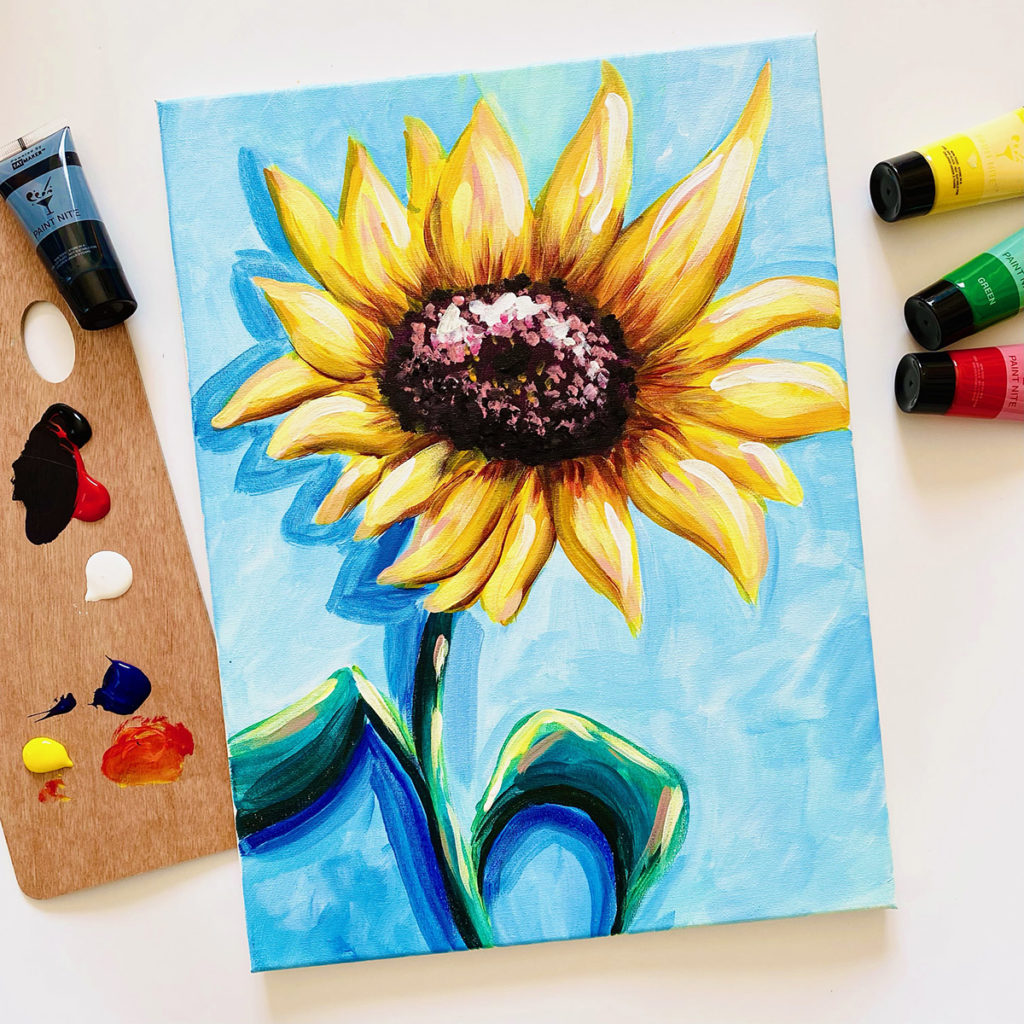
Step 7
For highlights: Using the small round brush and white paint (or very light pink or yellow), tap and stipple toward the top of the center of the flower, adding strokes toward the top of the leaves and the far right of the stem. You can also add highlights to the tips of the petals. Make any finishing touches you wish. And don't forget to sign your creation!
Wendy's 3 tips for becoming a better painter
- Adjust your mindset. You are an artist and must call yourself an artist before you start. Don't insist that your creation has to look exactly like the sample; just enjoy the process.
- Many people are afraid to take up space on the canvas; you actually want to take up space. Use enough paint, let it go on, spread it out, and don't be afraid to mess up. Composition is affected by the size.
- Check your colors, and make sure you always mix three different shades for each element. For example, the petals would have three different shades of yellow, ranging from light to medium to dark. Try to make each shade very distinct from the others.
AUTHOR

Erika Kotite is a she shed expert and the author of three books: She Sheds: A Room of Your Own; She Sheds Style: Make Your Space Your Own; and She Sheds: A DIY Guide. She co-founded "She Shed Living" to help women celebrate their lives in the backyard and natural world.


