
How to Make Painted Flowers
Learn how to make a unique and personalized multi-colored flower bouquet.
Jun 22, 2015
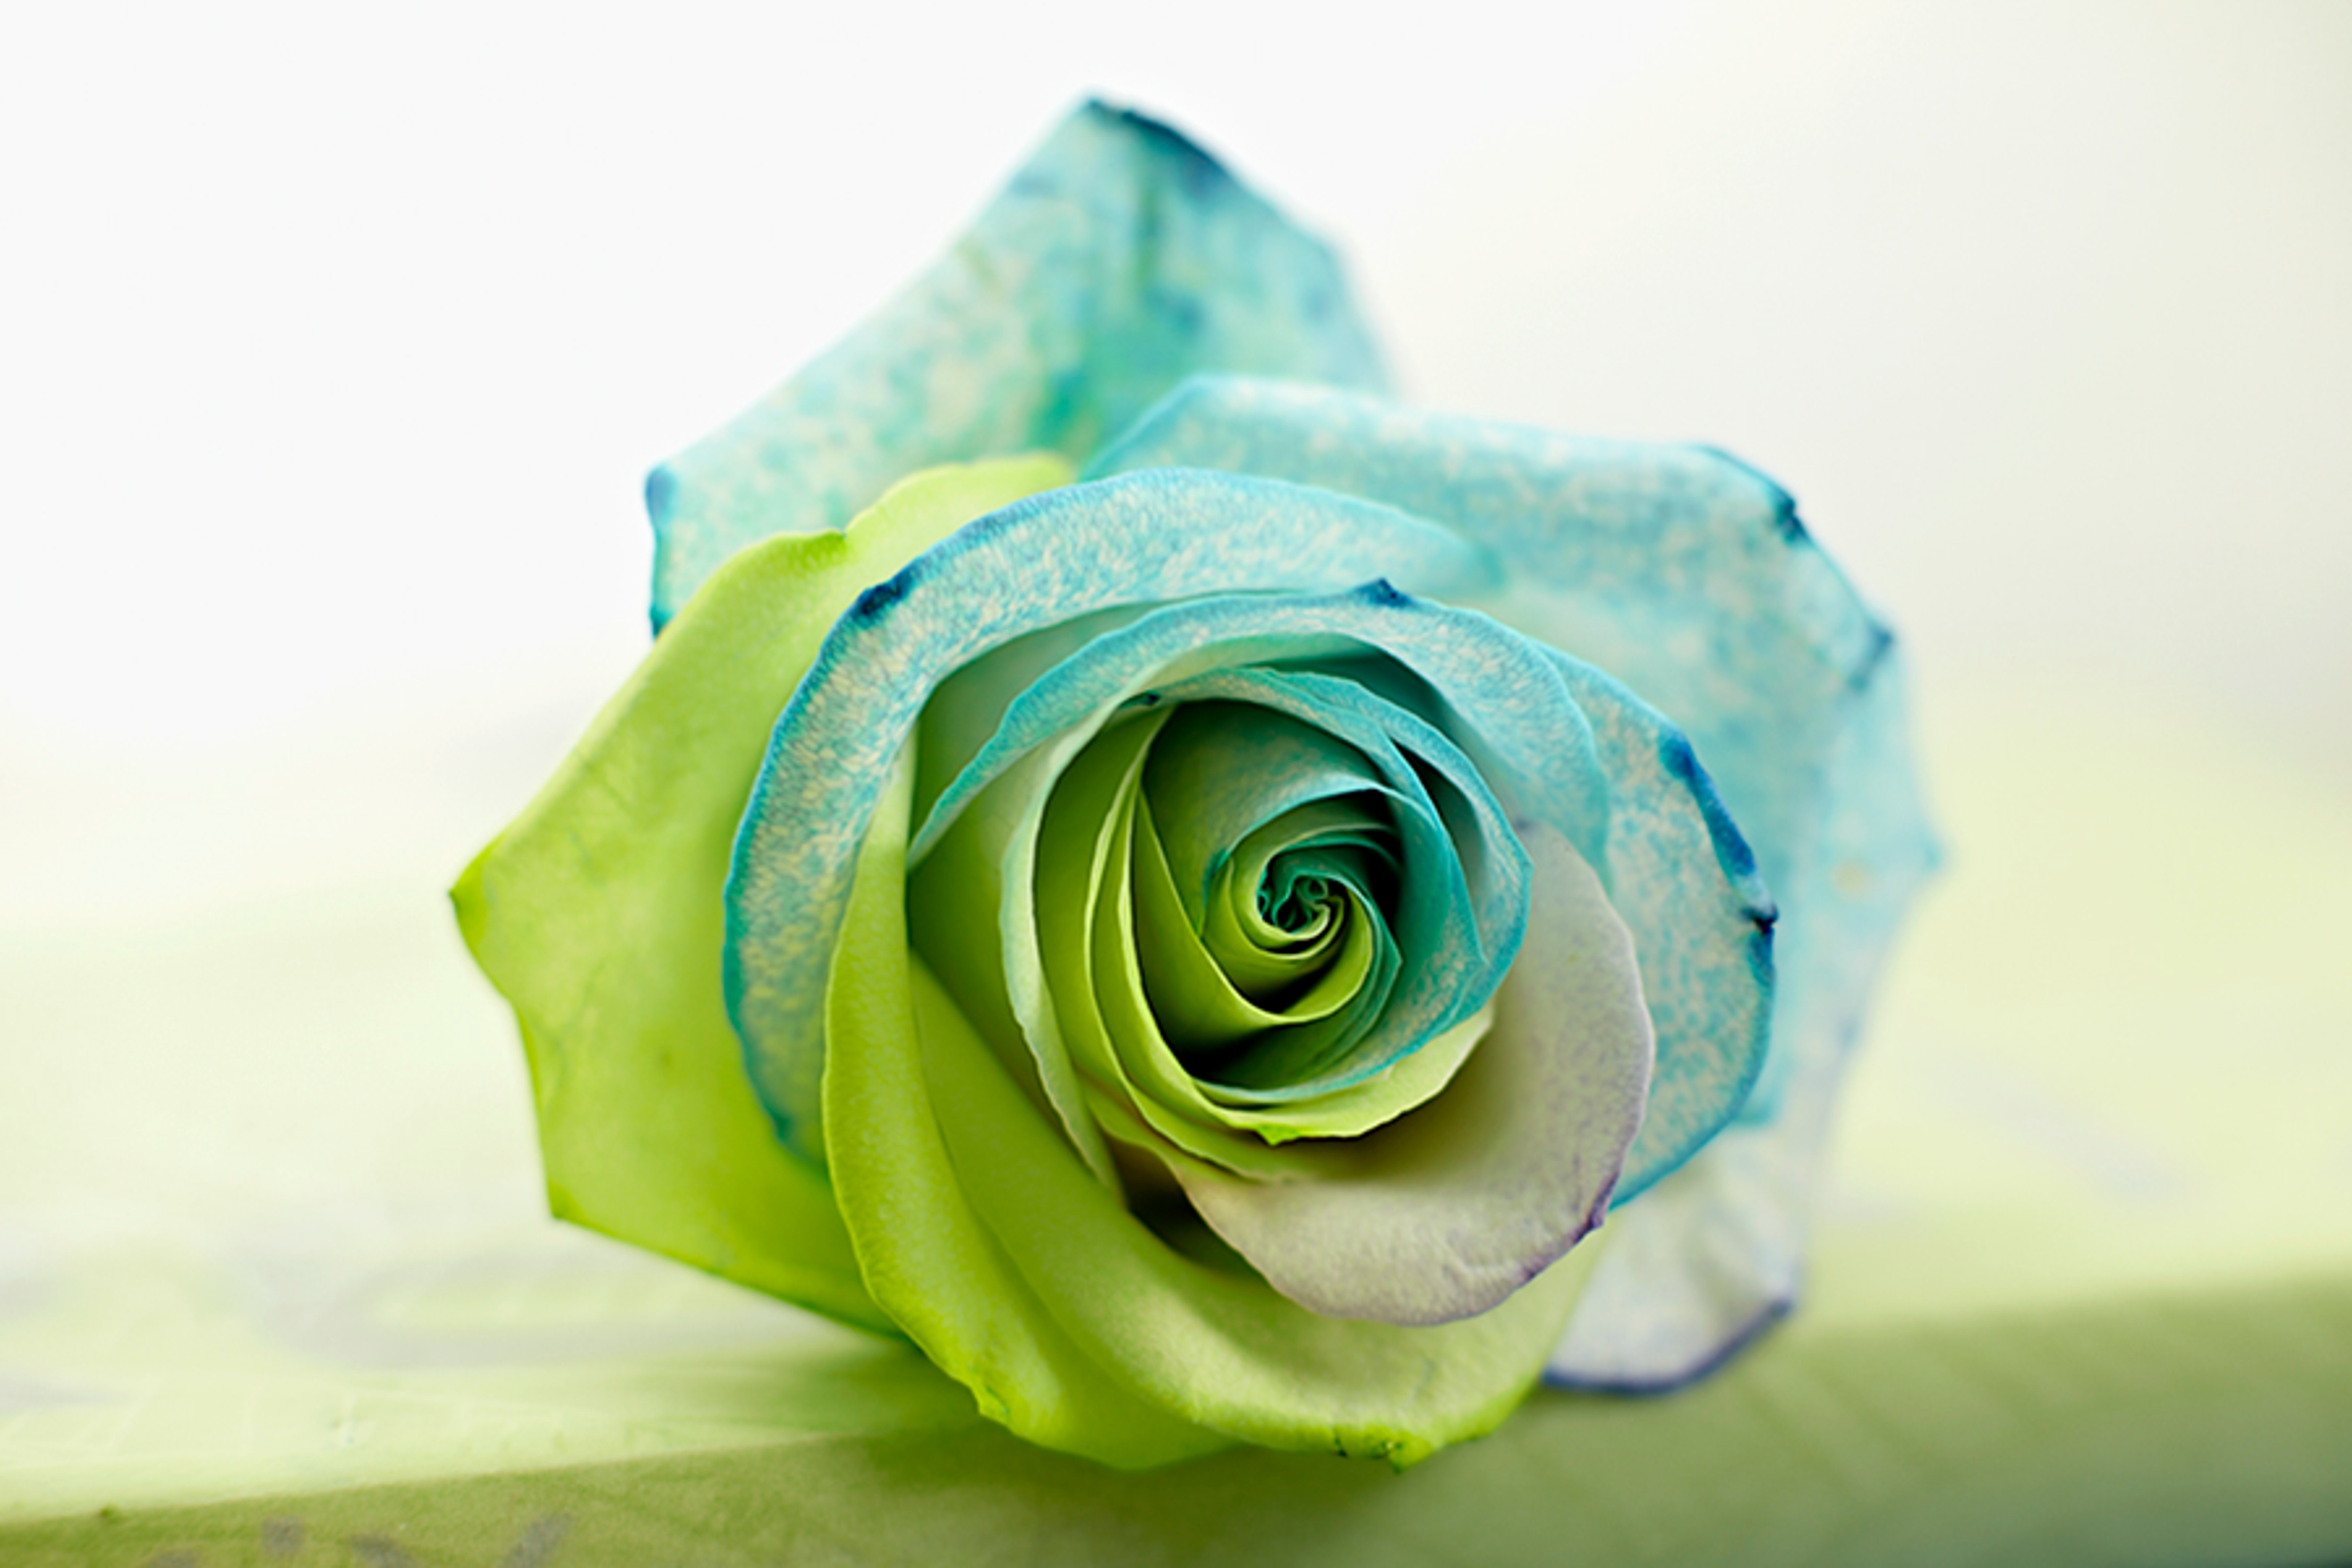
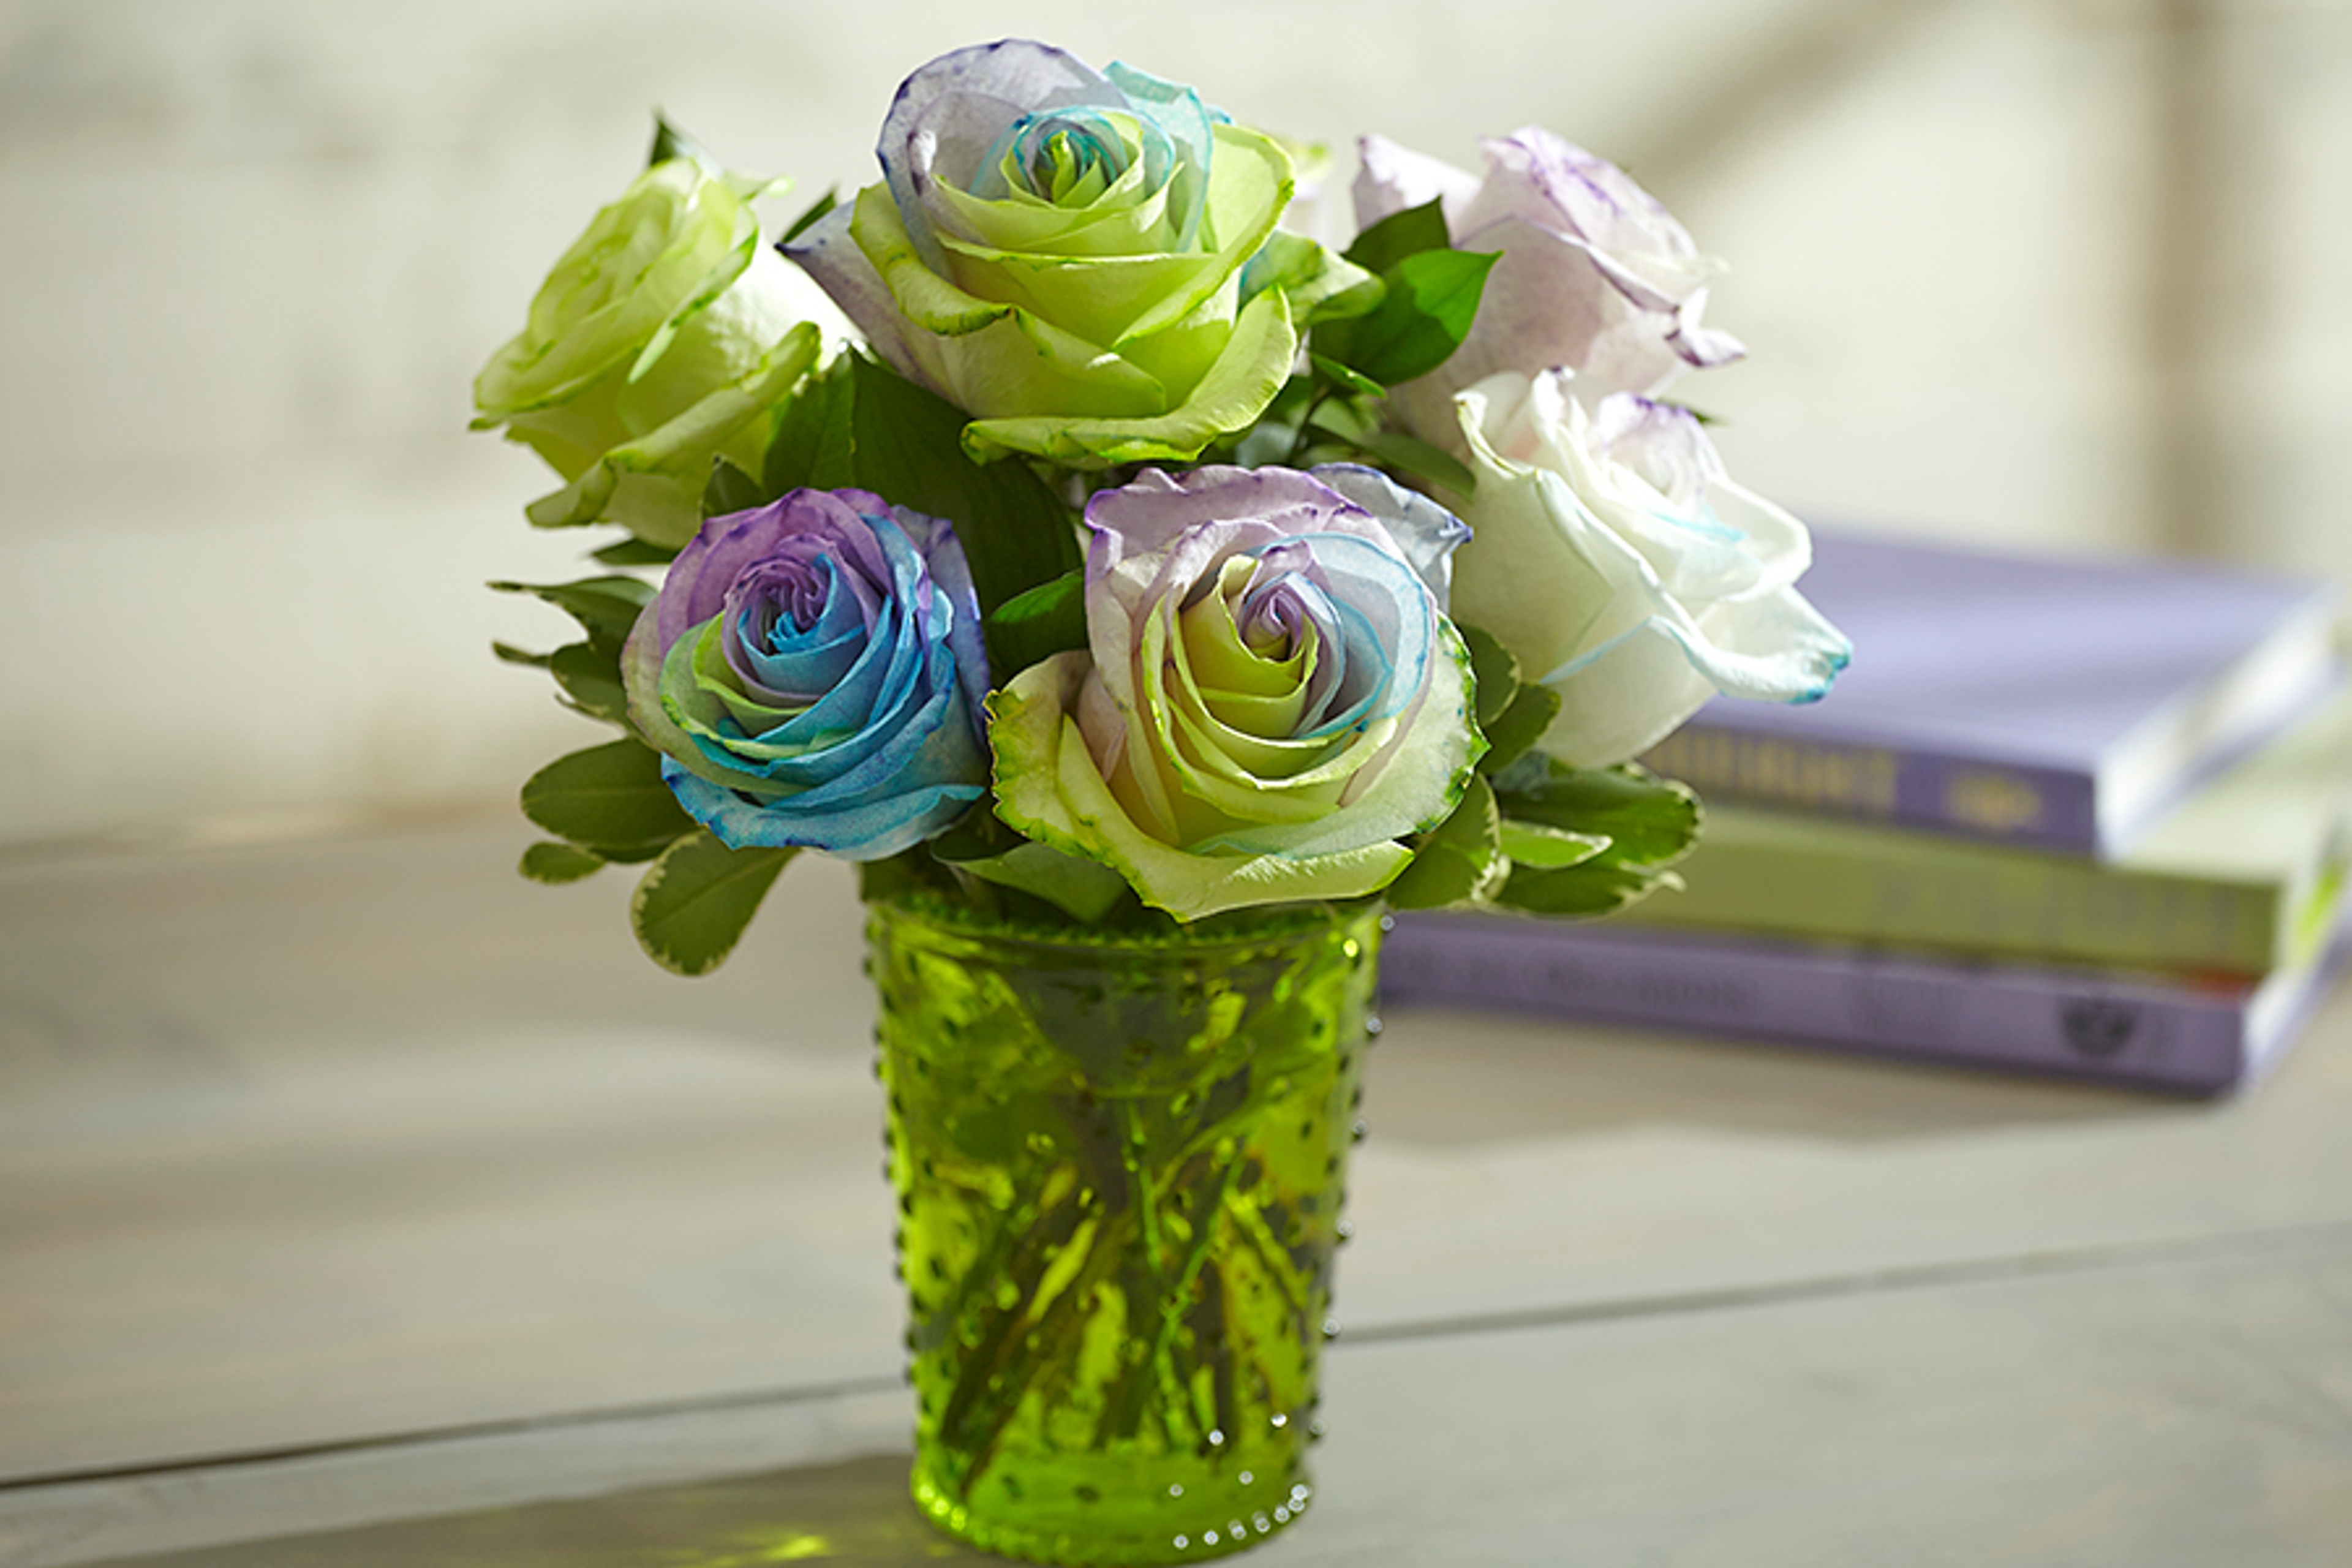
Painted flowers have become extremely popular of late. There are basically two different methods for painting flowers: stem dying and surface painting. One of the most popular is the stem-dyed, multi-colored rose, also referred to as rainbow, tie dyed, or kaleidoscope roses.
This method, used to achieve a multi-colored rose, is one of the more complicated processes, but the results are stunning. While the flower growers at 1-800-Flowers.com have this process down to a science, it’s also a fun project to try on your own. This was actually the first time I tried it myself, and it was so interesting to see how the petals on each rose accepted the various dyes a little differently, creating a bouquet of roses that is as unique as it is beautiful.
Stem-dyed roses
Supplies for stem-dyed roses
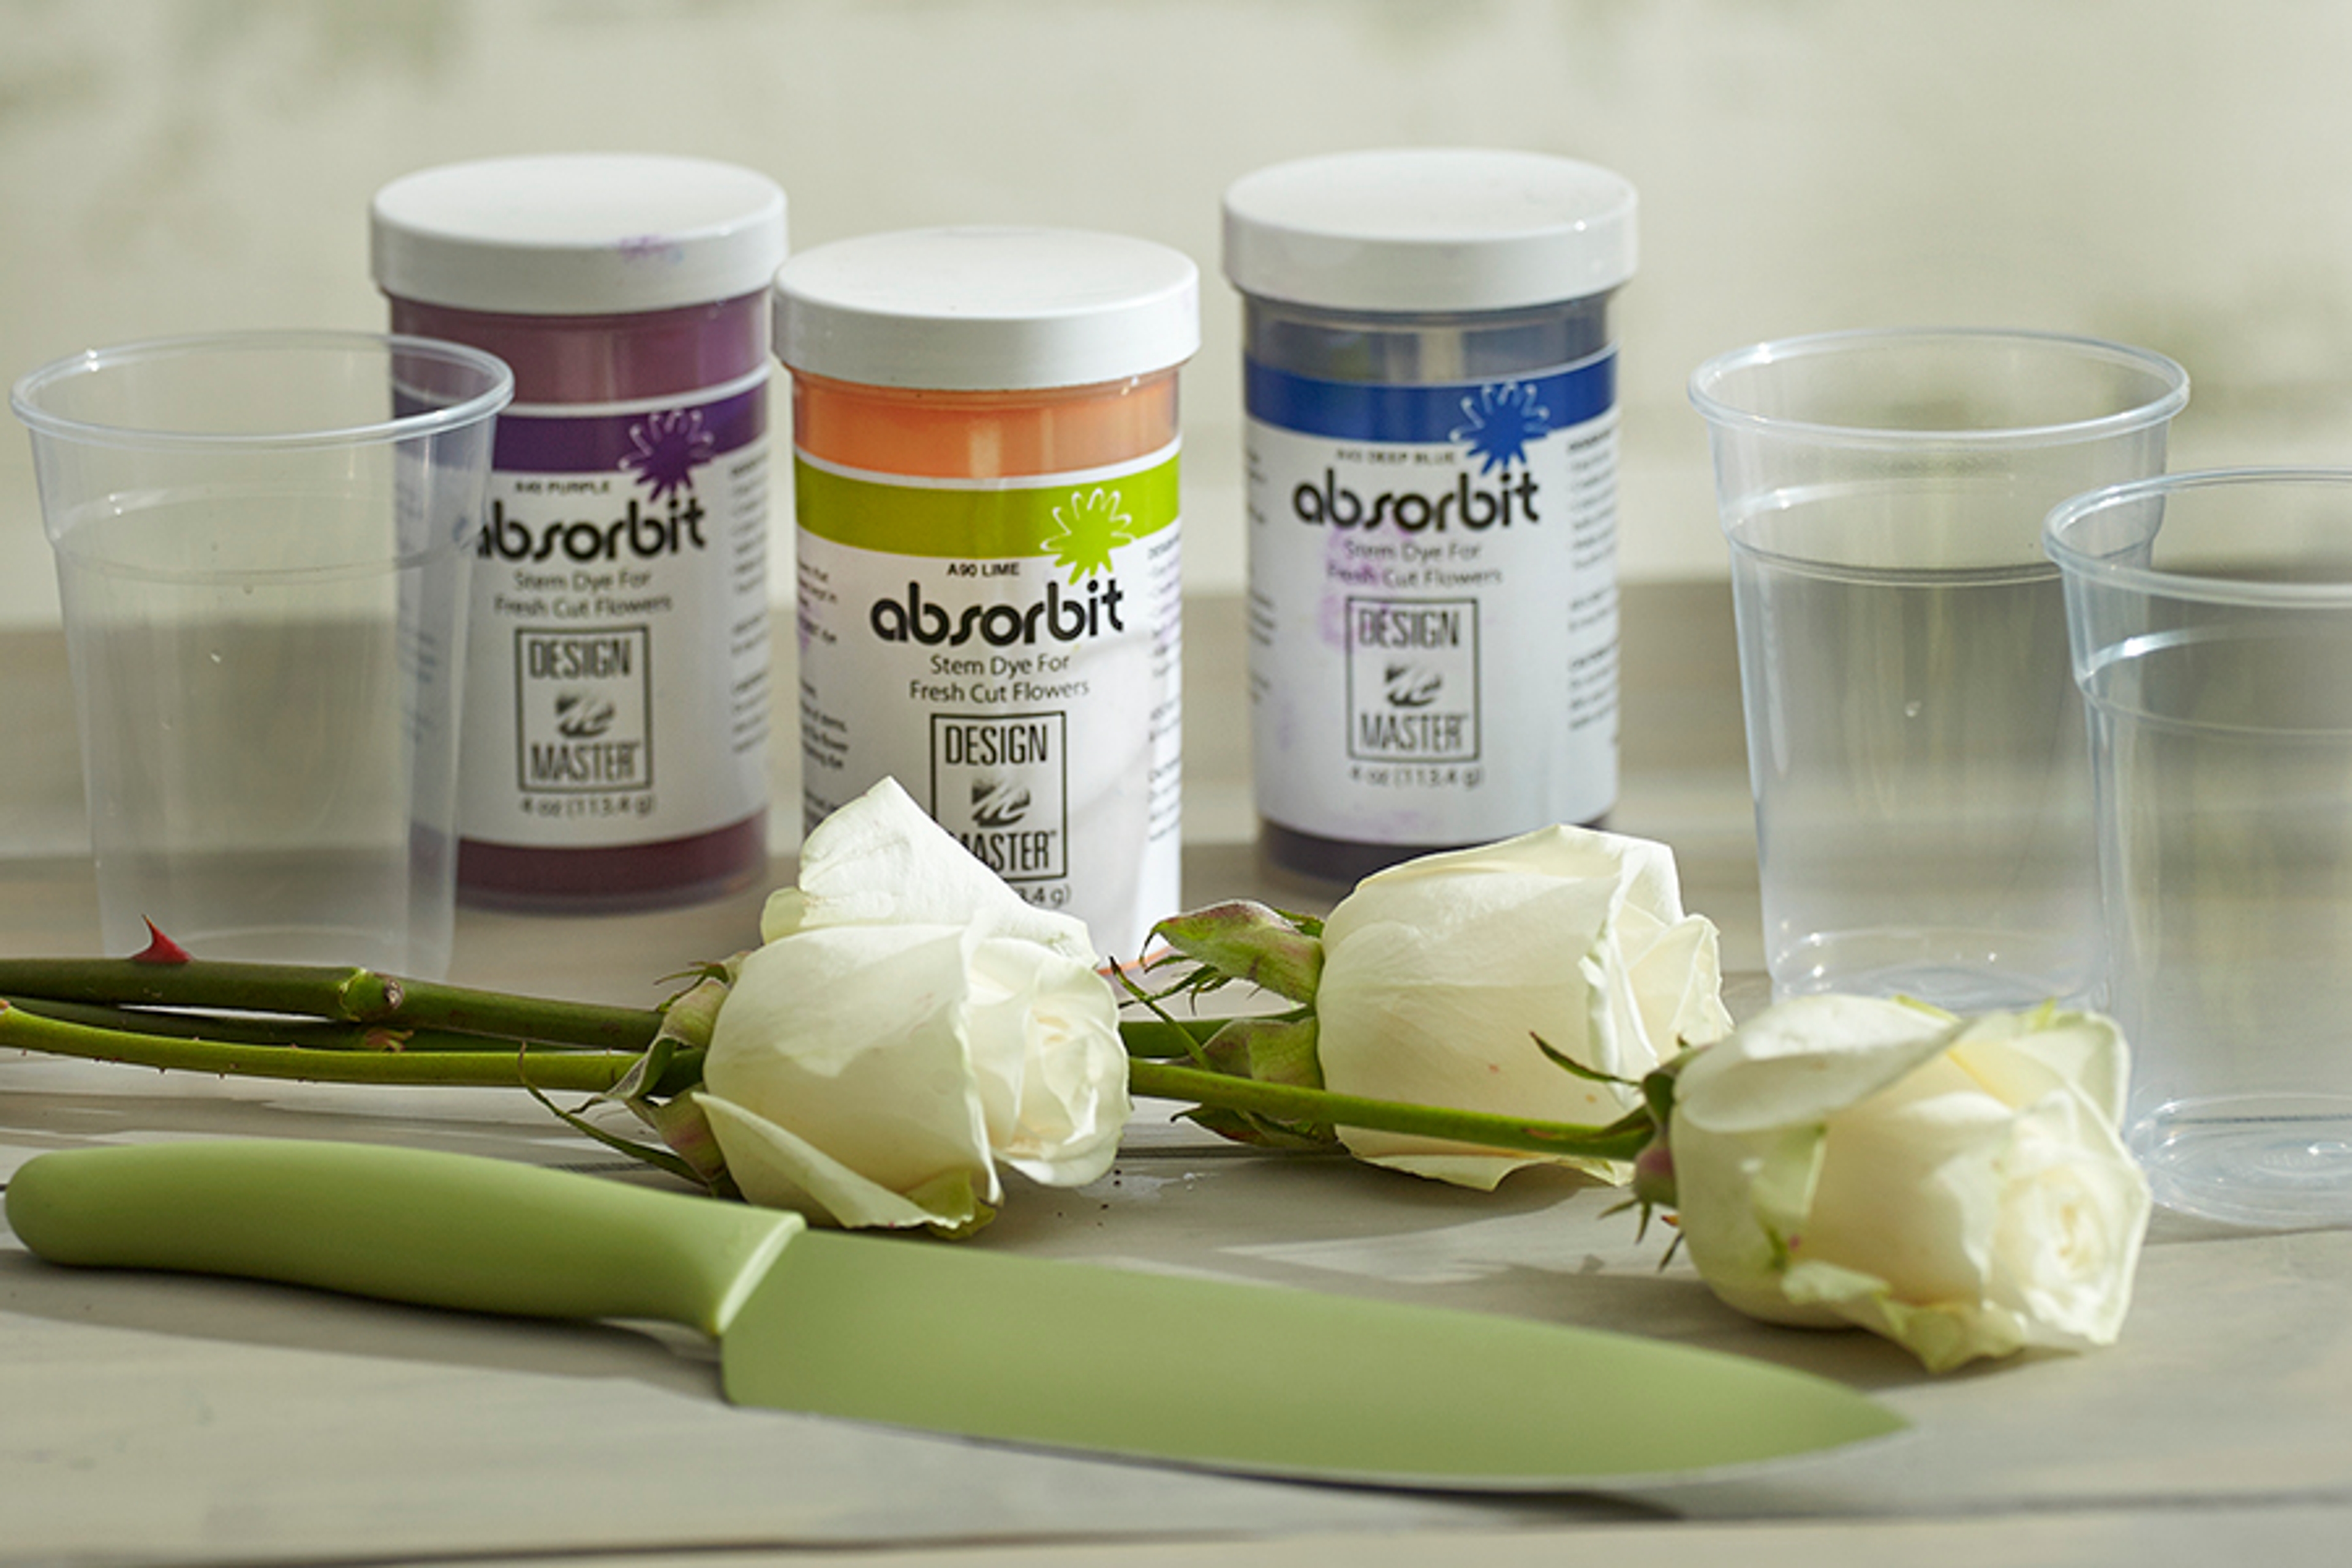
- White roses
- Stem dye for cut flowers (three different colors)
- Three plastic cups
- Sharp knife
- Large container big enough to hold the three plastic cups
Instructions
- Choose white roses that have already begun to bloom and are slightly open. For best results, store your roses out of water and on a shelf in a cooler or cool location overnight.
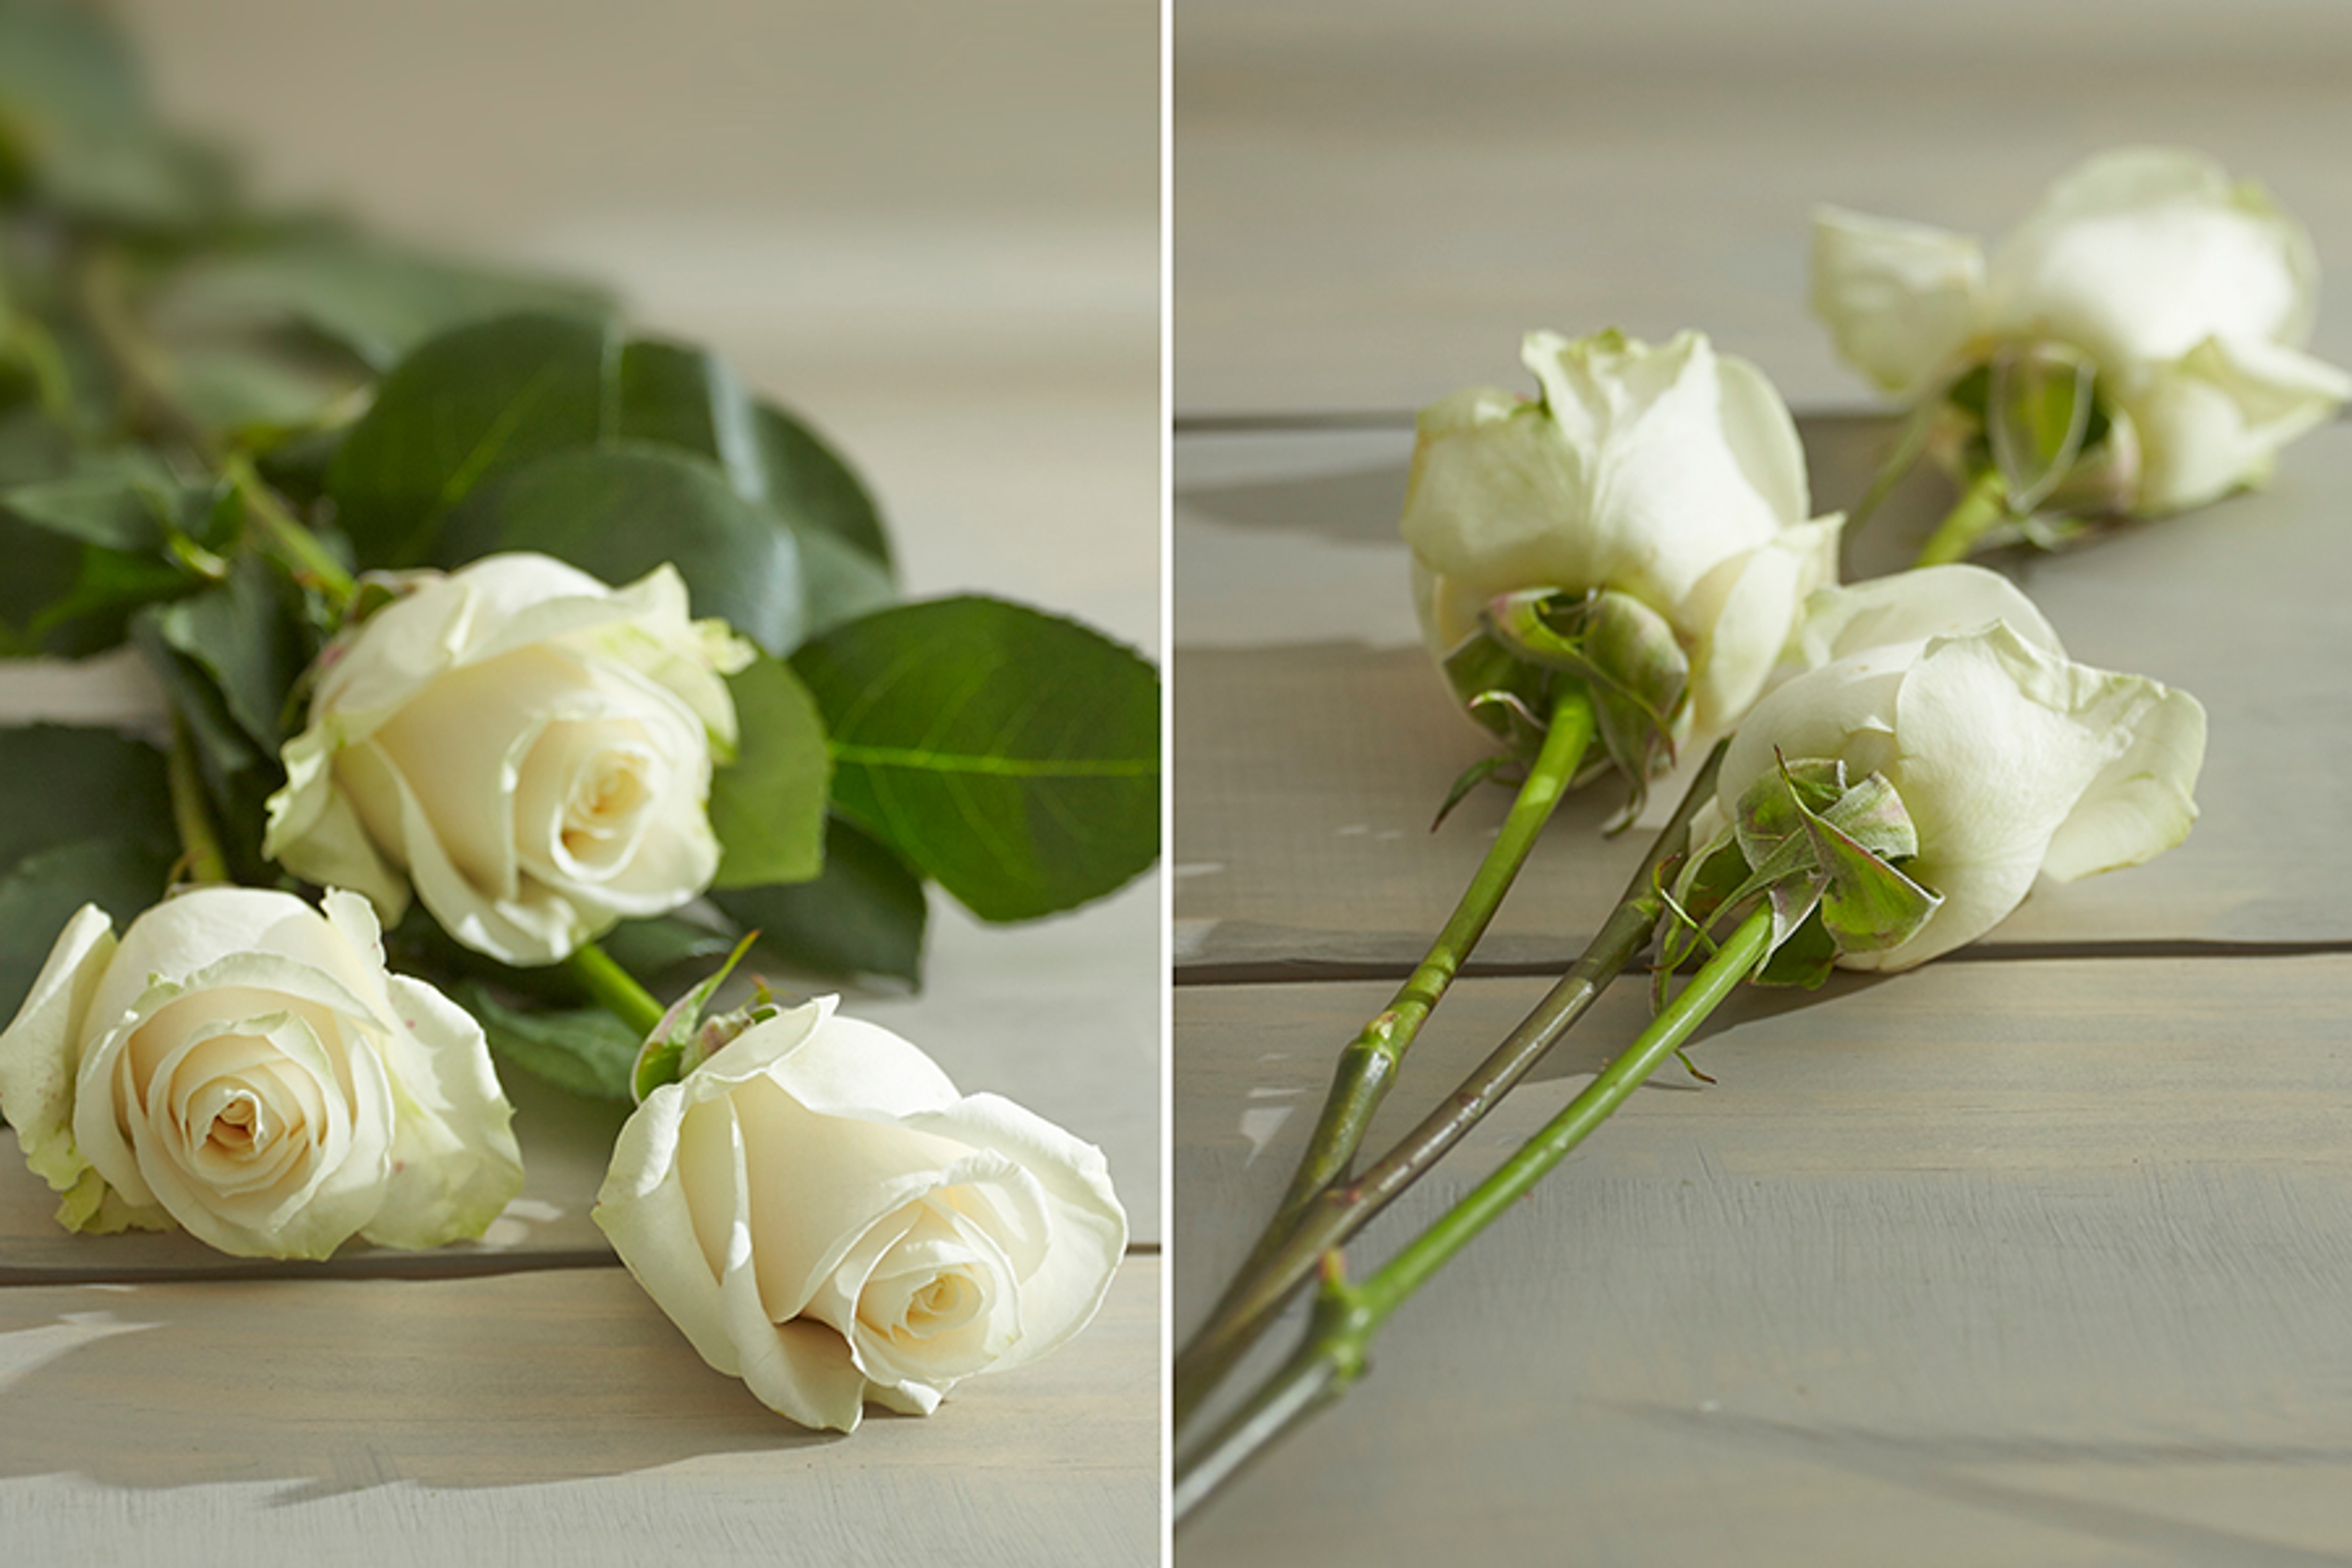
- Remove all foliage from the stem of each rose.
- Cut the ends of the stems so that they are as long as you’ll want them to be in your vase. The shorter the stem length, the easier the process will be.
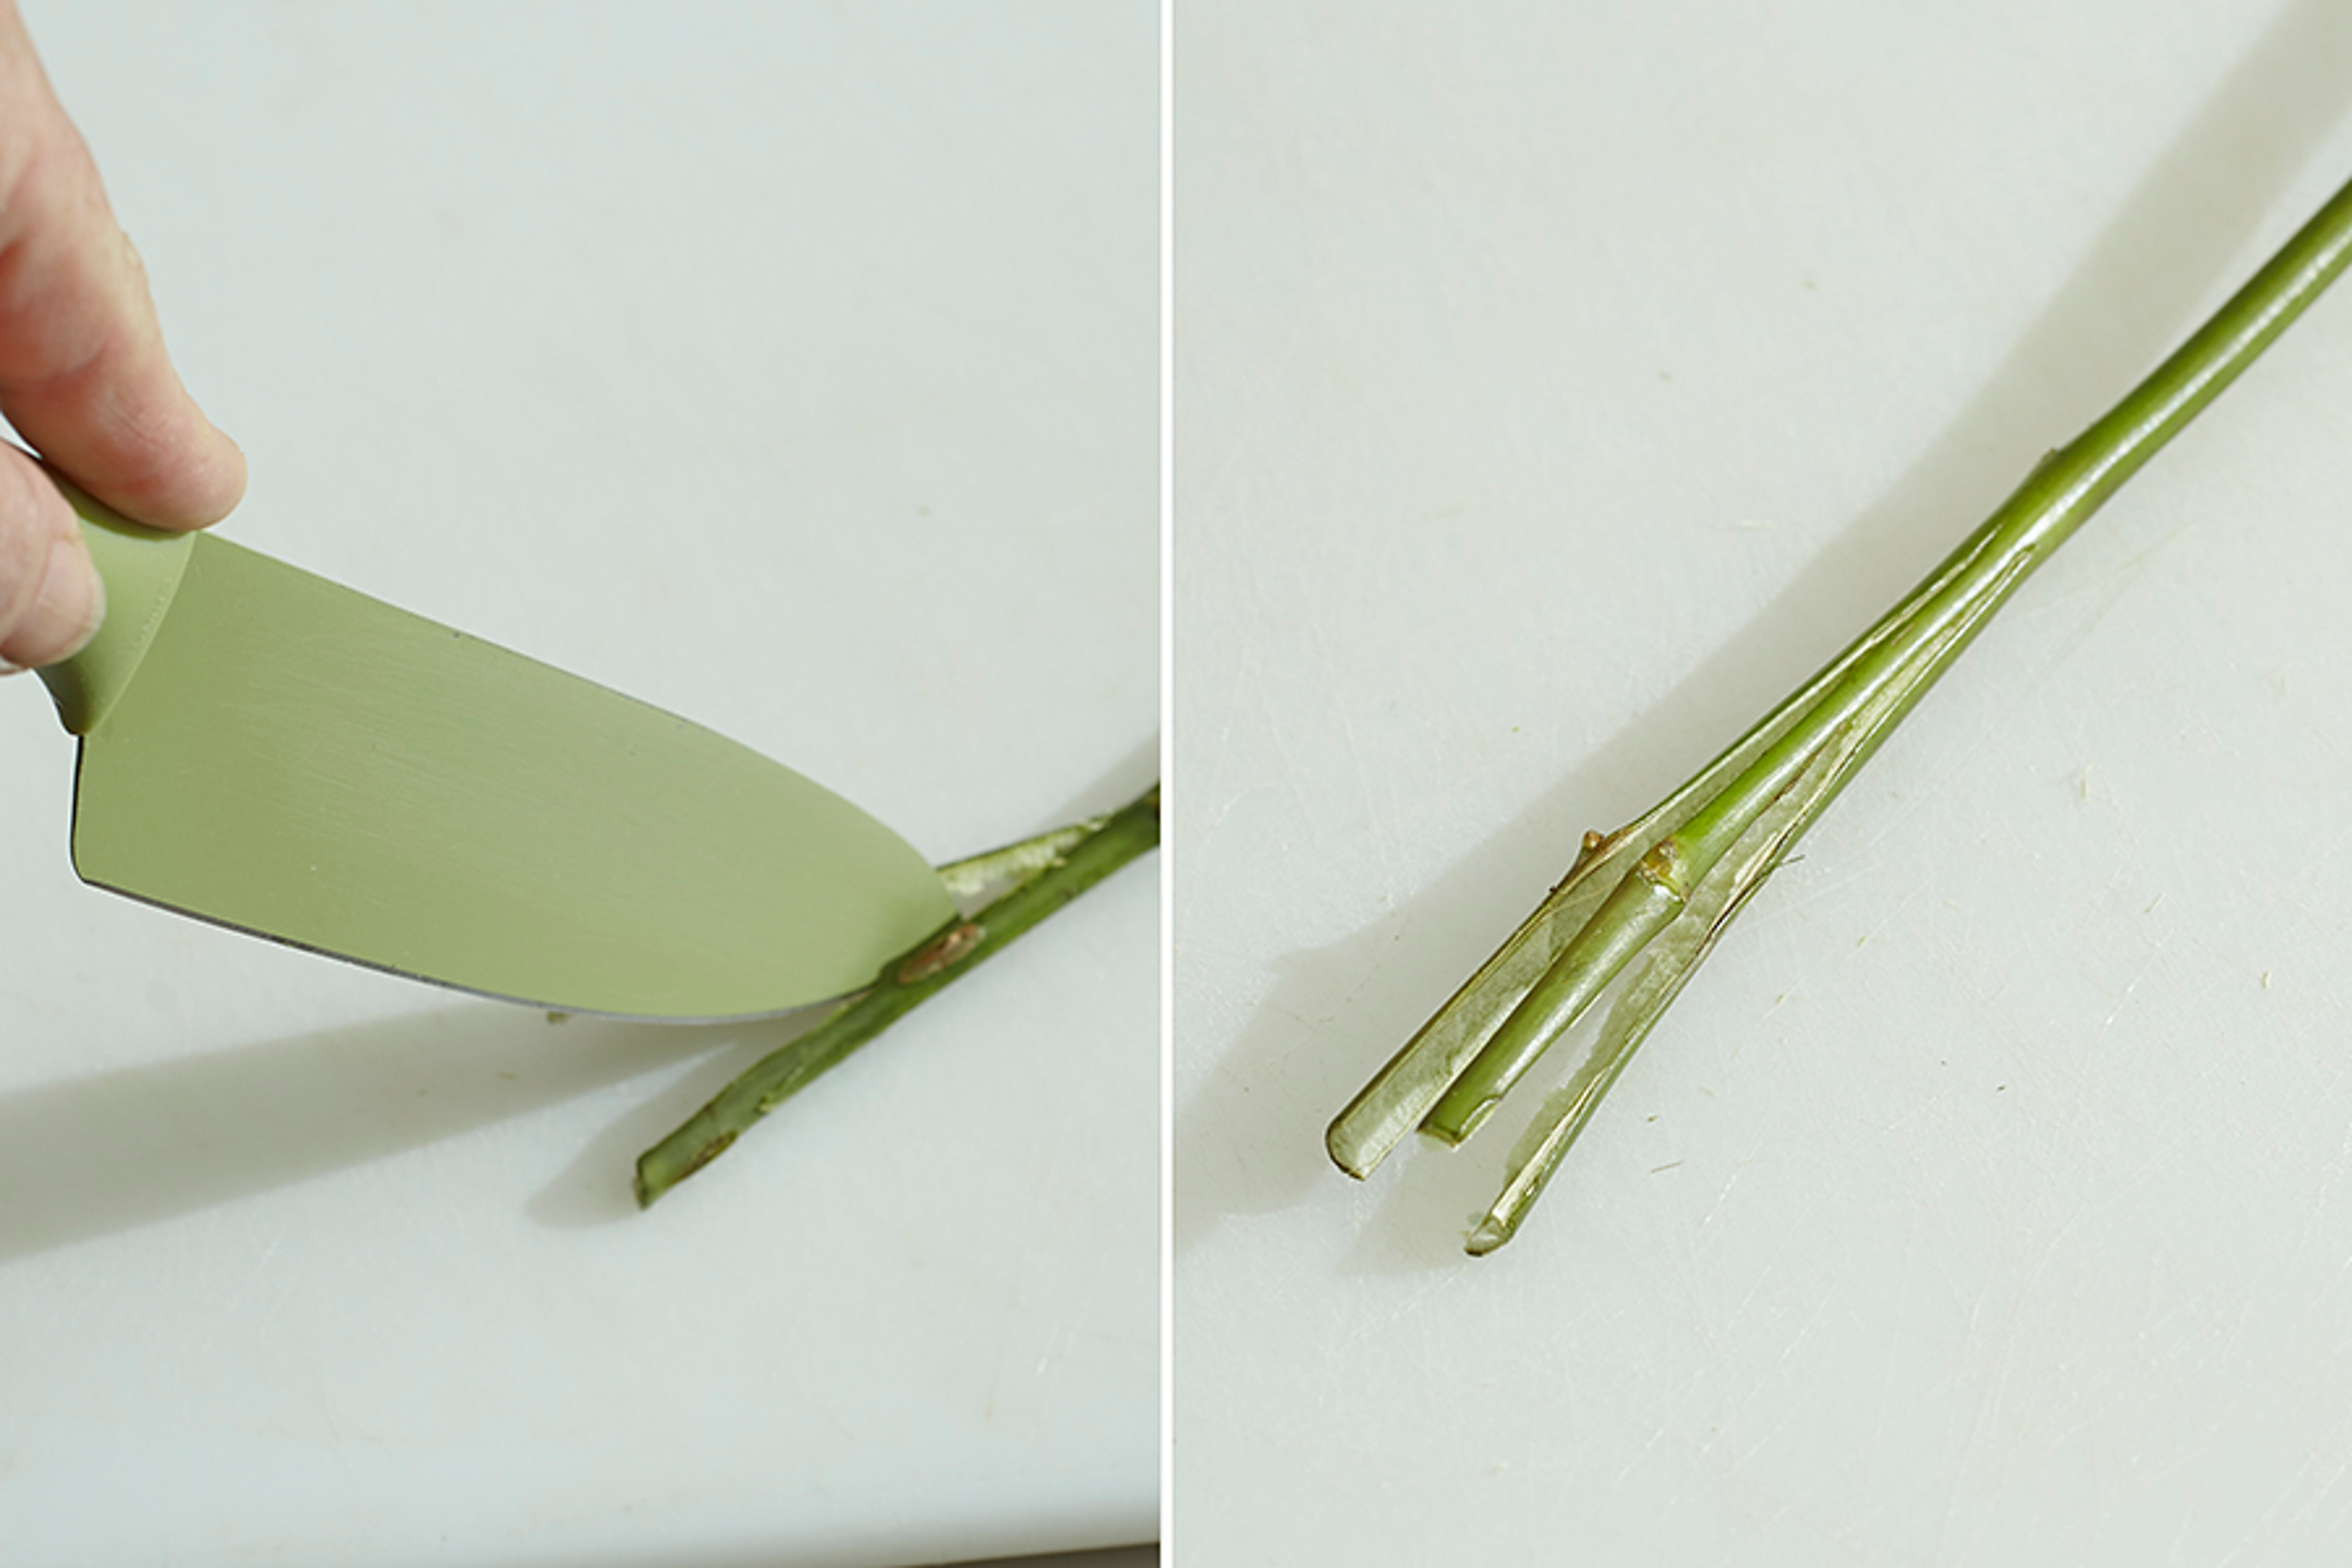
- Place each rose on a flat surface and split the bottom of the stem into three sections (one for each color) using a sharp knife. The split sections should be at least 3 inches in length.

- Fill three plastic cups with water and add the flower stem dye according to the package directions.

- Insert the roses with the split stems one by one into the cups of dye, making sure each section of the stem goes into a different color. (I found it easier, and safer, to put the each cup of dye into a larger container before adding the rose stems.) For added security, I wrapped a pipe cleaner or chenille stem around all the rose stems and taped the ends of the pipe cleaner to the outer vase. If your roses are shorter, then you probably won’t need to do this.
- Keep the roses in the dye for 30-60 minutes.
- Remove roses from the dye, rinse off the bottom of the stems, and place them in a container with clean room temperature water, and allow to hydrate for 24 hours.

The rose is now completely hydrated, the dye has reached the rose petals, and your rose has been transformed into a beautiful technicolor spectacular!
Surface painting fresh flowers
Spray painting is the easiest way to change the color of most varieties of fresh cut flowers. There are different brands of paint available, as well as various types of paint. There are also a few different methods of painting.
I used paint from Design Master, which has a great site with all kinds of information and inspiration that I recommend checking out.
Exploding firecracker flowers
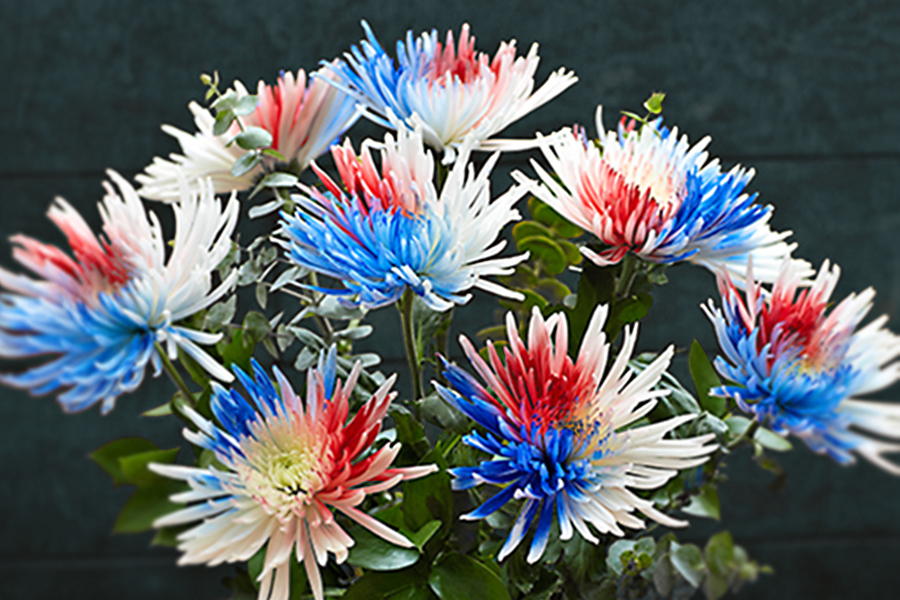
Decorate your next summer soirée with exploding fireworks! All you need are:
- White spider mums
- Red and blue floral spray paint
- Small piece of cardboard
- Exacto or sharp knife
- Newspaper, craft, or any scrap paper
- Latex gloves (optional)
If you don’t have latex gloves available, you can insert the stem of the spider mum through the center of a piece of scrap paper to protect yourself from getting painted, along with the flower!
Before starting, make sure to read the directions on the paint can. Believe it or not, there are people (like me) who don’t always bother reading the directions...not smart!
Air brushing technique
You can simply spray various spots of the spider mum using the red and blue paint, or, if you want a particular pattern, you can create a template with a small piece of cardboard.

For the “target” effect I was going for, I first cut a small hole the size of a quarter in the center of a square of cardboard that is slightly larger than the spider mum.
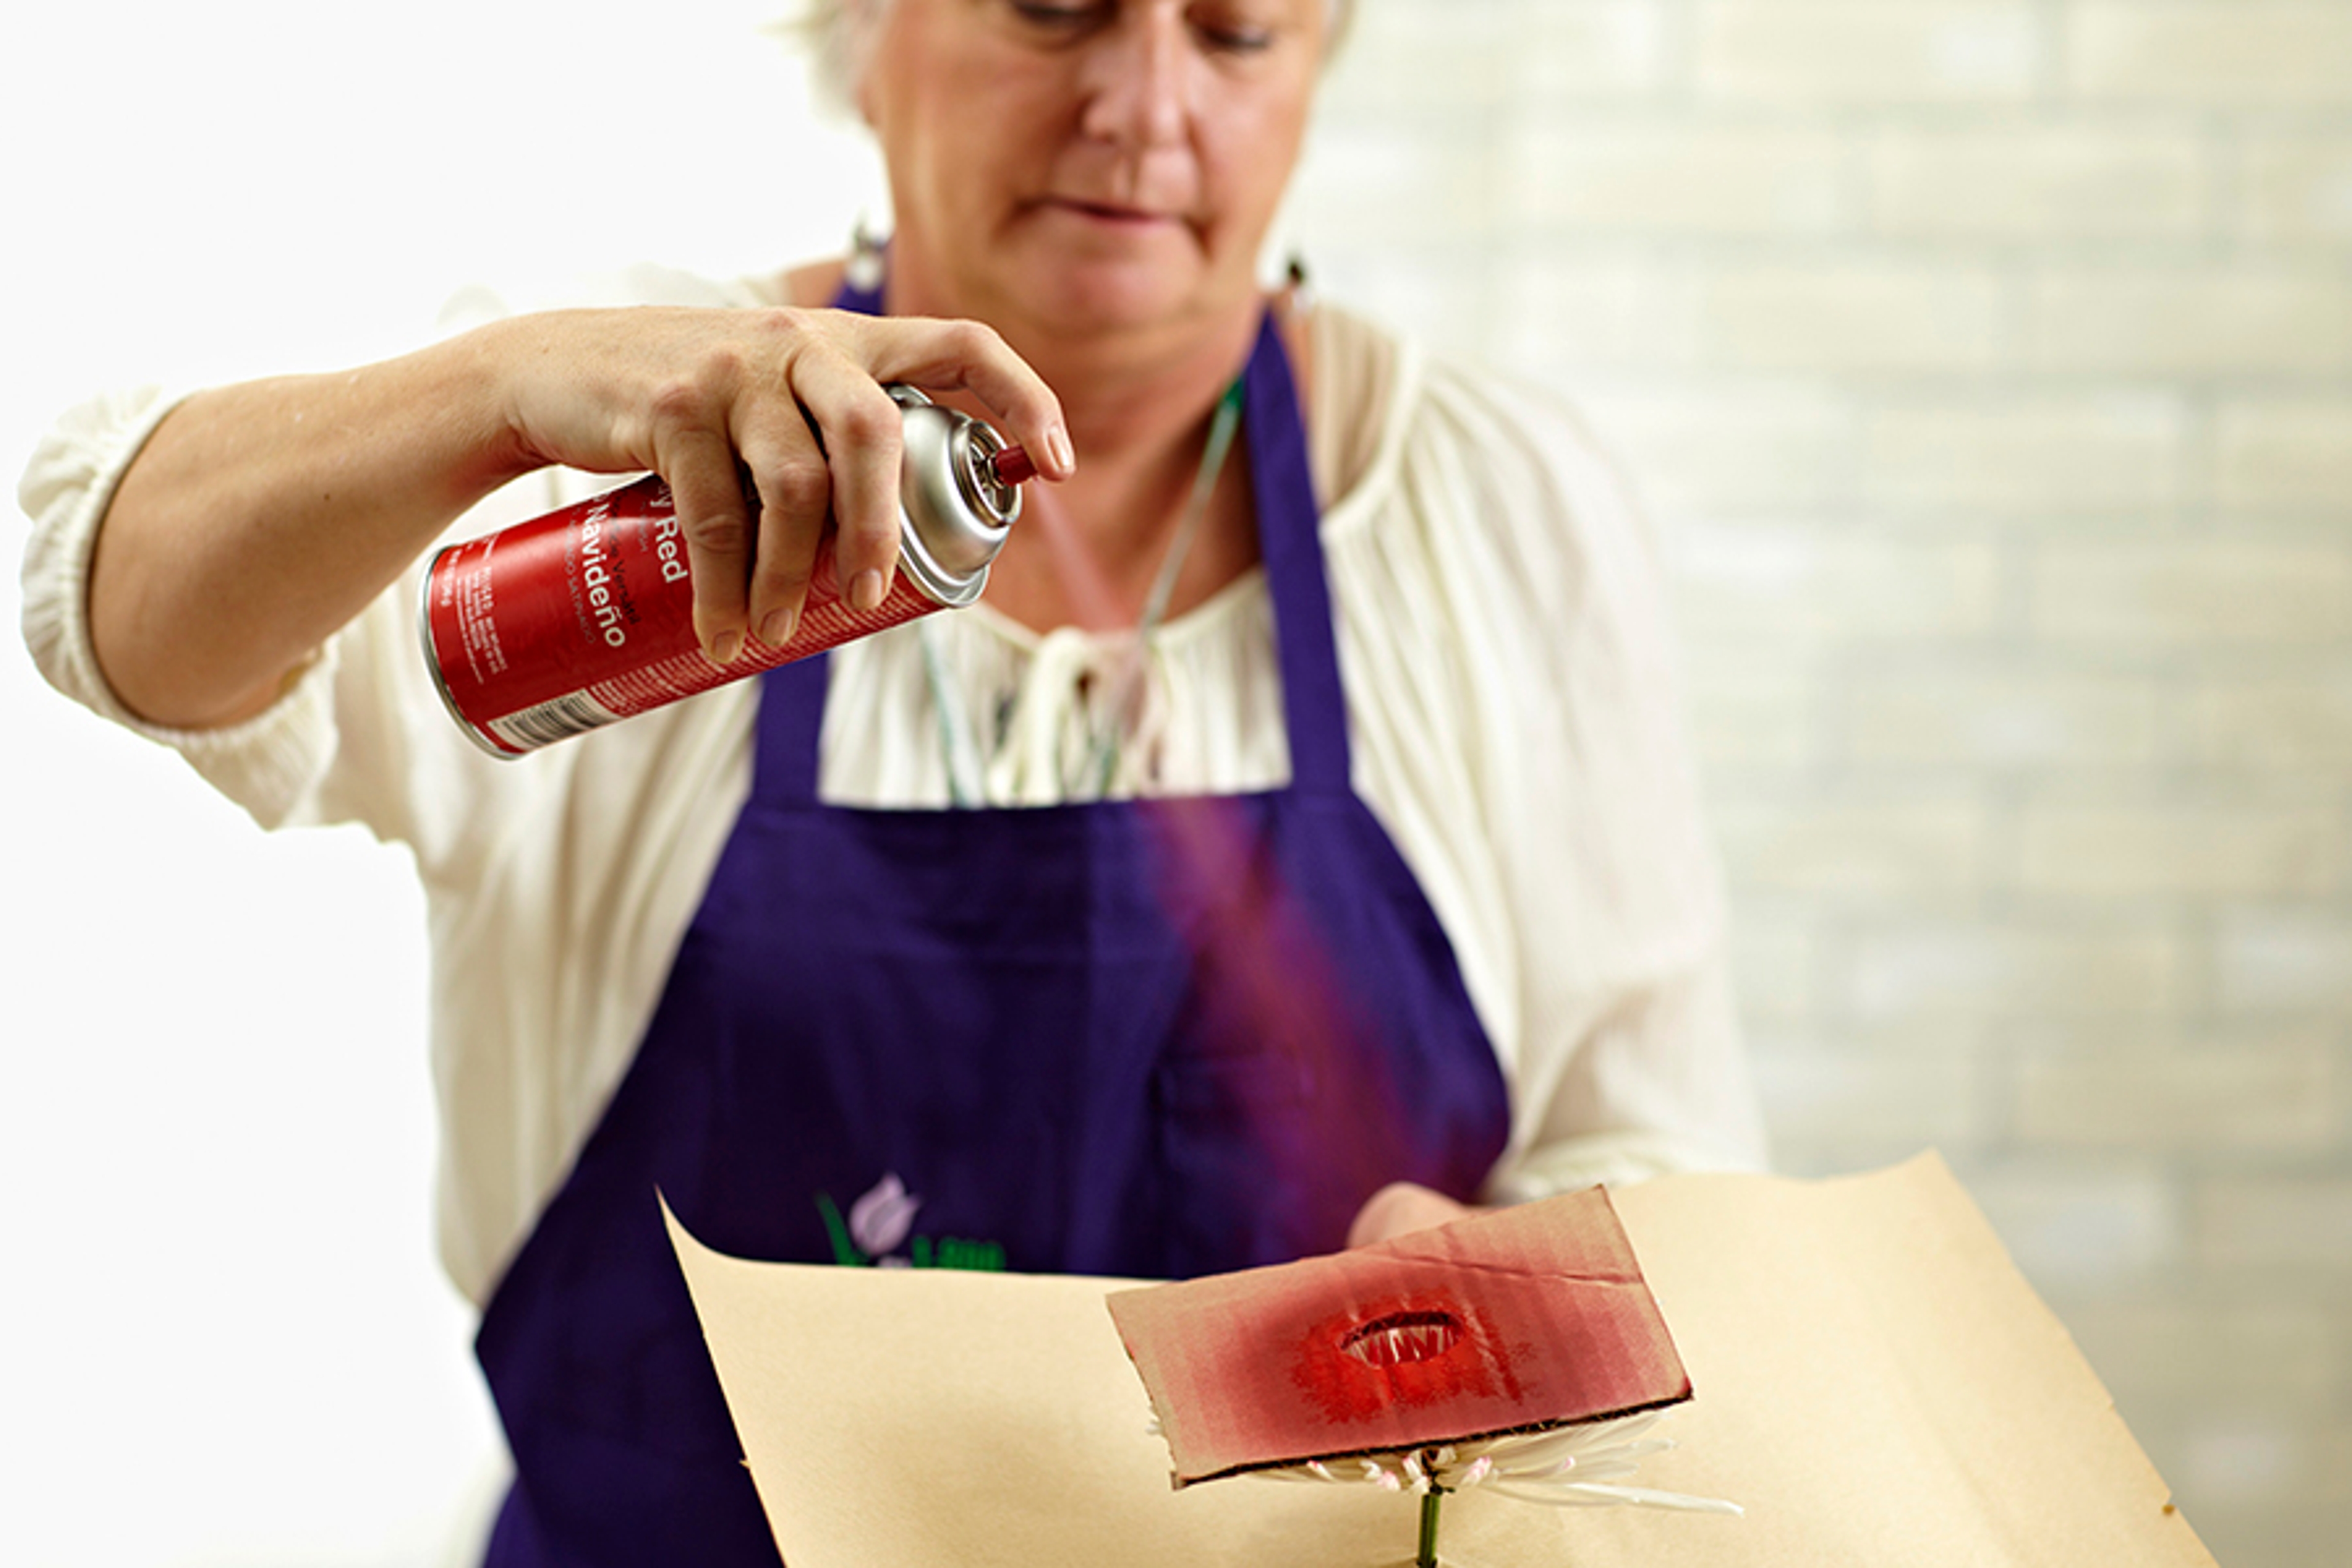
Put the circle to the side (for later use), place the square template with the circle opening over the mum, and spray into the center hole with the red paint.
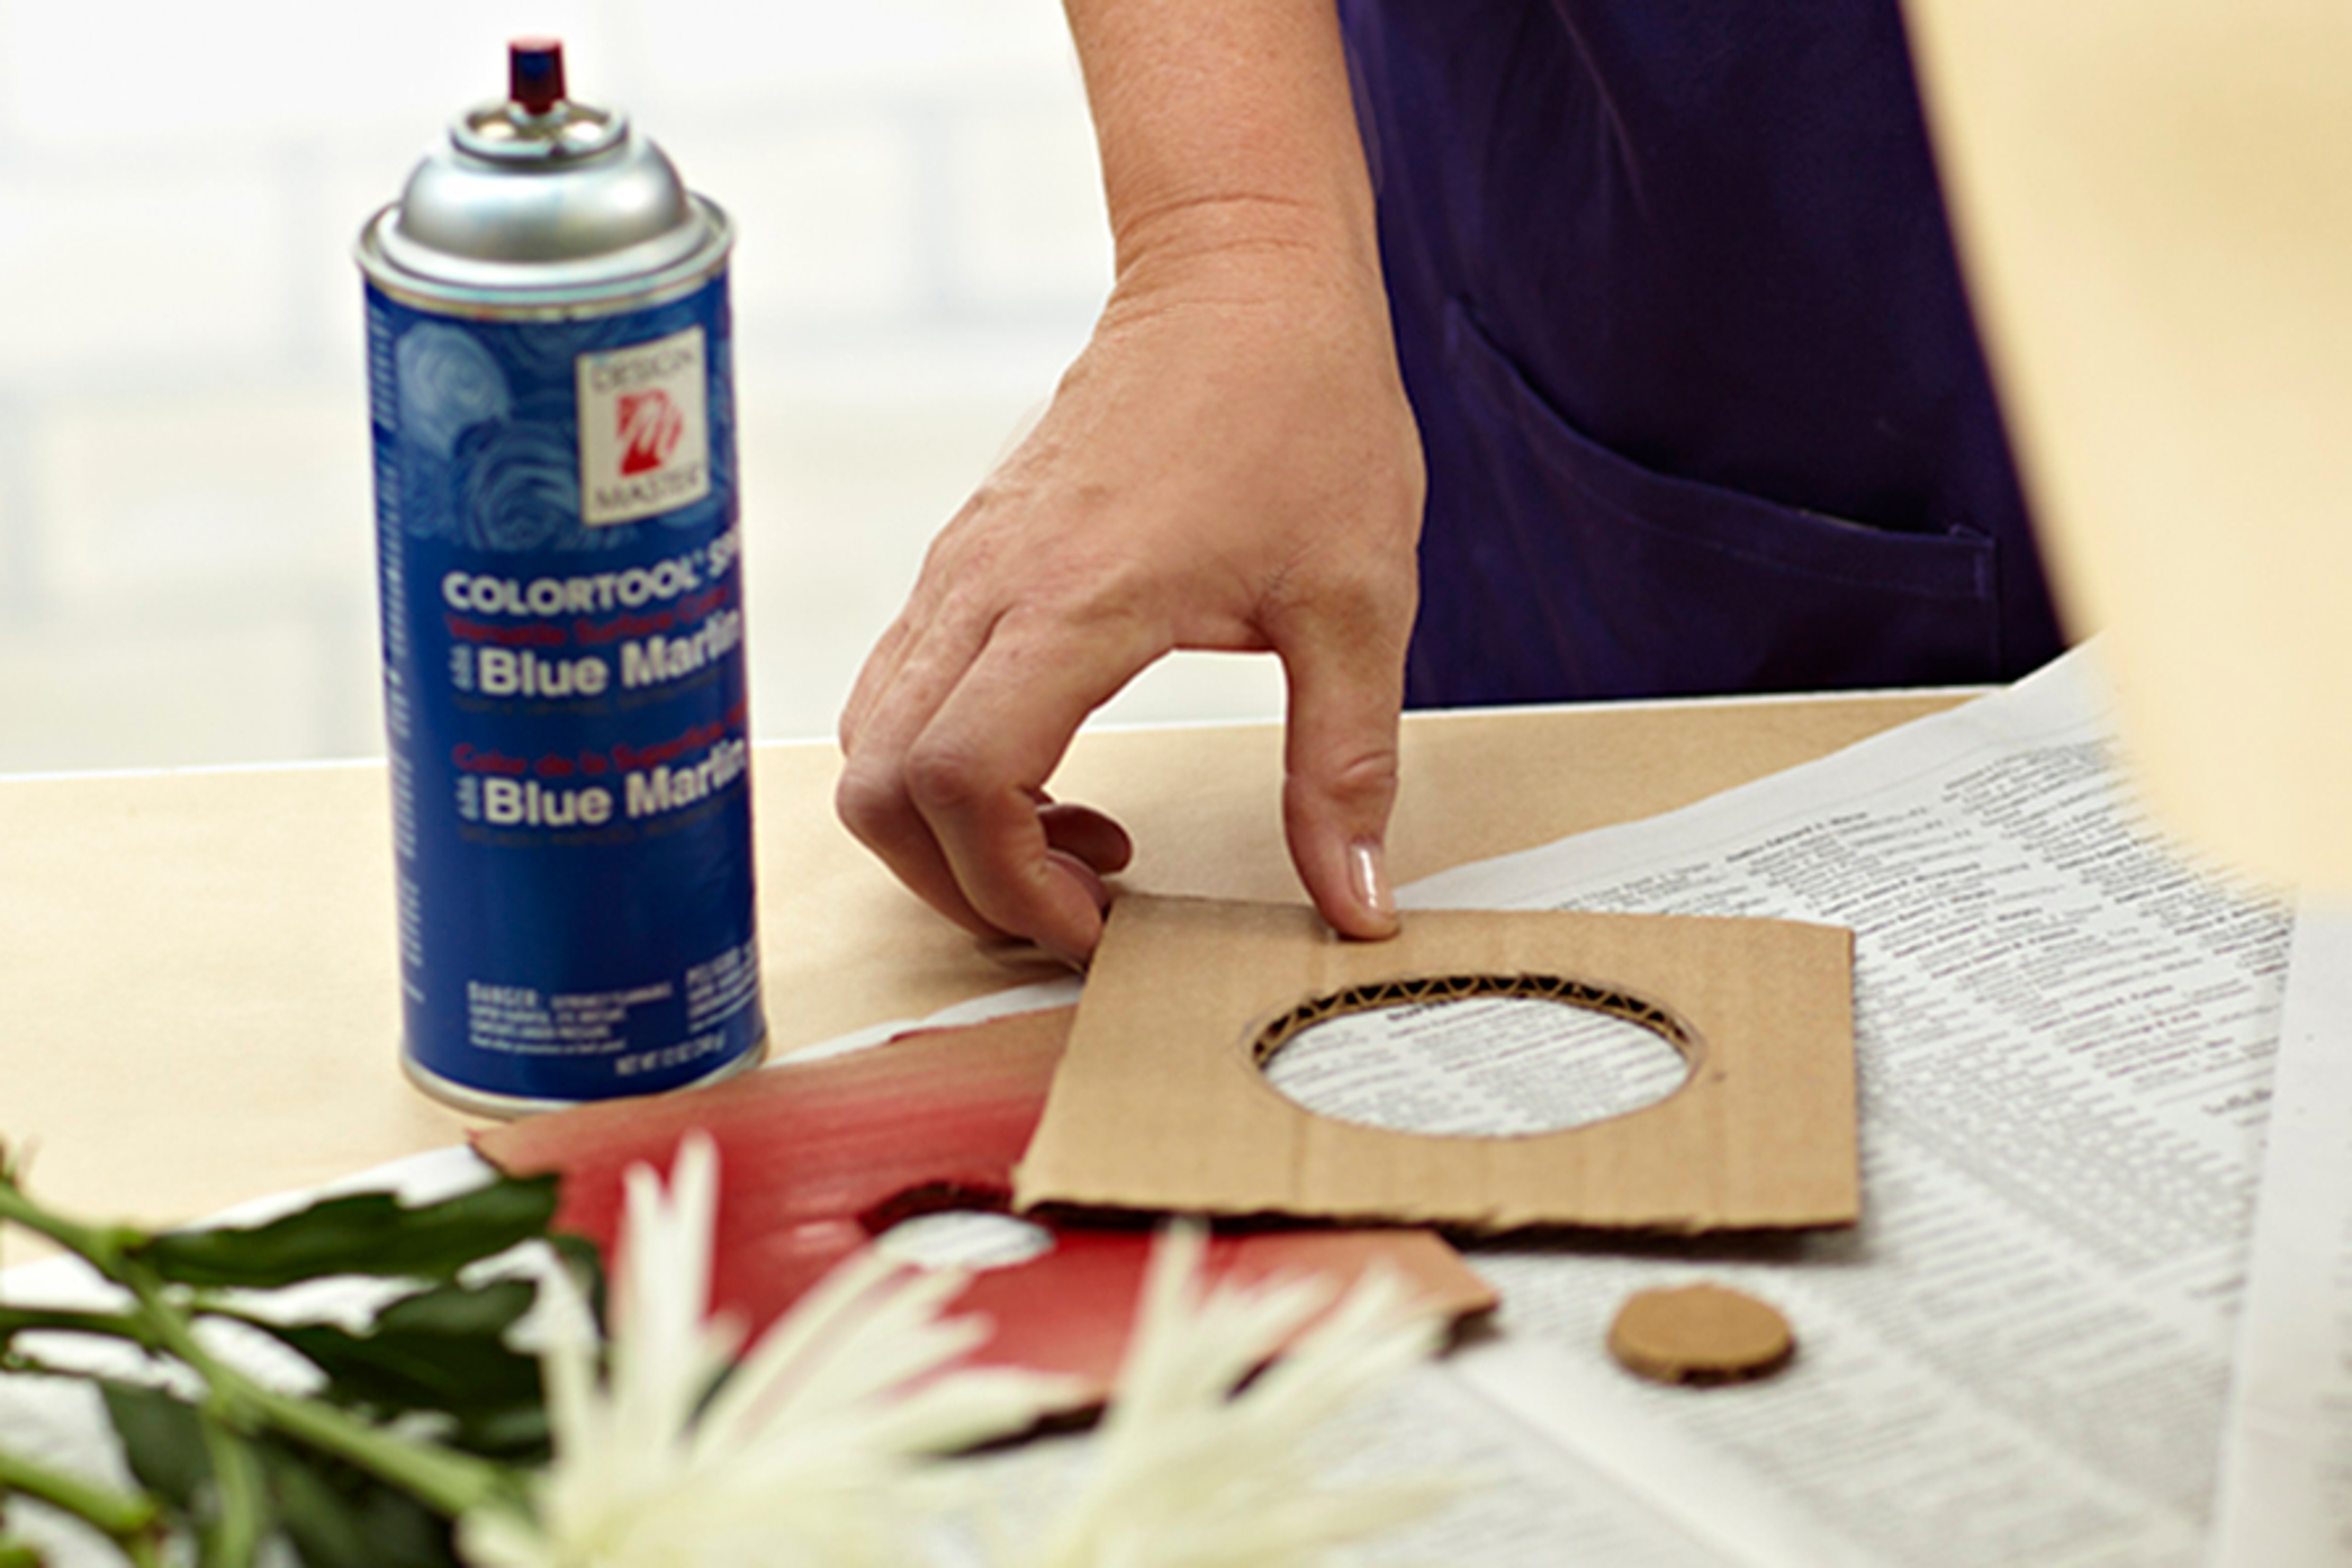
Make a second template using the same size square of cardboard (approximately 5 inches) cutting out a larger circle this time, about 3 inches.
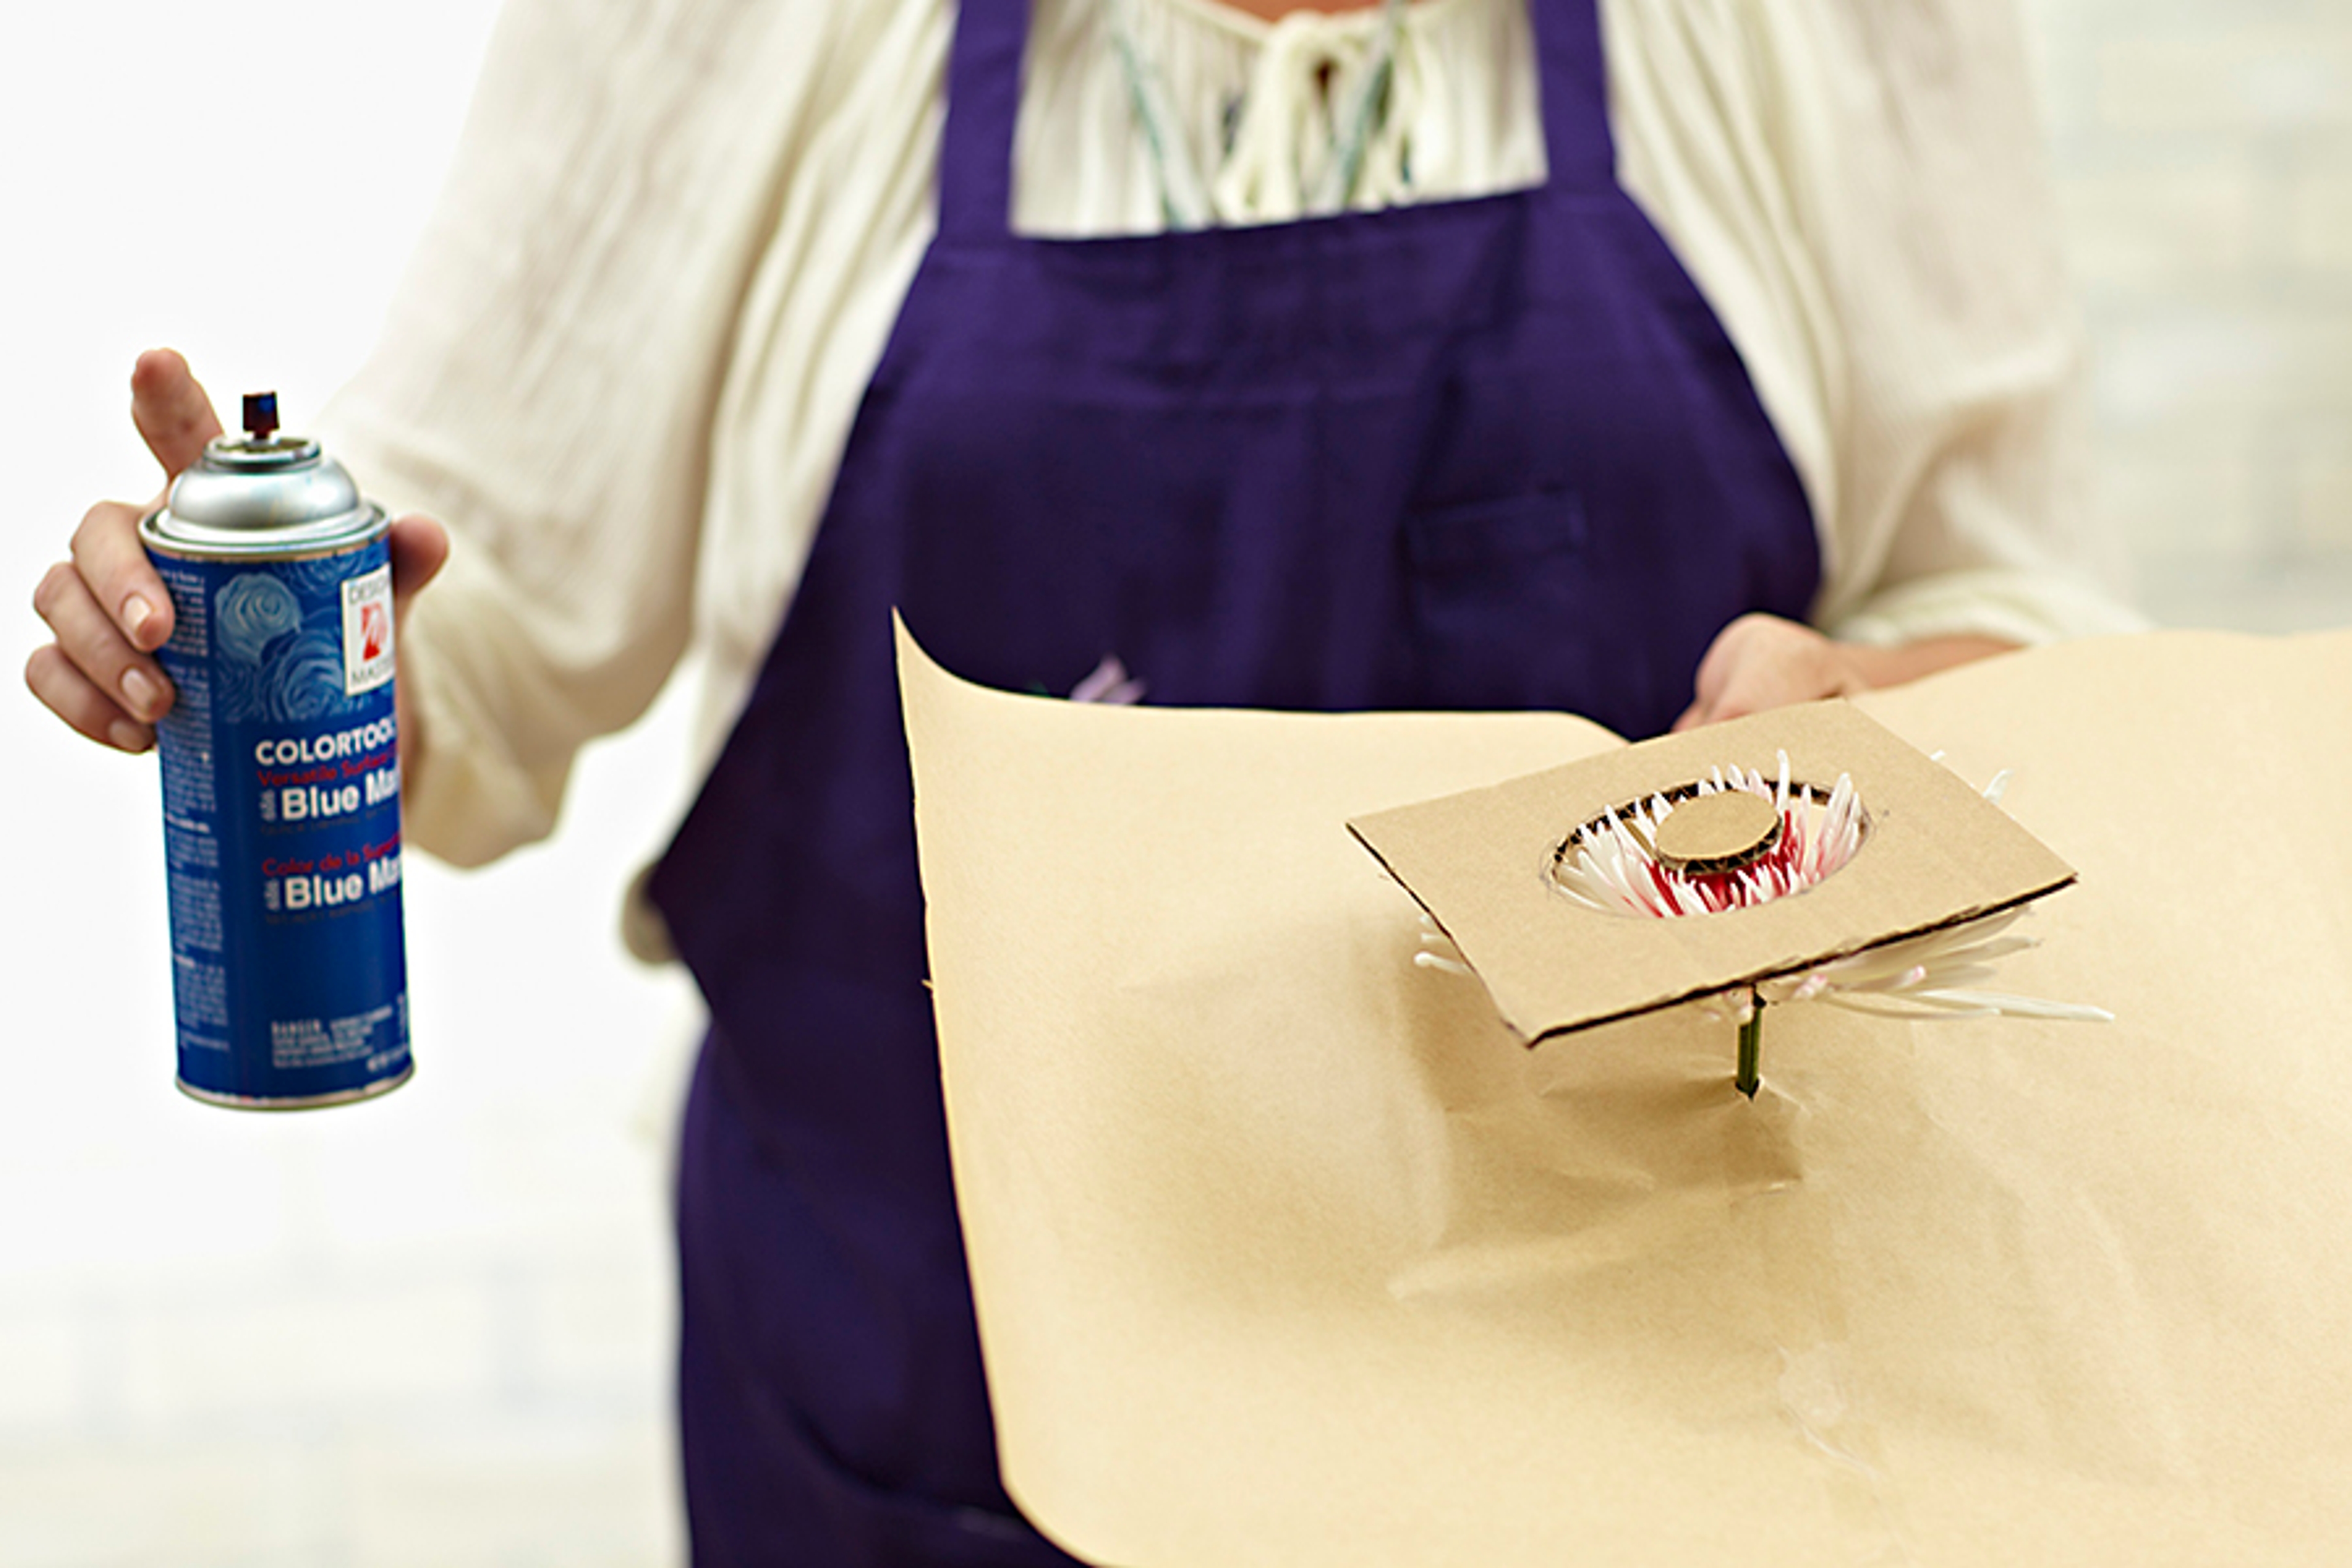
Place the new template with the larger circle opening on top of the same mum and place the smaller circle from the first template over the red center you just painted. You’ll now have a “donut” showing through the template that you can spray using the blue paint.
Tipping technique
With tipping, you are only applying the paint to the end or tips of the petals. I recommend wearing a glove for this method.

Hold the head of the spider mum in one hand, cupping it so the petals close in toward the center. Don’t hold them too tight or you won’t have enough petal surface to apply the paint.

Turn your hand so that you’re also applying the paint to the back of the petals to add more impact.
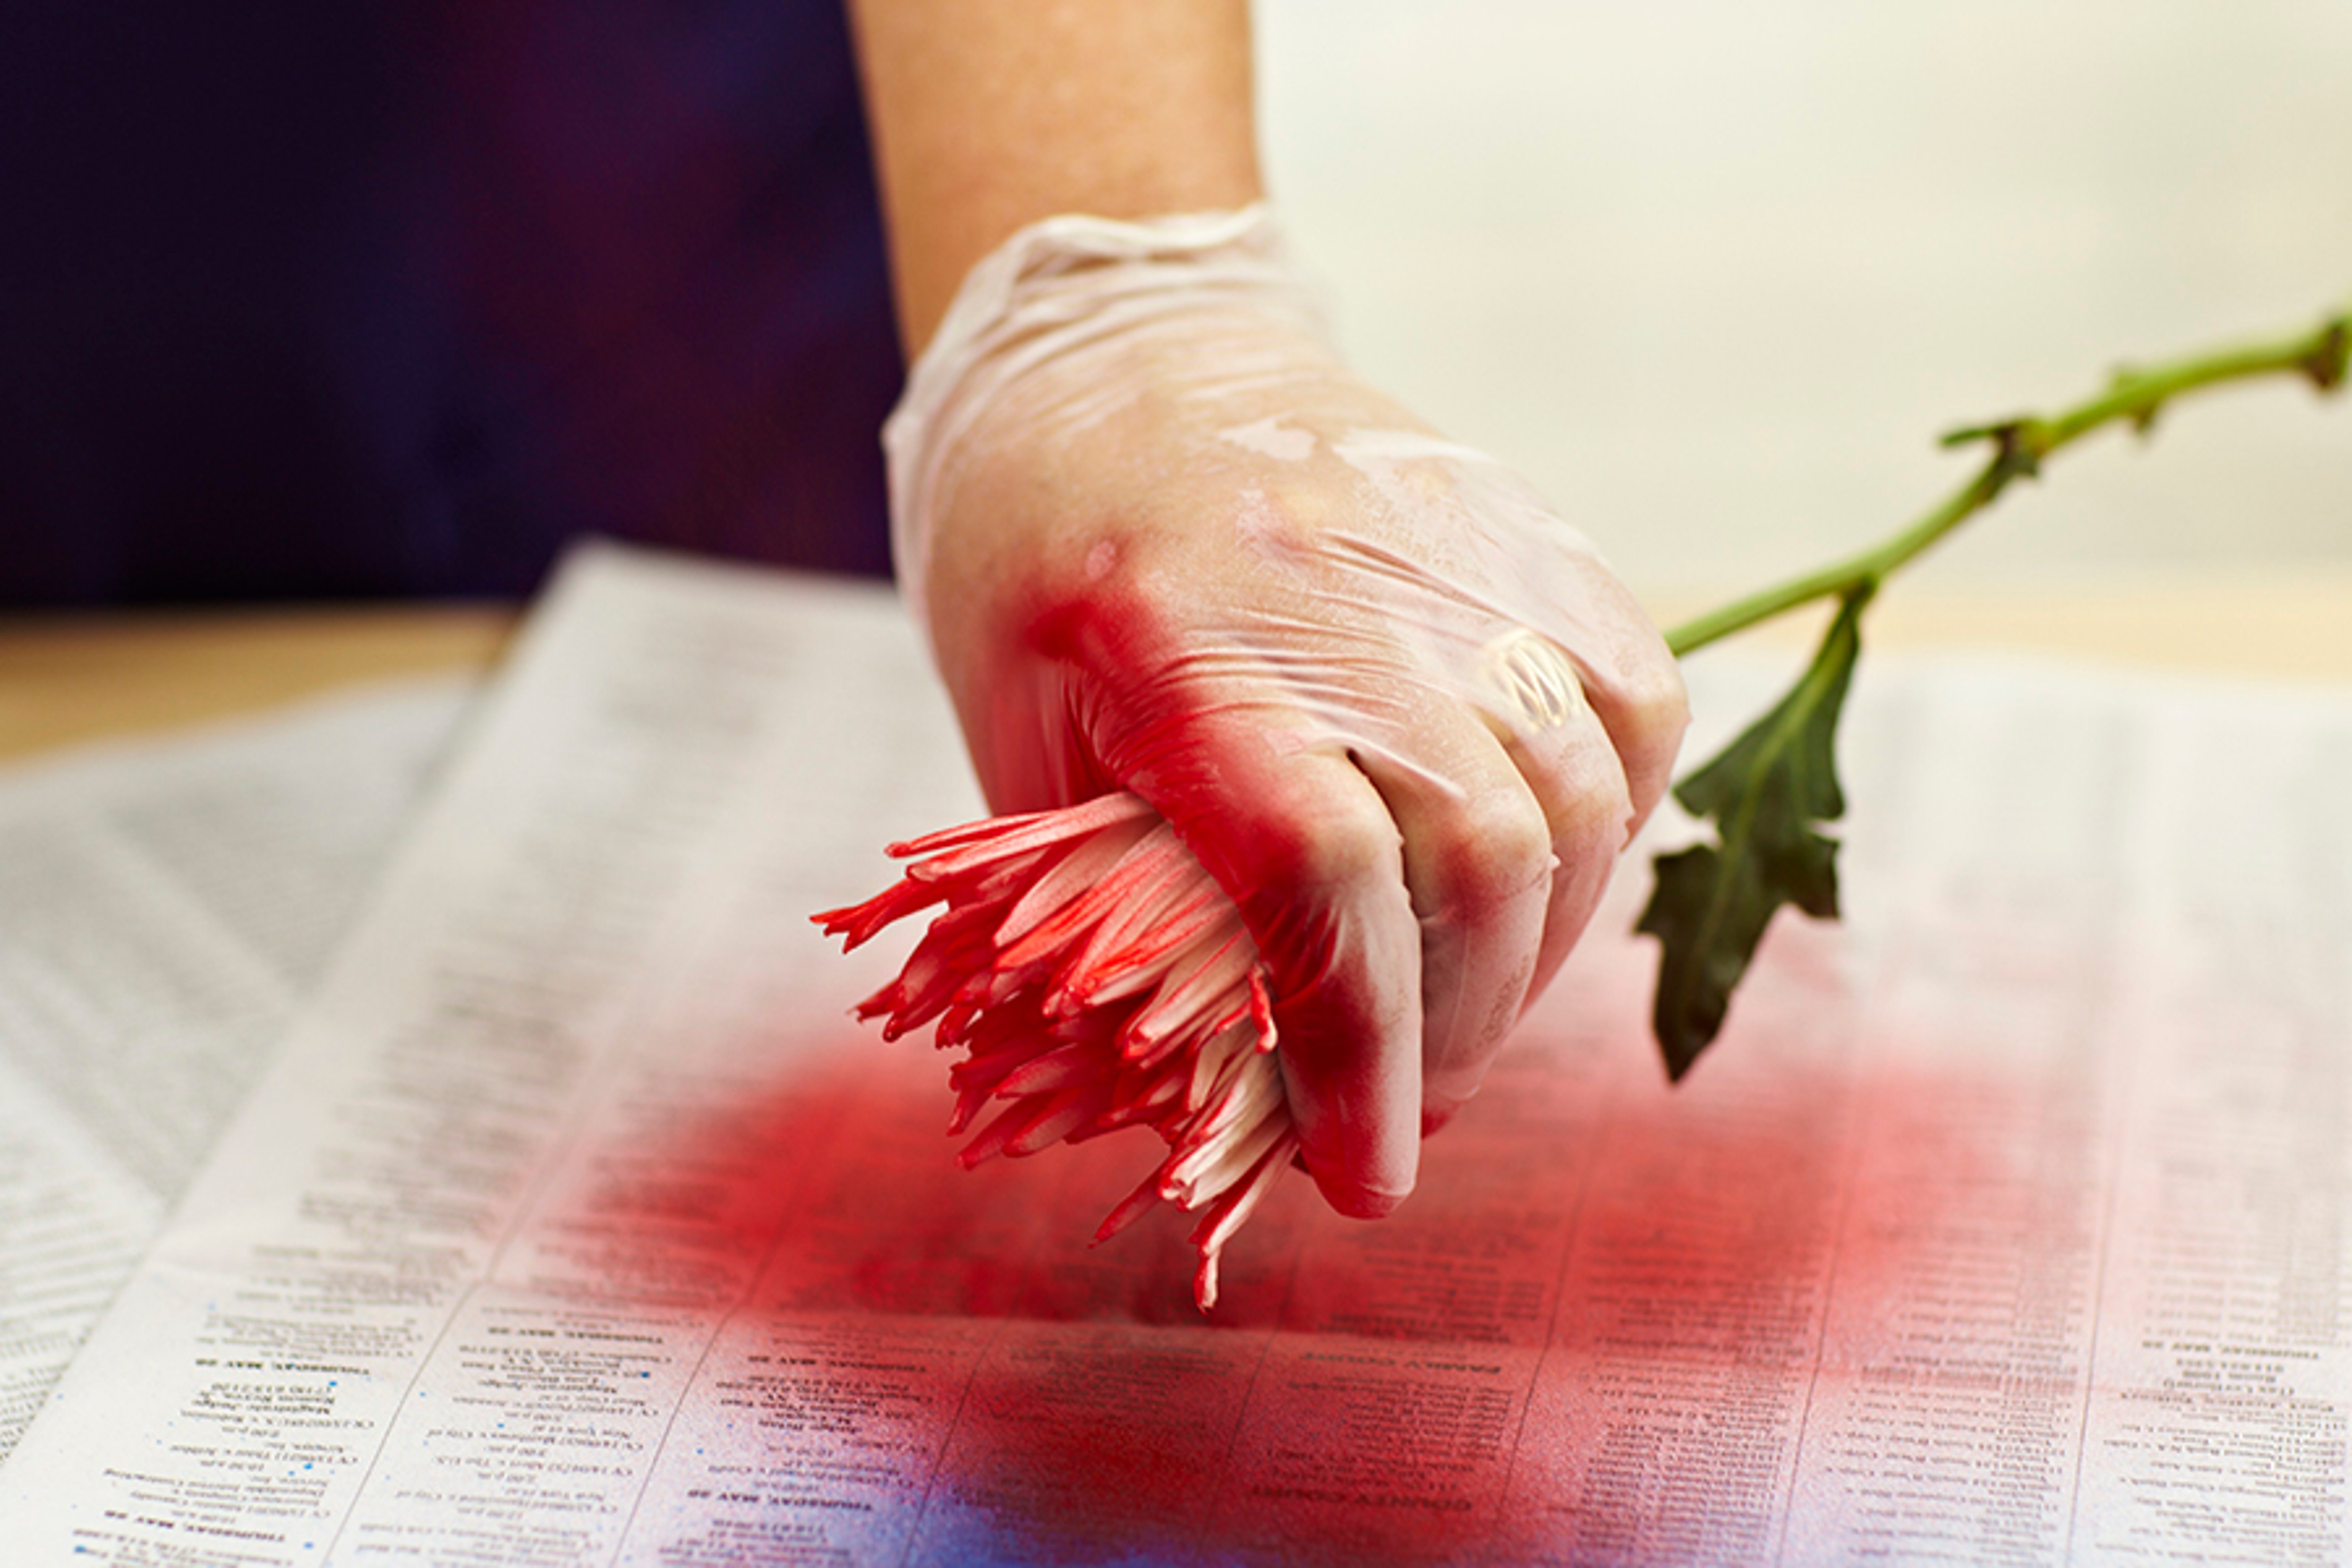
Release the flower and look at it to see if you are satisfied with the effect and amount of coverage. If you want more color, simply repeat the process, holding the flower a bit looser and more open this time.

Misting
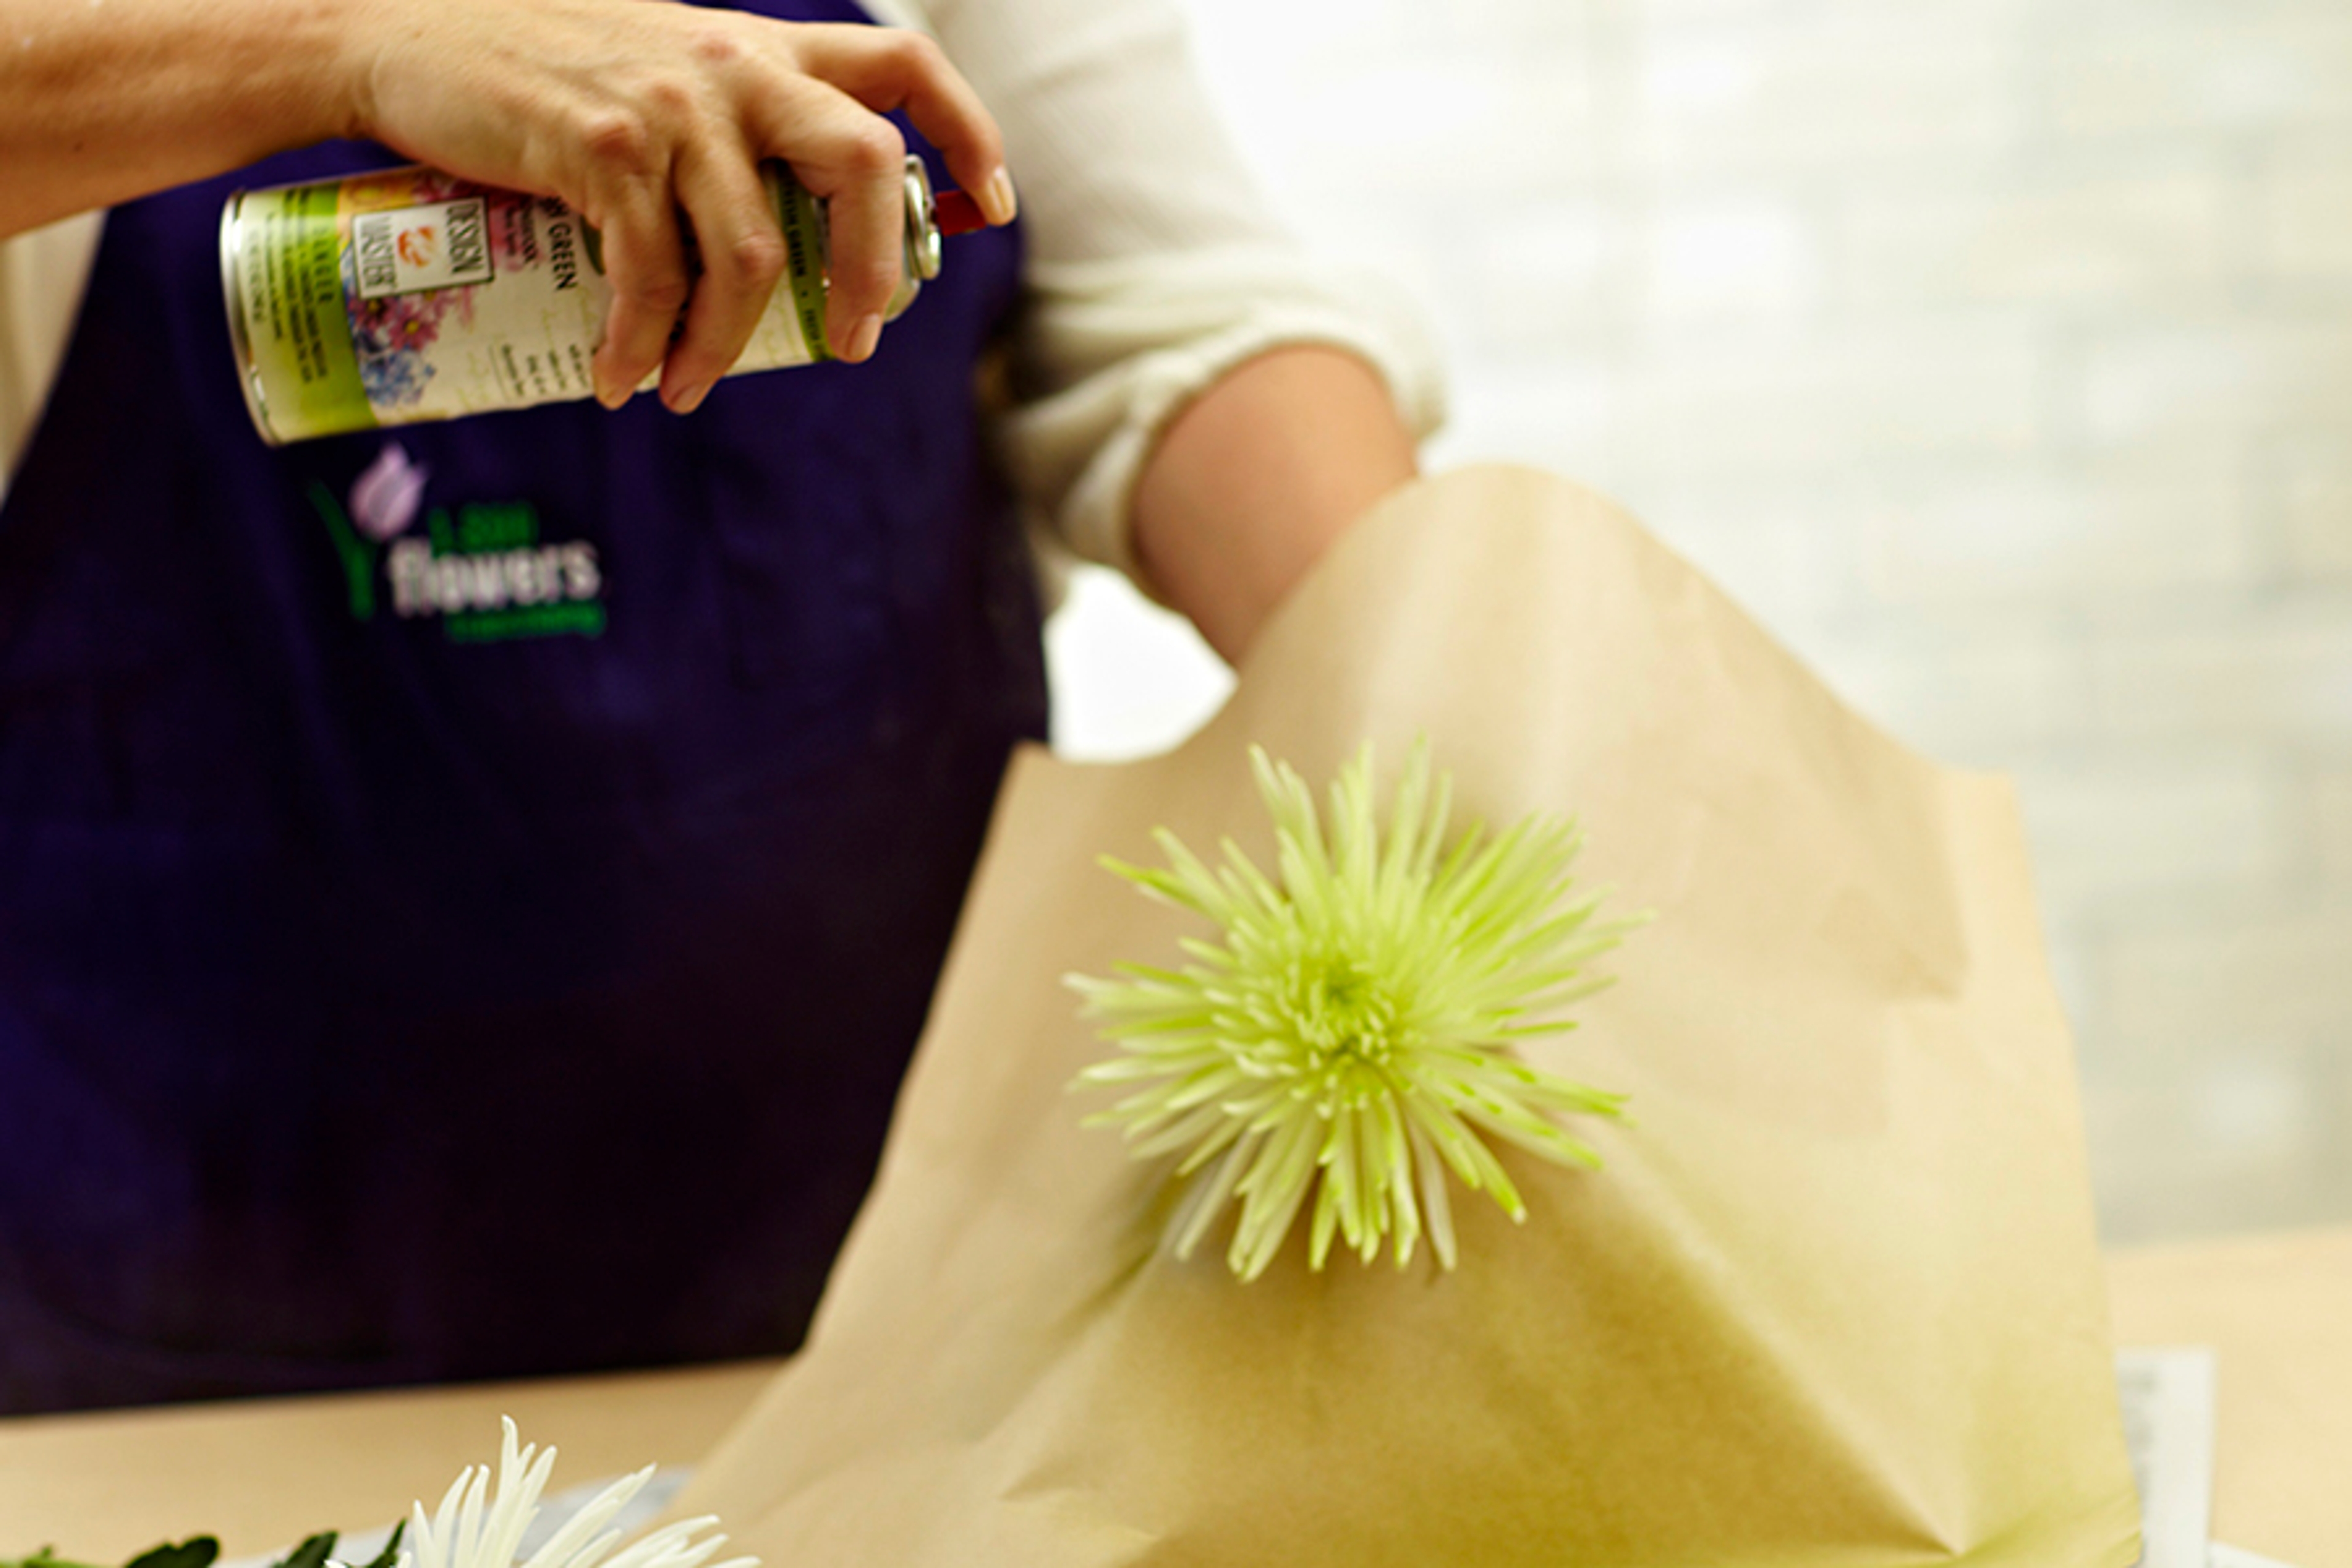
With the misting technique, you apply a light coat of paint over the entire surface of the flower. Hold the can 15 to 18 inches away from the flower. You can repeat this process a few times, depending on the depth of color you want. It’s amazing how realistic the color looks on fresh flowers, and you can choose whatever color flower you want — whether nature created it or not!
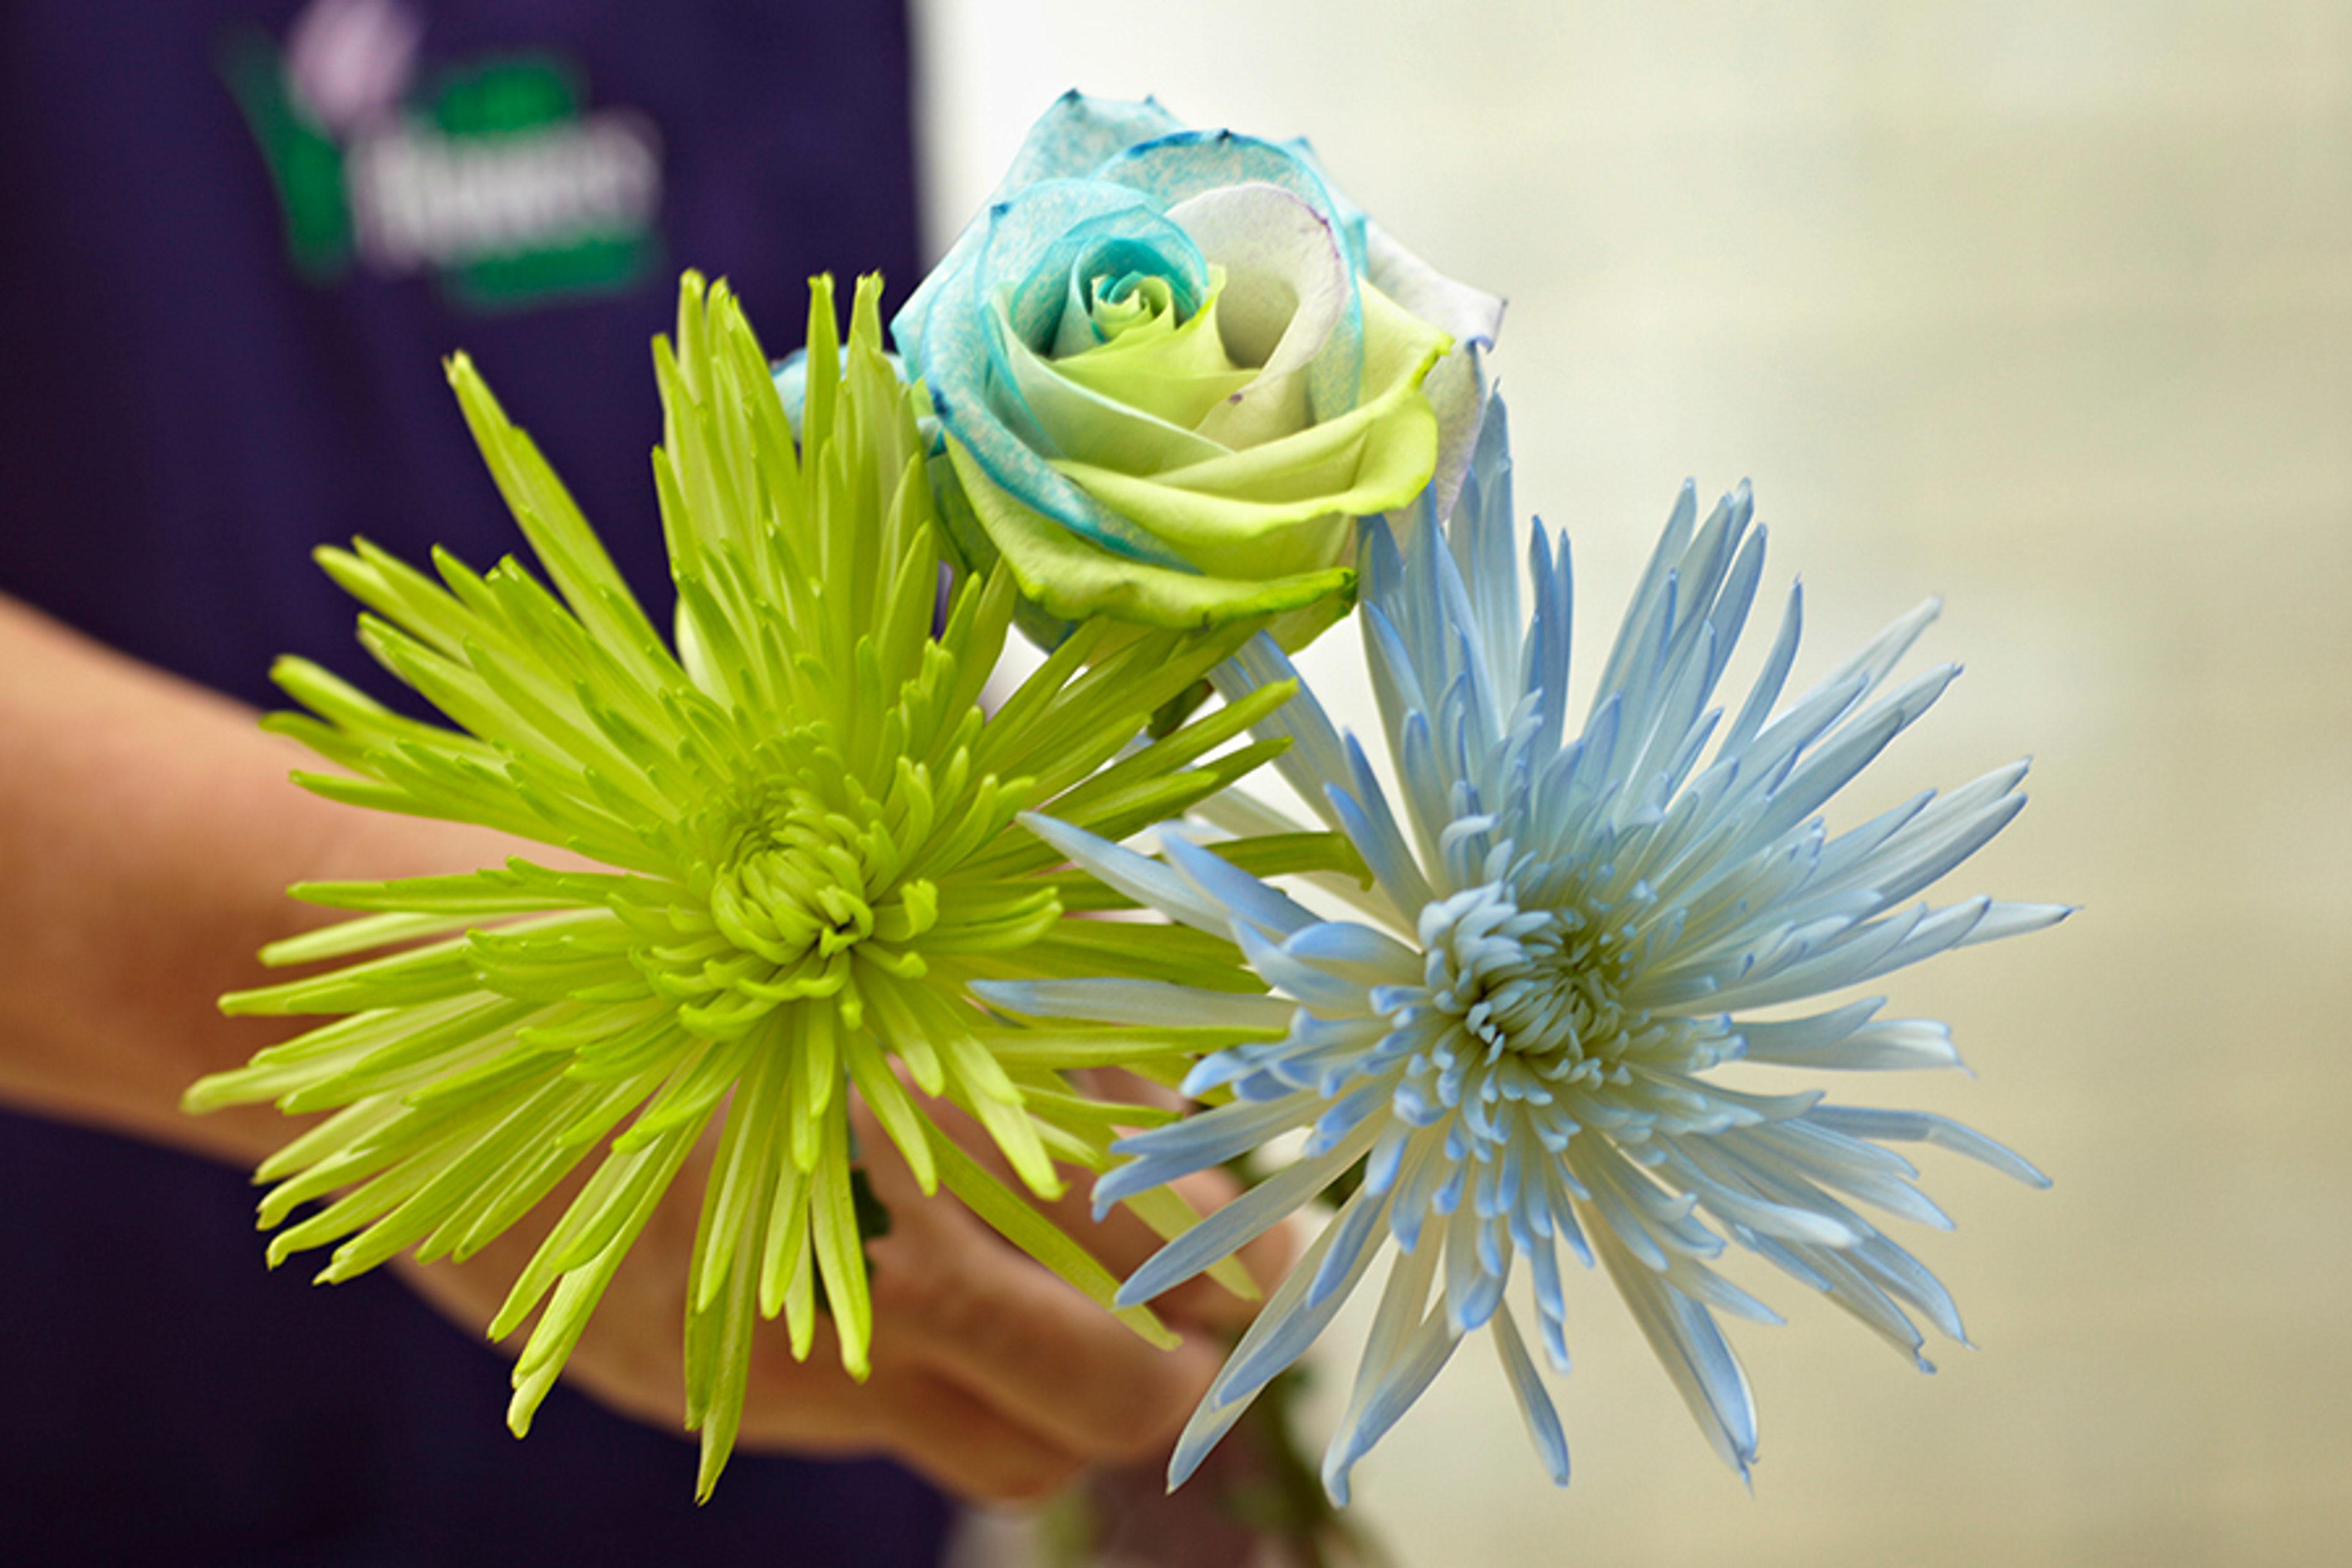
Both methods, stem and surface painting, and all the techniques outlined here, are fun and easy to do, and look great alone or combined within one arrangement.
AUTHOR

Julie started her career in the floral industry over 30 years ago in a small, family-owned flower shop. From floral designer to author and lifestyle expert, her insight has been instrumental in developing the 1-800-Flowers.com brand. Representing the company’s floral lifestyle vision, Julie has shared her talent and passion in numerous television appearances and national magazine features. She is an active fundraiser and longtime friend of IGHL, a group dedicated to facilitating a more independent life for developmentally challenged adults.


