DIY Flower Napkin Rings

diy-napkin-rings-1

Seasoned hostesses know it’s the small details that make the biggest difference. Kick your garden party decorations up a notch with a subtle yet stunning touch with DIY napkin rings! We used fresh white daisies for this project, but you can choose any flower and color to fit your event.

Pair these DIY flower napkin rings with a stunning spring inspired centerpiece like our DIY flower jell-o centerpiece for a beautifully put-together look.

diy-napkin-rings-supplies

Supplies for DIY Napkin Rings

  • Floral Tape
  • Floral Wire
  • Flowers
  • Wire cutters

Directions for DIY Napkin Rings:

  1. To assemble the folded napkin shape, lay your napkin flat, and fold in half. Then, roll onto itself until you have a compact napkin, ready for presenting.
diy-napkin-rings-wire-wrap
  1. Wrap the floral wire around the center of the rolled napkin 3 times to create a strong frame.
diy-napkin-rings-tape-wrap
  1. Remove the stem and leaves from the flower, and position it on the wire frame. When it is positioned to your liking, wrap the floral tape around the full frame to secure. Then, simply slip the napkin into the napkin ring for a simple yet sweet touch to your garden party!
diy-napkin-rings-2

DIY Floral Centerpiece Using Jello

Take your spring garden party from wow to WOAH with this stunning jello flower centerpiece idea! Using just a few basic supplies, we’ve created a show-stopping decoration that is sure to get guests talking.

diy-flower-jello-centerpiece_complete-edit

Use jell-o in colors that will fit your theme for a perfectly polished look. Use vases and containers in varying sizes to add dimension. Be sure to use glass containers as plastic may crack when pouring the hot water in.

Supplies for DIY Jello Flower Centerpiece:

diy-flower-jello-centerpiece_prep
  • Jell-o mix
  • Water
  • Flowers (we used daisies)
  • Long thin stick
  • Clear, glass vases and containers

Directions for DIY Jello Flowers Centerpiece:

  1. Follow the directions on the jell-o box, cutting the water contents in half. Place in fridge, and let slightly harden. Remove when the jell-o is not completely liquid, but not completely hardened. Depending on the size of the container, this can take anywhere from 15-45 minutes. You may want to consider setting alarms in increments of 10 minutes as to not miss the perfect consistency. Waiting too long for the jell-o to harden will make it difficult to position the flowers.
  2. While the jell-o is hardening, prepare your flowers by removing the stems and leaves. Once prepared, set aside.
  3. Once the appropriate consistency has been reached, it’s time to position your flowers! The flower pick that came with the bouquet of daisies worked perfectly for this project, but you can really use any long stick. The simplest method for getting your flowers to “stick” is to position them against the glass and hold down for a few seconds.
  4. When you are satisfied with how the design, place your flower jello centerpieces back in the refrigerator. Once the jello has fully hardened, your centerpieces are party-ready!
diy-flower-jello-centerpiece_complete-2

All About Lilies: Facts, History, and More

lily facts with sweet spring lilies

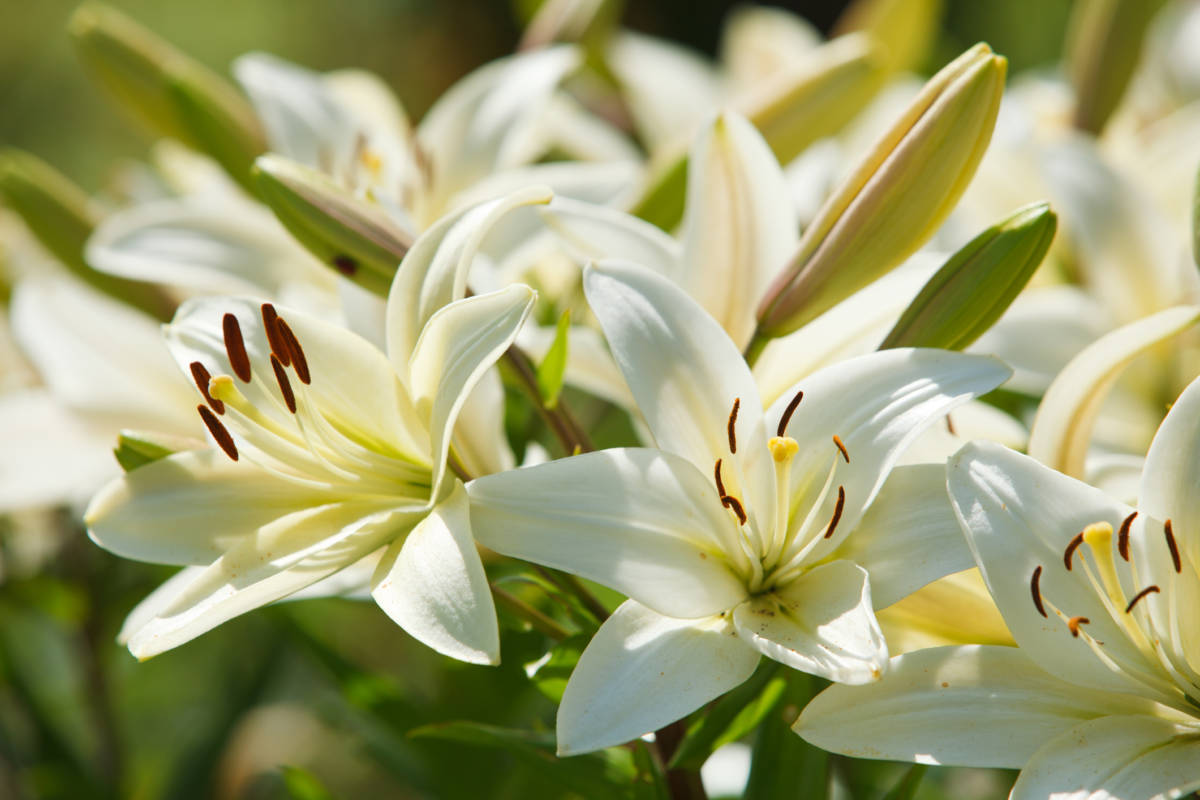
Beautiful in form, lilies are one of the most popular and versatile flowers in the world. Coming in a variety of colors and known for its strong fragrance, this elegant bloom is a show-stopper on its own while also serving as the perfect compliment to any bouquet. In fact, lilies are one of the most popular flowers in the world.

History of lilies

Lilies have been a prominent symbol throughout history. One of the first records of this flower dates back to the Minoan Period (around 1580 B.C.), when it appears in a painting found in Crete, Greece. Even the Ancient Greeks held this flower dear, as they believed lilies sprouted from the milk of Hera, the Queen of the Gods. Roman mythology claimed that Venus, the goddess of beauty, envied the flower’s beauty, which caused it to grow the pistil in the center. Ancient Egyptians saw the power of this flower as well, as they included lilies in the funeral ceremonies for mummies.

As time went on, lilies continued to grow in popularity for religious occasions. In artwork, the Virgin Mary is often found holding white bundles of lilies, representing her purity. One of the most popular lilies is the Easter lily plant, which has become one of the most prominent symbols for Easter.

In Chinese culture, lilies are known to symbolize good luck and long lasting love.

In addition to their usage at religious ceremonies, lilies have also been used for medicinal purposes. The buds or oils of the lily have been known to reduce fever and make skin more firm, thus lessening wrinkles.

Lilies for special occasions and by color

all about lilies with all white lily bouquet

Lilies are one of the most symbolic flowers in existence. Their symbolism is often determined by a specific occasion or the color of the lilies.

Lilies are the birth flower for May babies. They are also the traditional flower for 30th wedding anniversaries.

White lilies are one of the most popular funeral flowers as, by representing purity and giving off a fragrant and distinct scent, they provide comfort to the bereaved.

Pink stargazer lilies often symbolize prosperity, while orange lilies represent passion.

Peruvian lilies represent devotion and friendship, and the lily of the valley represents devotion and romance.

More fun lily facts

  • Some lily buds are consumable and can be used in cooking.
  • Lilies can range in size from 1 foot to 7 feet, depending on the type.
  • There are dozens of plants and flowers with the word “lily” in their name that are not true lilies. These include the daylily and peace lily. True lilies must belong to the genus Lilium.

Types of lilies

There are over 100 different types of true lilies belonging to the Lilium genus. Lilies are found predominantly in the northern hemisphere.

Some of the most popular types of lilies include:

  • Peruvian lilies (alstromeria)gemstone-peruvian-lilies
  • Calla lilies
  • Stargazer lilies
  • Easter lily
  • Tiger lily
  • Lily of the valley
  • Rock lilies
  • Madonna lily
  • Asiatic lily
  • Oriental lily
  • Amazon lily
  • Yellow lily
  • Turk’s Cap lily
  • Bolander’s lilycaptivating-calla-lilies
  • Washington lily
  • Panther lily
  • Michigan lily
  • Carolina lily
  • Sandhills lily
  • Swamp lily
  • Fire lily
  • Japanese lily
  • Morningstar lily
  • Siroi lily
  • Water lily

Celebrate Read Across America Day with DIY Floral Bookmarks

celebrating-friends

Did you know that March 3rd is National Read Across America Day?! Encouraging children to start reading at an early age is a great way to get them started on the road to success! Reading not only helps develop comprehension skills, but also helps to expand vocabulary and inspire creativity.

In honor of this exciting day, we’ve created this easy DIY bookmark for kids. Here are two simple and fun kid-friendly methods for creating personalized bookmarks that are sure to make reading more fun!

Supplies for DIY bookmarks:

Directions for DIY bookmarks:

Method 1
This method uses marker to color in the bookmark.

  1. Cut out bookmark shape from cardstock. For this project, cut out a 2 ¾” X 6” rectangle.
  2. Download and print template. Color in the flower and cut.
  3. Glue to the bookmark and voila! A beautiful bookmark to make reading more fun. Personalize it by adding your name, initials, or a favorite quote!
easy-diy-bookmark-craft-kids_complete-3

Method 2
This method omits the coloring and instead uses construction paper to add color.

  1. Cut out a 2 ¾” X 6” rectangle from the cardstock for the bookmark shape.
  2. Download and print template on cardstock. This way, when you cut out the shapes it will act as a stencil.
  3. Trace cutout shapes on construction paper.
  4. If you are using the daisy template, cut out one skinny strip of paper for the petals. Fold in half before tracing, so you can cut out half the work. To make the daisy stem, either draw a skinny rectangle with marker or cut out a strip from green colored paper. There is no need to trace a template for this part, as it may be too thin for little hands to maneuver.
  5. Once your shapes are all cut out, glue down using glue stick.

History of the Shamrock

cheryls-shamrock-cookies

It seems every year around March 17, the world gets a bit greener and Irish pride is on the tip of everyone’s tongue. Whether you are celebrating tradition or simply celebrating for the fun of it, there’s one symbol that’s bound to pop up in St. Patrick’s Day festivities: the shamrock. But how did this tiny little plant become such an important symbol in this Irish celebration? Read on for the history of this fun-filled holiday and get into the festive St. Patrick’s Day spirit by slipping one of these beauties into your clothes, crafts, and even into your cocktails!

What is a shamrock?

The shamrock, derived from the Irish word seamrog meaning “little clover”, refers to the sprigs on a clover plant. Although the 4-leaf clover may come to mind when we think of luck, most shamrocks are have only 3 leaves! The 4th leaf grows scarcely and is said to bring luck to those who find it. There is no defined clover which signifies a shamrock, but many officials claim it is the simple white clover that bears the shamrock name. Other 3-leaved clovers which can be considered shamrocks are the lesser clover, red, clover, and black medick.

Significance of the Shamrock

The significance of this plant is said to be derived from the period during the 5th century when Saint Patrick was helping to spread Christianity in Ireland. It is said he used the 3 leaves of the shamrock to describe the holy Trinity. Additionally, during the English takeover of Ireland, Irish citizens proudly wore shamrocks on their clothing to display their Irish pride and strength.

Today, St. Patrick’s Day celebrators – both Irish and Irish-for-the-day – show off this historically significant plant as they wear green and give out kisses to their Irish friends.

Exit mobile version