2 Ways to Entertain with Waxed Roses

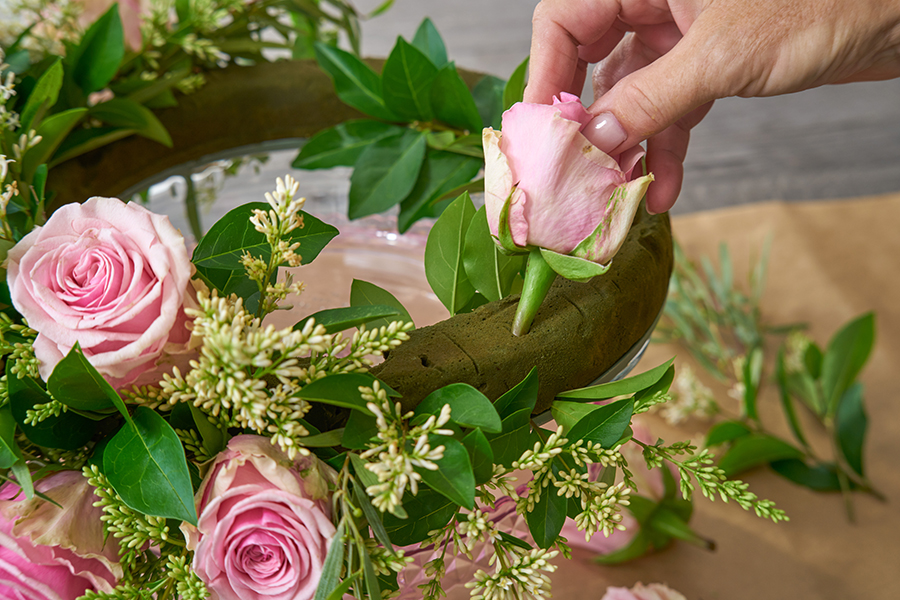
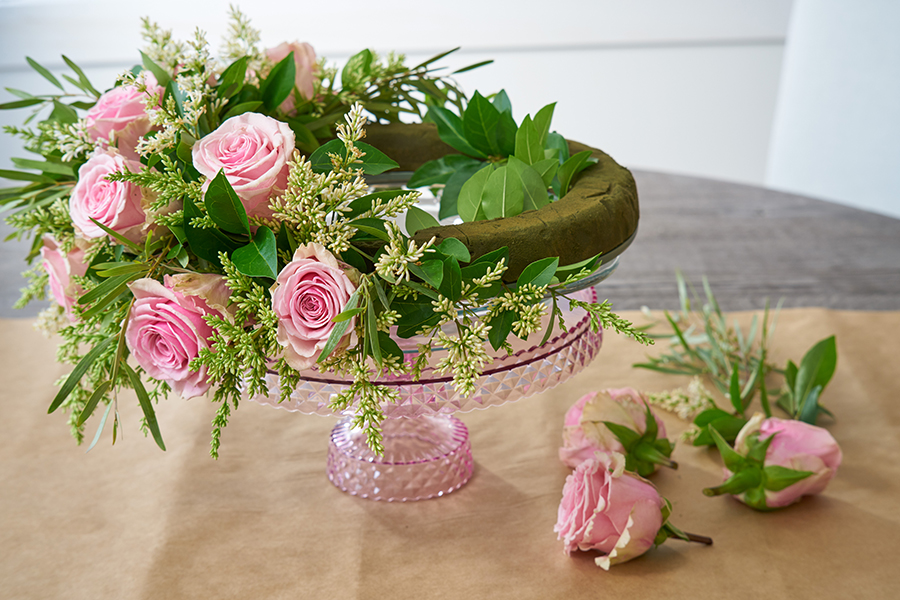
Fresh cut roses are the perfect flower to transform your entertaining space this summer season.

rose wreath with rosé wine

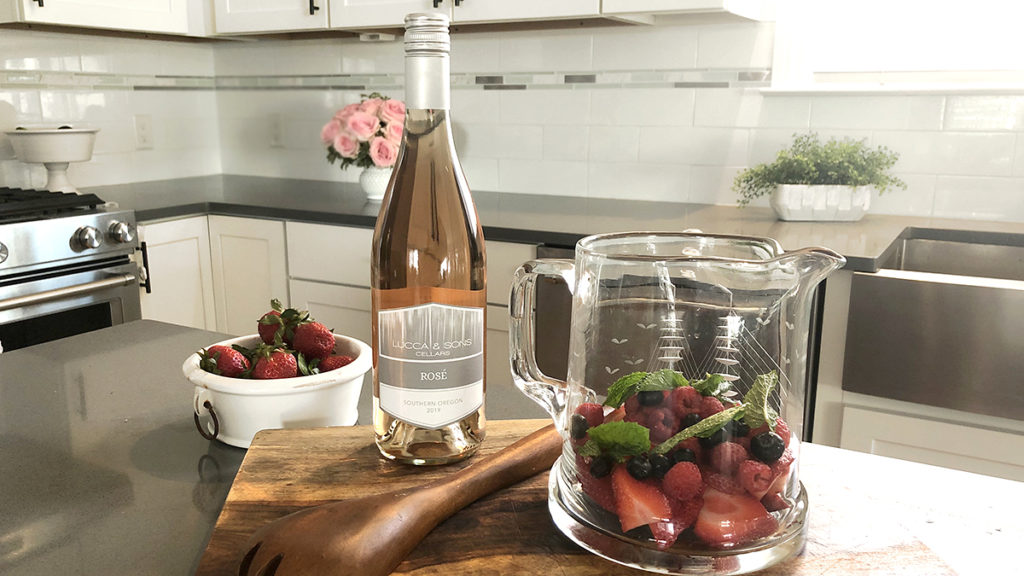
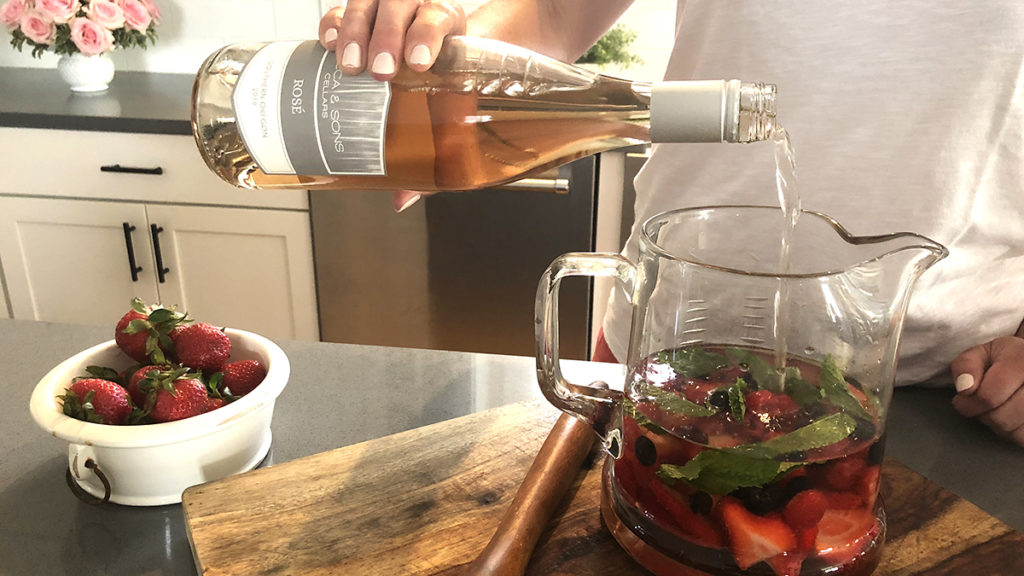
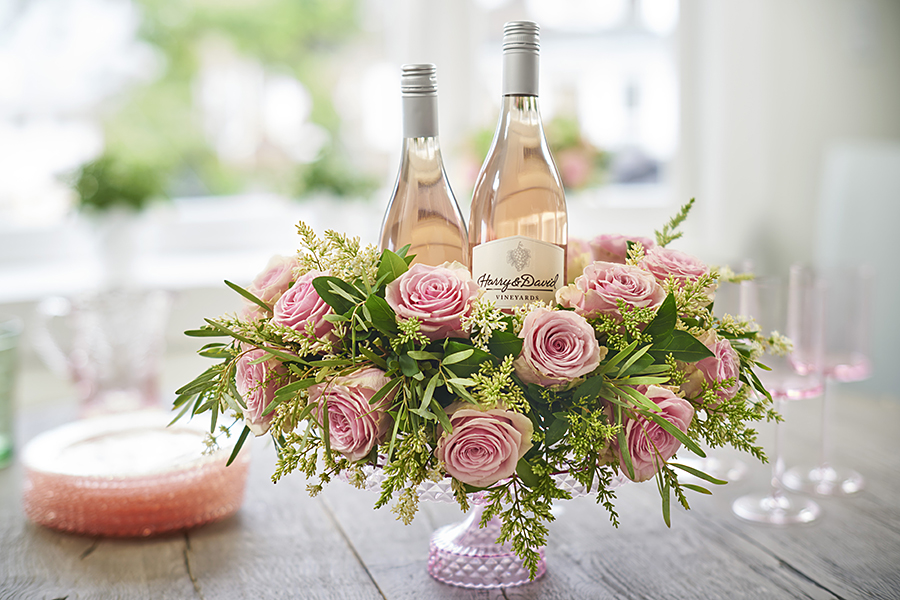
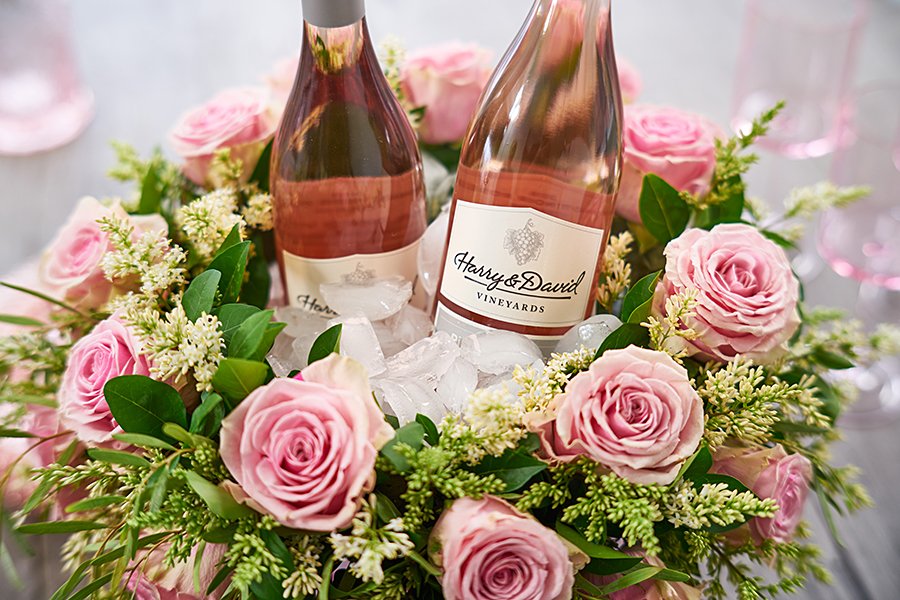
From lush creations, such as this fresh floral wreath surrounding an ice bowl keeping your favorite rosés chilled to perfection and ready for serving…

photo of waxed roses with two glasses of frosé

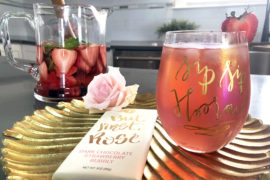
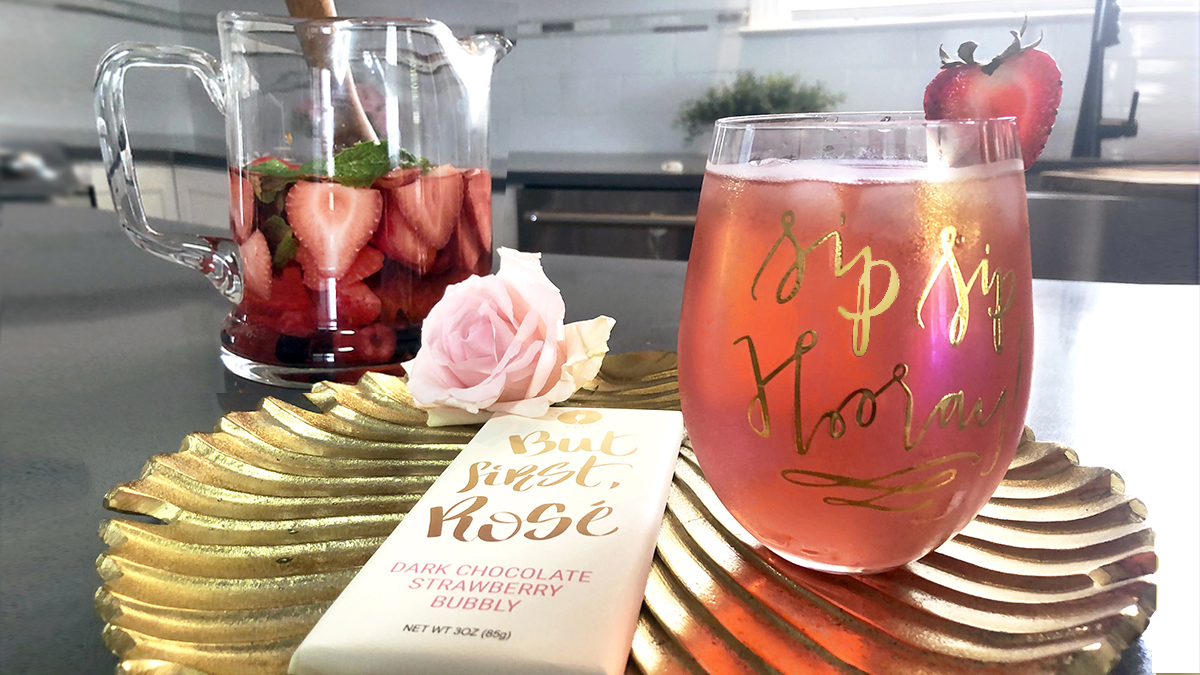
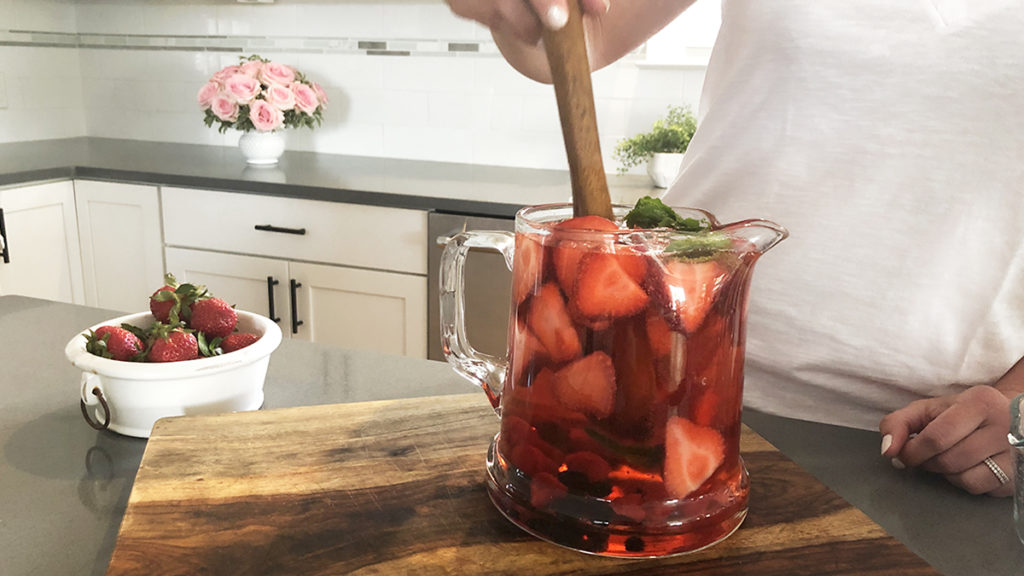
…to these glasses of delicious frozen rosé — also known as frosé — served on a golden tray decorated with a simple, sweet, single rose.

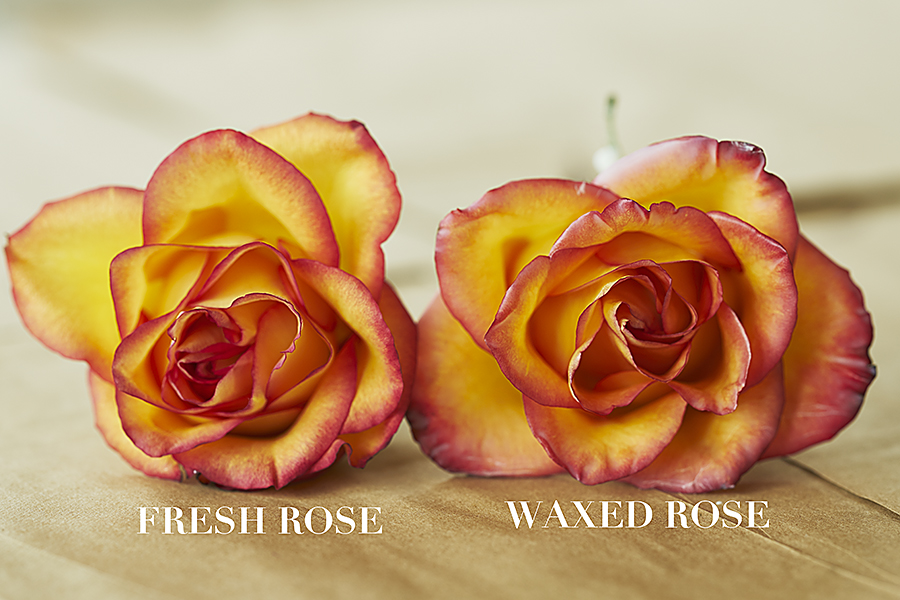
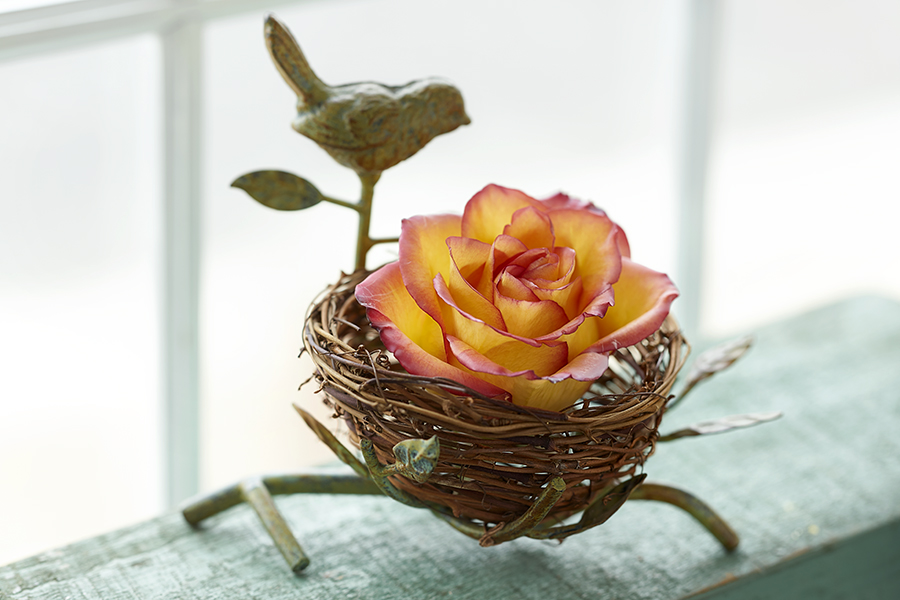
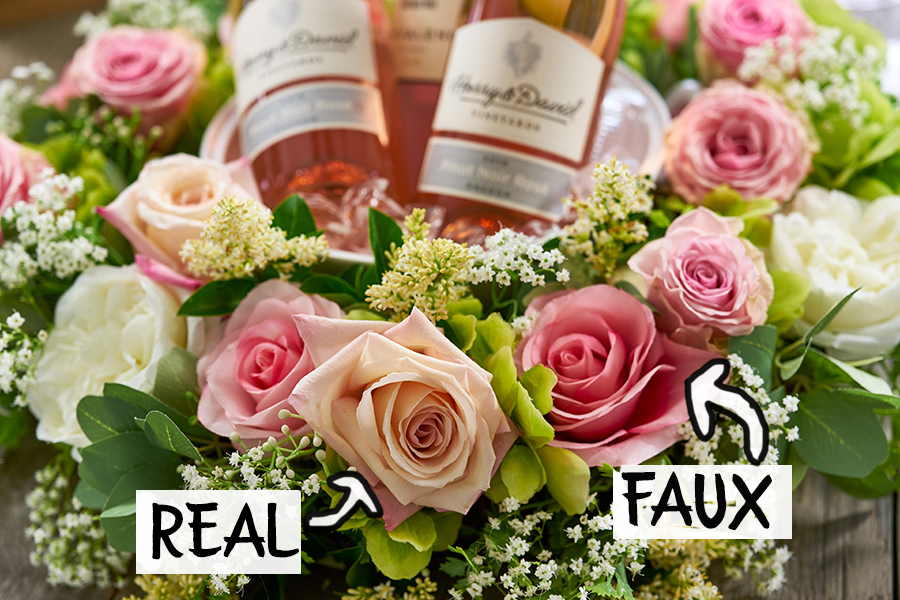
There are so many ways to use a single rose to add unexpected pops of beauty when entertaining. And there is an easy way to preserve fresh cut roses so that they will last for weeks, allowing you to use them multiple times in many different ways: preserving them in wax! And, yes, I did say easy, but did I also say how much fun it is?!

Here are two ideas for using waxed roses.

photo of waxed roses with a waxed rose in a table setting and a bottle of rosé

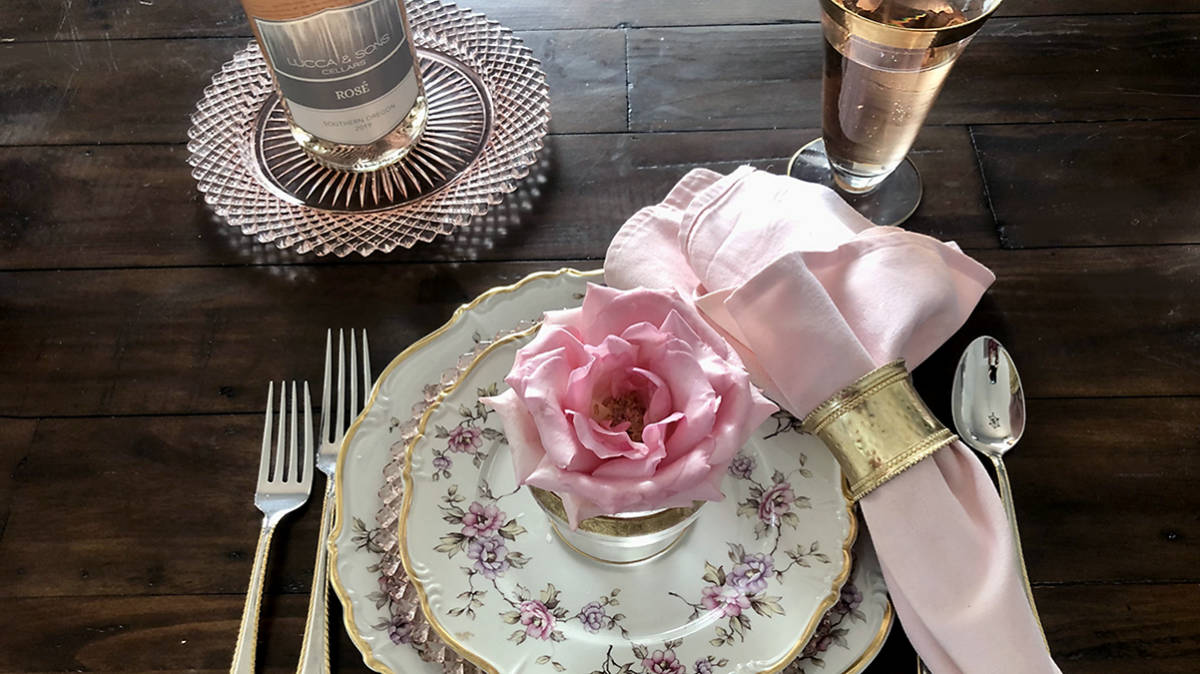
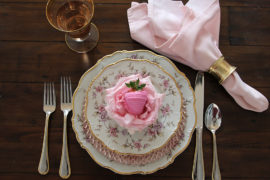
As if this combination of vintage china, pink depression glass, and gold accents wasn’t pretty enough, a waxed rose greeting each guest as they take their seat for lunch takes it to the next level.

photo of waxed roses with a waxed rose in a table setting with a chocolate covered strawberry sitting on it

But wait, there’s more! Gently place a single chocolate-covered strawberry into the waxed rose and start your celebration off with a little something sweet. Or package it up and send your guests off with the best take-home gift ever!

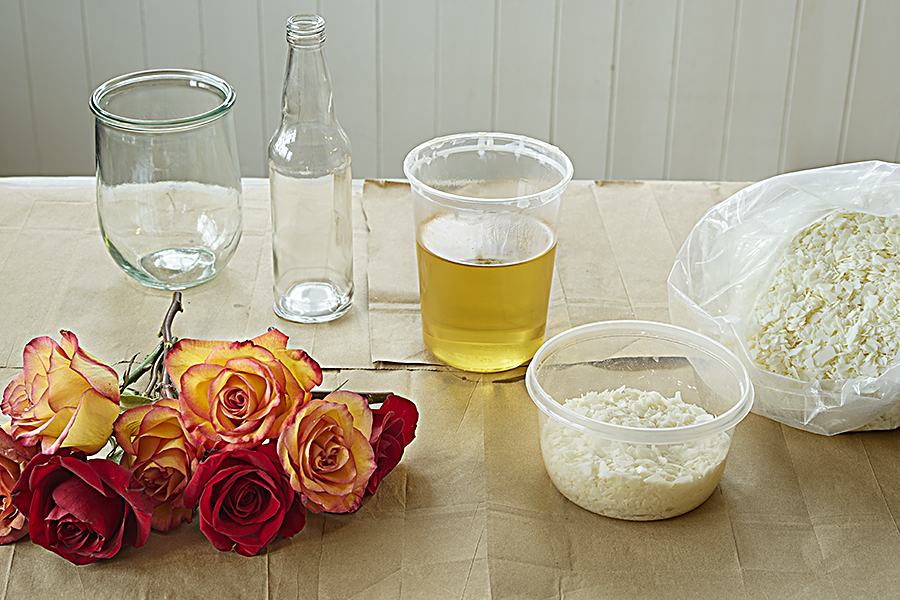
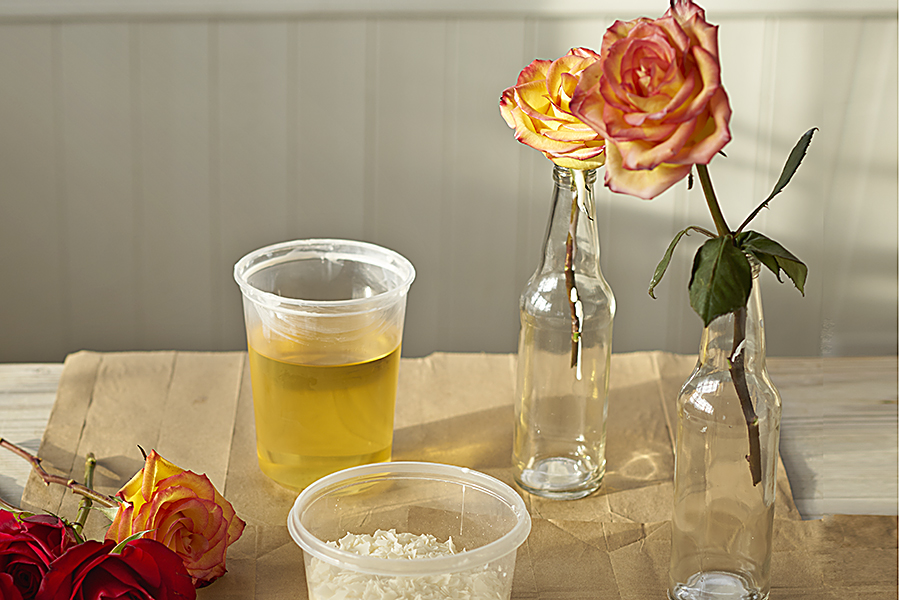
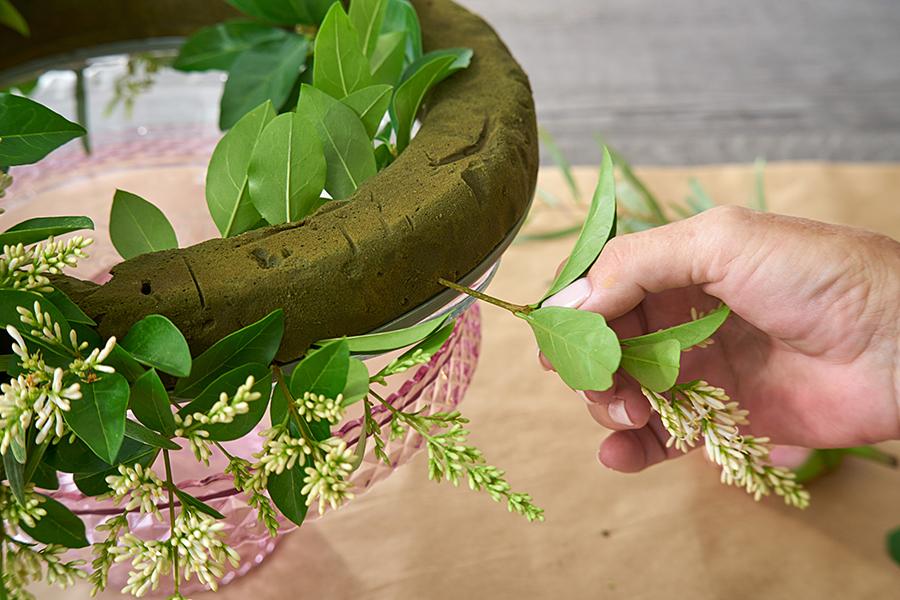
If you’ve never preserved flowers in wax, check out my step-by-step guide for how to do it. I even made a video to go along with it! These instructions apply to all flowers, not just roses.

Preserving flowers in wax, admittedly, takes a little practice, but it is so fun and relaxing to do. And the best part is that you get to enjoy your flowers as fresh cuts first. You can wait until your flowers are fully bloomed and just about to pass their prime to preserve them using the waxing method.

Rosé Sangria and Other Ways to Enjoy Roses During Summer

What are the first two things that come to mind when you think of summer? A lot of folks might say “sun and surf” or “grill and chill,” but if you ask me, it’s roses and rosé! And I’m not talking about Lauren Zima’s recap show for Bachelor Nation.

For me, summer is about celebrations and relaxation. Flirty and frivolous, rosé is the perfect beverage to enjoy on a sun-kissed balcony, at a bustling beachside bar, or while dining al fresco on a warm summer evening. Add the overwhelming fragrance and stunning beauty of rambling roses and you have the perfect storm of summer perfection!

Woman with glass of rose

Here are three ways to enjoy roses and rosé this season.

Rosé sangria mojito cocktail

Rosé is extremely versatile and can function as a base for your favorite cocktail, adding lovely flavors like strawberry, raspberry, and citrus. I wanted to create a summer cocktail that was light, with layered flavors, but not sweet. What I came up with is a cross between sangria and a mojito.

This rosé sangria mojito is a more grown-up cocktail. If you prefer your drinks on the sweeter side, you can add some simple syrup to the mix or use a sweetened cranberry juice instead of the flavored seltzer.

This drink pairs perfectly with the chocolate strawberry bubbly bar or dark chocolate sparkling rosé cordials that come with the Girls Night In Rosé Gift Basket. Just mix it up, pour it into the “Rosé All Day” stemless wine glass, and you’re ready for any celebratory occasion!

Rosé Sangria Mojito Cocktail

Prep Time 5 minutes
Cook Time 10 minutes
Chill time 1 hour
Total Time 1 hour 15 minutes

Ingredients:

  • 1 bottle rosé
  • 1 can cranberry seltzer
  • 2 cups rum
  • ½ cup strawberries, plus more for garnish
  • ½ cup raspberries
  • ½ cup blueberries
  • Fresh mint

Instructions: 

  • Wash all the berries. Remove the tops of the strawberries and cut into slices.
  • Add all the fruit to the pitcher, along with a few sprigs of fresh mint.
    Photo of rosé sangria with a bottle of rosé and a pitcher of fruit
  • Add two cups of rum, the bottle of rosé, and a can of cranberry seltzer.
    Photo of rosé sangria with pouring a bottle of rosé into a pitcher of fruit
  • Stir to mix all the ingredients together and refrigerate for about an hour.
    Photo of rosé sangria with stirring the pitcher of fruit and sangria
  • When ready to serve, pour in a glass over ice and garnish with a strawberry slice.

DIY roses and rosé wreath

This summer, everything is coming up pink! And that means lots of fabulous party décor in that trendiest of colors. This roses and rosé wreath is a particularly pretty — and pink — way to display your wine while keeping it chilled at the same time.

a photo of roses and rosé with a diy roses and rosé wreath

If you don’t feel like going all out, there’s a version of this you can make with a faux rose wreath. Or, meet in the middle and do a little of both.

How to Preserve Flowers with Wax

How to Preserve Flowers with Wax

You can make your beautiful fresh-cut roses last longer than you ever imagined by dipping the open blooms in melted wax. The best time to preserve flowers with wax is at the very end of their shelf life — after you have enjoyed their beauty for over a week — when the rose is in full bloom.

I have waxed roses many times over the years using paraffin wax. Now that soy wax is readily available, I decided to give that I try…and I’m glad I did! Soy wax is a completely natural and renewable resource, has a lower melting point, and cleans up easily, with just soap and water. And soy wax is so versatile that you can melt it in the microwave!

What you need to preserve flowers with wax:

  • Open roses
  • Microwave-safe container
  • Soy wax flakes
  • Candy thermometer (optional)
  • Empty bottles or vases or wax paper
a photo of wax flowers with ingredients for wax roses

Steps:

  1. Cut the stems of your roses to about 8 to 10 inches long to make it easy to dip the heads into the wax. Then, place the stems into your bottle or vase to cool. Be sure to put scrap paper on your work surface, including under the bottles, to catch dripping wax.
  1. Fill the microwavable container all the way to the top with the wax flakes and microwave for 2 minutes. After 2 minutes, take the container out of the microwave and stir the melted wax with a disposable plastic spoon. If there is still any white/un-melted wax, return the container to the microwave for another minute and repeat. Also: As the wax melts, you might find that you need to add more flakes. Go ahead and stir them into the container, and continue the melting process.
a photo of wax flowers with a wax rose cooling upright in a bottle
  1. Once all the wax is melted, you can start dipping. Place the wax container on a protected surface and have your bottle or vase ready to place the dipped roses in for cooling. You can also place the dipped roses on wax paper to cool, but they will keep their shape better if they cool while upright.
a photo of wax flowers with a wax rose vs. fresh rose

Note: Your wax should be at about 100° F. (You can measure the temperature with a candy thermometer.) I found that melting the wax in short increments of time will keep it from getting too hot. I waited a minute or two after removing my wax from the microwave to start dipping. You can tell that your wax is getting too cool if it starts to get cloudy looking and appears cloudy on the rose petals as well. The goal is to make your rose look so lifelike that it’s impossible to tell that it has been dipped in wax!

If you have many flowers to wax, you can continue to melt as you go along, using the same container and adding more wax flakes as needed. When you’re done, cover the wax container so you can use again at another time. You can preserve many different varieties of flowers and foliage with this method!

2 ideas for enjoying your waxed roses

a photo of wax flowers with a wax rose in birds nest display

After the wax has completely cooled, cut the stem off so that you can cradle the rose in this sweet bird’s nest dish.

a photo of wax flowers with wax roses and succulents

I love this arrangement! I simply alternated waxed roses and baby succulents to create a modern centerpiece as carefree as it is beautiful.

DIY Roses and Rosé Wreath

This summer, everything is coming up pink! And that means lots of fabulous party décor in that trendiest of colors. This roses and rosé wreath is a particularly pretty — and pink — way to display your wine while keeping it chilled at the same time.

a photo of roses and rosé wreath on a table

If you don’t have your own rose garden or a blooming rose bush, don’t worry — roses are abundant this time of year, and they’re priced right.

Roses and rosé wreath

What you’ll need

  • Oasis floral foam wreath base
  • Fresh cut roses
  • Fresh foliage
  • Shallow dish
  • Pedestal dish (for elevated display)
a photo of a roses and rosé wreath with  a shallow dish for the base

Soak the floral foam wreath base thoroughly. Then, place a shallow dish, such as a pie plate, on top of the pedestal dish, and put the foam wreath on the pie plate.

Start by creating the wreath shape with various sprigs of foliage. I was able to cut enough branches from the trees and shrubs in my backyard to use in this project!

a photo of a roses and rosé wreath with pushing leaves into floral foam

Because the wreath is elevated, make sure that you insert your lower branches into the foam on an angle so they hang over the dish.

a photo of a roses and rosé wreath with covering wreath base with flowers

Before inserting your roses, cut the stems to about an inch long so that the stem fits nicely into the foam without going all the way through. You want the bottom of the stem to stay in the foam so that it will be continuously hydrated.

Continue filling in with greenery and roses until you have completely covered the wreath base.

a photo of a roses and rosé wreath with bottles of wine in the wreath

When you’re ready to serve and enjoy your favorite rosé — mine is this delicious pinot noir rosé from Harry and David — fill the center dish with ice and add the bottles to keep them chilled between pours.

a photo of a roses and rosé wreath with a faux rose wreath

Want an even simpler version of this? Use a faux rose wreath instead. Place the wreath on the table, add a bowl filled with ice in the middle, and then fill it with a bottle of delicious, refreshing pink rosé!

Or meet in the middle and do a little of both.

Start with the pretty faux wreath base and add a few cuttings of fresh flowers and greenery to really make it pop!

As long as you want the roses to look beautiful for just a few hours, you don’t even need to worry about hydration — they’ll look great for the entire party. After the rosé is gone, you can remove the fresh cut roses and place them in a petite vase, and enjoy them for a few more days.

How to Arrange Roses in a Vase

From tulips to chrysanthemums, our series “The Language of Flowers” explores everything from fresh flower care tips to flower symbolism and meaning. Learn from floral and lifestyle expert Julie Mulligan how to arrange roses in a vase and create a beautiful arrangement for someone special.

Roses are timeless symbols of love and beauty, shared as gifts of affection for as long as anyone can remember. If you are lucky enough to receive a bouquet of roses for a special occasion, you might be tempted to just throw them in a vase filled with water and call it good. But don’t you owe those beautiful blooms a little more TLC than that?

If you’re not sure how to arrange your bouquet of fresh cut roses, you’re in luck. I created a video on arranging roses just for you, breaking the process down to three basic steps. Follow my advice, and you’ll create a beautiful arrangement in no time.

How to Arrange Roses Step-by-Step with Floral Expert Julie Mulligan

My favorite rose secrets

In addition, I want to share a few tips that I have learned over the years to help you get the maximum vase life from your fresh cut roses.

  • Get you roses in water as soon as possible. Hydration is what’s it’s all about.
  • Fill a clean vase three-fourths of the way with warm water.
  • Add a packet of flower food according to package directions. Flower food contains a biocide to kill bacteria, an acidifier to help stems drink water, and a sugar to nourish the blooms. If you don’t have any commercially prepared flower food, you can make your own recipe at home by adding three teaspoons of lemon-lime soda (non-diet) and one teaspoon of bleach to one quart of water. The soda provides the food source (sugar), and the acidifier and bleach will help prevent bacteria growth.
  • Remove all foliage from you flower stems that would fall below the water line before placing your flowers in the vase. This prevents bacteria growth in the water.
  • Just before placing your flowers in the prepared vase, give the bottom of each stem a fresh cut on an angle. Cutting the stem on an angle prevents the stem from sitting flush on the bottom of the vase, thus enabling maximum water intake.
  • Check the water level in your vase on a daily basis, and add fresh water as needed.
  • After three to four days, repeat these steps for optimum vase life.
Exit mobile version