How to Grow, Handle, and Care for Sunflowers

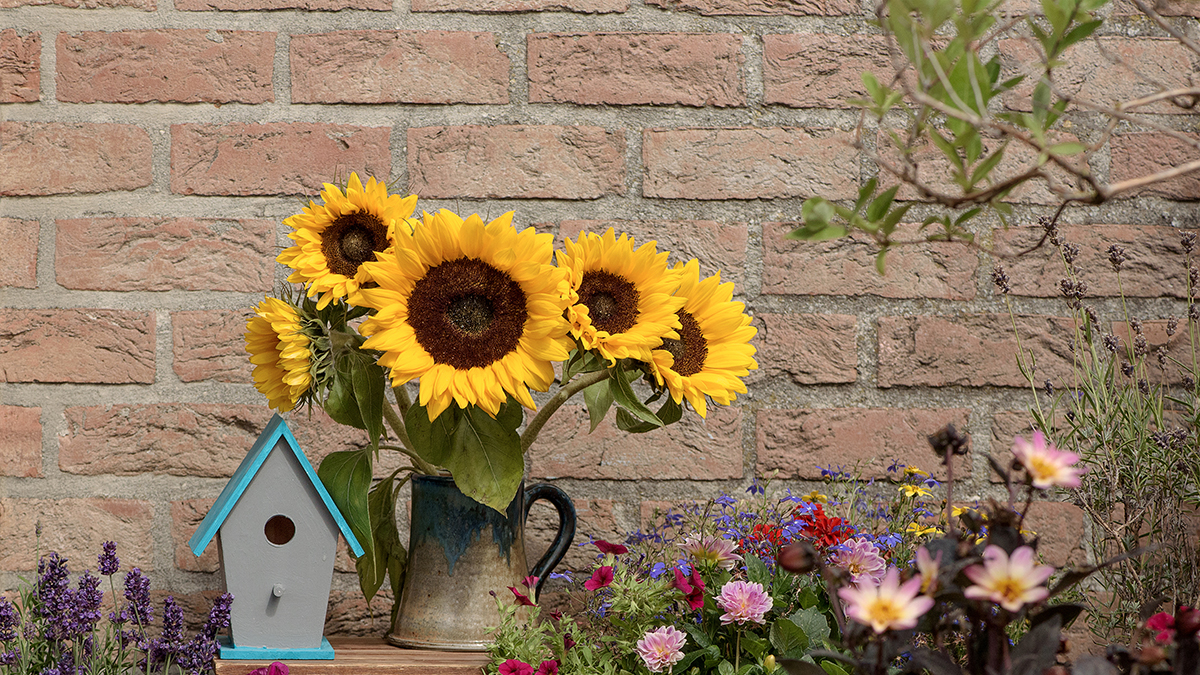
Sunflowers come in a variety of colors and sizes, but the most familiar type is the annual sunflower that grows to 10-feet tall. It has thick, fuzzy stems, heart-shaped leaves, and bright yellow petals circling the flat flower head, from which small, fertile flowers bloom and develop into seeds that make for good snacking (read until the end to find out how to dry them yourself).

These beautiful, colorful flowers can enhance any garden or living space — if you take care of them the right way.

Growing sunflowers in a garden

You can grow sunflowers from seeds or small plants that you buy. They are either annual or perennial, depending on the variety and region where they are grown. Many sunflower varieties are perennial in USDA hardiness zones 4 to 8, and some are annual or grown as annuals.

Choosing the right spot

care for sunflowers with sunflowers growing in the sun

True to their name, sunflowers love the sun and will bend to follow it as it moves across the sky. Choose a spot in the garden that gets six to eight hours of sunshine a day. Tall sunflowers are stunning against a bright fence or wall, and shorter varieties, with smaller flowers in yellow, orange, maroon, or brown colors, liven up a sunny bed or border. They bloom all summer into fall, providing consistently bright colors to the garden as other flowers bloom and fade.

Planting your sunflowers

Your sunny spot needs to have loose, well-draining soil that allows the sunflower’s roots to easily grow down and establish strong support for the tall plant. If you’re seeding sunflowers directly into the ground, dig a hole 12 to 24 inches deep, and mix in some compost or other organic matter with the native soil.

care for sunflowers with couple watering seedlings

Plant the seeds two to three weeks before the last predicted frost. Drop them into holes 1 to 2 inches deep and water them thoroughly. You can plant multiple seeds to give yourself the best chance for a healthy crop; after they’ve grown to about 6 inches tall, thin out the weakest, smallest seedlings. Tall sunflowers will need to be thinned to 1 to 2 feet apart, but smaller varieties can be thinned closer together. You can gauge the best distance apart by how tall or branching your varieties will be.

If you want to start the seeds inside, plant them in a loose seed-starting mix five to seven weeks before the last expected frost. It will take them about seven to 10 days to sprout. Then, after the date of the last estimated frost, acclimate the seedlings to the cold weather by setting them outside a week before you want to plant them. Dig small holes and gently transfer the seedlings from their starting pots to the soil. Water them thoroughly.

Small plants bought at a garden center can be set in the garden in the late spring or early summer. Tall sunflowers should be set 1 to 2 feet apart; smaller varieties can be set closer. Water them well, and watch them grow.

Care after planting

Sunflowers don’t require a lot of care since they’re drought and heat tolerant, and resistant to pests. They are, however, heavy feeders. You can add a weak dilution of liquid fertilizer at planting to encourage good root growth, and then apply a liquid fertilizer monthly throughout the growing season. Sunflowers tolerate periods of drought, but they will be healthier and produce larger flowers if their soil is moist. When you water, stay a good 3 to 5 inches from the stems of the plants to prevent fungal disease. As an alternative, you can mix a circle of slow-release, granular fertilizer into the soil around the plants once in the spring.

Growing sunflowers in containers

care for sunflowers with sunflowers growing in a container

Shorter varieties of sunflowers can grow very well in containers. They will need a good-quality, well-draining potting mix and a big enough pot so that their taproots can develop. Sunflowers that grow up to 2-feet tall will need 10-to-12-inch pots, and those that grow to 4 or 5 feet or more will need 3-to-5-gallon pots. Make sure the pot is deep and has at least one drainage hole to keep the roots healthy and prevent root rot.

Set the pot in a bright spot that gets sun for a good portion of the day. When the soil is dry, water 1 to 2 inches down from the top. Fertilize with a weak liquid fertilizer two to three times over the spring and summer or work some slow-release fertilizer into the soil once in the spring. Take care to keep both the water and fertilizer away from the stems of the plant to keep them from developing a fungal disease.

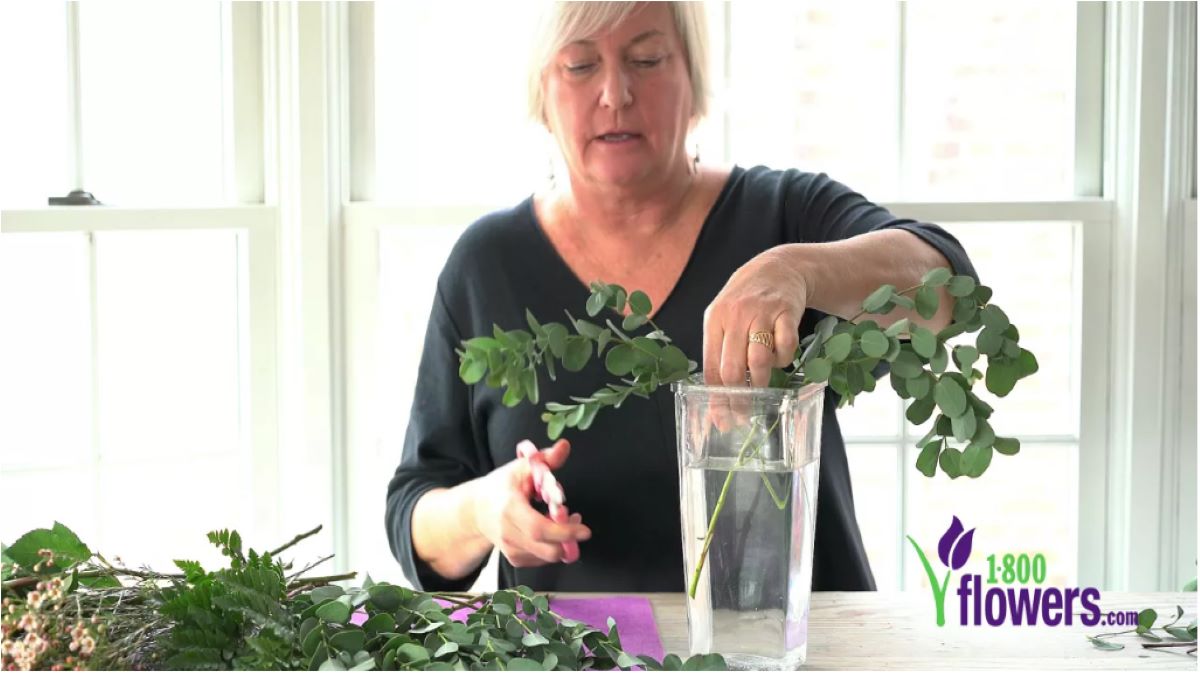
How to prepare a cut sunflower

Cutting sunflowers early in the morning will give you the best chance for fresh flowers that haven’t wilted in the heat and sun. Use a clean, sharp knife or clippers and trim the ends at an angle before putting them in a vase.

Choose a clean vase that is tall enough to support the stems, and fill the vase with lukewarm water. The flowers should last about a week if you change the water every day. Keep them in a cool part of the house, away from direct sunlight.


Drying sunflowers for seeds

Sunflower seeds are a healthy snack for people as well as wild birds, and harvesting them from your flowers is a simple procedure. The traditional tall sunflower varieties with large flower heads are better for seeds than the new hybrids that have been developed for their smaller, colorful, ornamental flowers.

care for sunflowers with girl holding sunflower seed

Toward the end of the summer, when the leaves are wilted and have turned yellow, and the petals are drooping and going by, the seeds should be brown and plump, and ready for harvesting.

Cut the stalks about a foot down from the flowers and either hang them up or set them out to dry for about five days. If they’re drying outside, be sure to cover them so birds won’t get to them before you do.

After that time, rub the seeds off with gloves or a tool, and collect them in a pan. Spread the seeds out so they are all exposed to the air and pick out any dried petals or leaves. Let them sit overnight to dry further, and voila! You have your own homegrown, healthy snack.

Show Your Valentine’s Day Flowers Some TLC


Whether you’re looking for romantic gift ideas or ways to make yourself feel loved, “Your Trusted Cupid” brings you top-notch advice from relationship experts. In this story, Julie Mulligan offers stylish ideas of how to use your Valentine’s Day flowers after the holiday
.

Make your Valentine's Day Flowers last with a woman smiling at a large bouquet of flowers.

Who doesn’t anticipate feeling special and loved on Valentine’s Day? And of course, receiving Valentine’s Day flowers is the best way to know you are adored. Flowers represent love in many ways, with their natural beauty, fresh scent, and elevating the atmosphere. So, once you receive Valentine’s Day flowers, be a flower “caretaker,” not a “heartbreaker” by giving your flowers plenty of TLC.

Our 1-800-Flowers.com team is so passionate about extending the happiness quotient of flowers, we created these tips to help preserve your arrangements.

Make your Valentine’s Day flowers last

1. After a few days, we recommend changing the water and re-cutting the flowers to ensure longevity. Place the bouquet in a separate holder, while you add warm water and flower food to its original vase. Be sure to follow the mixing directions on the flower food packet.

2. With a sharp knife or clippers, re-cut the stems by cutting one to two inches off on an angle, but be careful not to crush the stems. We find it best to hold the stems underwater. Return the bouquet to its vase with fresh water.

3. Once your flowers are down to their last stem, get inspired and be creative — especially with roses. Don’t believe us? You’d be surprised how long you can make a rose last, even if it is fully open. Look around the house for DIY décor-worthy items (glass containers allow for endless creative possibilities).

We’ve included some beautiful ideas to display short, fully open roses below. The shorter the stem, the easier it will be for the water to reach the rose and will last longer than you would expect.

Make your Valentine's Day Flowers last with petal-covered votive candles.

Petal-covered votives

Create an attractive, natural candle by using extra rose petals. Simply place rose petals along the perimeter of a votive and secure with a pretty ribbon for a unique candle.

Make your Valentine's Day Flowers last in an apothecary jar with a rose at the bottom.

Rose apothecary jar

At the bottom of an apothecary jar or vase, pad with greenery or leaves. Cut the stem from your rose and place the flower on top.

Lasting roses guaranteed

If the thought of seeing your Valentine’s Day flowers shrivel and wilt is too much to bear, consider Magnificent Roses. These arrangements are packaged in a chic hatbox, come in an assortment of colors and styles, and require minimal care. The main difference? Their beauty will last, just like your romance.

How to Preserve Flowers with Wax

How to Preserve Flowers with Wax

You can make your beautiful fresh-cut roses last longer than you ever imagined by dipping the open blooms in melted wax. The best time to preserve flowers with wax is at the very end of their shelf life — after you have enjoyed their beauty for over a week — when the rose is in full bloom.

I have waxed roses many times over the years using paraffin wax. Now that soy wax is readily available, I decided to give that I try…and I’m glad I did! Soy wax is a completely natural and renewable resource, has a lower melting point, and cleans up easily, with just soap and water. And soy wax is so versatile that you can melt it in the microwave!

What you need to preserve flowers with wax:

  • Open roses
  • Microwave-safe container
  • Soy wax flakes
  • Candy thermometer (optional)
  • Empty bottles or vases or wax paper
a photo of wax flowers with ingredients for wax roses

Steps:

  1. Cut the stems of your roses to about 8 to 10 inches long to make it easy to dip the heads into the wax. Then, place the stems into your bottle or vase to cool. Be sure to put scrap paper on your work surface, including under the bottles, to catch dripping wax.
  1. Fill the microwavable container all the way to the top with the wax flakes and microwave for 2 minutes. After 2 minutes, take the container out of the microwave and stir the melted wax with a disposable plastic spoon. If there is still any white/un-melted wax, return the container to the microwave for another minute and repeat. Also: As the wax melts, you might find that you need to add more flakes. Go ahead and stir them into the container, and continue the melting process.
a photo of wax flowers with a wax rose cooling upright in a bottle
  1. Once all the wax is melted, you can start dipping. Place the wax container on a protected surface and have your bottle or vase ready to place the dipped roses in for cooling. You can also place the dipped roses on wax paper to cool, but they will keep their shape better if they cool while upright.
a photo of wax flowers with a wax rose vs. fresh rose

Note: Your wax should be at about 100° F. (You can measure the temperature with a candy thermometer.) I found that melting the wax in short increments of time will keep it from getting too hot. I waited a minute or two after removing my wax from the microwave to start dipping. You can tell that your wax is getting too cool if it starts to get cloudy looking and appears cloudy on the rose petals as well. The goal is to make your rose look so lifelike that it’s impossible to tell that it has been dipped in wax!

If you have many flowers to wax, you can continue to melt as you go along, using the same container and adding more wax flakes as needed. When you’re done, cover the wax container so you can use again at another time. You can preserve many different varieties of flowers and foliage with this method!

2 ideas for enjoying your waxed roses

a photo of wax flowers with a wax rose in birds nest display

After the wax has completely cooled, cut the stem off so that you can cradle the rose in this sweet bird’s nest dish.

a photo of wax flowers with wax roses and succulents

I love this arrangement! I simply alternated waxed roses and baby succulents to create a modern centerpiece as carefree as it is beautiful.

Farm Fresh Flower Arrangements

When you send someone flowers,  you instantly make their day, no doubt about it! Flowers have an almost magical quality about them that just makes people feel good. And it couldn’t be easier to show someone how much you care: order online or by phone, pick up a bouquet at your local florist or market, pick a few stems from your own garden–any way you do it leads to a smile!

Bae Bouquet

Of course, with so many options, it can get a little confusing sometimes. For example, at 1-800 Flowers.com there are 2 distinct floral categories. There are flower arrangements designed & delivered from a local florist in the town where the recipient lives and there are fresh-cut flowers picked on our premier partner farms, right here in the United States and around the world, that are cared for and inspected to make sure they meet our 100% Smile Guarantee®, and shipped fresh to ensure lasting beauty and enjoyment.

Each option has its own unique benefits. Before choosing, just take a minute to think about the recipient and which surprise they would prefer. There’s the thrill of being handed a gorgeous, professionally designed arrangement that needs only to be unwrapped and enjoyed,  or the beauty of flowers that have been harvested, selected and wrapped with care to protect them on their journey to your loved one, who will delight in seeing the flowers open and bloom in the coming days! These flowers can be arranged in one vase or divided up in to several. They can also be displayed in a treasured family heirloom or a simple mason jar.  There’s an opportunity here to be a bit more creative and hands on with the flowers!

Which do I prefer?  Well, that’s like asking me to pick a favorite child! But in this post, I’m going to tell you more about what I love about our fresh-from-the-farm flowers.

These flowers are being sent to someone as a gift, and are packaged as such. From the moment they see that purple box being delivered to their door, they know they’re in for a treat!

There is a special compartment inside the box that holds an enclosure card with your personalized message.

Included with every bouquet are 2 packets of flower food, which has been proven to extend the vase life of fresh cut flowers.

There is also a special compartment inside of the flower box where a vase, chosen specifically for the bouquet, is placed and held securely during the delivery process.

After filling the vase with fresh, clean water and adding the flower food, they simply need to give the end of each stem a fresh cut before placing it in the vase.

They can start by inserting the stems around the circumference of the vase opening in a crisscross pattern. As they continue to add stems, they can be placed in the middle of the arrangement. They’ll see that the flowers added to the middle of the bouquet will be held up by the criss-crossed stems first added.

Because our farm-fresh flowers begin their journey to your home shortly  after they are cut, they’ll probably look very different than what you’re used to seeing in a flower shop. That’s because that haven’t even started to bloom and open their petals. There may not  be as  much color showing at this point, especially if the bouquet includes lilies.

For example, the bouquet on the left is how the Bae Bouquet™ from 1-800 Flowers.com looks when it first arrives. On the right is the same bouquet one week later!

By using a clean vase and clean water, adding flower food, and re-cutting the stems and changing the water every few days, your recipient can add several days to life of their beautiful bouquet. And they shouldn’t worry about discarding flowers as they pass their prime, perhaps even changing up the vase as the flowers get shorter from re-cutting and the bouquet gets smaller. This can literally add extra days of enjoyment to the life of a bouquet!

Coming up, I’ll be sharing some cool ideas for preserving and repurposing all those lovely Valentine’s flowers (and year-round bouquets) we love to help you send!

How to Arrange Roses in a Vase

From tulips to chrysanthemums, our series “The Language of Flowers” explores everything from fresh flower care tips to flower symbolism and meaning. Learn from floral and lifestyle expert Julie Mulligan how to arrange roses in a vase and create a beautiful arrangement for someone special.

Roses are timeless symbols of love and beauty, shared as gifts of affection for as long as anyone can remember. If you are lucky enough to receive a bouquet of roses for a special occasion, you might be tempted to just throw them in a vase filled with water and call it good. But don’t you owe those beautiful blooms a little more TLC than that?

If you’re not sure how to arrange your bouquet of fresh cut roses, you’re in luck. I created a video on arranging roses just for you, breaking the process down to three basic steps. Follow my advice, and you’ll create a beautiful arrangement in no time.

How to Arrange Roses Step-by-Step with Floral Expert Julie Mulligan

My favorite rose secrets

In addition, I want to share a few tips that I have learned over the years to help you get the maximum vase life from your fresh cut roses.

  • Get you roses in water as soon as possible. Hydration is what’s it’s all about.
  • Fill a clean vase three-fourths of the way with warm water.
  • Add a packet of flower food according to package directions. Flower food contains a biocide to kill bacteria, an acidifier to help stems drink water, and a sugar to nourish the blooms. If you don’t have any commercially prepared flower food, you can make your own recipe at home by adding three teaspoons of lemon-lime soda (non-diet) and one teaspoon of bleach to one quart of water. The soda provides the food source (sugar), and the acidifier and bleach will help prevent bacteria growth.
  • Remove all foliage from you flower stems that would fall below the water line before placing your flowers in the vase. This prevents bacteria growth in the water.
  • Just before placing your flowers in the prepared vase, give the bottom of each stem a fresh cut on an angle. Cutting the stem on an angle prevents the stem from sitting flush on the bottom of the vase, thus enabling maximum water intake.
  • Check the water level in your vase on a daily basis, and add fresh water as needed.
  • After three to four days, repeat these steps for optimum vase life.

Homemade Floral Food

How to Make Your Own Food For Flowers

There are 3 ingredients that are helpful when trying to keep your flowers fresh and long-lasting. They are:

  • Sugar – provides nutrition for flowers
  • Citric acid – acts as an acidifier and lowers the ph level of the water
  • Bleach – prevents bacteria growth in the vase

Here are a few do-it-yourself options that I have come across:

  • One part lemon lime soda (7-Up, Sprite) to 3 parts of water
  • Two tablespoons lemon juice, one tablespoon sugar, one quarter teaspoon bleach to one quart of water
  • Two tablespoons of white vinegar and two tablespoons of sugar to one quart of water

Make The Most Of Your Graduate’s Corsage

Tips on Choosing Your Grads Corsage!

The summer weather is here and that can only mean one thing; graduation time! Whether graduating kindergarten or college, it is a blissful, bittersweet celebration. This is their day to shine, and what is a better way to make the day even more memorable then giving them a one of a kind wrist corsage that will complement their personality and spirit. Here are a few tips on how to make the most of your graduate’s corsage!

  • Flower buds are good choices when creating wrist corsages. Buds are beginning to bloom retain color and scent for a longer period of time
  • Depending on what kind of look you’re going for, for a dramatic look, one large flower such as the Catteiya, is a classic type of orchid available in practically every color except true blue.
  • The more colors in the corsage, the more lively the corsage will look.
  • Durable flowers, besides the regular roses or carnations are orchids, calla lilies and daisies.
  • Gerbera daisies and carnations are the least expensive, and come in a large variety of colors that make them perfect for any occasion.

Hope these tips help make the most of their (or your own) special day!

Exit mobile version