Once Feb. 14 comes along, you may be anxiously awaiting that stunning flower arrangement your sweetie sent you. While your man may not have the same reaction to a brilliant bouquet of long-stem roses as like, you can still wow him with a bouquet of meaty bacon!
These blooming bites were so easy to make, and they can be gifted in a vase or presented as a centerpiece for your romantic dinner for two.
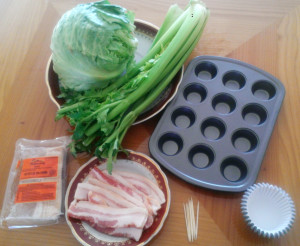
Materials needed for DIY bacon roses
24 strips of bacon (2 strips per rose)
1 head of crisp celery (with leaves)
1 mini muffin pan
12 baking cups or liners
Toothpicks
How to make a blooming bacon bouquet
To make the bacon roses, lay one strip of bacon on a plate and roll it onto itself. If your bacon has a lot of fat, be sure to keep the meaty red part at the top. Take a second strip of bacon and roll the rose into it to double the size. If your bacon roses appear extra meaty and look like they might fall apart, stick a toothpick in through the center to be sure it holds up.
Take a cupcake wrapper and use your toothpick to poke several holes through the bottom. Place one unbaked bacon rose into the cupcake wrapper, and place this above the muffin pan. The holes at the bottom allow the grease to escape, and the mini muffin pan will catch the escaped cooking grease.
Preheat your oven to 375 degrees. Place your muffin pan in the oven and let it bake for 40 minutes or until slightly crispy.
Remove from oven and let cool.
Take your head of celery and break off several stalks so you can arrange them in different heights in your vase.
Once the bacon roses cool, slowly sit your roses onto the celery until secure. As long as your celery stalks are fresh and crisp, you shouldn’t need any extra support.
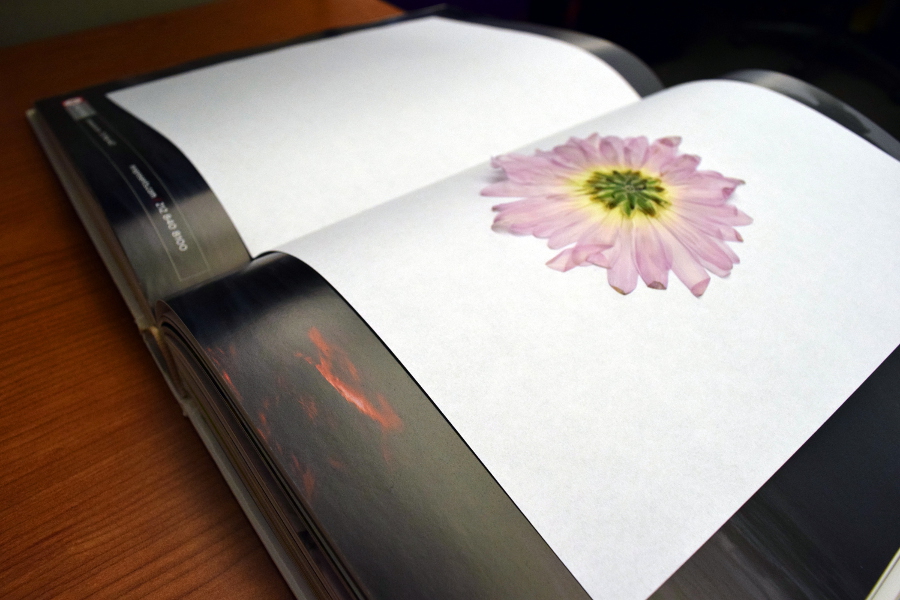
Preserving flowers is a popular way to lengthen the life of your flowers, especially if they’re from someone special. There are many ways to preserve flowers, one of which is pressing flowers.
Pressed flowers add a touch of elegance and beauty to any decoration or craft. From greeting cards to framed art, these dried beauties are versatile and will add a creative touch to any DIY project. Did you know that pressed flowers are also pretty easy to make? Rather than buying fake pressed flowers at the local craft store, we’re going to show you how to press your own from fresh flowers in just a few simple steps.
Here we have two methods for pressing flowers. The first requires using a microwave and takes about five minutes (from start to finish) per flower. The second requires less hassle but calls for a wait time of about a month.
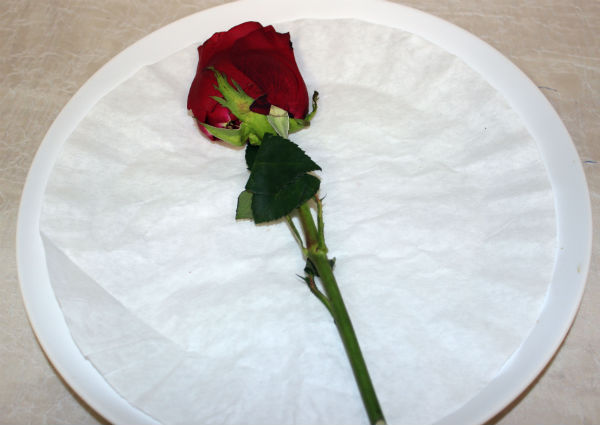
We used the first process to make these pressed roses, but you can use any flower of your choice. Lilies, daffodils, sunflowers, and daisies would also be a great choice for this project (just be sure to remove the excess pollen).
What you’ll need for DIY pressed flowers
Fresh flowers
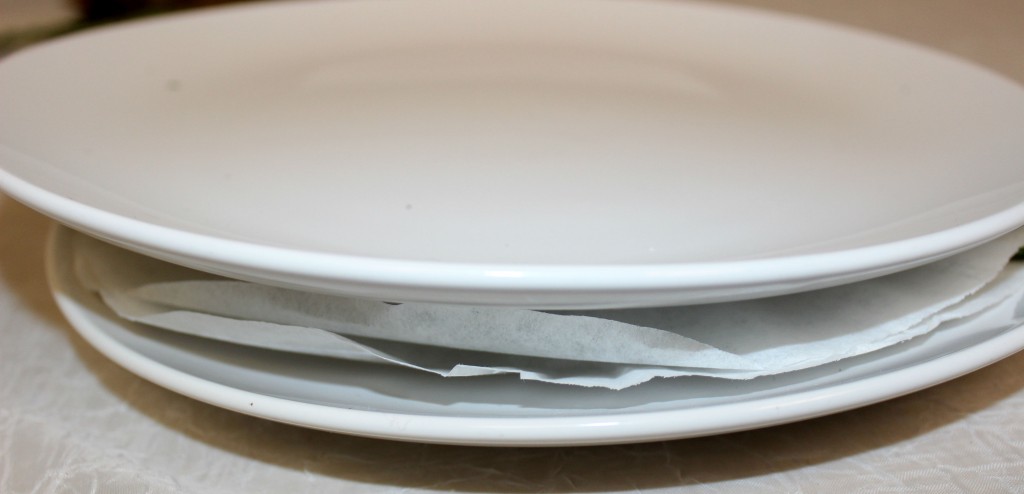
Absorbent material (we used coffee filters)
Ceramic plates
Microwave
Heavy coffee table book or encyclopedia (only for second method)
How to make last-minute DIY pressed flowers
If you’re pressed for time or looking for a quick craft, use this method.
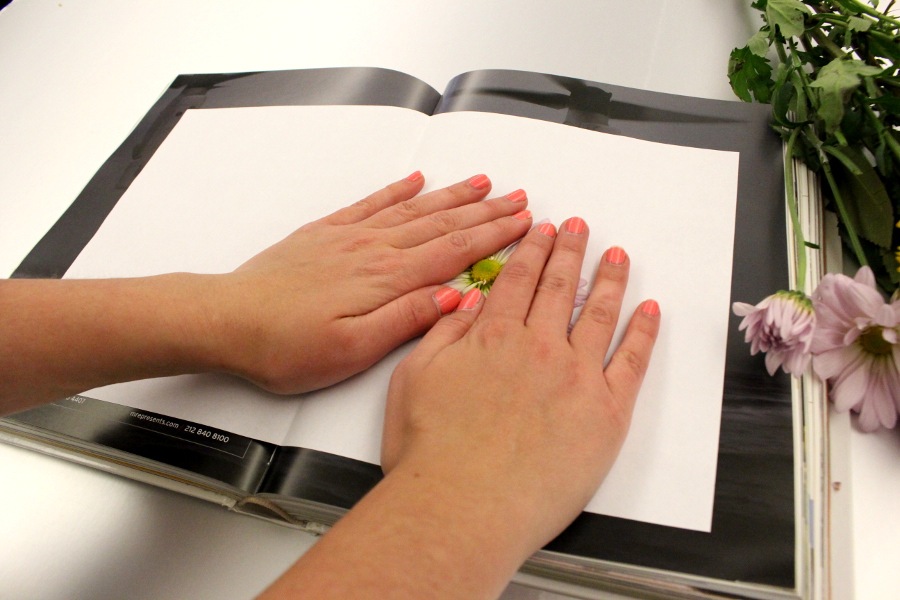
Lay a ceramic plate in front of you, and cover it with a coffee filter. Place a flower on top, and cover it with a second coffee filter.
Cover with an additional plate and place in the microwave. “Cook” for one minute, then take it out and replace the coffee filter. Top with the plate again and place in the microwave for another minute. Continue this process until you are satisfied with the result.
How To dry flowers with a book
This process may be lengthy, but it’s so simple that you can just set it and forget it!
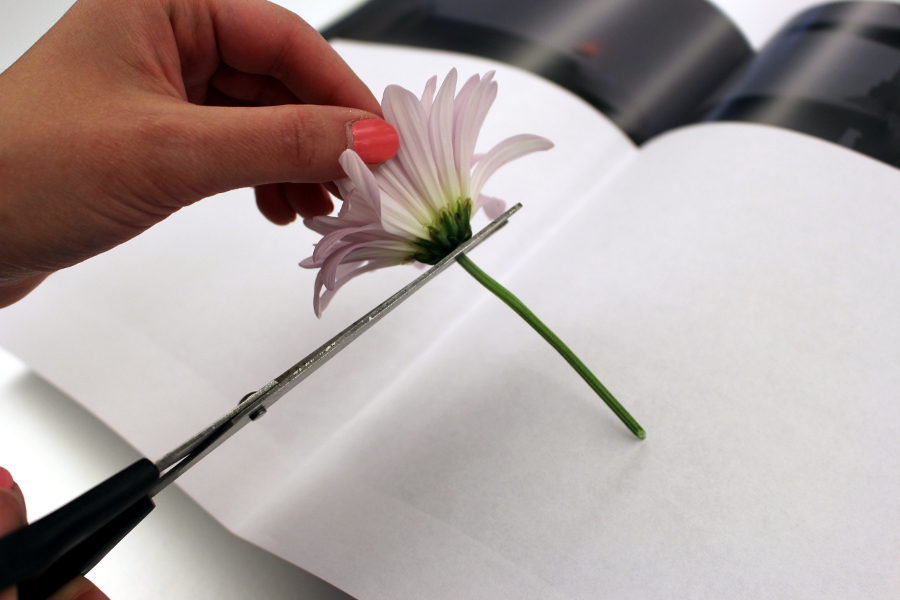
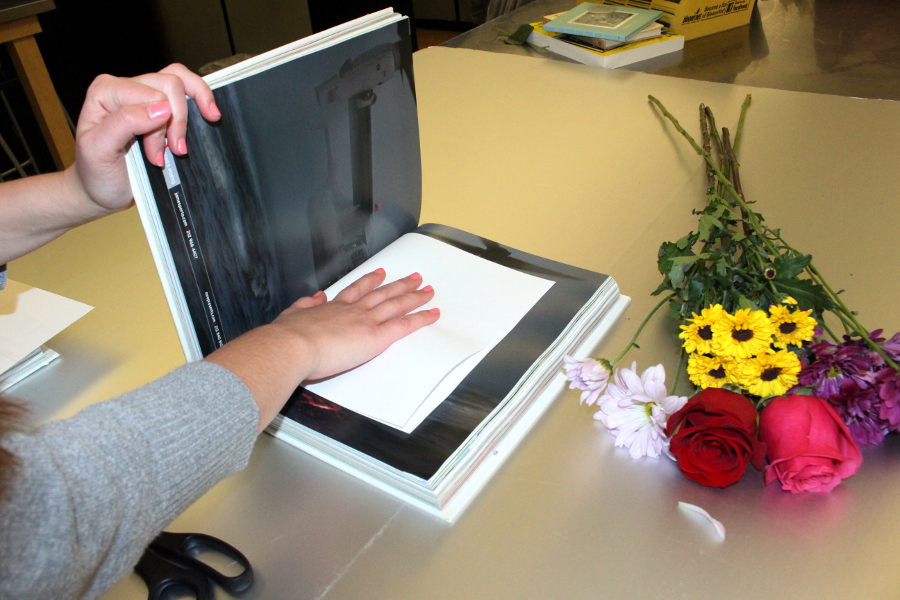
Grab a heavy book, such as a coffee table book or encyclopedia. Open to the middle of the book and place a folded piece of paper or wax paper inside.
Cut your flower to remove as much of the stem as possible.
Place the flower flat in the middle of the book. Use your hands to flatten the flower if needed.
Carefully close the book while making sure to keep the flower flat.
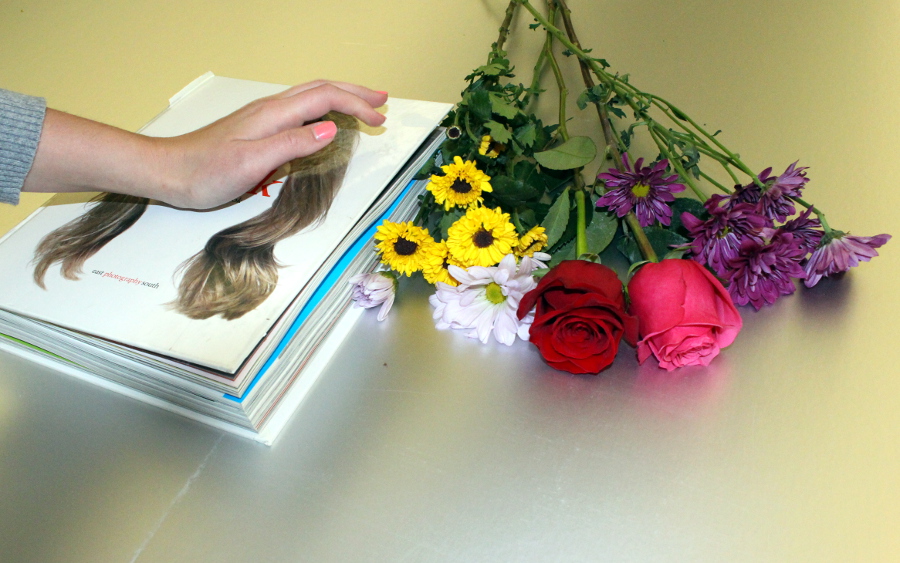
Leave for 4 to 5 weeks, making sure to replace the absorbent material once every week or so.
Whether you’re planning a romantic night out or an intimate night in, surprise your man with a gift that’ll make him want to shower you with roses all year long.
Rather than spending countless hours stressing over what to get your boyfriend or husband for Valentine’s Day, get inspired from some of our favorite man-approved gift ideas – from savory snacks to manly bouquets!
Start the celebration by surprising him with a sweet card, delivered right to his email! Celebrations.com has a collection of Valentine’s Day greeting cards which you can customize and send with one simple click. Or, if your sweetie is known for his sense of humor, send him one of our hilarious e-cards.
Valentine’s Day Food Gifts for Guys
You can even make a blooming bouquet out of his favorite meaty snack! These bacon roses are good gifts for guys of all ages, and can be gifted at any occasion!
If food is the way to a man’s heart, a succulent steak is a direct-flight. Sending him a package full of juicy meats is a no-fail option, and will put you in the running for girlfriend of the year.
Candy hearts may be the go-to treat for Valentine’s Day, but decadent Oreos frosted and topped with a sweet message are just as cute and so much more tastier! If it’s written in frosting, it must be true!
Man-Approved Baskets
Let him know how wild you are for him with this adorable and sweet Valentine’s Day gift. Filled with savory snacks and decadent Ghirardelli® chocolates, this fun gift box will let him know you’re not monkeying around with his heart!
Who says you can’t wow your man with flowers? Filled with tasty candies, hearty jerky, and a six of beer, we give you The Man Bouquet! Customize this DIY idea to suit your sweetie and you’re sure to impress.
Share your favorite memory or what you love most about your sweetie on this creative message on a bottle gift idea. The best part? This bottle of chocolate bubbly can be enjoyed any time of day, so he can pop it open during that last stretch of work before the real Valentine’s Day celebration begins.
Remember when we decked the halls with tissue paper flowers? Well, now it’s time to put a fancy twist on an old favorite. The most romantic day of they year is almost here, so let’s get your house ready for Cupid’s arrival by showing you how to make tissue paper roses! They bring a beautiful handcrafted touch to your Valentine’s Day décor, and they even make a charming gift for that someone special. Here’s how to make them.
Materials for DIY tissue paper roses
Red tissue paper (one sheet makes two roses)
Wooden skewers (one per rose)
Clear adhesive tape
Green adhesive tape
Scissors
Twine or ribbon
How to make tissue paper roses
Take one sheet of red tissue paper and crumple it into a ball. Carefully open the sheet again and flatten it out, making sure not to rip it.
Lay the tissue paper vertically and cut it in half, from bottom to top.
Fold each cut piece in half vertically twice to create a longer, skinnier rectangle.
Turn the rectangle so that it’s lying horizontally with the folded side at the top. Pinch one of the bottom corners and gently roll the tissue paper inward toward the opposite corner.
Make sure that the center is the highest point of the flower, and that the tissue paper moves lower and lower from the center as you continue to roll it.
When you’re done rolling your flower, place it on one end of a wooden skewer and secure it with adhesive tape.
Using your scissors and green construction paper, cut out a few leaf shapes with stems. To make the leaves look more natural, color them with a dark green permanent marker.
Starting at the top of the skewer, tightly wrap a thin strip of green tape around the wooden stick and work your way down until you reach the bottom of the stick. As you move along, place a few leaves onto the skewer and wrap them with the tape as well.
Repeat steps 1-8 for each flower you’d like to make.
Place your finished flowers into a mason jar. To add a homey touch, tie a piece of twine or festive ribbon around the mouth of the jar.
Of course, if crafting is not your thing, you can always surprise your special someone with Valentine’s Day roses. Sure, sending flowers might take as much effort as making them, but they still make for a great addition to anyone’s Valentine’s Day decor.
Your groom may be the one waiting for you at the end of the aisle, but it’s your caring and loyal bridesmaids that are going to help get you there!
Your bridal party is essentially your life support while planning your wedding day, which let’s face it, can be stressful! They help keep you sane in between dress decisions and vendor selections, all because they love you.
So now that you’ve chosen your bridesmaids, how do you propose to them to be in your bridal party? Show your gratitude for the group of your closest pals that will be by your side when you finally say “I Do” by making your bridal party proposal fun and unique. Here are some cool and creative ways for asking your best friends to be part of your bridal party.
A Rose-y Proposal
A long, single stem rose speaks for itself. Pop the question to your potential bridesmaids with a single rose in the color of your wedding theme (if you already know it). You can also do more than one flower in a bouquet of your choice. Whether you hand your bridesmaid the flower proposal yourself, send it to their home or to their office, your sweet gesture will definitely bring heartwarming smiles.
To the flower(s), attach a simple yet sweet proposal (the more personal the better) – they are sure to say “yes!”
Suggested Proposal Copy Ideas: * Will you be my bridesmaid?
* “I’ve got my man, now I need my girls! Will you be my bridesmaid?” * You’ve stood by my side for XX years [list # of years that you have known the person]… Please do me the honor of standing by my side at my wedding?
Throw a Bridal Party “Party”
It’s all about the bride, but how about making your bridesmaid proposal all about your bridesmaids? Show your appreciation by throwing a soiree all about them! Think of it as a low-key bachelorette party, focusing on your friends rather your upcoming nuptials. Decorate using nostalgic photos, create signature cocktails like a “Friendship Martini,” and provide dinner or hors d’oeuvres!
Once the celebration starts, raise a glass and toast to those loyal ladies in your life. Then, pop the question and enjoy the party in their honor!
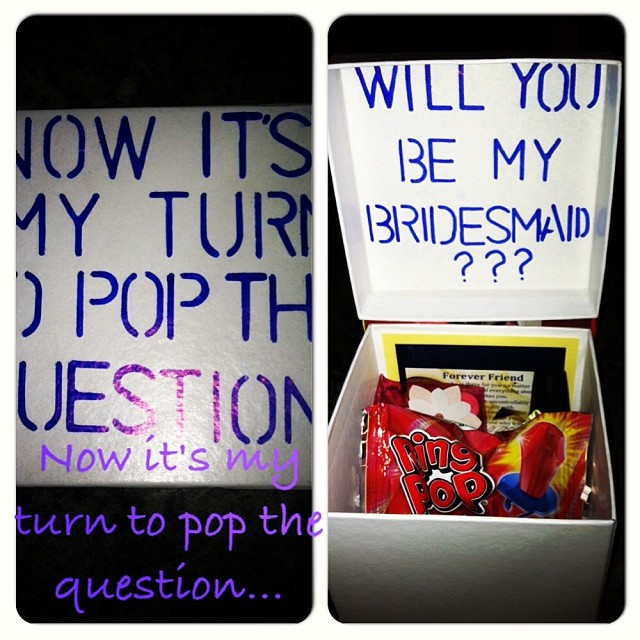
Send a Bridesmaid Proposal Package
Craft & Photo Courtesy of Bride-to-Be Carly Cintron
Put together a personalized care package for your proposal. Include a few pieces that reflect his or her personality as well as a few products that will help them through their obstacles should they say yes (coffee, band-aids, power bars, etc.). A sweet hand written proposal note with the question at hand will be the icing on the cake!
Make a One-of-a-Kind DIY Bridesmaid Proposal Card to Celebrate Friendship
Whether you want to “snail mail” a card or e-mail a card (snail is more personal), try creating a DIY proposal card celebrating your friendship! A personal and fun way to do this would be to do a photo collage–now’s the time to access all of those embarrassing photos you’ve banned from Facebook and use them to create a one-of-a-kind card to ask the big question! Relive past memories and inside jokes and lead it all up to the words: “Will you be my bridesmaid?”
If your group of friends is a tech savvy bunch, you may want to swap the handmade card for a virtual slideshow! You can create one long gallery to share with all of your recipients, or an individual gallery for each special guest.
Bridesmaid Proposal Poem
You may choose to include a poem in your proposal. Here’s a simple, yet sweet poem you can use to pop the question!
Roses are red, Violets are blue. It may be my special day, but I want you part of it too. We’re getting older, but our friendship will never fade, “Will You Be My Bridesmaid?”
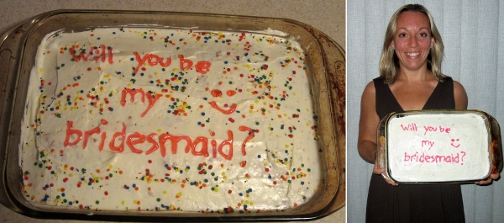
A Piece of Cake Bridesmaid Proposal
Bake your bridesmaid-to-be her favorite cake with a sweet surprise! Pop the big question in creamy frosting, and celebrate her acceptance by digging in!
Alternatively, if you are proposing to all of your potential bridesmaids at the same time, bake a batch of cupcakes and top with a tasty candy ring – now they too have some sweet bling for their ring fingers!
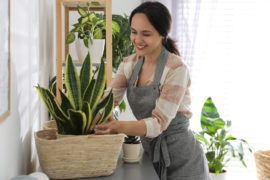
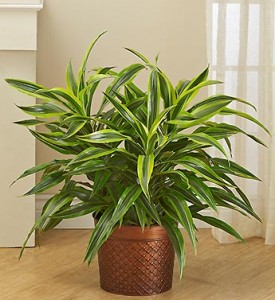
Caring for plants year round is important to ensure they live a long and prosperous life. During the cold months, winter plant care can be a bit more difficult. Below, I’ve provided some helpful winter plant care tips to get your green friends through the cold season.
Caring for large plants during winter months
Large house plants do well if you keep them clean. Do this by gently wiping their leaves of grime and dust. Doing this twice a year helps the plant grow and breathe.
While rinsing, be on guard for scale, mealybugs, and spider mites. Mealybugs look like little specks of cotton. If you still see mealybugs after rinsing, spray the plant with an insecticidal soap.
In cold climates, keep plants away from or against windows, and away from heat sources. Poinsettias like moist soil, but make sure to not over water and drown them.
Winter care for poinsettias
Poinsettias are on sale almost everywhere you shop during the holiday season. Before purchasing them, make sure you inspect them for white flies or eggs, as these can go airborne and infest other plants in your home.
The onset of winter means less daylight is available. During this time of year, most house plants are semi-dormant, so it’s important to cut down on the watering. It’s also best to not fertilize until early spring. Southern states may be a little different depending on how hot the temperatures are during the winter months.
If you liked this article, you may also be interested in some of our other Petal Talk articles from 1-800-Flowers.com expert Jerry Rosalia: