How to Make DIY Halloween Centerpieces for the Table

Halloween is arguably the most DIY-friendly holiday on the calendar. Between costumes for kids and adults, spooky décor, and parties decked out with frightfully ghoulish embellishments, there are countless opportunities to express your creativity and craftiness.

One of my favorite ways to celebrate the season is with colorful, over-the-top Halloween centerpieces. And with flowers that show off the vibrant colors of fall and the sugary treats we all have lying around the house this time of year, we have plenty of materials at our disposal to make some eye-catching pieces to be the focal points for our festive tablescapes.

Halloween centerpieces with Halloween M&M arrangement

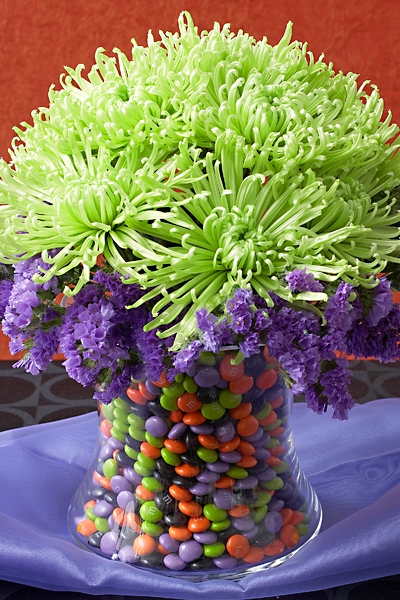
DIY Halloween candy centerpieces: the candy vase

I love the purple, lime green, orange, and black color combination that’s prevalent for the holiday, so when I saw Halloween M&M’s in the store, I bought a few bags. Just another reason to buy candy!

To create this look, I used a nested vase, which allows the filler to rest between the walls of two containers. You can make your own by putting a narrow vase or glass inside another large glass container. Ideally, both glasses should be the same height, but if they’re not, then the inside glass should be slightly shorter than the outer one. For the floral, I used shamrock spider mums and purple statice. Not only do they look great, but both flowers are hardy and will last about two weeks.

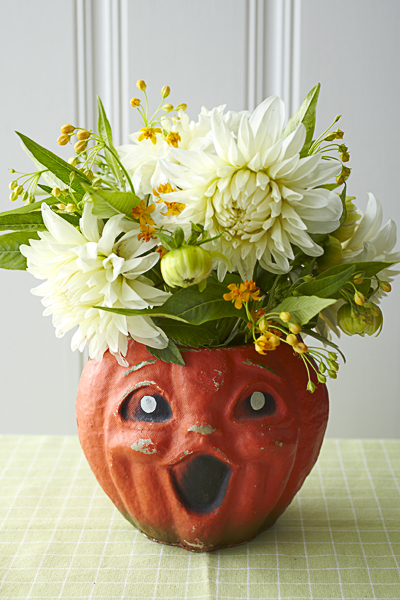
DIY Halloween table décor: papier-mâché pumpkin vase

When I’m going for a more retro look, I break out this original papier-mâché pumpkin from the 1950s — it’s my favorite Halloween table decoration. If you don’t have a decades-old, trick-or-treating pumpkin handy, just reuse one of the plastic baskets your kids take with them around the neighborhood on All Hallows’ Eve. It creates a similar — albeit not quite as spooky — look that positively screams Halloween.

With a few cuttings from your fall garden — here, I used dahlias and asclepias — this old pumpkin becomes the happiest jack-o’-lantern in town!

Halloween centerpieces with Halloween pumpkin centerpiece

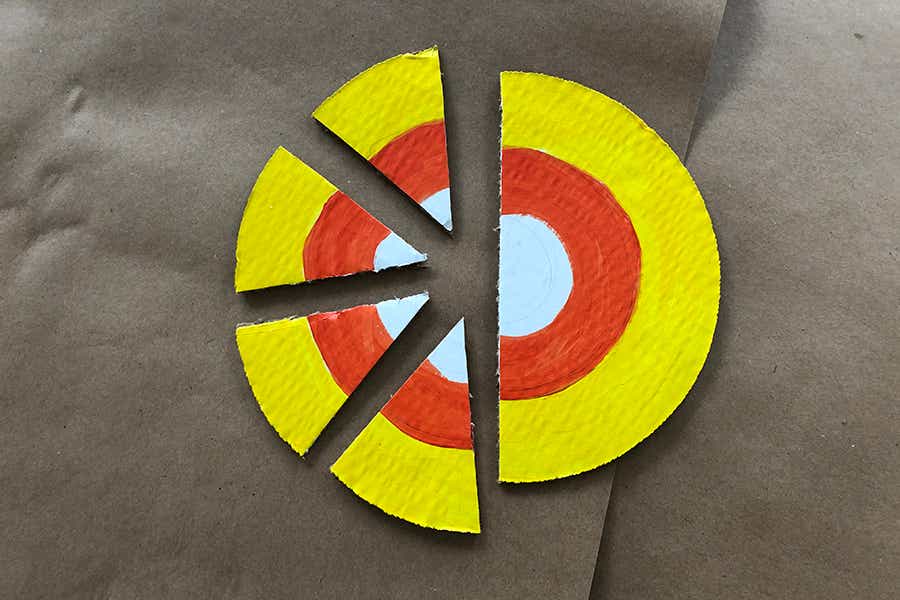
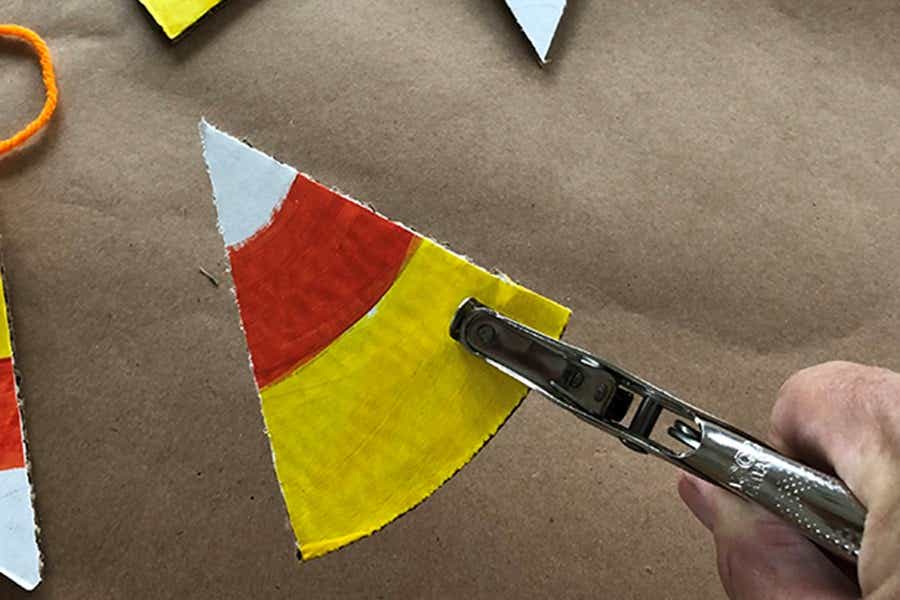
DIY candy corn flowers

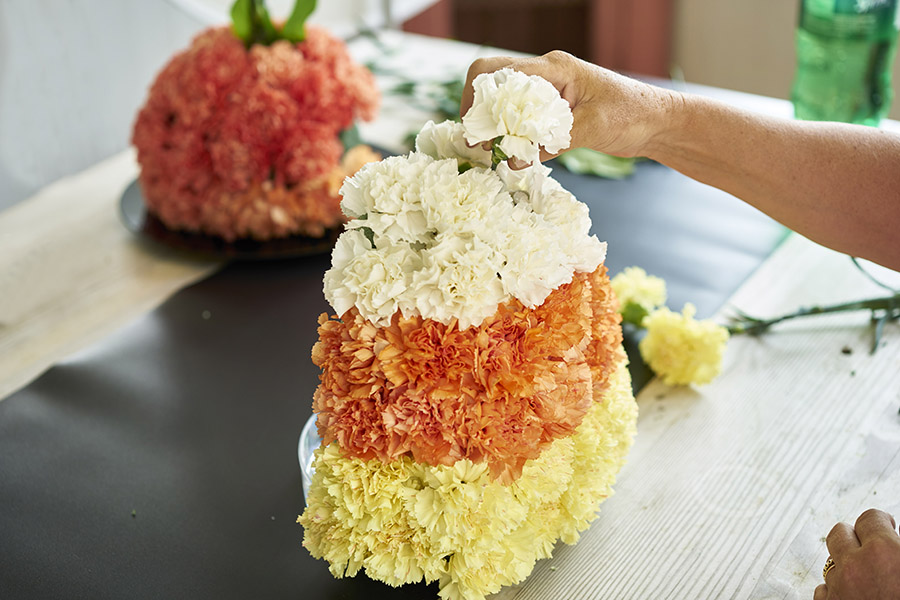
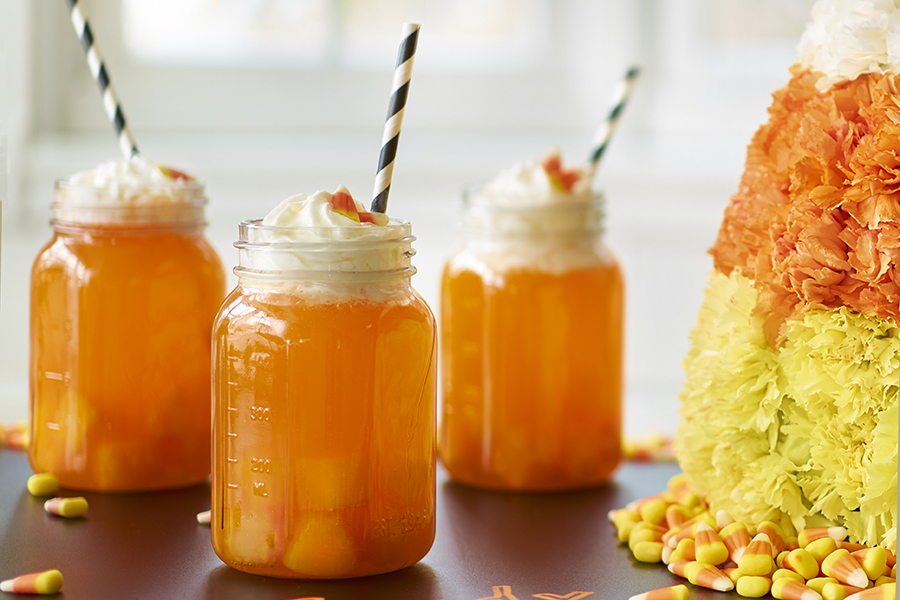
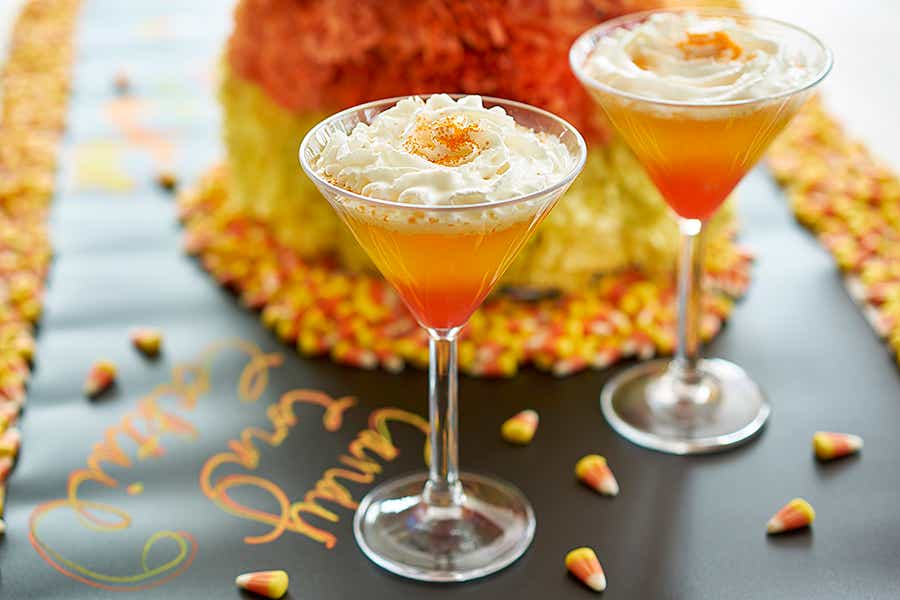
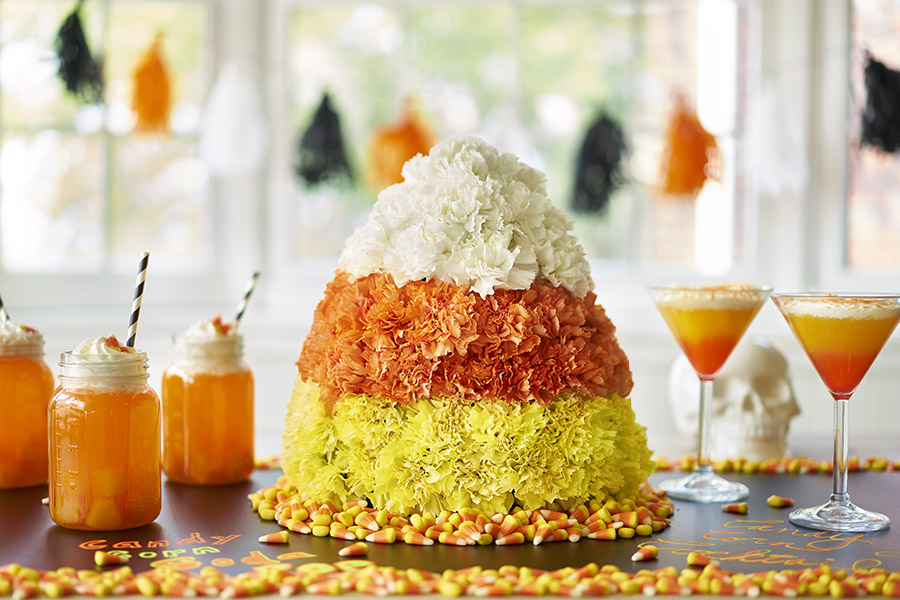
Planning a kids Halloween party? This candy corn arrangement is a sweet addition. It’s great as a centerpiece or as part of a Halloween-inspired dessert bar! Not only will guests love the final “treat” but the kids can help put this together prior to the festivities.
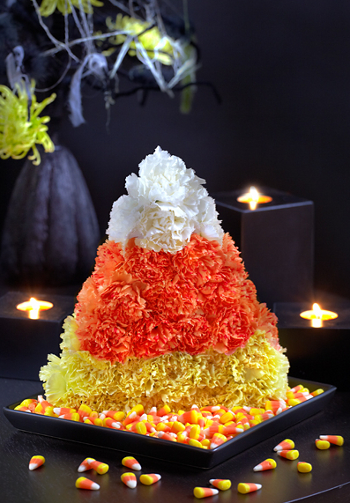
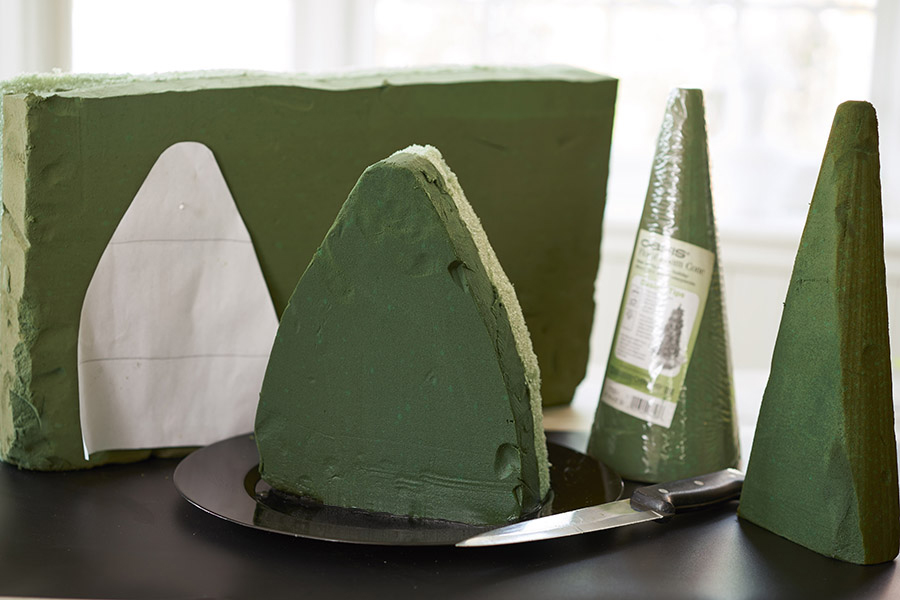
Halloween centerpieces with candy corn floral arrangement

Materials needed

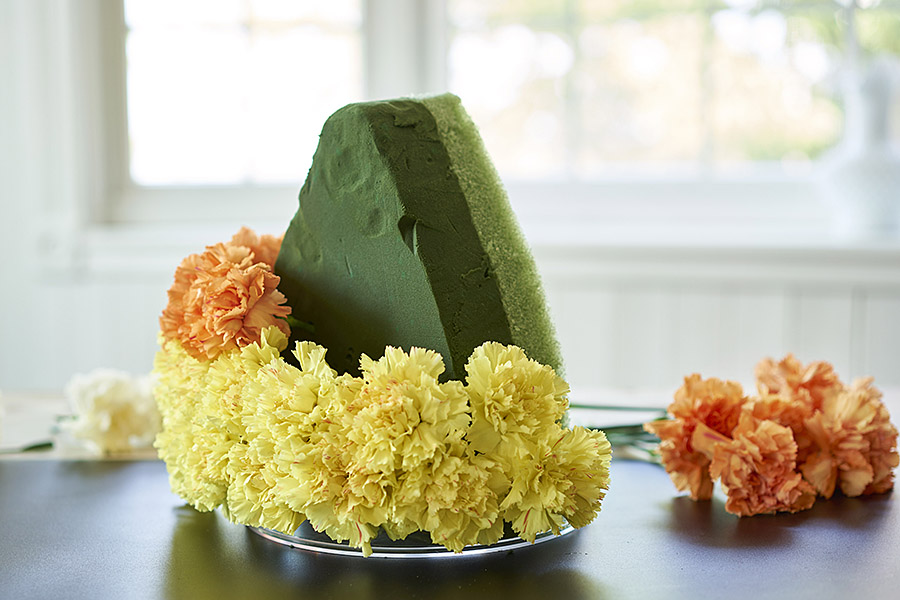
  • Approximately two dozen yellow carnations, two dozen orange carnations, and a dozen white carnations.
  • 1 brick of floral foam
  • 1 waterproof dish or tray

Instructions

  1. Thoroughly soak the floral foam and stand it up vertically on the tray.
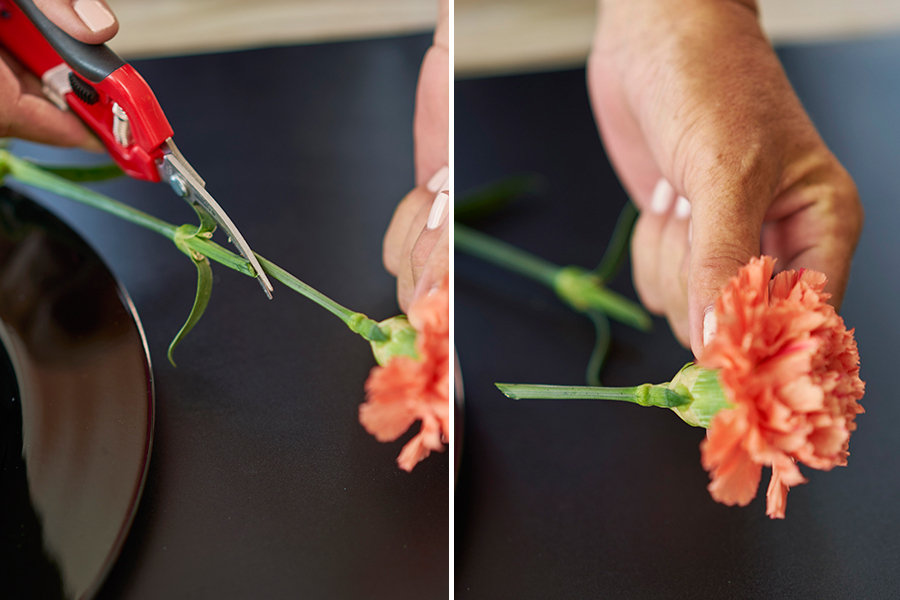
  2. Cut your carnation stems to about 2 to 4 inches in length.
  3. Starting at the base of the foam, insert the yellow carnations all around the sides, using the longest stems at the bottom to make the base of the “candy corn” wider.
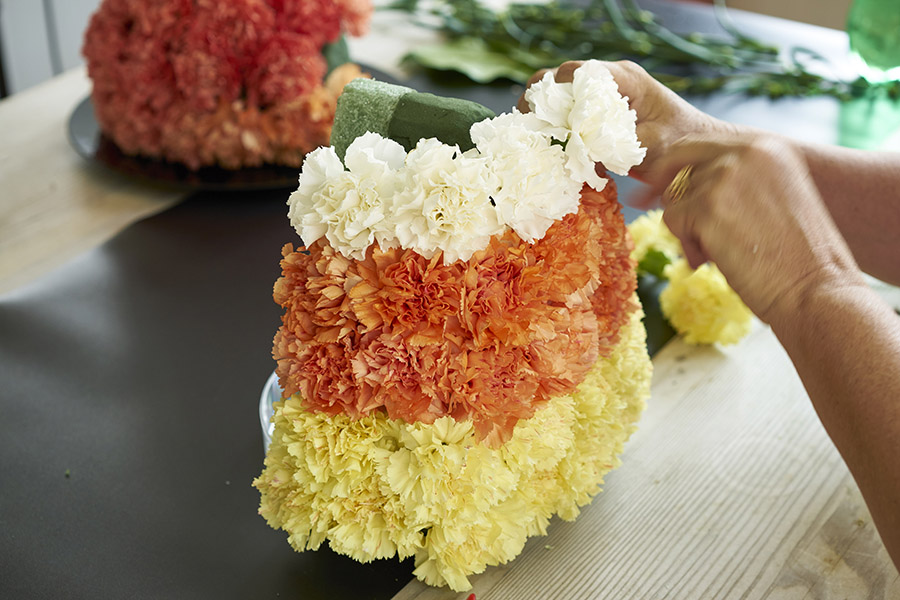
  4. Repeat with the orange and white carnations, creating the shape as you move up the foam.
  5. End with a single white carnation at the top to form the point of the candy corn.

You can take the basic directions for this floral candy corn arrangement and scale it up or down depending on your desired finished size. If you plan to display it on a mantle or foyer table, this arrangement can also be done as a one-sided design.

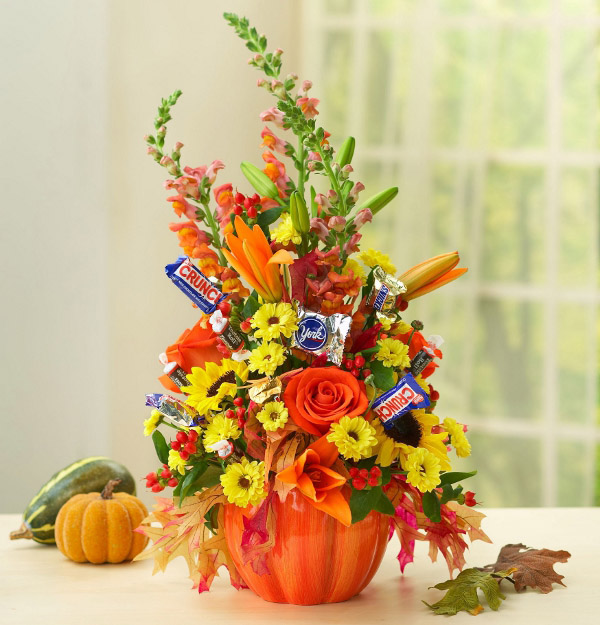
Halloween table decoration ideas: flower arrangement with Halloween candy

Here’s another decoration that’s perfect for a Halloween party table. This DIY Halloween flower arrangement featuring a ceramic pumpkin, your favorite candies, and the best fall flowers will wow your guests (and help satisfy their sweet tooth, too).

Create this festive centerpiece for your own home or as a gift for the hosts of a Halloween party you’re attending this month. Either way, it will help set just the right mood for you to have a monstrously good time!

halloween centerpieces with Halloween flower arrangement with Halloween candy

Halloween Crafts: Candy Corn Garland

Not everything about Halloween needs to be spooky and scary — it can also just be fun and colorful, and full of sweets and smiles.

Here is a simple DIY craft idea celebrating that perennial Halloween favorite, the candy corn.

This project starts off very basic so that even the littlest trick or treater can do it, and can be scaled up and personalized to entertain tweens and beyond.

Candy corn garland

Making this Halloween craft keeps the kids entertained and barely costs a thing. And, after Halloween is over, you can recycle the whole thing — no guilt about producing extra waste, and you don’t have to pack it up and find somewhere to store it all year.

halloween crafts with materials for candy corn garland

Materials needed for candy corn garland

  • Cardboard boxes
  • Paint or markers
  • String or ribbon
  • Hole puncher
  • Scissors or straight edge cutter

Instructions for making candy corn garland

The steps for this candy corn garland are the same as the ones I used for the patriotic-themed garland I made for Memorial Day. The only difference is it is painted differently.

halloween crafts with Circle
  1. Cut out a large circle from the cardboard box and, using a pencil, draw two smaller concentric circles inside it. (I was fortunate that one of my daughters operated a baking business out of my house and I had corrugated cake boards in my attic. And the fact that the boards were white meant I only had to paint the orange and yellow sections!)
  2. Repeat the process making more circles. You can make them all the same size or mix it up with larger and smaller ones.
halloween crafts with painted circles
  1. Paint or color the outermost ring yellow, the middle ring orange, and the innermost ring white (if necessary).
halloween crafts with cut circles
  1. Once the paint dries, cut the circle into triangle — just like a pizza!
halloween crafts with hole-punched wedges
  1. Use a hole puncher to punch two holes in the wider end of each triangle.
halloween crafts with yarn strung through wedges
  1. Lace yarn, twine, or ribbon through the holes on the triangular pieces.
halloween crafts with candy corn garland

Once you have the basic steps down, you can improvise as you see fit. Let the older kids design their own garlands, adding tassels made from yarn or fabric, or add paper straws cut to the desired length in between the candy corn. The possibilities are only limited by your imagination!

halloween crafts with candy corn sodas and cocktails

And when the decorating is done, treat the little ones to a candy corn soda pop and yourself to a candy corn cocktail!

Candy Corn Decoration & Drinks: Fresh Flower Centerpiece & Beverages for Halloween

Does anyone actually eat candy corn, or is it just for crafts and DIY projects? Whatever people do with candy corn, they do a lot of it: According to the National Confectioners Association, more than 35 million pounds of candy corn are sold annually. That’s a lot of kernels…so plug in those glue guns and get crafty!

Candy Corn Flowers & Drinks

Here is a Halloween decor idea and two candy-corn-inspired beverages for young and old ghouls and goblins alike.

Fresh flower candy corn centerpiece

Candy Corn decorations with candy corn Flower Arrangement

The simple geometric shape of this candy corn creation makes this a very easy DIY. And carnations are available naturally in all three colors, so no spray painting is necessary.

What you need

  • Floral foam
  • Carnations (12 orange, 14 yellow, 10 white)
  • Plate

Directions

  1. Choose a floral foam to use. (I opted for the sculpting sheet with the styrofoam back, as I wanted the candy corn arrangement to be a substantial size, and the styrofoam back gives the foam more support.)
  1. Make a template using a piece of copy paper, and cut out your candy corn shape from the larger piece of foam.
candy corn decorations with floral foam
  1. Drop the foam into a sink filled with water. As the foam absorbs the water, it will slowly fall to the bottom of the sink. Remove and place it standing upright on a plate with a small rim.
candy corn decorations Cutting Stems on an Angle
  1. While the foam soaks, prepare your flowers by cutting the stems to about 2 inches long using a sharp cutting shears and cutting on an angle. (The number of carnations in the supply list is for an arrangement that is approximately 11″ x 8.5”. This is a one-sided arrangement and should be placed in a location where it will be viewed from one side only.)
candy corn decorations with 2 Rows of Yellow Carnations
  1. Starting at the bottom, insert two rows of yellow carnations.
candy corn decorations two rows of orange carnations
  1. Then add two rows of orange carnations.
  1. Finish the top off with the white carnations. Now, your candy corn creation is complete!

Candy corn beverages

Soda Mason Jar Drinks

These adorable candy corn soda pops couldn’t be easier to make. Put a few pieces of cut-up pineapple in a small mason jar, fill the jar to the top with orange soda, and finish with whipped cream and a few pieces of candy corn.

For something with a little more kick, go with a candy corn cocktail served in a martini glass.

Candy Corn Cocktail

Prep Time 5 minutes
Cook Time 5 minutes
Total Time 10 minutes
Servings 1 drink

Ingredients:

  • 1-1/2 ounce whipped cream vodka
  • 3 ounce sour mix
  • 2 ounce pineapple juice
  • ½ ounce grenadine
  • Whipped cream (for topping)

Instructions: 

  • Combine vodka, sour mix, and pineapple juice in shaker with ice, and shake well.
  • Pour mixture into a martini glass.
  • Slowly pour grenadine into mix so it settles to the bottom.
  • Top with whipped cream.
  • Optional: Garnish with coordinating sprinkles.
Course: Drinks
Exit mobile version