How to Make a DIY Christmas Stocking to Add Holiday Cheer to Your Home

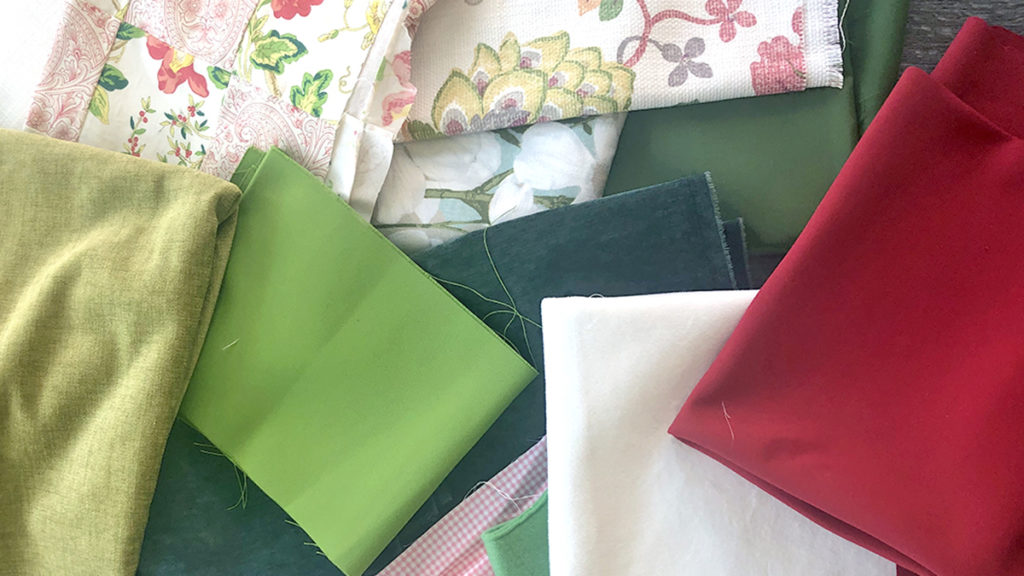
When I was asked to write an article about making DIY Christmas stockings, the first thing I did was to go to my favorite fabric store and head straight for the clearance remnant table.
diy christmas stocking with fabric remnants

I picked up the holiday color “trinity” — red, white, and green — as well as various prints and florals that just spoke to me. I knew I wanted to show how to make a basic Christmas stocking, but I also wanted to inspire creativity, to make you, the reader, go beyond what’s expected and design a stocking that matches your own personal style.

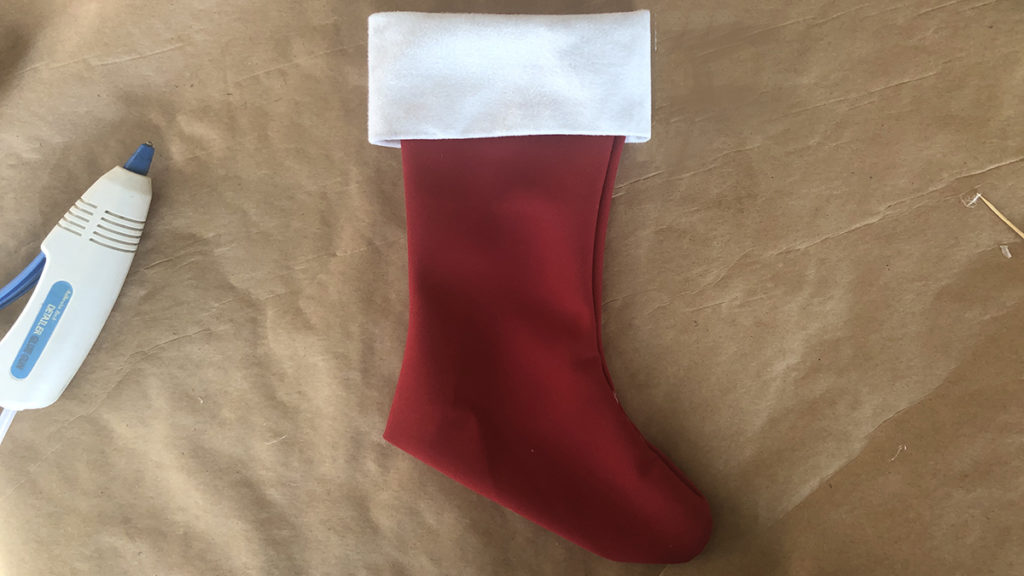
I started with a basic red stocking with white cuff. I am not a sewer and do not own a sewing machine, so I decided to make the stocking using glue — both hot glue and fabric glue. Easier said than done! Here’s how it went.

Making a basic Christmas stocking

diy christmas stocking with Christmas stocking template
diy christmas stocking with Christmas stocking cuff
Click images to enlarge
DIY Christmas stocking with hemmed cuff

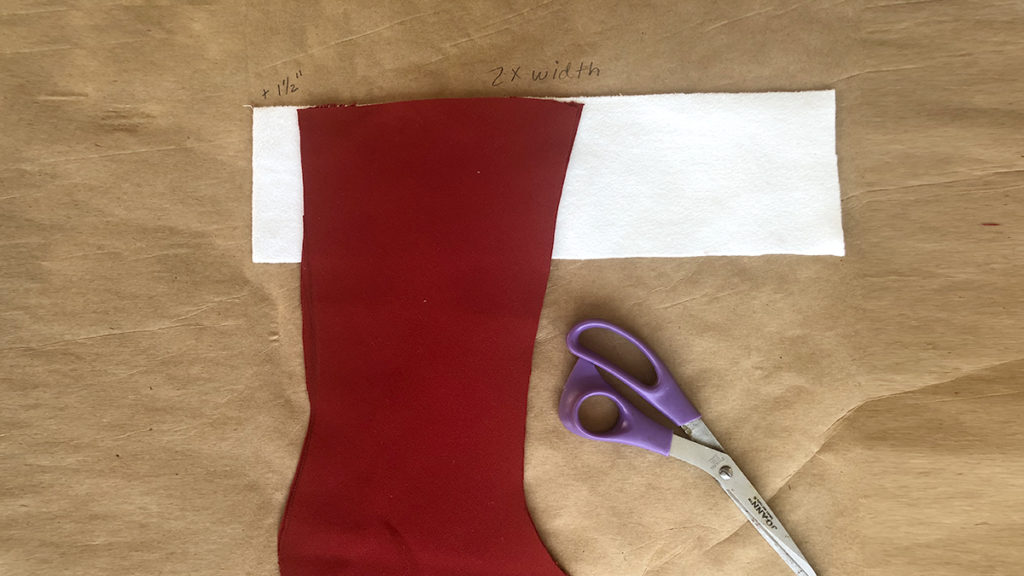
Using an old Christmas stocking, I created a stocking template that you can download here. This stocking measures 7 inches wide at the top and 14 to 16 inches high. Don’t feel like your stocking has to be these same dimensions — make your stocking any size you want!

  1. Trace the stocking template onto your fabric.
  2. Use a sharp scissors to cut out the stocking. You will need two pieces of fabric. Before cutting, fold the fabric so that you can cut both pieces at the same time.
  3. After cutting the two stocking pieces, place them right side together.
  4. Sew or glue the edges together, except for the top, with about a quarter-inch seam.
  5. Cut the material you are using for the cuff. The length should be two times the width of the stocking at the top plus another 1 1/2 inches. The height should be between 3 and 4 inches. If you are using a material that will need to be hemmed, add an additional quarter inch on the top and bottom.
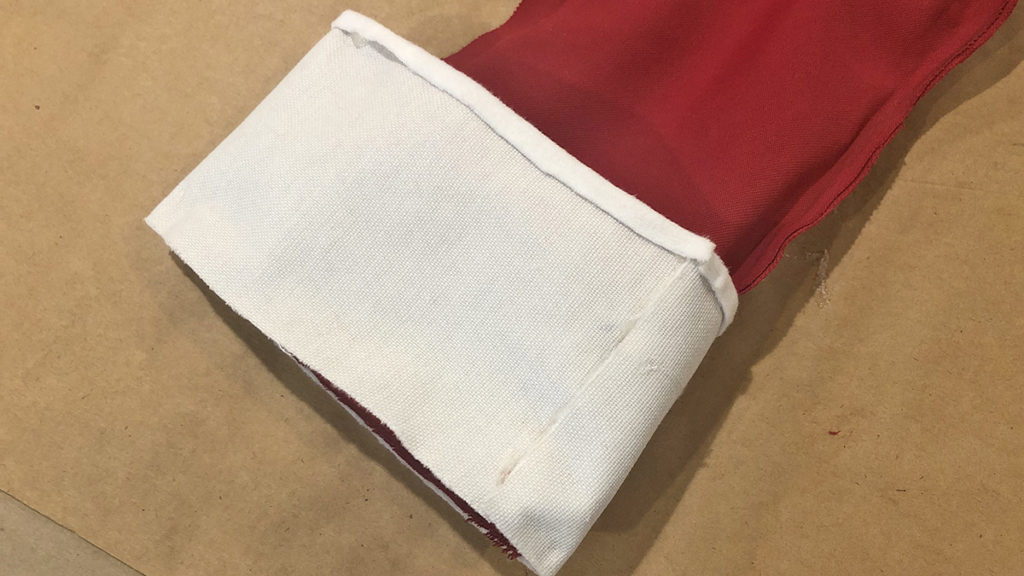
  6. Hem the cuff, if necessary. Glue or sew the cuff with the right side against the wrong side of the stocking along the top edge only. Remember, your stocking is inside out at this point.
  7. Turn the stocking right side out and roll the cuff down.
DIY Christmas stocking finished

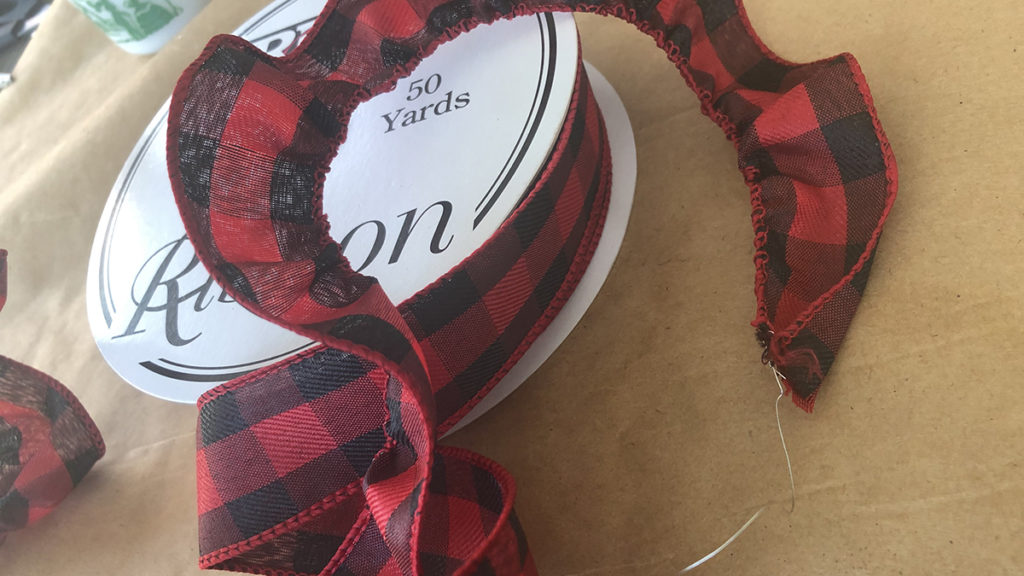
This is your basic stocking. However, I felt it was a bit plain looking, so I used a buffalo plaid wired ribbon to add some personality to it.

Embellishing a basic Christmas stocking

diy christmas stocking with buffalo plaid wired ribbon
DIY Christmas stocking with ruffled ribbon
Click images to enlarge
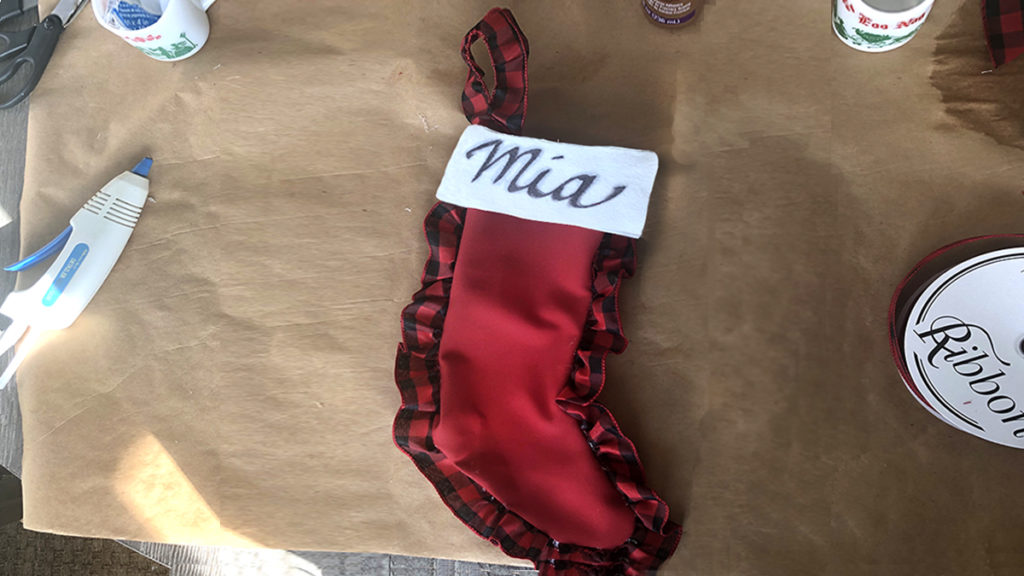
DIY Christmas stocking with name on it

To make a ruffled edge, simply hold the end of one of the wires and keep sliding the ribbon down the wire on that one side. Keep doing this until you have the length of ribbon you need.

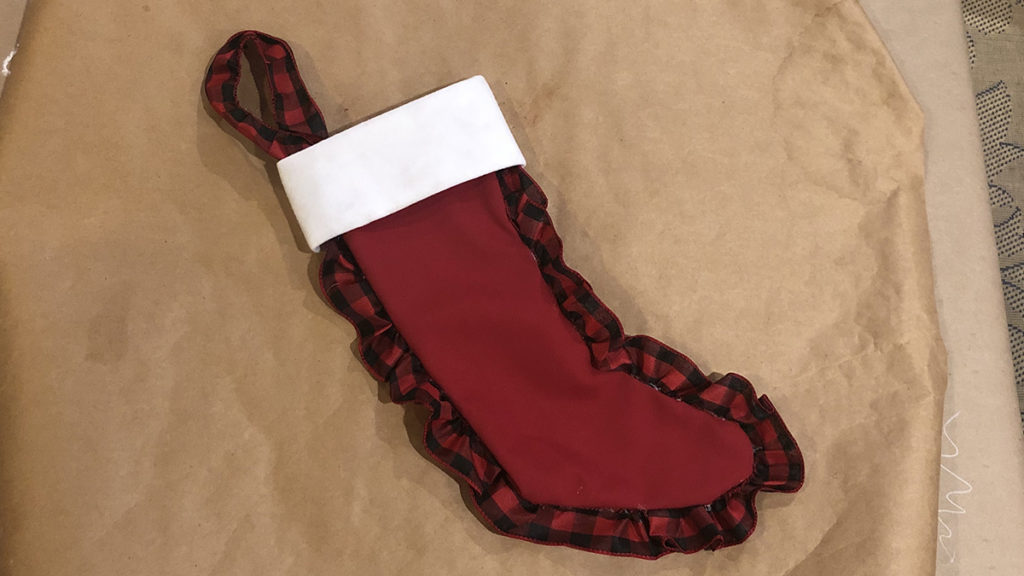
I attached the ruffled ribbon all along the edge of the stocking using a glue gun. I also made the loop for hanging from the same ribbon.

At this point, I thought it needed a little more personalization, so I added a name on the cuff. If you want to create your own custom stocking but don’t have the time, you can always order one online.

While making this stocking using only glue was fairly simple, I decided that sewing the stockings would be faster and easier, and make them more secure and functional. However, as I said before, I am not a sewer, so I called my good friend, Ann, who is a master quilter, for assistance. She was happy to help, and it turned out to be a great afternoon of holiday crafting and spending time together.

Making a mini Christmas stocking

We decided to do two stocking sizes: a traditional size and some minis that would be great for gift cards.

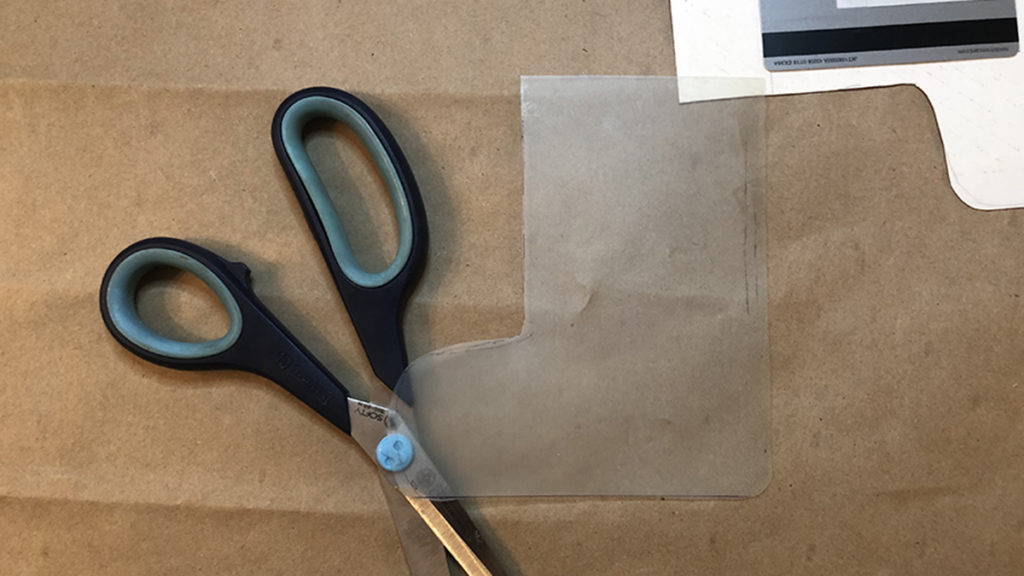
DIY Christmas stocking template
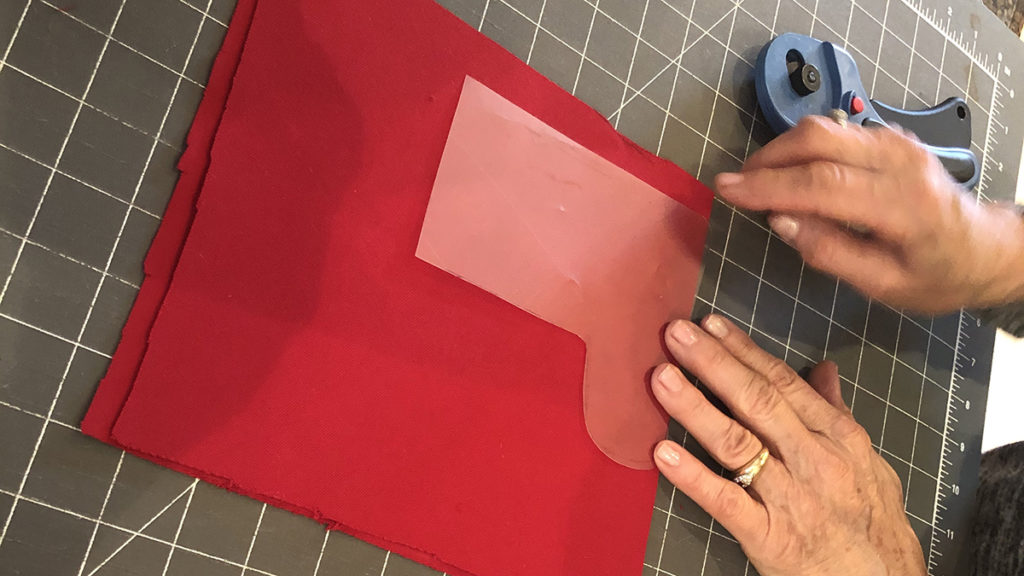
DIY Christmas stocking with tracing shape on fabric
Click images to enlarge
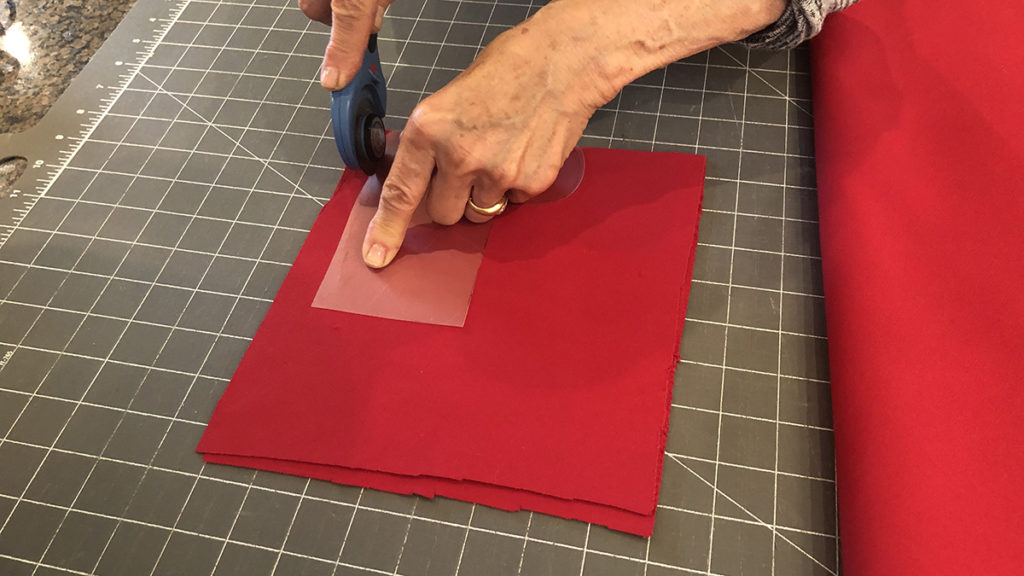
DIY Christmas stocking with cutting out shape

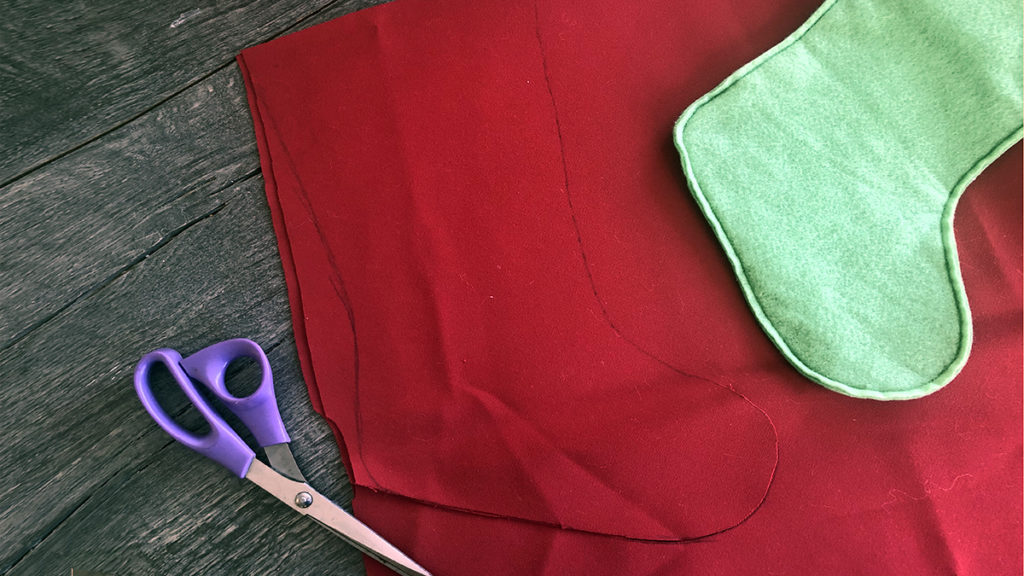
No matter the size you choose, you still need to start with a template. I used a credit card/gift card as a guide and drew the finished size that I wanted the mini stocking to be. Next, I created the final template that is a quarter inch larger all around to allow for the seams. Then, I followed the same steps as above.

Place the template on two pieces of fabric and cut both pieces at the same time.
diy christmas stocking with white stockings with black and white buffalo plaid ribbon cuffs

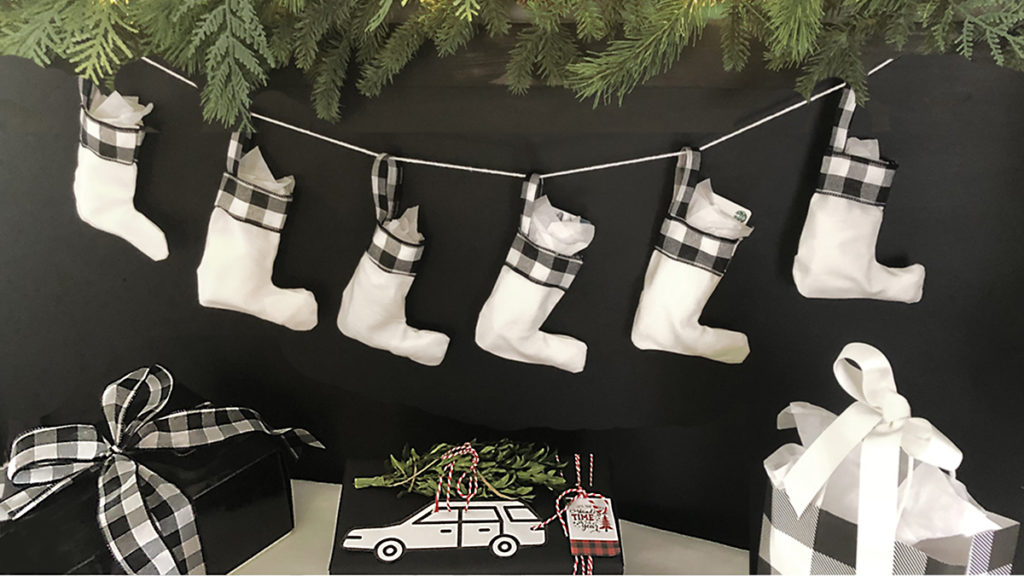
How adorable are these? We went all out on the buffalo plaid, making both red stockings with red and black ribbon cuffs, and white stockings with the black and white buffalo plaid ribbon cuffs. For both versions, we used the same ribbon for the loops.

I will definitely incorporate these mini stocking gift card holders into my wrapping plans this and every year!

More DIY Christmas stocking design ideas

Next, I laid out all the beautiful fabric remnants I bought and had fun putting these fabulous combinations together. Holiday stockings are just one more way to customize your holiday decorating or gift giving. Who said stockings need to be traditional? Why not have them match your style, maybe even using the same fabric as your pillows or curtains?
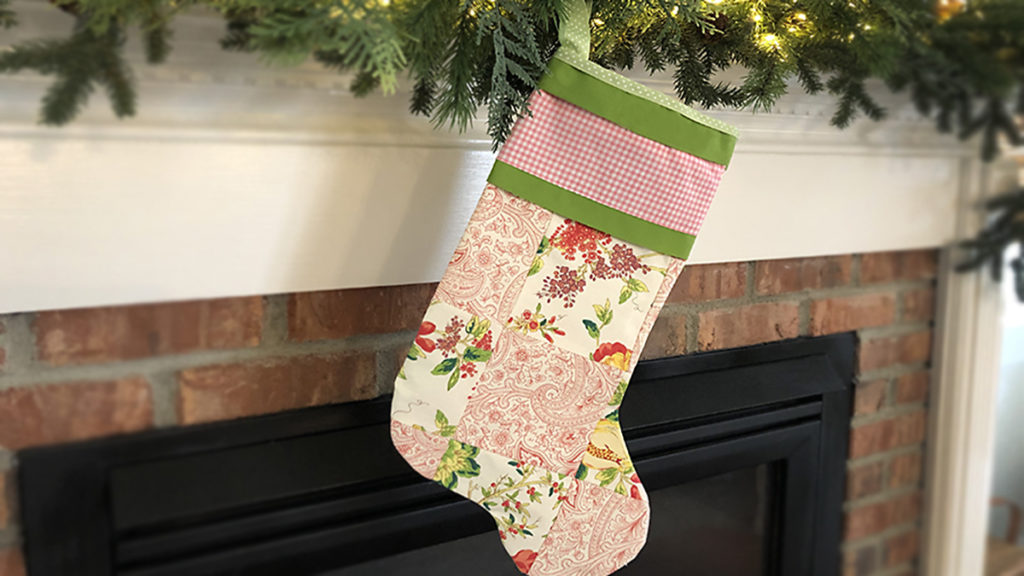
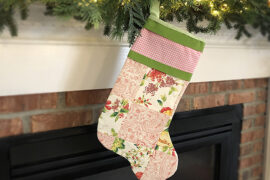
DIY Christmas stocking hanging from mantle

This stocking would be perfect as a gift bag for my quilting friend, Ann. I love the layering we did using both fabric and ribbon for the cuff.
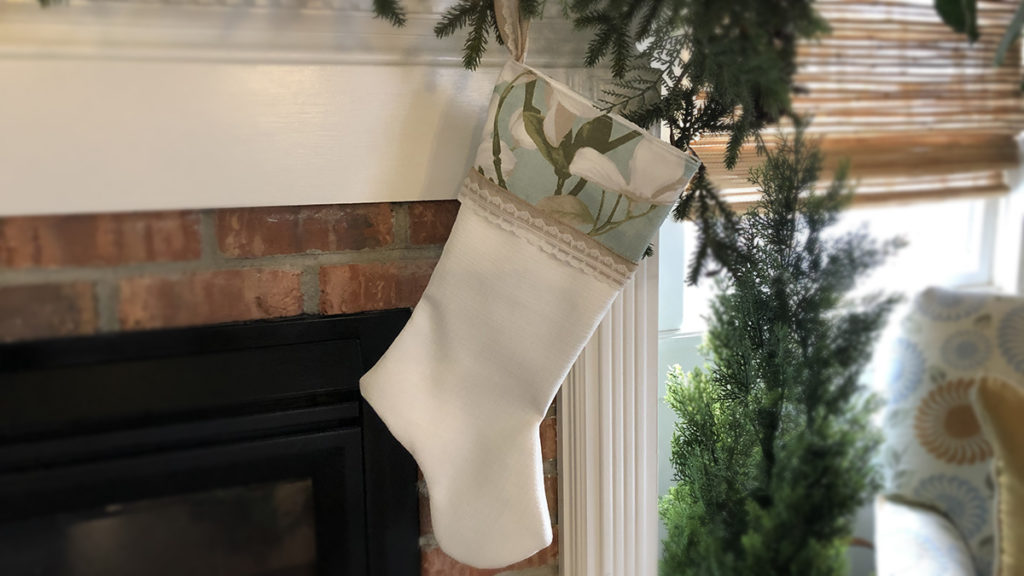
DIY Christmas stocking modern looking

This version is so pretty and modern looking. Adding the burlap and lace ribbon trim on the cuff adds just a touch of rustic to an otherwise elegant stocking.
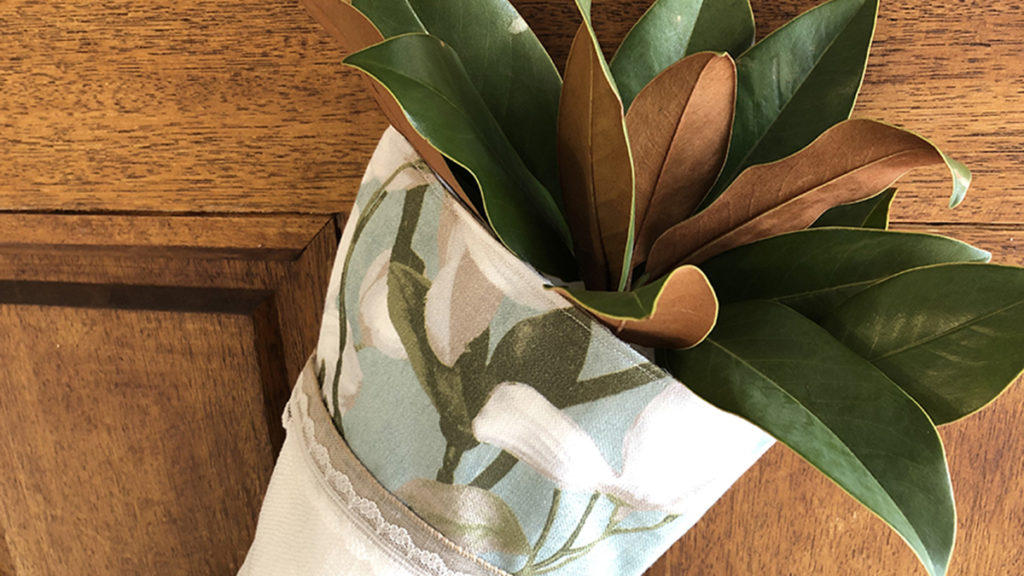
DIY Christmas stocking with magnolia leaves

How great does it look on a front door brimming with magnolia leaves?
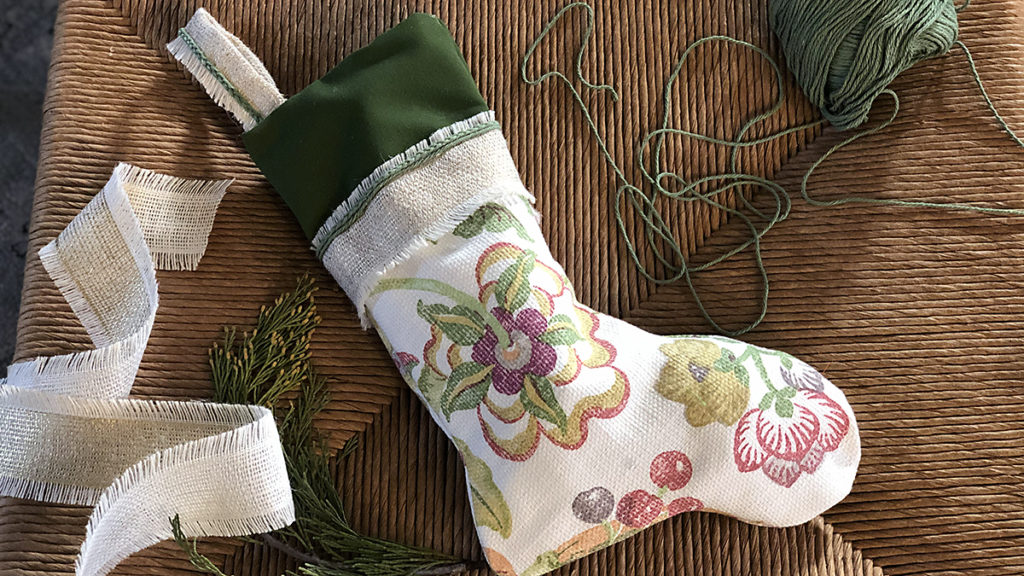
DIY Christmas stocking with materials

There’s something about all the texture in this combo that just did it for me! Again, it’s all in the details. Braiding the green yarn before gluing it to ribbon edging just brings it to the next level.

Ann and I had so much fun creating these beautiful stockings, and we hope they inspire you to try making some of your own.

I found the right combination for a detailed and structurally sturdy stocking was sewing the main portion and gluing the details. Find the method that’s right for you and remember — just have fun with it!
DIY Tabletop Floral Christmas Tree & Decoration Ideas

I love Christmas, and I love decorating Christmas trees! The main tree in my home tends to be pretty traditional, changing only slightly from year to year, with new ornaments added here and there. So, I’m here to talk about the beauty and versatility of fresh tabletop Christmas trees.

These beautiful arrangements are usually handcrafted by your local florist and make great gifts. In fact, the Holiday Flower Tree has been a bestseller since it was first introduced nearly 20 years ago!

Picture of Christmas tabletop tree for office

Trending mini Christmas trees with lights

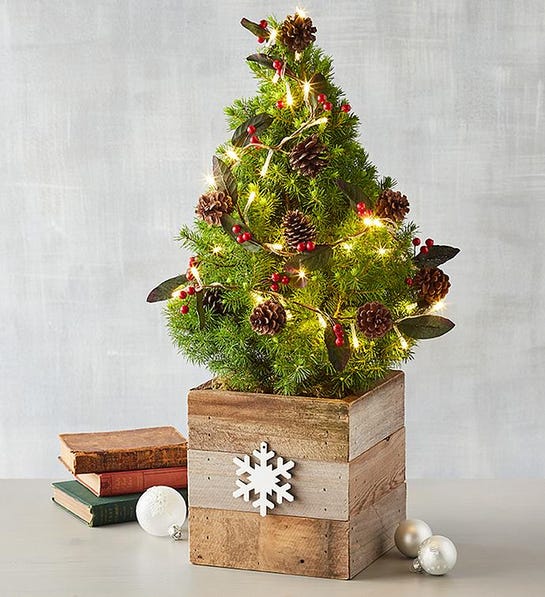
If you’ve attempted to decorate a Christmas tree with lights, challenges ranging from broken bulbs to tangled cords are enough to have you scrap the lights for a tree with ornaments. Fear not, for some mini Christmas trees with lights come pre-assembled, such as this Holiday Spruce or Rustic Christmas Tree. Another festive option is the Hand Tied Mini Christmas Tree Bouquet that comes with lights in a rustic mason jar. There are also trees that come with ornaments, if you want the full tree package.

Mini Christmas trees are versatile

Whether you live in an apartment, are an empty nester, or are traveling during the holidays, tabletop Christmas trees are festive additions for those who want to have a tree without the production. You can add a mini Christmas tree to the bedroom, kitchen, foyer, office, or any space that cannot accommodate a larger tree. And the trees, like the Holiday Lavender Tree, are sustainable too, and can be replanted in your garden or kept indoors for natural decorative appeal during the cozy winter months.

Other tree options that can work for the holidays and after are bonsaiolivemagnolia, and, money trees. Simply add a tree skirt or lightweight ornaments, and it’s getting to look a little more like Christmas.

DIY tabletop Christmas tree

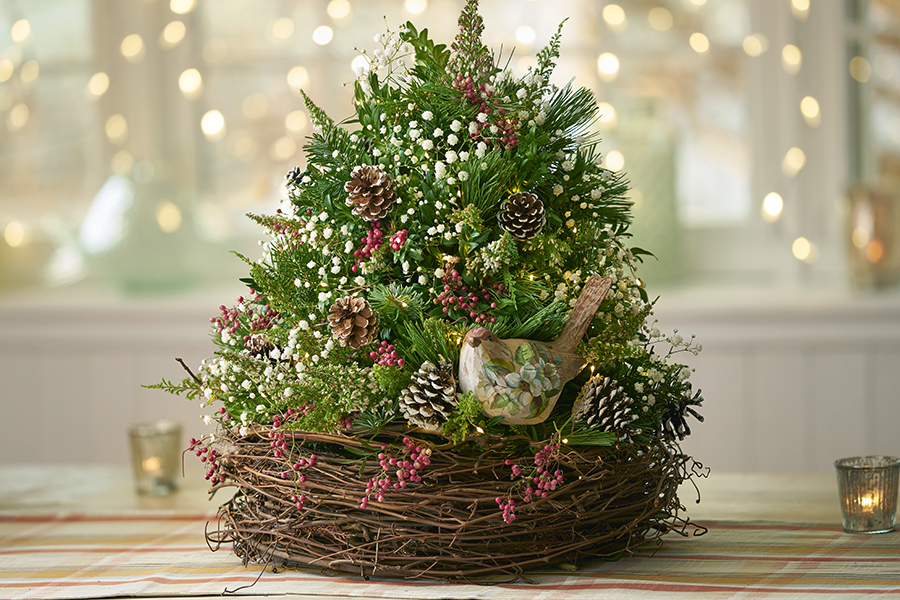
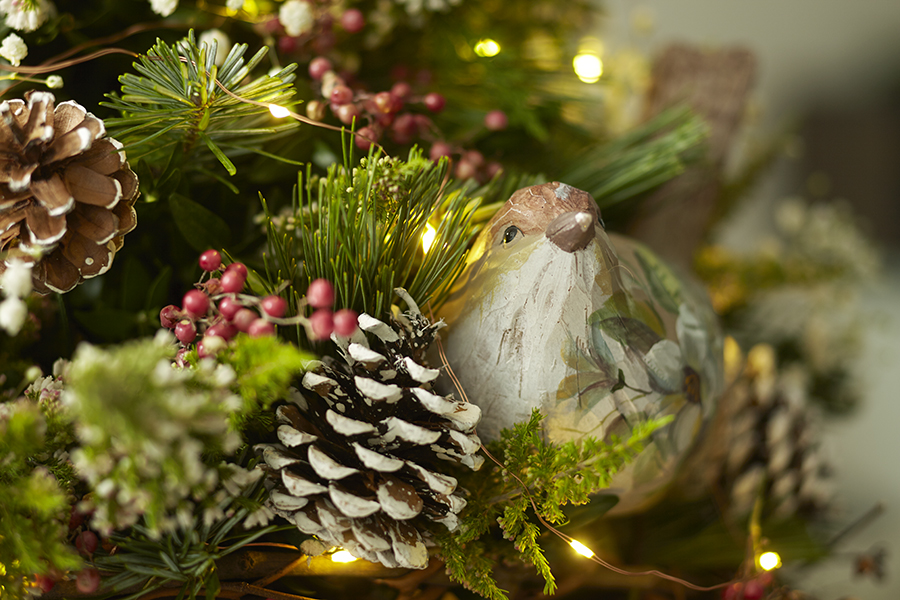
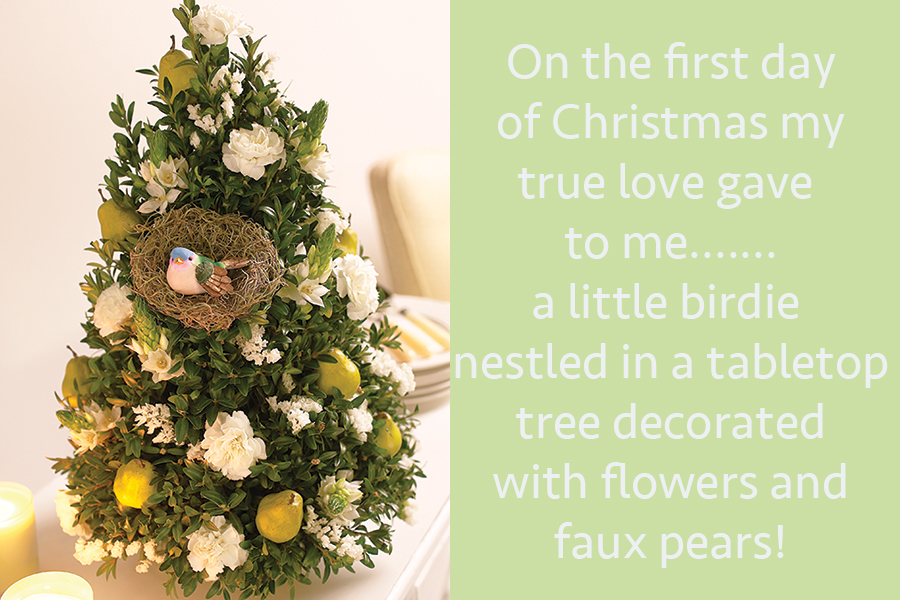
Tree with Bird

If you have a little time and want to get creative, these trees are pretty easy to make. The basic instructions are the same for whatever size tree you want. The smaller the tree, the faster and easier it will be to construct. Petite trees are so sweet and can be tucked into so many unexpected spots. Larger trees, on the other hand, allow you to create a completely custom look based on your choice of container, decorations, and color scheme.

How to make a tabletop Christmas tree

What you need:

  • Floral foam
  • Dish/plate
  • Tape
  • Clipper
  • English Boxwood
  • Assorted evergreens

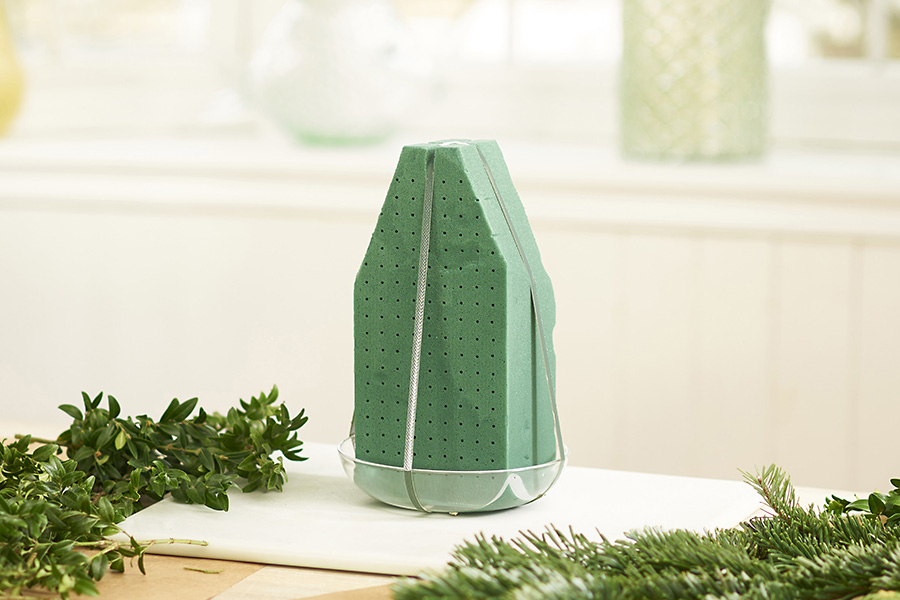
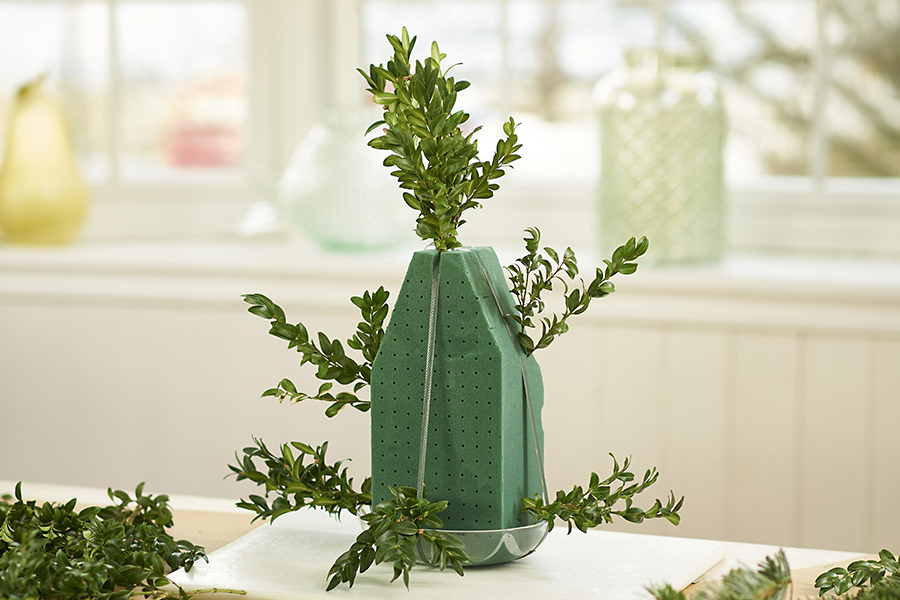
Step 1: Set up your floral foam

Floral Foam for Tabletop Christmas Tree

Cut the corners from one end of the foam as shown; fill your sink with water; and place the foam into the water, allowing it to become totally soaked through. Tape the foam into a plate/dish. You can use any waterproof container as the base and put the foam directly into your chosen container before creating the tree. Or you can create the tree using a smaller base, like the one in the image, and then place the finished tree into a decorative container.

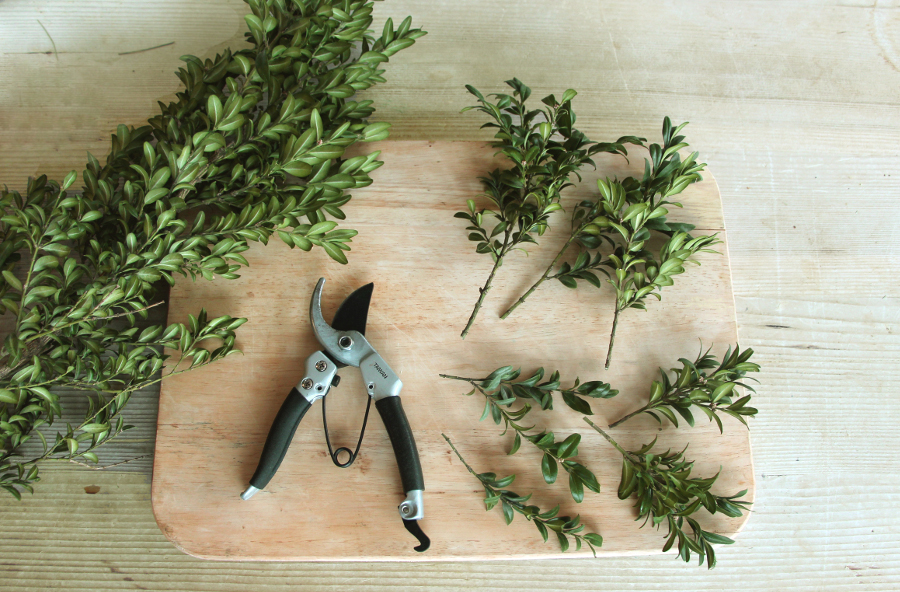
Step 2: Prepare your greens

Boxwood is the main green that I used for the tree, and I accented it after the main shape was created, filling in with other assorted evergreens such as cedar, pine, and balsam.

pre-cutting-greens

Before starting, cut the greens off of the main branch into smaller pieces of varying lengths ready to insert into the foam.

Step 3: Arrange your greens

Add Greens to Tree

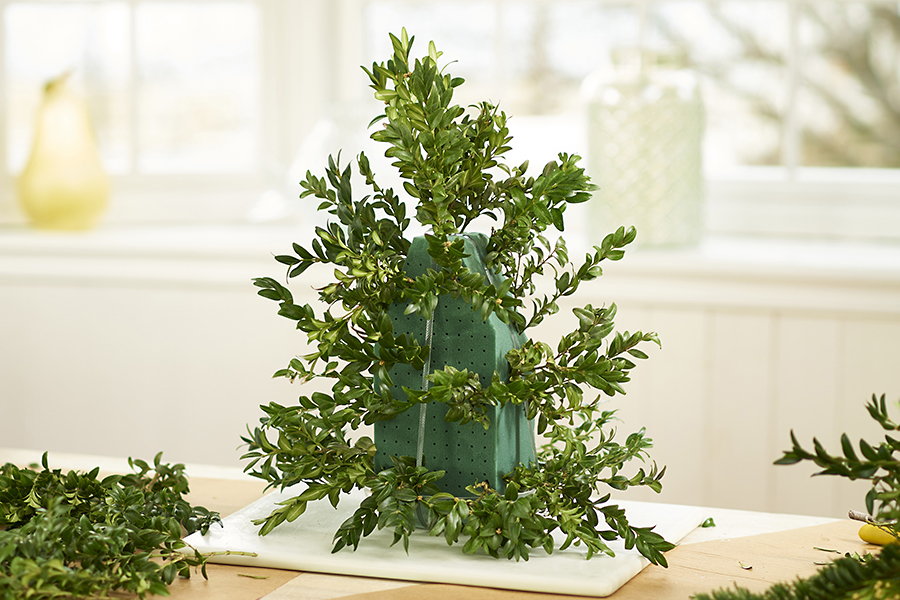
Start by inserting a taller pre-cut piece of boxwood at the top to create your basic height. Do the same at the bottom and the sides. This gives you the base shape of your tree.

Keep Adding Greens to Tree

Step 4: Fill in your tree

Fill in tree with greens

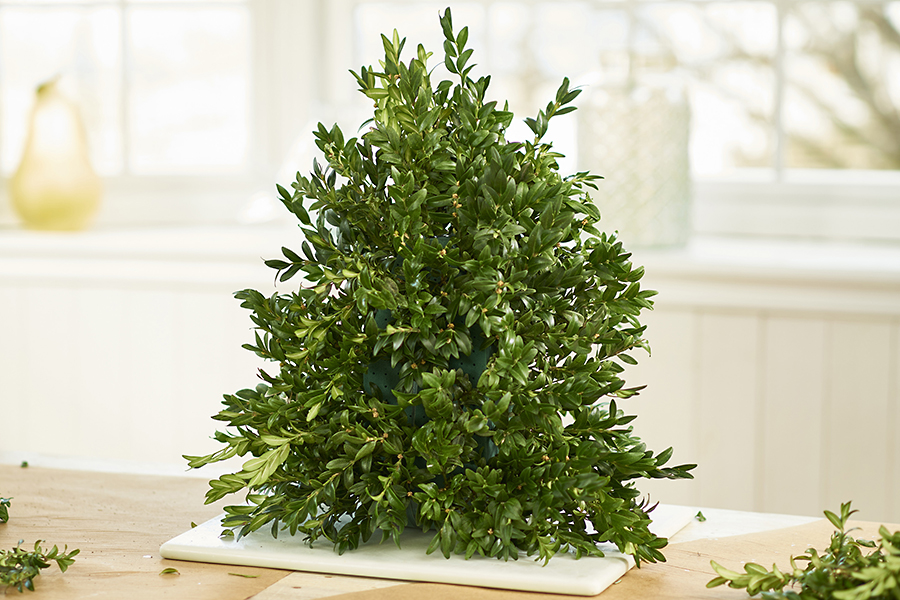
Continue adding pieces of boxwood, turning the tree as you go, until you have filled in the whole tree.

Step 5: Accent with various evergreens

Accent Evergreens

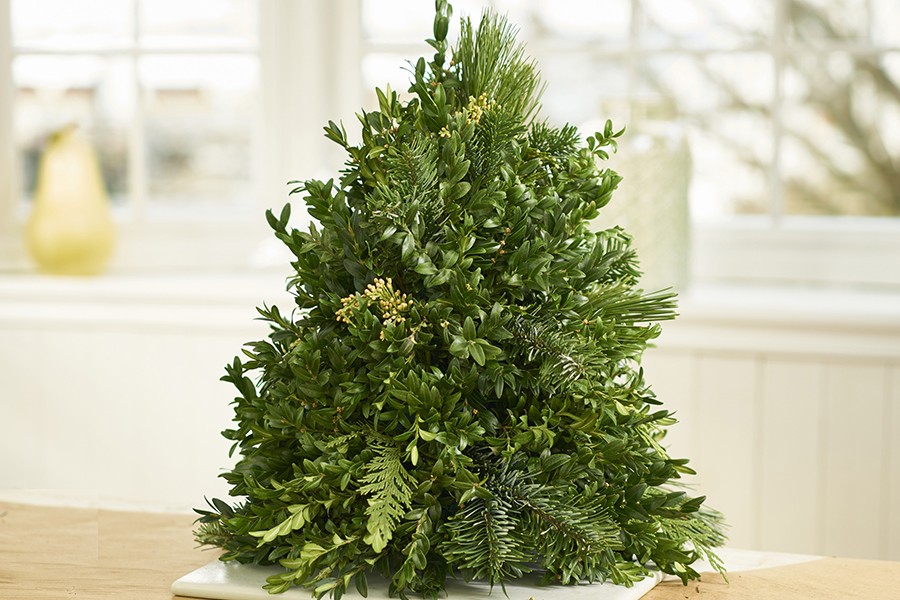
I like to add a few sprigs of other evergreens for two reasons. The first is that evergreens such as balsam and pine add wonderful fragrance. I find it adds visual interest as well.

DIY Tabletop Christmas Tree

Tabletop Christmas tree decoration ideas

At this point, your tree is ready to decorate! Because this tree is actually a “flower arrangement,” you can easily use fresh-cut flowers as a primary decorating feature. Just give your chosen flowers a fresh cut and insert them directly into the foam; they will stay fresh for up to two weeks at least. I like to use fresh flowers that will dry nicely too, such as baby’s breath (which looks like snowflakes), pepper berries, and heather.

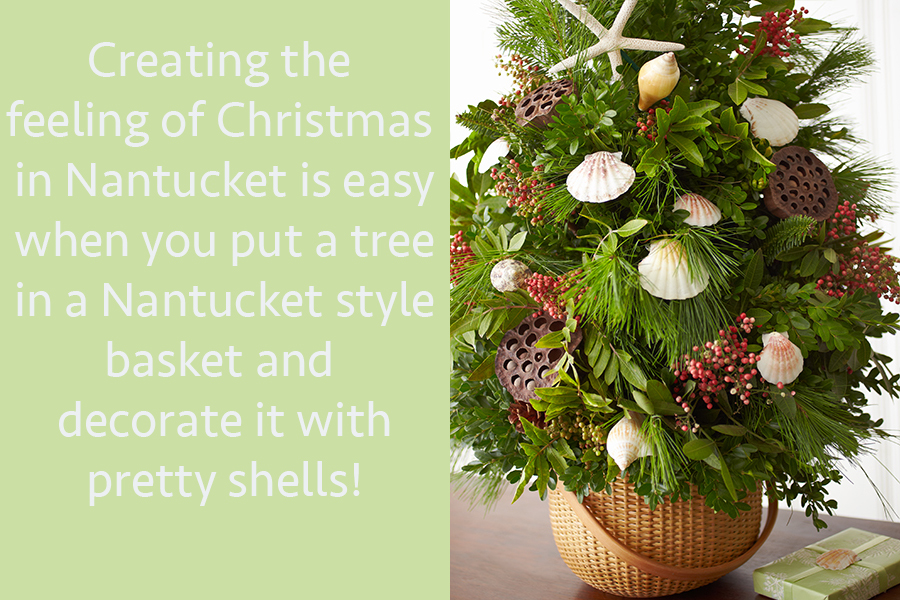
Here, I nestled my Christmas tree arrangement into a large bird’s nest basket and added white heather, baby’s breath, and pepper berries.

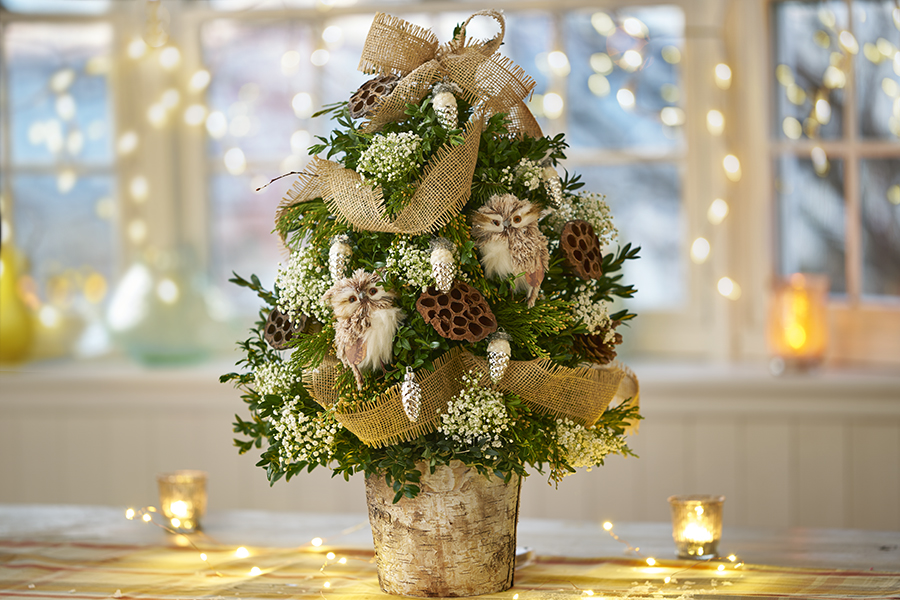
In keeping with the woodsy feeling, this is the same basic tree arrangement placed in a natural birch container. The decorations include dried pods, baby’s breath clusters, vintage silver pine cone ornaments, and burlap ribbon garland.

Closeup of owls in tree

The theme really comes to life with the addition of these faux snowy owls. Owls are on-trend, and this is an easy way to include them in your holiday decorating.

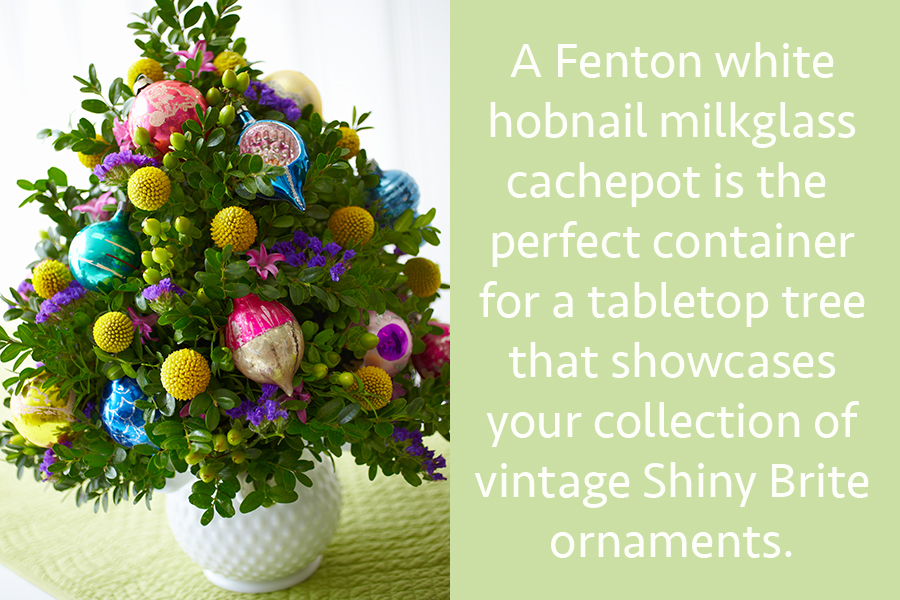
I have created and decorated so many different trees over the years, and I find that I never run out of new ideas. Here are a few more examples to inspire you to create one of your own and start a new tradition. It’s also a great way to give a truly personalized gift!

Creative Ways to Display ‘Santa and Me’ Photos This Christmas

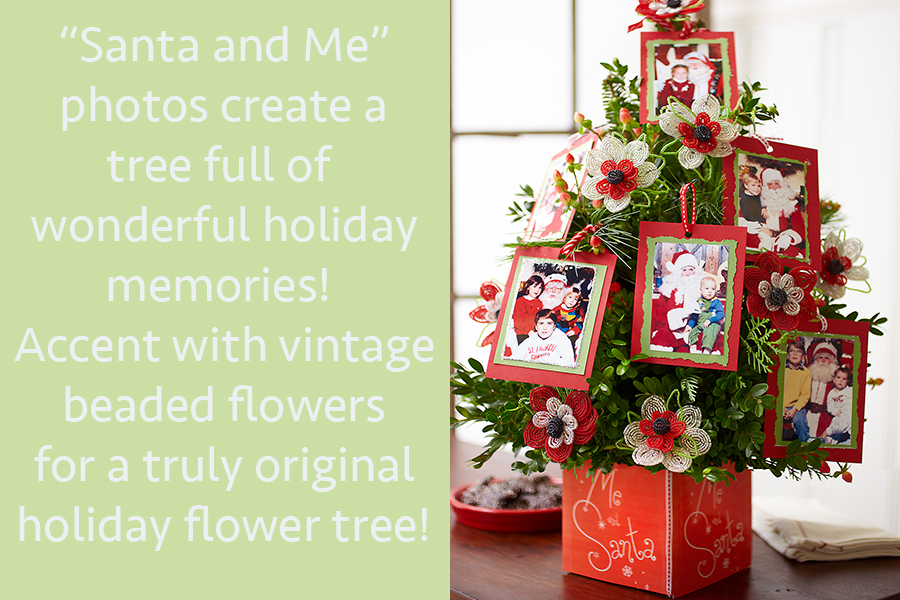
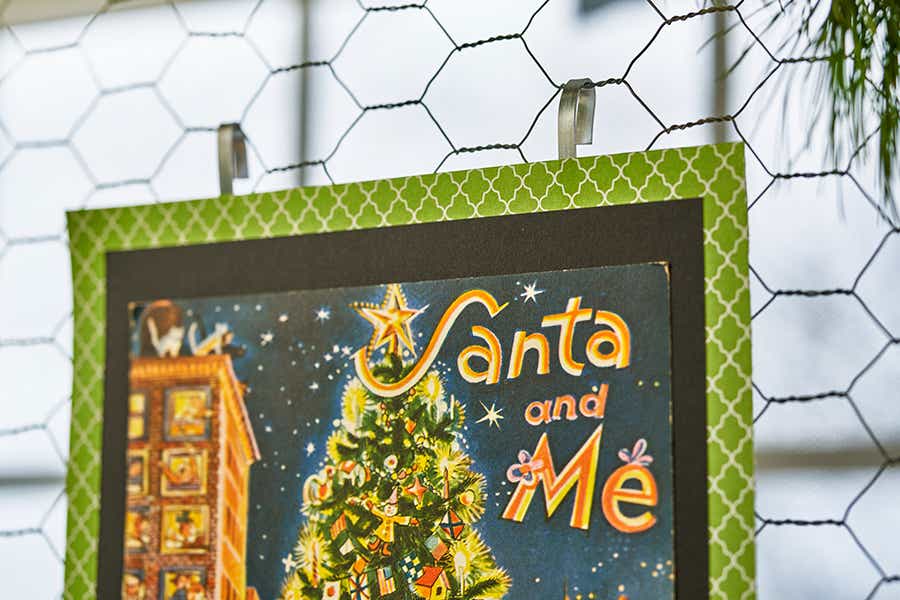
diy photo display Santa and Me Photo Display

In my home, Christmas decorating is about honoring the past in the most creative of ways. My latest project was a “Santa and Me” DIY photo display that was fun and easy to make. Below I share step-by-step instructions so you can create your own beautiful display to warm hearts and light up the holiday season!

What you’ll need to create your own holiday DIY photo display 

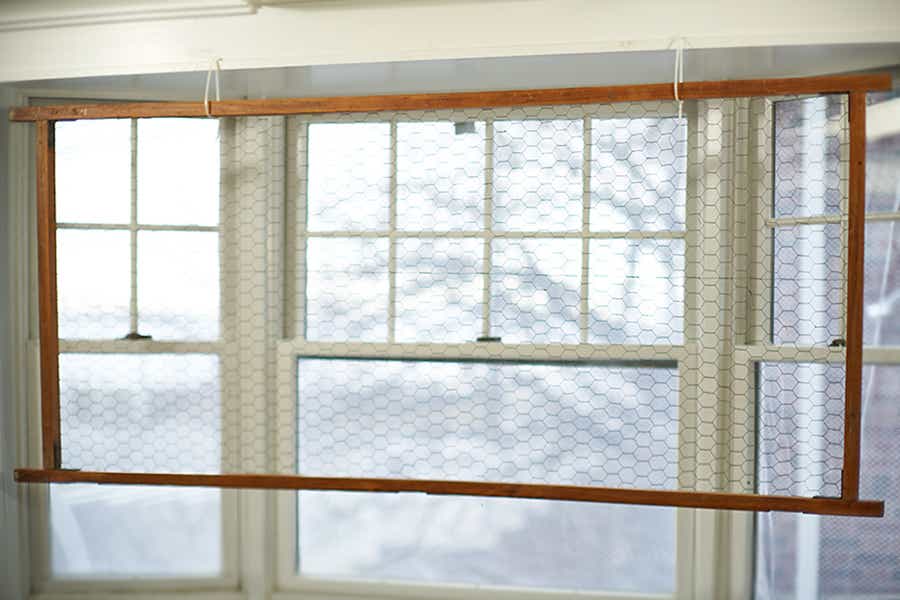
For  me, it all started with an old room divider I found in a barn sale a few years ago. Originally, I bought it to use in the décor for my daughter’s wedding, thinking it would be great for displaying all our family wedding photos.  

Wire on panel

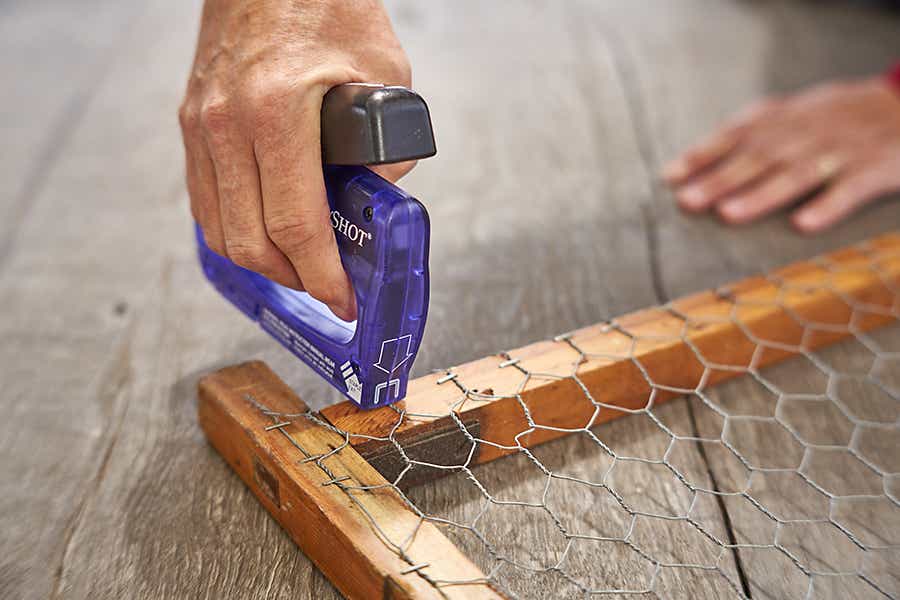
To begin, I ripped off the old fabric on each frame. Next, I attached chicken wire to the back of each panel using a staple gun.  

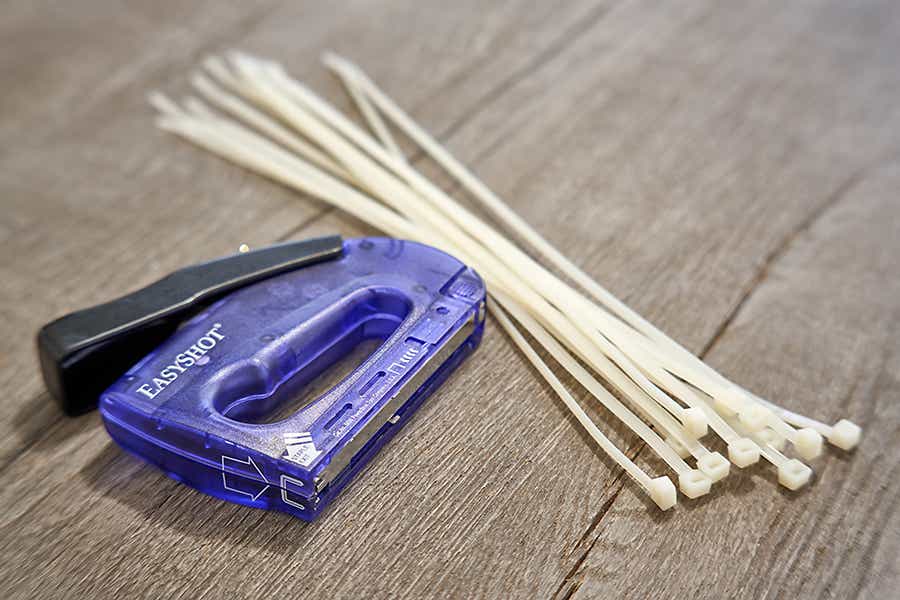
Staple gun and zip ties

Fortunately, I have a bay window that the panel fit perfectly into when hung horizontally. Because it’s so lightweight, I was able to hang it using zip ties and a staple gun. 

Staple gun and molding

To start this process, I stapled one zip tie into a piece of molding.  

diy photo display Screen

Then, I added another zip tie, and then attached the screen.   

To get a better glimpse of how easy the process is, check out the video below!

Easy Christmas DIY: Santa & Me Photo Display

Now for the fun part… 

Decorating your holiday photo display 

There are so many little details that go into taking this idea from drab to fab. 

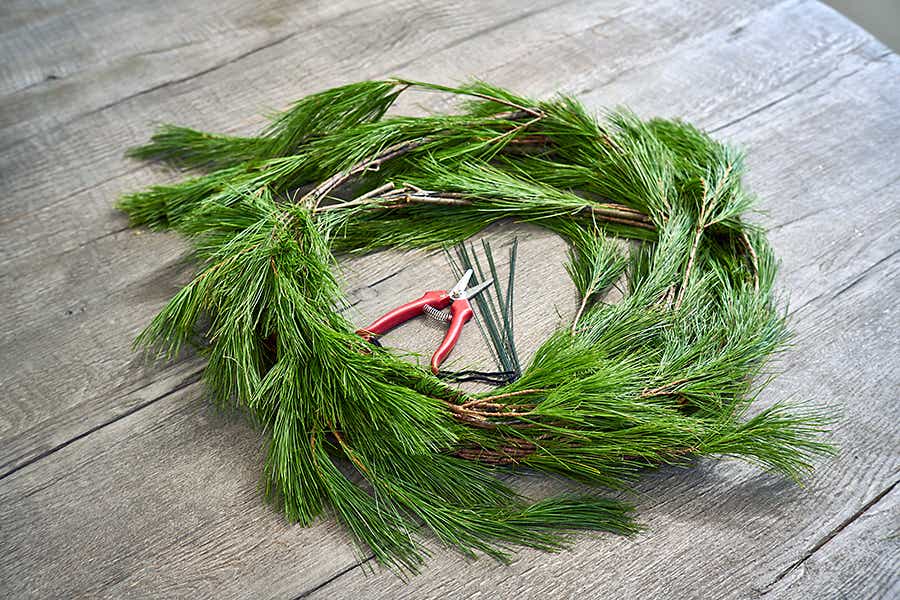
Pine roping with tools

For a festive look, you’ll need white pine roping, or garland.

diy photo display Pine roping

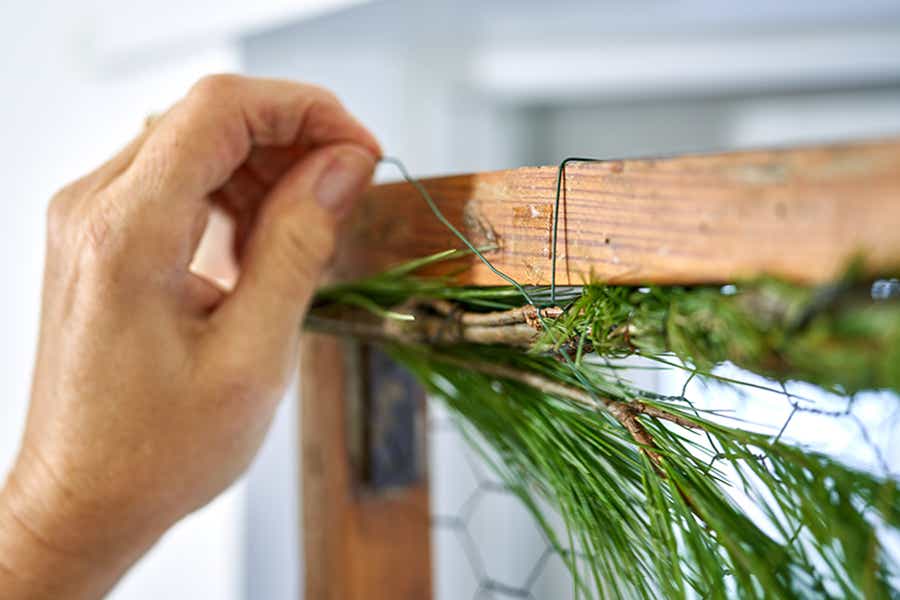
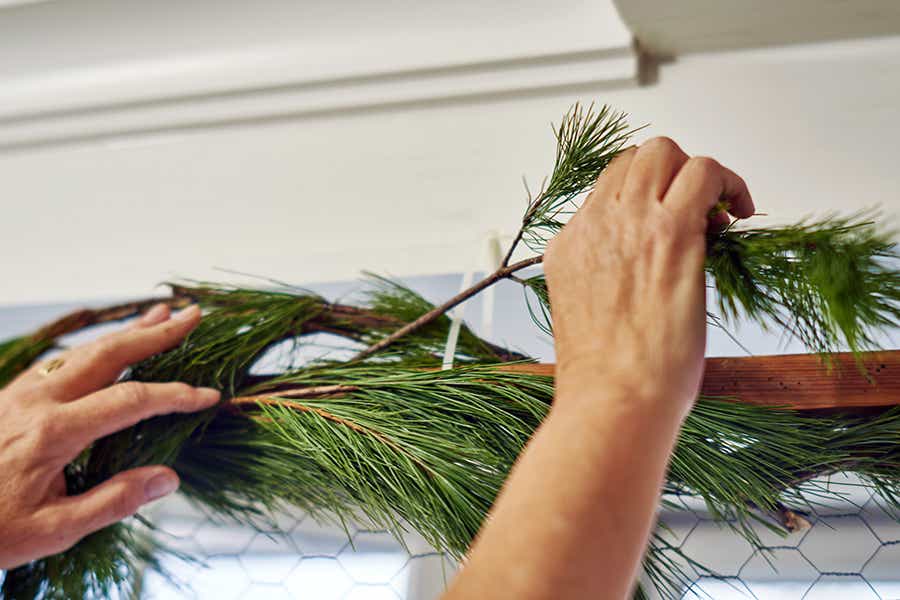
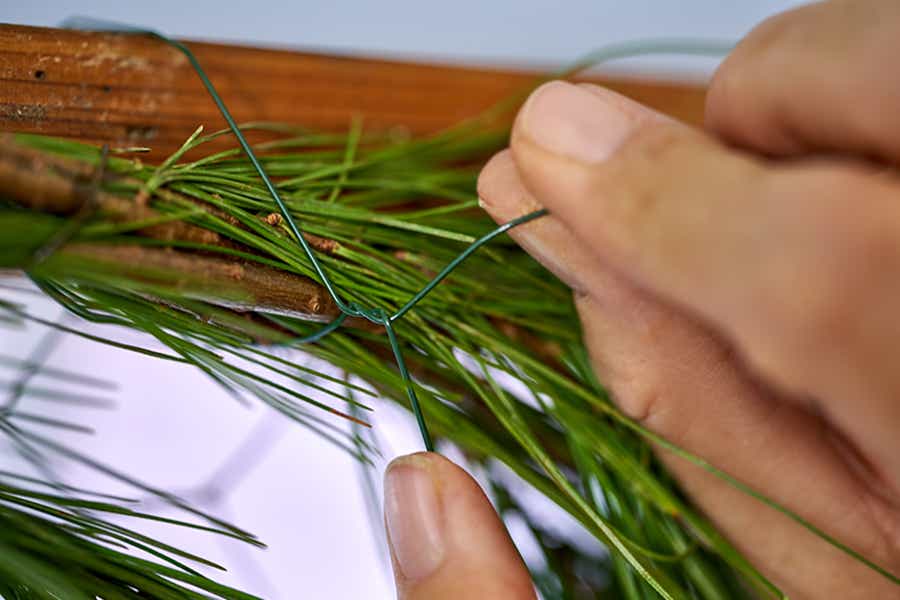
Next, you’ll attach it to the frame with pieces of wire. 

Twisting wire

Just a few twists will hold it in place.  

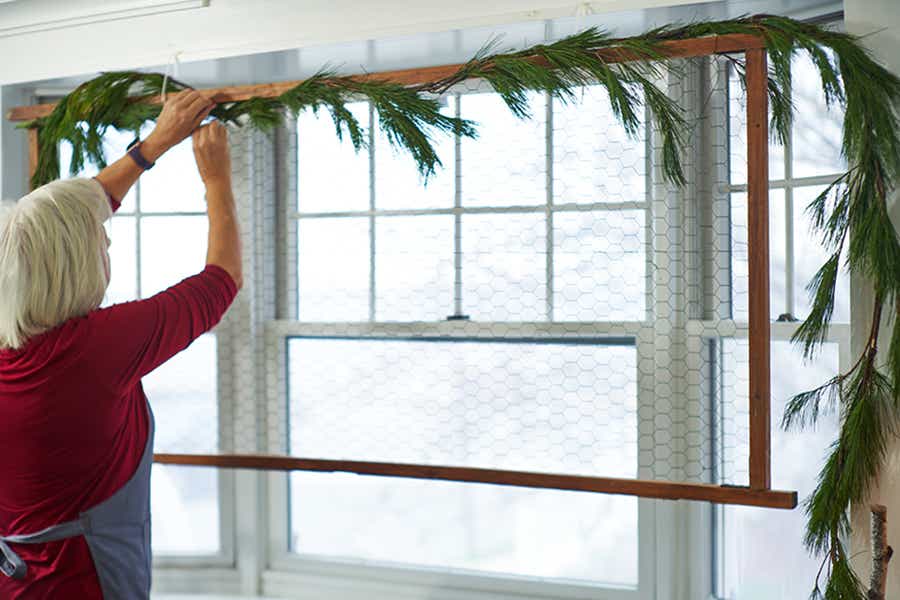
diy photo display Pine rope around frame

Continue attaching the pine roping all around the frame.    

Winter greenery

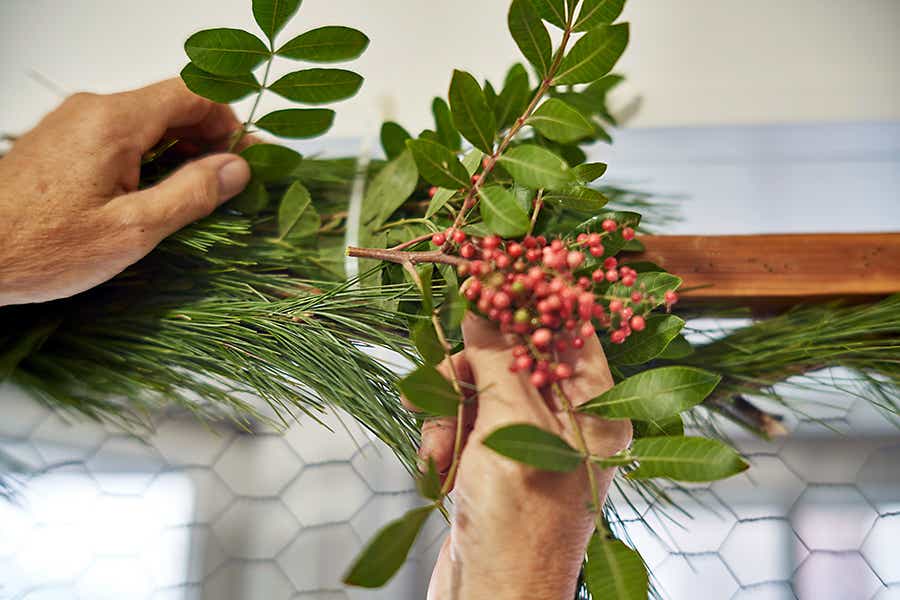
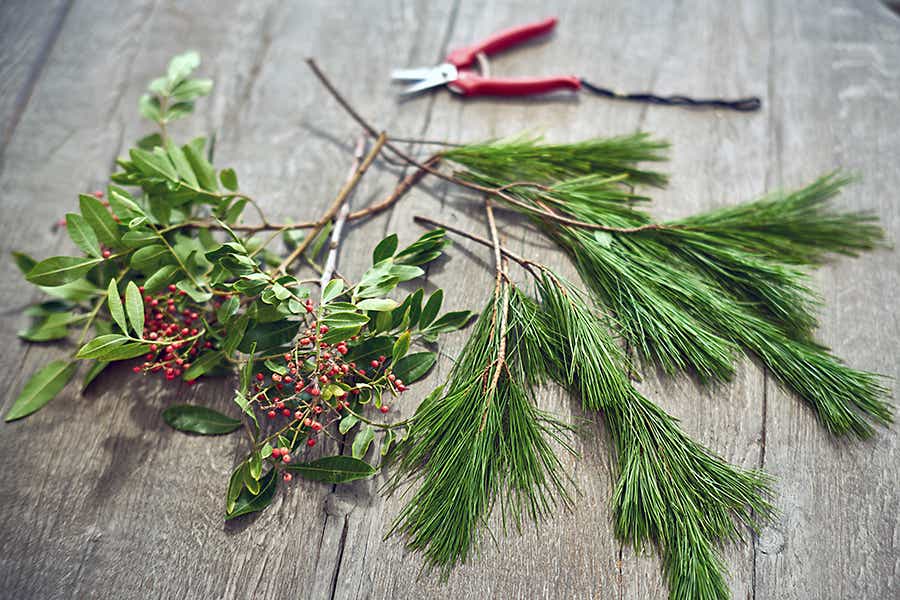
Remember to make it yours! You can add additional sprigs of pine as well as other winter greenery, such as pepper berry and balsam, or fir. 

diy photo display Garland on frame

Just insert the short pieces between the pieces of garland already attached to the frame. 

diy photo display Berries in garland


I like using pieces of pepper berry because they add a nice pop of color and texture.  

Christmas cards

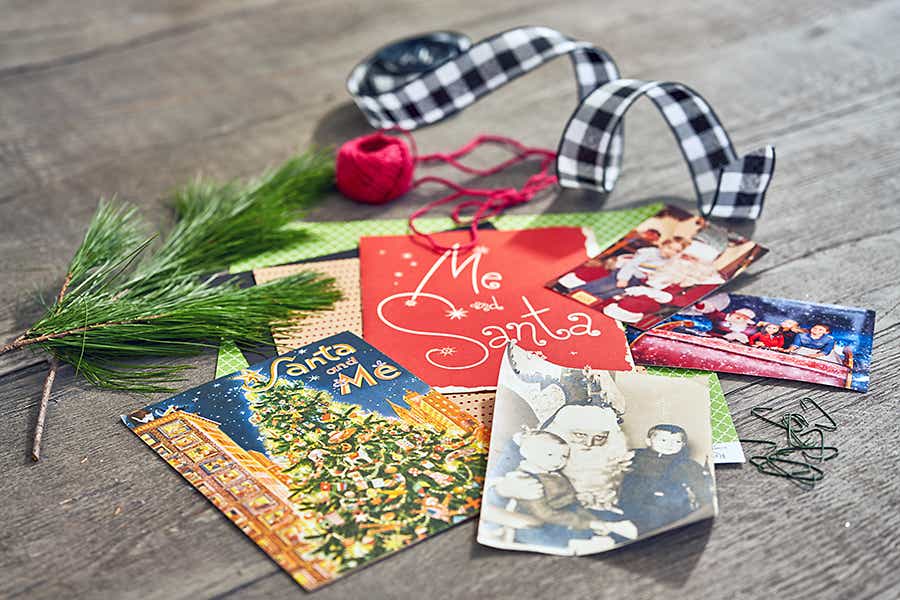
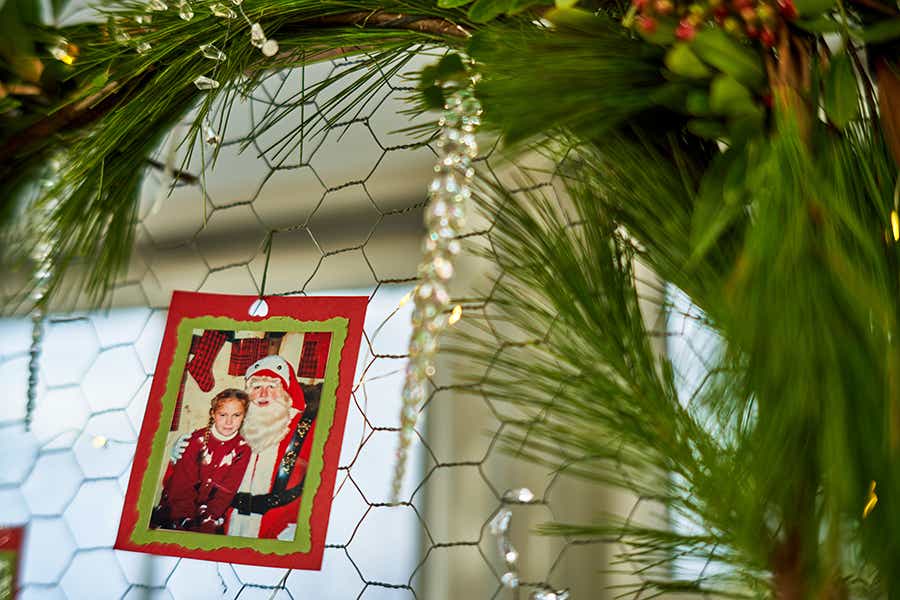
Now for the sentimental value. Gather your family’s “Santa and Me” photos that you have saved all these years.  I even have some of the original card holders that came with the photos back in the day! You’ll need some ornament hooks, but holiday-themed papers and ribbons are nice too. You can do as much or as little crafting with the photos as you want.

diy photo display Hanging Christmas card

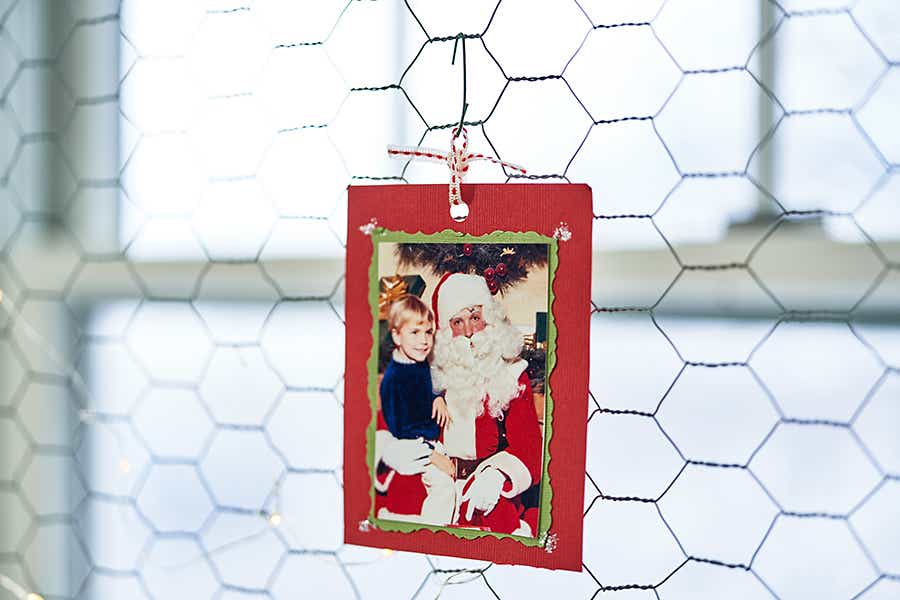
I started attaching each photo to cardstock, decorating it, and using a hole puncher and ribbon before hanging with the ornament hook. After a while, I simply started sticking the ornament hook right through the photo and hanging it up. 

diy photo display Santa and me card

I used larger width bendable wire, cut to size, and glued it to the back of the vintage “Santa and Me” photo holder.  

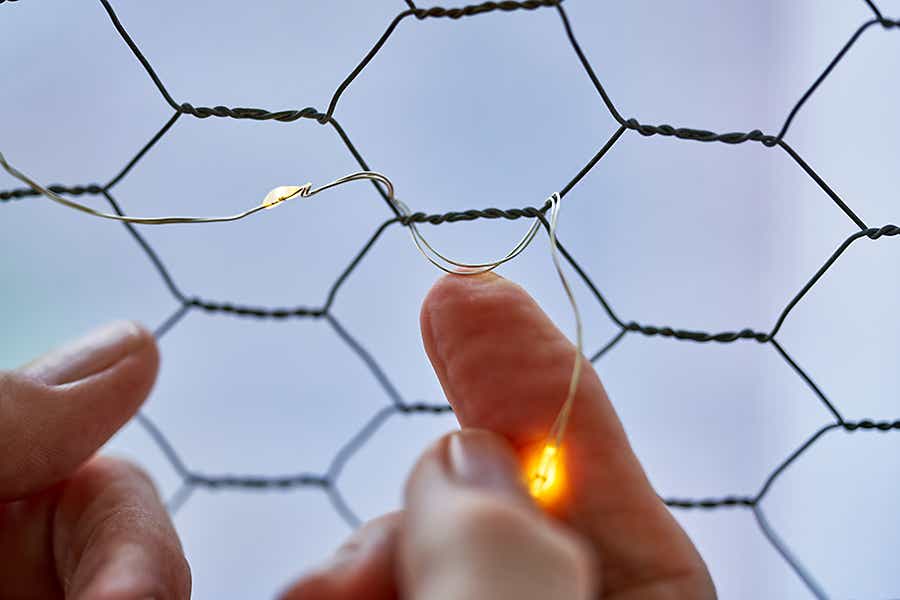
diy photo display Twinkle lights

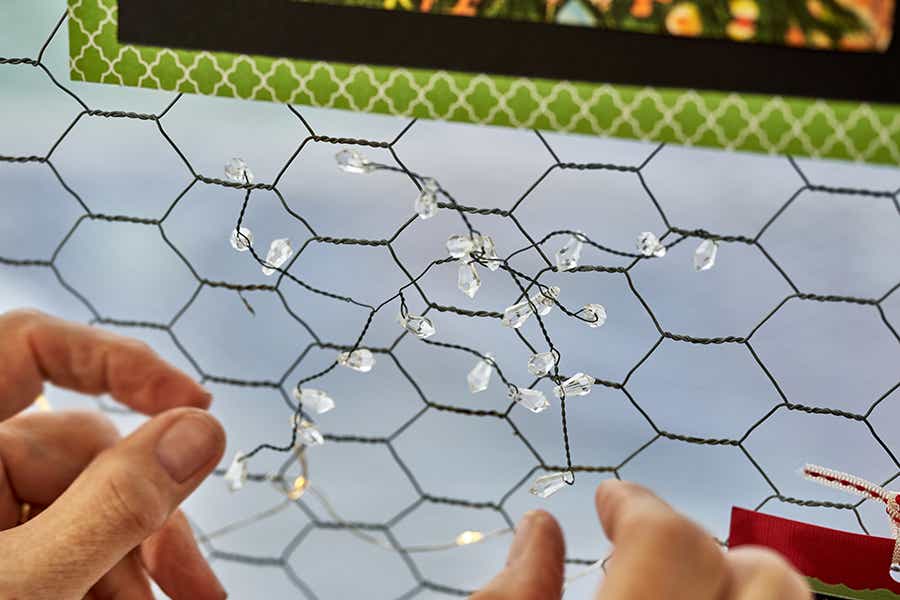
The only other decorations I on my display are small battery-operated twinkle lights and clear crystal acrylic pieces.  

diy photo display Attaching twinkle lights

It’s easy to attach these wired elements by just pinching the wire and wrapping it around a piece of the chicken wire base.  

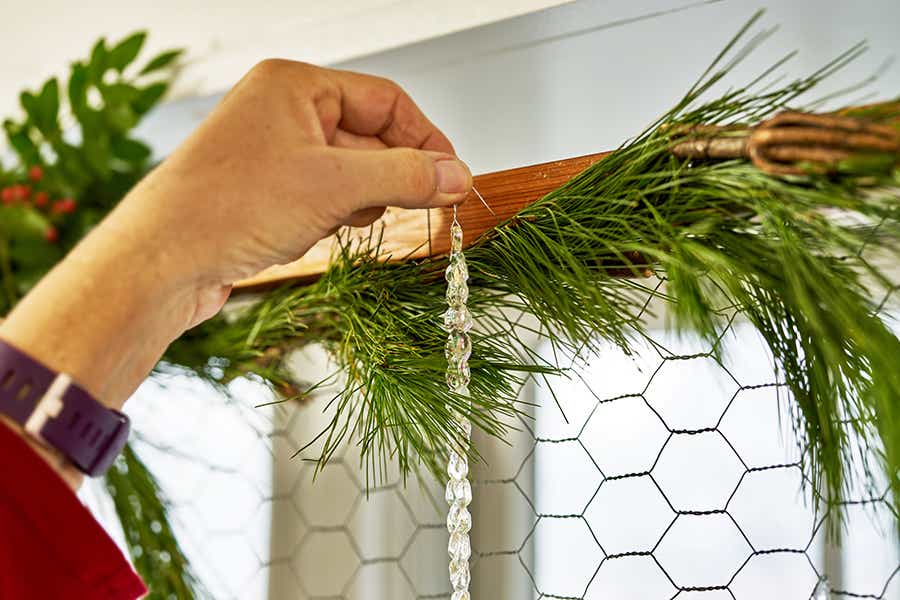
Acrylic icicle

For a fresh wintry look, use ornament hooks or small pieces of wire to hang acrylic icicles across the top of the frame.  

Hanging card

I love the effect you get by adding just a little bit of sparkle.

diy photo display with Hanging Christmas photos

The acrylic icicles add a whimsical, twinkling, charm while keeping everything light and airy.  During the day, the sun shines through, and when the sun sets and the lights come on, it’s magical!

The best part is that you get to enjoy your Christmas memories and are able to share them with all your friends and family during holiday visits. I have photos from my childhood and my husband’s childhood, my children’s visits with Santa through the years, and now my grandkids’ too! As a matter of fact, check out the one of me and my brother, Jim McCann.  Who knew that Jim would one day start a business that would help people connect with all the important people in their lives, not just at Christmas but every day! 

Easy-to-make Santa Hat Treats & Holiday Crafts

Everyone knows Santa’s iconic red and white hat. Put one on and you’ll instantly be in the holiday spirit!
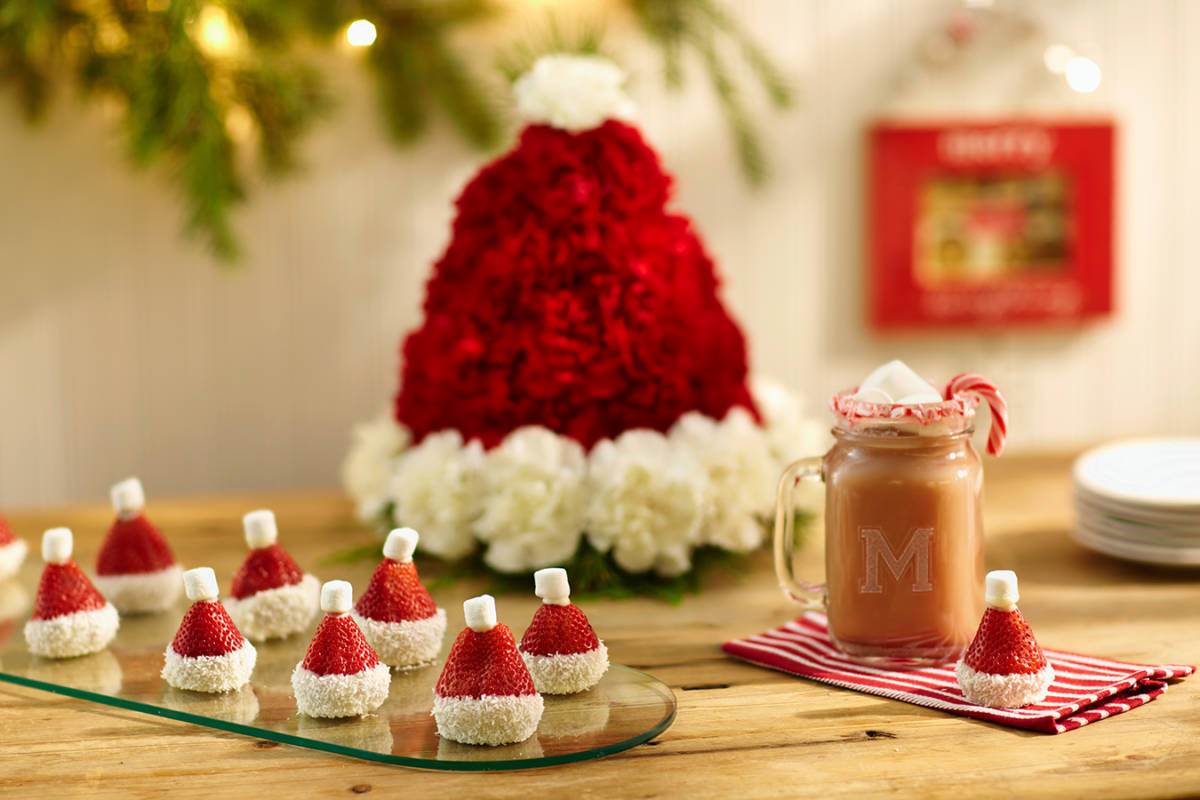
You know what else will put you in the holiday spirit? Making this floral centerpiece and these strawberry treats that are both in the shape of — you guessed it — Santa hats!
Want to learn ho, ho, how to create them? Read on, my little elves.

Santa hat floral centerpiece

DIY Flower Christmas Tree

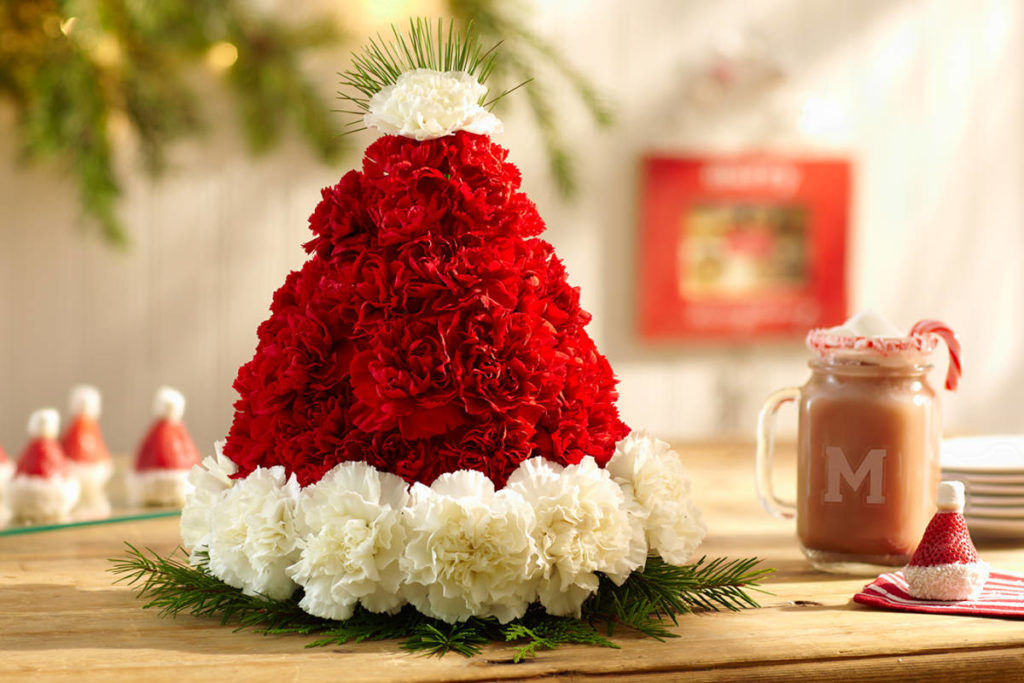
I decided to have a little fun and make a Santa hat entirely out of fresh flowers. Not only is it creative, but it’s so easy to make and will make you look like the “hostess with the mostess” at your next holiday get-together!

What you’ll need for your Santa hat floral centerpiece

  • Red and white carnations
  • Floral foam (cone shape)
  • Dish
  • Evergreens

Instructions

  1. Thoroughly soak the floral foam by letting it float in a sink full of water until the water is fully absorbed. Then, place the foam on a flat dish or low bowl slightly larger the the foam itself. (I used a 9 x 4 floral foam cone and a 6-inch clear design dish.)
  2. Cut the carnations’ stems to a length of about 3 inches. Insert the stems into the foam starting with the white ones to form the “fur” trim at the bottom of the hat. Leave one carnation for the pom-pom at the top.
  3. Add the red carnations all the way around until the foam is completely covered. Finish by adding the white one on top.
santa-hat-flower-diy
  1. You can add a few sprigs of evergreens to the base and top if you feel it needs a finishing touch.
  2. Keep your Santa hat centerpiece in a cool location, adding an ice cube to the dish every day, and it should stay fresh for at least a week.

DIY Santa hat strawberries

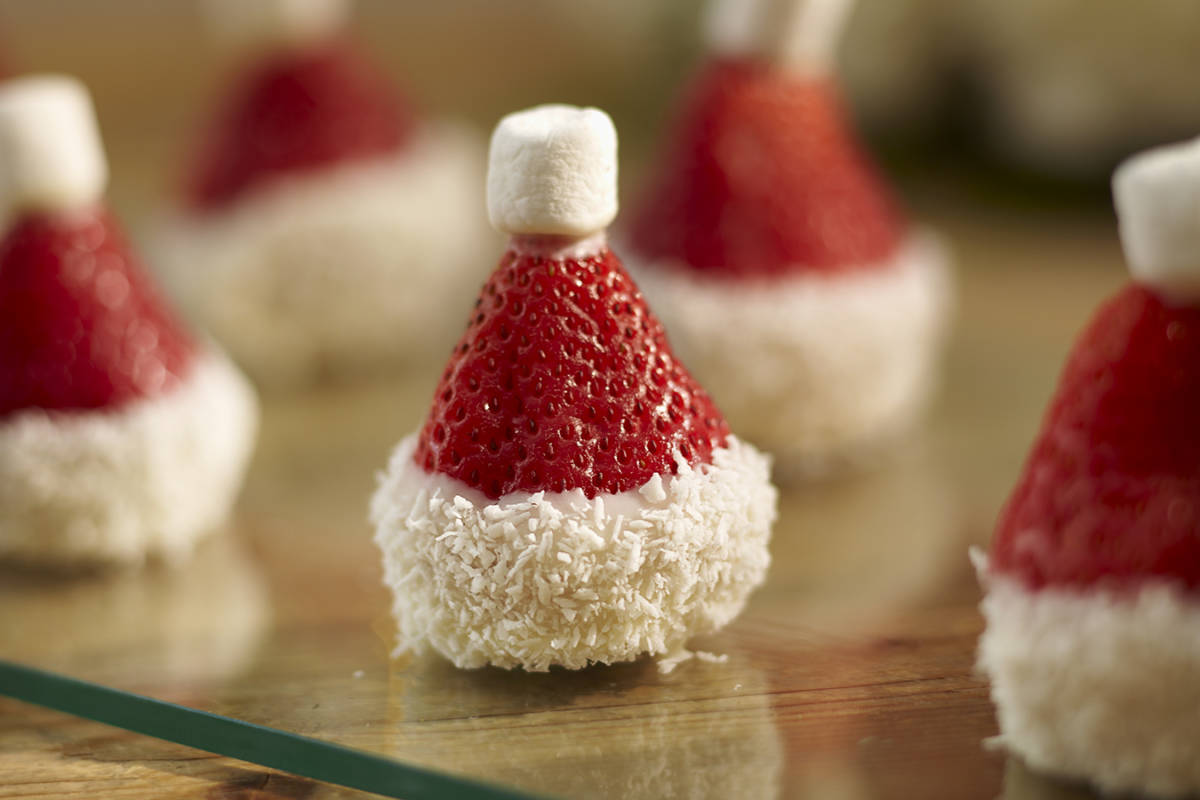
Need the perfect complement to your floral Santa hat? These sweet little pop-in-your-mouth treats are so easy to make, you’ll find yourself wanting to make more — for yourself, your family, friends, co-workers…you get the idea!

What you’ll need to make your Santa Hat strawberries

  • Strawberries
  • White melting chocolate
  • Coconut flakes
  • Mini marshmallows

Instructions

santa-hat-strawberries-diy-1
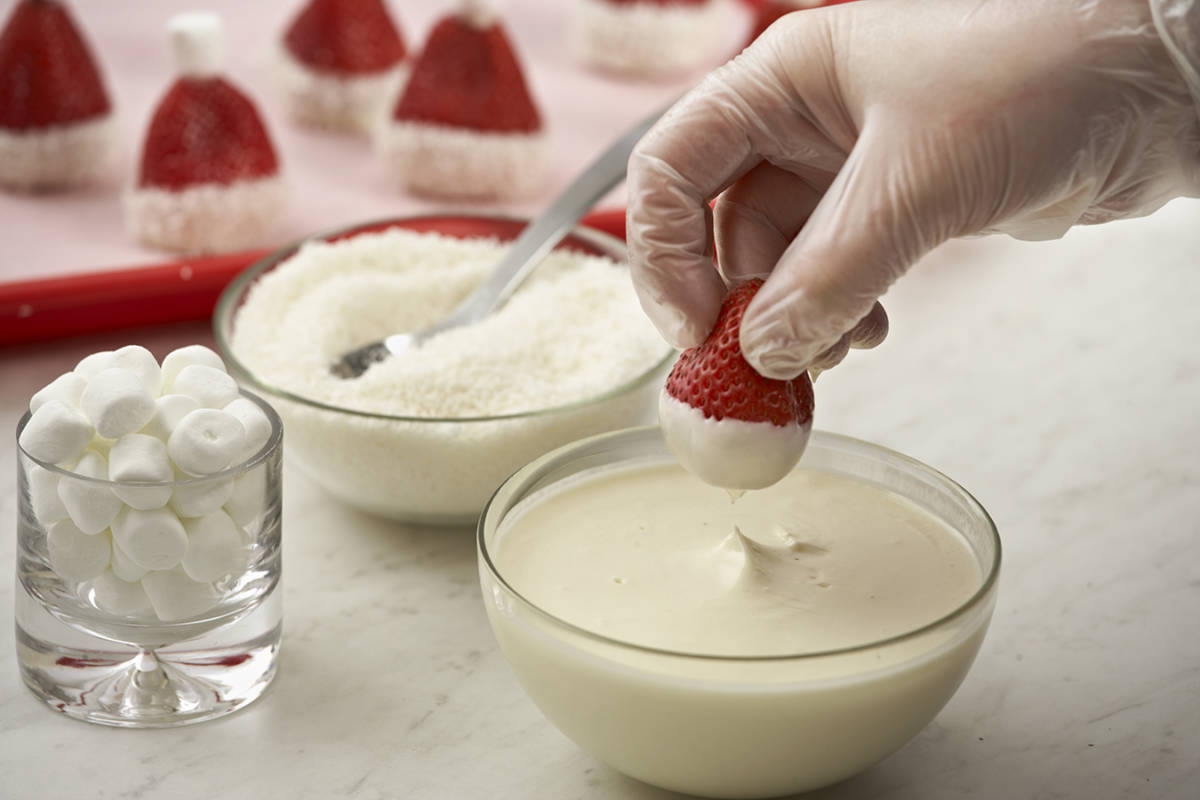
  1. Remove the stem from the strawberry. Don’t cut it off; just gently pull it away from the strawberry.
santa-hat-strawberries-diy-3
  1. Dip the larger end of the strawberry into the bowl of melted white chocolate, covering about a fifth to a quarter of the strawberry.
santa-hat-strawberries-diy-4
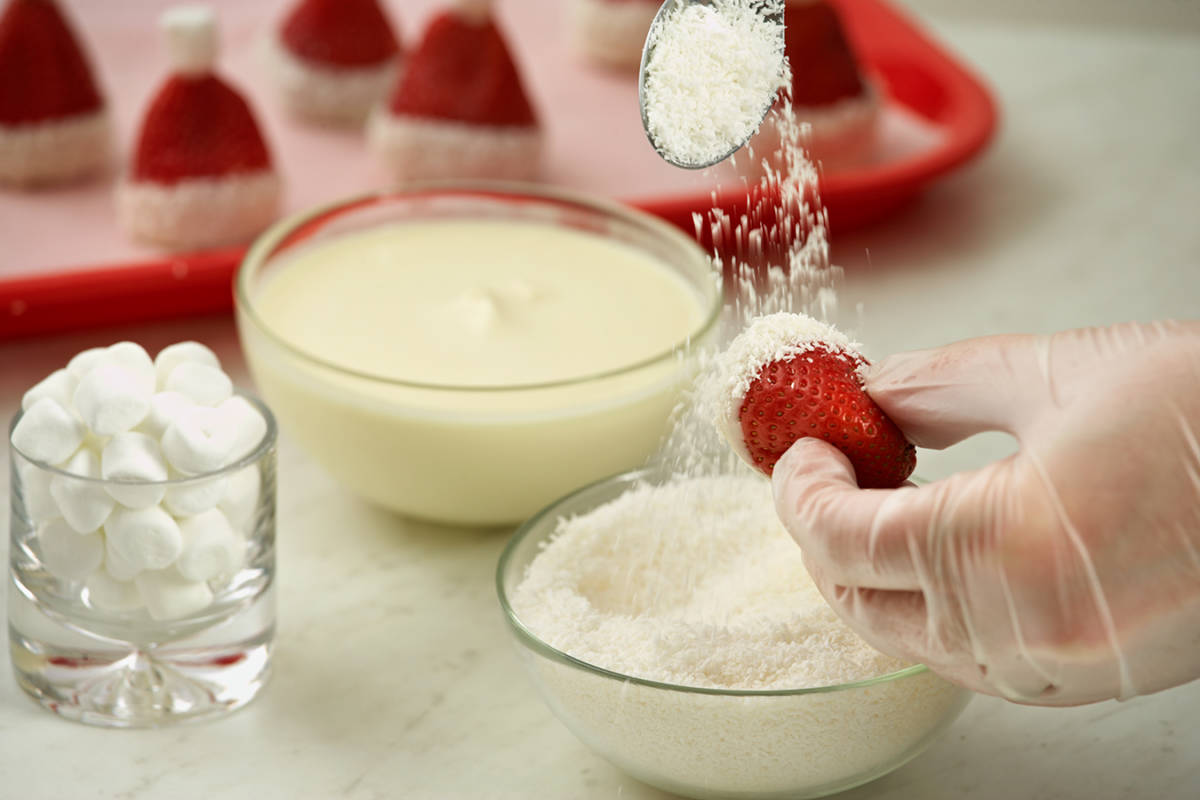
  1. Immediately hold the dipped strawberry over a bowl of shredded coconut and, using a spoon, drop the coconut flakes onto the melted chocolate on the strawberry. Place on a plate dipped side down.
santa-hat-strawberries-diy-5
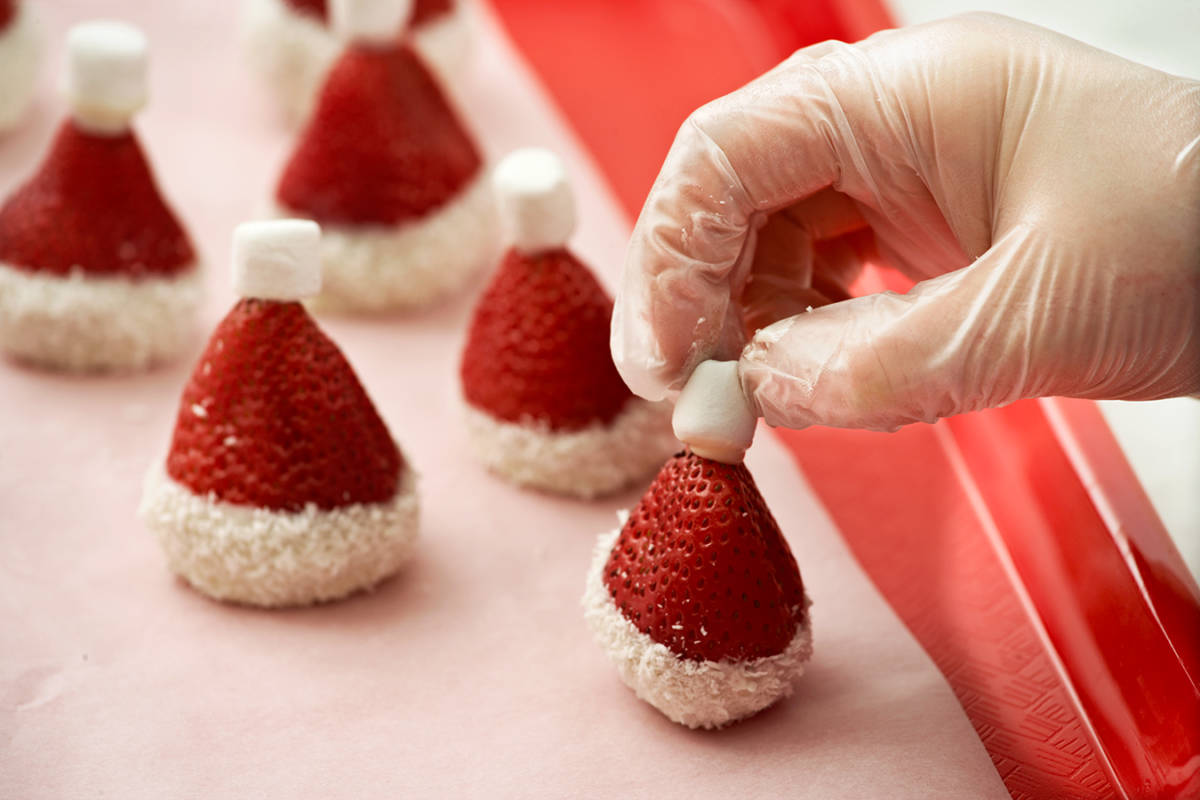
  1. Dip a mini marshmallow into the melted white chocolate and then place it on top of the strawberry to complete the Santa hat. As the chocolate cools and hardens, it will hold the marshmallow onto the strawberry.

Peppermint hot chocolate

Hot chocolate in mug

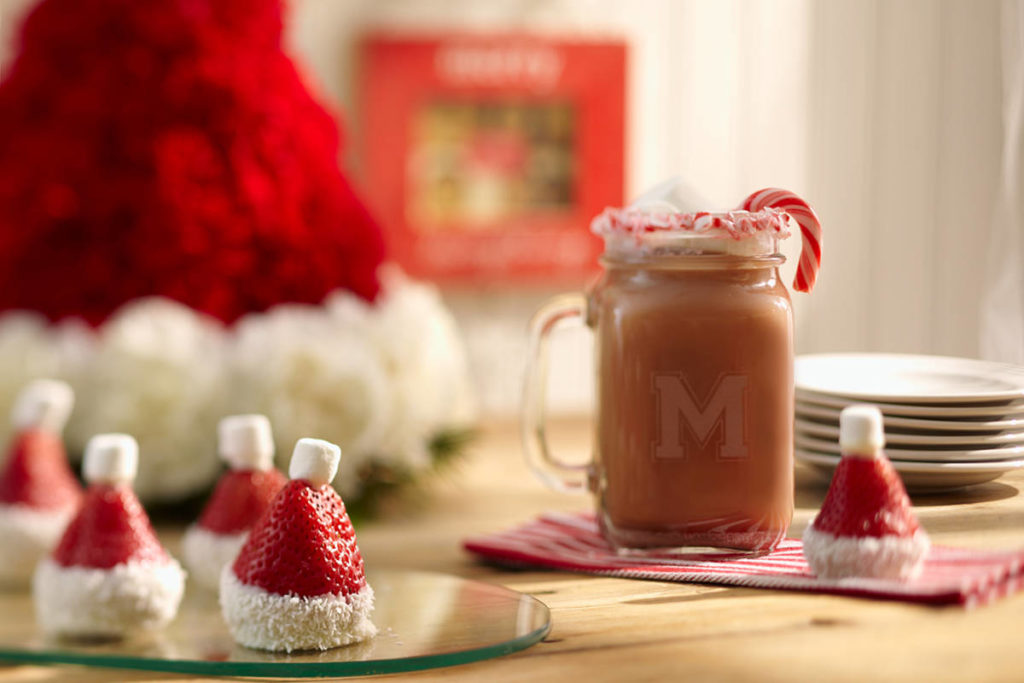
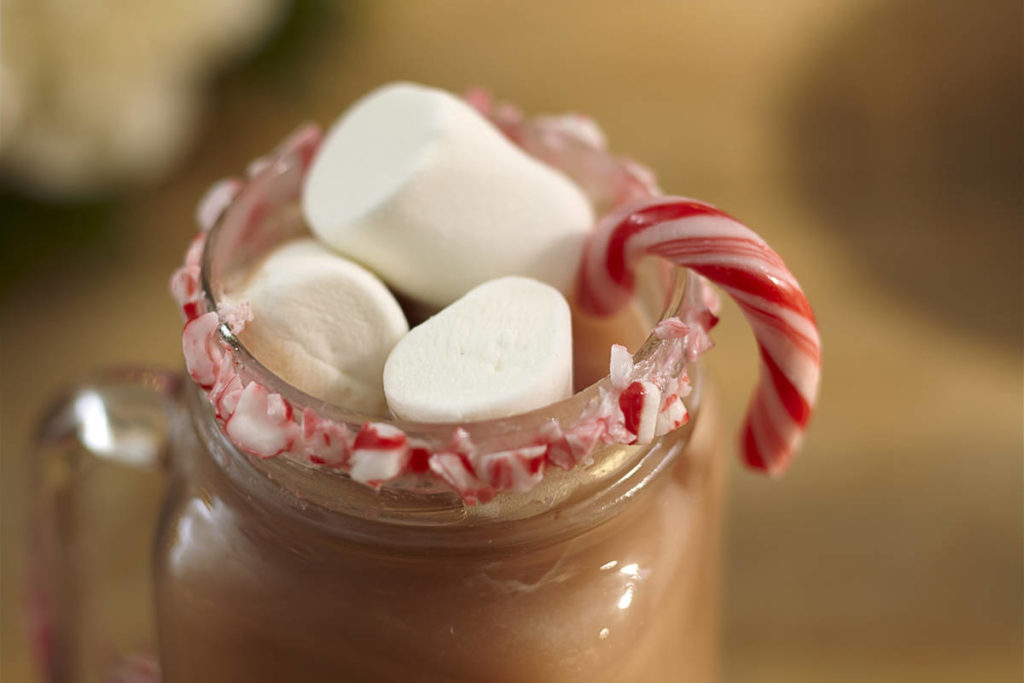
Who doesn’t love a nice cup of hot cocoa, especially during the holidays? For me, it’s all about the presentation. I used a regular hot cocoa mix but made it look fancy by serving it in a monogrammed mason jar mug, garnishing the rim with crushed candy canes and topping it off with marshmallows and a candy cane. The candy cane alone will add a peppermint flavor to the hot chocolate, or you could add three drops of peppermint oil per glass. Better yet, include a shot of peppermint schnapps to the hot chocolate to help chase away that winter chill!

Give A Personalized Wreath

Inspired by the ancient tradition of featuring a different floral arrangement in front of a home to identify the family and profession of the resident, I created these one of a kind designs. These are the kind of arrangements that I really like to create as gifts. They are so personal and take more thought then anything else. Give a personalized wreath to someone special, they are gifts from the heart.

Personalized Wreath Examples

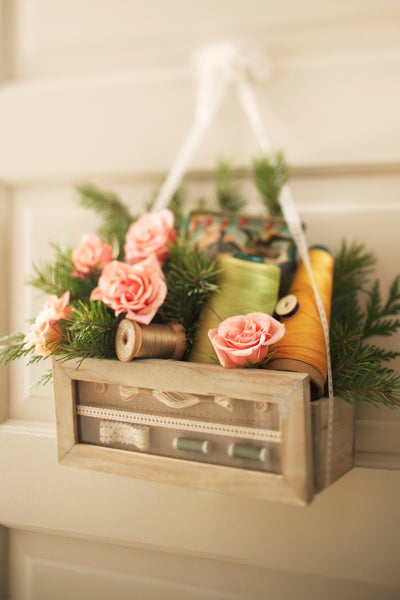
If your special person enjoys sewing, gather a few sewing supplies, some small roses, and a sewing kit basket with a long handle to hang in front of a door.  Arrange all your materials in the basket and surround it with flowers.  This is a lovely arrangement to hang on any door.


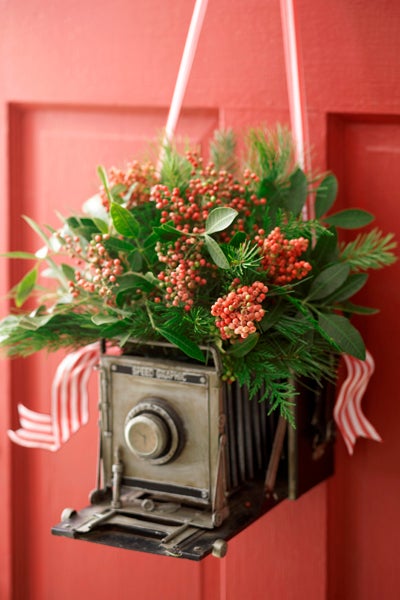
If your special somoeone enjoys photography, check out this creative wreath.  This personalized wreath  has nicely decorated flowers sitting ontop of an antique camera.

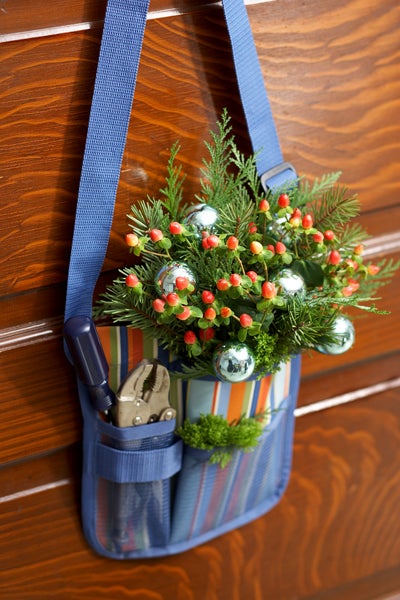
For the crafty person in you life, simply stuff a tool holder with flowers and ornaments.

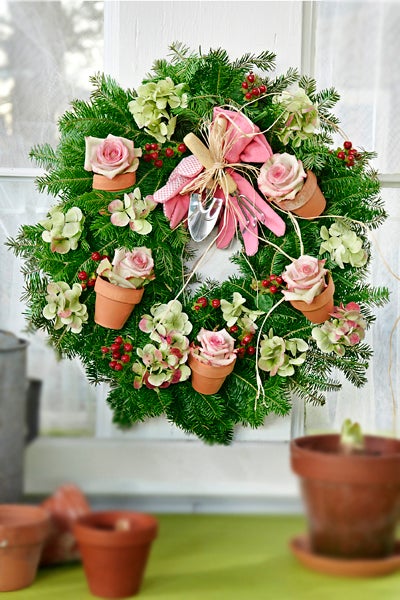
For a sweet, spring looking wreath, decorate your wreath with pink roses and small pots.
If your special person enjoys knitting, simply find some yarn and a needle and fashion it into a bow on your wreath.

3 Tabletop Trees With Personality

Three trees, three different materials, three different stories. What’s your story?

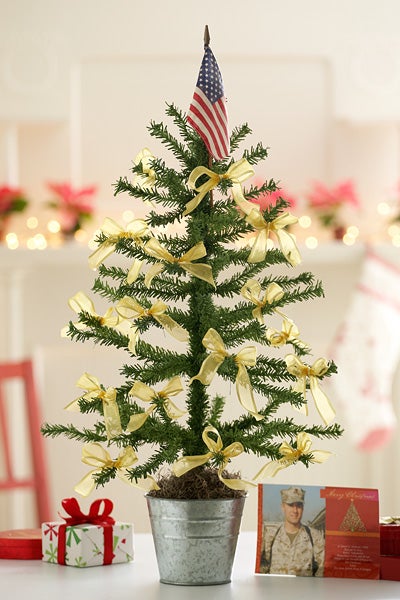
Tabletop tree No. 1: Tie a yellow ribbon

tabletop trees with Tie Yellow Ribbon Tree

A small way to keep the troops in our hearts and minds throughout the holiday season is to decorate a tabletop tree with yellow ribbons and top it off with an American flag. This one is a faux. It’s what I like to call a “Charlie Brown” tree.

Tabletop tree No. 2: Roses and elegance

Add to a holiday cocktail party by placing a fresh cut tree into a silver ice bucket and dressing it with lush velvety red roses and delicate baby’s breath. The fragrant combination of roses and fresh evergreens is truly intoxicating!

tabletop trees with Tree with Roses

You can create the same effect by decorating the tree with just sprigs of baby’s breath. It will look like fresh fallen snow!

Tabletop tree No. 3: On the first day of Christmas

tabletop trees with Pear Tree

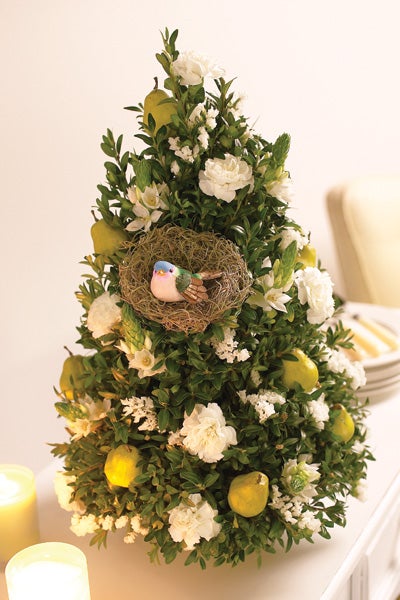
A partridge in a pear tree is a classic symbol from a traditional holiday song. Create this tree by using a base of floral foam and fresh boxwood. By adding fresh white flowers, faux mini pears, and a decorative bird in a nest made from Spanish moss, you will have completed the look.

Exit mobile version