6 Mardi Gras Decoration Ideas with Flowers

Mardi Gras, or Fat Tuesday, is one of the largest festivals of the year, with history dating back to the 18th century. Although the biggest celebration takes place in New Orleans, you can bring Mardi Gras right to your own home.

Here are six helpful and easy Mardi Gras decoration ideas using flowers.

mardi gras decorations Good Day Bouquet

1. Use flowers for decoration

Flowers are the perfect way to bring some life to your Mardi Gras decorations, whether you’re looking for a decorative centerpiece or festive conversation starter. The official Mardi Gras colors of purple, green, and gold were chosen by the Rex Organization in 1892 for symbolic reasons: Purple represents justice, green is synonymous with faith, and gold stands for power. Using these three colors in a festival floral arrangement to celebrate the occasion is a must.

2. Arrange a bouquet with purple, green, and gold flowers

Buying purplegreen, and yellow (gold) flowers, and placing them in a decorative vase is a great way to spice up any space for Mardi Gras. If you can’t find green flowers, green leaves work well, too.

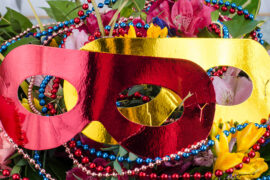
Take the three colors of flowers and place them in a vase for a Fat Tuesday mixed bouquet that will be the hit of any party! If you want to get creative, you can create DIY Mardi Gras picks, with fancy masks and plastic beads, to really take your bouquet to the next level. Use glue to attach ornate Mardi Gras masks and feathers to skewers to create a stunning effect.

If you don’t feel like putting together your own bouquet, just find an arrangement that is already arranged with flowers of the traditional Mardi Gras colors, such as the Good Day Bouquet.

mardi gras decorations with beaded vase craft

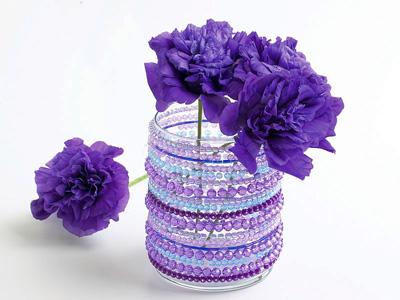
3. Make a vase with beads

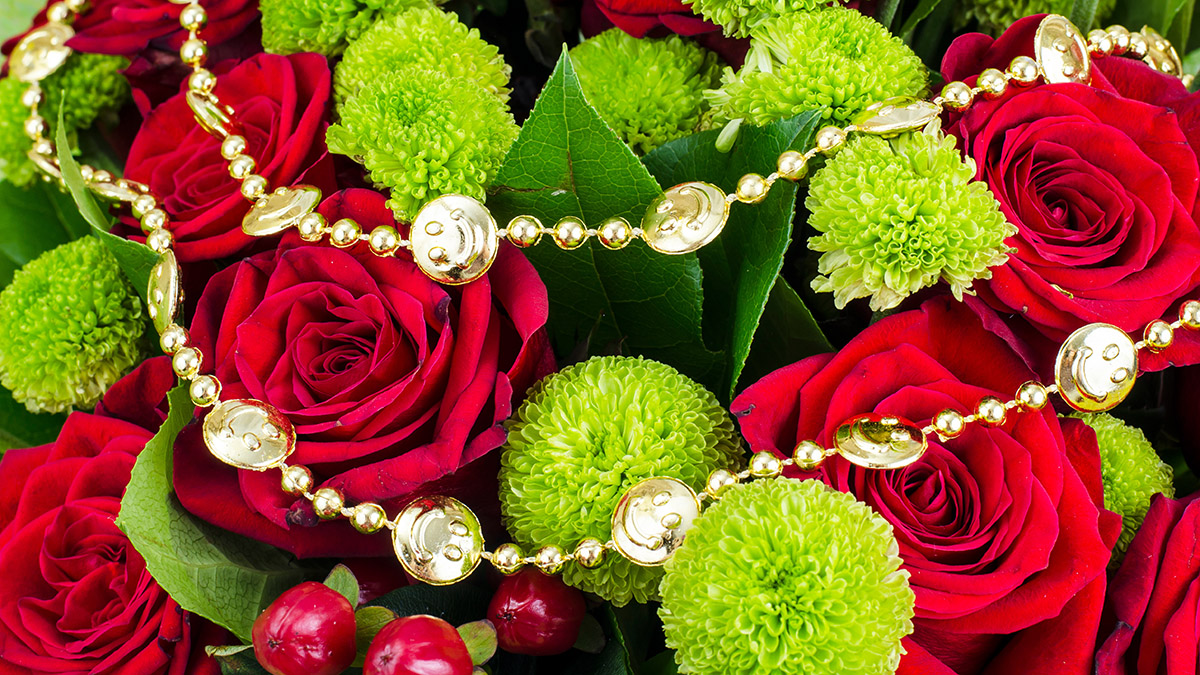
Head to your local party store and grab a bundle of those festive purple, green, and gold Mardi Gras beads that adorn the displays this time of year. These inexpensive plastic necklaces are sure to dazzle!

Option one: Throw a few necklaces into the vases with the water to decorate the arrangement from the inside out.

Option two: Make your own Mardi Gras beaded vase by using a glue gun to wrap the beaded necklaces around the outside of the vase. For a funny and unexpected surprise, consider gluing a plastic baby to the bottom of the vase to mimic the king cake. Then, fill your Mardi Gras vase with some festive flowers!

4. Create wearable floral décor

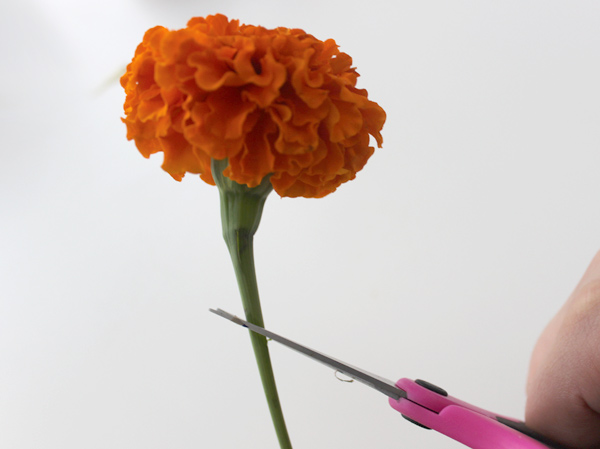
Turn flowers into interactive décor by creating beautifully festive corsagesfloral crowns, pins, and more! If you plan on handing out Mardi Gras beads at your soiree, attach flowers to them. Using a simple needle and thread, poke a hole through the bottom of the flower (closest to the stem) and create a loop around the necklace. Then, tie a knot to secure and — voila! — you have a beautiful Mardi Gras flower necklace. If you give out flowers to your guests, they can also add them themselves for a DIY party idea.

5. Add festive flower bundles throughout

Putting together a jaw-dropping centerpiece is one Mardi Gras floral option, but here’s another unique idea to keep the whole event space decorated with flower decorations. Pair appropriate colors together in bundles and create mini bouquets to spread around the room. Add these tiny arrangements to any areas that could use a little extra oomph: empty tables, mantle pieces, patios, even bathrooms. At the end of the night, let guests take the bouquets home as a party favor.

mardi gras decorations with roses and beads

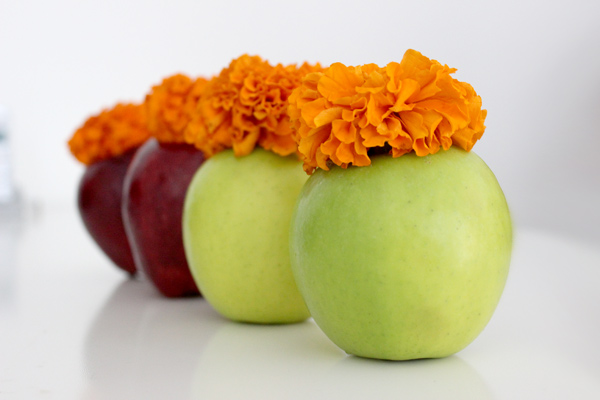
6. Decorate food with flowers

The menu is one of the most important parts of any celebration…especially one called “Fat Tuesday!” Take some extra care when preparing your Cajun-inspired menu and decorate the dishes with some fragrant, freshly cut flowers — they’re sure to wow guests and make for some photo-friendly foods! If you can’t find a king cake, decorate cupcakes with purple, green, and gold flowers and fun toppers.

5 Ideas for Honoring Veterans on Veterans Day

Every year on Nov. 11, friends, neighbors, and family members get together to honor those who have served in the U.S. Armed Forces. From veteran parades to gatherings in remembrance, there are many different ways to join the Veterans Day festivities to honor the brave men and women who have served.

Not sure where to start? Here are five ideas for honoring veterans on their special day. To add a special touch, we even asked some of our very own veterans at 1800Flowers.com how they celebrate fellow veterans.

1. Attend a Veterans Day parade

honoring veterans with waving flags at veterans day parade

Does your town or city have a special Veterans Day parade? If so, grab the whole family and attend the procession to show your support. To be even more festive, wave American flags and sport a red, white, and blue outfit! VetFriends can help you find the parade closest to you.

2. Donate to a veterans or military organization

From Veterans Affair (VA) hospitals to continuing education and financial aid, many organizations are dedicated to helping veterans and their families. Choose one that appeals to you and send a donation in honor of Veterans Day. Be careful when you are looking for organizations to donate to as you want to make sure it is an official organization.

Purple Heart Service Foundation

Established in 1782, the Purple Heart medal is the oldest award given to combat-wounded veterans of the U.S. military. This program helps all veterans recover and prosper for years to come.

The American Legion

The American Legion was started by Congress in 1919 as a patriotic veterans organization. Today, it is the nation’s largest wartime veterans service organization, focusing on support to servicemembers and veterans as well as mentoring youth, supporting communities, and inspiring patriotism.

Veterans of Foreign Wars

Tracing its roots back to 1899, the VFW aims to ensure aid for disabled veterans as well as support for families of deceased or dependent veterans while also inspiring patriotism in communities.

Team Rubicon

Team Rubicon, established in 2010 as a direct response to a 7.0 magnitude earthquake in Haiti, helps unite experienced military veterans and first responders to establish quick and effective emergency response teams.

3. Visit your local VA hospital

honoring veterans with volunteering at va hospital

Take some time out of your day to visit the wounded veterans at your local VA medical center. Bring a small gift or care package to make their stay a bit more comfortable, or bring some entertainment, such as a magazine or book. For those that are unable to read to themselves, perhaps you can read to them aloud.

4. Treat retired senior veterans to a meal

Whether it’s bagels for breakfast, sandwiches for lunch, or pasta for dinner, stop by your local retirement home and treat the veterans to a meal while you sit and speak with them about their military days. Ask them to share stories and experiences with you — they’ll enjoy reminiscing, and you will learn a thing or two as you’re brightening their day.

5. Say ‘thank you’

Something as simple as a “thank you” can go a long way. If you see men in uniform, be sure to say “Thanks!” You can also express your gratitude by writing a thank you letter to a nearby military installation or deployed troops, veterans, and their caregivers through an organization like Soldiers’ Angels. Even thought the recipient may not know the source of the letter, your gesture is sure to be appreciated.

How 1-800-Flowers.com vets honor Veterans Day

We asked a couple of our 1-800-Flowers.com veterans how they celebrate Veterans Day. Here’s what they told us.

Blair North Mug

Blair North

U.S. Army veteran and production director for Harry & David

Blair North says, “I will quietly reflect on the sacrifices veterans have made: Being away from family for long periods of time, including holidays. Missing the birth of their child. Coming home with physical and/or emotional scars. Or, not coming home at all.” Blair mentioned that he has reconnected on social media with people he served with, and on Veterans Day they will reach out to one another to share memorable stories from their time in the service. “I will share these stories with my children so they can also appreciate the sacrifices we made.”

Don LaFrance

U.S. Air Force veteran and vice president, logistics and supply chain solutions for 1-800-Flowers.com

Don LaFrance prefers a similarly lowkey celebration. He typically marks the occasion by reflecting “on the people that really made a sacrifice — their life or health” or visiting a historical cemetery. Since Don’s years of service, from 1977 to 1991, he has seen a great shift in the public’s perception of veterans. “There were not a lot of positive thoughts around veterans, especially right after Vietnam, so the significant change in attitudes in the past few years is a good way to be honored.”

honoring veterans with veteran don la france

Honor veterans with gifts

Let 1-800-Flowers.com help you find the perfect gift for Veterans Day. From flowers to food, plants to personalized keepsakes, we have everything you need to honor the veteran in your life.

Celebrate Sweetest Day with Quotes About Sweets

Chocolates and candies and desserts, oh my! There’s nothing quite like a sweet treat at the end of the day to melt away all the day’s stresses and sorrows. That’s why we love holidays like Sweetest Day, when we get to surprise our friends and families with the gift of desserts to make their day a little bit sweeter.

Sweetest Day is celebrated every year on the third Saturday in October. Surprise someone special with a sweet treat or other thoughtful gift, along with one of these oh-so-sweet quotes and sayings.

15 sweet quotes about desserts

“A balanced diet is chocolate in both hands.” – Unknown

“There is nothing better than a friend, unless it is a friend with chocolate.” – Linda Grayson, Printwick Papers

“You can’t buy happiness, but you can buy chocolate, and that’s kind of the same thing.” – Unknown

quotes about sweets with chocolate and pink rose

“Chocolate is the answer. Who cares what the question is.” – Unknown

“All you need is love. But a little chocolate now and then doesn’t hurt.” – Charles M. Shultz

“Sometimes I think that the one thing I love most about being an adult is the right to buy candy whenever and whenever I want.” – Ryan Gosling

“Vegetables are a must on a diet. I suggest carrot cake, zucchini bread, and pumpkin pie.” – Jim Davis

“As with most fine things, chocolate has its season. There is a simple memory aid that you can use to determine whether it is the correct time to order chocolate dishes: Any month whose name contains the letter A, E, or U is the proper time for chocolate.” – Sandra Boynton

“Put ‘Eat chocolate’ at the top of your list of things to do today. That way, at least you’ll get one thing done.” – Unknown

“After about 20 years of marriage, I’m finally starting to scratch the surface of that one. And I think the answer lies somewhere between conversation and chocolate.” – Mel Gibson

quotes about sweets with chocolate birthday cake

“You can tell a lot about a fellow’s character by his way of eating jelly beans.” – Ronald Reagan

“Life is uncertain. Eat dessert first.” – Ernestine Ulmer

“A party without cake is just a meeting.” – Julia Child

“Let them eat cake!” – Marie Antoinette

“Embrace a new challenge like your favorite desserts. Look forward to it and savor every minute like you savor every bite of your sweet treat.” – Mary-Frances Winter

Father’s Day Craft Ideas: How to Make a Photo Plant for Dad

a photo of father's day photo plant

Dad works hard, and while he’s putting in long hours at the office, he could always use a reminder of his loved ones back home (or in the next room, in the case of a home office). Give him something to add some flair to his workspace with a Father’s Day photo plant.

For this project, I used a ready-made cactus dish garden, but you may choose to build your own dish garden or terrarium from scratch. Likewise, I also used clear adhesive mailing labels, but any type of clear adhesive paper, such as contact paper, will do.

The photo picks took about 10 minutes to create from start to finish. You can use photos of the kids, the dog, or the whole family! If Dad is a sports fan, why not throw a baseball or soccer ball into the mix? Get creative and wow him with a Father’s Day craft idea that blends both his loving family and his unique personality.

Supplies for a Father’s Day photo plant

  • Terrarium or dish garden
  • Photos
  • Photo editing software
  • Photo paper
  • Clear adhesive paper
  • Scissors
  • Wooden skewers

How to make a Father’s Day photo plant

  1. Open the photos in your photo editing software. Since I used pre-sized clear labels, I resized and cropped my photos to fit (mine were 2 inches by 4 inches). Choose a size that will work well with your terrarium. When you have your photos cropped and ready, print them out on photo paper.
a photo of father's day craft ideas with photo cutouts
  1. Carefully cut your photos out.
a photo of father's day craft idea with laminated photos
  1. To make the “laminated” photo picks, take a piece of clear adhesive paper and lay it down on the table. Take one of your photos and carefully place it backside up. Put a bamboo skewer in the bottom center of the photo. Now, add another piece of clear adhesive paper to seal the photo. Use your nail to rub out any air bubbles. Then, use scissors to cut off the extra clear adhesive paper.
a photo of father's day craft ideas with all photos laminated
  1. Use this method for all of your photos until you are left with a few “laminated” photo picks.
a photo of father's day craft ideas with a completed terrarium
  1. Now, simply stick the picks into your photo terrarium. You are now ready to wow Dad with this creative Father’s Day craft idea!

Father's Day banner

DIY Father’s Day Card for Kids

A photo of diy father’s day card

Store-bought cards are fine, but to show Dad how much you truly care, make him a DIY card for Father’s Day. All you need are paper, glue, and markers to compete this kid-friendly craft that is sure to put a smile on Dad’s face.

Pair this creative card with a delicious homemade brunch or slip it into the amazing Father’s Day gifts you prepared for him. He’ll really appreciate this simple yet sweet statement and will love showing it off to friends and coworkers!

Supplies for DIY Father’s Day card

  • Cardstock or similar weight paper; 2 sheets in one color and 1 sheet in a second color/pattern
  • Glue or tape
  • Pencil
  • Markers
  • Scissors

Directions for DIY Father’s Day card

A photo of diy father’s day card with tracing a hand
  1. Start by tracing your hand on the paper using a pencil. Use the scissors to cut out the shape. Do this for the second sheet of paper as well.
A photo of diy father’s day card with writing an I Love You message
  1. Use a marker to write “I love you” in pencil on one of the paper hands. Then, trace the text with marker and erase any stray pencil lines.
A photo of diy father’s day card with the message inside the card
  1. Now it’s time to create the inside of the card. First, cut a long strip out of the third sheet of paper. Then, fold the strip accordion style. Use a thick marker to write the words “This Much” on the accordion-folded strip.
A photo of diy father’s day card
  1. Using glue or tape, add the adhesive to each end of the accordion strip. Attach the hands to the strip, making sure both hands are facing the same way. Now your card is ready to give to Dad!

Father's Day banner

DIY Mother’s Day Photo Vase Craft for Kids

Our series “Get Crafty” gives you the inspiration for creating inventive DIY projects during the holidays and year-round. Pair those Mother’s Day flowers with a creative DIY photo vase — the perfect Mother’s Day craft for kids of all ages!

This year, take your Mother’s Day flowers to the next level with a creative and personalized DIY photo vase. The beauty of this vase is in the tiny details that reflect each child’s personality, making it the perfect Mother’s Day craft for kids of all ages.

a photo of a diy photo vase

Depending on how old the child is, you may want to prepare the tissue paper shapes beforehand, as little kids may have trouble cutting the delicately thin material. Be sure to provide them with a smock and clear out an area for crafting, as this project includes liquid adhesive.

Once this DIY photo vase is completed, add mom’s favorite flowers or arrangement for a Mother’s Day gift she’ll treasure always.

a photo of a diy photo vase: materials

Supplies for DIY photo vase

  • Vase
  • Liquid adhesive (Mod Podge, PVA glue)
  • Small paintbrush
  • Tissue paper in a variety of colors
  • Photo
  • Scissors

How to make a DIY photo vase

Use soap and water to clean any residue off the vase. Set aside to dry.

a photo of a diy photo vase: tissue paper hearts

Cut shapes out of the tissue paper. We chose hearts, but you can go with flowers, stars, or diamonds. The homemade touch of this project is what makes it special, so the shapes do not all have to be the same size or shape. Once you have enough shapes, set them aside.

a photo of a diy photo vase: gluing on tissue paper hearts

Pour some of the adhesive into a small bowl. Dip the brush into the adhesive and pick up a tissue paper shape with the brush, and “paint” it onto the vase. You only need a light coat of adhesive, so try to avoid drenching the shapes.

Once you have stuck all the shapes to the vase, it’s time to add the photograph. You may want to trim the photo to fit your particular vase before placing it on. Once you have decided where the photo will go, use the brush to paint the adhesive onto the back of the photo. Apply it to the vase and hold it down for 5 to 10 seconds until it’s secure.

a photo of a diy photo vase: finished vase

Give the vase a few minutes to dry, and then use a cup or pitcher to carefully pour water into the vase. Then, add the flowers, and your DIY photo vase is ready to show off!

A graphic reminding visitors that moms deserve a special celebration on Mother's Day.

Mother’s Day Crafts for Kids: DIY Photo Flowers With Free Printable Template

Our series “Get Crafty” gives you the inspiration for creating inventive DIY projects during the holidays and year-round. Let the children make their own homemade Mother’s Day craft with this creative DIY photo flowers idea that will touch mom’s heart.

a photo of diy photo flowers

Move over macaroni frames, there’s a new DIY Mother’s Day craft in town! And it’s not only fun to make but easy, too.

Using our photo flower stencil template, some scrapbooking paper, scissors, and a bit of glue, we created creative and colorful DIY photo flowers. They’re the perfect kid-friendly complement to those stunning Mother’s Day flowers you plan on getting Mom.

Let the kids get creative by picking out their own patterned paper and colors. They’ll love letting their personalities shine in this personalized Mother’s Day gift idea.

And Mom will think it’s just the sweetest present she’s ever received.

Supplies for DIY photo flowers

  • Photo flower template (download here)
  • Scrapbook and construction paper in various colors and patterns
  • Scissors
  • Glue
  • Floral tape
  • Tape
  • Lollipop sticks or similar
  • Photos

Directions for DIY photo flowers

a photo of dit photo flowers: flower stencil cutout

Load your printer with a sheet of cardstock; download and print the photo flower stencil template. Cut out the shapes to use as stencils. Set aside.

a photo of diy photo flowers: tracing flower shape on photo

Now, prepare the photograph. If are using an existing photo, trace the smaller flower on the photograph and cut out the shape. If you plan on printing your child’s photo, crop the area you wish to use to 3.5 inches by 3.5 inches. Print on high-quality photo paper for best results. Once printed, use the smaller flower to trace the shape and cut out the photo.

a photo of diy photo flowers: cutting out the flowers

Take the larger flower and trace it onto the color/pattern you’d like to appear on the outermost layer of the flower. Cut out and set aside.

Then, take the smaller flower and trace it onto the color/patterned paper you would on the middle layer of the flower. Trace the circle stencil in the middle of the smaller flower shape. Fold in half and cut out the circle shape from the flower to create an open space.

a photo of diy photo flowers: faces in the flowers

Once you have all the shapes cut out, place a few drops of glue onto the largest flower. Take your first photo and glue it down. Once it’s dry, add a few drops of glue to the smaller flower and place it on top of the photo.

a photo of diy photo flowers: making the flower stems

To make the stems, grab your stick and wrap it in floral tape. (The tape is naturally slightly sticky so no further glue is necessary.) Once fully wrapped, tape the stick to the back of the flower.

a photo of diy photo flowers: finished flowers

Optional: Fold a piece of green construction paper in half and cut out a folded leaf shape. Add glue to one half of the leaf and hug it around the newly created stem.

Mother’s Day Flower Craft for Kids: Sunflower Wheel of Appreciation

Our series “Get Crafty” gives you the inspiration for creating inventive DIY projects during the holidays and year-round. Show Mom just how special she is by surprising her with a Sunflower Wheel of Appreciation! Read on to learn how to make this DIY Mother’s Day craft. 

a photo of a sunflower wheel of appreciation

Mom does it all. She cooks, cleans, consoles, and even coaches us through life’s toughest moments. To show Mom just how special she is, make her this Sunflower Wheel of Appreciation to go along with her Mother’s Day flowers. This creative DIY Mother’s Day craft is blooming with compliments that are sure to make Mom smile.

We chose to craft ours to resemble a sunflower, but you can get creative and mix and match colors and shapes to replicate Mom’s favorite flower! Think white and yellow for a beautiful daisy or pink and white for a stunning lily.

Supplies for Sunflower Wheel of Appreciation

  • Cardstock in 2-4 different colors (We used brown, orange, and two shades of yellow)
  • 1 paper plate
  • Scissors
  • Glue
  • 1 fine tip marker
  • Paper fastener

Directions for Sunflower Wheel of Appreciation

a photo of a sunflower wheel of appreciation: tracing paper plate

Trace the paper plate onto the piece of cardstock that will become the bottom of the wheel.

a photo of a sunflower wheel of appreciation: two paper circles

Then, trace a circle shape just a bit smaller than the first shape on a piece of different-colored cardstock. If you need a stencil for this part, bend the paper plate in half and trim the ends just a bit. The result will have scalloped edges but will suffice for creating the general circle shape.

a photo of a sunflower wheel of appreciation: cutting out and tracing rectangle

Use scissors or an X-Acto knife to cut out a rectangular shape on the smaller circle. Take the cut-out rectangle shape and use it to create a border for your text on the larger circle. This will assure your text stays within the boundaries of the box.

a photo of a sunflower wheel of appreciation: writing the messages


Once you draw your rectangular borders, use a pencil to write a message for Mom in each one. Then, use a marker to go over the letters to make the words pop. Erase any stray pencil markings.

a photo of a sunflower wheel of appreciation: petals

Now, take the cardstock you plan to use for the petals and cut out several petal shapes in varying sizes (they don’t need to be perfect). We used two shades of yellow, but you can stick to just one and still come out with a wow-worthy project.

Apply glue to the wide ends of the petals and stick them to the back of the larger circle.

To complete the wheel, position the smaller circle in the center of the larger circle and seal in the middle with the paper fastener.

Now, give your Wheel of Appreciation a spin and let your Mom know why she’s the best in the world!

a photo of a sunflower wheel of appreciation: mom is my hero message

My Mom…is my hero

a photo of a sunflower wheel of appreciation: mom makes the best breakfast message

My Mom…makes the best breakfast

a photo of a sunflower wheel of appreciation: mom is my number 1 fan message

My Mom…is my #1 fan

Apple Vase for Rosh Hashanah: Celebrate the Jewish New Year With This Sweet DIY Decoration

apple vase with diy apple vase

Looking for the perfect Rosh Hashanah centerpiece or accent? Take inspiration from the star of the menu — apples — and turn them into wow-worthy décor in a few simple steps!

Using just a knife and flowers, we turned this go-to Rosh Hashanah treat into a conversation-starting decoration. After creating your apple flowers, you can turn this DIY idea into place cards for a table setting (just tie a nametag around the apples), a juicy and vibrant centerpiece, or sweet accent pieces when you spread several throughout the room.

As this is a vase made from a fresh fruit, it is best to make these beauties the night before or morning of, if possible. Each apple takes about five minutes to make.

Supplies for fresh apple vase

  • Fresh apples (we used Granny Smith and red delicious)
  • Knife
  • Water
  • Scissors

Directions for fresh apple vase

apple vase with carving an apple
  1. Use a knife to carve an opening at the top of your apple. The carving should be a minimum of 1 inch, with a maximum varying based on the size of your apple. Your hole should be large enough to fill with a bit of water and a small piece of flower stem but small enough that you are not fully reaching the bottom skin of the apple.
apple vase with pouring water in apple
  1. Once your apple is carved, carefully fill it with water. Leave a bit of room at the top of the apple so the water does not spill over when you add the flower.
apple vase with cutting flower
  1. Trim your flower down so the stem fits the size of your carving and the flower head sits comfortably on the top of the apple.
apple vase with finished diy apple vase
  1. Now, your fresh apple vases are ready to show off!
Exit mobile version