Happy Birthday Snow People

Who better to deliver birthday wishes on a chilly winter day than a happy little snowman? Think about it: Have you ever seen a snowman who didn’t have a smile on his face? Snowmen are a celebration of winter, unexpected snow days, and family fun. And the best part about this snowman (or “snowlady”) craft is that it can stay inside, sharing birthday smiles without melting!
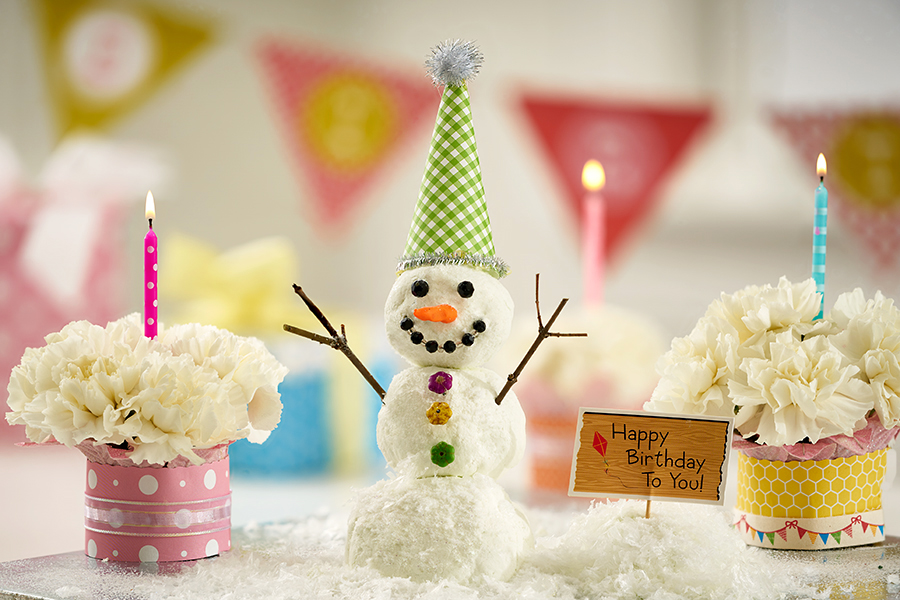
Winter Snowman Setting

This happy little guy is the finishing touch to a birthday vignette of floral cakes and cupcakes, and I created him with everyday materials found around the home. With a little research online, I found many snowman recipes that called for corn starch and shaving cream. After doing some experimenting, I went with the shaving cream version, but both work great! This snowman craft is a fabulous fun sensory activity to do with kids too.

Make a snowman craft (without snow)

What you need

  • Two 16 oz. containers of corn starch
  • One 10 oz. can of shaving cream
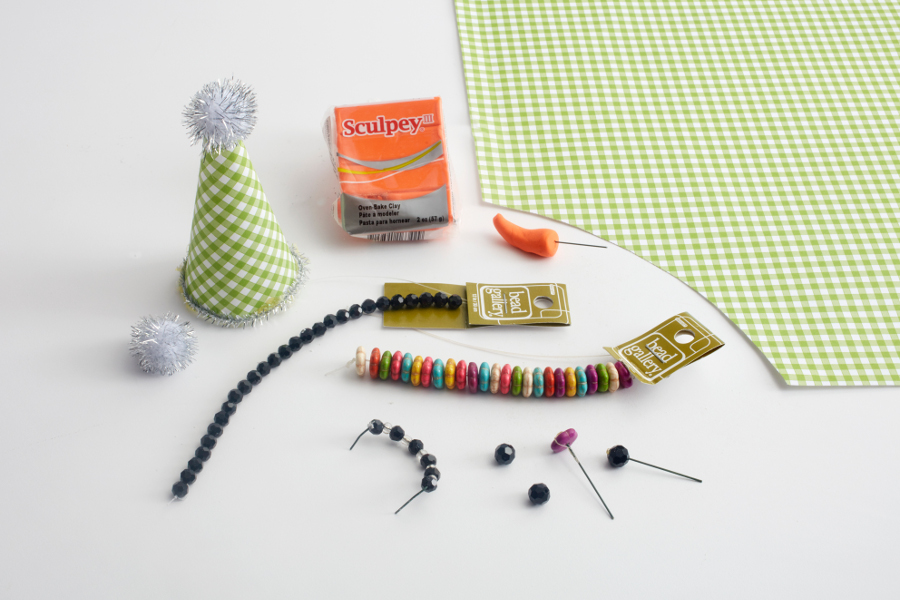
Snowman Decoration Supplies- Beads, Hat, Nose, etc.
  • Miscellaneous items to dress your snowman and add personality, such as:
    • Decorative beads
    • Sculpting clay
    • Twigs
    • Decorative paper, pom-poms, chenille stems (for birthday hat)
    • Wires
    • Glitter and faux snow

    What to do

    Pour the corn starch into a large bowl and slowly add the shaving cream, mixing it in as you go. Keep working the shaving cream into the corn starch until you can mold the mixture and it feels dry to the touch. You can store the faux snow mixture in a resealable bag, and it will keep for a few weeks.
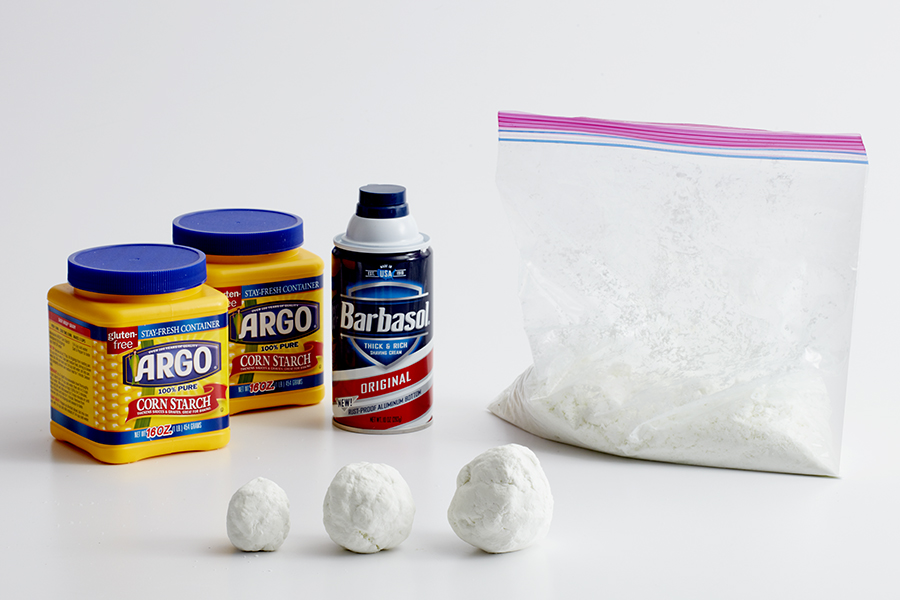
    How to Mix Snowman Supplies & Roll Into Balls

    Because this was for a birthday, I added a birthday hat that I made from a small piece of decorative paper, and added a silver pom-pom at the top and a silver chenille stem around the base.
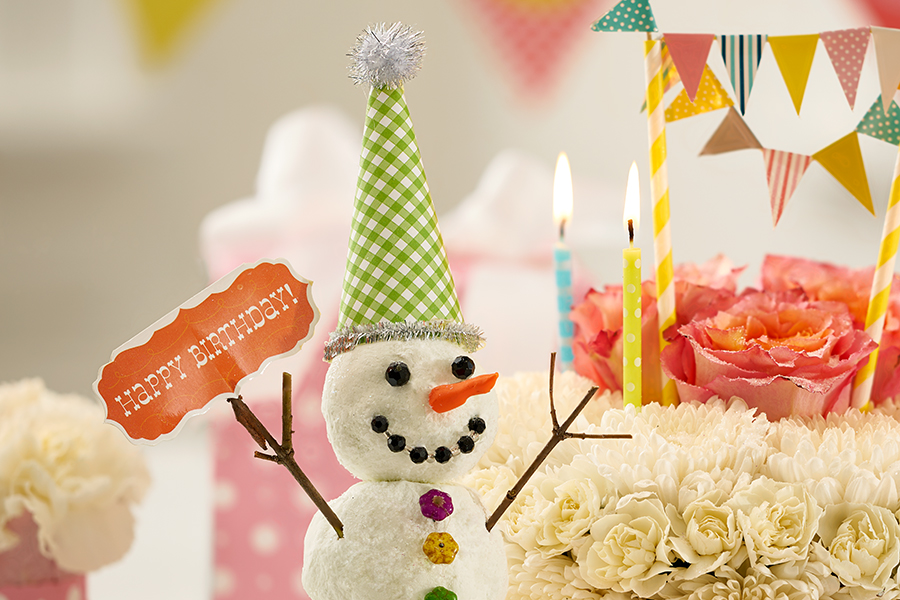
    Snowman with Hat and Happy Birthday Sign

    I also made a little “Happy Birthday” sign and attached it to one of his little twig arms!

    You can also add the sign to a pile of snow made with the cornstarch mixture. I used some faux snow around the snowman, as well as floral cakes and cupcakes, to complete the look.

    Create a floral snowlady
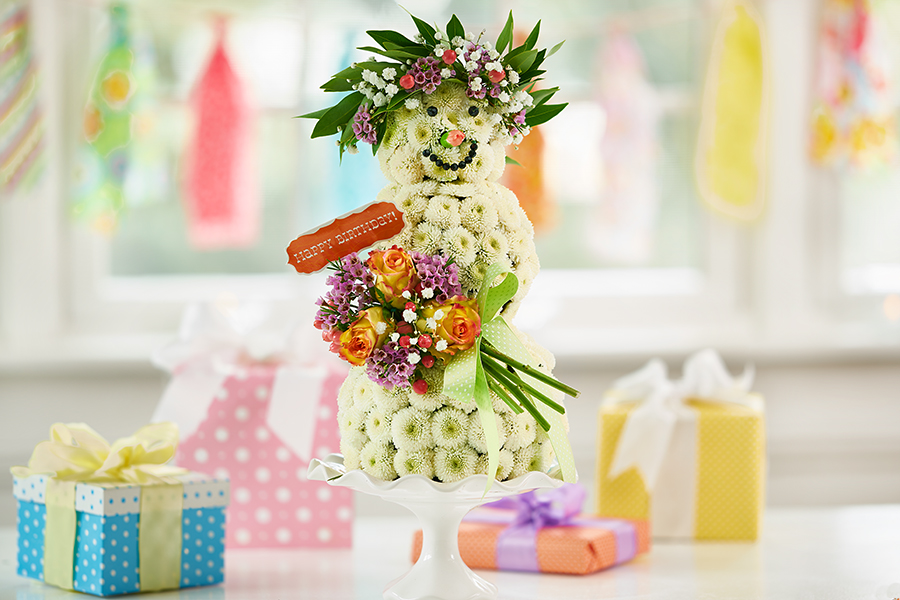
    DIY Flower Snowlady

    Another way to make an indoor snowperson is with flowers. If you know someone who has a birthday and deserves to smile, then this is one homemade gift they would be delighted to receive!

    What you need to make a snowlady
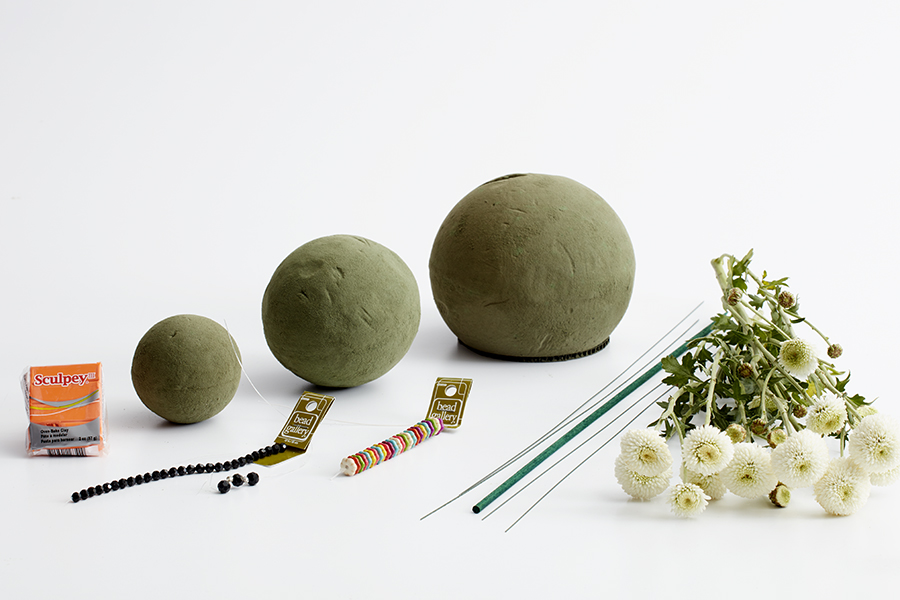
    DIY Floral Snowlady Supplies
    • 2 or 3 sizes of floral foam spheres
    • A stick
    • White button poms
    • Decorative elements to create the face (beads, sculpting clay, etc.)

    What to do

    1. Thoroughly soak the foam spheres. I used three sizes, but you can use just two.
    2. Place the largest sphere on a flat plate and insert the stick.
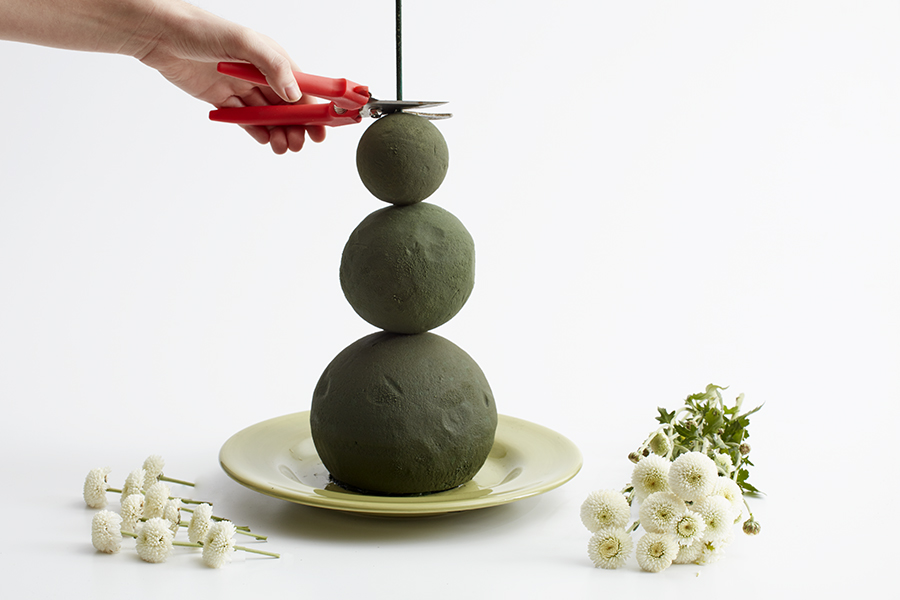
    Building Floral Snowman with Foam Spheres
    1. Place the next largest size on top of the larger one, and then the smallest. Cut the stick at the top if it is still sticking out.
    1. Cut all the individual button poms from the main stem, leaving about 1 inch of stem on the flower to insert into the foam.
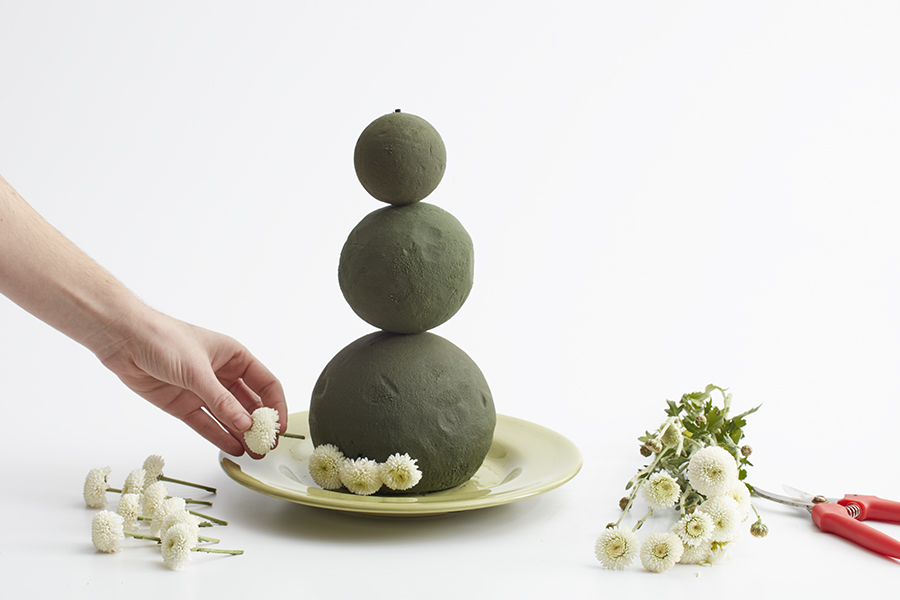
    Insert Flowers into Flower Foam
    1. Start at the bottom and insert the button poms until you have covered all the foam.

    This is a large snow lady — she stands a little over a foot tall — so it takes lots of button poms to make. (I used more than 15 stems.) You can create a smaller one using the same method, however.
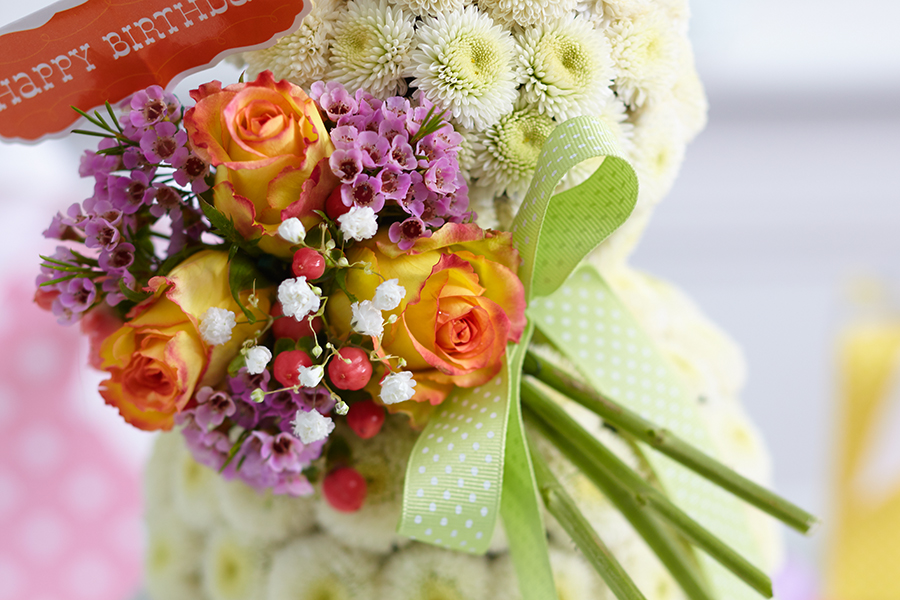
    Snowlady Bouquet

    For the birthday bouquet, I gathered a few stems in my hand and cut the bottoms short, and inserted them into the foam. I took the parts of the stems I had cut off and inserted them into the foam as well, and added a bow between the flowers and stems to make it look like she was holding a bouquet of fresh-cut flowers! Because I knew I was going to be giving her this bouquet, I didn’t put the button poms in the area where I planned to insert the bouquet.
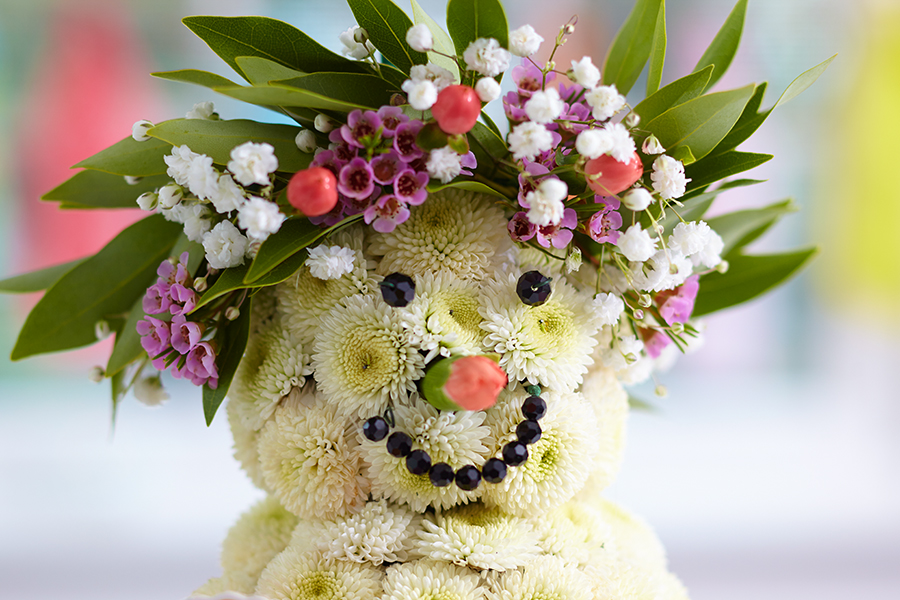
    Snowlady Flower Crown

    For the floral crown, I used small sprigs of flowers and greens, and wired them together.

    Creating any of these vignettes is a sure way to let someone know how special they on on their birthday — and every day!

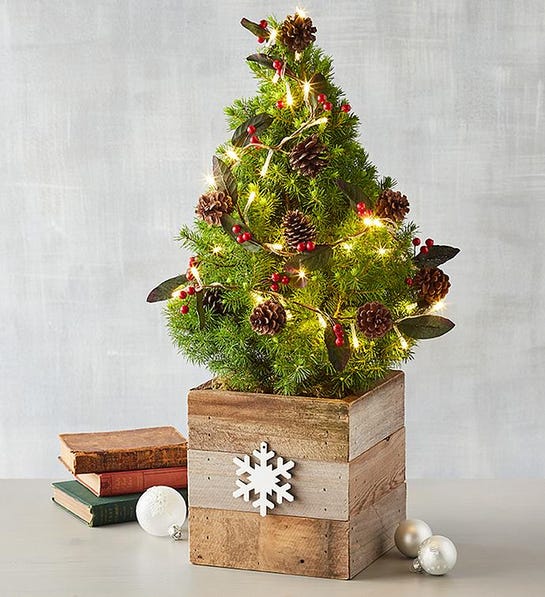
    DIY Tabletop Floral Christmas Tree & Decoration Ideas

    I love Christmas, and I love decorating Christmas trees! The main tree in my home tends to be pretty traditional, changing only slightly from year to year, with new ornaments added here and there. So, I’m here to talk about the beauty and versatility of fresh tabletop Christmas trees.

    These beautiful arrangements are usually handcrafted by your local florist and make great gifts. In fact, the Holiday Flower Tree has been a bestseller since it was first introduced nearly 20 years ago!

    Picture of Christmas tabletop tree for office

    Trending mini Christmas trees with lights

    If you’ve attempted to decorate a Christmas tree with lights, challenges ranging from broken bulbs to tangled cords are enough to have you scrap the lights for a tree with ornaments. Fear not, for some mini Christmas trees with lights come pre-assembled, such as this Holiday Spruce or Rustic Christmas Tree. Another festive option is the Hand Tied Mini Christmas Tree Bouquet that comes with lights in a rustic mason jar. There are also trees that come with ornaments, if you want the full tree package.

    Mini Christmas trees are versatile

    Whether you live in an apartment, are an empty nester, or are traveling during the holidays, tabletop Christmas trees are festive additions for those who want to have a tree without the production. You can add a mini Christmas tree to the bedroom, kitchen, foyer, office, or any space that cannot accommodate a larger tree. And the trees, like the Holiday Lavender Tree, are sustainable too, and can be replanted in your garden or kept indoors for natural decorative appeal during the cozy winter months.

    Other tree options that can work for the holidays and after are bonsaiolivemagnolia, and, money trees. Simply add a tree skirt or lightweight ornaments, and it’s getting to look a little more like Christmas.

    DIY tabletop Christmas tree

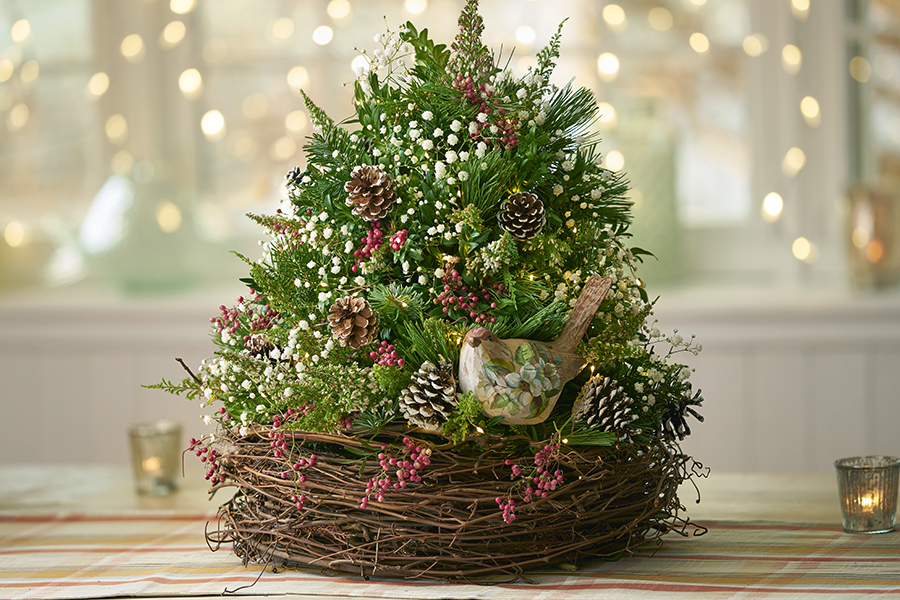
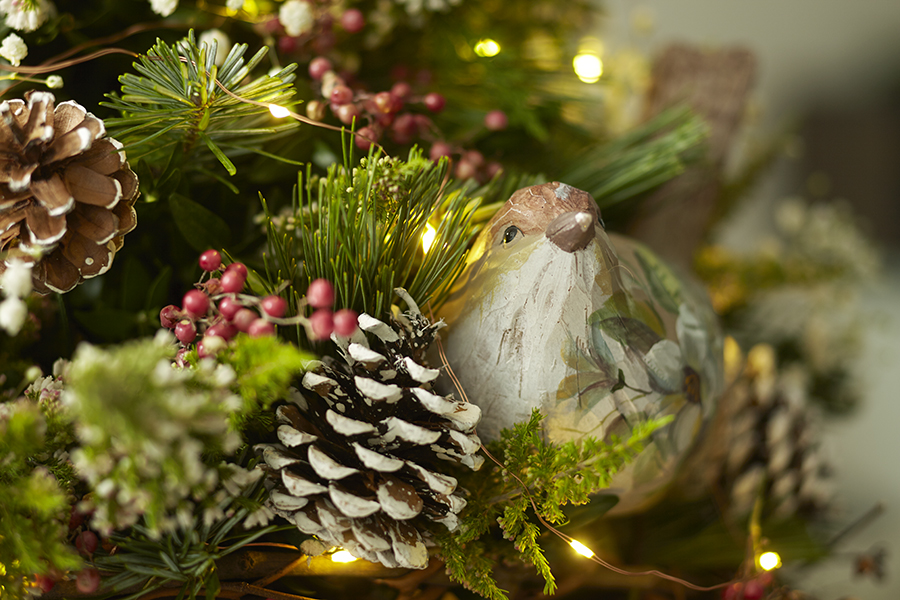
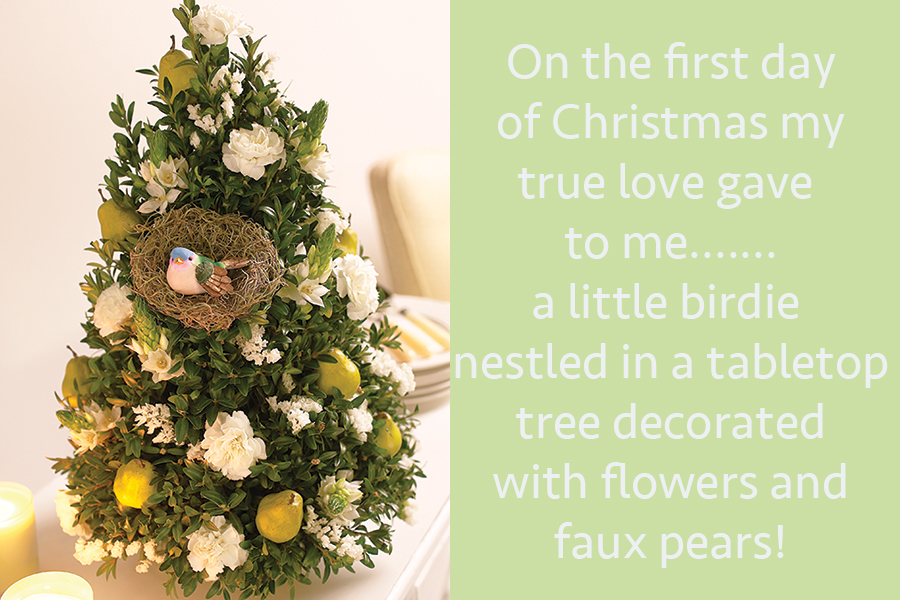
    Tree with Bird

    If you have a little time and want to get creative, these trees are pretty easy to make. The basic instructions are the same for whatever size tree you want. The smaller the tree, the faster and easier it will be to construct. Petite trees are so sweet and can be tucked into so many unexpected spots. Larger trees, on the other hand, allow you to create a completely custom look based on your choice of container, decorations, and color scheme.

    How to make a tabletop Christmas tree

    What you need:

    • Floral foam
    • Dish/plate
    • Tape
    • Clipper
    • English Boxwood
    • Assorted evergreens

    Step 1: Set up your floral foam

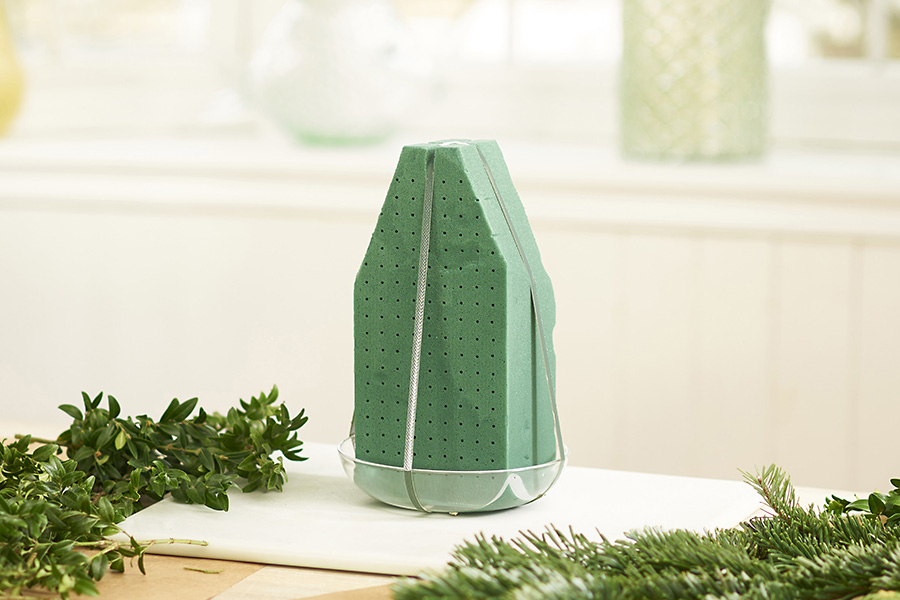
    Floral Foam for Tabletop Christmas Tree

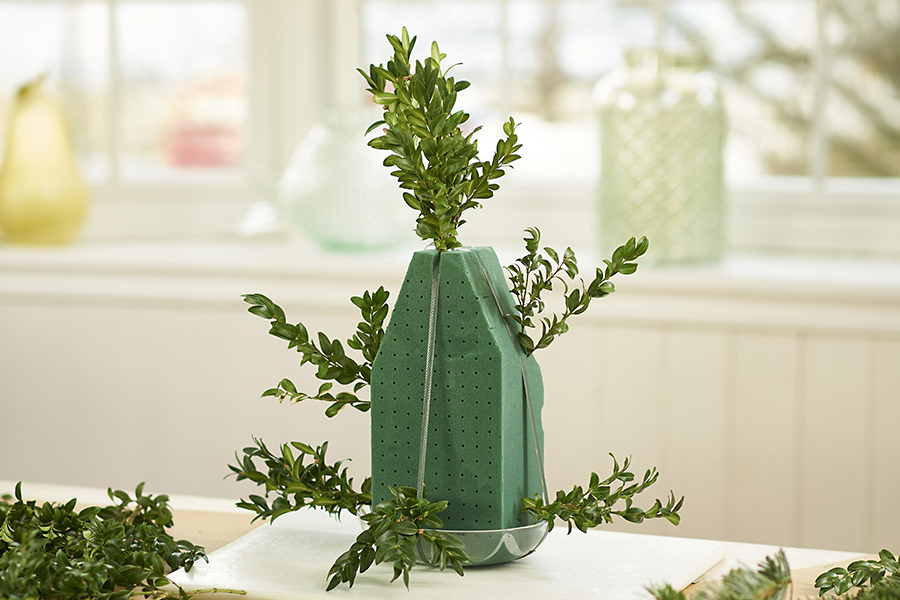
    Cut the corners from one end of the foam as shown; fill your sink with water; and place the foam into the water, allowing it to become totally soaked through. Tape the foam into a plate/dish. You can use any waterproof container as the base and put the foam directly into your chosen container before creating the tree. Or you can create the tree using a smaller base, like the one in the image, and then place the finished tree into a decorative container.

    Step 2: Prepare your greens

    Boxwood is the main green that I used for the tree, and I accented it after the main shape was created, filling in with other assorted evergreens such as cedar, pine, and balsam.

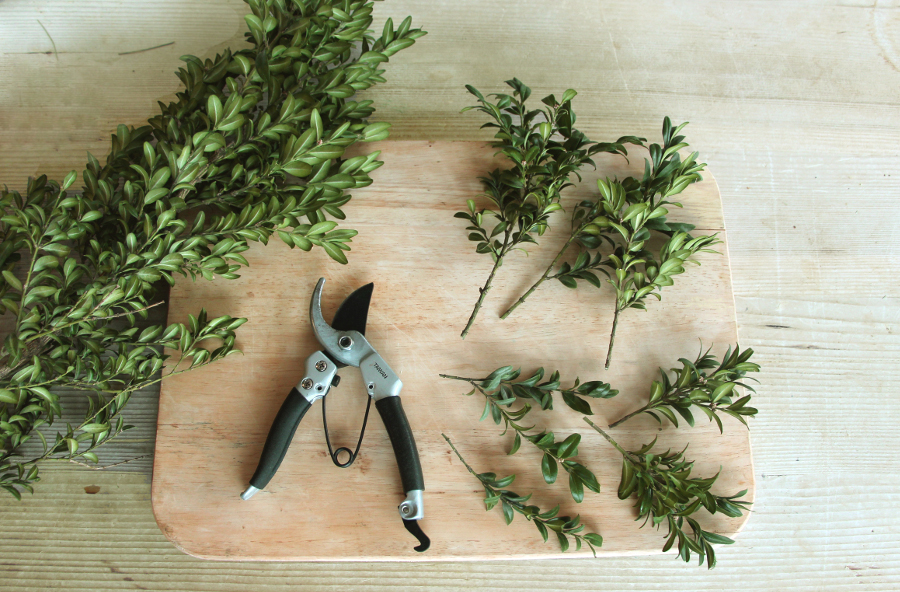
    pre-cutting-greens

    Before starting, cut the greens off of the main branch into smaller pieces of varying lengths ready to insert into the foam.

    Step 3: Arrange your greens

    Add Greens to Tree

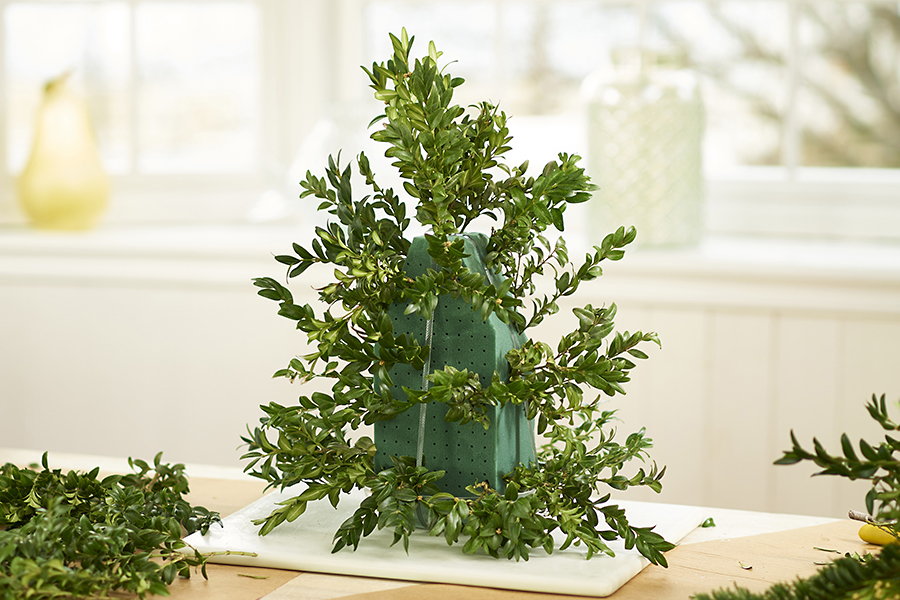
    Start by inserting a taller pre-cut piece of boxwood at the top to create your basic height. Do the same at the bottom and the sides. This gives you the base shape of your tree.

    Keep Adding Greens to Tree

    Step 4: Fill in your tree

    Fill in tree with greens

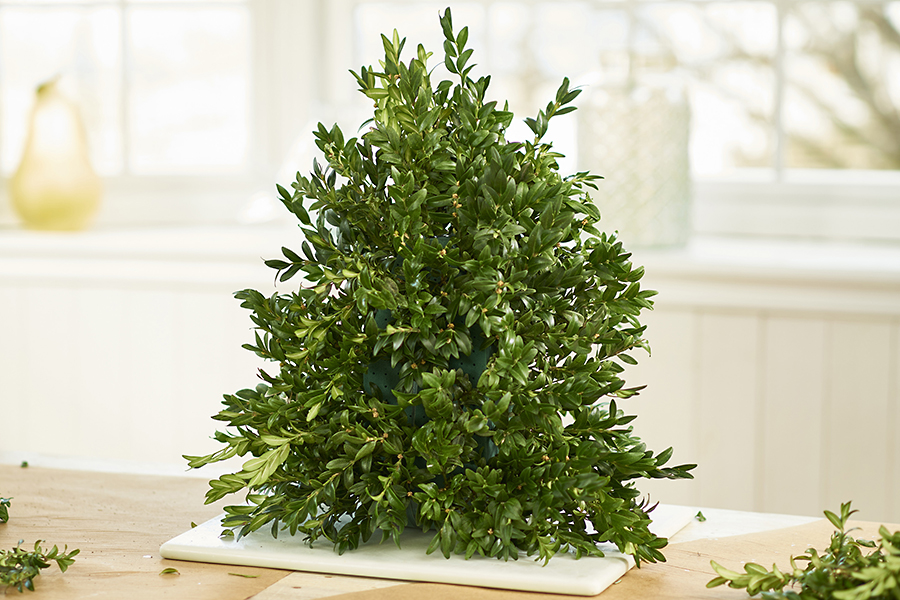
    Continue adding pieces of boxwood, turning the tree as you go, until you have filled in the whole tree.

    Step 5: Accent with various evergreens

    Accent Evergreens

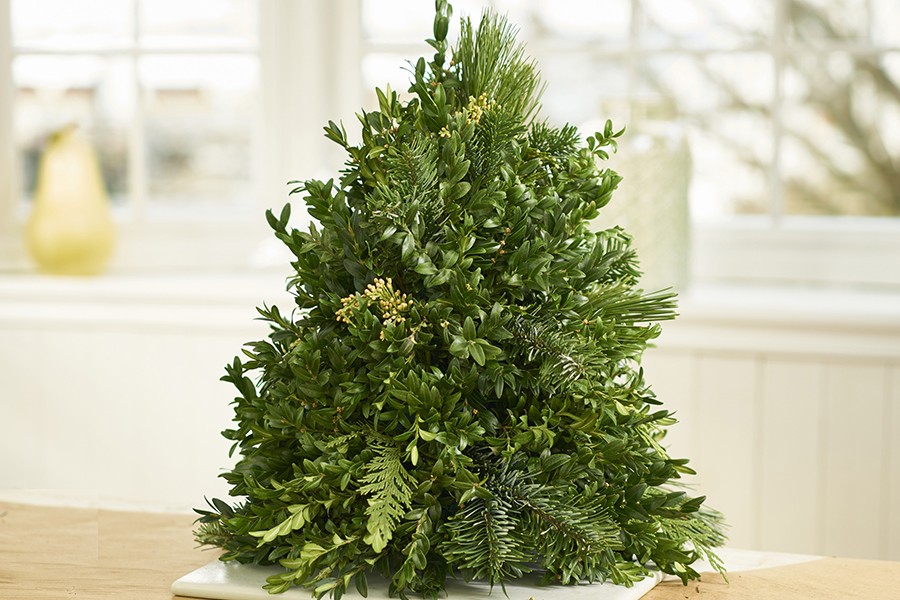
    I like to add a few sprigs of other evergreens for two reasons. The first is that evergreens such as balsam and pine add wonderful fragrance. I find it adds visual interest as well.

    DIY Tabletop Christmas Tree

    Tabletop Christmas tree decoration ideas

    At this point, your tree is ready to decorate! Because this tree is actually a “flower arrangement,” you can easily use fresh-cut flowers as a primary decorating feature. Just give your chosen flowers a fresh cut and insert them directly into the foam; they will stay fresh for up to two weeks at least. I like to use fresh flowers that will dry nicely too, such as baby’s breath (which looks like snowflakes), pepper berries, and heather.

    Here, I nestled my Christmas tree arrangement into a large bird’s nest basket and added white heather, baby’s breath, and pepper berries.

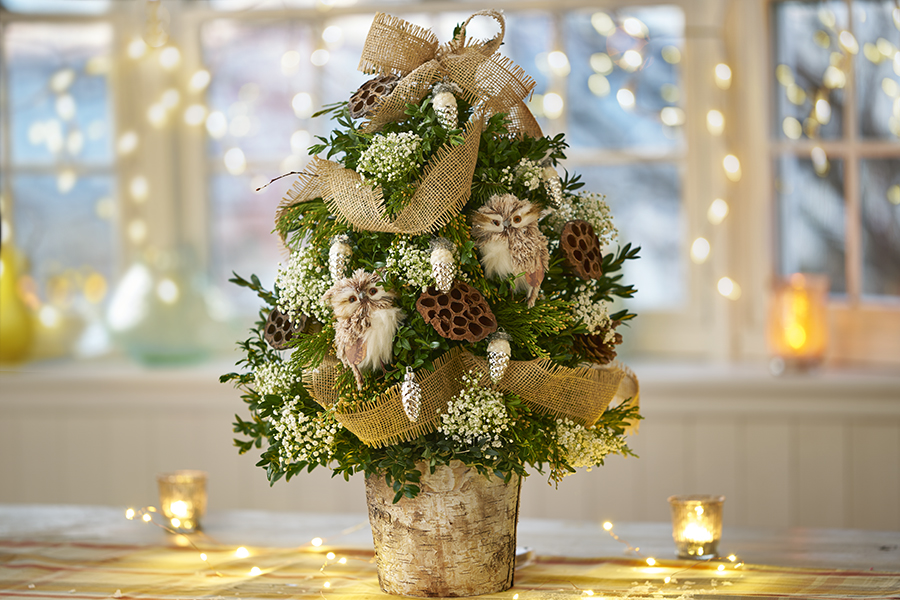
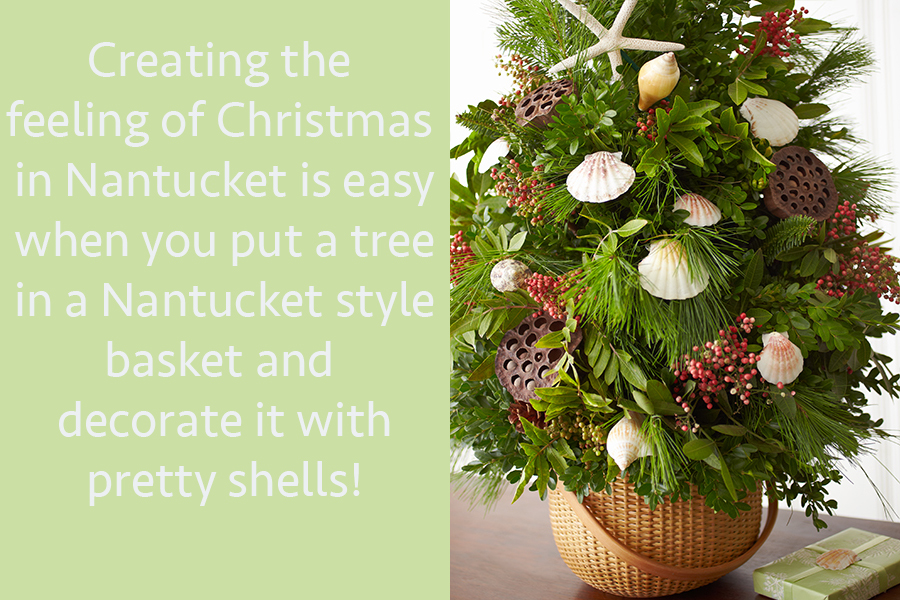
    In keeping with the woodsy feeling, this is the same basic tree arrangement placed in a natural birch container. The decorations include dried pods, baby’s breath clusters, vintage silver pine cone ornaments, and burlap ribbon garland.

    Closeup of owls in tree

    The theme really comes to life with the addition of these faux snowy owls. Owls are on-trend, and this is an easy way to include them in your holiday decorating.

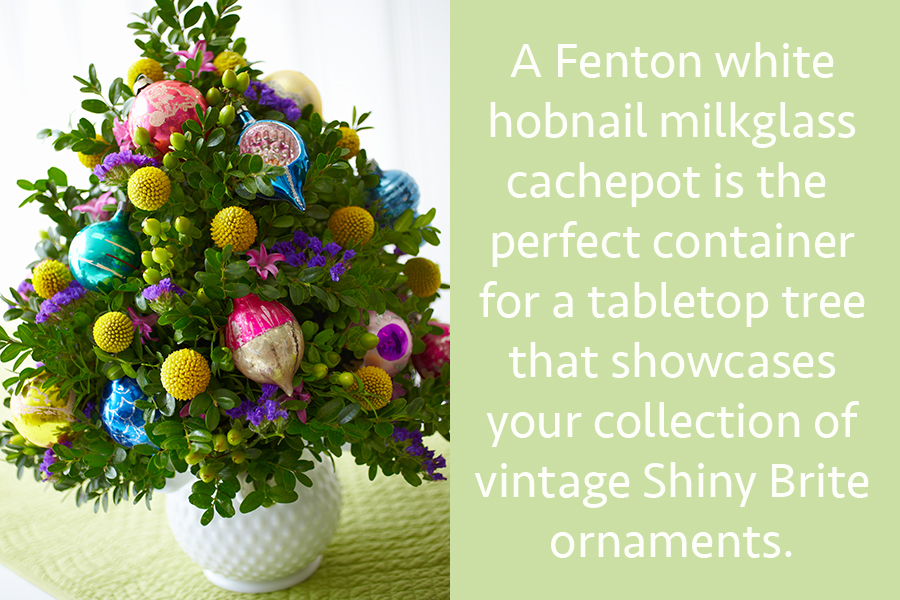
    I have created and decorated so many different trees over the years, and I find that I never run out of new ideas. Here are a few more examples to inspire you to create one of your own and start a new tradition. It’s also a great way to give a truly personalized gift!

    Thanksgiving Floral Arrangements That Have the Florist’s Touch

    Not all of us have the time or materials on hand to make elaborate centerpieces or place settings around the holidays. Never fear: I’m sharing with you some of my favorite ideas for decorating and entertaining this Thanksgiving. Whether you are hosting the big event or just having a few friends over during the long holiday weekend, these ideas are really easy and add that extra touch that your get-togethers always have!

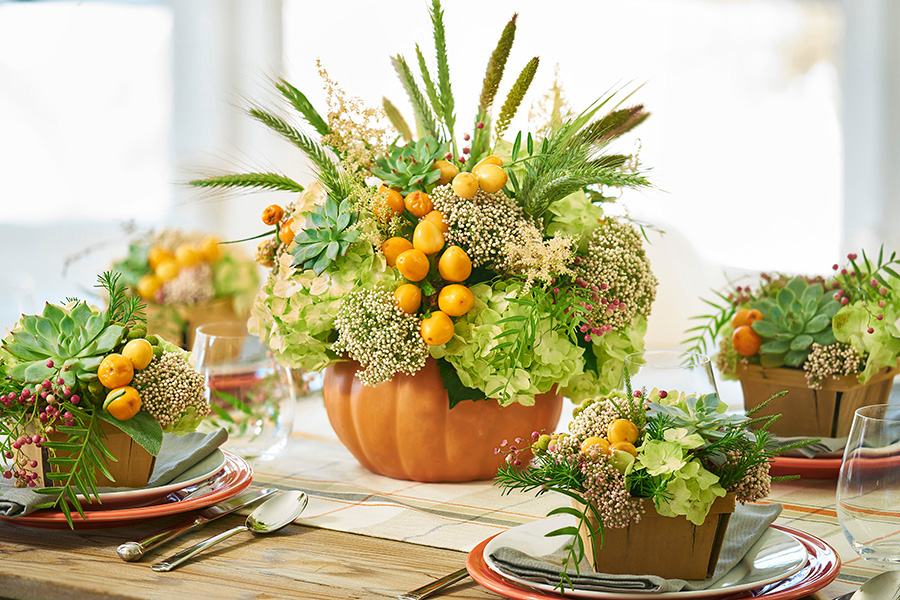
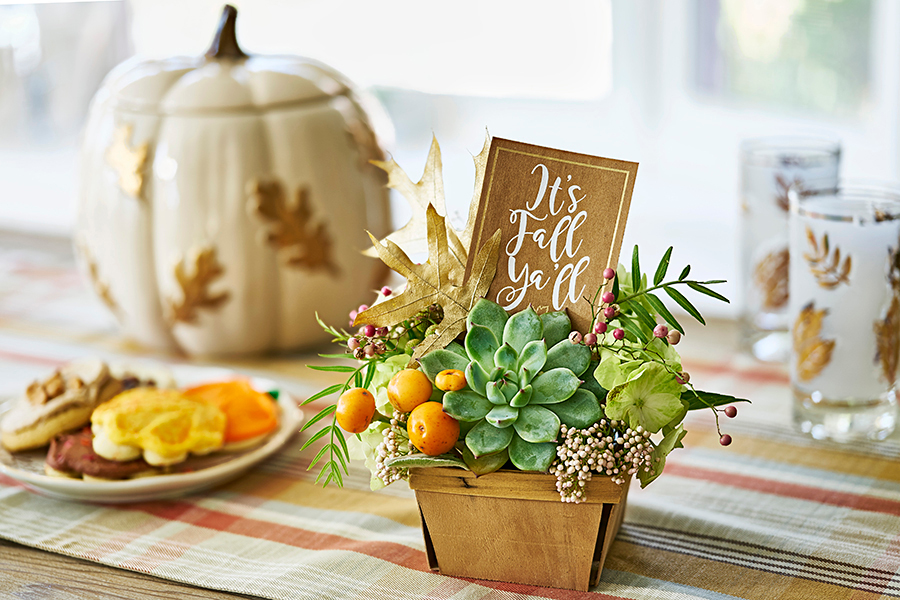
    I have a few season-specific decorative pieces that I reuse every year, such as this gorgeous ceramic pumpkin. I filled mine with a farm-fresh palette of flowers, grasses, peppers, and succulents.

    thanksgiving decorating ideas with Thanksgiving centerpiece

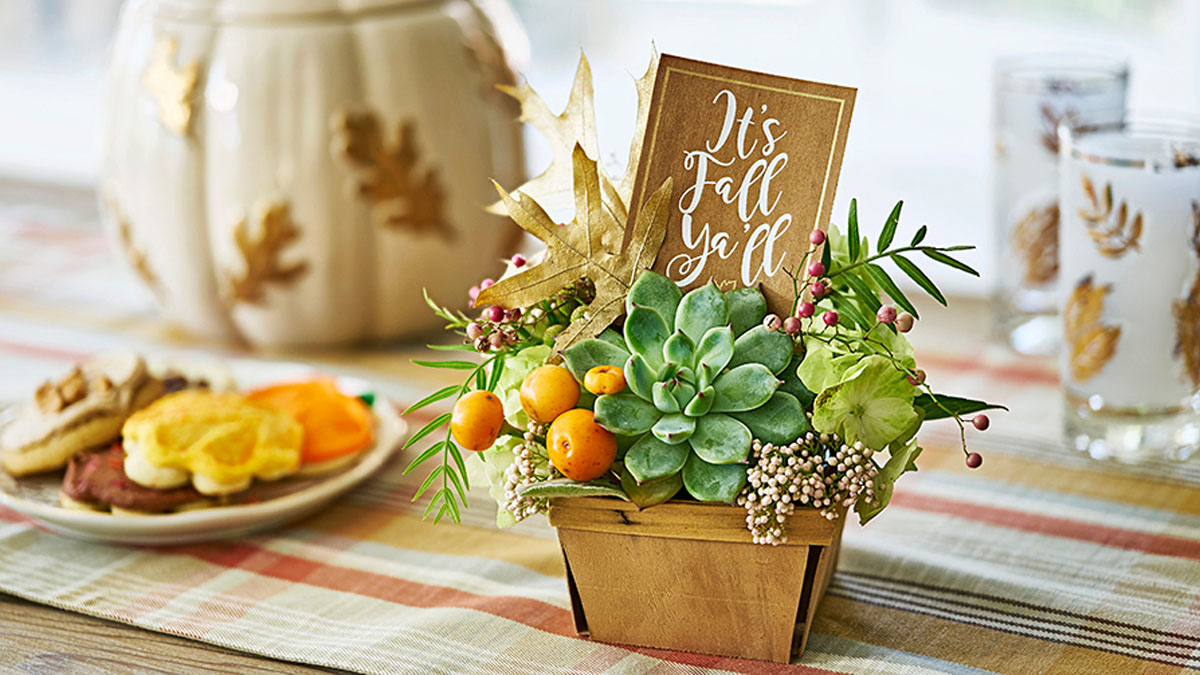
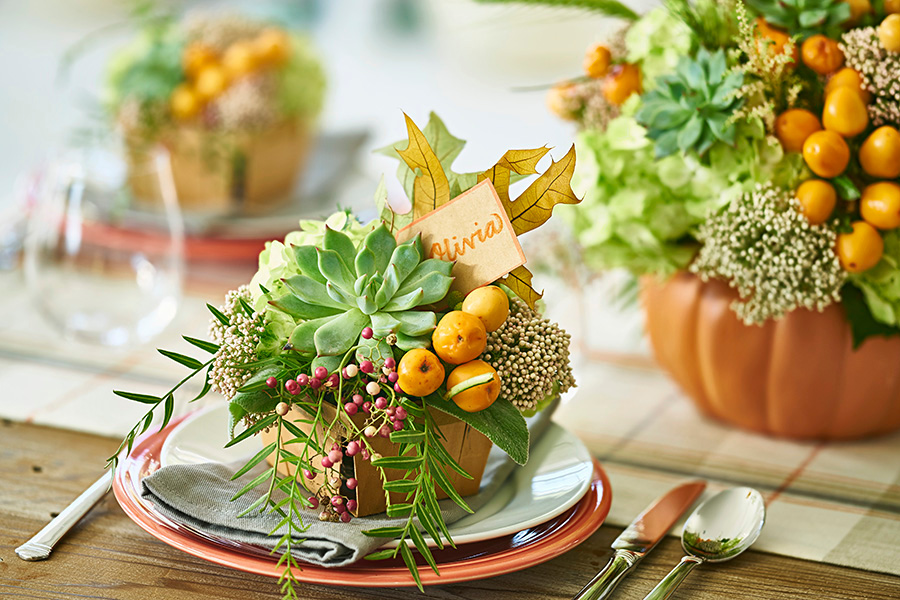
    Staying with the farm-fresh theme, a great way to create a stunning tablescape is to set vintage berry baskets filled with similar floral on each plate. These arrangements look almost good enough to eat! Add a bit of personalization simply by slipping a place card in among the florals and greenery.

    thanksgiving decorating ideas with Thanksgiving flower arrangement

    I find these little berry baskets to be the perfect size to use as multiples as I did on the dining table or to add just the right festive touch on the dessert or buffet table.

    thanksgiving decorating ideas with fall succulents for Thanksgiving

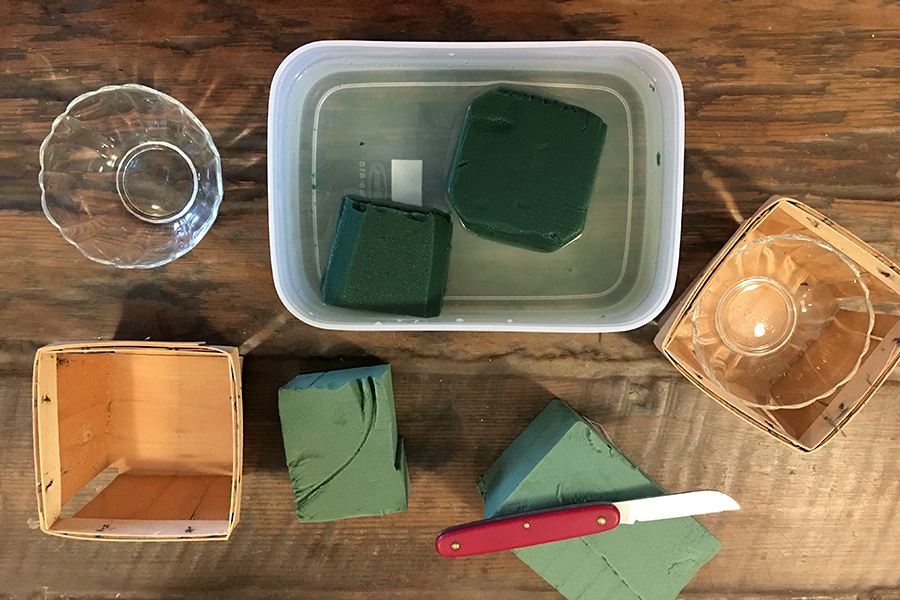
    Just line the basket with a small dish, bowl, or can. Cut a piece of floral foam to size and thoroughly soak the foam before placing it in the dish. The foam will make it easy to create your piece, as it holds each insertion in place and provides hydration to keep your flowers fresh.

    thanksgiving decorating ideas with foam floral supplies

    Guests will be so enamored of these handmade Thanksgiving decorating ideas that you can give them as gifts once the meal is over. It will add to their list of what to be thankful for.

    Picture of a 1-800Flowers Thanksgiving ad

    Not Just Any DIY Hippie Costume: Peace Out As a 60s Flower Child

    The series “Get Crafty” features handy how-to guides that will help you tap into your passion for crafting and show you how to make all kinds of fun and inventive creations. In this article, crafting expert Julie Mulligan shows you how to create the ultimate hippie costume – a ’60s flower child!

    My 12-year-old granddaughter Juliette and I recently went at shopping a few of my favorite local vintage stores here in Rockaway, New York. It was trip down memory lane – I was a teen in the 1960s and 1970s, and it seems like days of peace and love are back in fashion. The flowing tops, bell-bottom pants, and tie-dyed shirts weren’t limited to just the vintage stores!

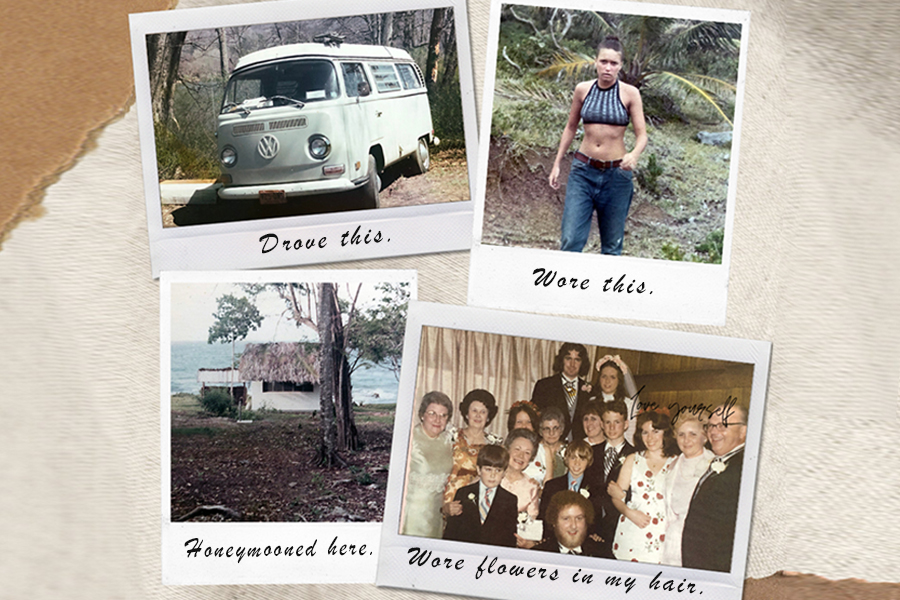
    And I know about the originals, having been a teen in the 60s and 70s. Yes, I was a hippie/flower child. Here’s proof:

    Photo showing crafting expert Julie Mulligan's personal experiences with the flower child lifestyle in the late 1960s and early 1970s

    I wore flowers in my hair when I married my best friend in 1972!  This was just a few years before my brother Jim started a little flower business in an 800-square-foot flower shop in New York City that grew into 1-800-Flowers.com. My little brother, Chris, eventually grew the family business and became CEO and president of a family of brands that now includes Shari’s Berries, Harry & David, Cheryl’s Cookies, and many more. Can you pick Jim and Chris out in the photo above?

    The best Halloween hippie costume? A flower child!

    The trip down memory lane inspired Juliette to dress up as a flower child for Halloween. It was the perfect choice. One reason? She could just wear half of the clothes that she has in her closet! But we found a lot more inspiration during our shopping trip.

    Juliette found this great Baja hoodie that she loves and can wear with a tie-dye t-shirt and a pair of a pair of jeans. Any kind will do – bell bottom, ripped, cut-off, shredded, except skinny!  This was the period before Gloria Vanderbilt introduced us to designer jeans and when we called them dungarees!

    Photo of the ultimate hippie costume, a flower child from the 1960s

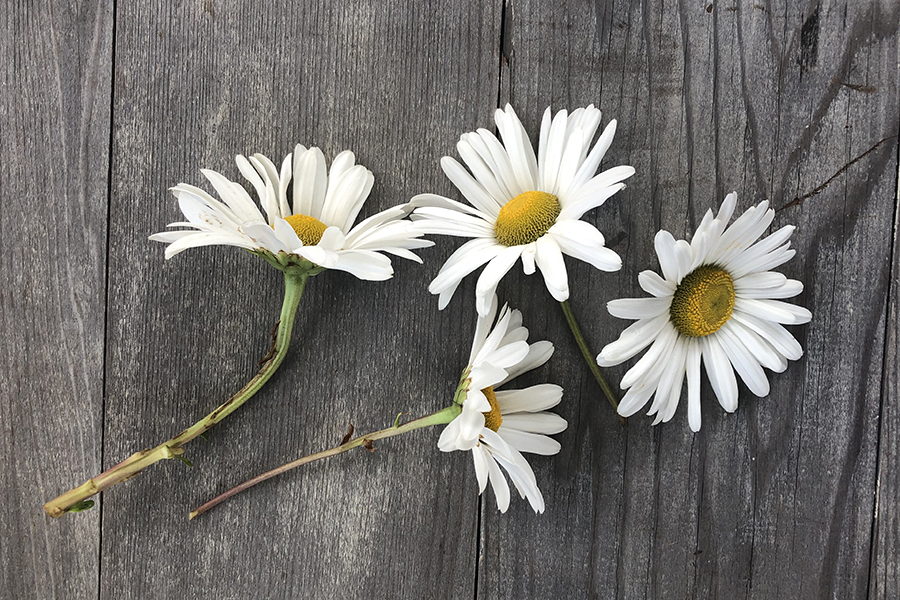
    A pooka shell necklace would be nice but what sets this look apart is a crown of flowers in your hair!  And to me the daisy is the flower of that generation and that time.  This fresh flower daisy crown is so easy and inexpensive to make that it is a Halloween win-win for the tween and her mom! 

    Here’s how we did it, step by step.

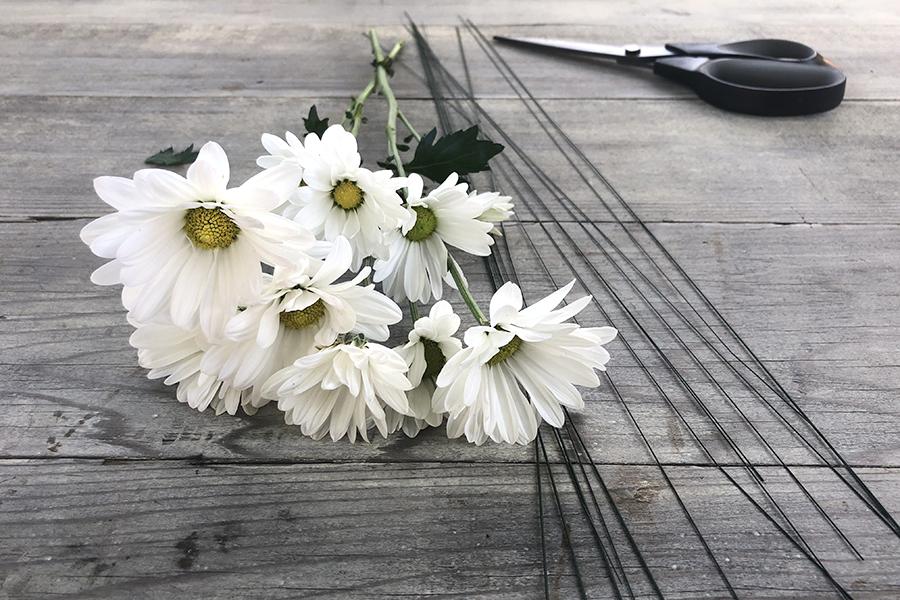
    Photo of daisies, a critical component of a flower child costume

    Step 1

    This is all you need, seriously!  Two stems of daisy pom-poms and wire.

    Step 2

    You might even be lucky enough to have some Montauk daisies growing in your garden (or a friends) that you can clip a few flowers from.

    Step 3

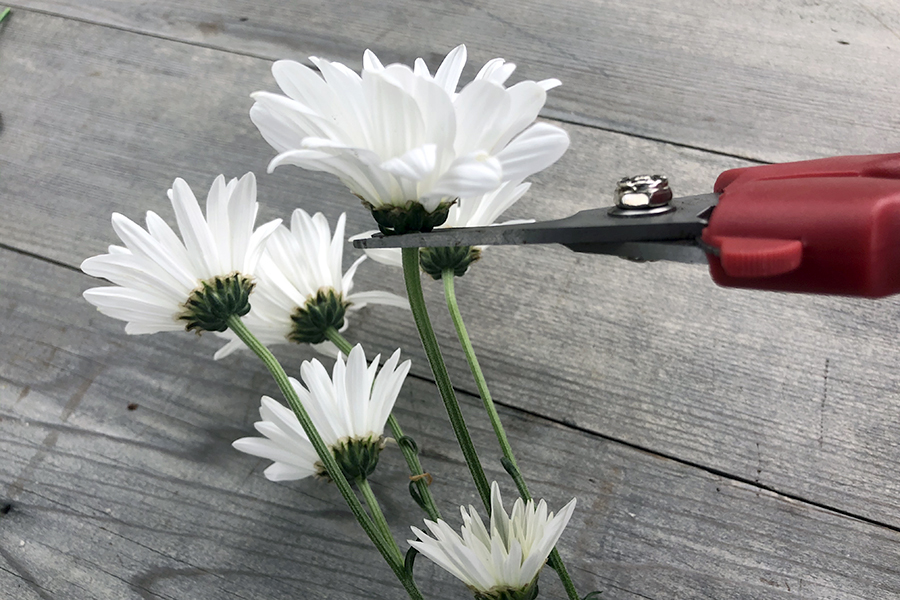
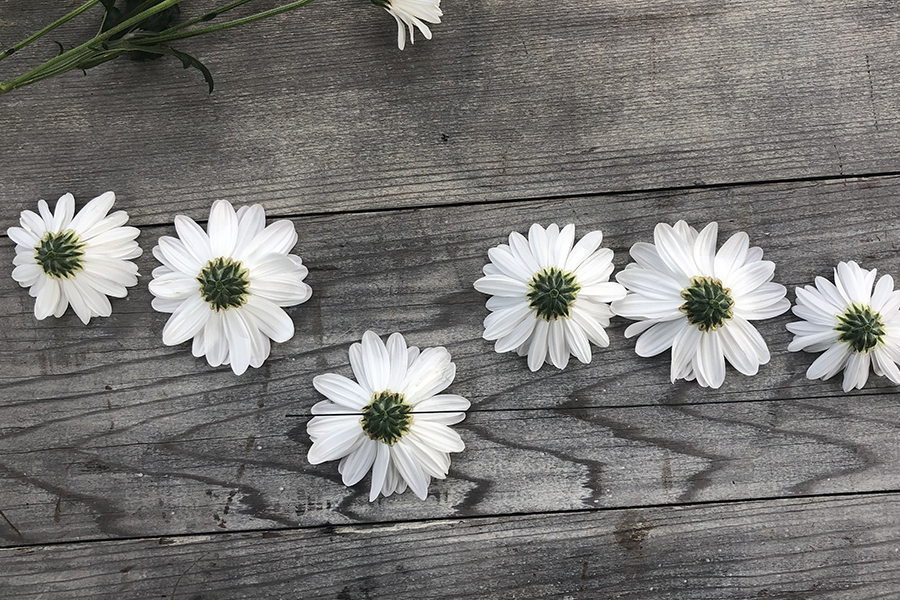
    Using a clippers or scissors, clip the individual flowers from the stem, right at the base of the receptacle.

    Step 4

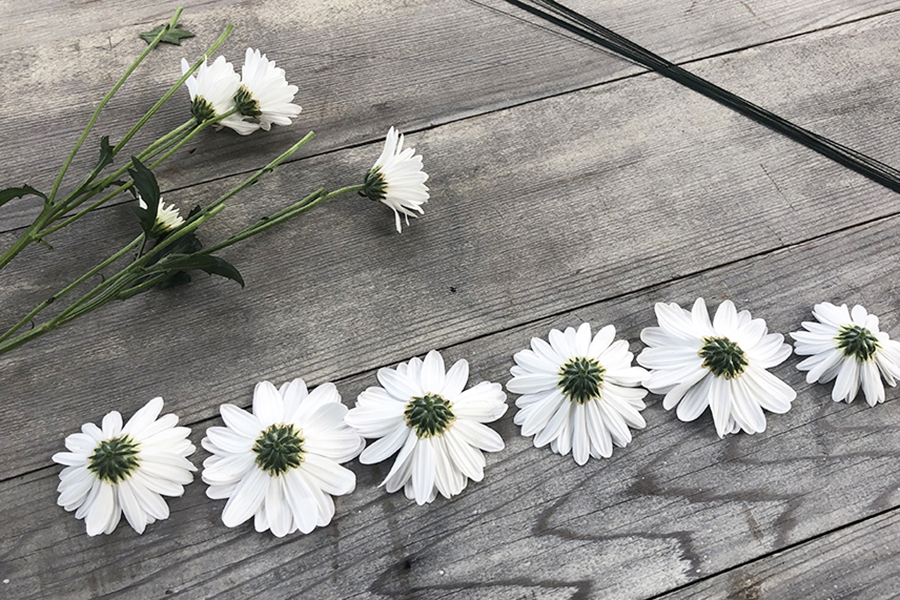
    Lay the flowers out on the table with the larger size daisies in the middle. About six flowers should be enough.  I didn’t put the flowers all the way around – just in the front.

    Step 5

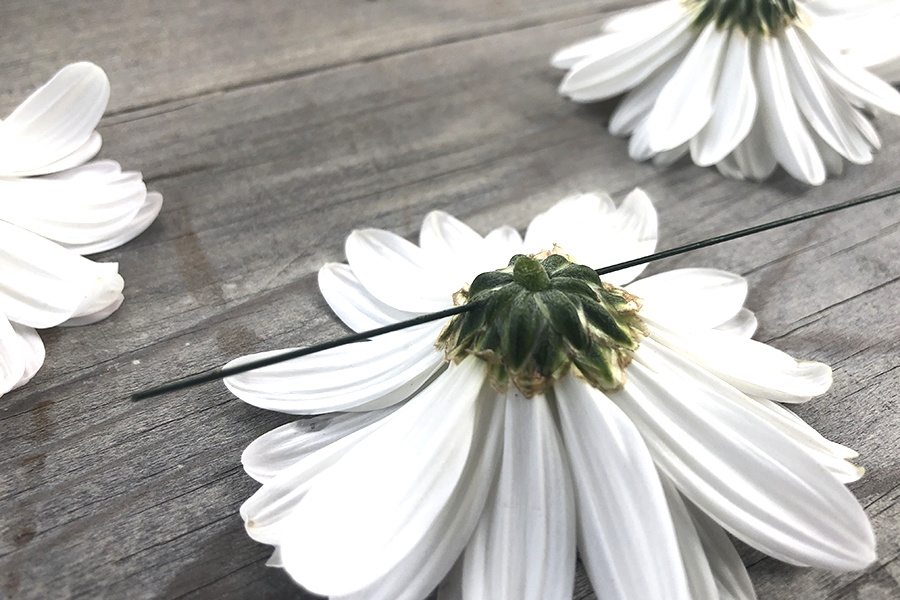
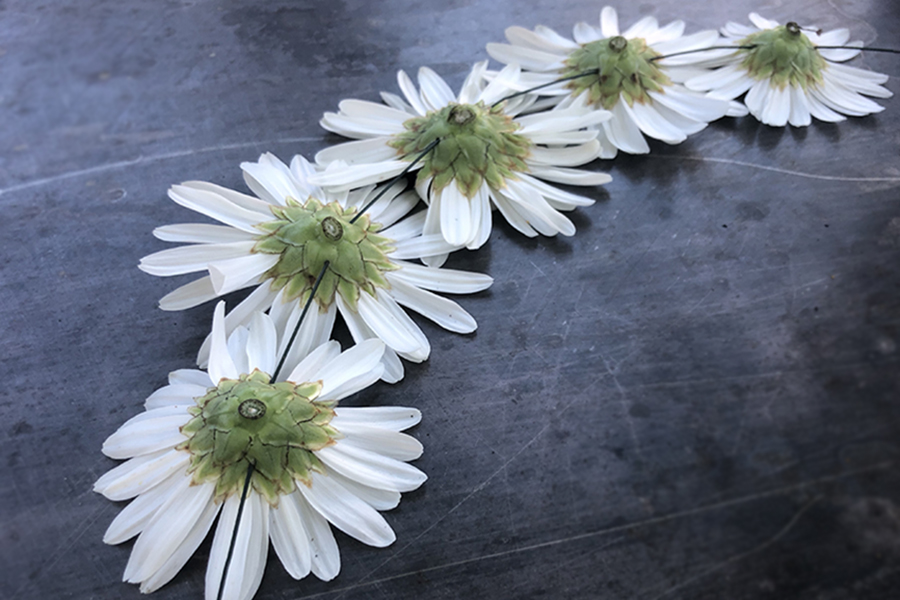
    Starting with one of the larger daisies from the middle, simply thread the wire through the receptacle.

    Step 6

    Slide the first daisy to the middle of the piece of wire. I used an 18” length wire.

    Step 7

    Here’s how your full “daisy chain” should look!

    Step 8

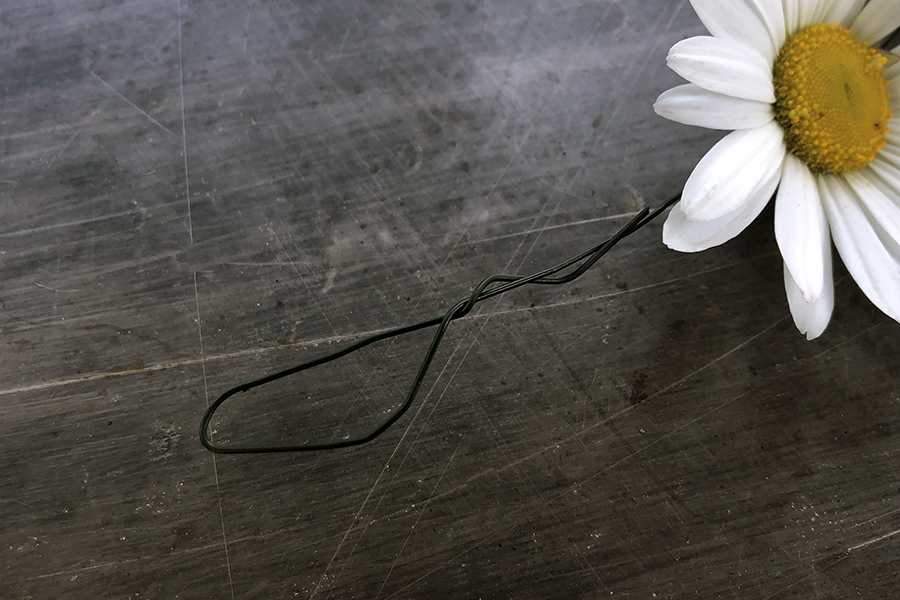
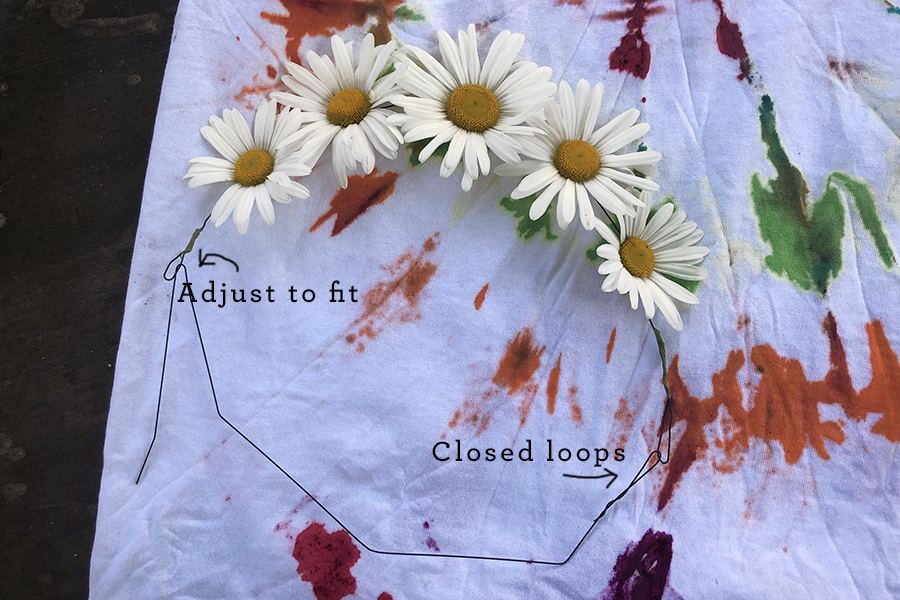
    Make a loop on one end of the wire.

    Step 9

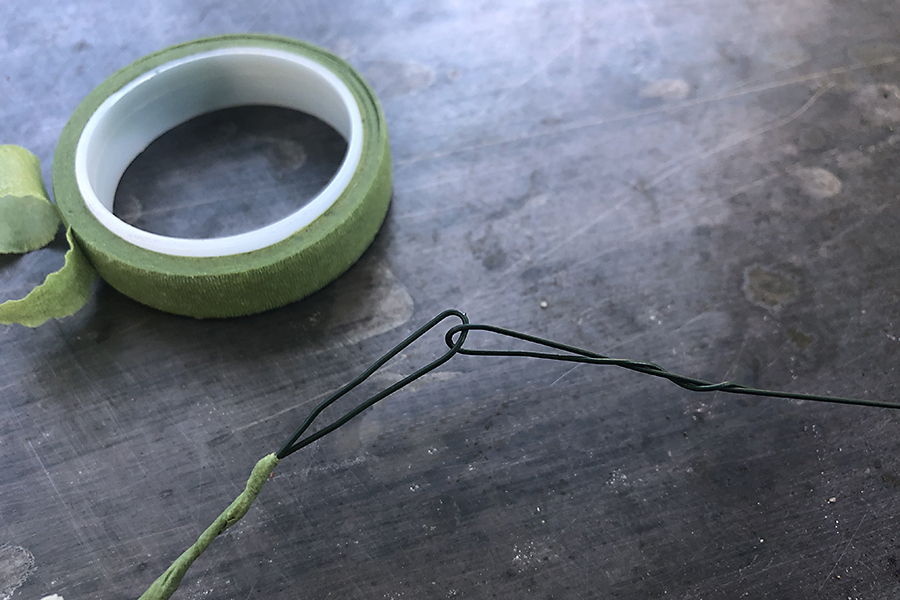
    Take a second piece of wire and thread it through the loop to attach.  If you have any floral tape around you can wrap the stem where you make the loop to hold it more securely, but it isn’t necessary.  You could also use masking tape.

    Step 10

    Take the other end of the second wire and loop it through the loop on the other side of the wire with the flowers.  Don’t close this loop until you place it on the head of your Flower Child.  This allows you to make sure that it fits exactly the way they want it to.  The most important component in creating a successful hippie costume is comfort and wear-ability! 

    This flower crown is so light and easy to wear and makes the wearer feel like a beautiful free spirit filled with peace and love!

    Today’s flower child

    Like everything else today, being a Flower Child is definitely more intentional, designer level, social-media worthy, and expensive.

    Think flower crowns for Coachella! If you are serious about knocking it out of the park this Halloween or just want to live your best Flower Child life, you can find all of the instructions here. Which every path you choose remember to just have fun with it!

    Peace out!

    How to Make a DIY Fall Wreath With Fresh Flowers

    While this beautiful lush centerpiece may look like you would need an advanced floral degree to create it, it’s really quite easy to make. You just need the right tools and someone to guide you along. That is where I come in.

    How to make a DIY fall wreath

    Most people think of a wreath as something you would hang on a wall or door — and only during Christmas. But these festive decorations are perfect as centerpieces, too, and can be displayed any time of year. Having the center of the wreath open provides endless design opportunities for personalizing it with lanterns, candles, or any number of other accessories.

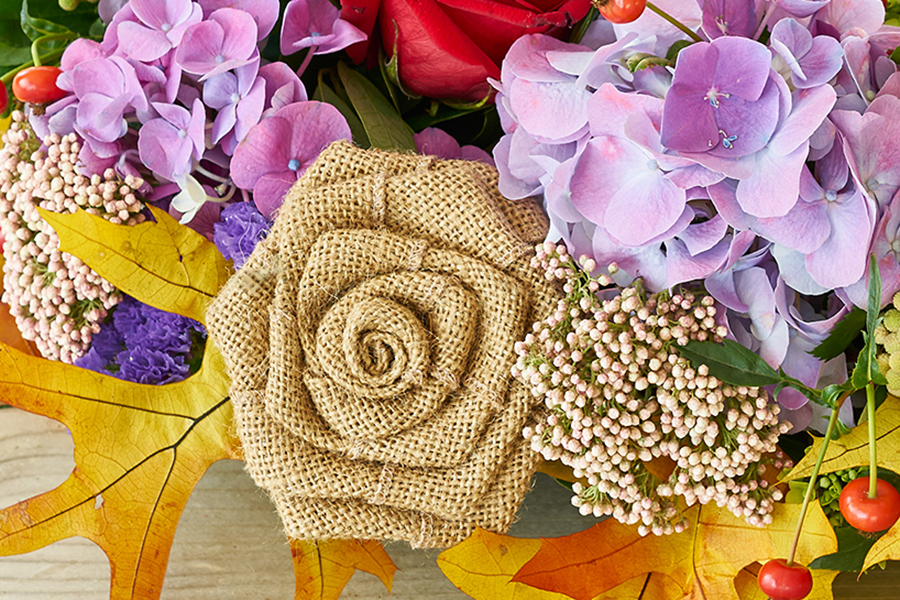
    For this DIY fall wreath, I used a beautiful amber Fenton glass vase as a candleholder. I really like how the amber glow complements the rich hues of the seasonal flowers in the wreath. You’ll want to select flowers that have lots of different textures and air dry nicely, such as hydrangea, rice flower, colored roses, fall leaves, and berries. Adding non-perishable seasonal accents like dried pods and burlap roses not only fill up the wreath but help extend the life of the it for weeks.

    As the flowers begin to dry, the accents keep their color and shape. Then, when it is time to discard your fall wreath, you can remove these elements and reuse them in your holiday décor. Did someone say upcycling?

    Watch this video to see how easy it is to make this fall wreath, and then I’ll walk you through some of the details.

    DIY: Fresh Flowers Fall Wreath

    Five simple steps to assembling this arrangement:

    1. Start with a floral foam base that has been thoroughly soaked. Cut the stems of all the flowers and accents short, about 3 to 4 inches.
    2. Starting with a base of foliage, insert short pieces around the outside of the foam and add additional sprigs on the inside rim as well as the top. Your foam does not have to be completely covered at this point. You can always go back and fill in any empty spaces after you have added the flowers and other accents.
    3. Insert the largest flowers first; this establishes the size and basic shape. When inserting the floral stems, make sure the bottom end of the stem is in the foam and has not gone all the way through.
    4. Next, add the dried pods and burlap roses.
    5. Continue adding the remaining floral pieces, and finish up with berries and autumn leaves.

    Adding a candle to the center of the wreath is a perfect touch for a centerpiece, but it is not necessary. It’s all up to you and the look you want.

    How to make ribbon roses

    Don’t you love these burlap roses? They are very easy to make and can be fashioned out of lots of different types of ribbons and fabric. I use burlap ribbon. The process is the same for any type of ribbon. And be patient. Remember: Practice makes perfect.

    diy fall wreath with rose made out of burlap

    To make a 3-inch burlap ribbon rose, you will need:

    • 36-inch piece of wired burlap ribbon (You can make these ribbon roses without using wired ribbon, but I find it easier to use wired ribbon.)
    • Glue
    • Wood sticks (I used green floral sticks, but you can also use a wood skewer.)
    • Floral tape

    Start by folding one end of the ribbon over the stick and glue in place. Start rolling the ribbon around the stick tightly to create the center of the rose. Then, continue to roll the ribbon around the stick to create each “petal.” Twisting the ribbon as you go helps to mimic the way each rose petal opens up from the center.

    No two ribbon roses will be exactly alike, so don’t feel pressure to make each of your roses perfect. Give it a try and remember to just have fun with it.


    An ad for 1800flowers' flower subscription service

    How to Make a Sunflower Topiary

    How to Make a Sunflower Topiary

    Sunflowers are one of the most popular flowers out there, and for good reason. Their shape and bright yellow, orange, and red petals are symbolic of the sun. These instantly recognizable flowers symbolize radiant happiness and all things positive.

    Many different varieties of sunflowers exist, as do ways to use these flowers to decorate your home. The topiary design is an easy way to display these cheerful blooms. You can use this one design technique to create many different looks and styles, depending on the size and shape of the sunflowers you use, whether you incorporate foliage and other floral varieties, and any accessories you add, such as ribbon, raffia, etc.

    The container you use contributes to the final look, too. A terra cotta planter gives a nice rustic garden look, while a white ceramic wine cooler, such as the ones pictured above, feel brighter and lighter.

    Making a sunflower topiary is easier than it looks. Here’s what you’ll need:

    Materials

    • Container (if the container isn’t waterproof, you’ll need to use a liner, such as a plastic bag)
    • Floral foam
    • Sunflowers (at least six stems)
    • Waterproof tape
    • Raffia or ribbon
    • Moss

    Instructions for making a sunflower topiary

    sunflower topiary with fitting foam in container

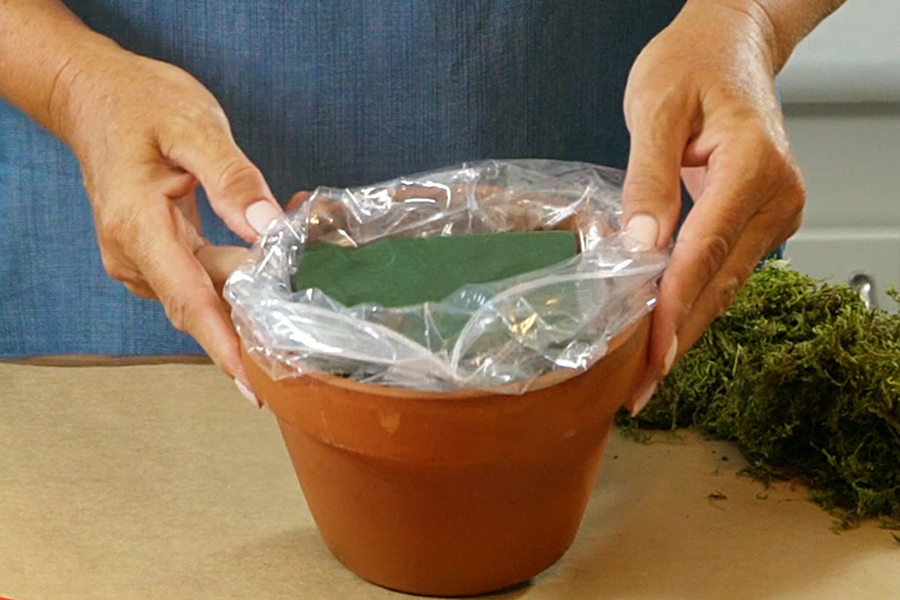
    Cut a piece of floral foam to fit the size of your container and soak thoroughly before placing it in the pot. If the container you’re using isn’t waterproof (this terra cotta pot has a drainage hole on the bottom), you’ll need to line it first. A plastic bag will do the trick.

    sunflower topiary with choosing sunflowers

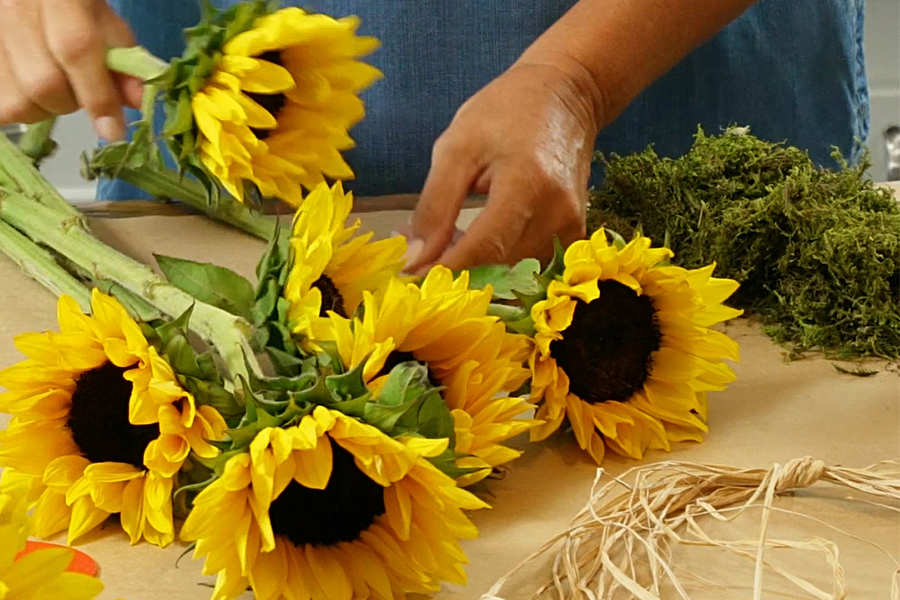
    Choose six long-stem sunflowers with similar size heads.

    sunflower topiary with gathering sunflowers

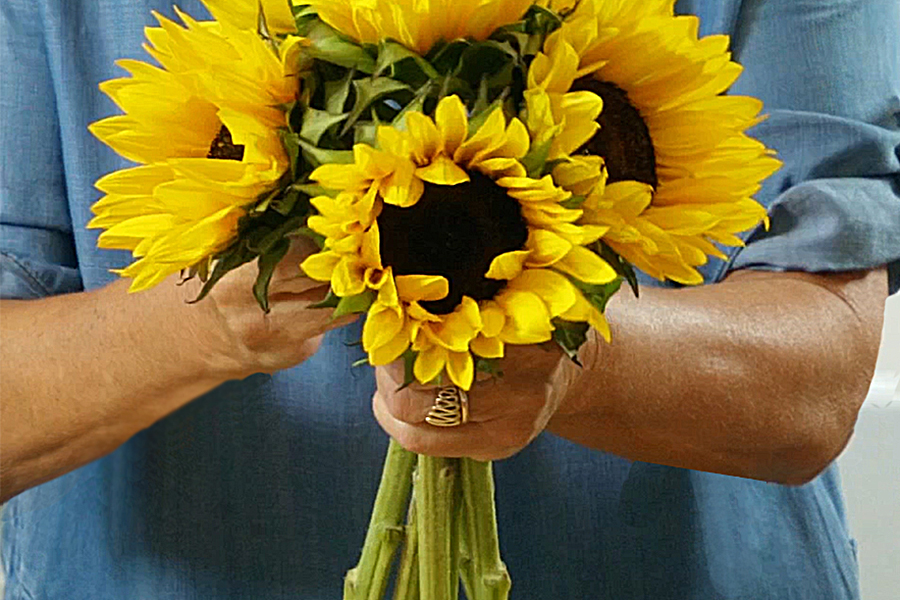
    Gather the sunflowers in your hand, one by one, with one in the middle and the other five placed around and slightly below the middle one.

    sunflower topiary with wrapping stems

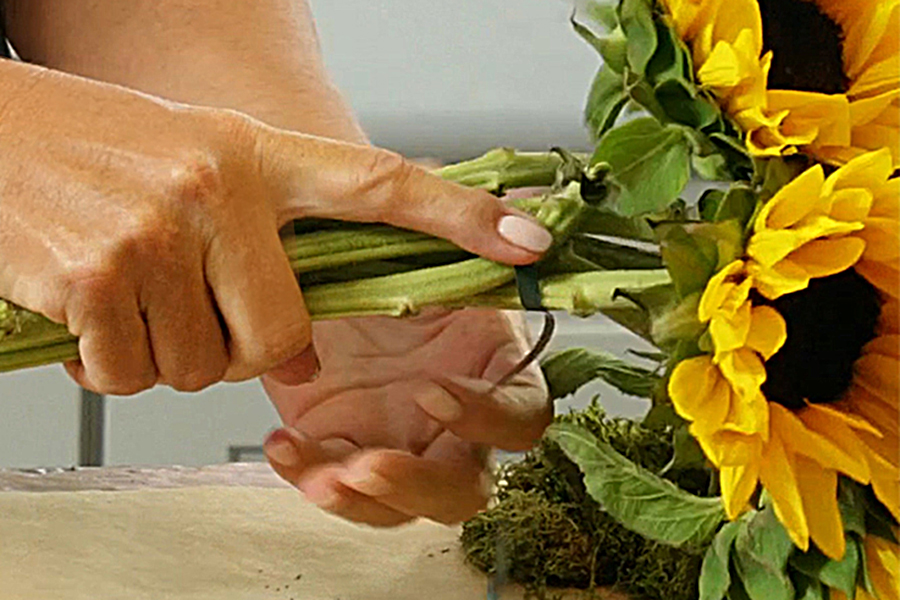
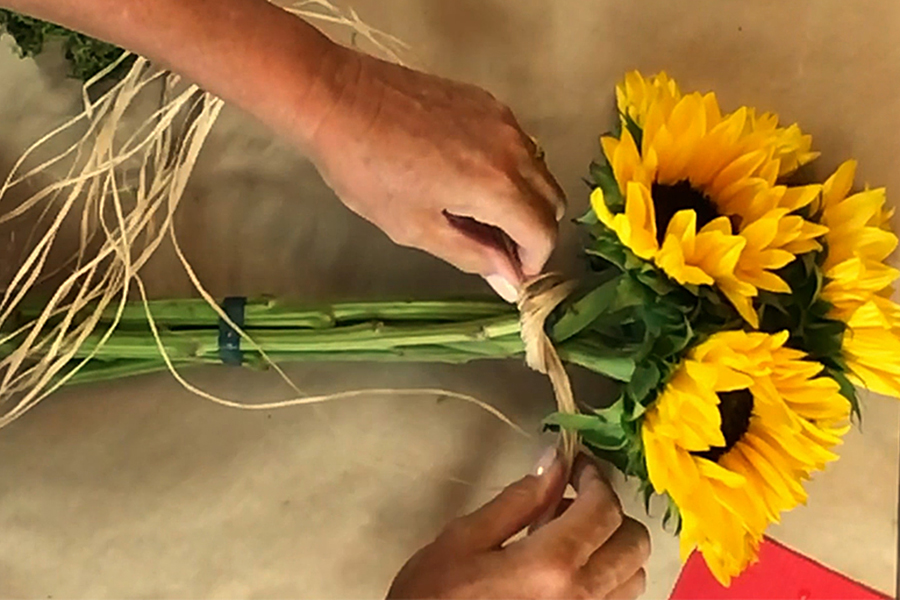
    Using waterproof tape, wrap the stems together first at the top of the stems right under the heads of the sunflowers…

    sunflower topiary with wrapping stems again

    …and again near the bottom of the stems.

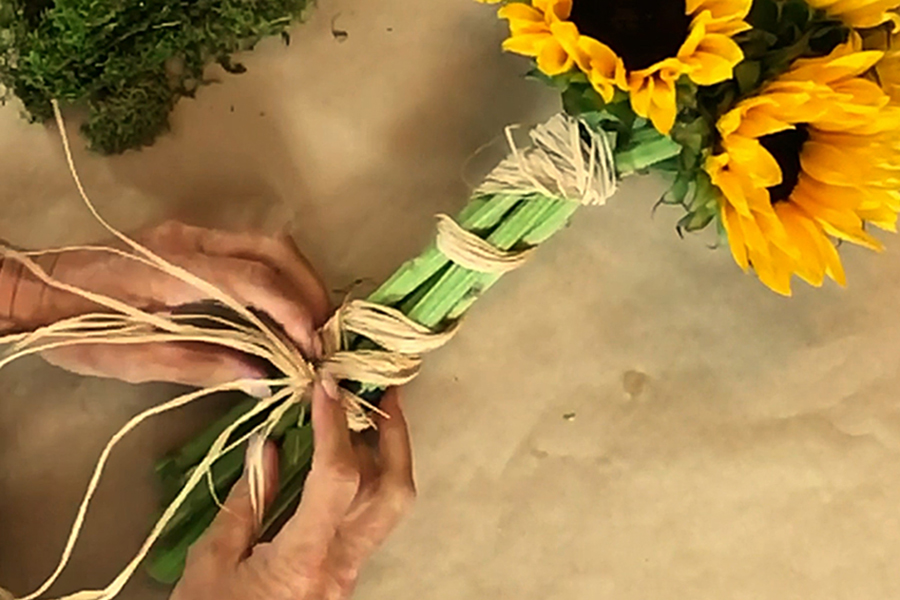
    sunflower topiary with covering tape with raffia or ribbon

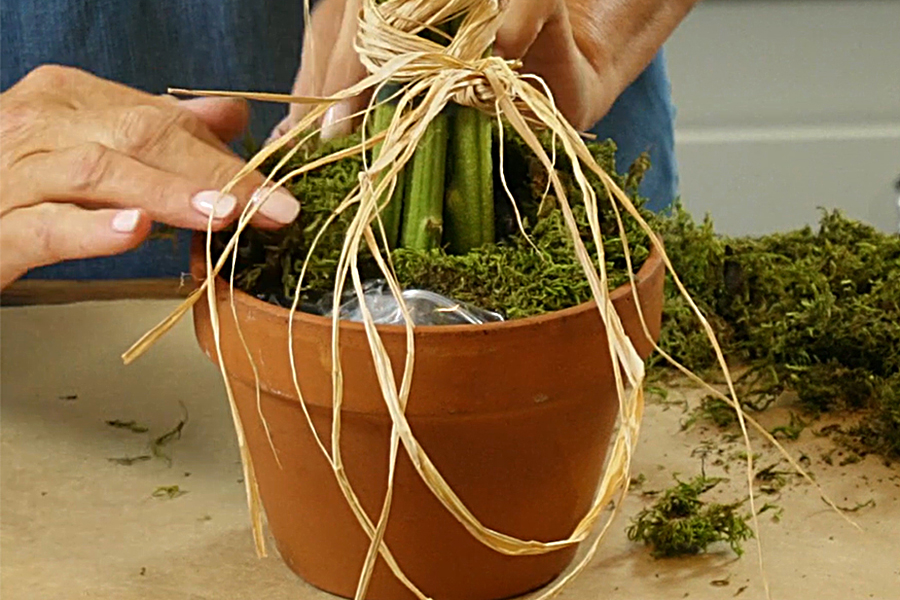
    Use raffia or ribbon to cover your tape and to add a decorative touch.

    sunflower topiary with wrapping bouquet with ribbon

    Continue bringing the ribbon down to the bottom of the stems to wrap the bouquet together tightly.

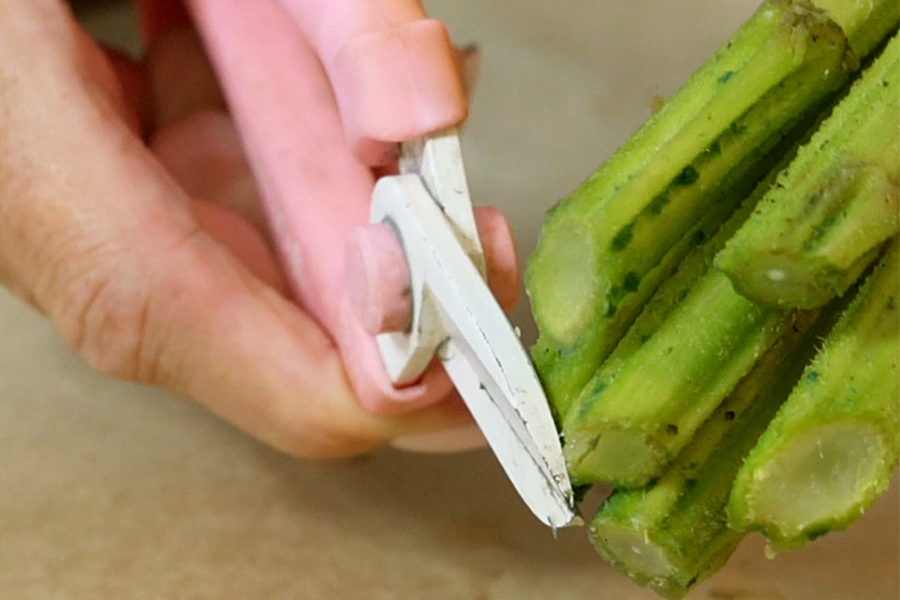
    sunflower topiary with cutting stems

    Cut the bottom of each stem on an angle.

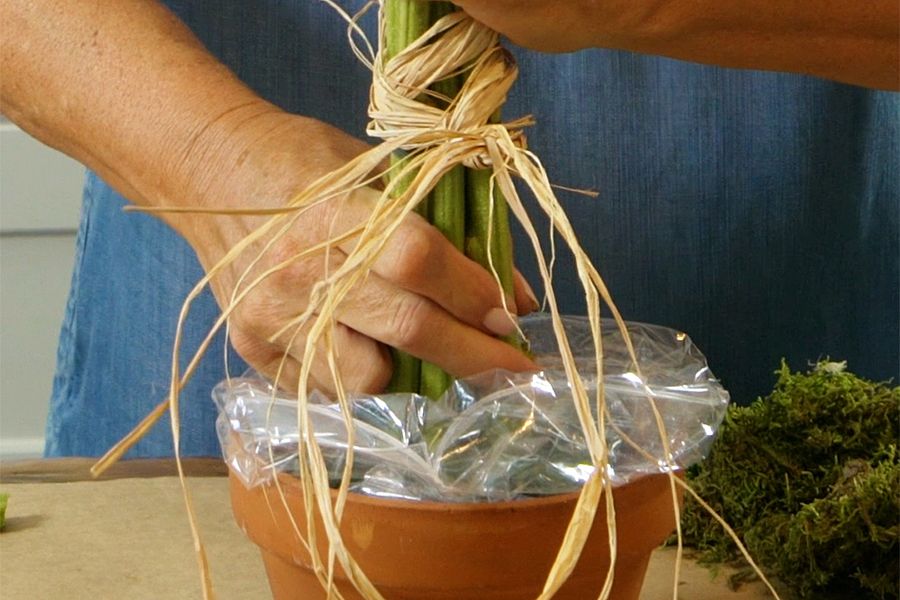
    sunflower topiary with inserting stems into foam

    Insert the stems into the wet foam.

    sunflower topiary with covering foam with moss

    Cover the foam around the stems with moss. You can also add additional flowers, fruit, or other decorative elements.

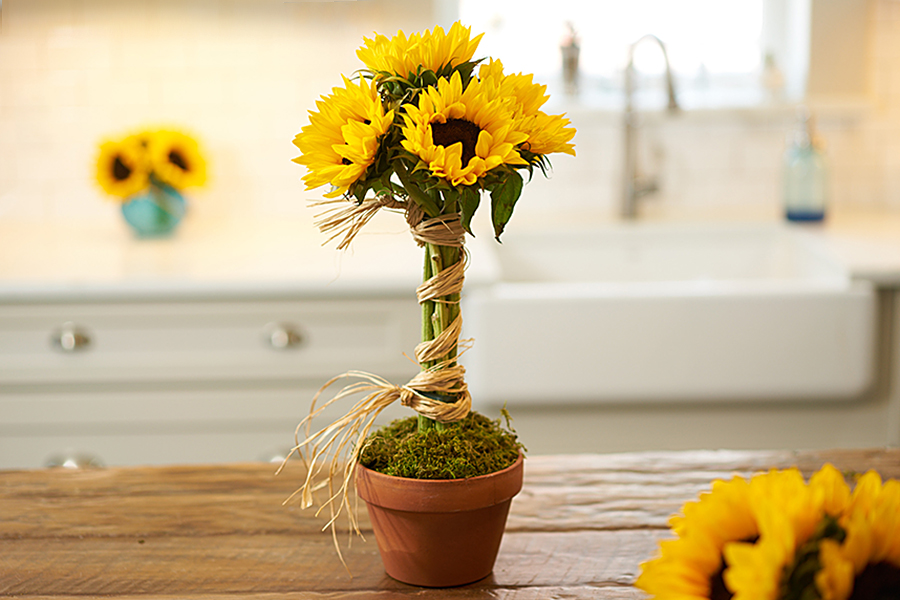
    sunflower topiary with finished topiary

    And that’s it! Your finished sunflower topiary is ready to be displayed.

    Remember to add water to your sunflower arrangements daily, and they’ll stay fresh for about a week.

    Keep the Memory of Your Family Reunion Alive With This DIY Spider Plant Activity

    The series “Get Crafty” features handy how-to guides that will help you tap into your passion for crafting and show you how to make all kinds of fun and inventive creations. Craft expert Julie Mulligan will provide a step-by-step tutorial for the creation process.

    Who doesn’t love a good party favor, especially one that conjures up happy memories? Get creative at your next family reunion by making a parting gift for each family member in attendance.

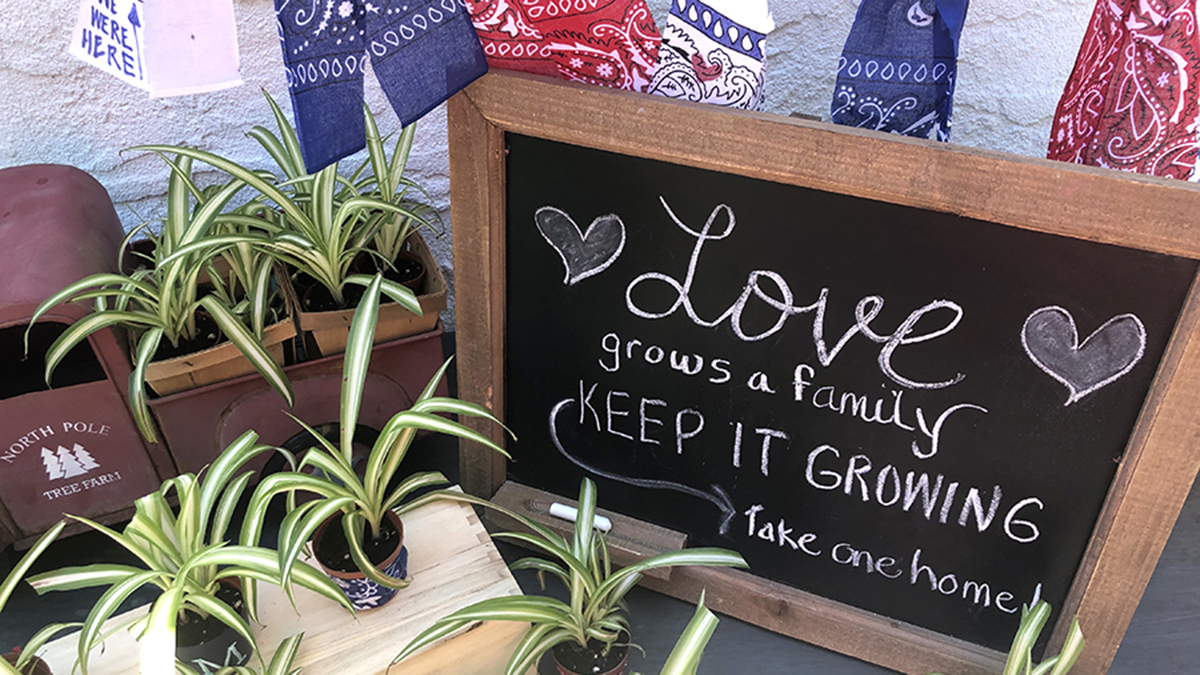
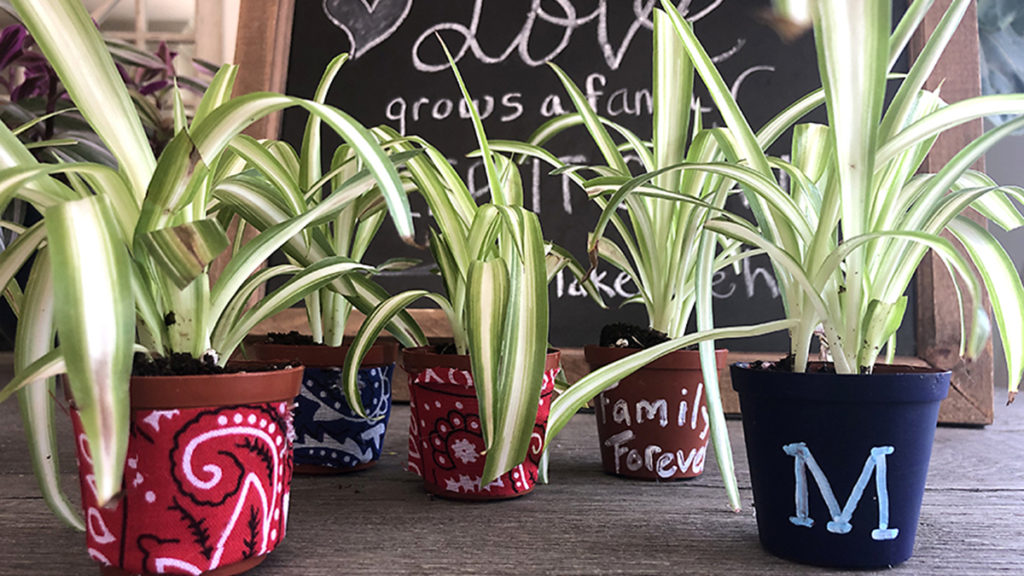
    One idea is to make individual baby spider plants by taking cuttings from a “mother” plant. As each guest departs, present them with the latest “family member” and ask them to share photos throughout the year with the rest of the family. This way, everyone can see how fast the little plants are growing.

    If you’d rather not use a spider plant, then you can choose any number of other houseplants that are easy to propagate, such as pothosprayer plants, and umbrella trees.

    I find spider plants easy to create new plants from, as they’re continuously producing “baby” plants on their own. You just need to snip and root!

    How to propagate a spider plant

    Follow these steps to propagate a spider plant.

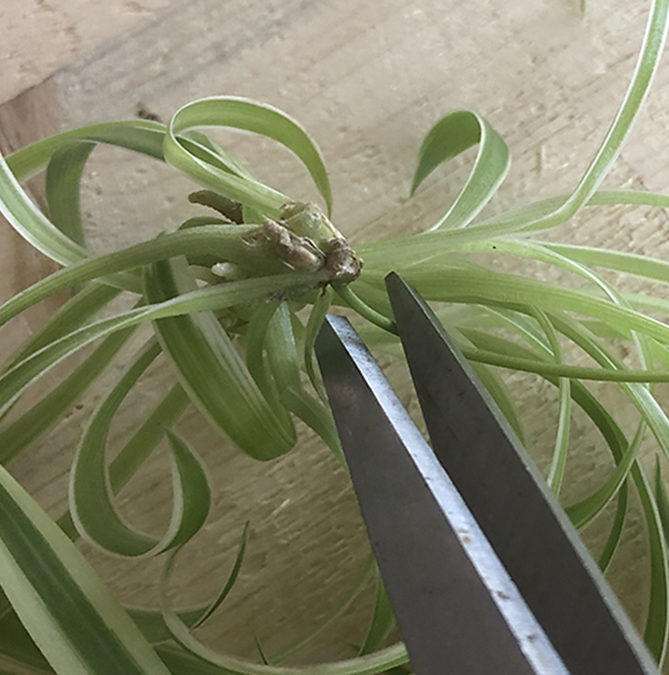
    1. Look for a “baby” that has a nice nodule formed where it’s attached to the mother plant. Then, snip as close to the nodule as possible.

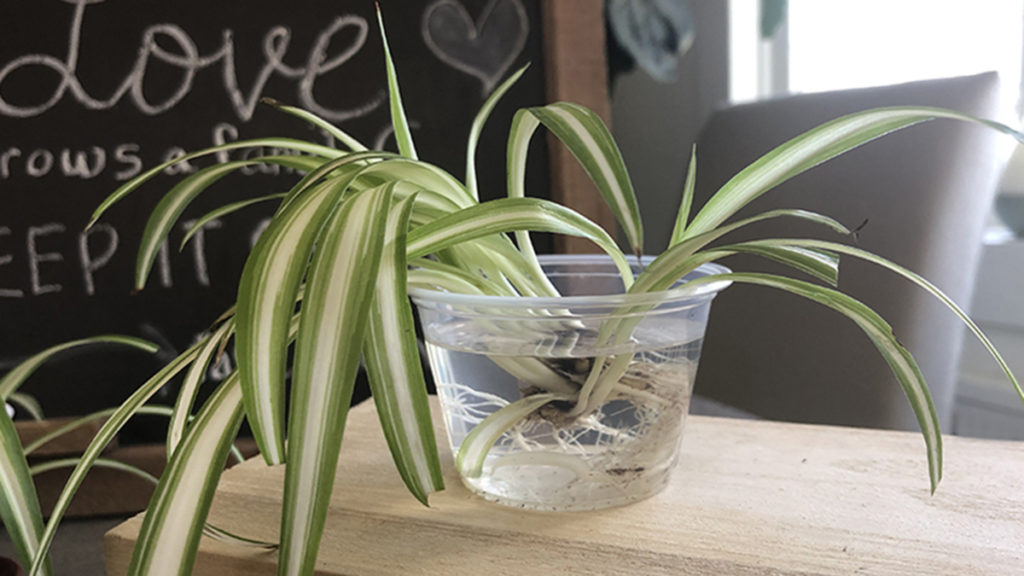
    2. To form roots, place the cutting directly in either soil or water. You’ll be able to see the roots forming when you start with water, which can be exciting.

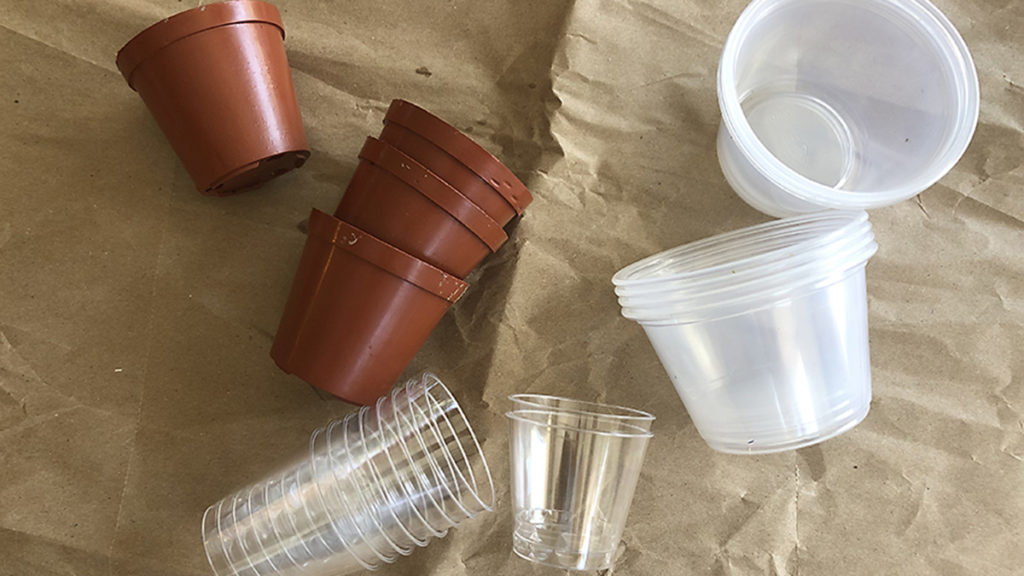
    3. As for giving your plant a “home,” you can use various kinds of inexpensive and recycled containers. The small plastic condiment containers you get with take-out food are the perfect size.

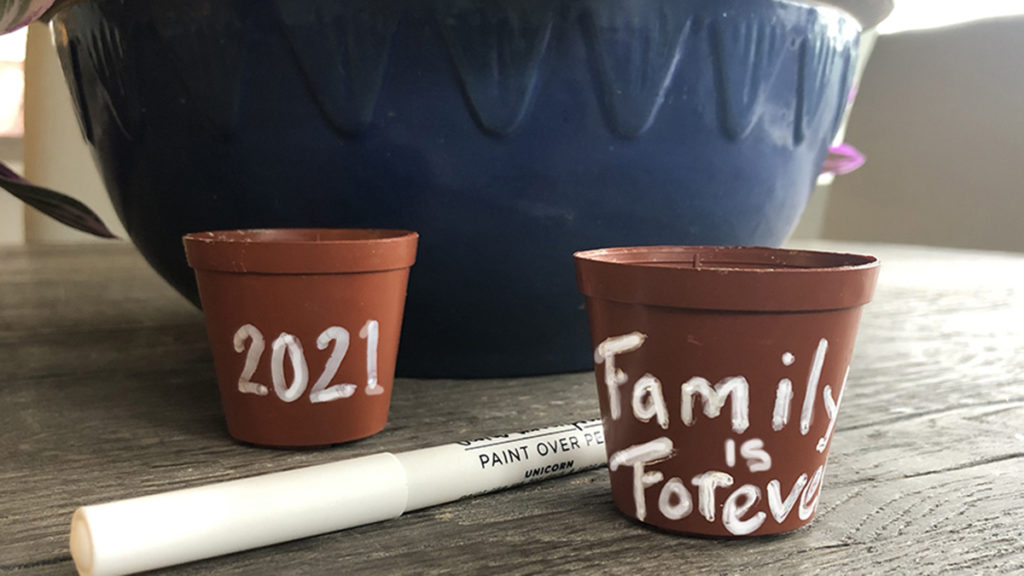
    4. If you’re already a plant parent, then you may have some two-inch plastic pots; if you’re not, they’re very inexpensive. Before filling the pots with soil, jazz them up with a little creative decoration. Keep it simple, using a paint marker to write directly on the pots.

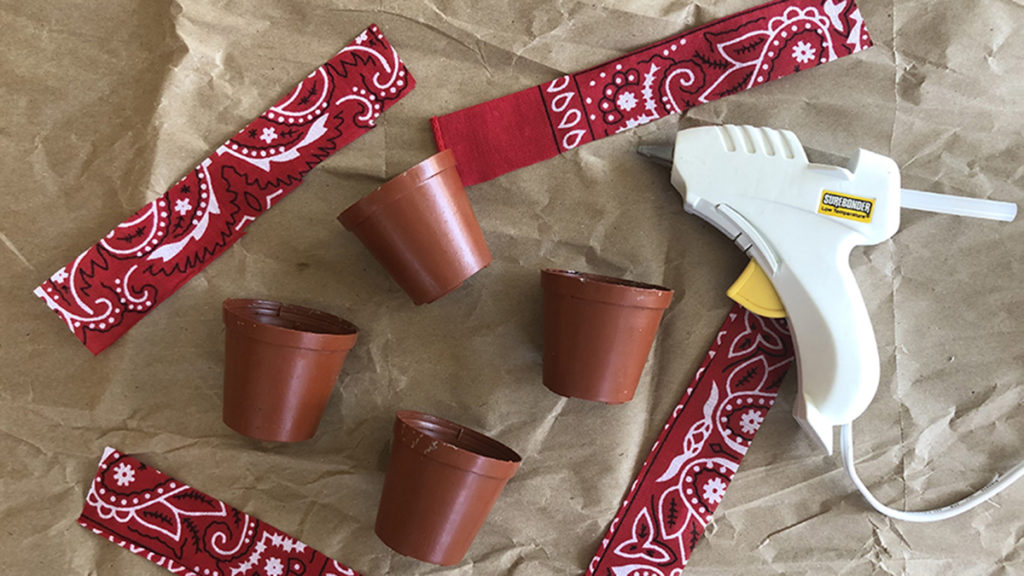
    5. You can also use strips of the bandanas with which you made the garland, cut them to size, and glue them onto the pots.

    6. Don’t worry about perfection; these pots are only a temporary home for the plants until they have established a root base. Once that happens, you’ll need to replant them in a larger pot with more soil. Before long, you’ll be able to start making new plants from this cutting!

    I’m sure you’ll find this DIY activity is a great way to make a family connection and keep the love growing.


    Plant-Gift-Guide-Blog-banner-1

    Creative Ways to Display ‘Santa and Me’ Photos This Christmas

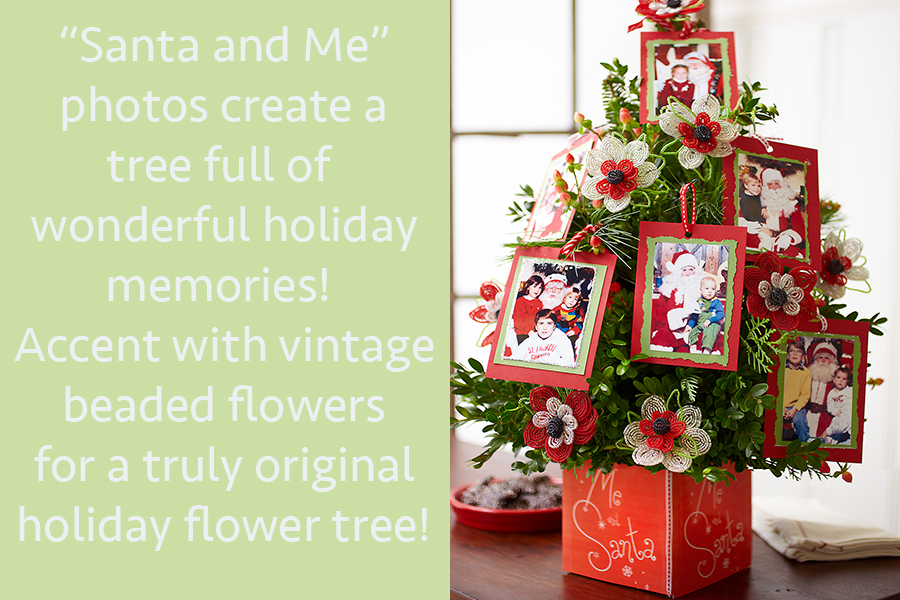
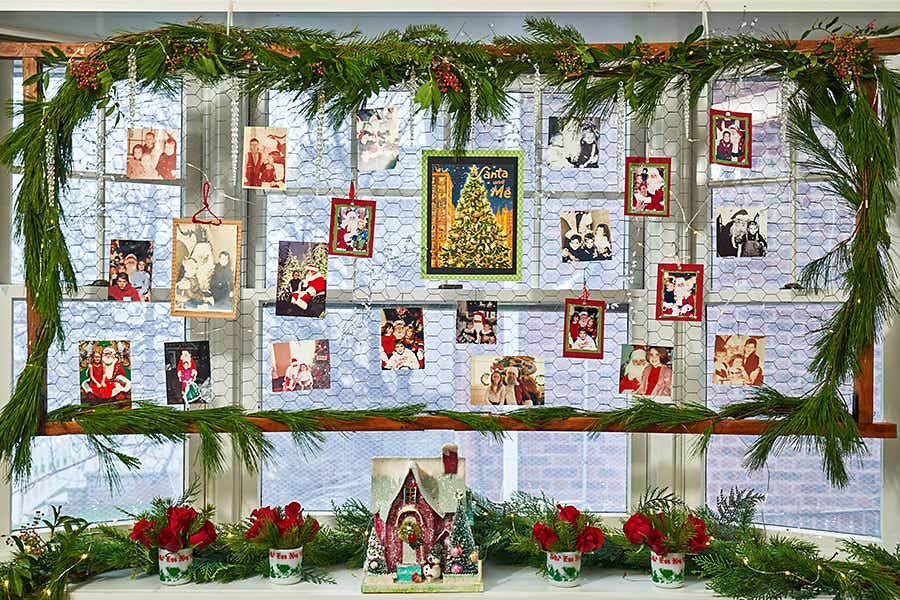
    diy photo display Santa and Me Photo Display

    In my home, Christmas decorating is about honoring the past in the most creative of ways. My latest project was a “Santa and Me” DIY photo display that was fun and easy to make. Below I share step-by-step instructions so you can create your own beautiful display to warm hearts and light up the holiday season!

    What you’ll need to create your own holiday DIY photo display 

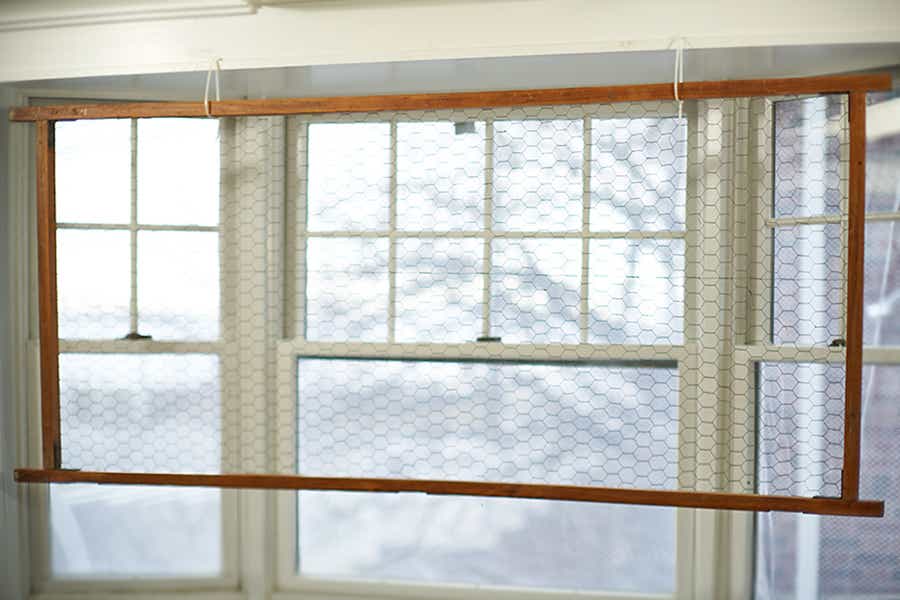
    For  me, it all started with an old room divider I found in a barn sale a few years ago. Originally, I bought it to use in the décor for my daughter’s wedding, thinking it would be great for displaying all our family wedding photos.  

    Wire on panel

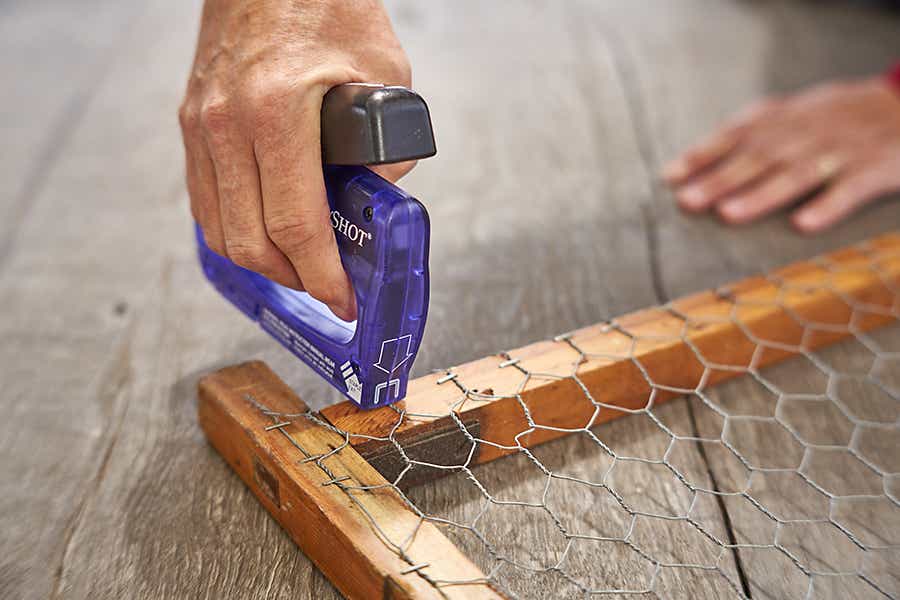
    To begin, I ripped off the old fabric on each frame. Next, I attached chicken wire to the back of each panel using a staple gun.  

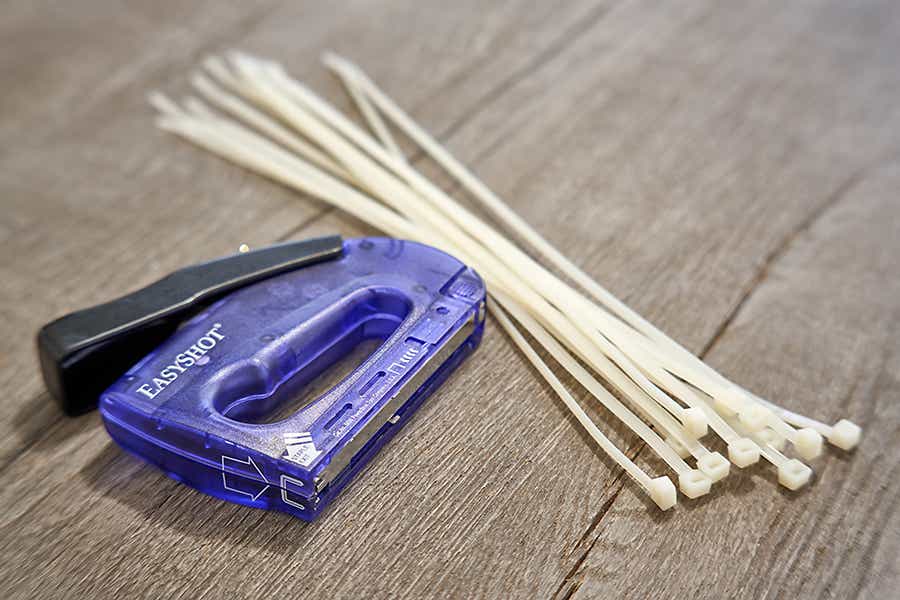
    Staple gun and zip ties

    Fortunately, I have a bay window that the panel fit perfectly into when hung horizontally. Because it’s so lightweight, I was able to hang it using zip ties and a staple gun. 

    Staple gun and molding

    To start this process, I stapled one zip tie into a piece of molding.  

    diy photo display Screen

    Then, I added another zip tie, and then attached the screen.   

    To get a better glimpse of how easy the process is, check out the video below!

    Easy Christmas DIY: Santa & Me Photo Display

    Now for the fun part… 

    Decorating your holiday photo display 

    There are so many little details that go into taking this idea from drab to fab. 

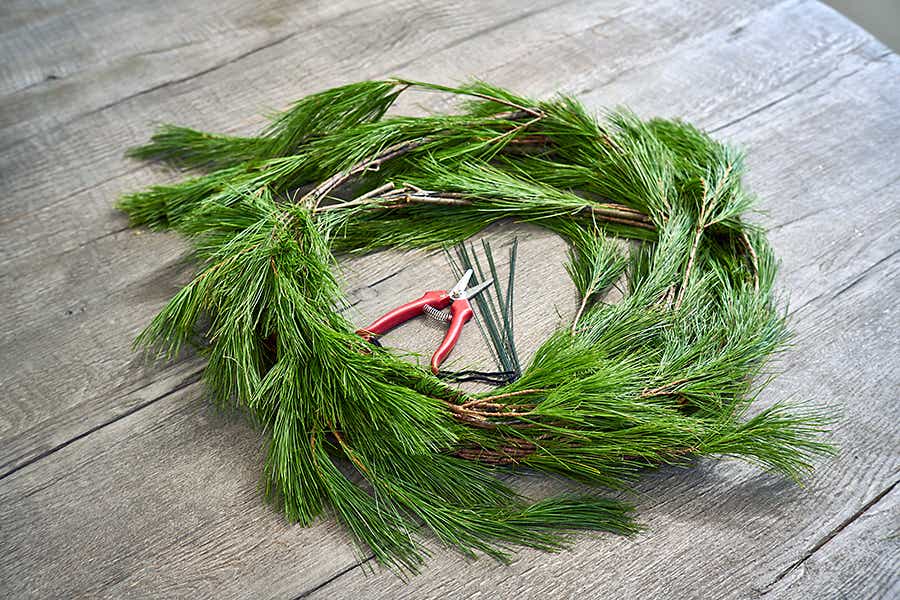
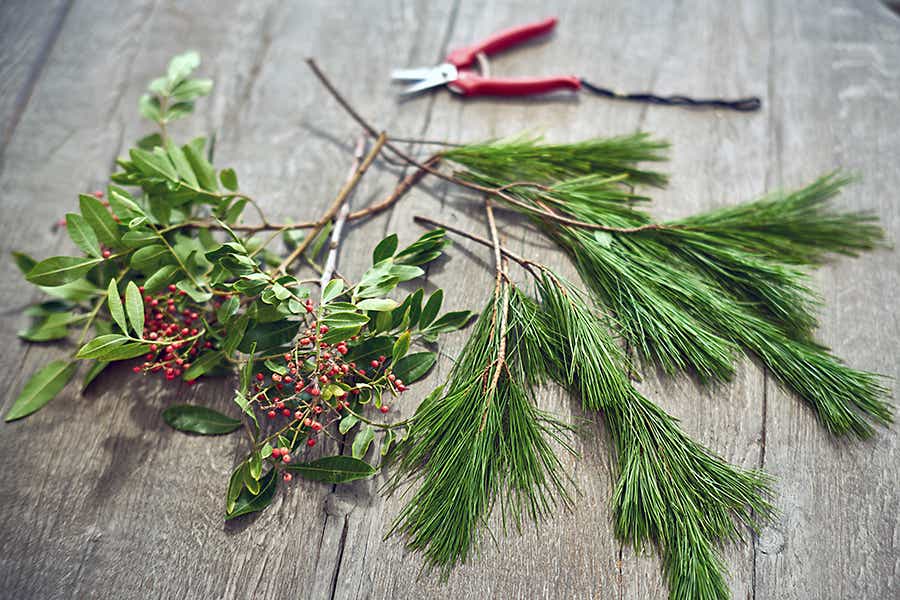
    Pine roping with tools

    For a festive look, you’ll need white pine roping, or garland.

    diy photo display Pine roping

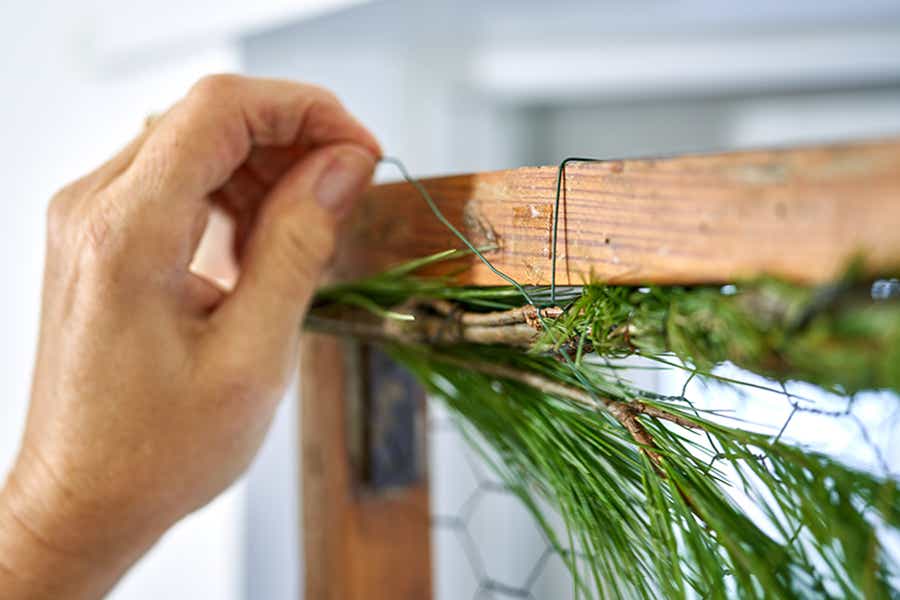
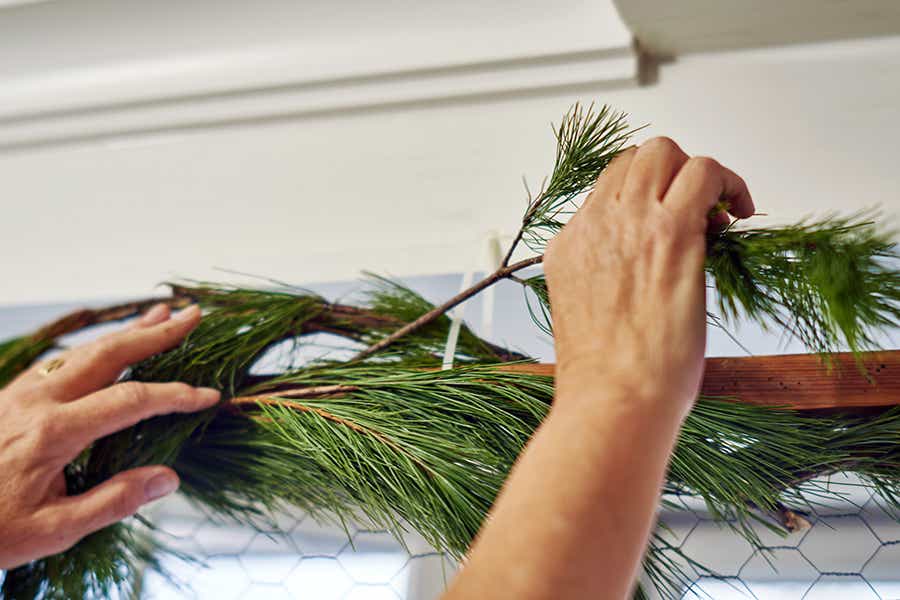
    Next, you’ll attach it to the frame with pieces of wire. 

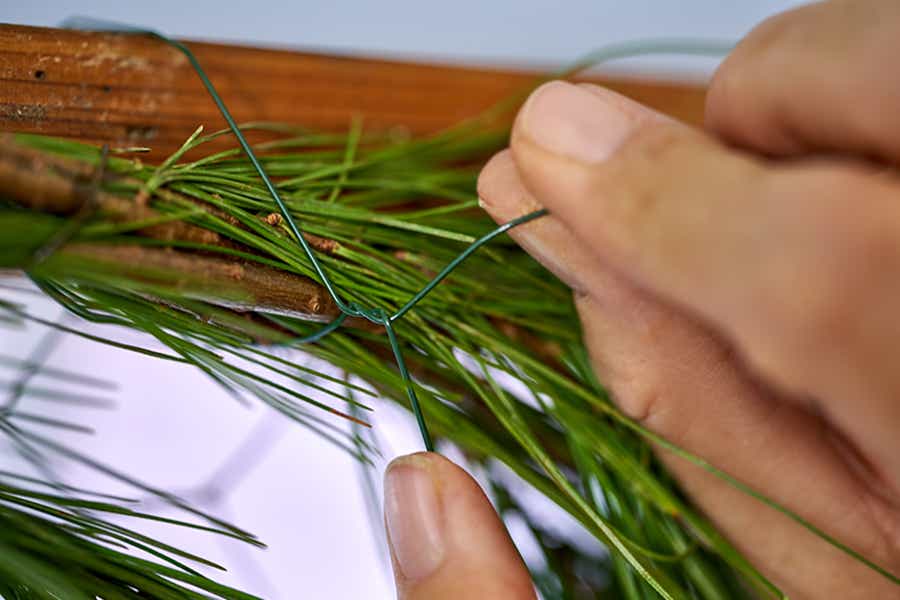
    Twisting wire

    Just a few twists will hold it in place.  

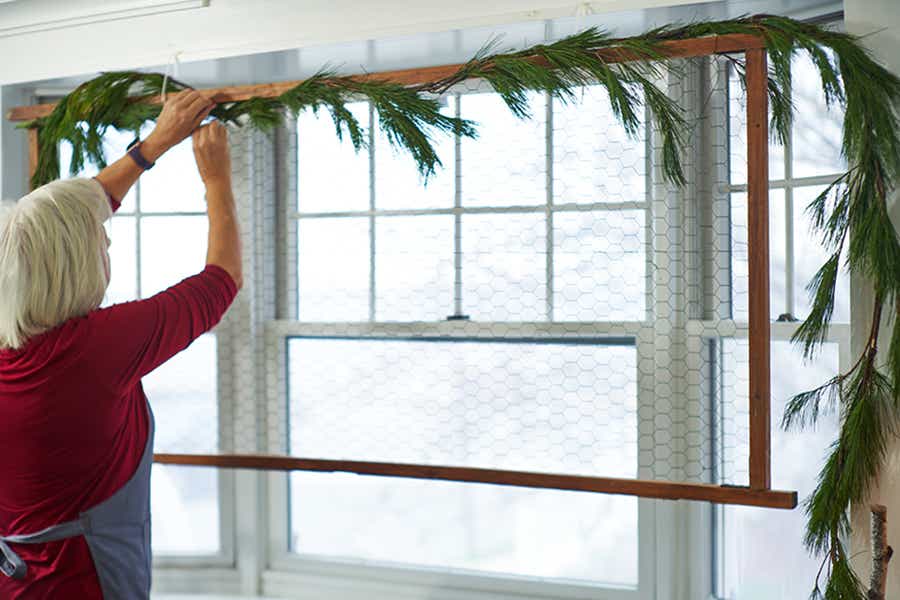
    diy photo display Pine rope around frame

    Continue attaching the pine roping all around the frame.    

    Winter greenery

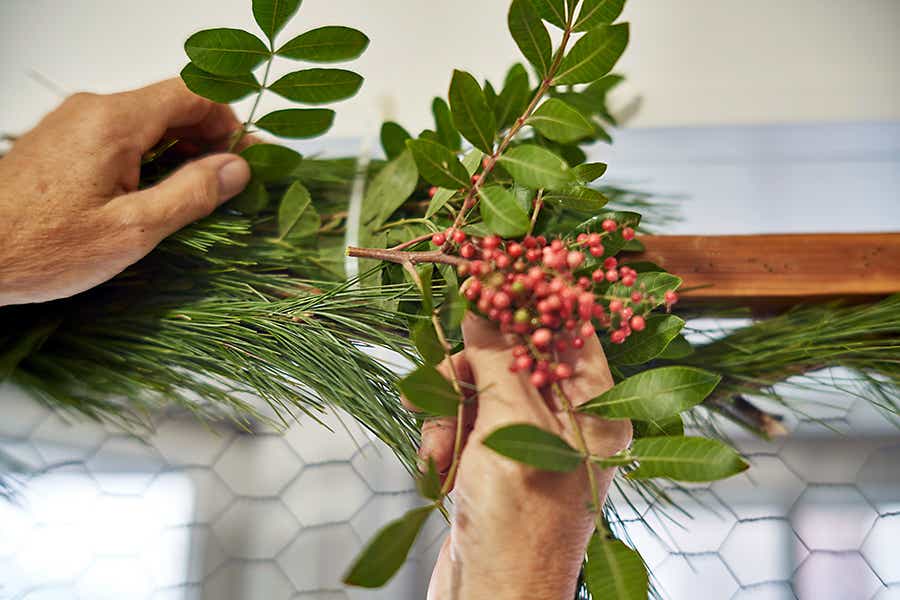
    Remember to make it yours! You can add additional sprigs of pine as well as other winter greenery, such as pepper berry and balsam, or fir. 

    diy photo display Garland on frame

    Just insert the short pieces between the pieces of garland already attached to the frame. 

    diy photo display Berries in garland


    I like using pieces of pepper berry because they add a nice pop of color and texture.  

    Christmas cards

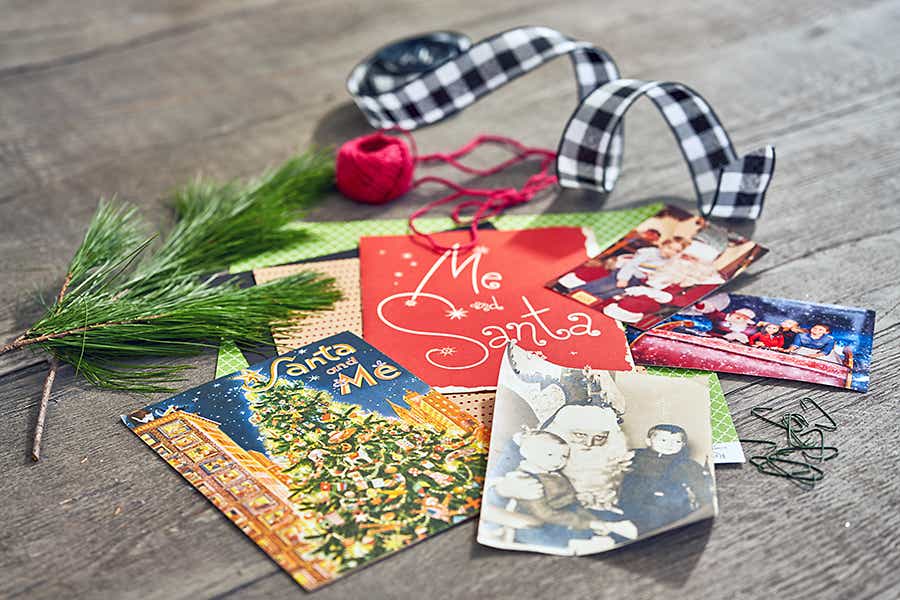
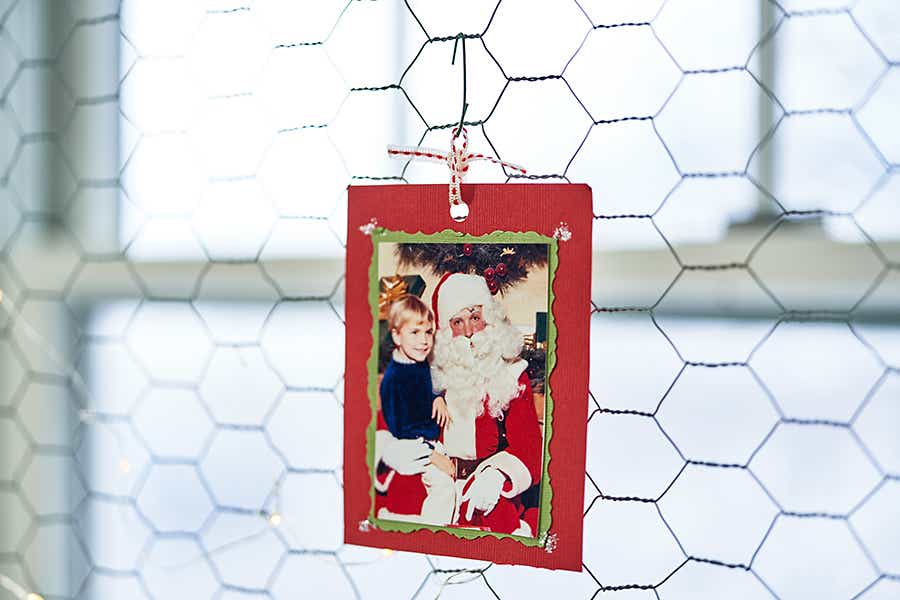
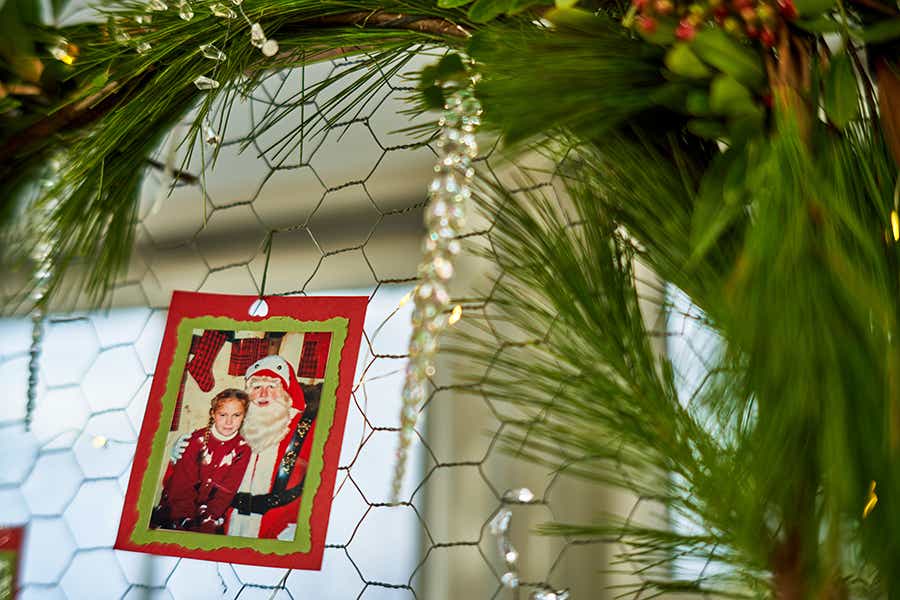
    Now for the sentimental value. Gather your family’s “Santa and Me” photos that you have saved all these years.  I even have some of the original card holders that came with the photos back in the day! You’ll need some ornament hooks, but holiday-themed papers and ribbons are nice too. You can do as much or as little crafting with the photos as you want.

    diy photo display Hanging Christmas card

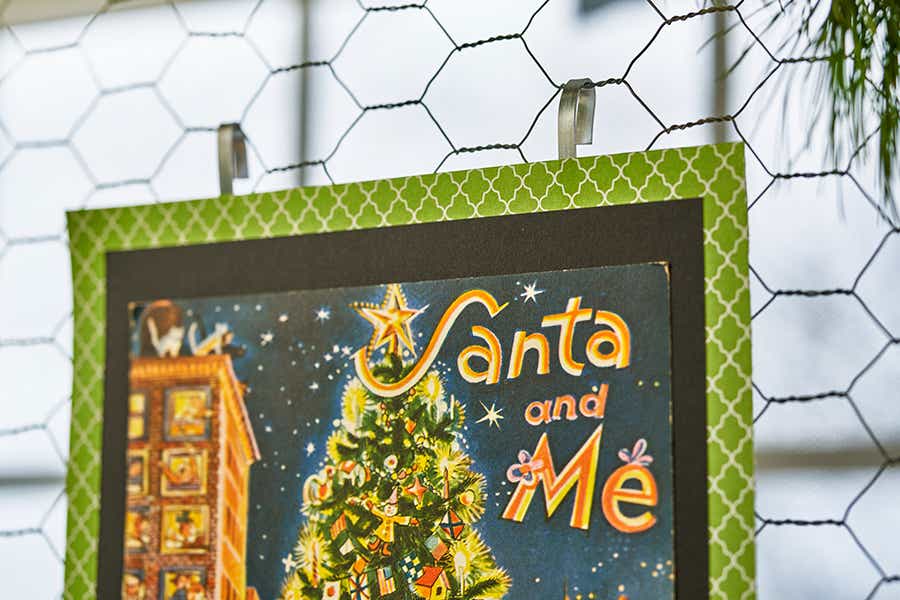
    I started attaching each photo to cardstock, decorating it, and using a hole puncher and ribbon before hanging with the ornament hook. After a while, I simply started sticking the ornament hook right through the photo and hanging it up. 

    diy photo display Santa and me card

    I used larger width bendable wire, cut to size, and glued it to the back of the vintage “Santa and Me” photo holder.  

    diy photo display Twinkle lights

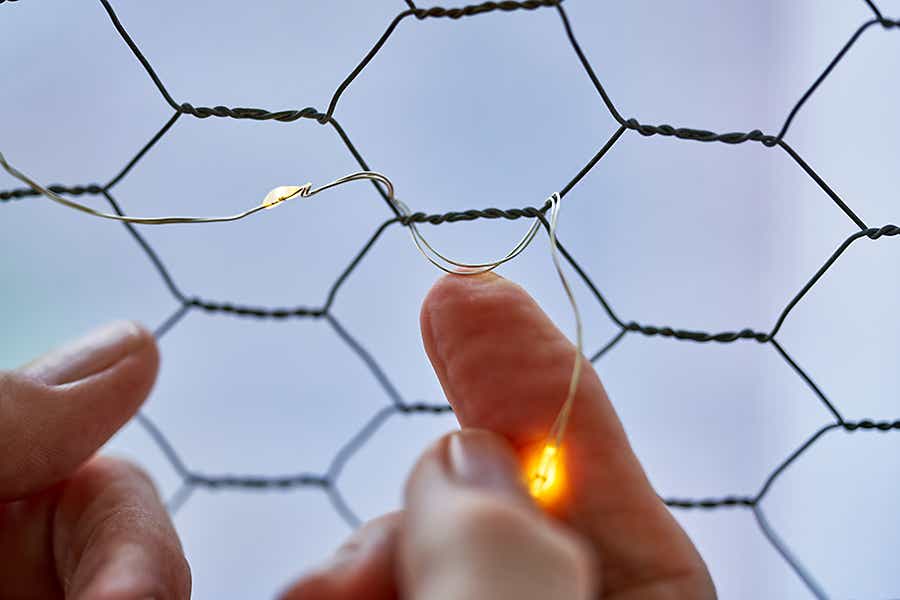
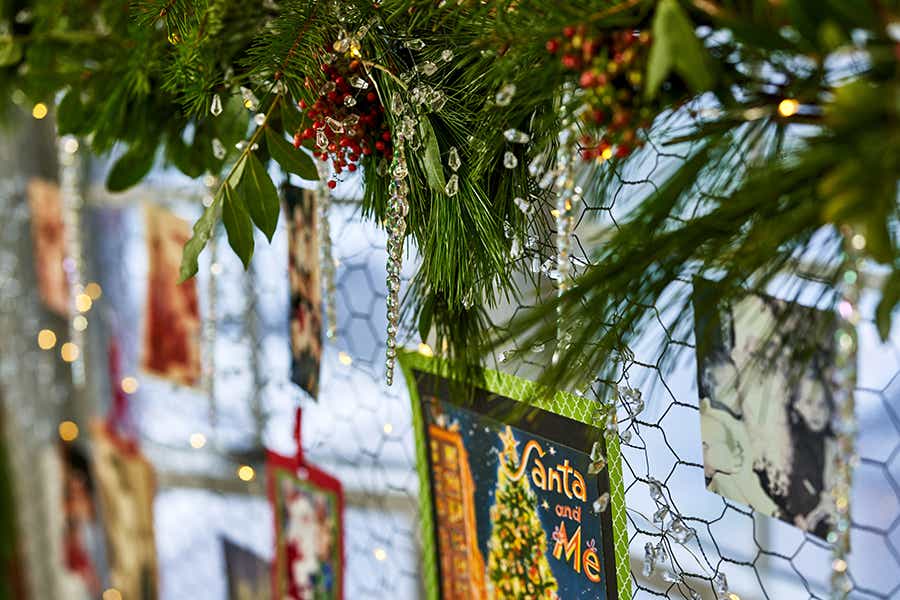
    The only other decorations I on my display are small battery-operated twinkle lights and clear crystal acrylic pieces.  

    diy photo display Attaching twinkle lights

    It’s easy to attach these wired elements by just pinching the wire and wrapping it around a piece of the chicken wire base.  

    Acrylic icicle

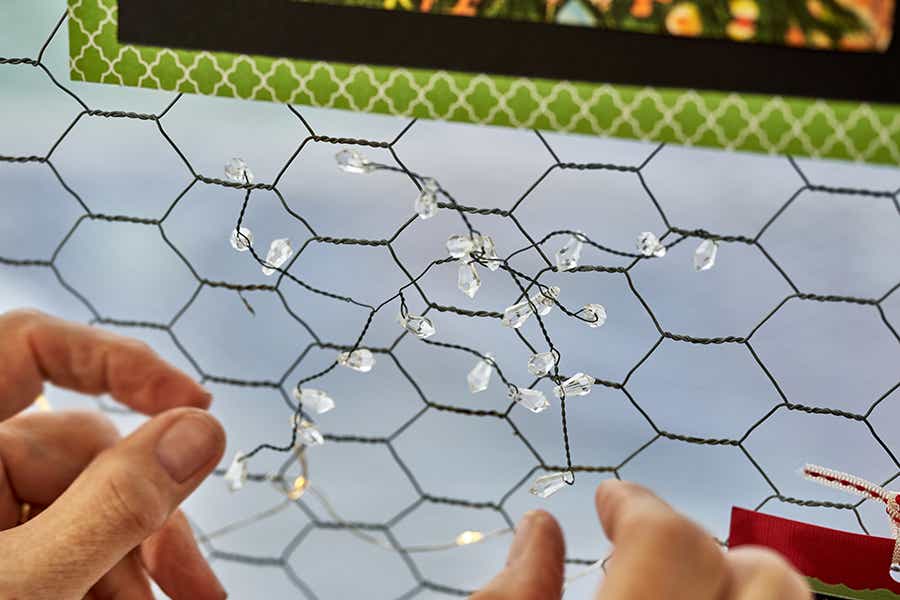
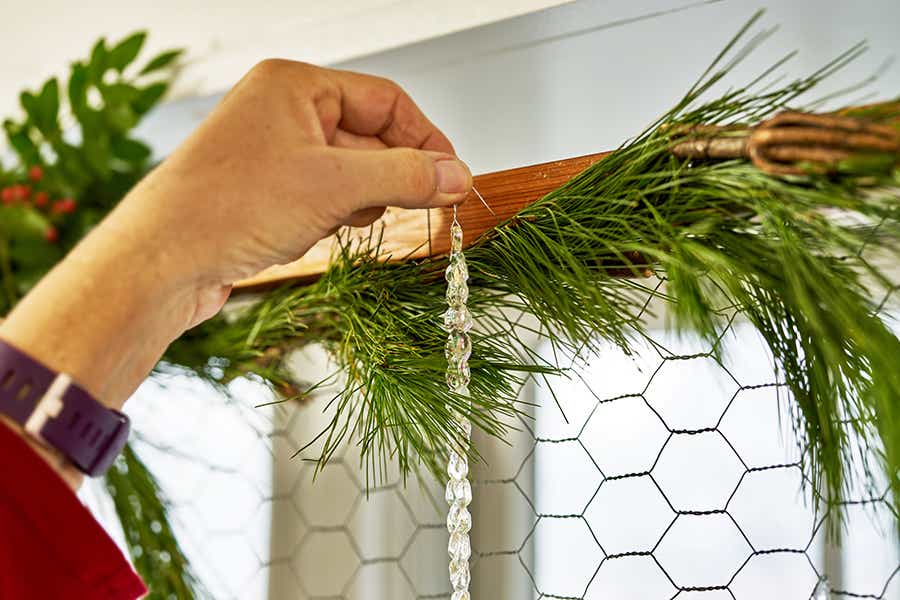
    For a fresh wintry look, use ornament hooks or small pieces of wire to hang acrylic icicles across the top of the frame.  

    Hanging card

    I love the effect you get by adding just a little bit of sparkle.

    diy photo display with Hanging Christmas photos

    The acrylic icicles add a whimsical, twinkling, charm while keeping everything light and airy.  During the day, the sun shines through, and when the sun sets and the lights come on, it’s magical!

    The best part is that you get to enjoy your Christmas memories and are able to share them with all your friends and family during holiday visits. I have photos from my childhood and my husband’s childhood, my children’s visits with Santa through the years, and now my grandkids’ too! As a matter of fact, check out the one of me and my brother, Jim McCann.  Who knew that Jim would one day start a business that would help people connect with all the important people in their lives, not just at Christmas but every day! 
    Halloween Crafts: Candy Corn Garland

    Not everything about Halloween needs to be spooky and scary — it can also just be fun and colorful, and full of sweets and smiles.

    Here is a simple DIY craft idea celebrating that perennial Halloween favorite, the candy corn.

    This project starts off very basic so that even the littlest trick or treater can do it, and can be scaled up and personalized to entertain tweens and beyond.

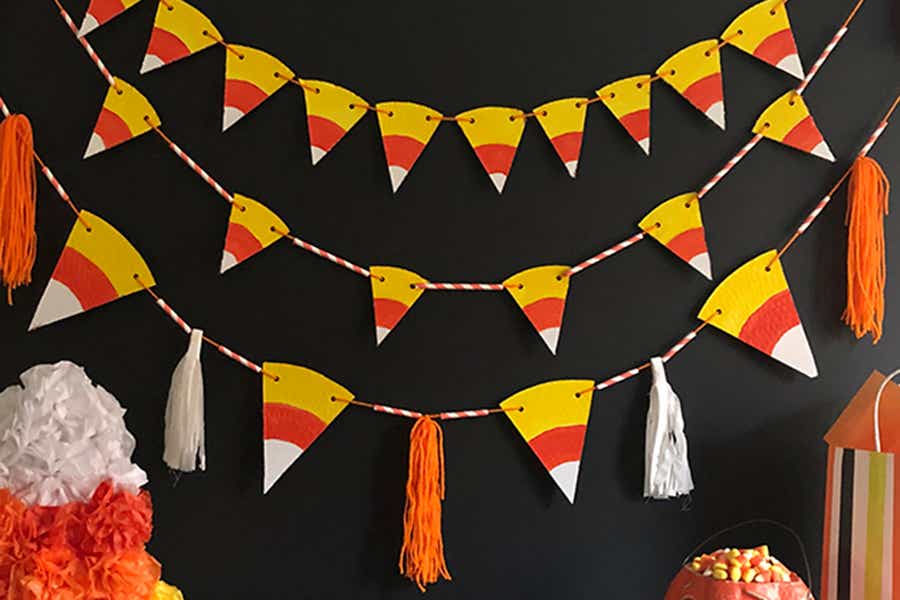
    Candy corn garland

    Making this Halloween craft keeps the kids entertained and barely costs a thing. And, after Halloween is over, you can recycle the whole thing — no guilt about producing extra waste, and you don’t have to pack it up and find somewhere to store it all year.

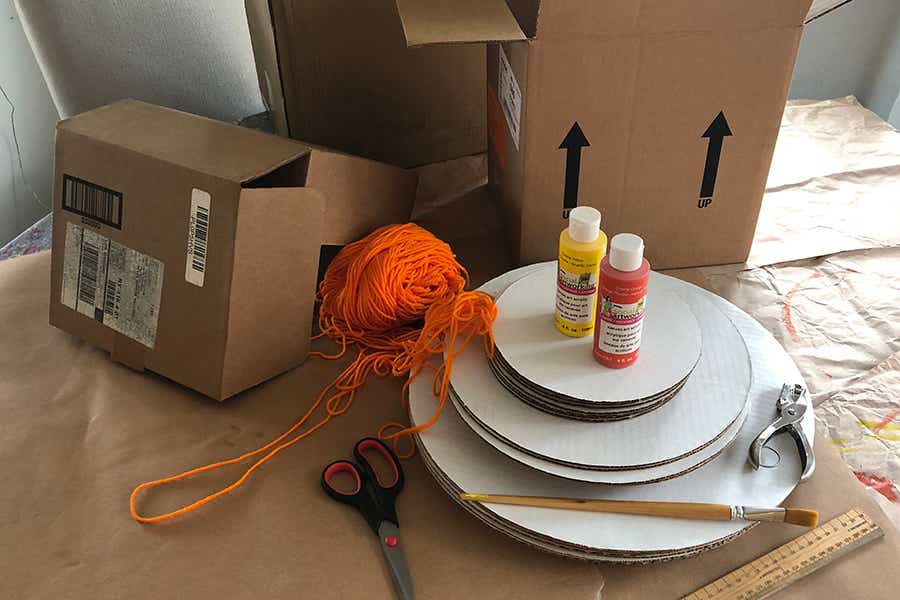
    halloween crafts with materials for candy corn garland

    Materials needed for candy corn garland

    • Cardboard boxes
    • Paint or markers
    • String or ribbon
    • Hole puncher
    • Scissors or straight edge cutter

    Instructions for making candy corn garland

    The steps for this candy corn garland are the same as the ones I used for the patriotic-themed garland I made for Memorial Day. The only difference is it is painted differently.

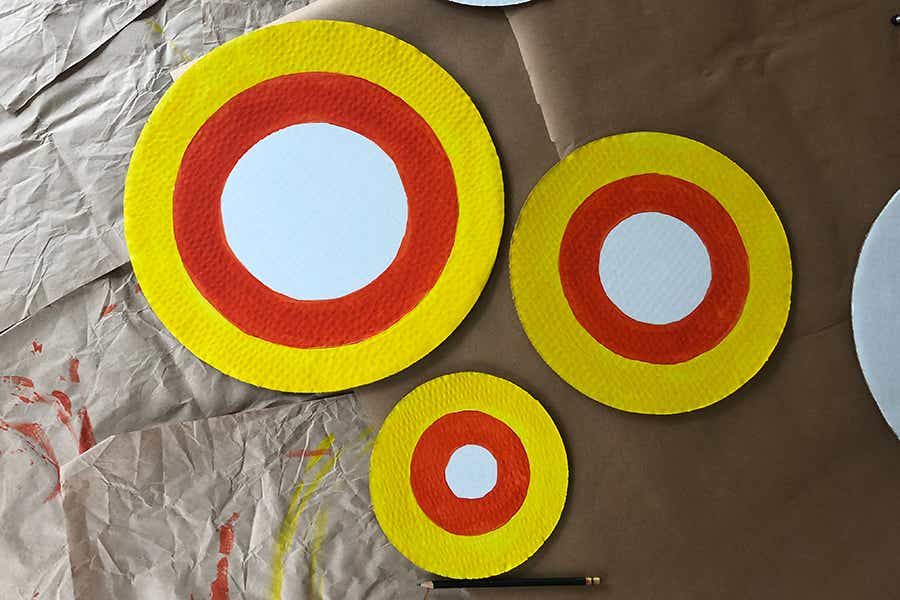
    halloween crafts with Circle
    halloween crafts with Circle
    halloween crafts with Circle
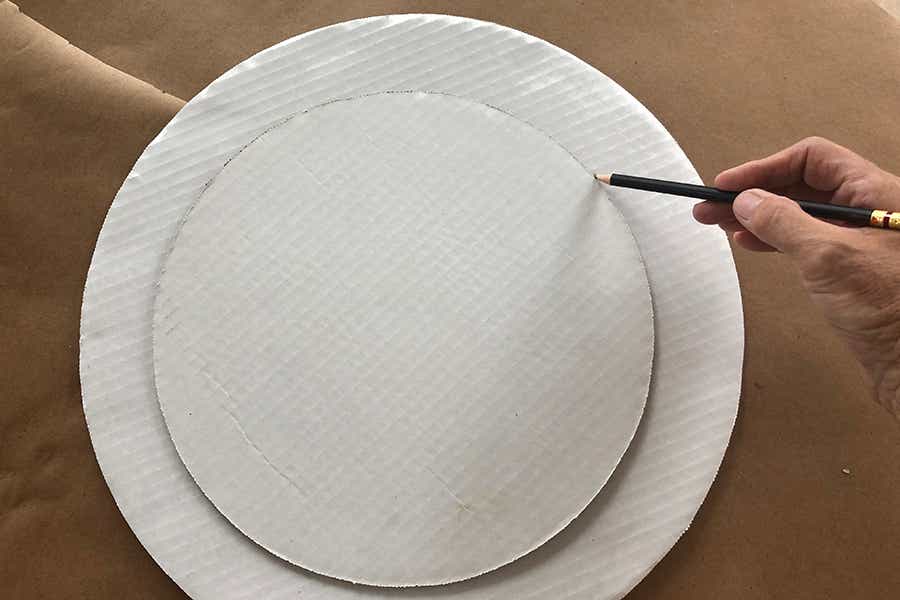
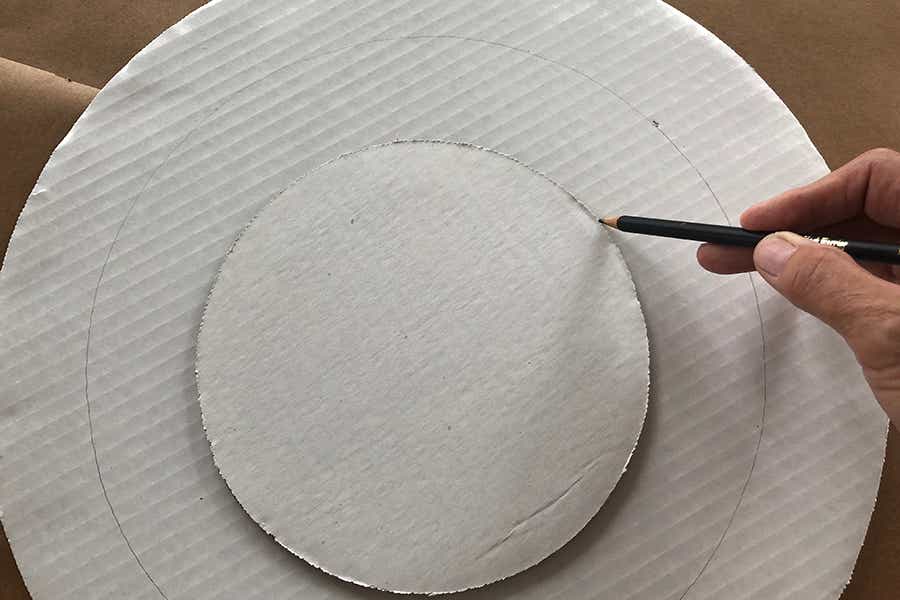
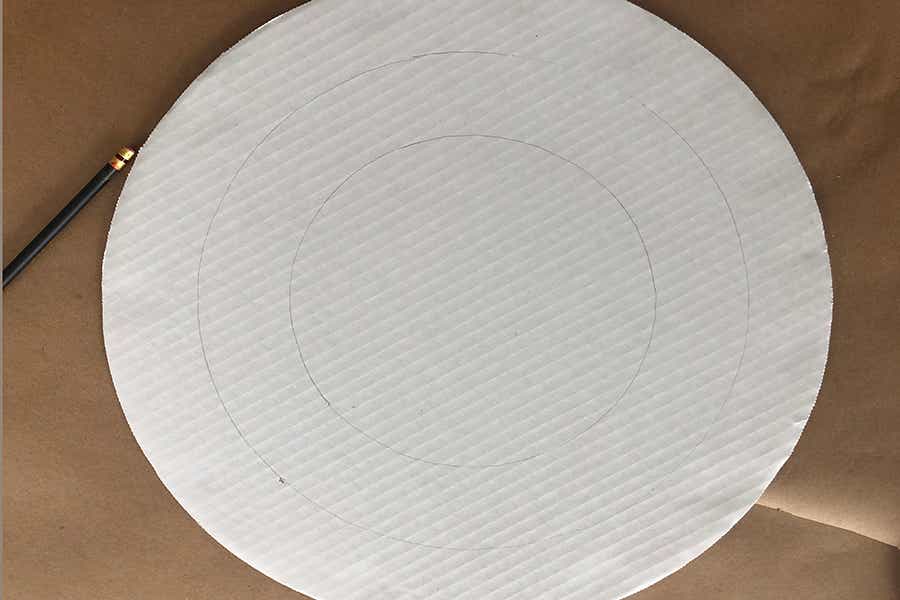
    1. Cut out a large circle from the cardboard box and, using a pencil, draw two smaller concentric circles inside it. (I was fortunate that one of my daughters operated a baking business out of my house and I had corrugated cake boards in my attic. And the fact that the boards were white meant I only had to paint the orange and yellow sections!)
    2. Repeat the process making more circles. You can make them all the same size or mix it up with larger and smaller ones.
    halloween crafts with painted circles
    1. Paint or color the outermost ring yellow, the middle ring orange, and the innermost ring white (if necessary).
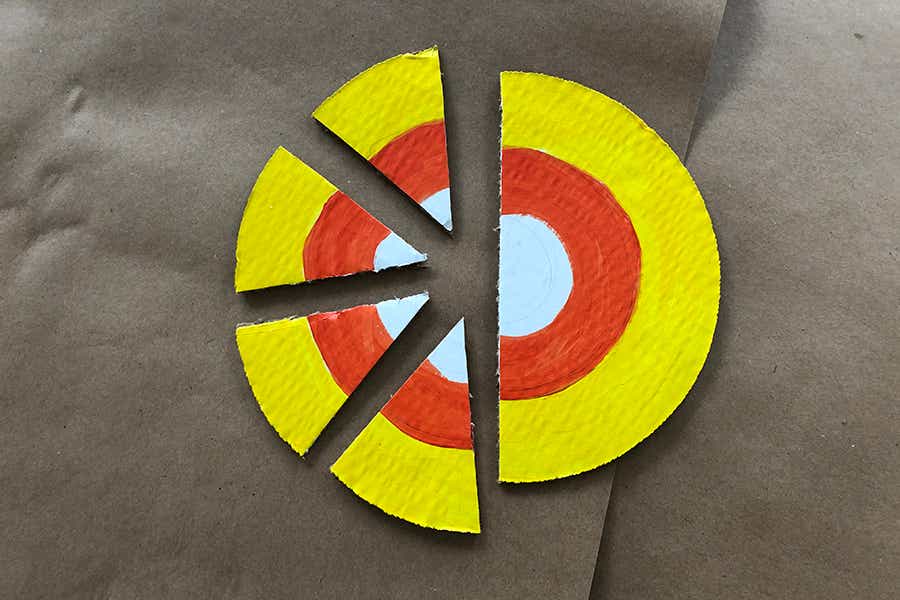
    halloween crafts with cut circles
    1. Once the paint dries, cut the circle into triangle — just like a pizza!

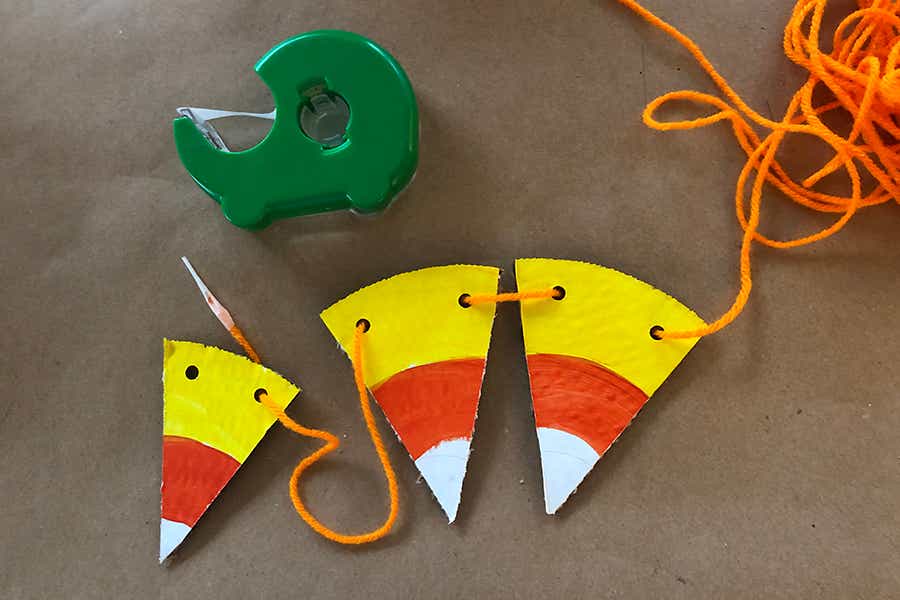
    halloween crafts with hole-punched wedges
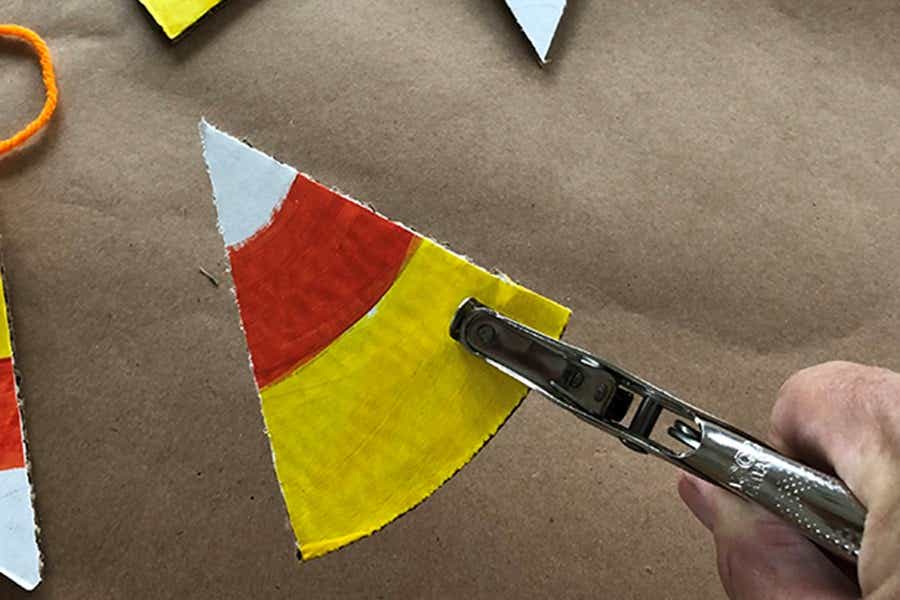
    1. Use a hole puncher to punch two holes in the wider end of each triangle.
    halloween crafts with yarn strung through wedges
    1. Lace yarn, twine, or ribbon through the holes on the triangular pieces.
    halloween crafts with candy corn garland

    Once you have the basic steps down, you can improvise as you see fit. Let the older kids design their own garlands, adding tassels made from yarn or fabric, or add paper straws cut to the desired length in between the candy corn. The possibilities are only limited by your imagination!
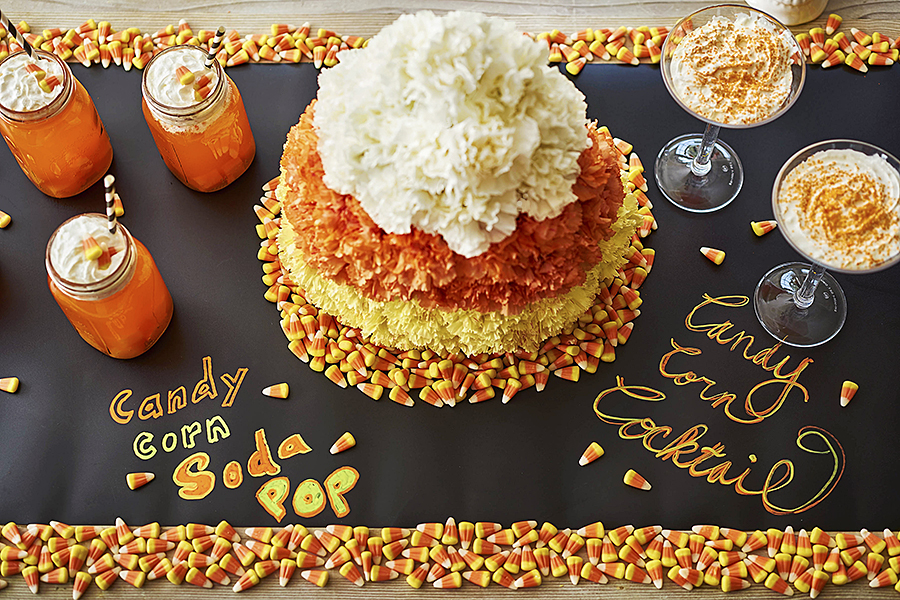
    halloween crafts with candy corn sodas and cocktails

    And when the decorating is done, treat the little ones to a candy corn soda pop and yourself to a candy corn cocktail!

    Exit mobile version