DIY Friendship Bracelet With Flower Beads

In honor of friends everywhere and Friendship Day, we decided to celebrate our BFFs with the timeless tradition of friendship bracelets. Consisting of a series of tied knots, friendship bracelets represent the strong and unbroken bond between two friends…and they look pretty, too!

friendship-bracelet-final-image

Whether making a friendship bracelet as a gift for your closest friend or organizing a party to make bracelets with a group of friends, the sentimental value of handmade bracelets is priceless. Just like every friend, each bracelet is unique and can be made to fit your bestie’s personality. So, take out your string and let’s get crafty with these easy-to-follow instructions!

Supplies needed to make a friendship bracelet

  • Embroidery floss
  • Scissors
  • Tape
  • Flower beads (Make sure the holes of the beads are large enough.)
  • Flower for inspiration

Instructions for making a friendship bracelet

1. Choose bracelet colors your bestie will love

Decide which colors you want to use for your bracelet. For ours, we used pink, lavender, purple, and dark purple. The more strings you use, the wider the bracelet will be.

2. Measure and cut the string

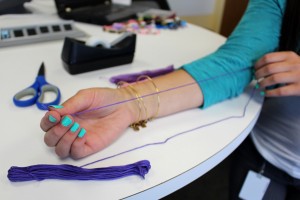
Measure out one string using your forearm as a guide, from your wrist to your elbow. If you are making the bracelet for your friend, consider the size of their wrist, and increase or decrease the size as needed. Cut the string to four times the length of your forearm, leaving a few extra inches for safe measure. (It is better to have more string than not enough.) Use your first cut string as a guide to measure the rest of your strings. All strings should be the same size. When you have finished cutting all your strings (we used four total, one for each color), place all the strings together and then fold your strings in half. This should leave you with two of each color.
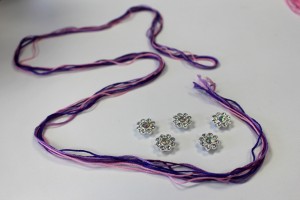
3. Create a loop and get started

After folding the strings in half, create a loop. Tie the loop into a knot.
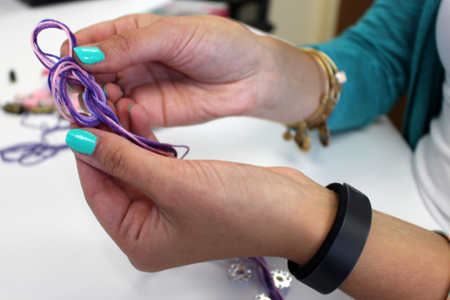
friendship-bracelet-loop-knot

4. Create a sturdy and organized workplace
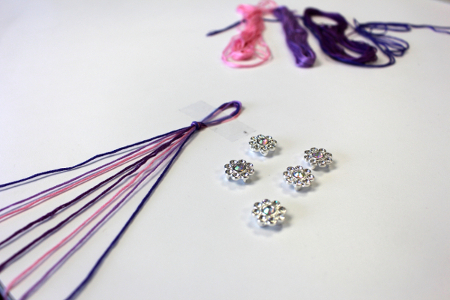
friendship-bracelet-setup

Tape your loop onto a flat working surface, such as a table. Spread out your strings so the colors are symmetrical.

5. Master the forward knot

To make the chevron stitch “V” shape, start from your left side (stitched from left to right) until you reach the middle, then work from your right side (stitched from right to left). The right and left side of the “V” stitch is completed by tying the two middle strings together, which should be the same color. Start with the left outermost strand (we used dark purple) and make a forward knot by crossing it over the next string (to the right) in a “4” shape, and looping it under and through the opening.

Pull the string up to tighten the knot. Repeat this step again using the same string (in our case, dark purple). One stitch consists of two forward knots per string. Make two forward knots per string, until you reach the middle.
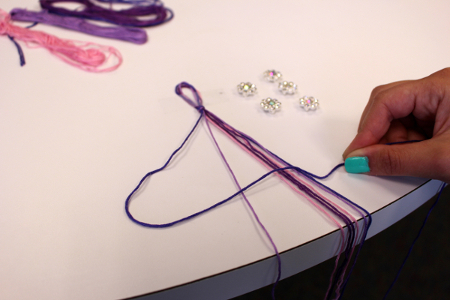
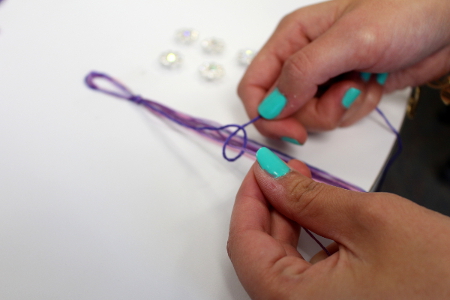
6. Master the backward knot

Once you’ve reached the middle of the row, move to the right outermost strand. Create a “backward knot” by crossing it over the strand to its left and forming a “P” shape. Loop the strand under and through the opening of the “P.” Do this for each string until you reach the middle.

Tie the two middle strands (which should be the same color) using either a forward or backward knot.
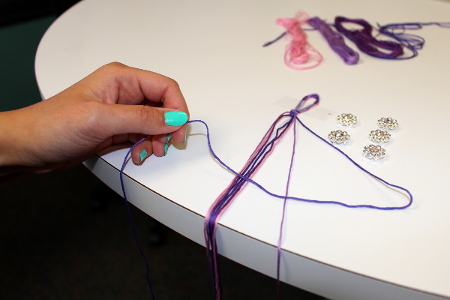
7. Repeat steps 5 & 6
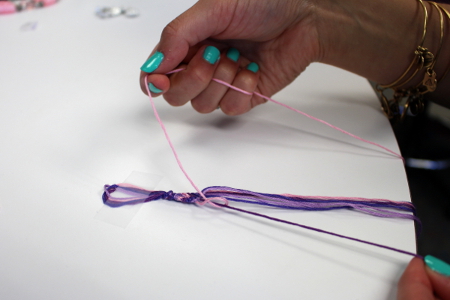
friendship-bracelet-forward-knot-loop-pull

Continue doing forward knots on the left side, and backward knots on the right side, until you are halfway done with the bracelet. You can check if you are halfway done by measuring with your wrist.

8. Add your flower beads

This step may vary depending on what type of beads you have, how many beads you use, and where you would like to place them. You will want to place all strings through the one bead, so make sure your bead holes are large enough.
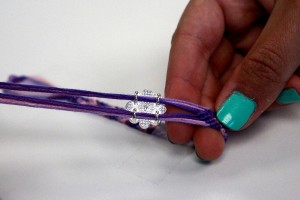
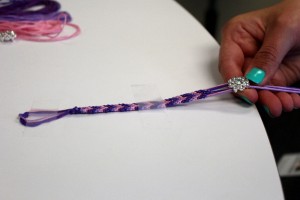
9. Repeat steps 5 & 6

Repeat steps 4 and 5 to continue the rest of the bracelet until it fits around your (or your BFF’s) wrist.

10. Complete your bracelet

Take the remainder of the string and neatly smooth it out into one large strand. Take the large strand of strings and tie it through the end of the loop to make it secure around your (or your friend’s) wrist.
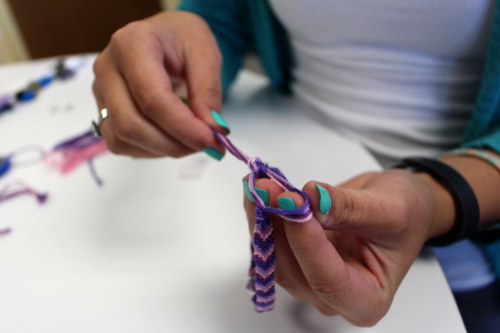
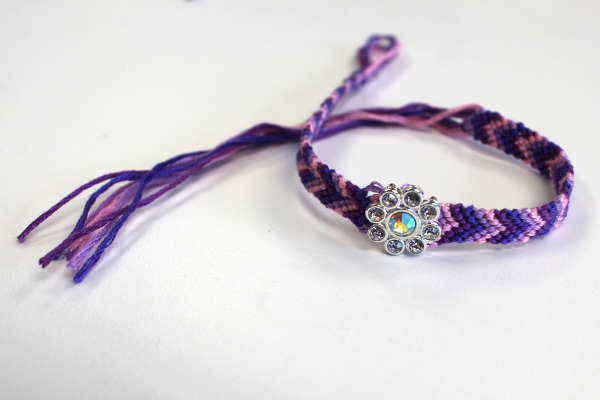
friendship-bracelet-knot-finish

11. Gift your bracelet to your best friend

friendship-bracelet-completed

Last-Minute Halloween Costume Idea: How to Make a DIY Flower Costume

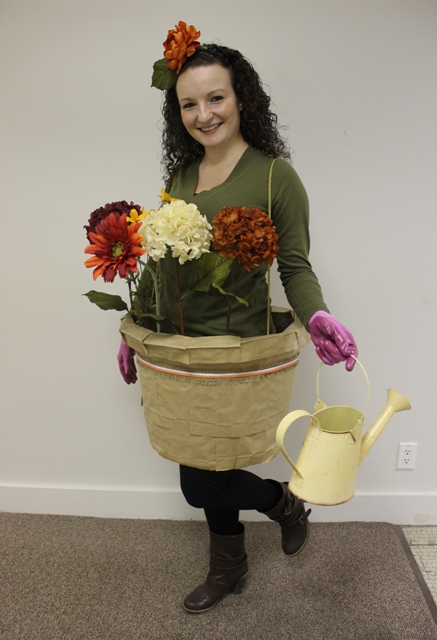
Looking for a last-minute Halloween costume for you or your kids? Instead of dropping close to $100 at the Halloween warehouse, get inspired by your favorite blooms and make this adorable DIY flower costume instead. It’s fast, fun and cheap: If you don’t already have the supplies lying around your house, you can find them at your local dollar store! Just follow this simple tutorial and you’ll be blossoming in the spotlight at your Halloween party.

Last Minute Halloween Costume Idea DIY Flower Costume

Flower Costume Materials Needed

Laundry basket*
Brown wrapping paper
6 long-stemmed flowers
12-foot pet tie-out rope (or regular rope)
Yarn
Adhesive tape
Scissors
Hot glue gun
Thick plastic headband

* You’ll be wearing the basket around your waist, so make sure it’s big enough for you to fit in it

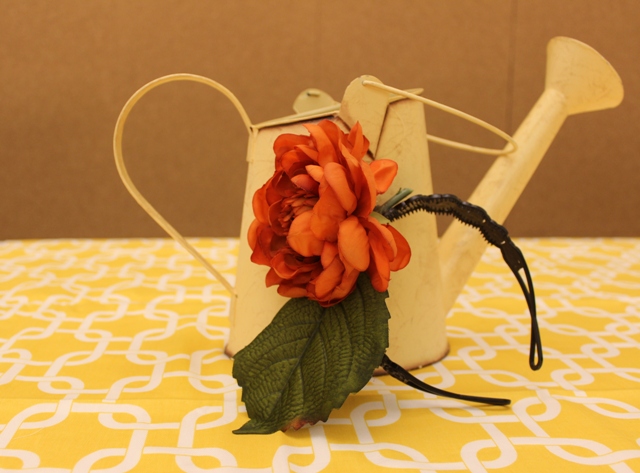
How to Make a Flower Headband

How to Make a DIY Flower Headband
  1. Cut off the top of one of the flowers, leaving about an inch and a half of the stem in tact below the head of the flower. Remove a large leaf from the stem as well.
  2. Position the leaf and flower flat on the top of the headband, off-center and slightly tilted forward so the face of the flower points out to the front of the headband.
  3. Using a hot glue gun, carefully glue the leaf and the flower to the headband.
  4. For extra security, use yarn to tie the flower and leaf to the headband. Tie the stem directly underneath the flower petals so the yarn doesn’t peek through.

How to Make a Flower Pot Costume

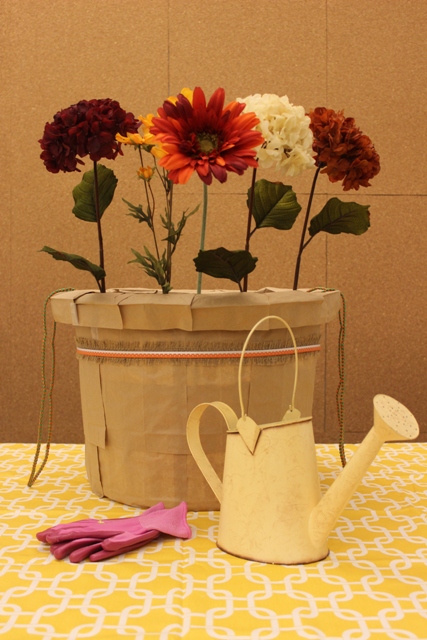
How to Make a DIY Flower Costume
  1. Turn the laundry basket upside down. Using a sharp knife, carefully cut out the bottom of the basket. The hole should be big enough for you to comfortably fit inside.
  2. Sit the basket right side up. One by one, stand up the remaining five flowers inside the basket, with the stems flat against the inside front wall. To attach each flower to the basket and to keep it from shifting, tightly tie the top, middle and bottom parts of each stem to the basket. (Tip: When you’re done wearing your costume, you can simply snip the yarn to remove and reuse the flowers!)
  3. Attach the rope to each handle of the basket to create “suspenders” that will go over your shoulders and hold up the basket around your waist. We used pet tie-out line; the hooks on each end of the rope can be easily clipped on to the basket.
  4. To transform your basket into a realistic flower pot, cover it with brown wrapping      paper. (Don’t forget to wrap the inside of the basket too!)
  5. Tie a fall-themed ribbon around the basket, just below the rim, to give the pot an extra-festive look.

And, of course, a costume isn’t complete without some accessories! Add a bit of horticultural flair to your look by carrying a watering can (or a basket of gardening tools) and wearing gardening gloves.

How would you add your own personal touch to this DIY flower Halloween costume?

How to Decorate a Graduation Cap with a DIY Flower Crown

From music festivals to spring picnics, floral crowns are everywhere you look. Now, you can take this popular hair accessory and add it to your graduation cap with a few simple steps.

We found that using fresh flowers versus artificial flowers works best as fresh flowers not only stand out but also give off an intoxicating scent. The flowers we used come from the Floral Embrace bouquet, part of the 1-800-Flowers.com graduation flowers collection.

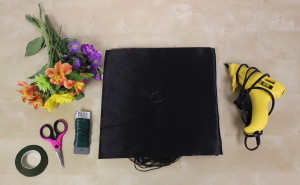
Materials needed to make DIY flower crown graduation cap

diy-floral-crown-graduation-cap-decoration_supplies
  • Graduation cap
  • Flowers
  • Floral wire
  • Floral tape
  • Scissors
  • Glue gun (optional)

Instructions

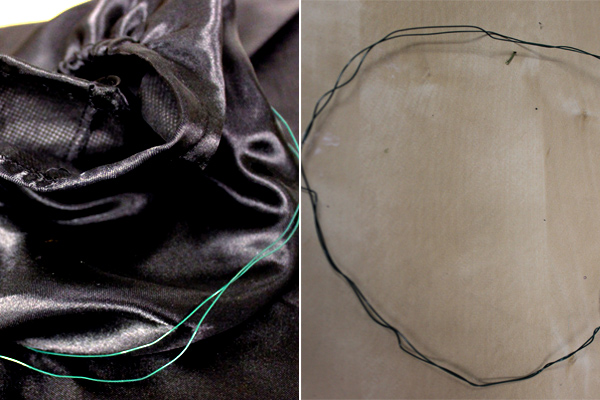
graduation cap with decoration wrap
  1. Take your spool of floral wire and wrap the wire twice around the rim of the graduation cap. Cut the piece off, and wrap the ends of the floral wire around the frame shape to secure.
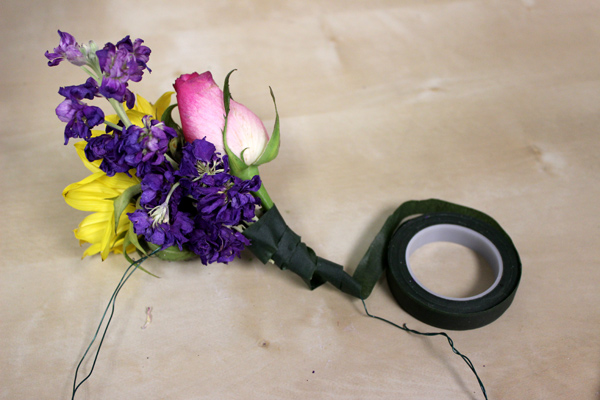
graduation cap with decoration tape

2. Take your flowers and remove most of the stem, leaving about 2-3 inches. Align your flowers on the crown as you want them to look, and wrap the floral tape around the stems and tape to secure.

graduation cap with graduate wearing diy floral crown graduation cap

3. Slip the DIY floral crown over the graduation cap. The crown should stay in place, but if you wish to secure it, you can glue the crown to the cap.

How to Decorate a Graduation Cap with Flowers

Graduation is a special day, and one way to stand out from the crowd is by adding your own personal flair to your grad cap! Here is an easy yet stunning graduation cap decoration idea using artificial flowers and hot glue.

Choose flower varieties and colors that represent your personality. For example, sunflowers represent a sunny and jolly disposition, while lilies are a wonderful choice for someone looking for a softer, more delicate touch. Choose two types of flowers in varying sizes for a visually impressive arrangement. As artificial flowers come in shapes and shades not necessarily found in nature, you can really get creative with the layout and design.

how to decorate a graduation cap with diy grad cap

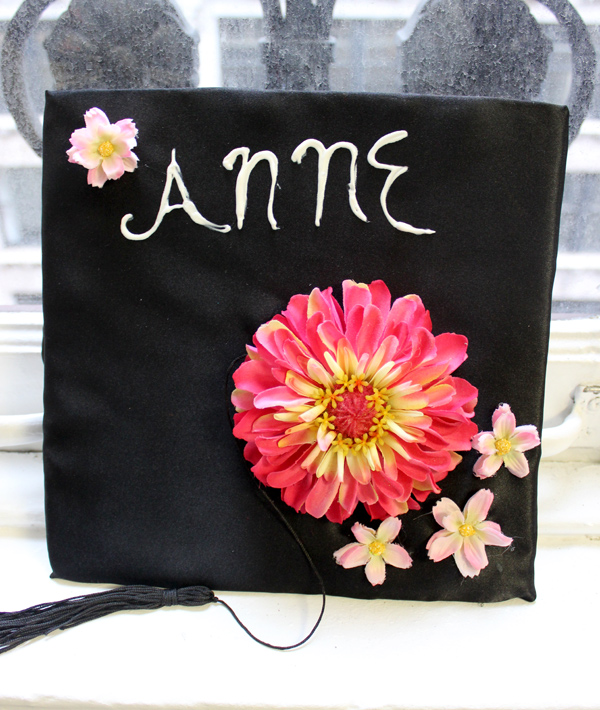
We used 3D puff paints to personalize the DIY graduation cap decorating, but you can also use glitter pens or 3D fabric markers. Additionally, rather than writing your name, you can personalize the grad cap with a favorite quote, message, or simply your class year (“Class of ___”).

Supplies needed for decorating a graduation cap with flowers

  • Graduation cap
  • Artificial flowers
  • Glue gun
  • Glue
  • 3D paint or similar

Directions for decorating a graduation cap with flowers

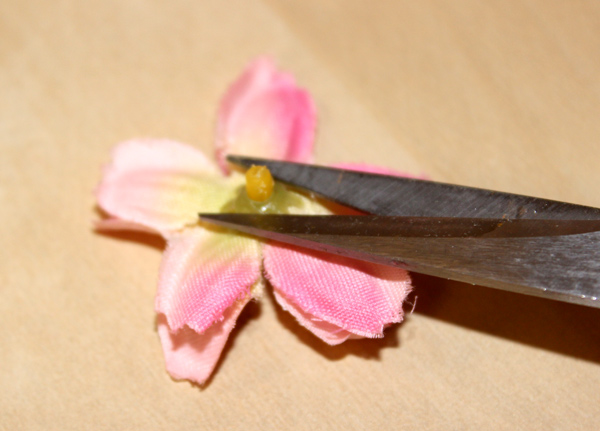
how to decorate a graduation cap with flowers cut
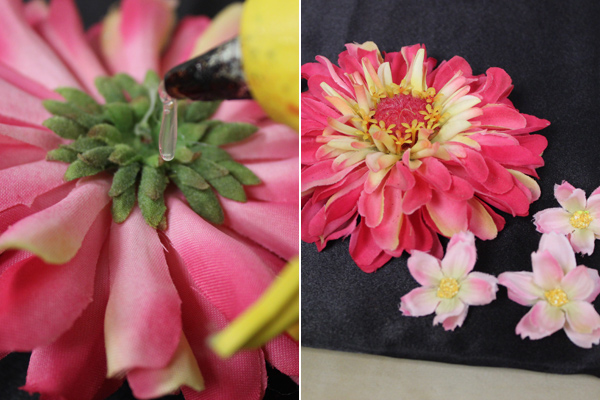
  1. Prepare your artificial flowers by cutting off any stems or unnecessary plastic parts that may get in the way of securing them to the graduation cap.
how to decorate a graduation cap with applying flowers to cap with hot glue
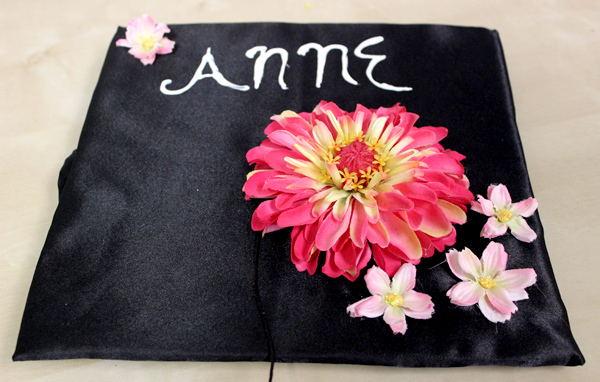
  1. Position the flowers on the cap where you want them. Use the hot glue gun to add glue to the bottom of a flower and press it onto the graduation cap, holding it down for 3-4 seconds to secure. Continue doing this until all the flowers are glued down and the glue is dried.
  1. Once the flowers are secured, use the paint to write your name or message of your choice. Let it dry for a few minutes.

Now, your graduation cap is ready to show off and dazzle!

DIY Manischewitz Passover Centerpiece with Purple Flowers

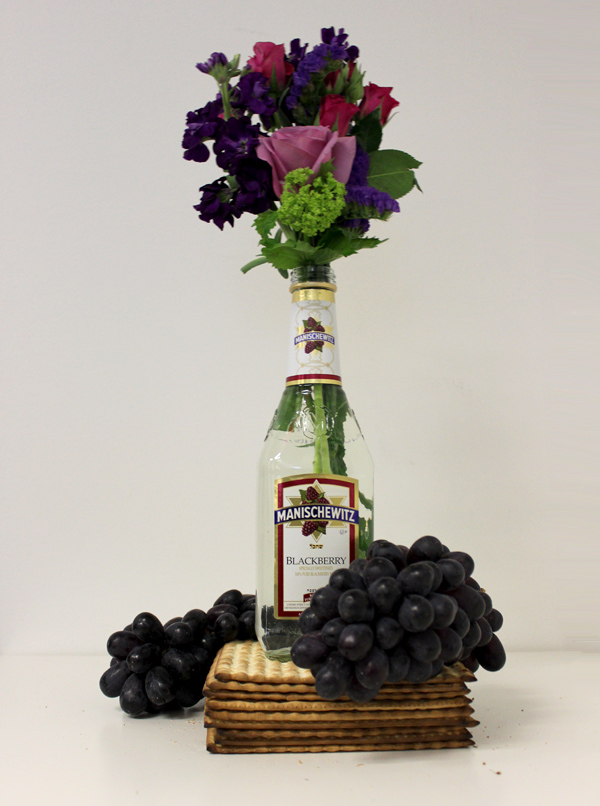
Set the scene for your Passover seder and celebrations with a creative twist on your décor! Taking inspiration from Passover’s most popular wine — Manischewitz — we came up with this creative Passover centerpiece that will add a fun and festive touch to your spread.

passover centerpiece

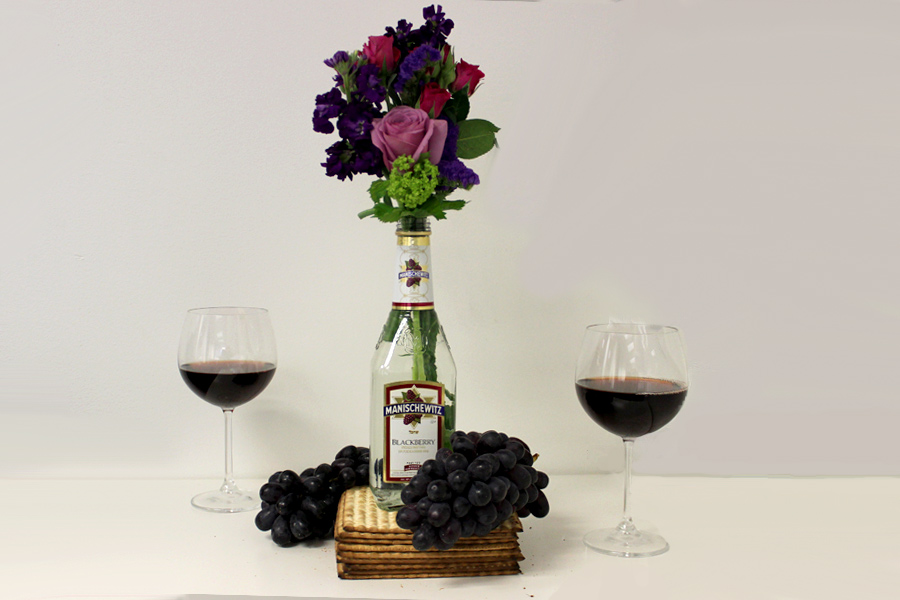
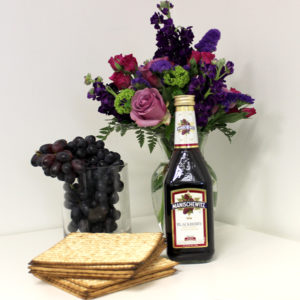
To celebrate the vino’s robust purple color, we paired a stunning bouquet of purple flowers with an empty bottle of the wine and some juicy dark purple grapes. This centerpiece is simple to make and takes little to no time at all. Throw these together about an hour or two before guests arrive — that way, you can empty the bottles by filling their wine glasses. Or, pour the wine into mason jars and place them in the fridge to chill.

Tip: Make several of these creative arrangements and spread them around the table for a “pop” of fun!

passover centerpiece supplies

Supplies for Manischewitz Passover centerpiece

  • 1 bottle of Manischewitz
  • Purple flowers
  • Purple grapes
  • Matzo
  • Scissors and ruler (optional)

Directions for Manischewitz Passover centerpiece

  1. Prepare your Manischewitz bottle vase by washing out any wine residue from the inside.
  2. Fill the bottle with water and arrange the flowers to your liking. You may need to trim the stems to fit your vessel.
  3. Place your bottle with flowers on top of a stack of matzo, and then arrange the grapes around it for a finishing touch. We recommended you wash (and fully dry) the grapes beforehand in case guests find them irresistible to eat!

Happy Pesach!

Trendy Trifecta: DIY Planter Decorating with Gold Foil

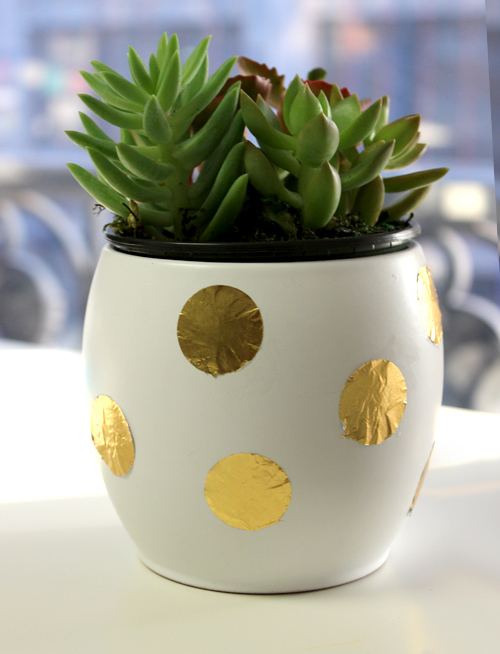
diy-planter-gold-foil-decorating

Looking for the perfect way to add some dazzle to your workspace?Look no further than potted plants! They not only add a simple and chic fresh touch but plants also have tons of great benefits. Win-win!

We jam-packed 3 trends – DIY-ing, chic potted plants, and gold foil – and turned them into one super chic and trendy decoration to add a touch of glam to your work desk or study. The potted plant used here was the Succulent Garden by Real Simple®. It comes in a sleek white ceramic planter which served as the perfect canvas for what I had in mind. The best part? Not only was this craft so easy, but if you grow tired of the metallic look, the gold foil polka dots will come off easily with some rubbing alcohol!

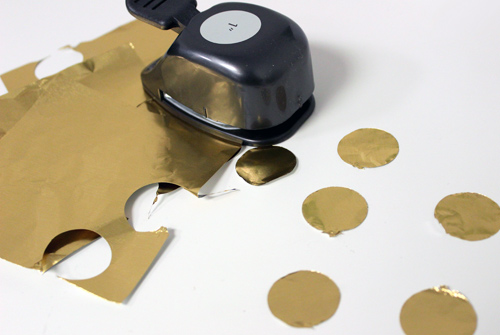
Note:  A 1” round hole punch was used here to create the “polka dots.” You can choose whatever hole puncher you wish to achieve your desired look. Alternatively, if you do not have a hole puncher, you can easily use scissors and a pencil to trace and cut out your desired shapes.

diy-planter-gold-foil-decorating-supplies

Supplies for DIY Planter Decorating With Gold Foil

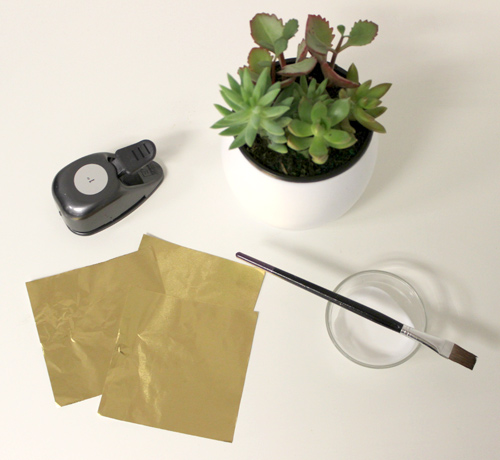
Planter (preferably in one basic color)
Gold Foil
Hole Puncher in desired shape and size
Liquid Adhesive (I used Mod Podge)
Brush

Directions for DIY Planter Decorating With Gold Foil

Start by cleaning off your planter and removing any fingerprint or residue stains. Once your planter is prepared, cut out a handful of your desired shape.

diy-planter-gold-foil-decorating-cutout

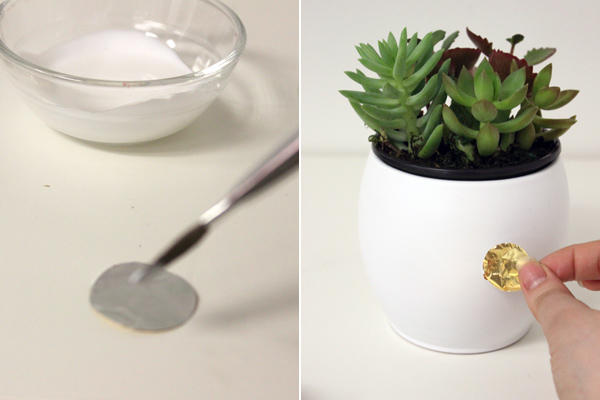
Dip your brush into the liquid adhesive and apply to the back of your shape. Try and keep most of it in the center of the shape as it will ooze out the sides when you are securing it to your planter. Use your fingernail to smooth out the shape and secure onto the planter.

diy-planter-gold-foil-decorating-apply

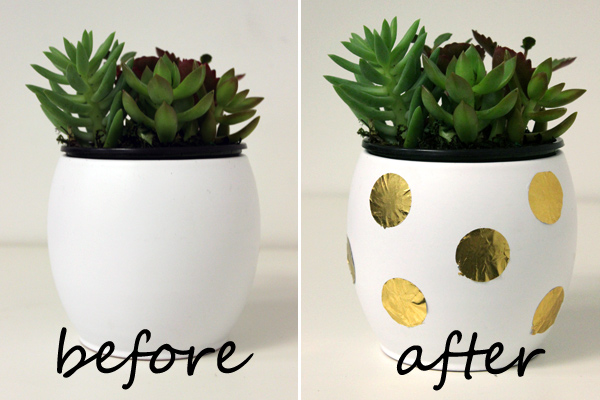
Continue until you are satisfied with your look. Now, you’re ready to show off your newly decorated planter!

DIY Gold Foil Polka Dot Planter: Before and After

diy-planter-gold-foil-decorating-before-after-text

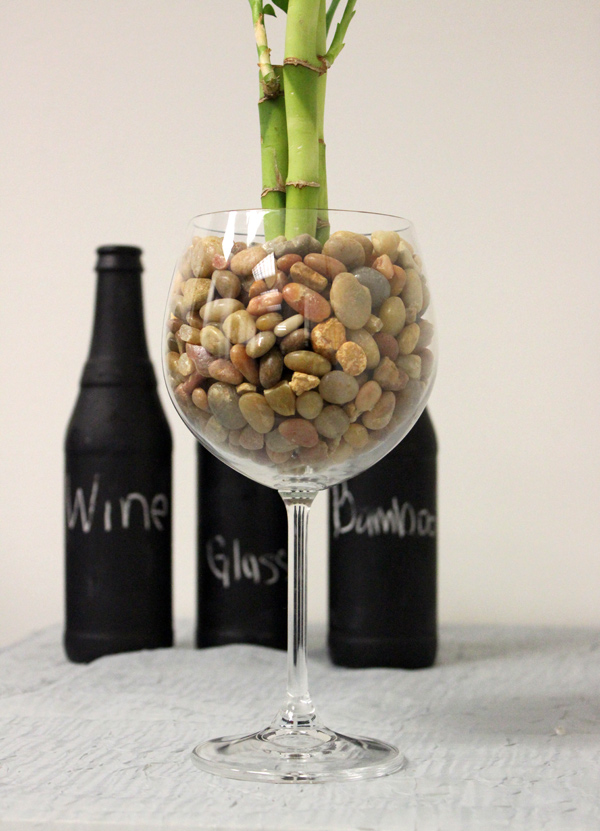
DIY Wine Glass Bamboo Gift

diy-wine-glass-bamboo-gift-labels

Sometimes, the best gifts are ones that take a backseat to life, playing in the background versus taking a front seat. That’s why live plants and dish gardens make such great gifts – they’re stunning, add a breath of fresh air to the room and play a subtle yet important part in one’s every day lives. A plant placed on one’s work desk brightens their mood and day in a subtle way on a daily basis, while a flower or plant showcased in one’s living room makes for a much livelier atmosphere.

If you know someone who fancies themselves a wine aficionado or simply loves the sophistication of a classic bottle of red or white, surprise them with a lucky bamboo plant showcased in a chic wine glass!

Since we’re a big fan of personalized gifts, we put a personal touch on this gift by writing a surprise message on the inside of the glass with permanent marker. This step is optional.

The best part? Thank to the bamboo plant’s low maintenance nature, even someone with a brown thumb can appreciate this creative idea!

Continue reading DIY Wine Glass Bamboo Gift

DIY Hanukkah Decorations: How to Make a Floral Hanukkah Centerpiece with Dreidels

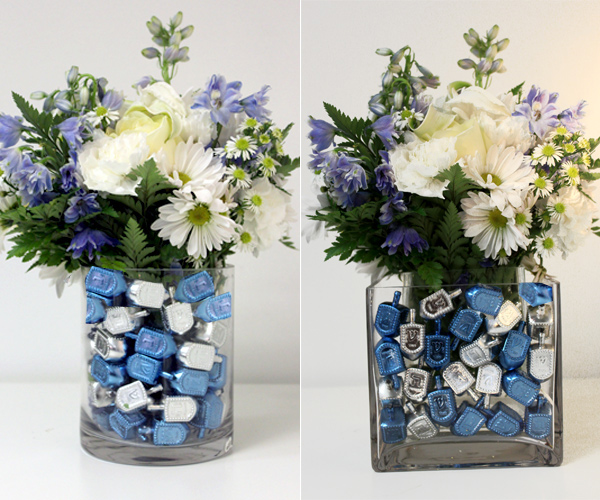
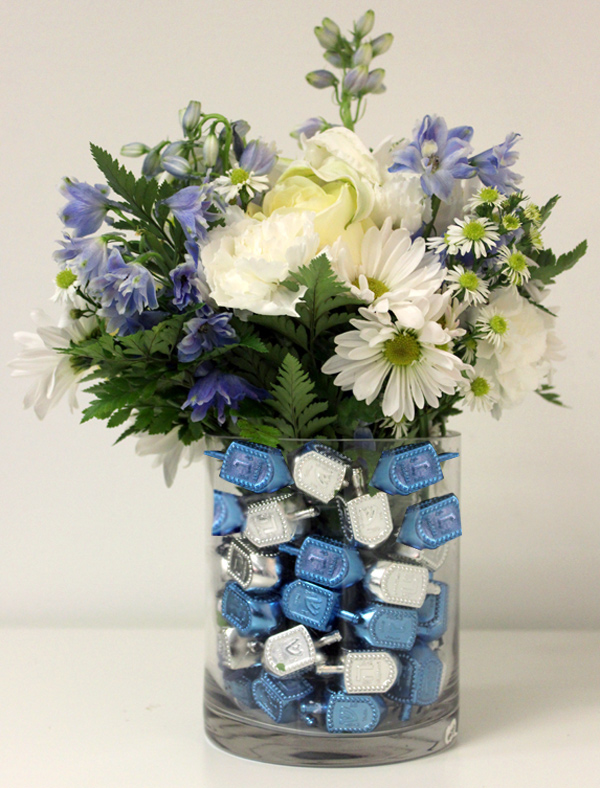
DIY Hanukkah centerpiece with dreidels and flowers in a vase.

The menorah may be the star of the show, but it is only one of many Hanukkah decorations. Add a simple festive touch to your décor with a DIY Hanukkah centerpiece or accent for your tables with a dreidel-filled vase for your Hanukkah flowers.

We stuck with metallic blue and silver dreidels for a chic and sophisticated vibe, but you can choose dreidels in vibrant colors for a playful look or classic wooden ones for a traditional touch.

Supplies needed

  • Hanukkah flowers
  • 2 similarly shaped vases: 1 large, 1 small
  • Dreidels (40-60, depending on size of vase)
  • Water
  • Floral shears

How to make the Hanukkah centerpiece

  1. Prepare your smaller vase by filling it with water and arranging your flowers how you see fit.
Hanukkah centerpiece with a vase of flowers.
  1. Carefully place the smaller vase inside the larger vase.
Hanukkah centerpiece with a vase full of dreidels and flowers.
  1. Slowly fill the larger vase with dreidels until you are satisfied with how it looks.

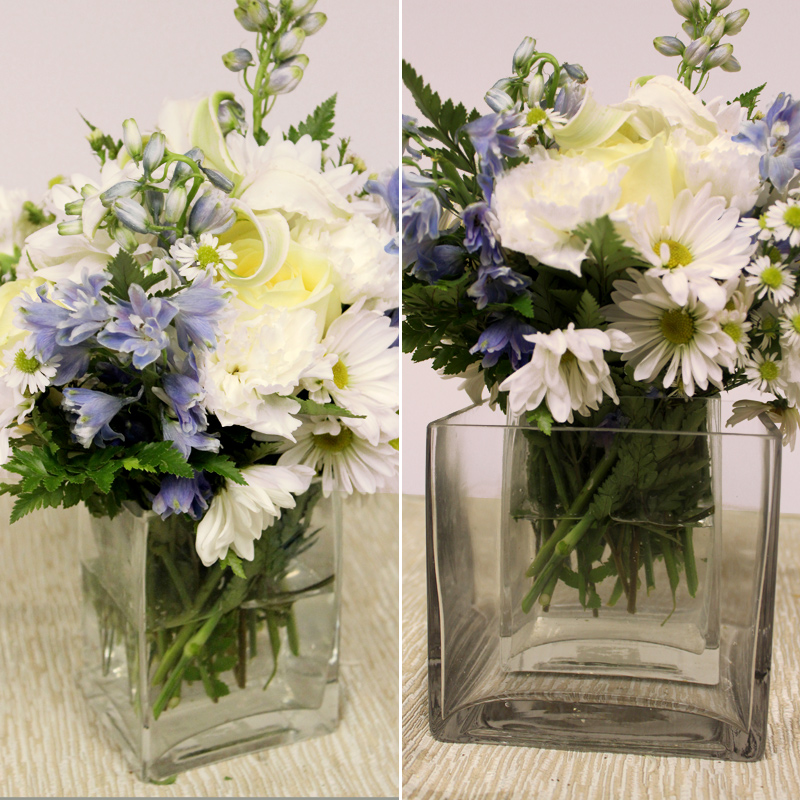
We tried this with both square and circular vases, and both looked absolutely stunning!

Make several and place them throughout the room for a beautifully unified look that will also add a sweet scent to your home.

How to Make Paper Poinsettias

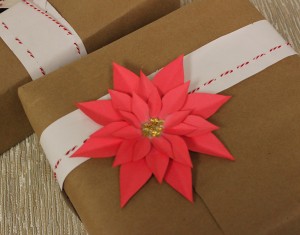
how-to-make-paper-poinsettias-gift

There’s no denying that poinsettias are the quintessential holiday flower. While there’s nothing to replace the aesthetic of a fresh bouquet of poinsettias in a stunning holiday vase or basket, there are other less conventional ways to decorate using this holiday must-have.

Use our template to create your own paper poinsettias that you can attach to gifts, turn into name tags or place card settings, or simply sprinkle throughout the room for a fun pop of holiday cheer.

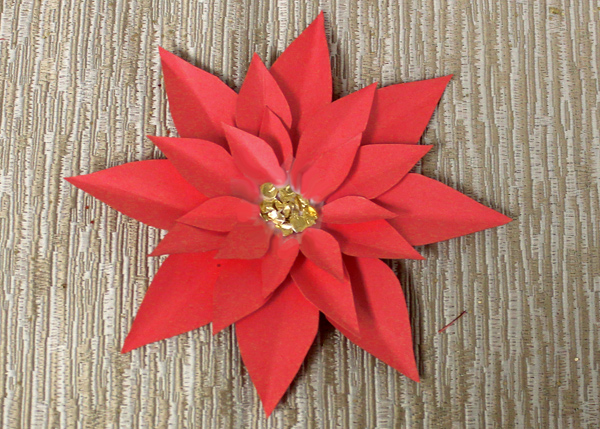
We used gold foil confetti for the middle of the flower, but you can choose any type of material from pearls to buttons to construction paper!

Supplies for DIY Paper Poinsettia

how-to-make-paper-poinsettias-supplies

Printable paper poinsettia template + access to printer
Colored cardstock or paper with similar weight
Scissors
Glue or tape
Gold Foil (optional)
Hole Puncher (optional)

Directions for DIY Paper Poinsettia

First, load your printer with your colored cardstock or paper. Download our printable paper poinsettia template and print.

how-to-make-paper-poinsettias-petals

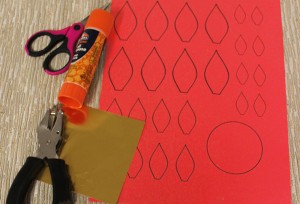
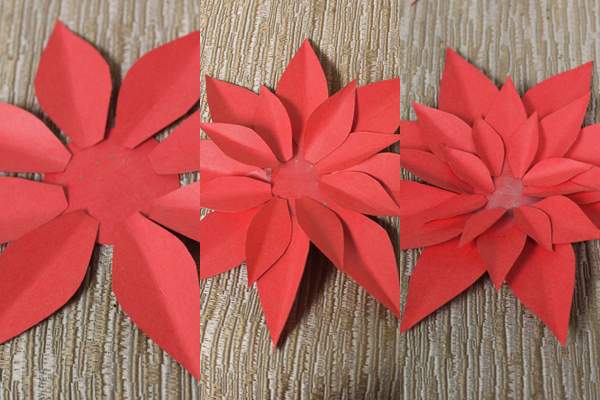
Cut out all of the shapes in the printable. You should have: 8 large petals, 8 medium-sized petals, 8 small petals, and 1 circle. Fold all of the petals slightly and carefully in half, vertically.

how-to-make-paper-poinsettias-flower

Begin by gluing the large petals around the outer edge of the circle. Then, glue the medium sized petals overlapping the “gaps” in the larger petals. Finally, do the same for the small petals on top of the medium petals.

how-to-make-paper-poinsettias-foil

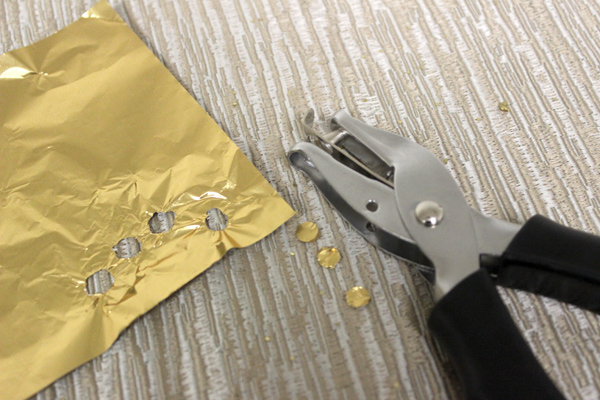
Now it’s time to put the finishing touches on your flower. Use a hole puncher and the gold foil to create foil confetti.

how-to-make-paper-poinsettias

Glue the confetti onto the middle and let dry. Now your pretty paper poinsettias are complete!

Exit mobile version