Why We Hang Christmas Wreaths

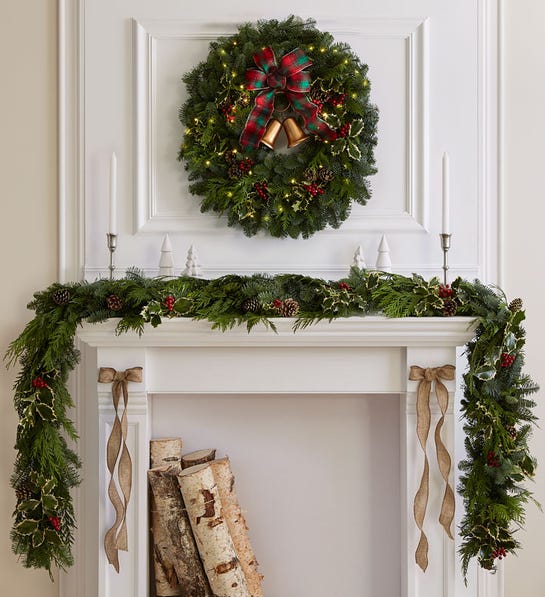
A quintessential symbol of Christmas, the wreath is practically de rigueur in yuletide decorating. But as a token of hope and eternity, the Christmas wreath isn’t just another decorative artifact with a pretty bow. So how did this circular object become emblematic of “the most wonderful time of the year”?

Wreaths, the early days

Picture of wreath over mantle

The wreath has enjoyed a long and storied history, although its precise origins are unclear. In ancient times, wreaths made from leaves, olive treesberries, and twigs were worn as headdresses to denote royalty, authority, and power. The Greco-Romans conferred wreaths upon notable individuals as symbols of honor, respect, and victory. In 10th-century Scandinavia, as part of the pagan winter solstice Yule festival, candles were lit and placed around wooden wheels to pay homage to the sun and to summon warmth from the gods.

By the 16th century, the prevalence of Christianity in Northern Europe had ushered in new traditions, and the wreath took on a whole new meaning. Evergreen trees, naturally abundant and revered for their ability to withstand the elements of winter, became symbols of hope and eternal life.

In Germany, families chopped down fresh evergreens and cut them into triangular formations in a symbolic act representative of the Holy Trinity. They brought the trees home to decorate as part of their Christmas tradition that also included twisting the discarded cuttings into small circular ornaments — the very shape of which signifies eternity.

The eventual introduction of the Advent wreath in the 19th century sparked another sacred practice: the lighting of candles to celebrate the birth and light of Christ. In addition to evergreens, other elements of the traditional Advent wreath included holly oak and berries — symbols of the crown of thorns and the blood of the crucifixion.

“The decorative value of wreaths is believed to have been derived by ancient tradition. In the way that we use house numbers today, wreaths featuring different floral arrangements were used to identify different families and houses,” says Julie Mulligan, 1-800-Flowers.com’s lifestyle and crafting expert.

21st-century Christmas style

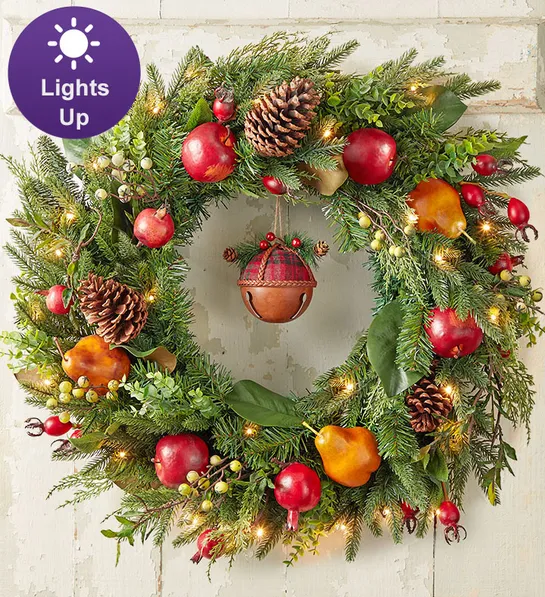
The Christmas wreaths of today may or may not have a religious significance, depending on the individual. Whether your wreath is crafted from evergreen branches embellished with pinecones or made from bright sparkly baubles accented with ribbon, it should always speak to your personal taste and holiday decorating style.

“The wreath is so rich in history, tradition, and symbolism, yet most people just like the way they look and incorporate them into their decor,” Mulligan says. “And that’s fine: They offer a year-round opportunity to be creative and change it up seasonally. “

If you’re planning to create a wreath from scratch this year, consider going the sustainable route. “Sustainable wreath bases formed from the grapevine, kiwi vines, and other 100% compostable materials are more popular than ever,” says Debra Prinzing, creative director of Slow Flowers Society. Otherwise, Prinzing says, metal wreath forms generally “end up in the landfill after the holidays.”

Here are some of the snazzy wreath ideas trending this season.

Shapeshifters

Circles are so 20th century. Try something new this year by creating a wreath in a totally different shape. This season’s wreath shapes “include oval, crescent, and square forms,” Prinzing says. A triangular-shaped Christmas wreath is a nice way to pay tribute to its ancestor, the Christmas tree.

Vintage vavoom

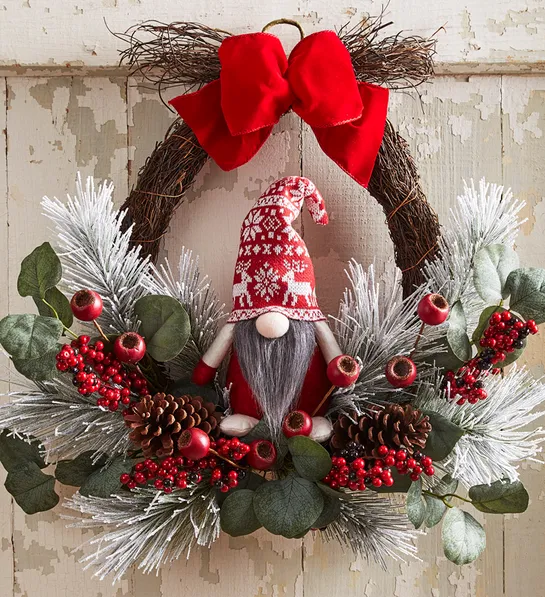
“I love the idea of incorporating something personal into the wreath,” Mulligan says. “A vintage collector type could include some old shiny bright ornaments. Or a gardener might feature some tools, mini clay pots, or some seeds!” You can score vintage holiday decorations from antique stores, flea markets, and thrift shops. Layer in retro-style tinsel garland for a touch of mid-century modern shimmer.

Personal touch

Picture of wreath on black door

Create a wreath using family photographs, mementos gathered from special trips, and personalized keepsake ornaments for a one-of-a-kind holiday heirloom with meaning. Make the wreath even more special by inviting family members to take part in its installation. “Creating wreaths is a wonderful communal act for people of any age,” Prinzing says. “Gathering branches and hanging [a wreath] feels like a timeless gesture of hope for the season.”

Baby’s first Christmas wreath

Celebrate the arrival of your new little one with a flocked wreath embellished with miniature baubles in pretty pastels and a satin ribbon. Attach a favorite photograph so it hangs in the center.
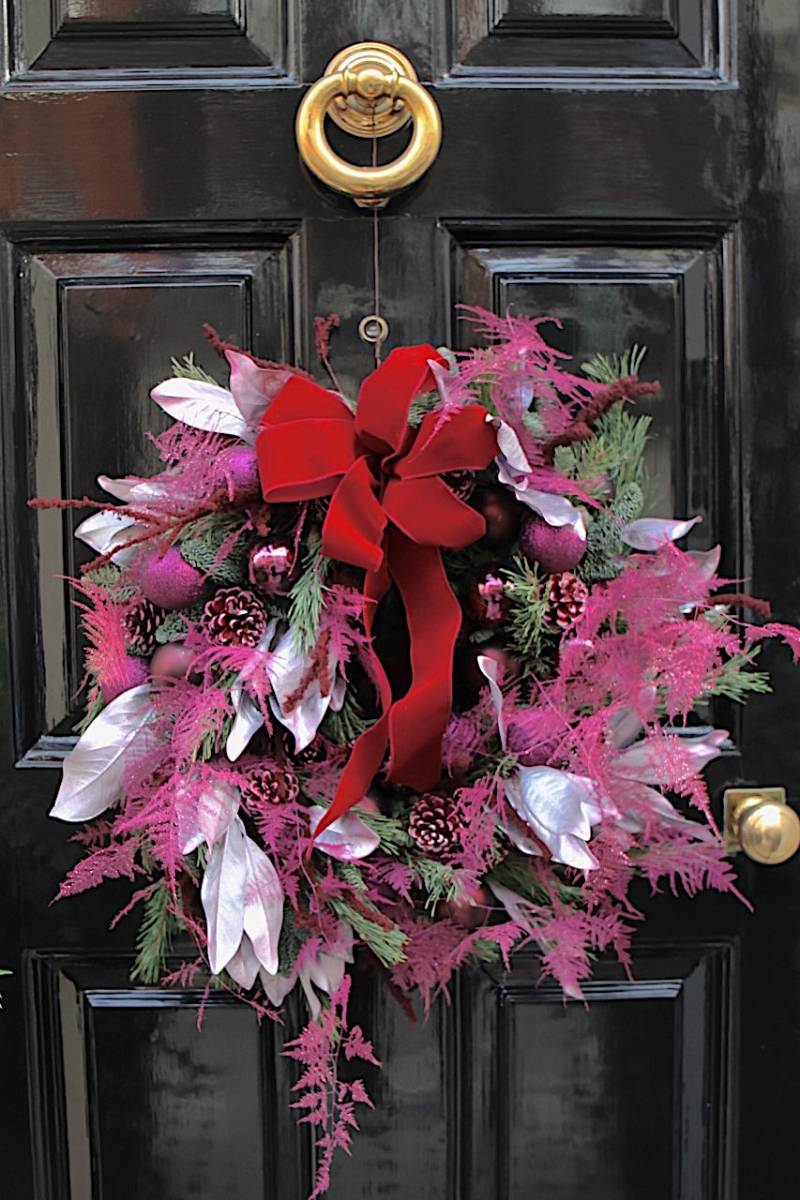
Regal elegance

Jewel tones are so in. Midnight blue, royal purple, emerald green, gold, and silver add sophistication to any holiday vignette. Use a combination of fresh blooms, velvet ribbon, glittery baubles, feathers, and sequin trim to capture the look you want.

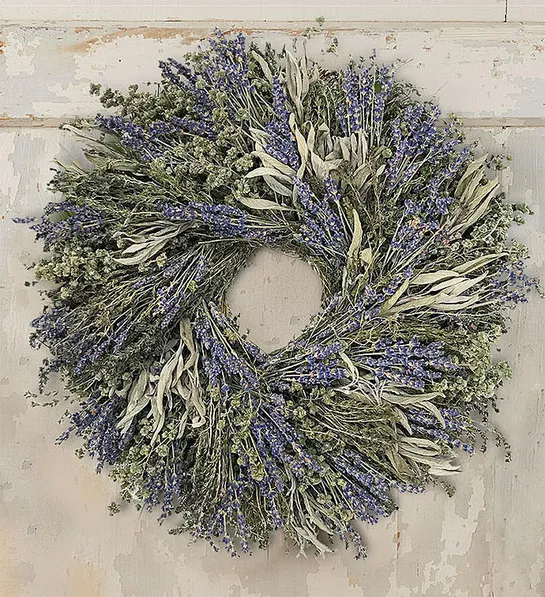
Sensational sunflowers

Sunflowers might seem like an unconventional choice for a holiday wreath, but it really is an all-occasion flower. The sunflower embodies the very essence of optimism, and it reminds us to stay hopeful during challenging times. Accent your sunflower wreath with holly sprigs, pip berries, pinecones, and twigs. Then, add a dark green satin bow as the finishing touch.

Coastal vibes

There’s never a wrong time for a wreath inspired by the seashore. Create a base wreath with shells, starfish, sand dollars, driftwood, and twine. Then, add a few evergreen sprigs and mini pinecones to the arrangement to infuse it with some holiday pizzazz.

Says Mulligan, “It’s all about creating your world, your way, and using what you already have in new ways.  So, look around and create a holiday wreath that represents you!”

Christmas ad with stockings

Top 10 Poinsettia Facts

poinsettia facts with potted poinsettia

Holiday decorating is one of the best things about Christmas. The lights, the wreaths, the tree…they all combine to make one big festive display in — and out of — our homes.

But there’s one element that can take your decor from ordinary to extraordinary: a poinsettia plant!

Poinsettias are one of the most popular flowers associated with Christmas. Since poinsettia displays are so prominent this time of year, you should take a minute to get to know more about this plant that embodies the holiday season.

Poinsettia facts

  1. A poinsettia plant’s botanical name is “euphorbia pulcherrima,” which translates to “very beautiful.”
  2. Joel Roberts Poinsett, the first U.S ambassador to Mexico and a U.S congressman, is credited as the person who introduced poinsettias to the United States, after discovering them in Mexico.
  3. Poinsettias were given the name “poinsettia” by William Prescott. After learning the story of Poinsett’s findings, Prescott renamed the plant after him.
  4. Speaking of Poinsett, Dec. 12 is known as Poinsettia Day in his honor; Dec. 12 is the day that Mr. Poinsett died.
  5. The red blooms we see on poinsettia plants are actually not flowers; rather, they are known as bracts. By definition, bracts are simply modified leaves. The actual “flower” on a poinsettia plant is the yellow bloom found at the center of the bracts.

Poinsettia gift ideas


poinsettia facts with woman holding poinsettia
  1. Poinsettias come in over 100 colors. While prestige red is the most common, you can also find plants whose bracts are white, pink, and even gold!
  2. The color of poinsettia leaves is actually determined by how much light the plant gets. For red leaves, the plant needs must get bright light during the day and no light at night (for at least 12 hours).
  3. The majority of poinsettias found in the U.S. are grown and produced in California.
  4. Though they are most commonly seen around the holidays, poinsettias can bloom again after the season is over, which makes them perennials. However, getting them to do so requires a ton of care throughout the spring and summer.
  5. Contrary to popular belief, poinsettias are not poisonous. Research shows that a child would have to eat more than 500 poinsettia leaves in order to experience really serious effects — but that’s not to say they’re completely harmless. To be safe, it’s best to keep poinsettias away from children and pets.

Patriotic Flowers to Decorate Your Home With

With Independence Day right around the corner, most of us have one thing on our mind — patriotic decorations. Perhaps no historical day is more beloved among Americans than the Fourth of July. And for that reason, it’s no surprise that people go out of their way to cover their homes in all things red, white, and blue!

This holiday, show your love for your country with the help of these patriotic flowers.

Red, white, and blue arrangements

Celebrate America all day (and night) long by making this colorful arrangement the focal point of your gathering. Talk about an American dream!

patriotic flowers with patriotic dog bouquet

Patriotic pups

With Yankee Doodle Doggie™ at your party, things are sure to get dandy. After all, what better way to celebrate the dog days of summer than with a patriotic party pooch of your very own!?

Roses

While it may seem like roses are the official flower of Valentine’s Day, they’re actually the official flower of the United States. It was President Ronald Reagan who declared roses the national flower emblem in 1986. The White House Rose Garden is also home to many diplomatic meetings and bill signings.

patriotic flowers with red roses
patriotic flowers with red, white, and blue wreath

Dazzling wreaths

Show your pride to everyone who passes your home with the help of a red, white, and beautiful wreath. Particularly perfect for the upcoming holiday, it features an American flag-inspired bow.

Not feeling the traditional red, white, and blue decorations this year? Break away from the pack by incorporating patriotic flowers that hold a special place in American history into your decor.

Jasmine

Aside from the President himself, greenery was a major theme for President Barack Obama’s official portrait, which was unveiled in February 2018. Present among the green leaves were several flowers, one of which was white jasmine. The artist, Kehinde Wiley, said white jasmine was included to represent Obama’s Hawaiian birthplace. Chrysanthemums can also be found growing in the background. They were included to symbolize Chicago, the city Obama grew up in before becoming senator of Illinois.

patriotic flowers with white jasmine flowers
patriotic flowers with field of orange poppies

Poppies

Poppies, which have come to symbolize American lives lost to war, are often worn by Americans on patriotic holidays. This practice was inspired by the 1915 poem “In Flanders Fields,” in which the writer, John McCrae, describes the sea of poppies that could be seen as fallen soldiers were being buried.

Peonies

White peonies were a favorite among several first ladies, including Jackie Kennedy and Nancy Reagan. If it were up to Nancy Reagan, white peonies would have been used in arrangements around the White House and for political gatherings far more. Rumor has it that her chief floral designer had to tell her on several occasions that peonies couldn’t be used for events taking place in the summer, fall, and winter because they only bloom in spring.

patriotic flowers with bouquet of peonies
patriotic flowers with white carnations

Carnations

As the flower behind the historic “Flower Power” image, carnations became a universal symbol of peace and love after a photographer captured Vietnam War protesters sticking carnations into the barrel of a soldier’s rifle.

11 Creative Ways to Brighten Up Your Office Space

Administrative Professionals’ Day is April 26, so all you secretaries, receptionists, and office workers, get your headquarters ready — it’s your time to shine! You are the people who make every business a success, and exceptional employees like you deserve to have an equally special work space.

Here are 11 fun and creative ways to brighten up your office space just in time for the holiday.

1. Decorate your desk with flowers and plants

Photo of young workers in an office that makes good use of desk plants

Whether you work in an office or a cubicle, accessorizing your space with flowers has lots of benefits. In office environments, where décor is typically minimal and, well, dull, a colorful bouquet of flowers or a pretty green plant will bring instant natural beauty to your workstation. But it’s not just about the wow factor; flowers lift your spirits and make you healthier and more productive too! They allow you to enjoy the outdoors even on days when you can’t leave the office, and studies show that plants remove toxins from the air and improve concentration

2. Promote tranquility with a water fountain

Instead of listening to the monotonous clicking of keyboards all day, bring some zen into your cubicle with the calming sound of a desktop water fountain. It’ll drown out other annoying sounds and help you relax, allowing you to get your work done in peace. Just make sure the running water isn’t so loud that it distracts you and your co-workers!

3. Transform your chair with a cozy pillow and blanket

Your desk chair is your home for about eight hours a day (even more on late nights!), so you might as well make it as comfy as possible. If your chair isn’t particularly cushiony, soften it up by placing a cute pillow on the seat. You can also wrap a pretty pashmina around the back of the chair: You’ll make a stylish statement and you’ll have something to wrap around your shoulders when the office gets cool.

4. Warm up your floor space with a pretty rug

Get rid of those boring plastic floor mats under your chair and replace them with a plush rug. Its fuzzy texture and bright colors will show off your personality and make your office visitors feel right at home. It’s a small change that’ll brighten up your office space in a big way.

5. Use placemats to bring pops of color to your desk

Think there’s nothing spectacular about your plain white desk? Think again! Look at it as a blank canvas — it’s up to you to bring it to life. Turn it into a work of art by sliding a patterned or brightly colored placemat under your computer screen, keyboard, file organizers, etc. You’ll feel like you’re sitting at a whole new desk!

6. Hang curtains for a homey atmosphere

If you have windows by your desk that could use some sprucing up, make them more welcoming by decking them out with curtains. Make sure the curtains aren’t too dark; you still want some of that natural light to shine through. Two sheer panels and a couple of cute tiebacks are enough to make your space the most inviting and desired real estate in the office!

brighten up your office space with desk lamp lighting up desk

7. Bring in a softer, more pleasant source of light

Bright overhead fluorescent lights can be harsh on the eyes, especially when you’re reading from a computer screen for hours. Placing a lamp on your desk will tone down the atmosphere with more natural-looking light and give your eyes a rest. And with all those cool, creative lamps that are out there on store shelves these days, you won’t have any trouble finding one that shines a spotlight on your unique personality!

8. Clear out the clutter with fun storage solutions

It’s a proven fact: The more clutter you’re surrounded by, the more stressed you’re going to be. When you work in a tiny cubicle, even the tiniest bit of clutter can look like mass chaos — and as busy as you are at work, you know you don’t need any extra worries. Storage solutions like file organizers allow you to neatly stow your stray office supplies, helping you clear out the unnecessary anxiety from your mind. Plus, with so many designs and color options, these storage supplies give your desk another splash of character.

brighten up your office space with artwork hanging above desk

9. Surround yourself with family photos

When times get tough, or when we need a little inspiration, the first people we look to are our family members. You can do that at work too: Fill a few picture frames with your favorite family photos, and look at them whenever you need a quick morale boost.

10. Put some artwork on display

Crazy about sports? Always dreaming of lounging on a tropical beach? Whatever your hobbies or interests are, find some artwork in that theme and display it above your desk where you can see it. It’ll automatically brighten your day and transport you to a happy state of mind every time you look at it.

11. Show off your accomplishments

Nothing revs you up for a day of work more than a visual reminder of all the great things you’ve accomplished in the past. Frame and exhibit your diplomas, awards, and any other mementos from your proudest moments. Any time you feel slightly unsure of yourself, look at these objects and you’ll be reminded of what a true talent you are and receive the encouragement you need to seize the day.

DIY Valentine’s Day Décor: How to Make Tissue Paper Roses

Bouquet of Tissue Paper Roses

Remember when we decked the halls with tissue paper flowers? Well, now it’s time to put a fancy twist on an old favorite. The most romantic day of they year is almost here, so let’s get your house ready for Cupid’s arrival by showing you how to make tissue paper roses! They bring a beautiful handcrafted touch to your Valentine’s Day décor, and they even make a charming gift for that someone special. Here’s how to make them.

Materials for DIY tissue paper roses

  • Red tissue paper (one sheet makes two roses)
  • Wooden skewers (one per rose)
  • Clear adhesive tape
  • Green adhesive tape
  • Scissors
  • Twine or ribbon

How to make tissue paper roses

Crumpled Tissue Paper Flattened out Into a Sheet
  1. Take one sheet of red tissue paper and crumple it into a ball. Carefully open the sheet again and flatten it out, making sure not to rip it.
    Crumpled Tissue Paper Cut in Half
  2. Lay the tissue paper vertically and cut it in half, from bottom to top.
    Crumpled Tissue Paper Folded in Half Twice
  3. Fold each cut piece in half vertically twice to create a longer, skinnier rectangle.
    Pinching the Corner of the Tissue Paper to Begin Rolling
  4. Turn the rectangle so that it’s lying horizontally with the folded side at the top. Pinch one of the bottom corners and gently roll the tissue paper inward toward the opposite corner.
    Tissue Paper Rolled up Into a Rose
  5. Make sure that the center is the highest point of the flower, and that the tissue paper moves lower and lower from the center as you continue to roll it.
    Tissue Paper Rose Placed on a Wooden Skewer
  6. When you’re done rolling your flower, place it on one end of a wooden skewer and secure it with adhesive tape.
    Rose Leaves Cut out of Construction Paper
  7. Using your scissors and green construction paper, cut out a few leaf shapes with stems. To make the leaves look more natural, color them with a dark green permanent marker.
    Wooden Skewer Wrapped With Green Tape to Create a Rose Stem
  8. Starting at the top of the skewer, tightly wrap a thin strip of green tape around the wooden stick and work your way down until you reach the bottom of the stick. As you move along, place a few leaves onto the skewer and wrap them with the tape as well.
    Bunch of Tissue Paper Roses
  9. Repeat steps 1-8 for each flower you’d like to make.
    Mason Jar Decorated With Twine
  10. Place your finished flowers into a mason jar. To add a homey touch, tie a piece of twine or festive ribbon around the mouth of the jar.

Of course, if crafting is not your thing, you can always surprise your special someone with Valentine’s Day roses. Sure, sending flowers might take as much effort as making them, but they still make for a great addition to anyone’s Valentine’s Day decor.

How to Make Tissue Paper Flower Ornaments for Your Christmas Tree

Christmas Tree Decorated With Tissue Paper Flower Ornaments

If you want a casual, low-maintenance option to decorate your Christmas tree with, try creating these super-fun, super-festive tissue paper flowers. They look just like real flowers, and their decorating potential isn’t limited to Christmas trees: Use them to dress up wreaths, garland, gift boxes, baskets, curtain rods, flower pots, and more. Plus, you can enjoy making this easy Christmas craft with your kids — no cleanup required.

Materials needed for tissue paper flower ornaments

  • Red, green, and white tissue paper (about 6-8 sheets of tissue paper per flower)
  • Scissors
  • Ruler
  • Floral wire

How to make tissue paper flower ornaments

  1. Neatly stack six to eight sheets of tissue paper, one on top of the other. Pile them in any color pattern you wish: You can use one color or alternate colors for each layer. Use your imagination to make each flower unique, like the ones shown above.
tissue paper flower ornament with Trimmed Stack of Christmas Tissue Paper
  1. Trim the stack according to the size you want your flower to be. You can trim it down to a 10 by 10 square or 7 by 12 rectangle. The smaller you cut the pile, the smaller your flower will be.
tissue paper flower ornament with Stack of Christmas Tissue Paper Folded Like an Accordion
  1. Fold the tissue paper accordion style into 1-inch-wide folds.
tissue paper flower ornament with Tissue Paper Accordion Secured With Floral Wire
  1. Lay the tissue paper accordion flat on a table. Fold a 10-inch piece of floral wire in half and wrap it around the center of the accordion. Twist the floral wire right below the accordion to prevent the tissue paper from unfolding. There will be a few extra inches of floral wire sticking out; you’ll use this to attach your flower to your tree.
  1. Trim the two ends of the accordion to create either round or pointed edges. Round edges will give you a flower that looks like a rose or peony; pointed edges will create poinsettia-like petals. The image above shows what each type of petal looks like on a finished flower. (The red and white flowers have rounded petals; the green flower pointed petals.)
tissue paper flower ornament with Fanned-Out Tissue Paper Accordion
  1. Fan out the accordion on each side of the floral wire.
tissue paper flower ornament with Half-Ruffled Tissue Paper Flower Ornament
  1. One by one, slowly and very gently start pulling each layer of tissue paper up and toward the center of the accordion, away from the floral wire. Do this on each side of the floral wire.
tissue paper flower ornament with Tissue Paper Flower Ornament Attached to Christmas Tree With Floral Wire
  1. When you’re done, carefully fluff up the petals to fill any empty spaces. Use the wire to attach your gorgeous tissue paper blossom to a branch on your Christmas tree…or to anything else you think could use a festive and flowery touch!
tissue paper flower ornament with Completed Tissue Paper Flower Ornament

Bonus: When Christmas is over, save your flowers and use them as decorations for your next birthday party, barbecue, baby shower, or bridal shower.

How to Make A DIY Advent Calendar for Christmas

DIY Advent Calendar With Christmas Ornaments and Socks x

For some people, Christmas starts when they wake up on Dec. 25 and start exchanging presents with loved ones. But, as with the best things in life, it’s the journey, not the destination, that counts.

We believe that the granddaddy of all holidays isn’t just one day but comprises a full 25 days of merrymaking! And one of the most fun ways to count down to the big day —and make the most of the season — is by crafting a DIY advent calendar.

But this isn’t just any advent calendar; it’s made with, get this, socks! Festive red and green Christmas socks, to be exact, just like the kind the elves wear.

The best part is, the whole thing takes just four easy steps to put together…five if you’re starting with dirty socks. Wash them first!

Materials needed for DIY advent calendar

  • 9-foot string of beaded garland
  • White and green cardstock
  • Scissors
  • Glue
  • Pack of 12 regular-sized Christmas ball ornaments
  • One oversized ornament in a fun shape of your choice
  • 6 pairs of Christmas socks
  • 12 safety pins
  • Floral wire

How to make a DIY advent calendar

diy advent calendar with Labeling Socks and Ornaments

Step 1

Using scissors and white cardstock, trace and cut out the shapes of the numbers 1 through 25. Glue the number 13 onto the oversized ornament and each remaining odd number onto a smaller ball ornament. Then, glue each even number to a piece of cardstock cut into the shape of a circle and attach it to a Christmas sock with a safety pin.

Step 2

String up the garland across a bare wall or fireplace mantel. Make sure it is secure enough to hold up all the ornaments.

Step 3

With floral wire, hang each ornament and sock on the garland in numerical order. Start with the number 1 at the left end of the garland and work your way up to the number 25. The order of the ornaments and socks will alternate, with the oversized ornament sitting directly in the middle.

diy advent calendar with Christmas Ornaments and Socks Strung up on Garland

Step 4

Fill each sock with candy or a small trinket for each member of the family.


And there you have it: A daily countdown that will fill Christmas — all 25 days of it — with even more joy, excitement, and anticipation.

Exit mobile version