How to Make DIY Halloween Centerpieces for the Table

Halloween is arguably the most DIY-friendly holiday on the calendar. Between costumes for kids and adults, spooky décor, and parties decked out with frightfully ghoulish embellishments, there are countless opportunities to express your creativity and craftiness.

One of my favorite ways to celebrate the season is with colorful, over-the-top Halloween centerpieces. And with flowers that show off the vibrant colors of fall and the sugary treats we all have lying around the house this time of year, we have plenty of materials at our disposal to make some eye-catching pieces to be the focal points for our festive tablescapes.
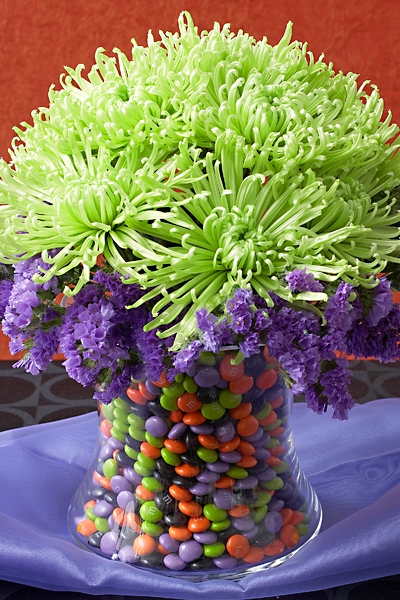
Halloween centerpieces with Halloween M&M arrangement

DIY Halloween candy centerpieces: the candy vase

I love the purple, lime green, orange, and black color combination that’s prevalent for the holiday, so when I saw Halloween M&M’s in the store, I bought a few bags. Just another reason to buy candy!

To create this look, I used a nested vase, which allows the filler to rest between the walls of two containers. You can make your own by putting a narrow vase or glass inside another large glass container. Ideally, both glasses should be the same height, but if they’re not, then the inside glass should be slightly shorter than the outer one. For the floral, I used shamrock spider mums and purple statice. Not only do they look great, but both flowers are hardy and will last about two weeks.

DIY Halloween table décor: papier-mâché pumpkin vase

When I’m going for a more retro look, I break out this original papier-mâché pumpkin from the 1950s — it’s my favorite Halloween table decoration. If you don’t have a decades-old, trick-or-treating pumpkin handy, just reuse one of the plastic baskets your kids take with them around the neighborhood on All Hallows’ Eve. It creates a similar — albeit not quite as spooky — look that positively screams Halloween.

With a few cuttings from your fall garden — here, I used dahlias and asclepias — this old pumpkin becomes the happiest jack-o’-lantern in town!
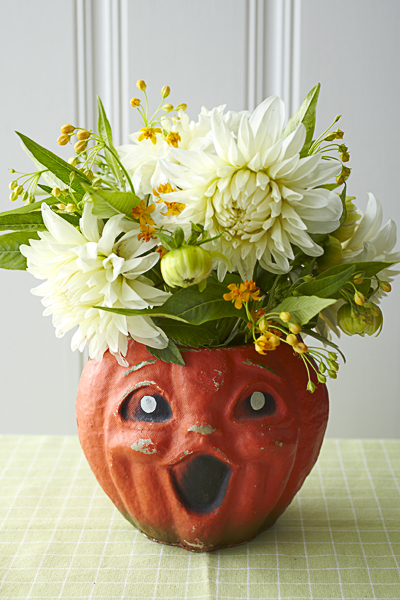
Halloween centerpieces with Halloween pumpkin centerpiece

DIY candy corn flowers

Planning a kids Halloween party? This candy corn arrangement is a sweet addition. It’s great as a centerpiece or as part of a Halloween-inspired dessert bar! Not only will guests love the final “treat” but the kids can help put this together prior to the festivities.
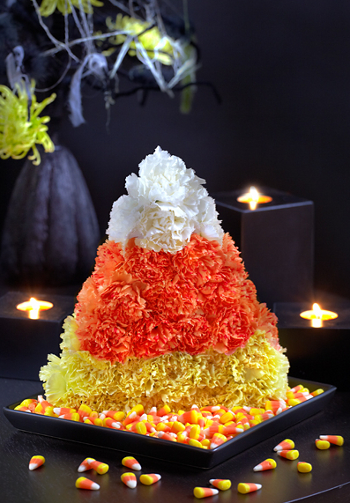
Halloween centerpieces with candy corn floral arrangement

Materials needed

  • Approximately two dozen yellow carnations, two dozen orange carnations, and a dozen white carnations.
  • 1 brick of floral foam
  • 1 waterproof dish or tray

Instructions

  1. Thoroughly soak the floral foam and stand it up vertically on the tray.
  2. Cut your carnation stems to about 2 to 4 inches in length.
  3. Starting at the base of the foam, insert the yellow carnations all around the sides, using the longest stems at the bottom to make the base of the “candy corn” wider.
  4. Repeat with the orange and white carnations, creating the shape as you move up the foam.
  5. End with a single white carnation at the top to form the point of the candy corn.

You can take the basic directions for this floral candy corn arrangement and scale it up or down depending on your desired finished size. If you plan to display it on a mantle or foyer table, this arrangement can also be done as a one-sided design.

Halloween table decoration ideas: flower arrangement with Halloween candy

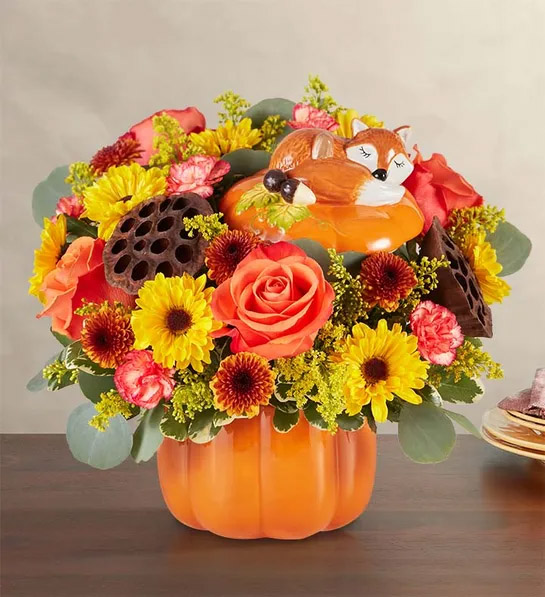
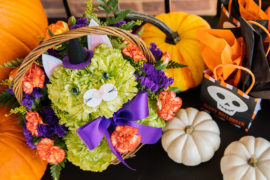
Here’s another decoration that’s perfect for a Halloween party table. This DIY Halloween flower arrangement featuring a ceramic pumpkin, your favorite candies, and the best fall flowers will wow your guests (and help satisfy their sweet tooth, too).

Create this festive centerpiece for your own home or as a gift for the hosts of a Halloween party you’re attending this month. Either way, it will help set just the right mood for you to have a monstrously good time!
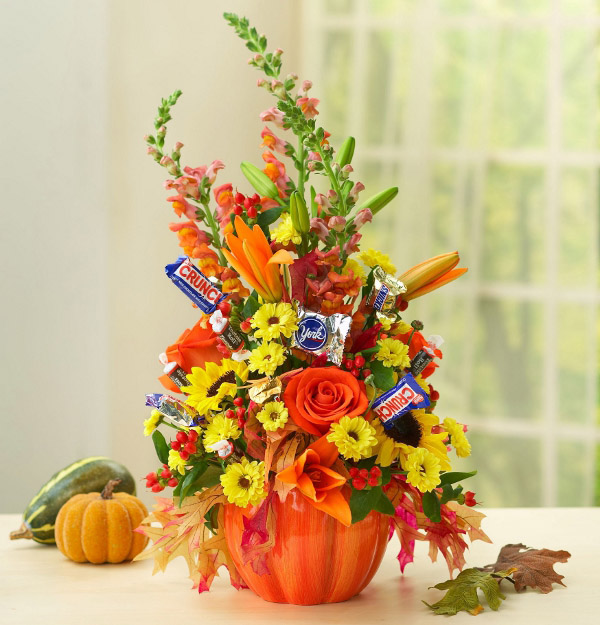
halloween centerpieces with Halloween flower arrangement with Halloween candy

Halloween Decor Ideas & Crafts for the Entire Home

It’s time to get scary festive! In case you haven’t noticed from the assault of fall displays and deluge of gourds on porch steps, Halloween is upon us. Here are wicked Halloween decor ideas that are sure to make a monster impression. From lining your hallways with ghostly mirrors to wrapping the stairway in holiday-themed garland, lift spirits this season by decorating the entire home for a Halloween that’s destined to be remembered.

Outdoor decor

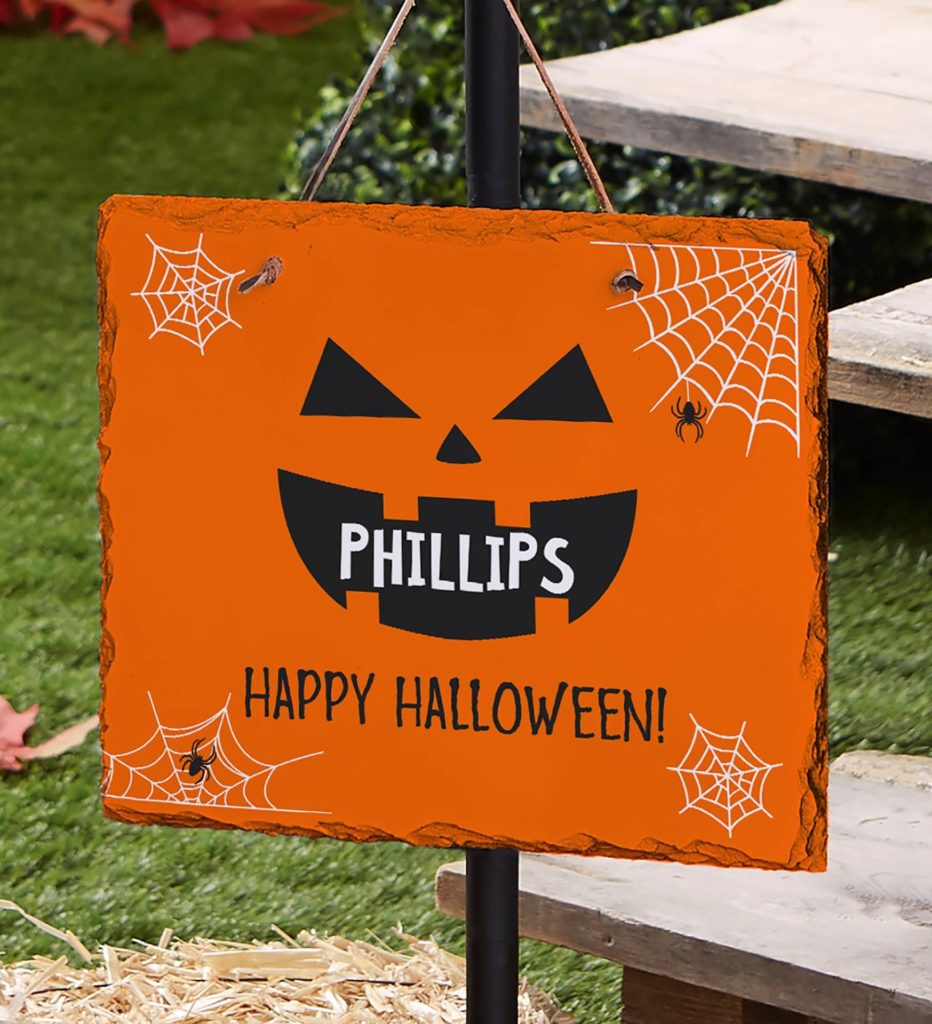
Halloween decor ideas with personalized lawn sign that greets trick-or-treaters

Welcome visitors to your home with mood-setting outdoor decorations. Line the walkway with fall mums on each side, and wrap them with spooky string lights. Place a few mini pumpkins between each mum to complete your grand entryway. To help guests know that they’ve arrived at the right place, pitch seasonal slate signs identifying your family’s name.

At your doorstep, decorate with a personalized jack-o’-lantern and candy basket trick-or-treat style. When they arrive to pick up their tasty treat, they’ll be greeted by a seasonal wreath on your front door that builds anticipation. Once night falls, moody lighting from a spooky-looking lantern reinforces the theme. With such a fall reception, your guests are ready for some All Hallow’s Eve revelry.

Accentuate the indoors with Halloween accents

Misty mirrors craft: Mirror, mirror on the wall, who has the spookiest house of all? With a DIY ghostly mirror, it must be you. Using construction paper, cut out letter stencils and them to spell out a spooky message that you paste on a mirror with double-sided tape. Simply mist with matte finish spray, allow to completely dry, and peel off the newspaper. And don’t be a scaredy cat! Glass cleaner will reverse this spell after Halloween.

Chandeliers or lampshades: An easy way to add holiday flavor is by updating lampshades with Halloween bats, skulls, wolves, and ghost ornaments. Layer the look with white spider webbing but beware — creepy crawlers may want to move right in.

Halloween decor for the living room

halloween decor ideas with posies in a pumpkin vase

Pumpkin flower arrangements: A vase is so last season. Nothing screams fall like fresh blooms popping out of a pumpkin. Craftier than just carving and easy to create, start by cutting off the top of your pumpkin and scooping out the insides. Next, line the pumpkin with plastic and insert floral foam that’s been soaked in water. Add the long-stemmed flowers of your choice, and then integrate leaves, berries, artichokes, or anything else you wish.

Festive coffee table: Make the coffee table a fiery focal point of the room. Robust orange, yellow, and red flowers surrounded by mini pumpkins, along with crow figurines and cobwebs, make for a startling and stunning centerpiece for the living room.

Halloween-themed throw pillows: Decorative Halloween throw pillows are another effortless way to make a room festive. Add pillows to the couch or a window seat, and then sit back and enjoy the coziness of the season.

Create a spooky stairway

Step it up accessorizing: Creaky steps are so in this season, as is garland that says the boo for you. Weave your handrail with twine pinned with leaves preserved with Mod Podge or a pumpkin garland. The good news is that autumn finds are versatile enough to leave up throughout the fall.

Halloween decor in the bedrooms

Spooky picture frames craft: Cause a fright with some ghostly DIY picture frames. Make a black and white copy of any photo and brush the image with black paint and water to “age” it. After the paper dries, match up a piece of card stock to the back of the photo. Using an X-Acto knife, cut out the eyes of the subject in the image and add mini red Christmas lights through the back of the eyes. Finally, set it up on your nightstand, or anywhere in your house.

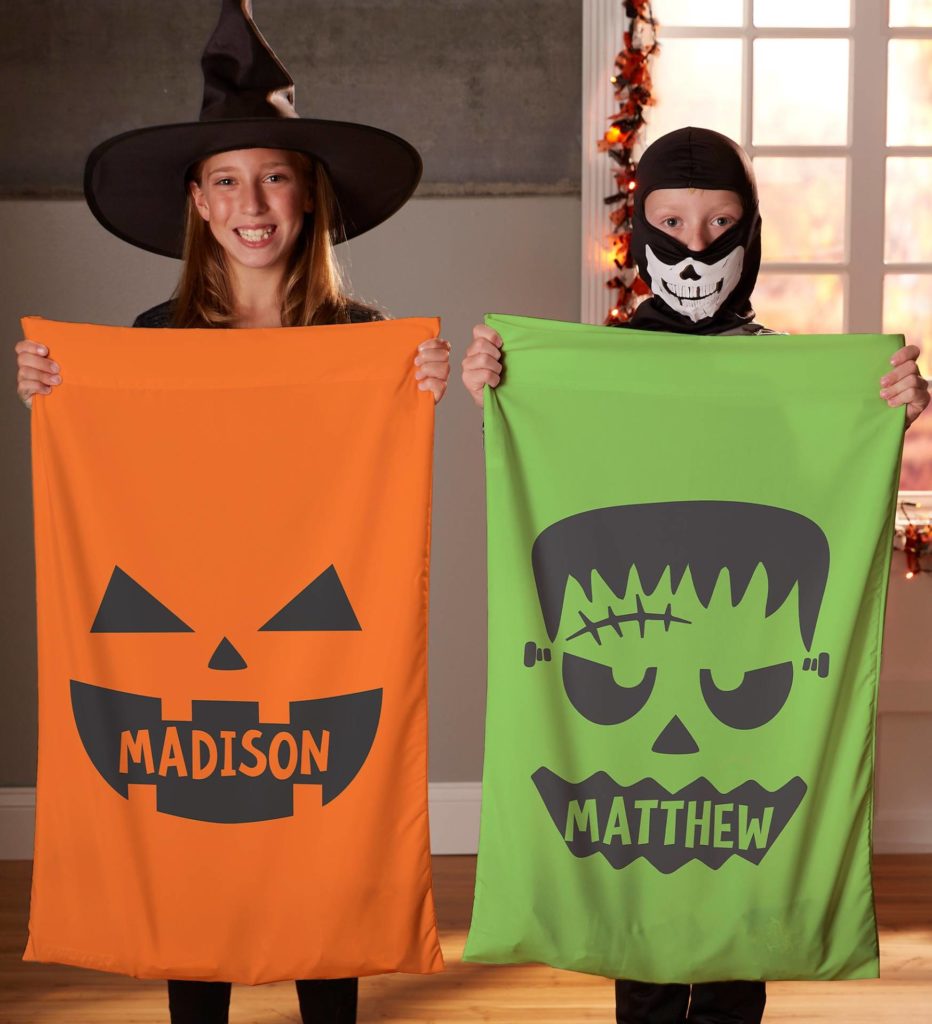
Scary fun pillowcases: Dress up your bed with festive Halloween pillowcases, such as ghoulishly cute ghosts or bat cases. Simply swap out your daily pillowcases for these fun fall options, which can moonlight as trick-or-treat bags on the big night.

halloween decor ideas with two children holding personalized spooky pillow cases

Don’t forget the bathrooms!

Spidery soaps craft: Not even the bathroom is safe this spooky season! Upgrade the room with DIY soaps that will make you scream. Start by melting a soap base in a pot until it reaches 140° F. Using a soap mold, place a plastic bug into each mold and pour over the melted soap. Once the bubbles rise on the mold, use a knife to scrape them off. Leave the soap in the molds overnight. Then, remove, rinse, wash, and repeat until Oct 31.

Enough tricks, it’s time for treats

Top it all off by decorating your home with Halloween flowers and gifts to get everyone in the spooky spirit. Shop our Halloween collection to find sweet treats for every boo and ghoul!

Beyond Pumpkins: Flowers for Halloween to Spook Up the Decor

“Celebration Inspiration” is all about bringing you top-notch advice and creative ideas to make the most of life’s special moments. Flowers for Halloween, such as glow-in-the-dark and black roses, are a stunning trend that provides another option in Halloween decorating.

From a costumed flamenco dancer with a red rose in her teeth to Morticia Adams clipping off the blooms leaving only their thorny stems, flowers and Halloween have a history together. But blooms can be more than just a costume prop — they can play a prominent role in your fall and Halloween decor.

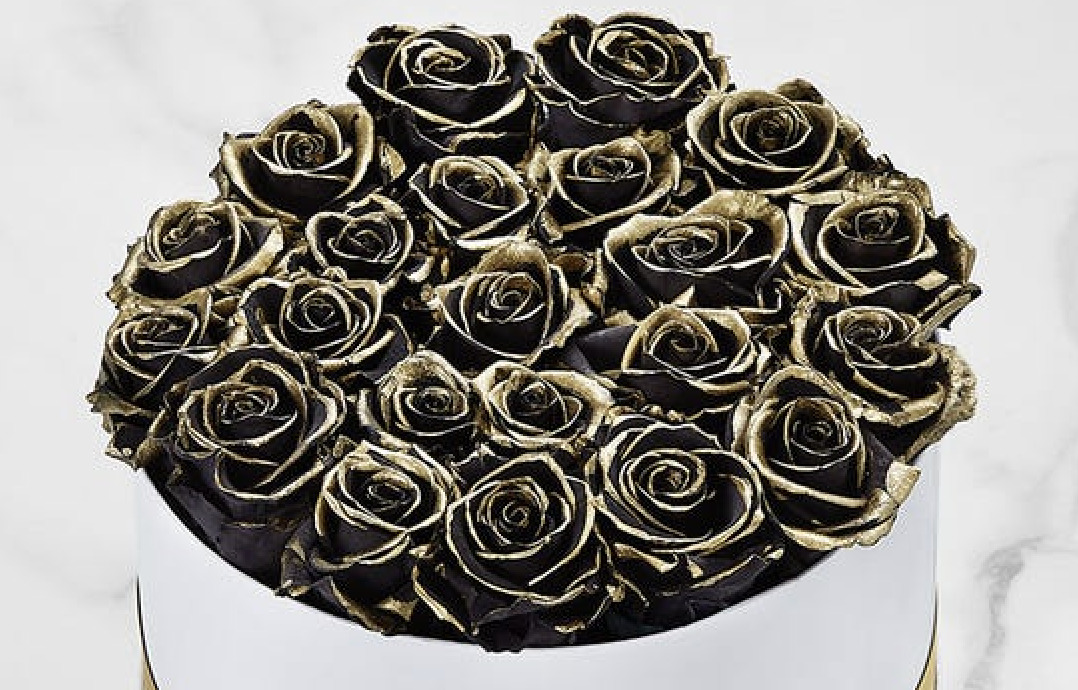
A picture of preserved  black and gold roses

Just as you see with clothing and design, flowers follow a pattern of what’s in fashion. “Fads and trends come and go for every holiday, and Halloween is no different,” says Jackie Lacey, president of the American Institute of Floral Designers and director of education and industry relations at the Floriology Institute.

While pumpkins and gourds are regarded as the go-to elements for nature’s contributions to Halloween decorating, flowers for Halloween — notably glow-in-the-dark and black roses — are becoming more closely associated with the holiday. They offer an elegant spin on the holiday, and are further elevated by noteworthy designs emerging from floral tastemakers.

Here are some latest trends for incorporating roses to Halloween decor for a modern spooky effect.

Painted flowers for Halloween

One big trend, Lacey says, is painted roses. “Orange roses with black tips, or pink or white roses with red splatter to imply a bloodstain, are a great source to add flair to your Halloween party.” These will last just as long as regular roses, he says. “You might think the paint would be harmful to the flowers, but it actually helps seal in the moisture by coating the petals. These roses will usually hold up the same length of time as unpainted flowers — an average of five to seven days.”

Painted roses are a statement in and of themselves, so they’re probably the least time-intensive decor solution — just throw them in a sleek container and you’re done!

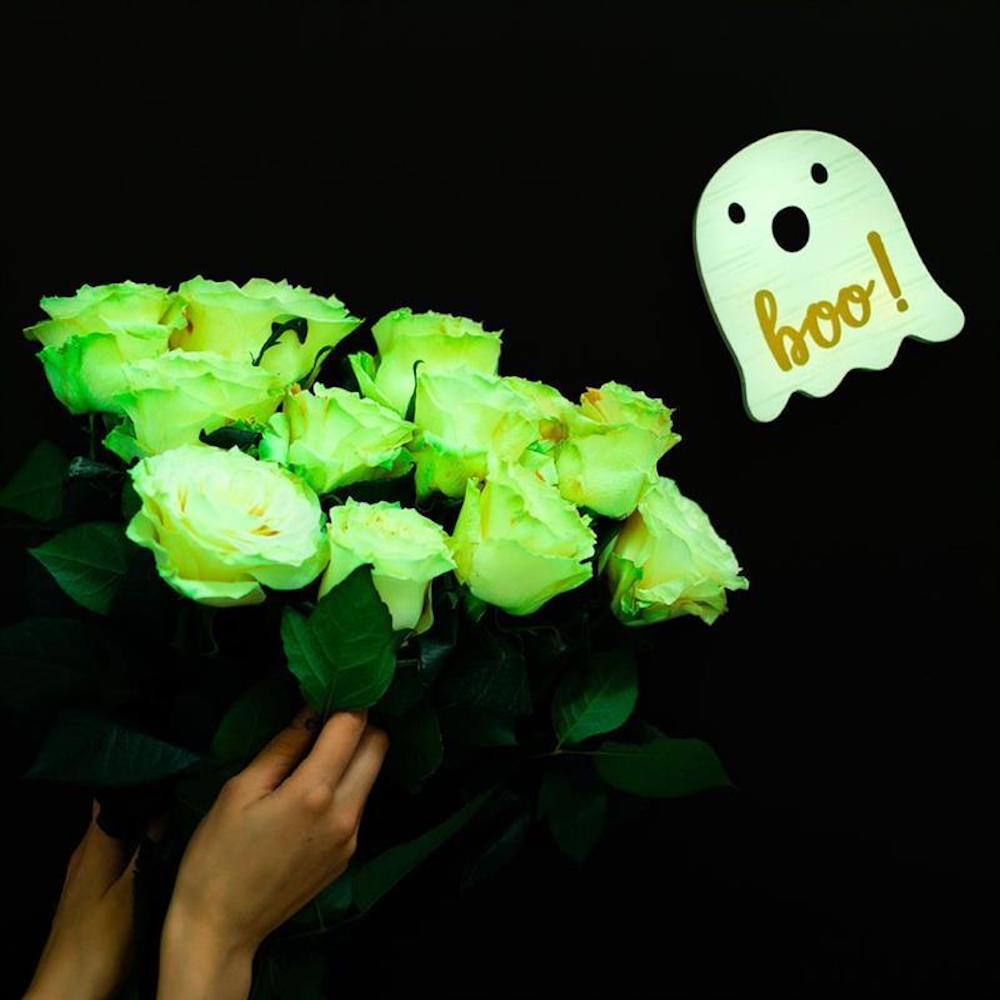
Picture of Halloween roses that glow in the dark

Glowing blooms

A bouquet of white or glow-in-the-dark roses covered with a spider web and small black spider rings is a perfect centerpiece for your celebration. The more flowers for Halloween, the better. Find a large vase, short or tall, and fill it with white roses. Strategically place a few black spiders or one larger fuzzy spider that looks super spooky. Webbing can be black or the white fuzzy stuff you find at the drugstore (or leave it out!).

Fill your gourds with flowers

Carving jack-o’-lanterns? Find gray or white pumpkins and gut the pumpkin as usual, but, instead of a candle, use the squash as a vase and make a floral arrangement. Trim the stems of some white roses so the heads are just popping out, tight to the top of the gourd, and place in a small container of water directly in the squash (so the flowers don’t wilt!). Greens spilling over the edge are optional — either way, you have a cauldron of gorgeousness.

Día de Muertos

The day after Halloween is the Mexican celebration of those who have died. The colors of the day are orange, yellow, and red. Skulls are a focal point of this look. Surround one on a silver or white tray with neon-colored roses and candles. Special kaleidoscope roses are a novel take on this look, too.

Adult indulgence

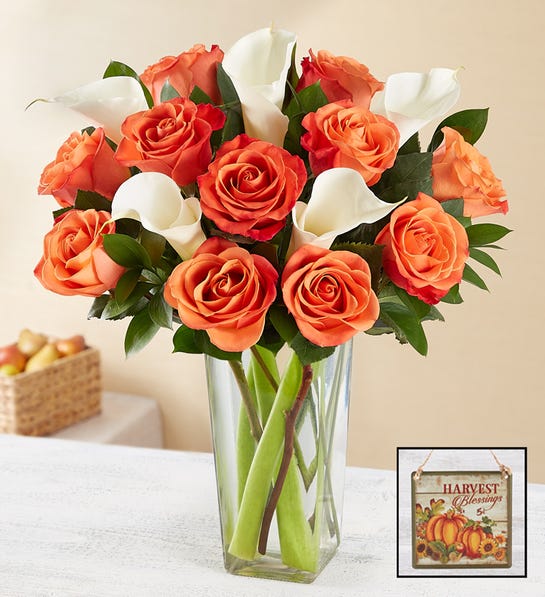
A gorgeous orange rose bouquet sprinkled with a few white calla lilies is a treat you can give yourself on a holiday typically focused on the kids. Put the mixture in a ball jar or Halloween-inspired vase and move it to something more traditional after the day’s festivities.

Trick or treat?

If you’re having a Halloween party for the neighborhood kids — or as the children knock at your door — don’t forget about the unsung heroes of the evening: the adults taking the little ghosts and goblins door to door. A bucket of cold seltzers or water is just what they need to keep plugging away. Giving them a single orange rose stem with a “Happy Halloween!” ribbon or note attached is a sweet way to acknowledge parents and caregivers. A 3D flower ghost will make them laugh, and a tray of cookiesbrowniescupcakescaramel pretzels — or even dried fruit — is just enough of a sweet to satisfy the “big kids.”

Primary color

Halloween is synonymous with orange and black, but an inspired take on decorating with these two colors is to separate them and use them monochromatically. Try orange gourds with orange roses or black Baccara roses (really a deep red) in painted black pumpkins, with spiders in black spider webs — an homage to the traditional Halloween in a non-traditional way!


Halloween ad

Halloween Crafts: Candy Corn Garland

Not everything about Halloween needs to be spooky and scary — it can also just be fun and colorful, and full of sweets and smiles.

Here is a simple DIY craft idea celebrating that perennial Halloween favorite, the candy corn.

This project starts off very basic so that even the littlest trick or treater can do it, and can be scaled up and personalized to entertain tweens and beyond.

Candy corn garland

Making this Halloween craft keeps the kids entertained and barely costs a thing. And, after Halloween is over, you can recycle the whole thing — no guilt about producing extra waste, and you don’t have to pack it up and find somewhere to store it all year.

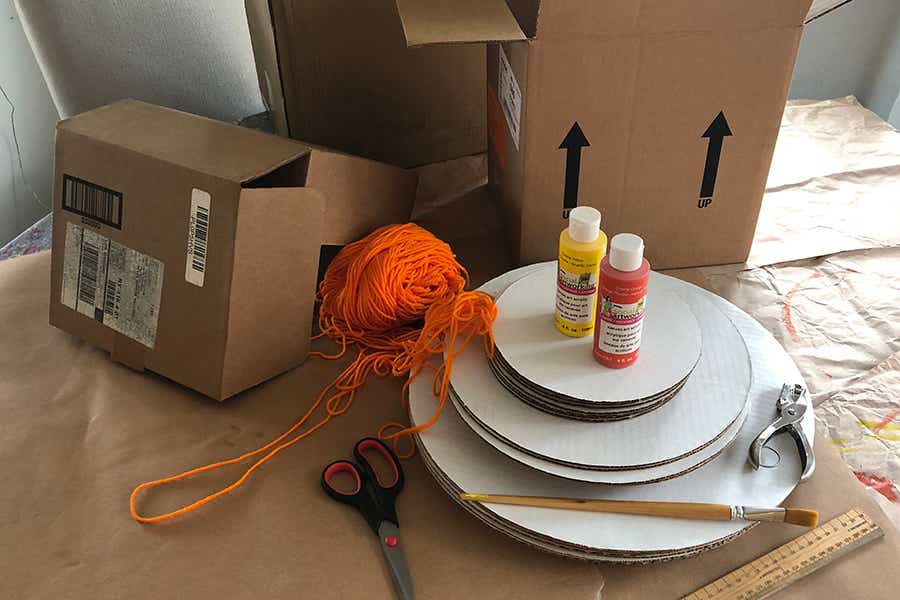
halloween crafts with materials for candy corn garland

Materials needed for candy corn garland

  • Cardboard boxes
  • Paint or markers
  • String or ribbon
  • Hole puncher
  • Scissors or straight edge cutter

Instructions for making candy corn garland

The steps for this candy corn garland are the same as the ones I used for the patriotic-themed garland I made for Memorial Day. The only difference is it is painted differently.

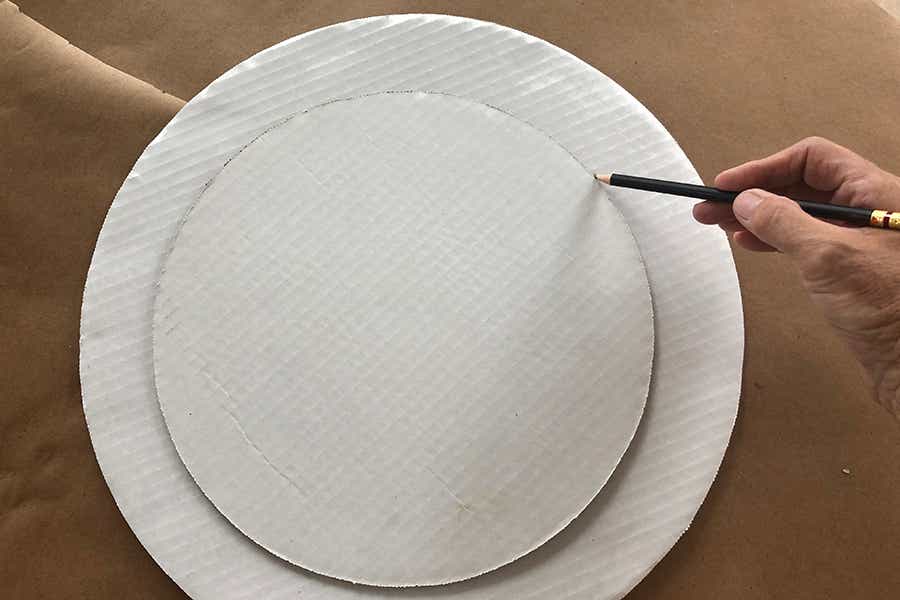
halloween crafts with Circle
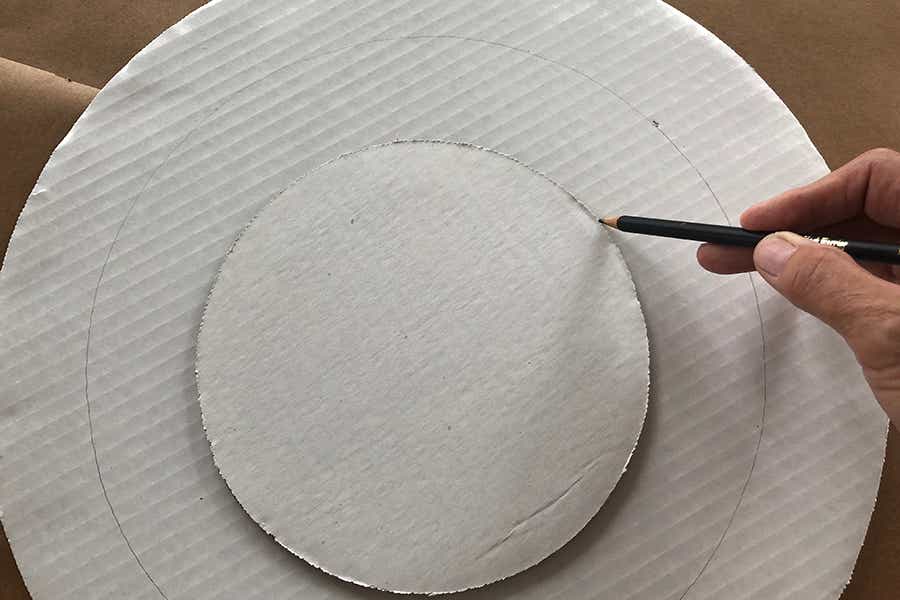
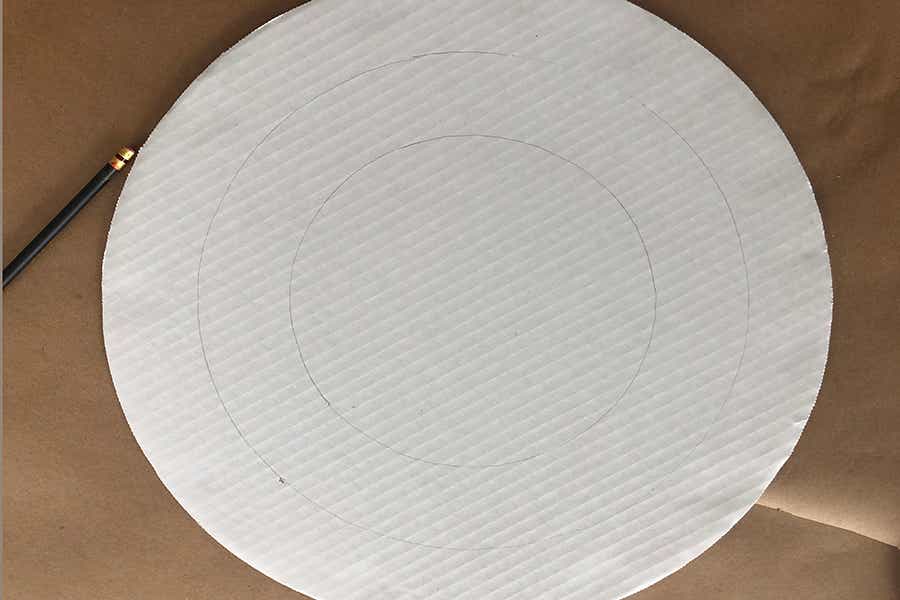
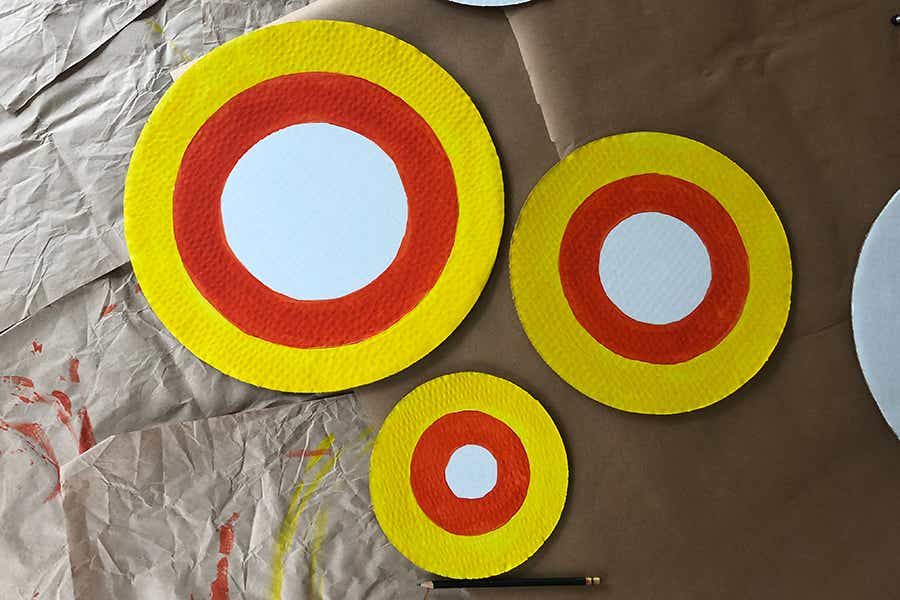
  1. Cut out a large circle from the cardboard box and, using a pencil, draw two smaller concentric circles inside it. (I was fortunate that one of my daughters operated a baking business out of my house and I had corrugated cake boards in my attic. And the fact that the boards were white meant I only had to paint the orange and yellow sections!)
  2. Repeat the process making more circles. You can make them all the same size or mix it up with larger and smaller ones.
halloween crafts with painted circles
  1. Paint or color the outermost ring yellow, the middle ring orange, and the innermost ring white (if necessary).
halloween crafts with cut circles
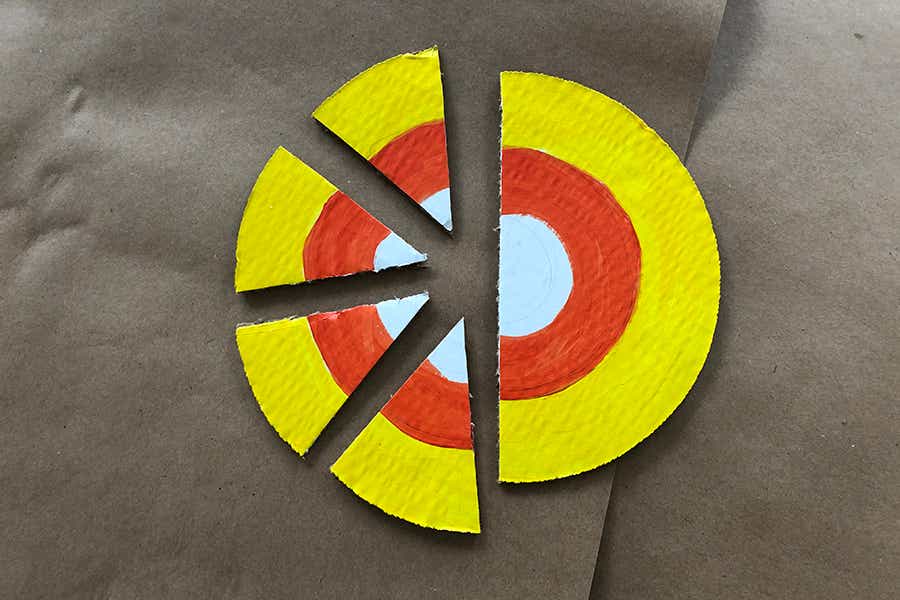
  1. Once the paint dries, cut the circle into triangle — just like a pizza!
halloween crafts with hole-punched wedges
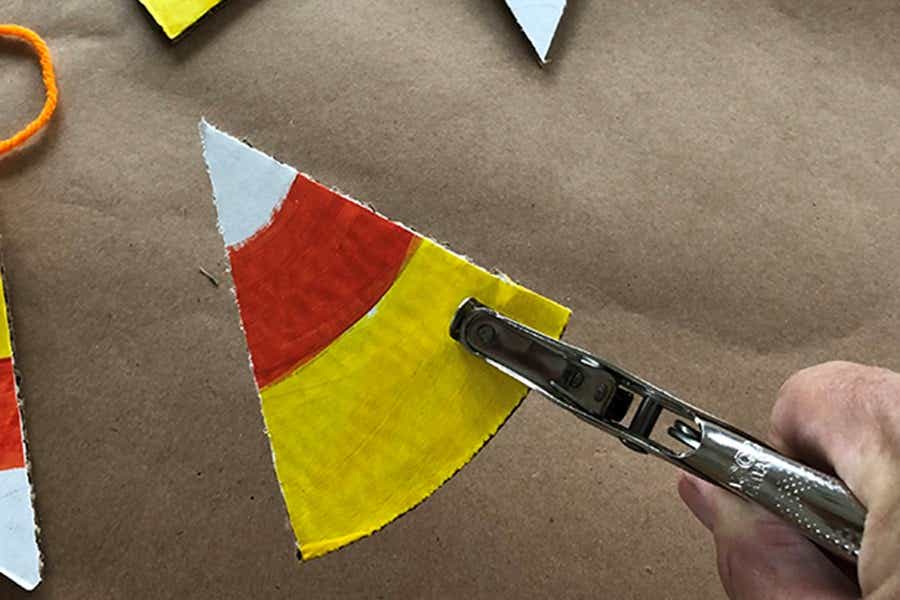
  1. Use a hole puncher to punch two holes in the wider end of each triangle.
halloween crafts with yarn strung through wedges
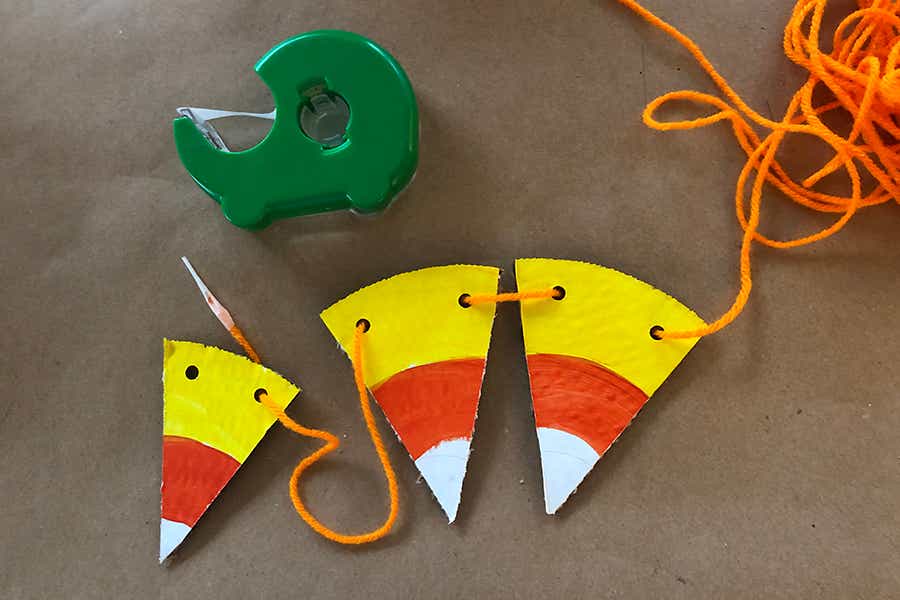
  1. Lace yarn, twine, or ribbon through the holes on the triangular pieces.
halloween crafts with candy corn garland

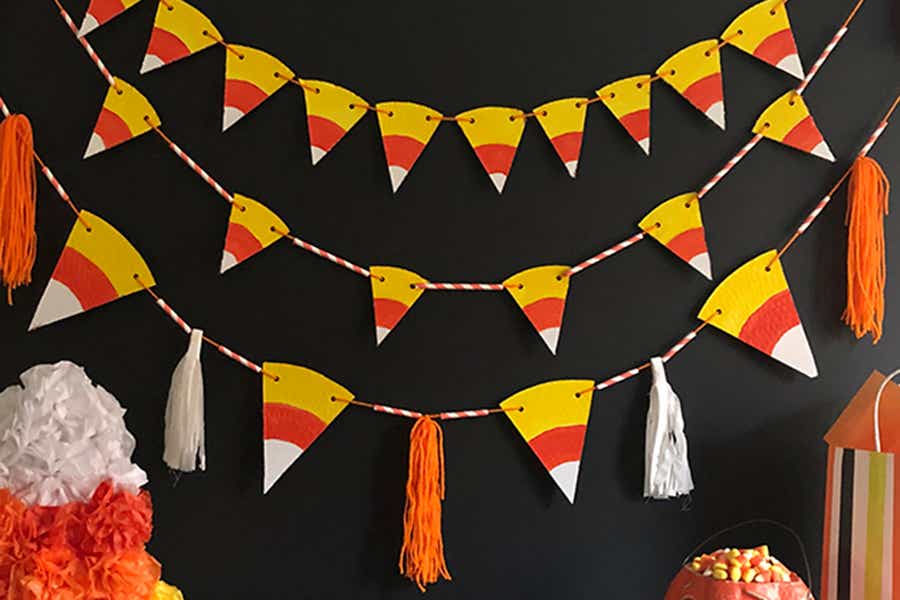
Once you have the basic steps down, you can improvise as you see fit. Let the older kids design their own garlands, adding tassels made from yarn or fabric, or add paper straws cut to the desired length in between the candy corn. The possibilities are only limited by your imagination!

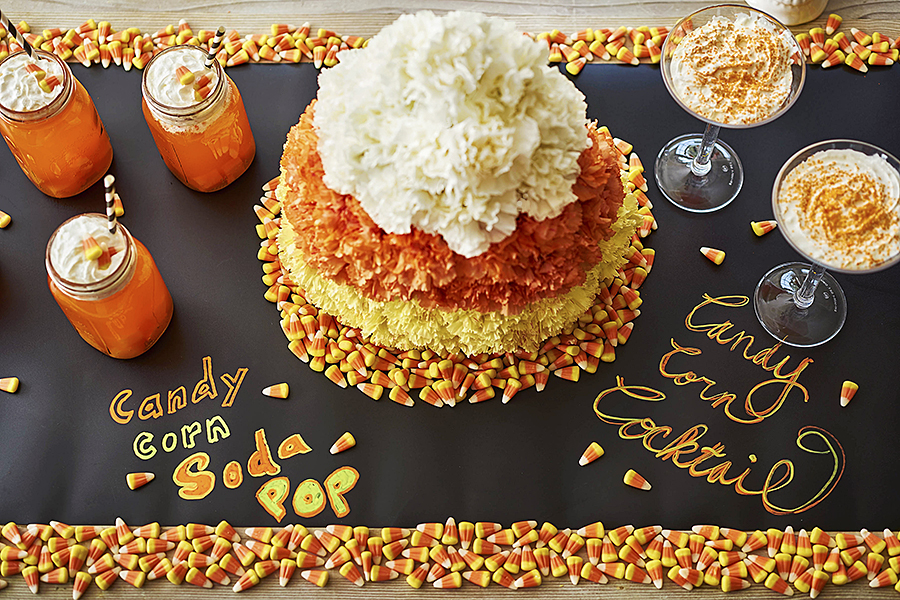
halloween crafts with candy corn sodas and cocktails

And when the decorating is done, treat the little ones to a candy corn soda pop and yourself to a candy corn cocktail!

What Does It Mean to Be ‘Booed’ on Halloween?

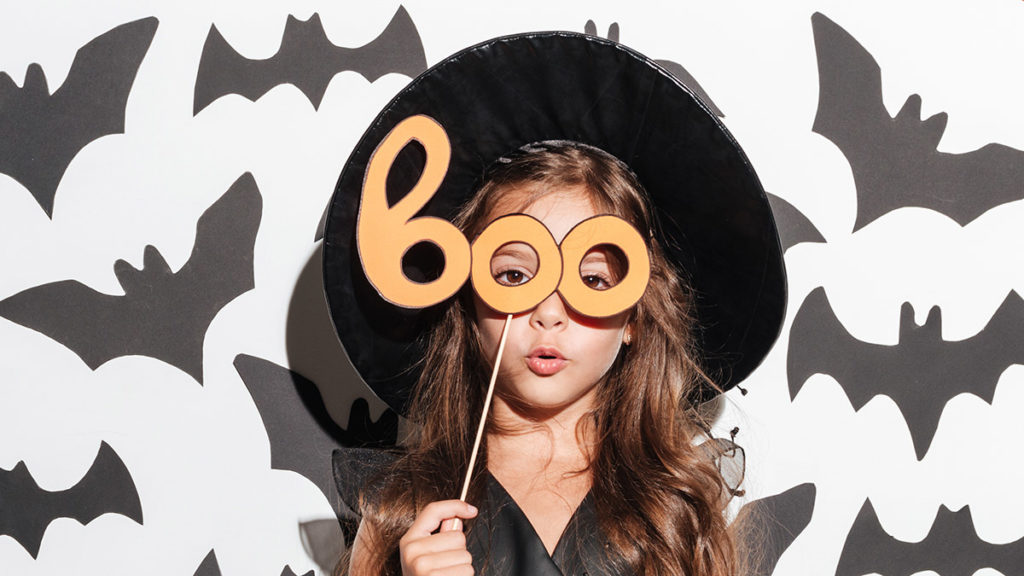
youve been booed with girl wearing boo mask

Halloween is nearly here, and ghastly ghosts and ghouls lurk in the shadows, waiting for just the right time to leap out and make their frightful presence felt.

While the trick-or-treaters may not start gobblin’ up their candy until All Hallows’ Eve, the booing starts now. No, we’re not referring to making your crush your boyfriend or girlfriend (or “boo,” as the kids call it) — we’re referring to the relatively recent Halloween tradition of booing your friends, neighbors, loved ones, and even strangers.

So, what is booing, and how do you go about pulling off an effective boo? Read on for your one-stop guide to booing someone around Halloween along with some extra special booing advice from a certified booing expert.

What is ‘booing’ on Halloween?

Unlike the booing traditionally heard in sports stadiums, this type of booing is a wholesome, positive trend meant to spread joy and the holiday spirit. Simply put, it involves blessing your booing target with treatsthemed gifts, and a “directive” to continue spreading the boo.

The tradition dates back to the 1980s and has gone by many names throughout the years, including “ghosting” and “hobgoblining.”

Now, it is commonly known as booing, and its popularity is booming.

How to ‘boo’ someone

Booing someone during Halloween is a fun and engaging activity. Booing begins with a selfless gesture and spreads (if done properly) like a delightful plague. The most common booing method is to fill a bag (or bucket) with delicious treats and goodies — along with a “you’ve been booed” note — that is then sneakily dropped off at a friend or neighbor’s doorstep.

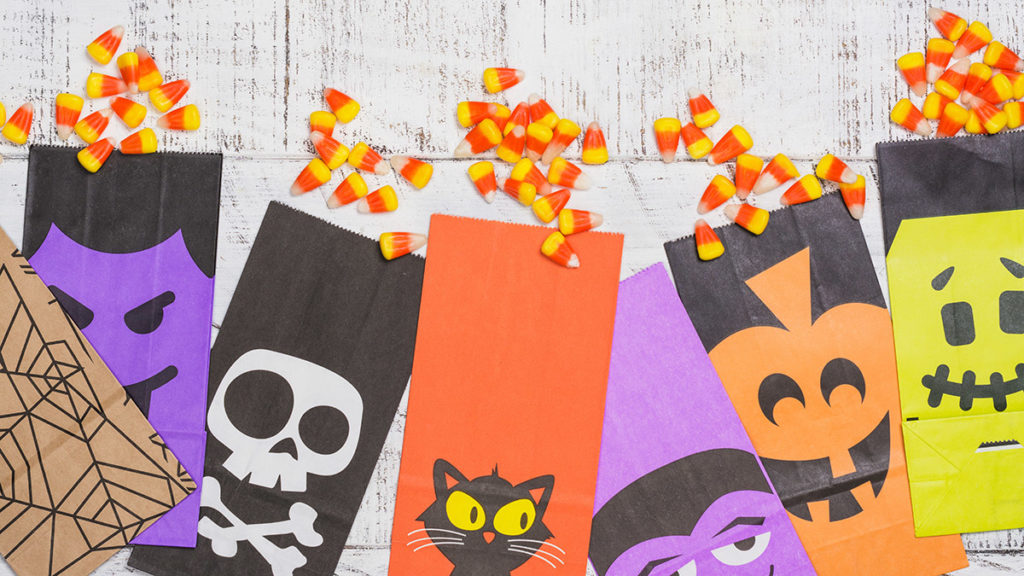
youve been booed with boo bags

To spark this flame of fun, however, you must make sure to execute your boo correctly — that is, the booing needs to continue on. No matter what you decide to put in the bag — homemade treats, store-bought sweets, thoughtful messages, etc. — it is crucial to include a special note that encourages the recipient to pass the booing on to at least two other friends.

While a properly executed boo usually contains certain elements, there’s more than one way to skin a (black) cat, as Kendra Montante points out. And she should know. Montante is affectionately known as “The Boo Lady,” a moniker she received after writing the book Booing: A Halloween Tradition, which shows how small acts of kindness can build up a community.

“Booing is regional. In my area [the suburbs of Detroit], we tend to pack two bags of treats, sneak out at night, and take them to the neighbors’ or friends’ houses, put them on the porch, ring the doorbell, and run and hide. That’s being booed!” she said. “Still, it happens so much and it’s so widespread that it takes on different forms all throughout the country.”

Some people might fill entire driveways with candies and treats, she said. Others take a more 21-plus approach and opt for boo-zing their friends, where you leave beer, wine, or liquor as a surprise.

Want to know how to boo? Here are three easy steps to bringing Halloween joy to your neighborhood.

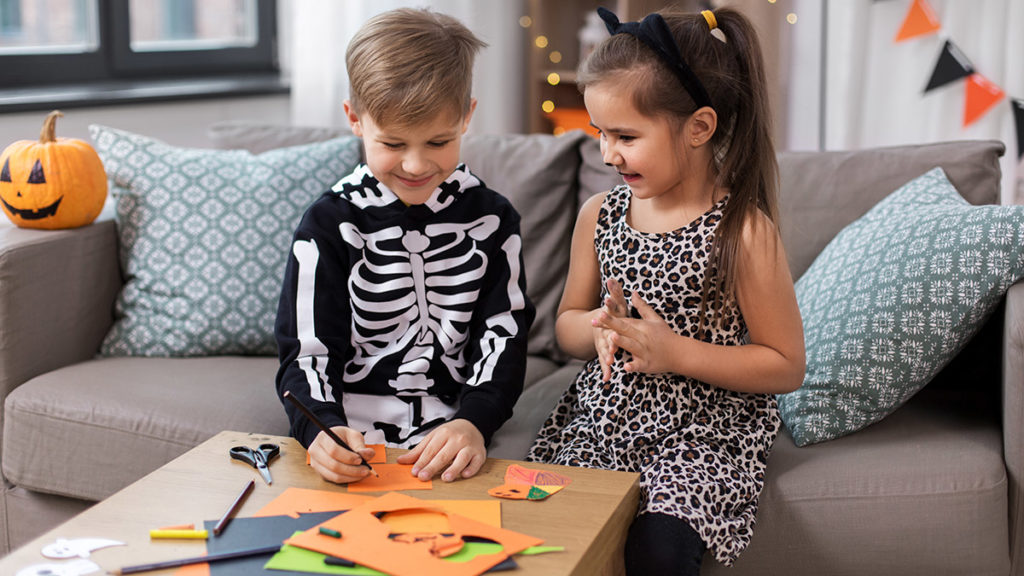
youve been booed with kids making boo bags

Prepare the packages

To start, you will need to put together the packages you’ll be dropping off. This is the first step in the process of booing at Halloween. You can use candy, but feel free to get creative. Consider adding Halloween-themed crafts, toys, family games, and other goodies to the loot.

Once you’ve stuffed those surprise sacks full of fun and delicious treats, attach a note to the bag that says “You’ve Been Booed!” (Just don’t include who it’s from!) This will tell your boo beneficiaries that they should continue the tradition and pass the boo along to someone else.

Deliver the Halloween boo goods

Now, it’s time to channel your inner ghoul. When you’re being booed or booing someone else, the delivery is crucial. Float like a ghost to your neighbors’ or friends’ homes and, under the cover of darkness, deliver the goods. Quick as a cat, ring the doorbell and run  you do not want to be seen! If you want, you can stay close by (in a hidden spot, of course) to watch the recipient discover their delivery of Halloween treasure.

Spread the Halloween boo

Your responsibility as a boo-er, however, does not stop when you deliver the sweets and treats to your selected boo-ees. Being booed or booing at Halloween means you have the responsibility to keep the tradition going. While a boo will likely spread auto-magic-ally, that does not mean you should sit idly by. Take it upon yourself to share the ins and outs of booing with everyone you know. The idea is just as contagious as the act, and before you know it, the whole neighborhood will be caught up in this festive tradition.


Halloween ad

Candy Corn Decoration & Drinks: Fresh Flower Centerpiece & Beverages for Halloween

Does anyone actually eat candy corn, or is it just for crafts and DIY projects? Whatever people do with candy corn, they do a lot of it: According to the National Confectioners Association, more than 35 million pounds of candy corn are sold annually. That’s a lot of kernels…so plug in those glue guns and get crafty!

Candy Corn Flowers & Drinks

Here is a Halloween decor idea and two candy-corn-inspired beverages for young and old ghouls and goblins alike.

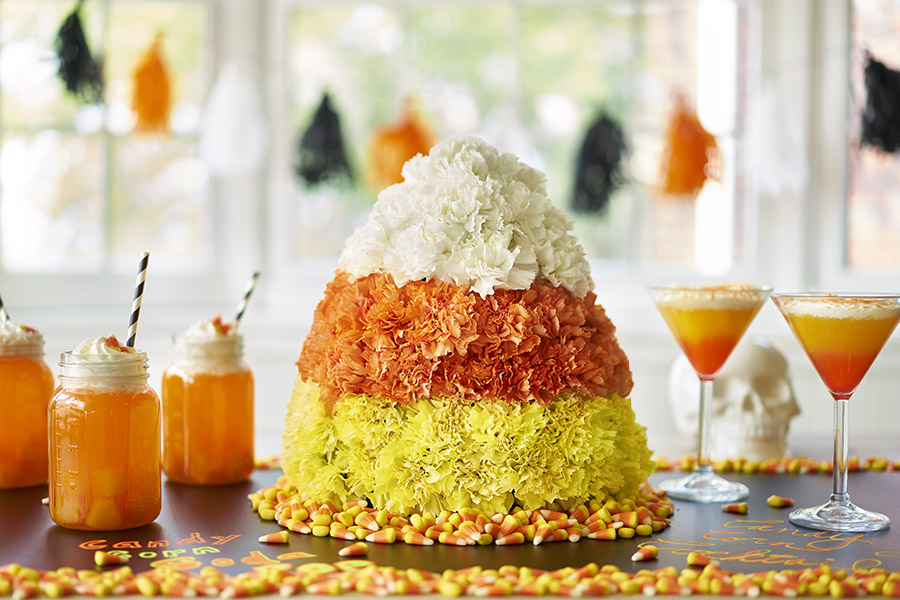
Fresh flower candy corn centerpiece

Candy Corn decorations with candy corn Flower Arrangement

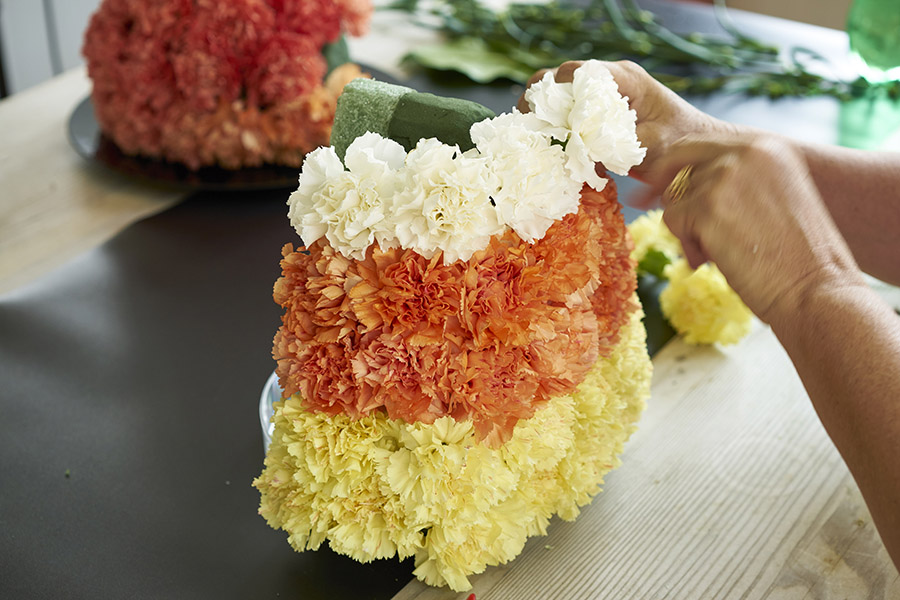
The simple geometric shape of this candy corn creation makes this a very easy DIY. And carnations are available naturally in all three colors, so no spray painting is necessary.

What you need

  • Floral foam
  • Carnations (12 orange, 14 yellow, 10 white)
  • Plate

Directions

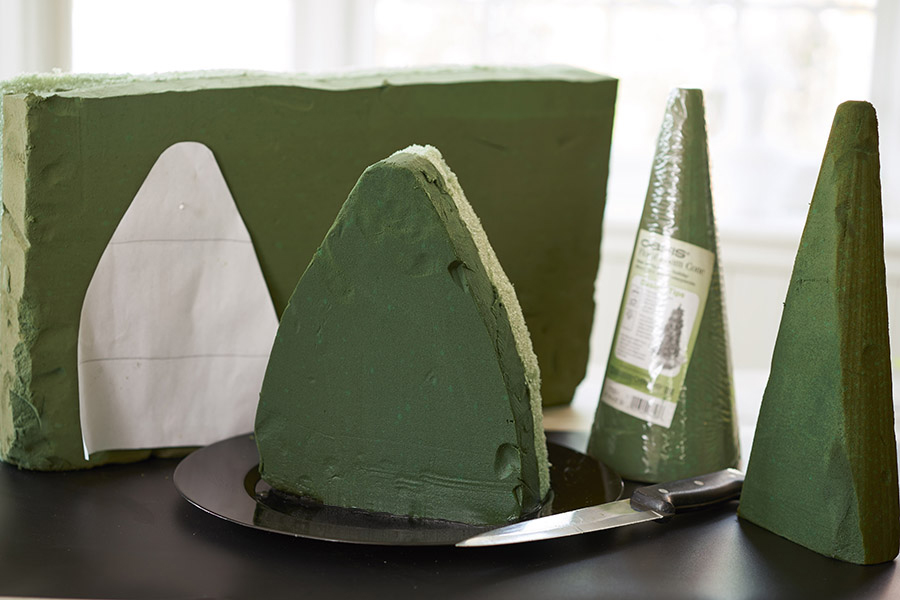
  1. Choose a floral foam to use. (I opted for the sculpting sheet with the styrofoam back, as I wanted the candy corn arrangement to be a substantial size, and the styrofoam back gives the foam more support.)
  1. Make a template using a piece of copy paper, and cut out your candy corn shape from the larger piece of foam.
candy corn decorations with floral foam
  1. Drop the foam into a sink filled with water. As the foam absorbs the water, it will slowly fall to the bottom of the sink. Remove and place it standing upright on a plate with a small rim.
candy corn decorations Cutting Stems on an Angle
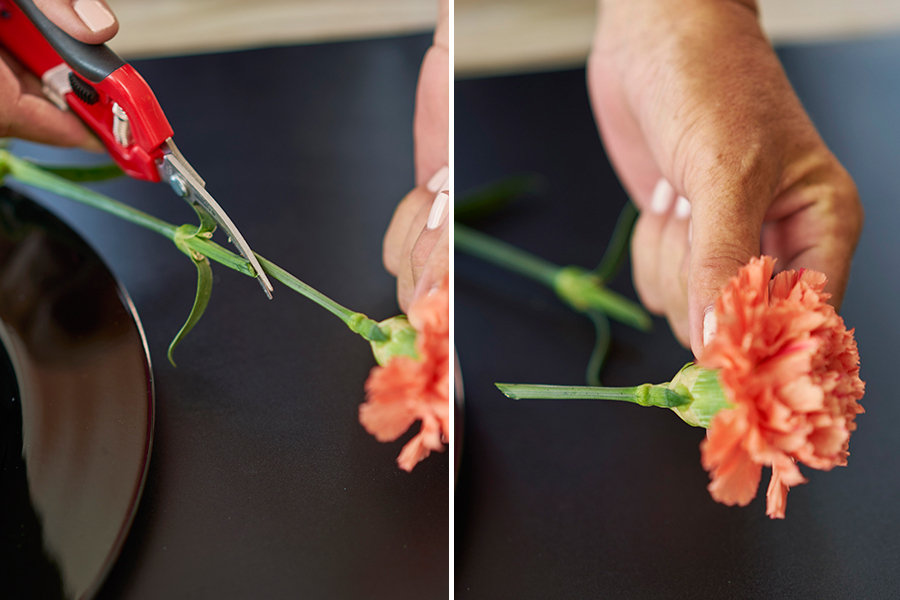
  1. While the foam soaks, prepare your flowers by cutting the stems to about 2 inches long using a sharp cutting shears and cutting on an angle. (The number of carnations in the supply list is for an arrangement that is approximately 11″ x 8.5”. This is a one-sided arrangement and should be placed in a location where it will be viewed from one side only.)
candy corn decorations with 2 Rows of Yellow Carnations
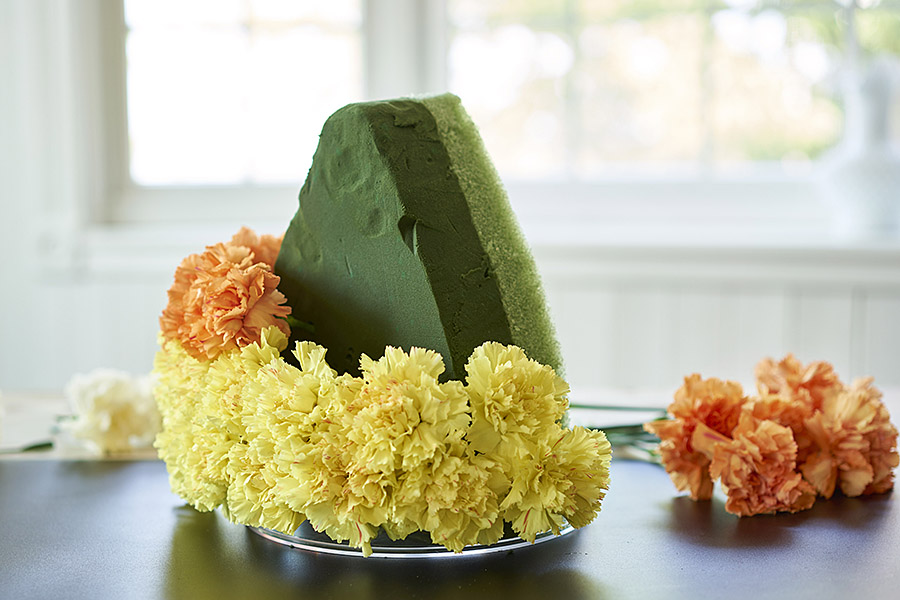
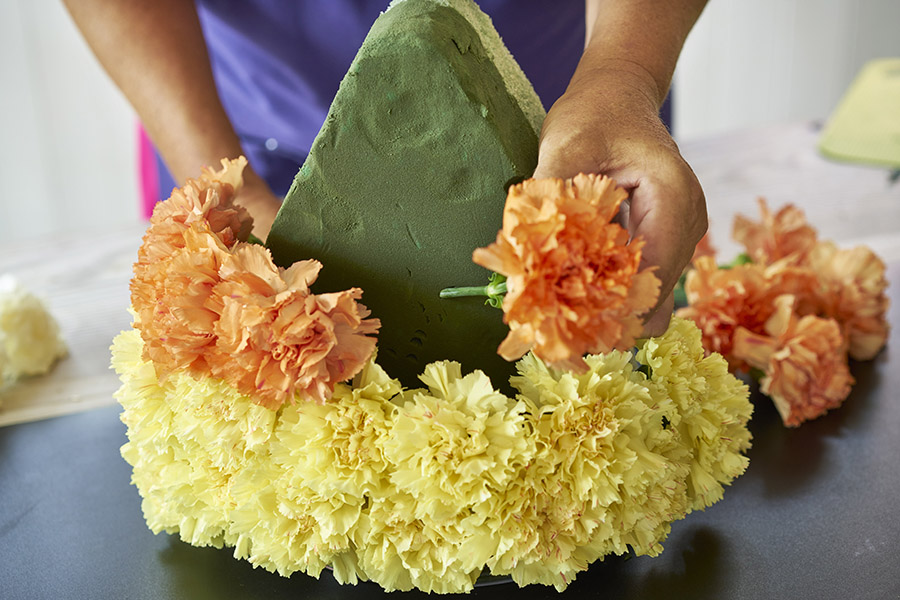
  1. Starting at the bottom, insert two rows of yellow carnations.
candy corn decorations two rows of orange carnations
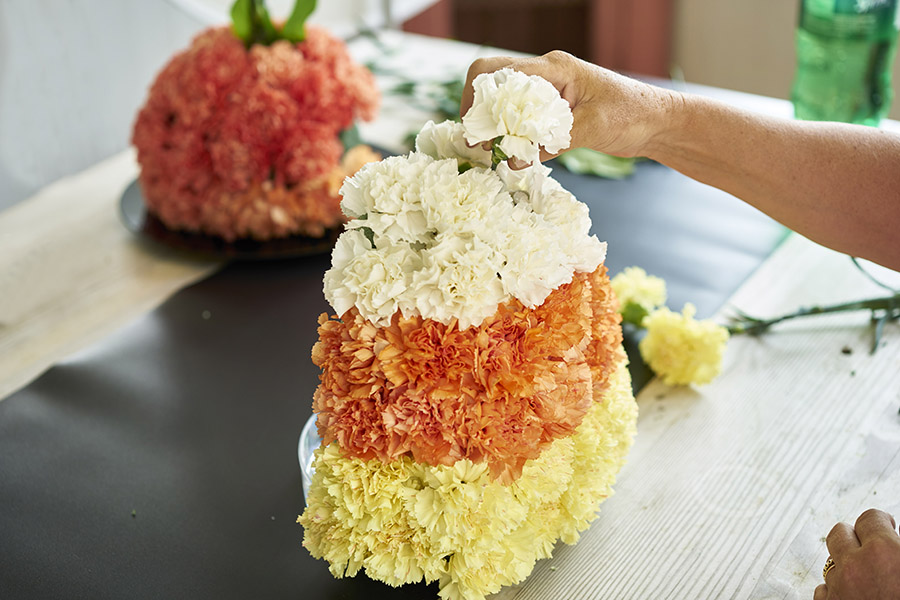
  1. Then add two rows of orange carnations.
  1. Finish the top off with the white carnations. Now, your candy corn creation is complete!

Candy corn beverages

Soda Mason Jar Drinks

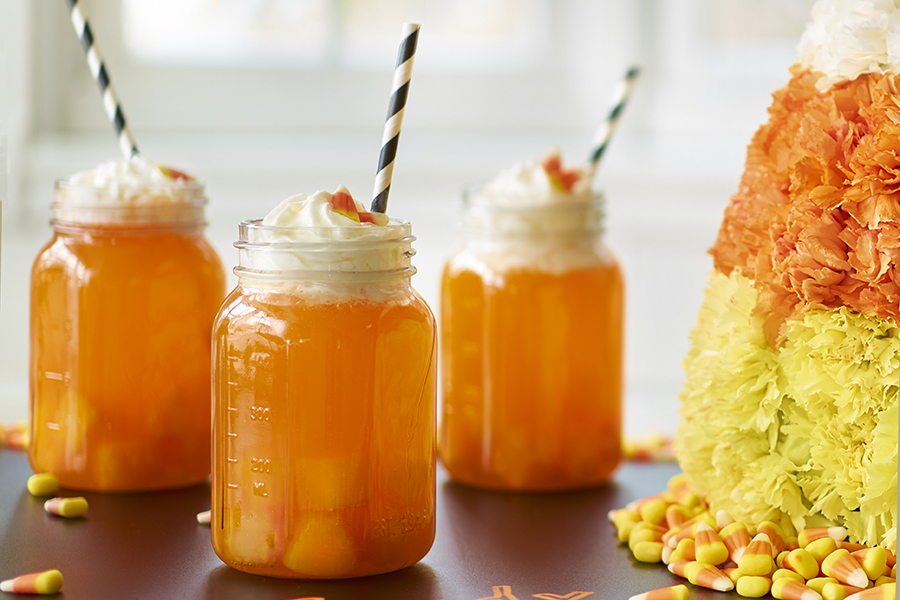
These adorable candy corn soda pops couldn’t be easier to make. Put a few pieces of cut-up pineapple in a small mason jar, fill the jar to the top with orange soda, and finish with whipped cream and a few pieces of candy corn.

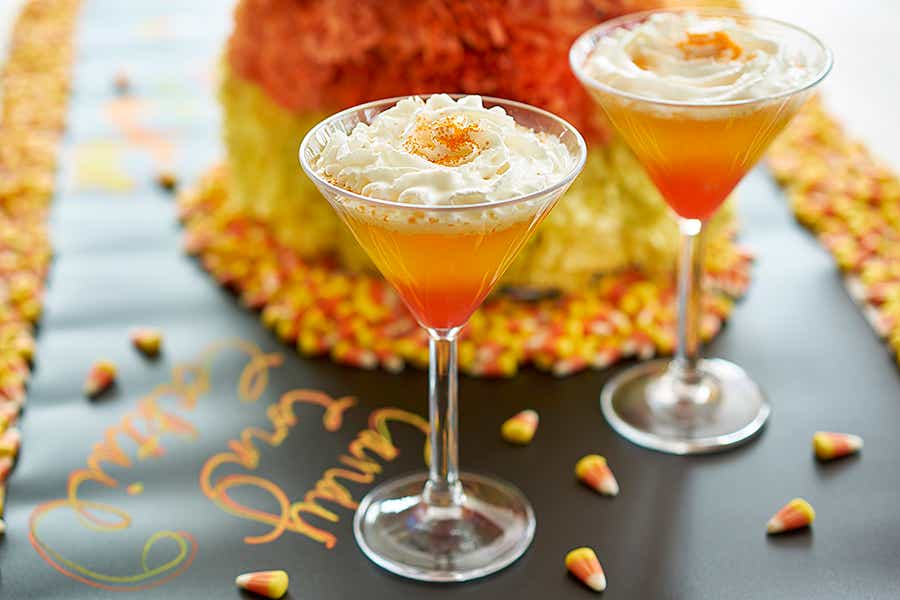
For something with a little more kick, go with a candy corn cocktail served in a martini glass.

Candy Corn Cocktail

Prep Time 5 minutes
Cook Time 5 minutes
Total Time 10 minutes
Servings 1 drink

Ingredients:

  • 1-1/2 ounce whipped cream vodka
  • 3 ounce sour mix
  • 2 ounce pineapple juice
  • ½ ounce grenadine
  • Whipped cream (for topping)

Instructions: 

  • Combine vodka, sour mix, and pineapple juice in shaker with ice, and shake well.
  • Pour mixture into a martini glass.
  • Slowly pour grenadine into mix so it settles to the bottom.
  • Top with whipped cream.
  • Optional: Garnish with coordinating sprinkles.
Course: Drinks

DIY Halloween Crafts: Halloween Flower Arrangement with Halloween Candy

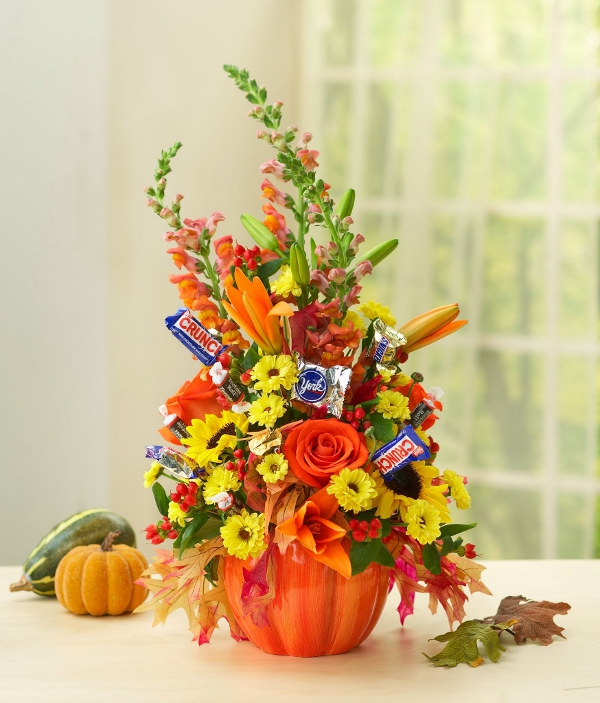
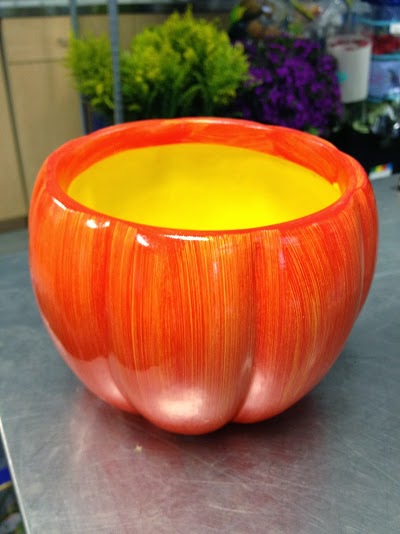
Looking for the perfect decoration for a Halloween party? This DIY Halloween craft featuring a ceramic pumpkin, your favorite candies, and the best fall flowers will wow your guests — and help satisfy their sweet tooth, too.

Create this festive centerpiece for your own home or as a gift for the hosts of a Halloween party you’re attending this month. Either way, it will help set just the right mood for you to have a monstrously good time!
Materials:

  • Pumpkin flower pot
  • Scissors or knife
  • Floral foam (preferably with holes)
  • Water
  • Flowers (I used lilies, “Viking” daisy poms, hypericum, snapdragons, roses, and sunflowers.)
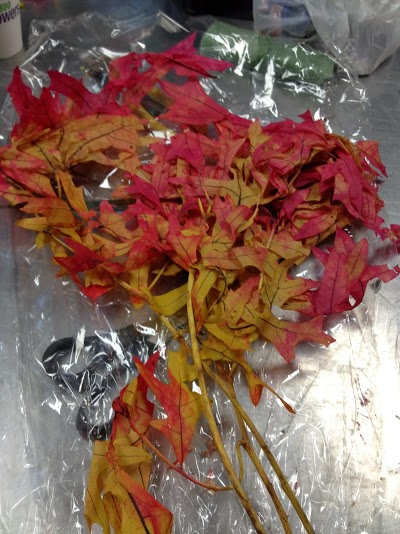
  • Fall glycerin leaves
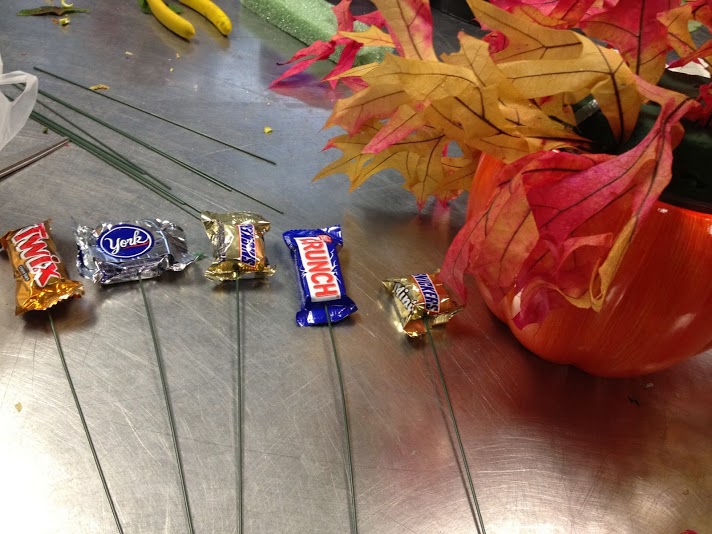
  • Halloween candy (in wrappers)
  • Wire sticks (for the candy)
Halloween Flower Centerpiece DIY with Candy

How to make the DIY Halloween flower arrangement:

  1. Choose a Halloween ceramic container or pot. I used a pumpkin ceramic pot for my creation.
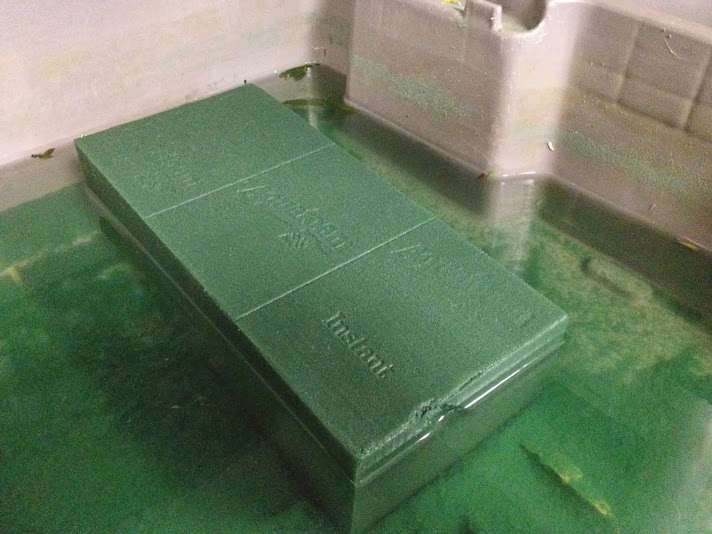
  2. Carve the floral foam to fit your pot. You will want to place the cut foam into the container to make sure it fits snugly.
  1. Place the floral foam in water and soak it for roughly five minutes. Let the foam sink into the water so it absorbs as much water possible. If your floral foam has holes (which is preferred), make sure the holes are face down in the water. This ensures the foam will absorb the most water possible and, thus, keep your flowers well fed!
  2. Once the foam is fully saturated, remove it from the water and place it in the ceramic pot. Make sure the foam is secure and snug inside.
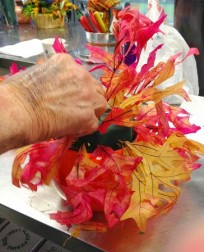
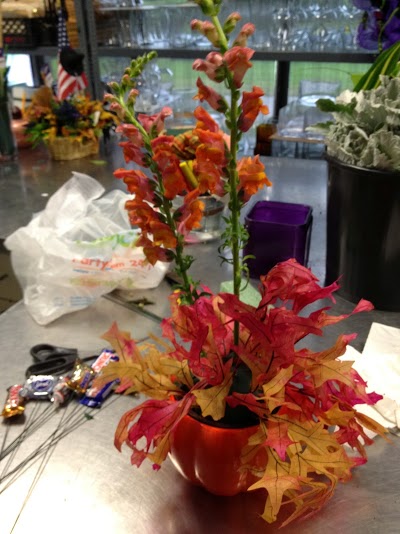
  1. Create a base with the glycerin leaves by carefully sticking them into the floral foam. I placed the leaves low to form a base for the flower arrangement. You can cut the glycerin leaves as needed to fit your arrangement but still allow the ceramic pot to show.
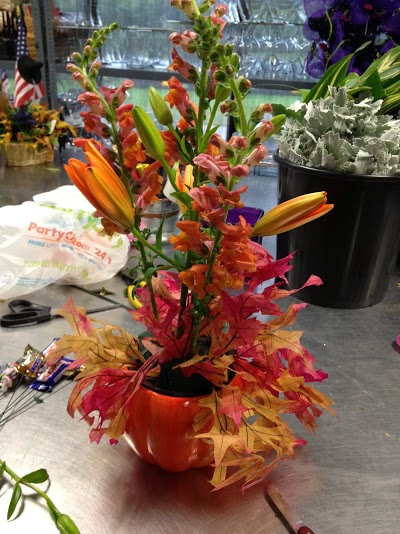
  1. Now we add our fall flowers to our ceramic pumpkin and autumn glycerin leaves. Start with the tallest flowers first (in my case, snapdragons) to give the arrangement height. Typically, the rule of thumb is the flowers should be 2 1/2 times the height of the vase.
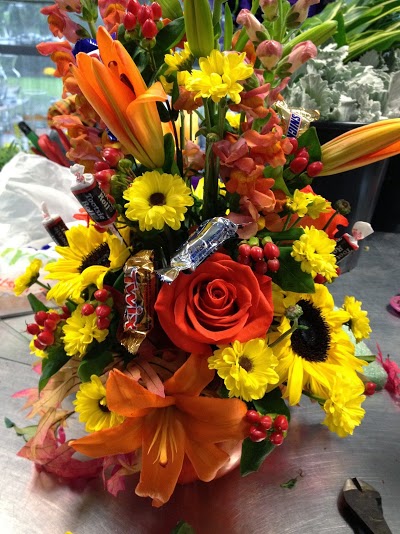
  2. Add the remainder of your flowers in whatever order you please. In my case, I added the lilies, hypericum, “Viking” daisy poms, roses, and, lastly, sunflowers. I added more as needed to fill the arrangement, and adjusted the height to ensure all the flowers were visible. Note: Don’t be scared of sticking the flowers into the floral foam — you want to make sure they are secure.
  1.  Stick your candies into the wire sticks and place the sticks in the arrangement as you see fit.
  2. Your Halloween flower centerpiece is finished! Feel free to add more flowers and candy for finishing touches, and make sure to allow some space so people can see your creative ceramic vase.

Enjoy and happy Halloween!

Exit mobile version