Taco Love

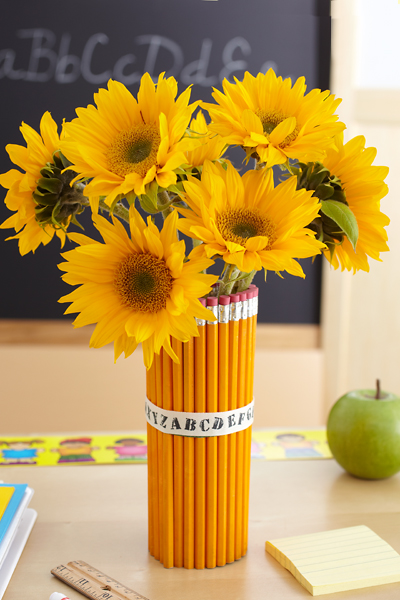
There are at least three reasons to celebrate love and tacos, or just your love for tacos: Valentine’s Day, Galentine’s Day, and Cinco de Mayo. And let’s not forget Taco Tuesday! So, I put my thinking cap on and came up with some easy and inexpensive taco decor ideas that can take any party from “asi asi” to “espectacular!”

taco decor with jars of salsa

Almost everything you’ll need to create these — flowers, salsa, chips, peppers, taco shells, etc. — can be picked up at your local market.

taco decor with salsa jars filled with flowers

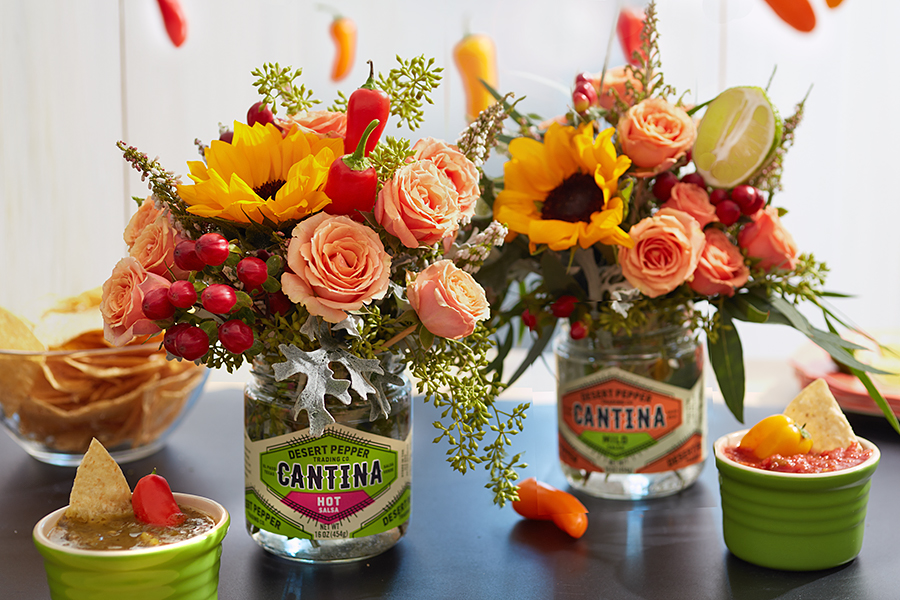
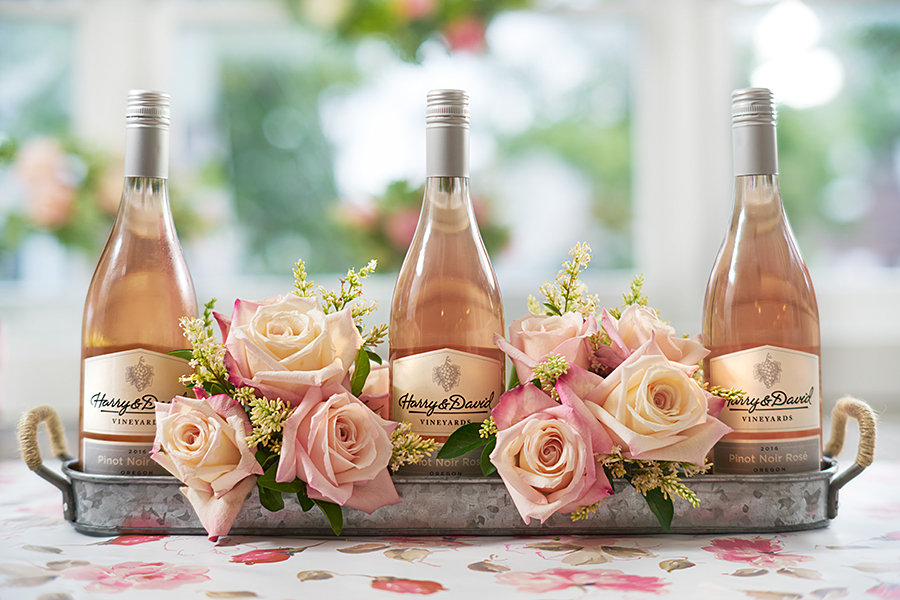
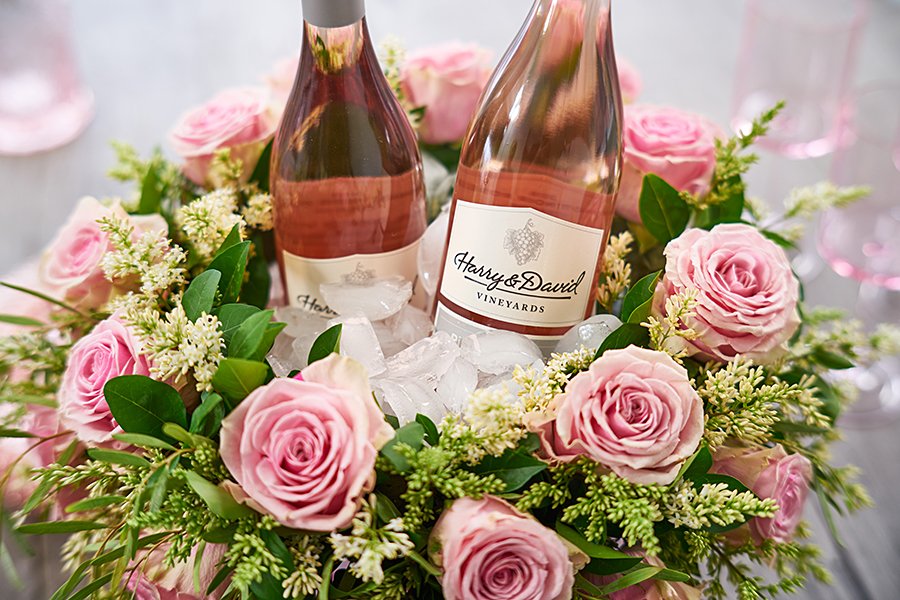
And they’re not just easy to make but ingenious too! After pouring your salsa into serving dishes, use the glass jars as vases for the flowers. (I bought the Desert Pepper Cantina brand salsa for the cool labels, but Harry & David carries a fantastic selection of salsas as well.) Then, I placed the festive arrangement next to the coordinating salsa so guests knew what heat level to expect.

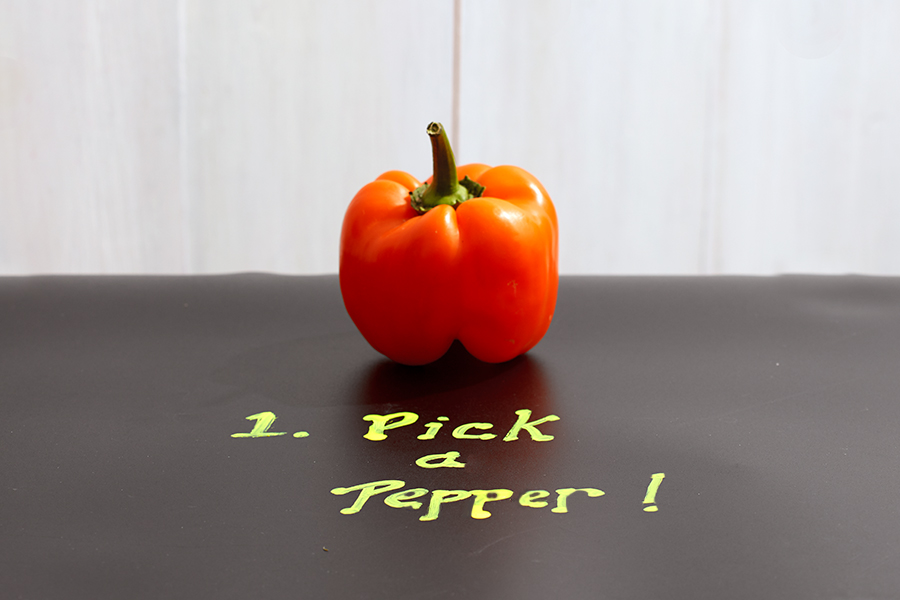
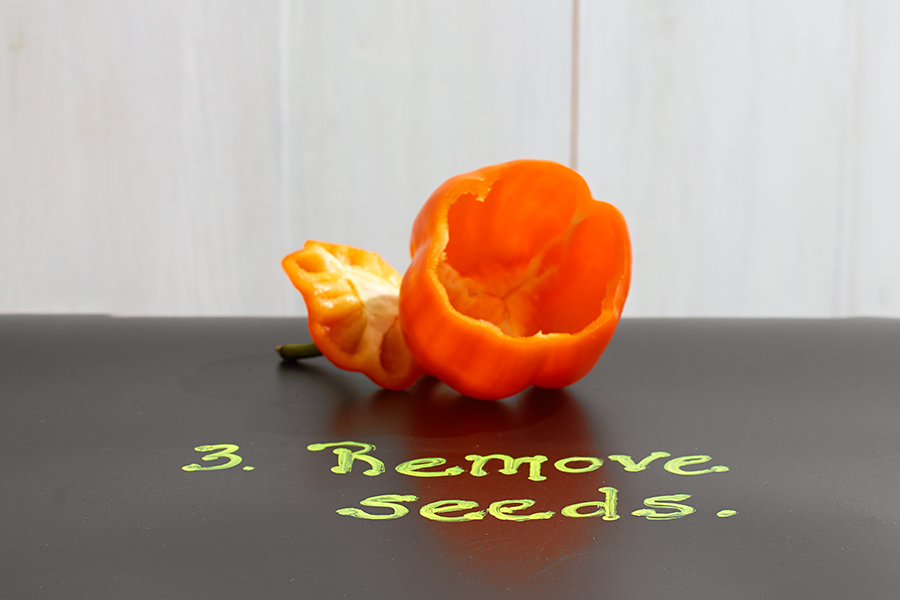
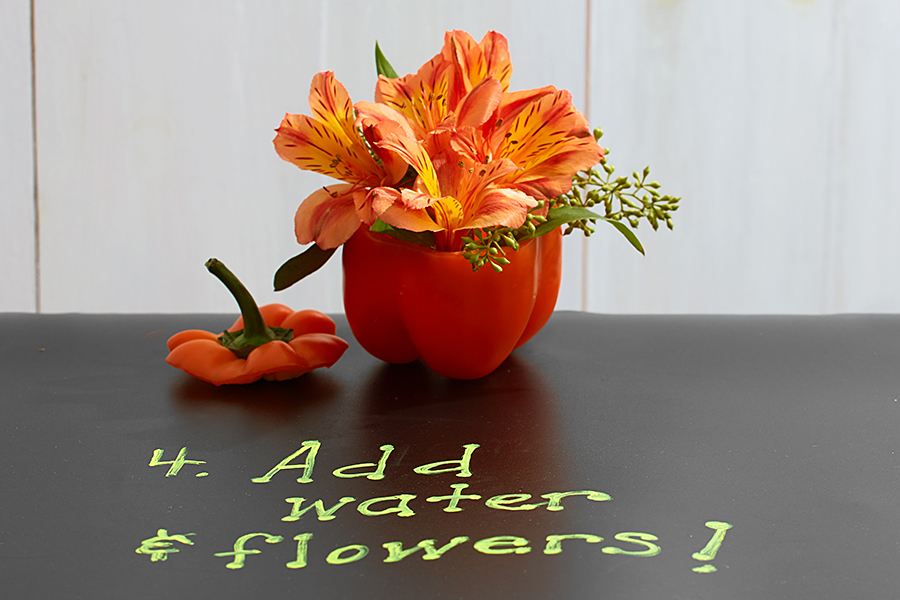
Pepper your table with little pepper vases
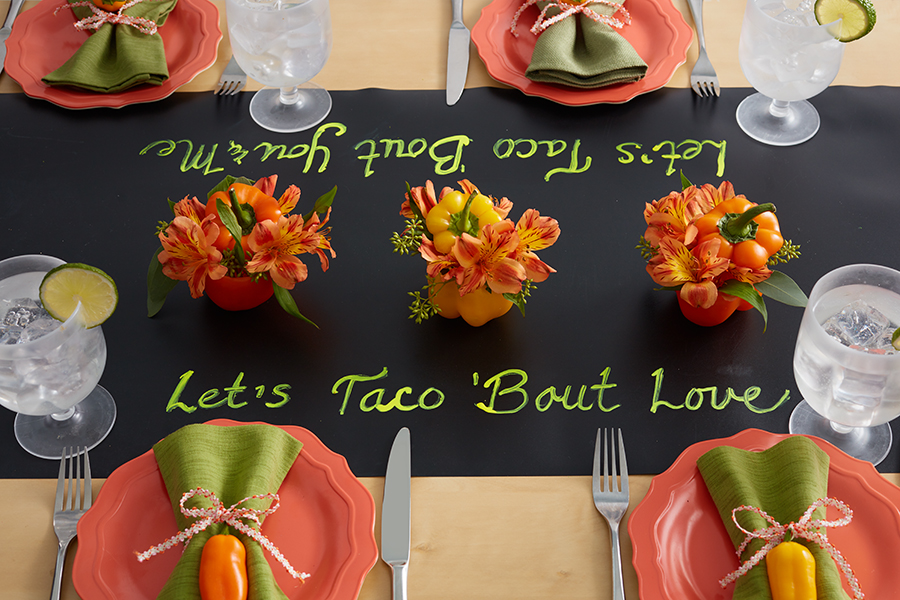
taco decor with pepper vases

It’s as easy as:

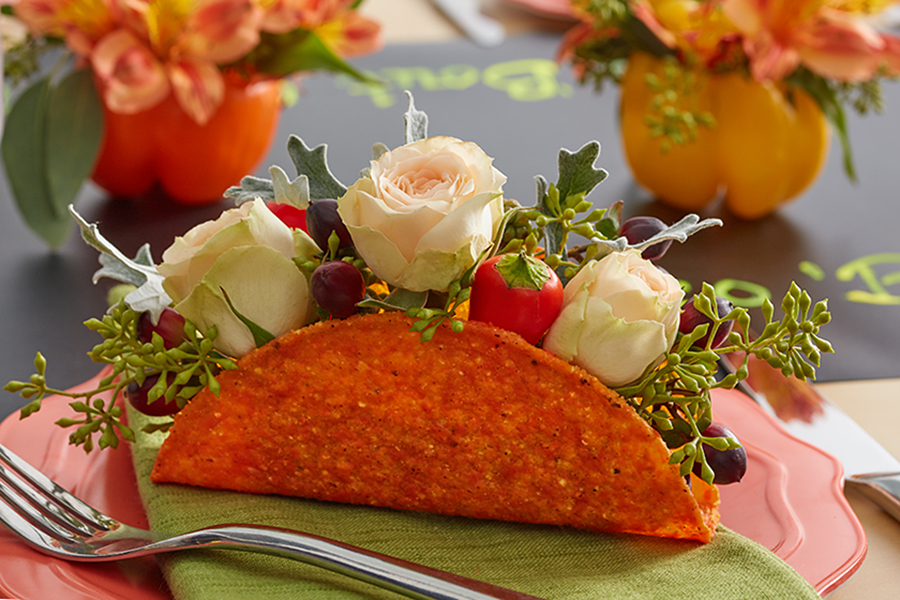
Everybody gets a flower taco

taco decor with flower taco

I like to challenge myself to think outside the box when I am working on a project…and then things like this happen!

taco decor with flower taco materials

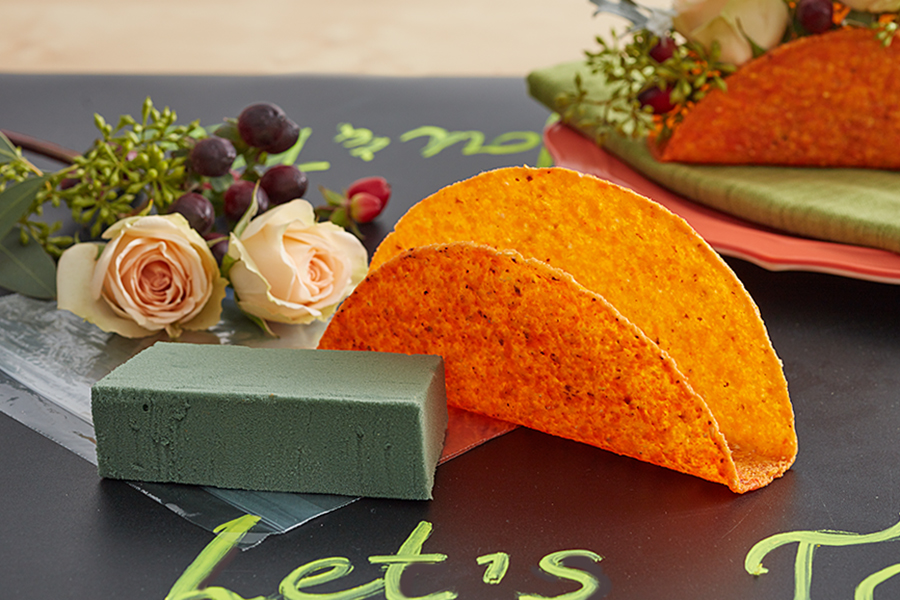
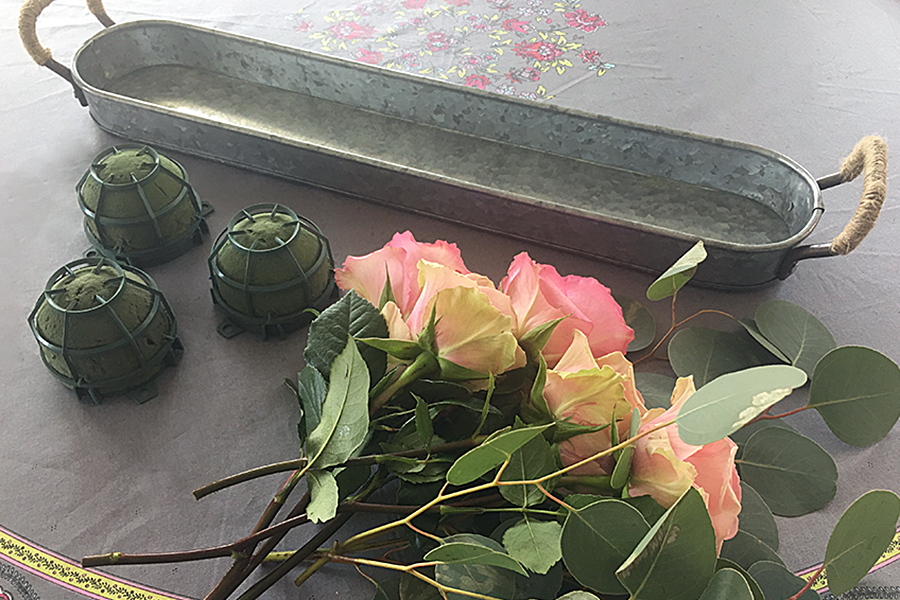
Here’s how to make personal size taco bouquets.

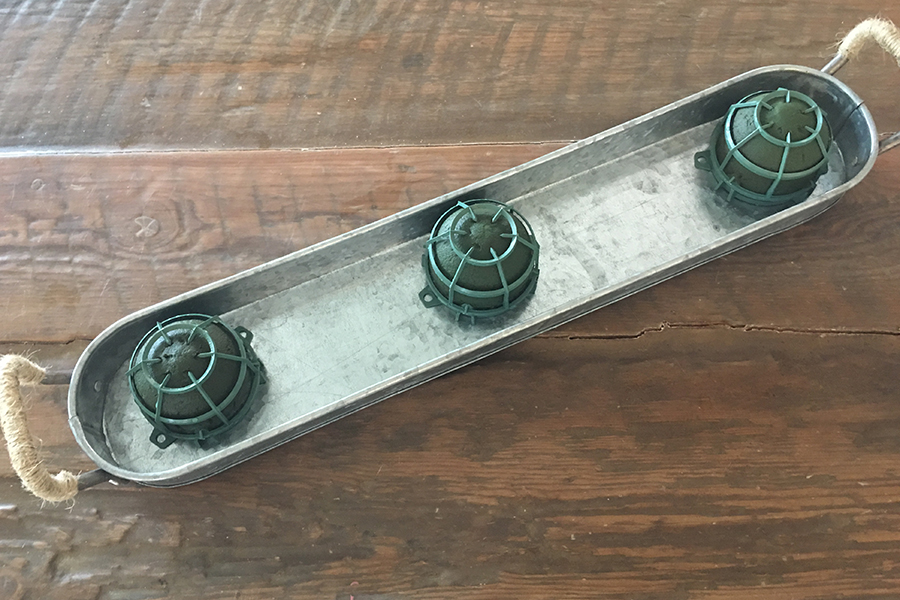
  1. Start with a stand-up taco shell.
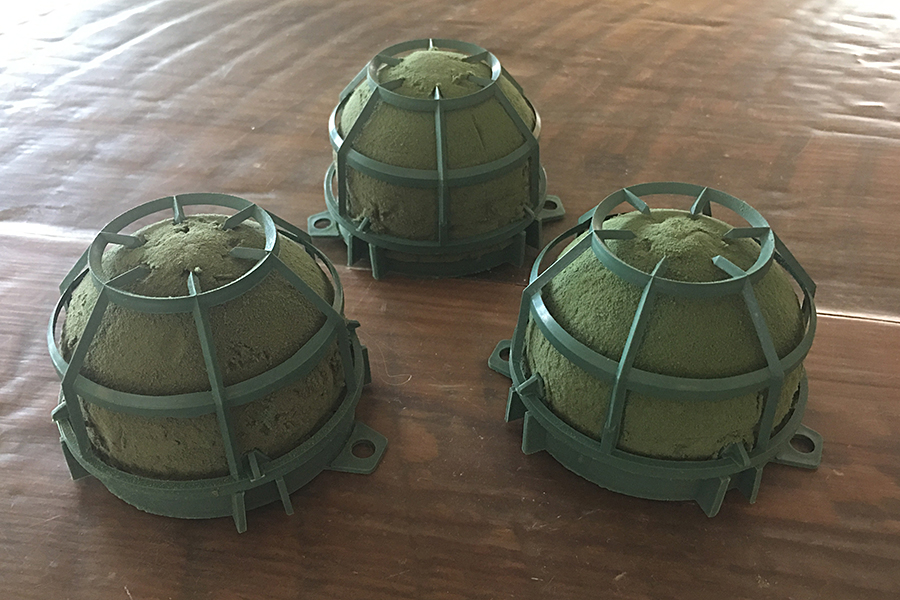
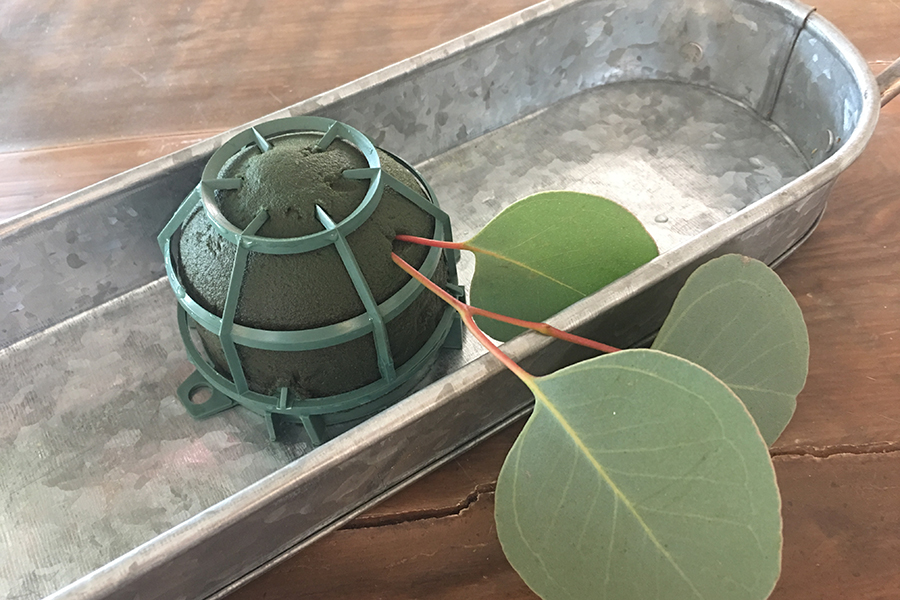
  2. Cut a small piece of floral foam to fit in the shell.
  3. Soak the foam and then put it into a small plastic sandwich bag.
  4. Place in shell.
  5. Add fresh cut flowers!

Maybe you prefer your tacos “supersized”

taco decor with taco centerpiece

A super-sized flower taco nestled in a wooden planter and accented with a few Coronas, limes, and fresh peppers make a unique centerpiece for a buffet table or DIY taco bar.

taco decor with making co centerpiece

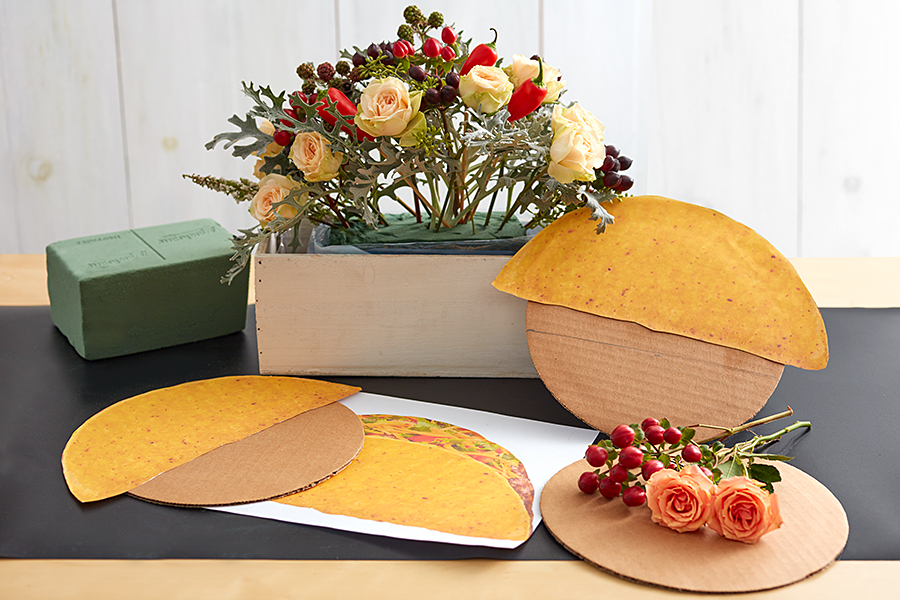
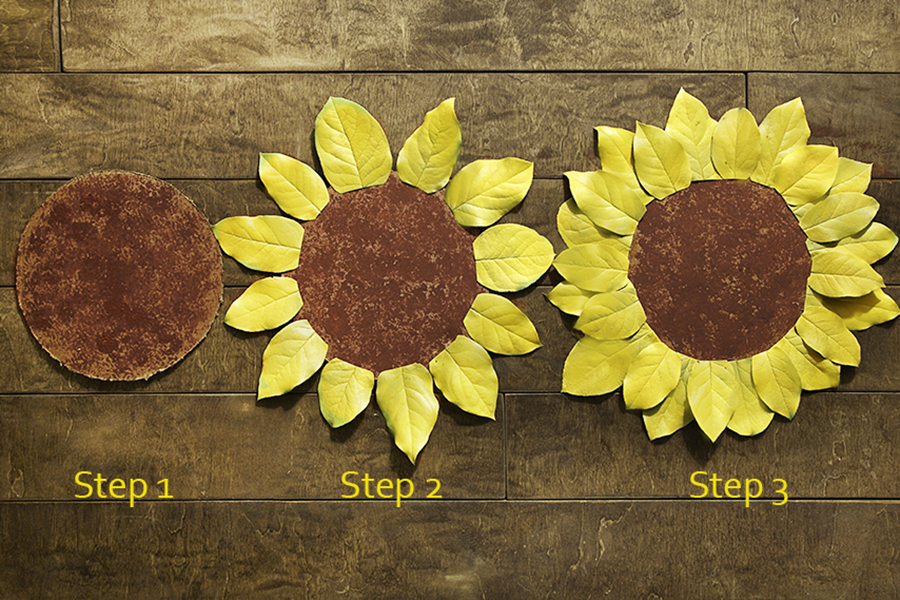
To make the large taco:

  1. Print out two large images of a taco shell.
  2. Cut out the taco shells and glue them to pieces of cardboard.
  3. Cut a piece of floral foam a little smaller than the width of your taco shell.
  4. Soak the floral foam and place it into the liner of a wooden planter (or any container of your choice).
  5. Add one image of the taco shell (facing out) to the one side of the foam and place the other a little higher (facing the same direction as the first one) on the other side of the foam.
  6. Cut fresh flowers so they sit right at the top of the taco shell when inserted into the foam, and arrange accordingly.
  7. Add the additional elements to make it a complete “party in a box!”

Taco Jell-O® shots

While I was putting this together, I thought about how perfectly these taco decor ideas would work for Galentine’s Day, which reminded me of the fun ideas I shared last year for my gal’s party.  One of them was the waffle Jell-O® shots.

taco decor with taco jell-o shots

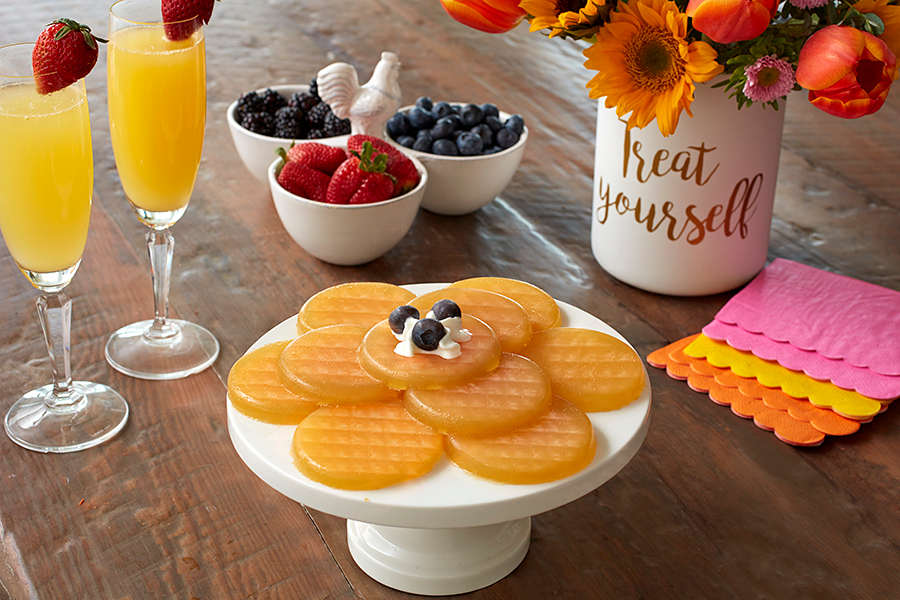
And a light bulb went off in my head — that pan would make perfect little taco shells!

taco decor with making taco jell-o shots

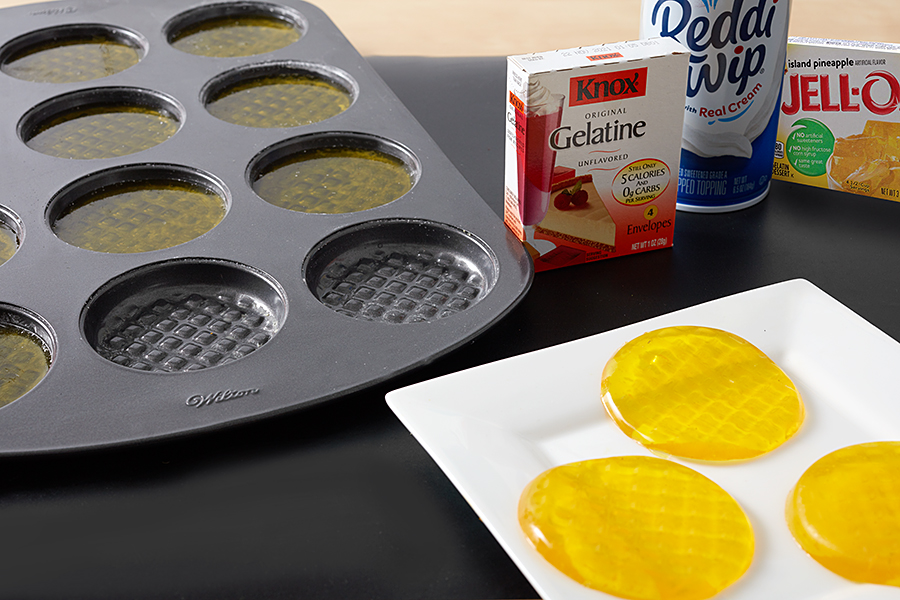
I changed the recipe a little, combining a gummy and Jell-O® shot recipe, to come up with this.

  1. Add two packets of plain gelatin and one packet of Island Pineapple Jell-O® to a pot.
  2. Slowing stir in a half cup of water until dissolved and let sit for five minutes.
  3. Turn on heat and stir for about five more minutes.
  4. Add a half cup of tequila and another half cup of water, and stir completely.
  5. Dust the pan lightly with corn starch.
  6. Fill each opening half way up.
  7. Place in refrigerator for four hours.
taco decor with taco jell-o shots on plate
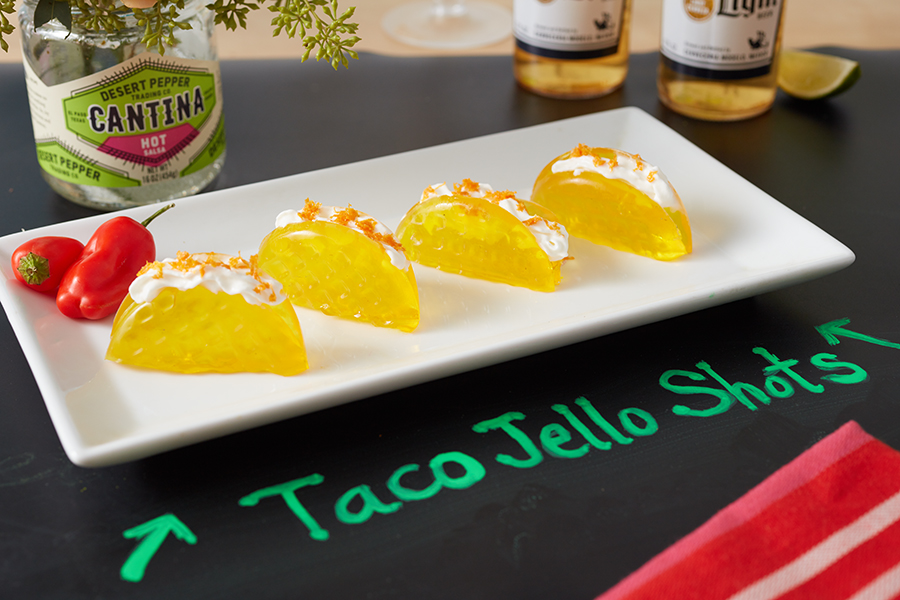
  1. To serve, fold each mini waffle in half and stand together on a plate.
  2. Right before serving, add whipped cream and orange rinds or orange sprinkles.

Or set out a DIY taco shot bar. Just put the taco shell Jell-O® shots flat on a plate, along with bowls of small pieces of fruit and whipped cream, and let everyone make their own.

If you like these fun taco decor ideas, check out similar posts with activities, how-to’s, and recipes to help you celebrate all the LOVE you have to give.

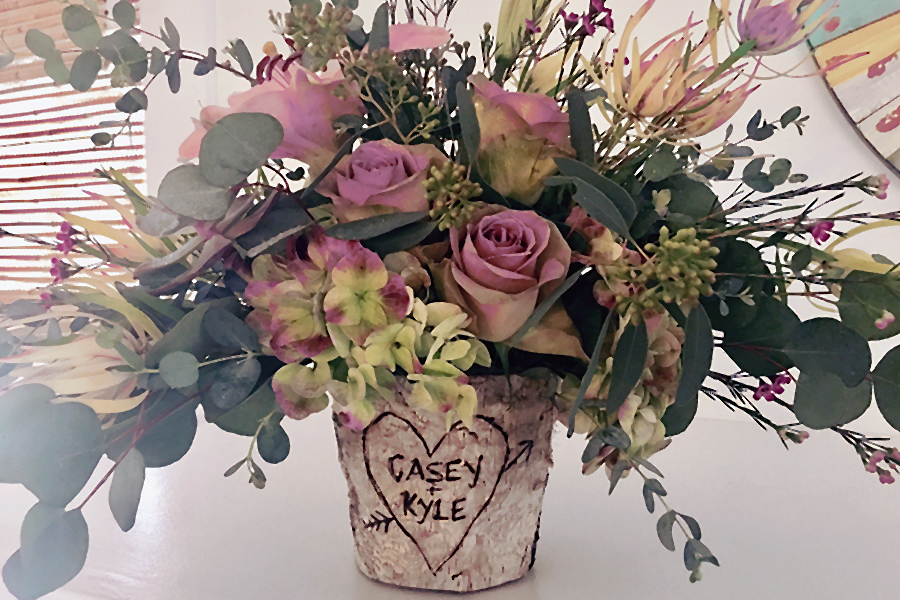
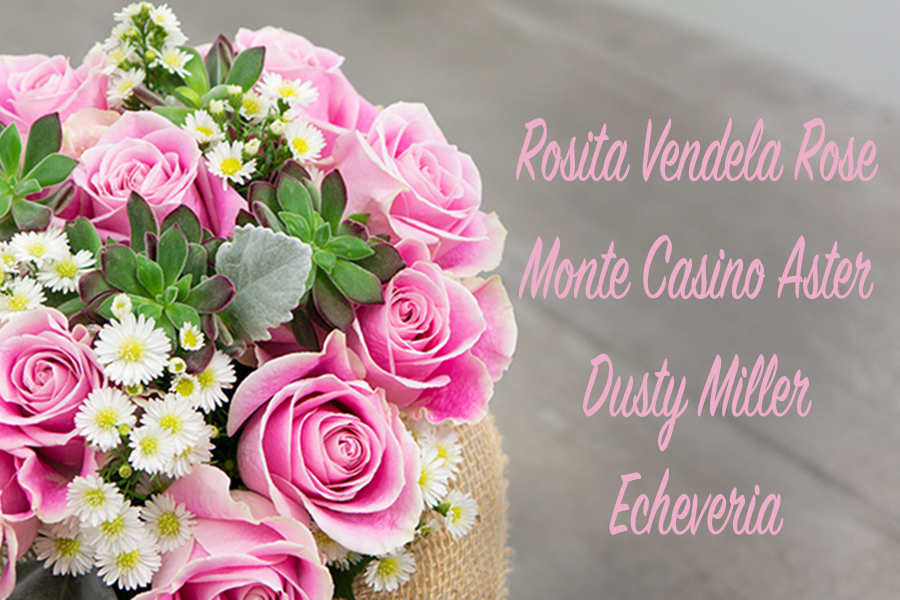
Or you can always say “I love you” with a dozen roses. That always works.

Naturally Romantic Flower Arrangements with Wood Burned Planters

OK I have officially moved on from pallet wood to birch as my go to obsession.  Birch fits in so perfectly with my home décor style, bringing in natural texture and personality.  Birch trees and birch bark are in themselves works of art with limitless uses and opportunities for combining with other elements to create even more beauty!I have several different size and shape birch vases and planters and have been dying to try burning a heart into as you would see on a real tree where someone romantically declared their love.  Being a florist in February I am thinking love and romance 24/7 these days.  And my daughter is just starting to plan her wedding which she envisions in a tent with lots of natural décor elements.  So, if not now when?

Continue reading Naturally Romantic Flower Arrangements with Wood Burned Planters

Sunflower Decor Ideas

The sunflower is a symbol of happiness, strength, loyalty, and adoration. Because the sunflower always turns its face to the sun, it has also come to symbolize faith and the constant search for light, or enlightenment. All in all, it is one of the most beloved flowers on the planet.

Its overwhelming popularity also makes it a popular choice for decorating. These two sunflower decor ideas are the perfect way to incorporate the irresistible beauty and warmth of the sunflower into your next summer get-together.

Vintage sunflower tabletop

sunflower decor with Sunflower Tablescape with DIY Placemats

This fall-themed tabletop features vases and placemats that play into the sunflower theme, and can be assembled in mere minutes.

Use antique single-flower vases

For an updated twist on a traditional centerpiece, line an assortment of vintage-style green and yellow bottles, each holding a single sunflower, down the center of the table. This creates a garden of sunflowers with their faces looking up at the sun!

How to make sunflower placemats

Sunflowers come in many different colors and sizes, from mini to giant. These super-size sunflower placemats make a big impact and are so easy to make!

Materials

sunflower decor with Supplies for DIY Sunflower Placemats
  • Cardboard circle (approximately 10 inches in diameter)
  • Salal leaves (20 to 25 leaves in various sizes; fake leaves can work too for a longer-lasting placemat)
  • Glue
  • Yellow spray paint
  • Brown paint
  • Sponge

Instructions

Step 1

Cut one cardboard circle for each placemat. (This is a good use for old cardboard boxes!) Each circle should be about 10 inches in diameter. I used a dinner plate as a template to trace a circle onto the cardboard, which worked perfectly. Use the sponge to add brown paint to your circle, leaving a bit of the original cardboard color showing through to create a textured look for your sunflower center.

sunflower decor with DIY Sunflower Placemats
Step 2

Cut all the salal leaves from the stem and spray paint them yellow. Once they have dried, glue the wider end of the larger-sized leaves to the edge of the cardboard circle.

Step 3

Glue the smaller leaves between each of the larger leaves.

With fresh salal leaves, the sunflower placemats can be made a day or two before you plan to use them. Keep them flat and in a cool place.

These super fun sunflower decor ideas will help set the mood at a summer party and add a brightness and whimsy to the proceedings. After all, everyone is happier around sunflowers!


An ad for 1800flowers' flower subscription service

How to Make Back to School Flowers to Start Their School Year Off Right

back-to-school-flowers-mason-jar

Back to school flowers can help everyone start the new school year off on the right foot! According to research conducted at Rutgers, The State University of New Jersey, the presence of flowers triggers happy emotions, heightens feelings of life satisfaction and affects social behavior in a positive manner far beyond what is normally believed. “Flowers bring about positive emotional feelings in those who enter a room,” said Dr. Haviland-Jones. “They make the space more welcoming and create a sharing atmosphere.”

Here are some creative ideas that you and your child can put together the day before school starts. Your child might be a little nervous about the first day of school and spending time with you; putting a floral or plant gift together for the teacher will relax them and get them excited about giving their new teacher such a beautiful gift.

How to make a pencil vase with flowers

pencil-vase

Can a teacher ever have too many #2’s? This adorable vase is just a clear beverage glass covered with unsharpened #2 pencils. Place a rubber band around the glass and insert the pencils between the glass and the rubber band until the entire glass is covered. Hide the rubber band with a fun school themed or colorful ribbon. Add about 2 inches of water into the glass (easier for transporting), but make sure the teacher knows they should add more water as soon as possible to keep the flowers fresher longer. Sunflowers are perfect long lasting flowers, but you can use any flowers. Flowers picked from your garden are great too!

Garden fresh flowers for the teacher

Keep it simple and fresh by cutting a few stems of flowers from the garden and placing them in a mason jar. Bring your child into the garden with you and let him or her pick out the flowers. There’s no right or wrong here — any flowers cut from a garden will look good together. I love this natural look! It reminds me of my grammar school days, when kids would bring flowers to the teacher. A few stems of garden roses wrapped with a little aluminum foil seemed to have magical powers for both the giver and the receiver!

Rosé Wine Cooler Centerpiece

Knowing a few tricks from the floral industry can make it so easy to create beautiful, one-of-a-kind pieces that can set your party apart from the crowd!For this pretty wine cooler/centerpiece, you’ll need an oblong waterproof tray, a couple of IGLU floral foam cages, fresh flowers, and foliage.

These small pieces of floral foam in their own plastic cages can make it so easy to add real flowers to unexpected places while keeping them hydrated and fresh for days!

Before using, soak the IGLU in water.

Place the soaked IGLU in the tray. If you wanted to display two bottles of wine in this size tray, I would use three IGLU cages.

I wanted to have three bottles available, so I used two IGLU cages.

Add foliage first.

Then add roses.

You may find it helpful to have a bottle in place as you’re creating your floral design so that you can build around it.

You can use this to simply display your wine in a pretty way, or you can add a few ice cubes around the bottles to keep them chill!

Frozen Roses and Frosé

I’ve shown you how to surround your bottles of rosé (I love the Harry & David rosé shown above!) with a wreath of blooming summer roses. Now I’ll show you how to keep the rosé chilled with frozen rose buds.

I would have made these in an ice cube tray, but because I have an automatic ice maker at home, I didn’t have any trays on hand. I did, however, have plastic shot glasses, so I decided to go with them.

Here are a few tips to make it even easier:

  • Use small roses, such as a sweetheart or spray rose.
  • Cut the stem off at the base of the rose.
  • Stand individual roses in shot glasses (or ice cube tray) and fill 1/3 of the way with water.
  • Place shot glasses (or ice cube tray) with roses and water on a tray, and place in freezer.
  • After the water has frozen, take the shot glasses out of the freezer and add water to fill to the top.

Fill your bowl or ice bucket with plain ice cubes, leaving room at the top to add the fancy frozen roses.

If you made them in an ice cube tray, you would remove each cube from the tray. I liked the way the roses looked in the clear plastic shot glasses, so I left them in and just nestled them in between the regular ice cubes. I thought it added a special touch to something so easy to do!

And while we’re talking about a fabulous frozen rose display that’s easy to create, here’s my vote for the tastiest and easiest summer frozen cocktail: frosé!

How to make strawberry frosé

Fill your blender with frozen strawberries, add your favorite bottle of rosé, and blend away! How much rosé you add will determine how slushy your cocktail will be. It’s that easy!

Garnish with a fresh strawberry and rosé gummy bear, and you have an instant party!

I have a confession to make: There was a Pinterest fail associated with this project. I was going to make my own rosé gummy bears following one of the recipes I found on Pinterest. I ordered the gummy bear trays and gathered all the ingredients needed. Then I asked my daughter and her friend (with whom she used to own a baking business) to give it a try. Unfortunately, they gave me a big thumbs down. My suggestion to you: If you want to add the whimsy of the rosé gummy bears to your party, buy a box from Sugarfina and use them as a special garnish. They’re expensive but so darn cute!

DIY Roses and Rosé Wreath

This summer, everything is coming up pink! And that means lots of fabulous party décor in that trendiest of colors. This roses and rosé wreath is a particularly pretty — and pink — way to display your wine while keeping it chilled at the same time.

a photo of roses and rosé wreath on a table

If you don’t have your own rose garden or a blooming rose bush, don’t worry — roses are abundant this time of year, and they’re priced right.

Roses and rosé wreath

What you’ll need

  • Oasis floral foam wreath base
  • Fresh cut roses
  • Fresh foliage
  • Shallow dish
  • Pedestal dish (for elevated display)
a photo of a roses and rosé wreath with  a shallow dish for the base

Soak the floral foam wreath base thoroughly. Then, place a shallow dish, such as a pie plate, on top of the pedestal dish, and put the foam wreath on the pie plate.

Start by creating the wreath shape with various sprigs of foliage. I was able to cut enough branches from the trees and shrubs in my backyard to use in this project!

a photo of a roses and rosé wreath with pushing leaves into floral foam

Because the wreath is elevated, make sure that you insert your lower branches into the foam on an angle so they hang over the dish.

a photo of a roses and rosé wreath with covering wreath base with flowers

Before inserting your roses, cut the stems to about an inch long so that the stem fits nicely into the foam without going all the way through. You want the bottom of the stem to stay in the foam so that it will be continuously hydrated.

Continue filling in with greenery and roses until you have completely covered the wreath base.

a photo of a roses and rosé wreath with bottles of wine in the wreath

When you’re ready to serve and enjoy your favorite rosé — mine is this delicious pinot noir rosé from Harry and David — fill the center dish with ice and add the bottles to keep them chilled between pours.

a photo of a roses and rosé wreath with a faux rose wreath

Want an even simpler version of this? Use a faux rose wreath instead. Place the wreath on the table, add a bowl filled with ice in the middle, and then fill it with a bottle of delicious, refreshing pink rosé!

Or meet in the middle and do a little of both.

Start with the pretty faux wreath base and add a few cuttings of fresh flowers and greenery to really make it pop!

As long as you want the roses to look beautiful for just a few hours, you don’t even need to worry about hydration — they’ll look great for the entire party. After the rosé is gone, you can remove the fresh cut roses and place them in a petite vase, and enjoy them for a few more days.

DIY Mother’s Day Flower Gift: Rose Bouquet Accented with Succulent ‘Flowers’

DIY Mother's Day Flower Gift with rose bouquet in cachepot

I love putting the right combination of flowers and container together to create a gift that speaks to a person’s heart. This time it spoke to my heart as well because I was creating a DIY Mother’s Day flower gift for my granddaughter to give to her mom, my daughter-in-law, Lina.

Lina and I both love objects with a story and history, and she has always admired my collection of Made in America hobnail milk glass from the Fenton® company!

DIY Mother's Day Flower Gift with cachepot

I have given Lina a few pieces over the years, including this cachepot. It’s one of my favorite shapes and sizes. It looks stunning filled with fresh-cut flowers and just as fabulous when empty with an LED votive light inside. It gives the milk glass a pretty warm glow.

DIY Mother's Day Flower Gift with girl holding flower arrangement

Once we chose the container, it was time to choose the flowers for our bouquet. Olivia knows what she likes, and pink is her favorite color!

DIY Mother's Day Flower Gift with rose bouquet

The Rosita Vendela rose is so beautiful and has a vintage vibe to it, so I thought it would make the perfect focal flower. We complemented that look with a few stems of dusty miller and monte casino. The finishing touch — and one that I know Lina is going to love — is the addition of cut succulents. An obsession with succulents is another thing Lina and I have in common!

DIY Mother's Day Flower Gift with closeup of succulent flower

This succulent is a variety called Echeveria Devotion.

Here’s how easy it is to turn a potted succulent into a fresh-cut flower that can be used in a bouquet.

DIY Mother's Day Flower Gift with succulent out of pot

1. Remove plant from pot. For smaller to average size bouquets, use 2-3” potted succulents.

DIY Mother's Day Flower Gift with removing dirt from succulent roots

2. Gently remove dirt from the roots. You can even remove the roots entirely if you want without damaging the plant.

DIY Mother's Day Flower Gift with skewering succulent

3. Insert a wooden skewer into the bottom of the succulent.

DIY Mother's Day Flower Gift with succulent flowers

That’s all it takes!

DIY Mother's Day Flower Gift with adding succulent flowers to bouquet

I find it works best if you create your bouquet or arrangement first and then insert the succulents. The surrounding flowers will help support the extra weight of the cut succulent. They will look beautiful for weeks and can then be re-rooted.

DIY Mother's Day Flower Gift with girl holding rose bouquet

We added a simple burlap wrap, pretty ribbon, and card that Olivia accented with a bright pink tassel to create the perfect DIY flower gift for Mother’s Day that not only speaks to the heart but totally melts it!

DIY Mother’s Day Gift: Succulent Mug Planter

DIY Mother's Day Gift with succulent mug planters

As easy as it looks to use a Sharpie® to give your mom’s DIY Mother’s Day gift that personal touch, it just might not be your thing.

DIY Mother's Day Gift with mug and succulent

Well, here’s a super cute and super easy solution. Pick up some Mother’s Day coffee mugs and personalize them for every mom you know. I immediately thought of so many mom friends that I wanted to surprise with a DIY Mother’s Day gift on their special day!

DIY Mother's Day Gift with succulent in mug

But, of course, I couldn’t just let them sit there empty, could I?  Not when a 3-inch potted succulent fit so perfectly in the mug.

You could also transplant the succulent directly into the mug, but I like the idea of using the mug as a gift within a gift. It gives the recipient the choice of using it as a planter or for their oh-so-necessary cup of morning caffeine!

Exit mobile version