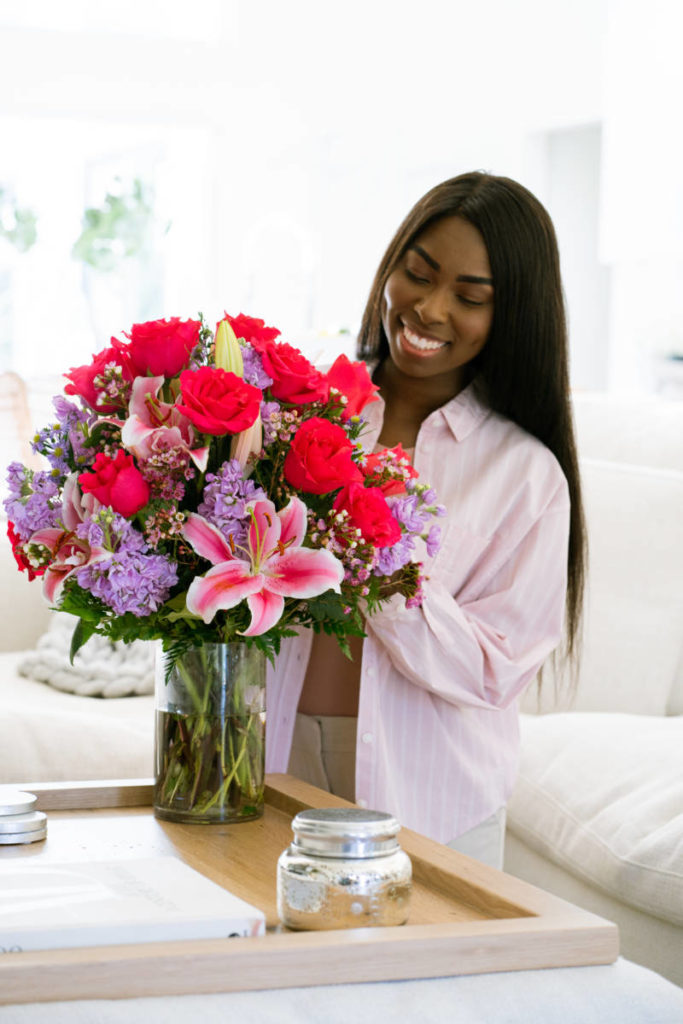
Whether you’re looking for romantic gift ideas or ways to make yourself feel loved, “Your Trusted Cupid” brings you top-notch advice from relationship experts. In this story, Julie Mulligan offers stylish ideas of how to use your Valentine’s Day flowers after the holiday.
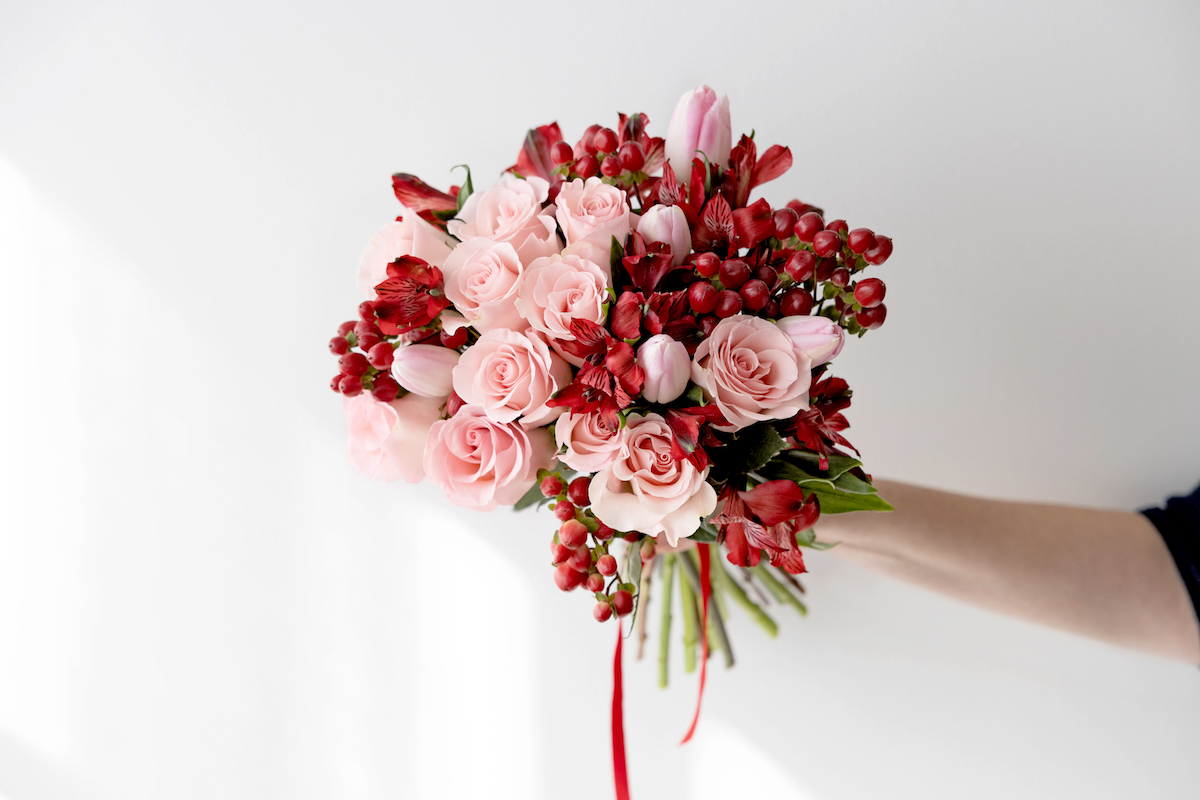
Who doesn’t anticipate feeling special and loved on Valentine’s Day? And of course, receiving Valentine’s Day flowers is the best way to know you are adored. Flowers represent love in many ways, with their natural beauty, fresh scent, and elevating the atmosphere. So, once you receive Valentine’s Day flowers, be a flower “caretaker,” not a “heartbreaker” by giving your flowers plenty of TLC.
Our 1-800-Flowers.com team is so passionate about extending the happiness quotient of flowers, we created these tips to help preserve your arrangements.
1. After a few days, we recommend changing the water and re-cutting the flowers to ensure longevity. Place the bouquet in a separate holder, while you add warm water and flower food to its original vase. Be sure to follow the mixing directions on the flower food packet.
2. With a sharp knife or clippers, re-cut the stems by cutting one to two inches off on an angle, but be careful not to crush the stems. We find it best to hold the stems underwater. Return the bouquet to its vase with fresh water.
3. Once your flowers are down to their last stem, get inspired and be creative — especially with roses. Don’t believe us? You’d be surprised how long you can make a rose last, even if it is fully open. Look around the house for DIY décor-worthy items (glass containers allow for endless creative possibilities).
We’ve included some beautiful ideas to display short, fully open roses below. The shorter the stem, the easier it will be for the water to reach the rose and will last longer than you would expect.
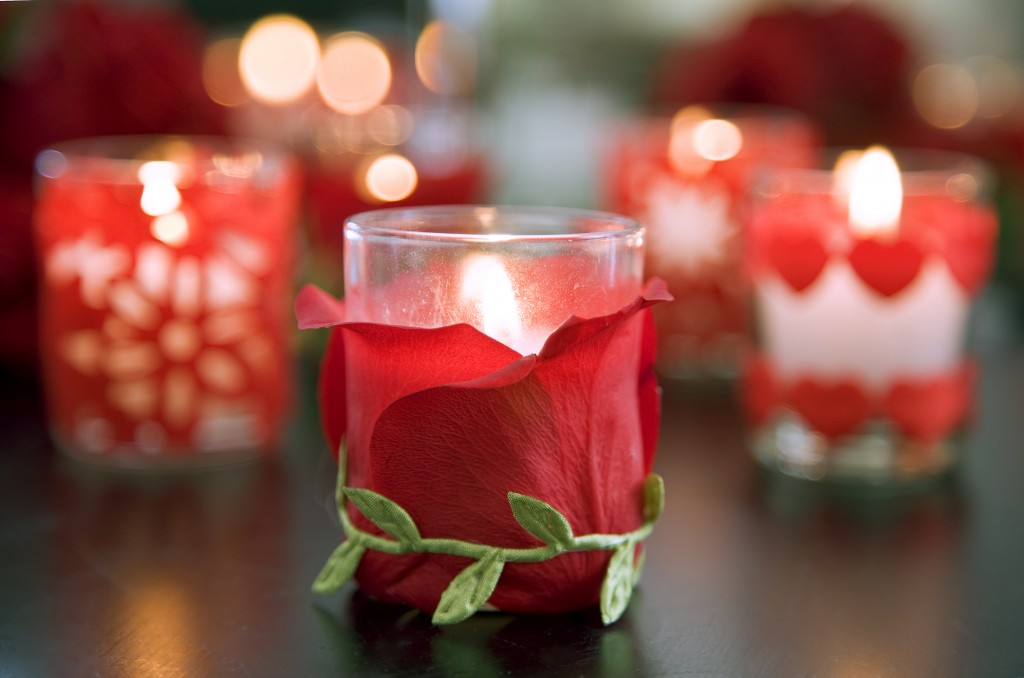
Petal-covered votives
Create an attractive, natural candle by using extra rose petals. Simply place rose petals along the perimeter of a votive and secure with a pretty ribbon for a unique candle.
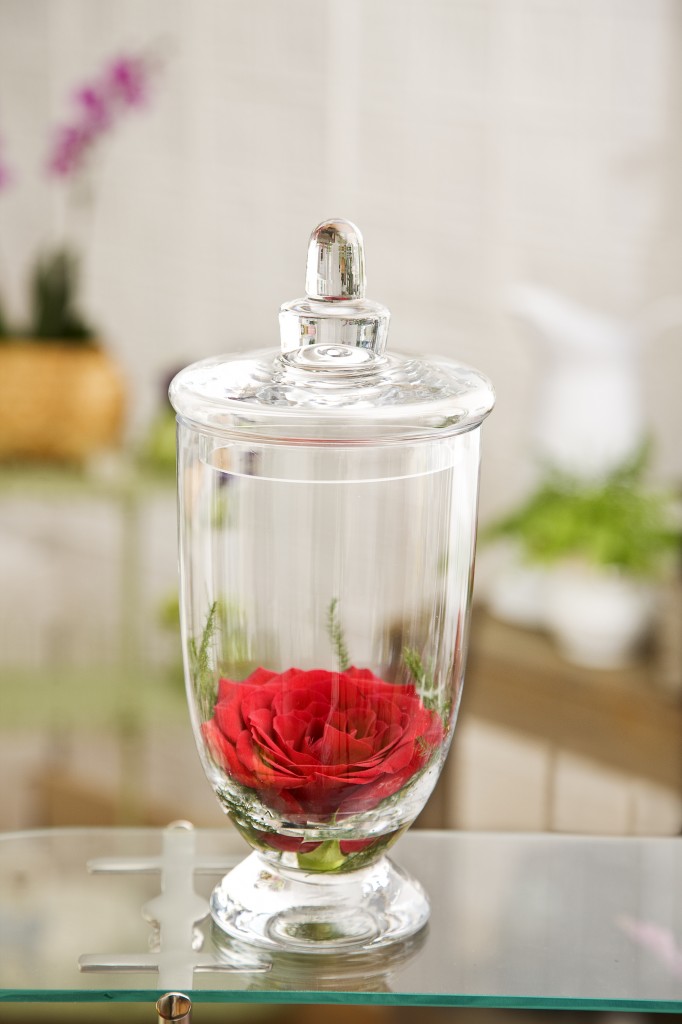
Rose apothecary jar
At the bottom of an apothecary jar or vase, pad with greenery or leaves. Cut the stem from your rose and place the flower on top.
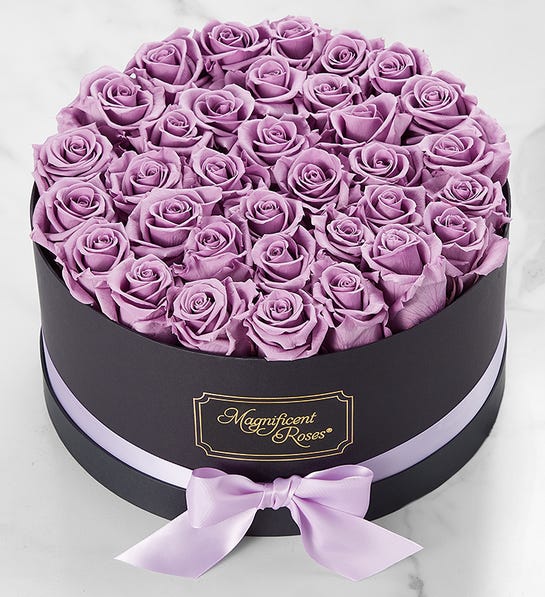
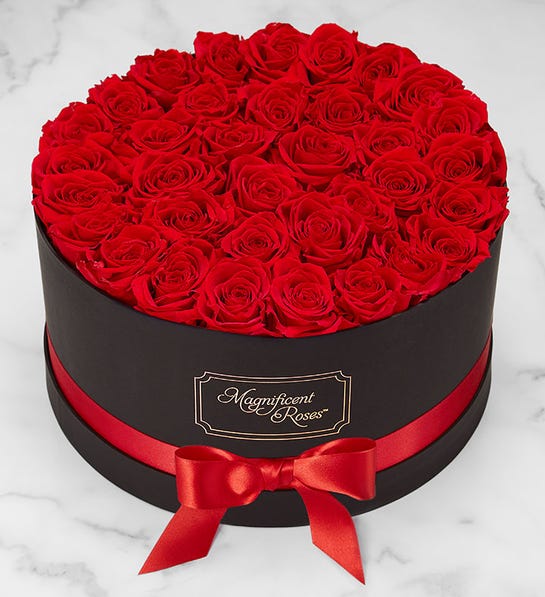
Lasting roses guaranteed
If the thought of seeing your Valentine’s Day flowers shrivel and wilt is too much to bear, consider Magnificent Roses. These arrangements are packaged in a chic hatbox, come in an assortment of colors and styles, and require minimal care. The main difference? Their beauty will last, just like your romance.
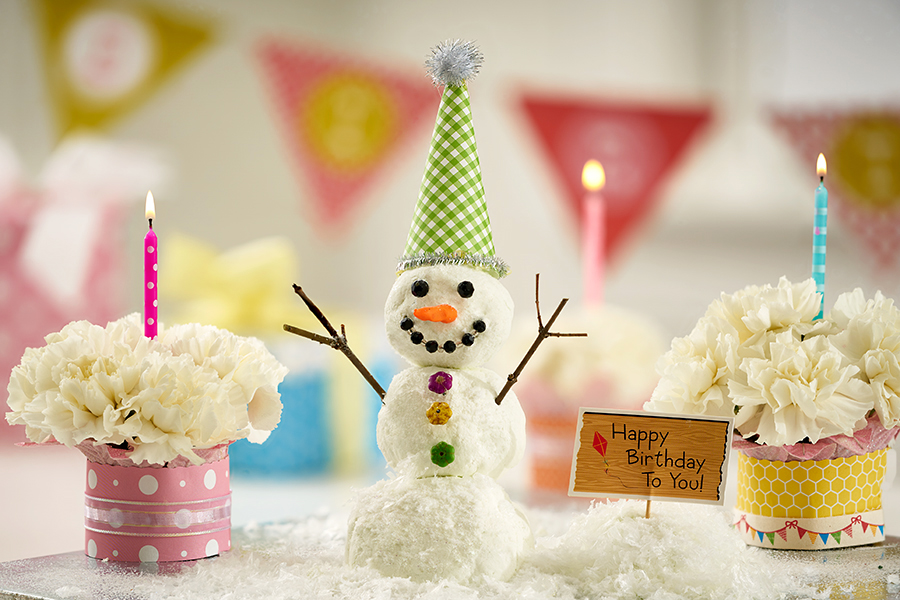
Who better to deliver birthday wishes on a chilly winter day than a happy little snowman? Think about it: Have you ever seen a snowman who didn’t have a smile on his face? Snowmen are a celebration of winter, unexpected snow days, and family fun. And the best part about this snowman (or “snowlady”) craft is that it can stay inside, sharing birthday smiles without melting!
This happy little guy is the finishing touch to a birthday vignette of floral cakes and cupcakes, and I created him with everyday materials found around the home. With a little research online, I found many snowman recipes that called for corn starch and shaving cream. After doing some experimenting, I went with the shaving cream version, but both work great! This snowman craft is a fabulous fun sensory activity to do with kids too.
Make a snowman craft (without snow)
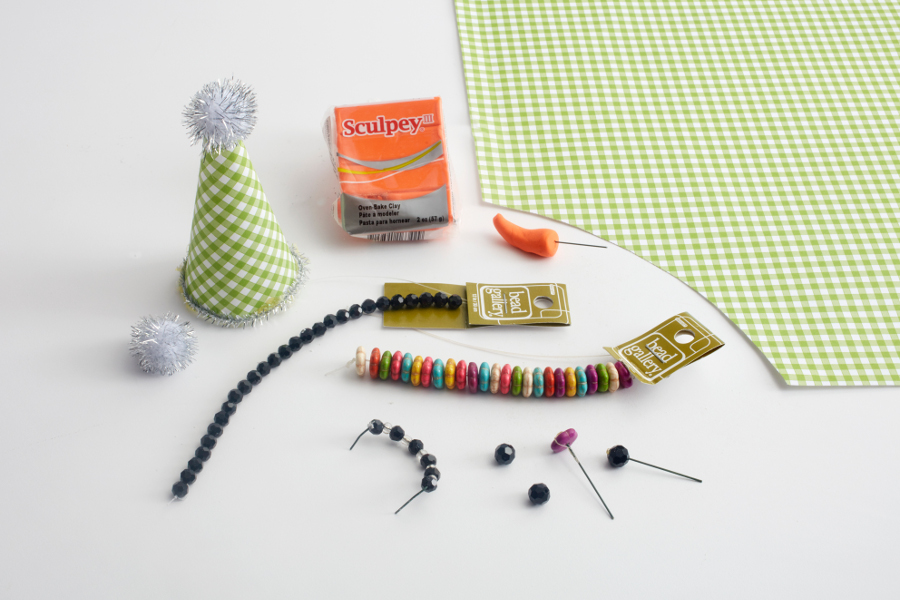
What you need
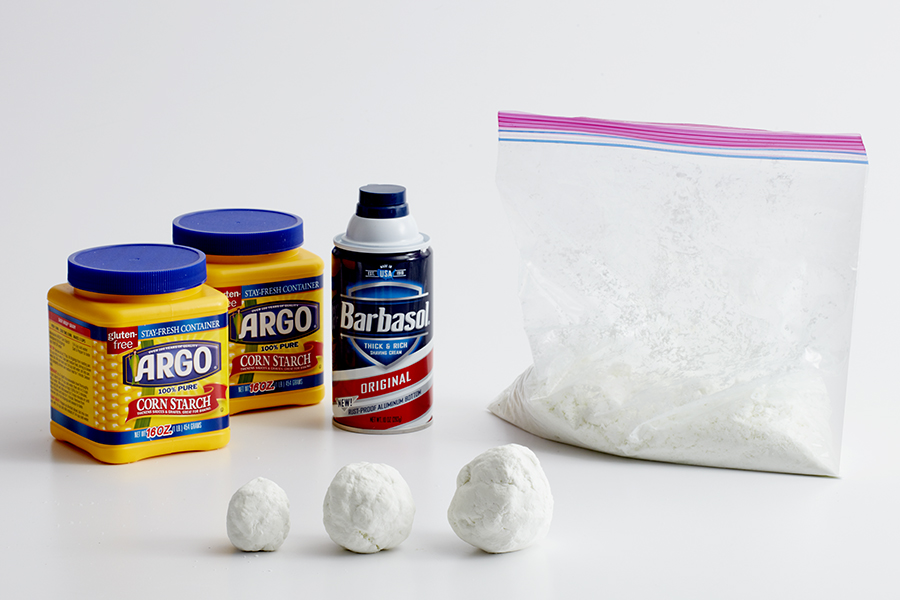
Two 16 oz. containers of corn starch
One 10 oz. can of shaving cream
Miscellaneous items to dress your snowman and add personality, such as:
Pour the corn starch into a large bowl and slowly add the shaving cream, mixing it in as you go. Keep working the shaving cream into the corn starch until you can mold the mixture and it feels dry to the touch. You can store the faux snow mixture in a resealable bag, and it will keep for a few weeks.
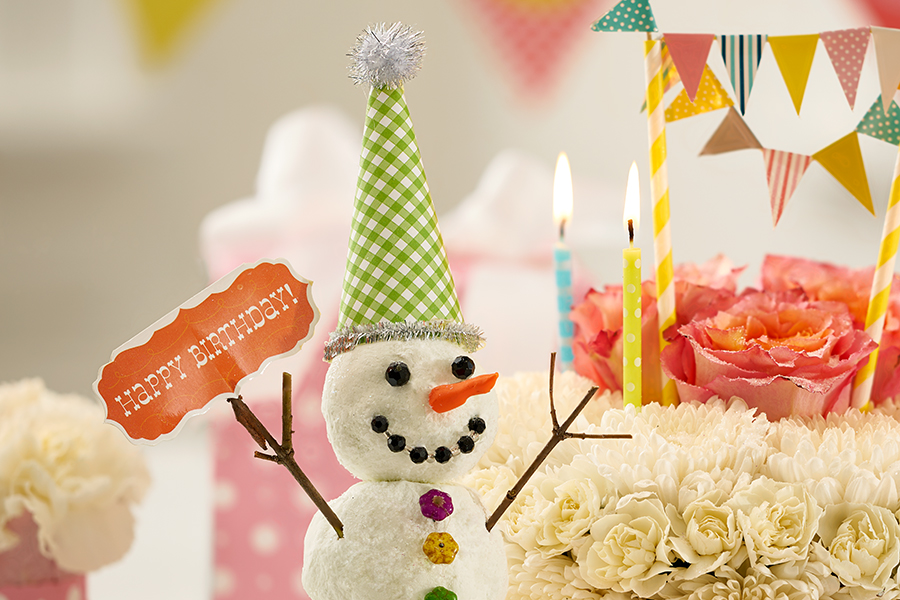
Because this was for a birthday, I added a birthday hat that I made from a small piece of decorative paper, and added a silver pom-pom at the top and a silver chenille stem around the base.
I also made a little “Happy Birthday” sign and attached it to one of his little twig arms!
You can also add the sign to a pile of snow made with the cornstarch mixture. I used some faux snow around the snowman, as well as floral cakes and cupcakes, to complete the look.
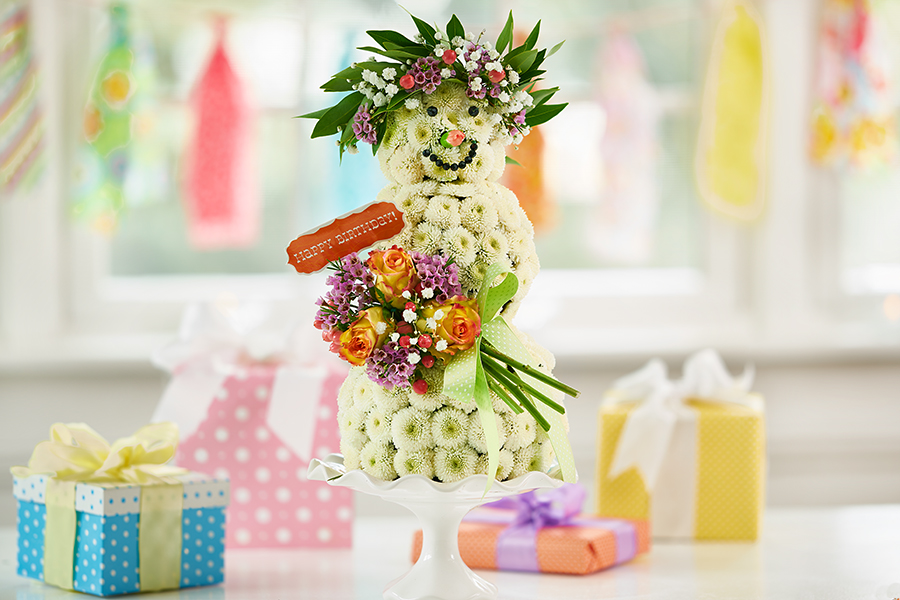
Create a floral snowlady
Another way to make an indoor snowperson is with flowers. If you know someone who has a birthday and deserves to smile, then this is one homemade gift they would be delighted to receive!
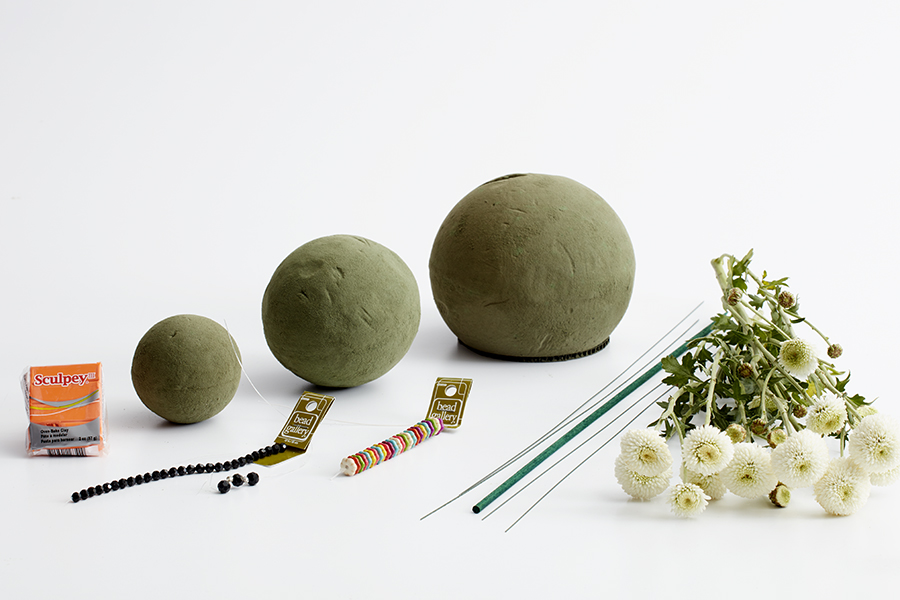
What you need to make a snowlady
2 or 3 sizes of floral foam spheres
A stick
White button poms
Decorative elements to create the face (beads, sculpting clay, etc.)
What to do
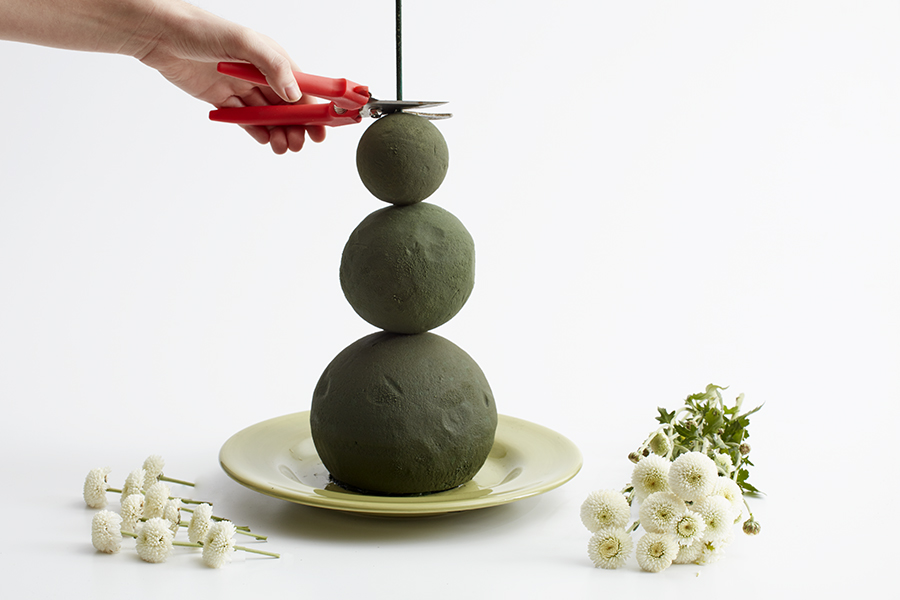
Thoroughly soak the foam spheres. I used three sizes, but you can use just two.
Place the largest sphere on a flat plate and insert the stick.
Place the next largest size on top of the larger one, and then the smallest. Cut the stick at the top if it is still sticking out.
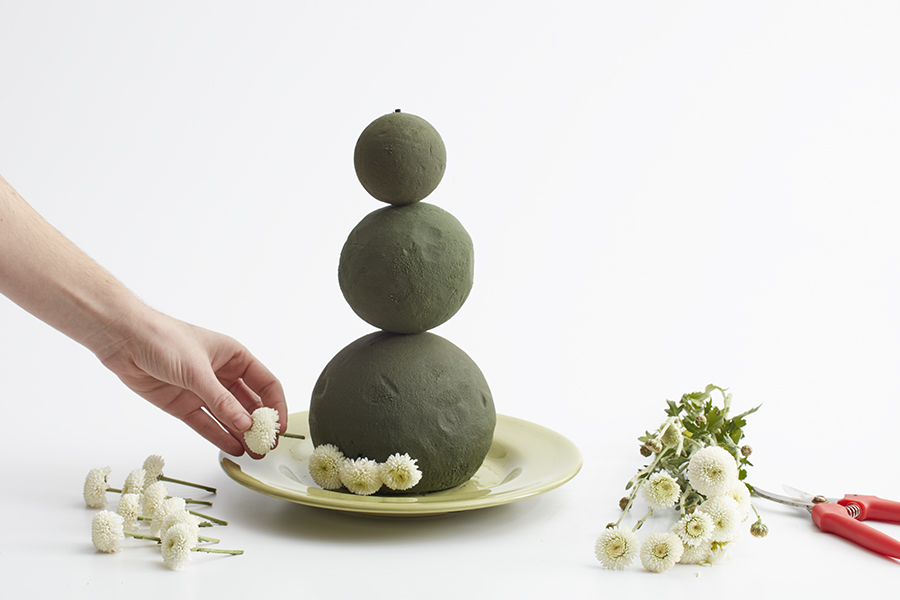
Cut all the individual button poms from the main stem, leaving about 1 inch of stem on the flower to insert into the foam.
Start at the bottom and insert the button poms until you have covered all the foam.
This is a large snow lady — she stands a little over a foot tall — so it takes lots of button poms to make. (I used more than 15 stems.) You can create a smaller one using the same method, however.
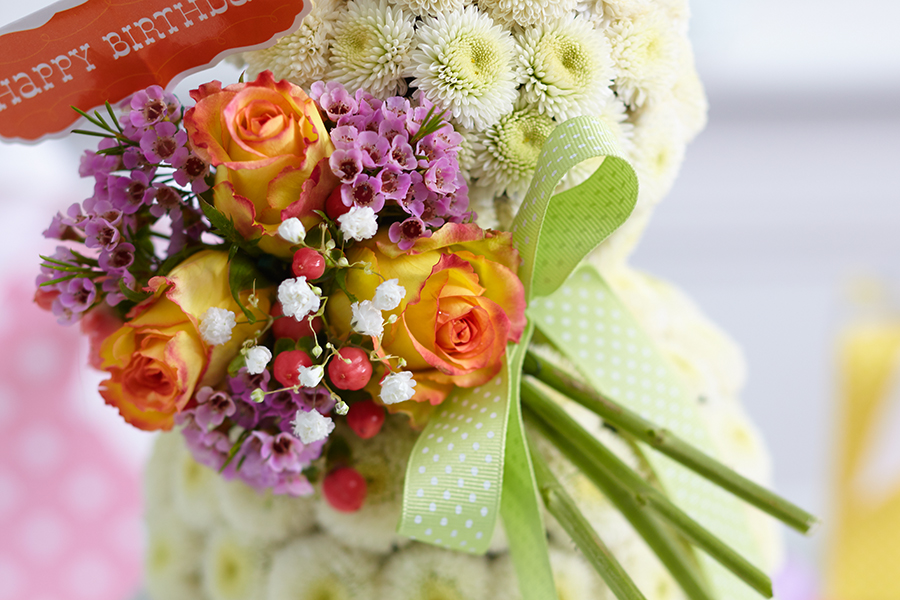
For the birthday bouquet, I gathered a few stems in my hand and cut the bottoms short, and inserted them into the foam. I took the parts of the stems I had cut off and inserted them into the foam as well, and added a bow between the flowers and stems to make it look like she was holding a bouquet of fresh-cut flowers! Because I knew I was going to be giving her this bouquet, I didn’t put the button poms in the area where I planned to insert the bouquet.
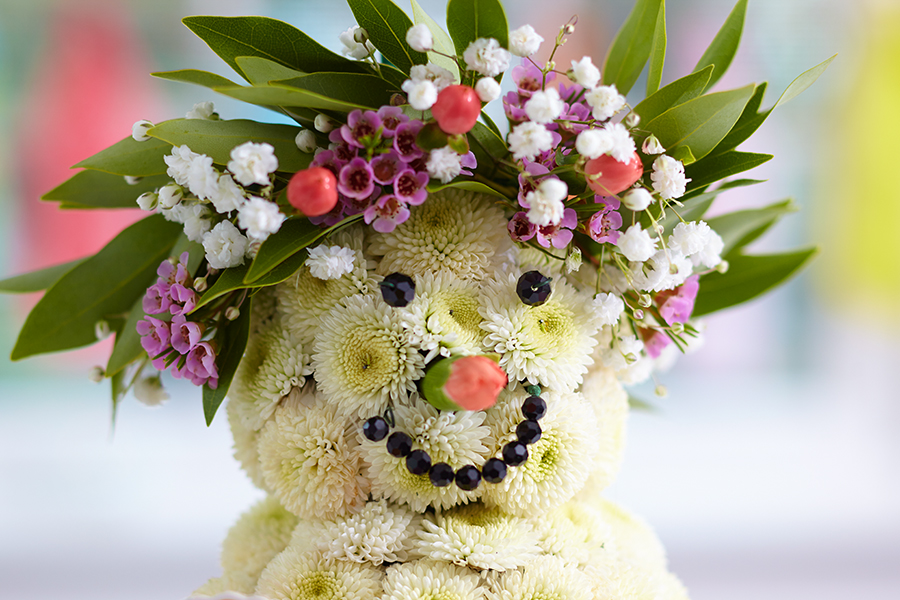
For the floral crown, I used small sprigs of flowers and greens, and wired them together.
Creating any of these vignettes is a sure way to let someone know how special they on on their birthday — and every day!
The series “Seasonal Design” covers home decor and how flowers elevate an environment. In this story, we feature the cottagecore flowers associated with the cottagecore lifestyle.
Once upon a time, we were tiny humans listening to stories about woodland folk who lived in cozy thatch cottages and found wild berries and mushrooms to eat in the forest. That blissful feeling can be ours even as overly stressed adults, simply by accenting our home with the flowers of cottagecore: sublime arrangements of blooms that speak of country roads, cozy fireside, and cottage gardens.
Cottagecore, a design aesthetic, and lifestyle trend are all about the quest for natural surroundings that make you happy and reduce feelings of anxiety. It embraces a life that is harmonious yet floral, serene yet colorful, simple yet lush.
“The desire for traditional blooms has emerged with the onset of the pandemic as people are looking at life and recalling the past when life was less challenging and less complicated,” notes Valerie Ghitelman, vice president of product development, sourcing, and design at 1-800-Flowers.com. “Farmlife and country garden-style flowers have gained popularity as generations are spending more time at home in search of a simpler more complete lifestyle.”
Certain flowers hold the magic key to the cottagecore look, from alstroemeria (Peruvian lilies) to sunflowers. They cheered us in the picture books of our childhood and now they evoke the wonder and contentment of pastoral life within our homes and office spaces.
Quintessential flowers you’ll love
Which cottagecore flowers speak to our quest for a simple, comfortable, and oh-so-beautiful life? They are the ones you can picture growing in the abundant gardens you’ve always wanted — fortunately, there are many blooms to fill the bill! “Garden roses, tulips, dahlias, hydrangeas, and spray roses all possess vintage flair and appeal to those who enjoy a traditional old-world style,” Ghitelman says.
Here are just a few to remember for the delightful cottagecore decorating:
Roses: Hands down the most beloved flower on Earth, roses never stop delighting with their amazing softness and unique shape. You always know it’s a rose no matter who you are or where you come from, and that familiarity is what cottagecore comfort is all about. And that scent!
Hydrangeas: The fluffiest blooms in the garden, hydrangea typically present in hues of sky-blue and rose pink. They grow generously in all kinds of gardens and conditions; the perfect companion to cottage life. Surround one large bloom with a handful of smaller flowers for an instant bedside or bathroom arrangement. They’re so joyful, you can even arrange hydrangeas on their own!
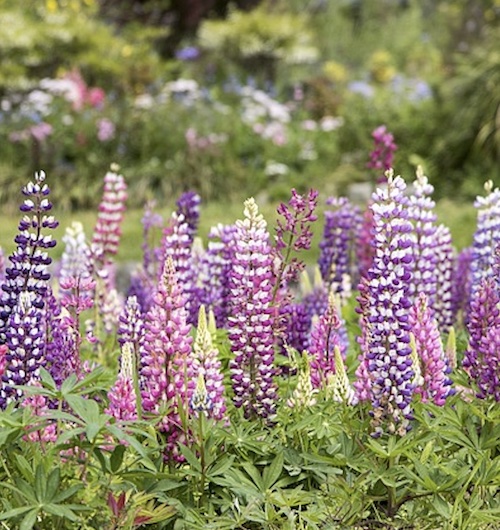
Lilacs: Lilac shrubs have been prized for their fragrance and color since ancient Greek times. They were often planted around homesteads and today, more than 100 years later the same hardy shrubs can be spotted long after the farmhouse itself disappeared. Lilacs speak of old-fashioned backyard gardens, with a small table set for tea.
Delphiniums: Although they come in numerous colors, delphinium flowers are best known for their blue variety, a dramatic deep periwinkle that is virtually irresistible. The blossoms are dainty and droopy, matching perfectly with other classic flowers like roses, alstroemeria, and carnations.
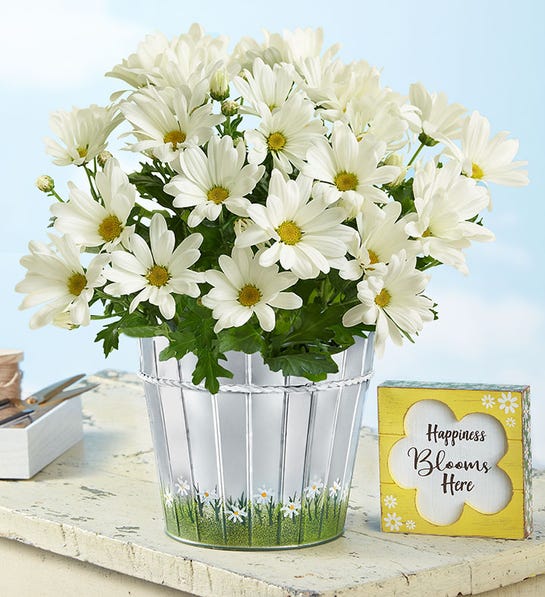
Daisies: The Jo March of flowers, daisies are playful, get those giggles, and perhaps can be a part of some light mischief. They are a quintessential country flower that can make an old coffee can look divine. Though they and are equally gorgeous gussied up and throw joy to any environment.
Snapdragons: Another old-fashioned staple, snapdragons are ideal cottagecore blooms. They come in an astonishing variety of colors and feature charming bell-shaped flowers that cluster in abundance at the head of the stem. Snapdragons add a bit of height to rounded bouquets for a hand-gathered effect.
Our favorite cottagecore flower creations
Whether you are just getting started with your quest for a more beautiful life or you just want a few simple touches to give your home a cottage flair, floral accents are the perfect place to start. Here are a few of our suggestions:
The quintessential pumpkin with its round shape and jaunty stem evoke the beloved harvest time of communities around the world. Whether fall or any other season, a charming ceramic pumpkin bursting with flowers is a great way to brighten the apartment or home.
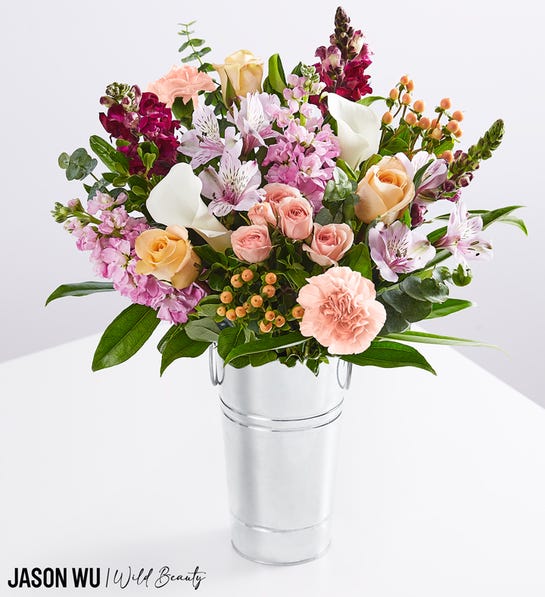
Teeming with cottage flowers and lots of interesting greenery grown sustainably on eco-friendly farms, bouquets like this unstructured beauty feel like they were hand-gathered.
Use wide-mouth vases that are a bit on the short side. Cut flowers will look more like a bunch of flowers growing in a garden this way. This ethereal bouquet is punctuated by vividly blue delphinium, one of our favorite cottagecore flowers.
Combining plenty of textures and colors captures the spirit of cottagecore. The pale-pink Mason jar in this sweet Confetti Bouquet has a pleasing honeycomb pattern (and would make a cute kitchen utensil holder later on!) It pairs well with a profusion of yellow alstroemeria, peach roses, and red hypericum.
Wreaths are symbols of eternal life and have become beloved beacons of welcome on front doors over the years. The standard circle gets a lovely refresh as a heart in this luscious wreath festooned with preserved pink hydrangea and myrtle branches. With its handmade look, the wreath will lift the hearts of all who see it.
Simple meets lavish in this colorful mix of cottage-style flowers. The weathered-looking box container keeps everything real and provides an appealing contrast to the mass of flowers inside. Perfect for that cottage outdoor party with friends!
Is Cottagecore what you’re longing for?
You know you’re a fan of cottagecore flowers if:
1. Your TikTok feed is full of happy women tending to their cutting gardens or flower farms out in the country.
2. Most of your screen time is spent gazing at homes with cascades of fresh flowers like dahlias, roses, hydrangea, and lilac. Bonus points for a sleepy cat sunning herself next to a vase of sunflowers.
3. Your favorite movies include The Holiday, Moonrise Kingdom, Little Women, and Pride and Prejudice (think: the re-proposal scene).
This yearning for pastoral beauty and a return to simpler times is a time-tested way to cope with the stress of modern life. It mirrors the emergence of Rustic Style, a mid-19th century aesthetic of the primitive, handmade, and untamed that rejected excess and overly formal design.
4. Generous profusions of mixed flowers with variegated greenery get your vote as favorite floral arrangements.
Weary workers in industrialized society responded enthusiastically to the new movement, learning to slow down and enjoy the fruits of nature and hand-craftsmanship as their agrarian ancestors once did. Wealthy families turned their formal gardens into landscapes containing wild masses of flowers and vines, punctuated by rustic arbors and handmade benches.
Does this sound like the look and lifestyle you love? Fortunately, there are lots of ways to enjoy the cottagecore life, starting with simple floral arrangements that enhance your home and even your office cubicle.
Live your best cottagecore life and you’ll find yourself stopping to smell the roses much more often!
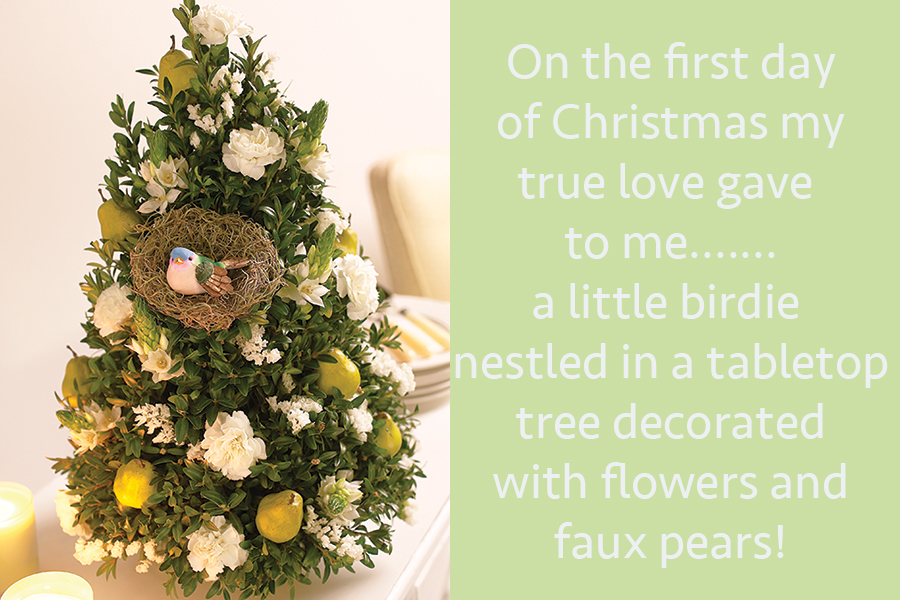
I love Christmas, and I love decorating Christmas trees! The main tree in my home tends to be pretty traditional, changing only slightly from year to year, with new ornaments added here and there. So, I’m here to talk about the beauty and versatility of fresh tabletop Christmas trees.
These beautiful arrangements are usually handcrafted by your local florist and make great gifts. In fact, the Holiday Flower Tree has been a bestseller since it was first introduced nearly 20 years ago!
Trending mini Christmas trees with lights
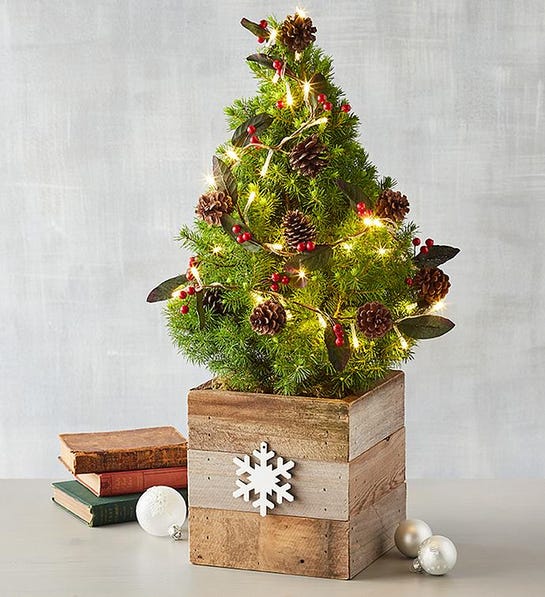
If you’ve attempted to decorate a Christmas tree with lights, challenges ranging from broken bulbs to tangled cords are enough to have you scrap the lights for a tree with ornaments. Fear not, for some mini Christmas trees with lights come pre-assembled, such as this Holiday Spruce or Rustic Christmas Tree. Another festive option is the Hand Tied Mini Christmas Tree Bouquet that comes with lights in a rustic mason jar. There are also trees that come with ornaments, if you want the full tree package.
Mini Christmas trees are versatile
Whether you live in an apartment, are an empty nester, or are traveling during the holidays, tabletop Christmas trees are festive additions for those who want to have a tree without the production. You can add a mini Christmas tree to the bedroom, kitchen, foyer, office, or any space that cannot accommodate a larger tree. And the trees, like the Holiday Lavender Tree, are sustainable too, and can be replanted in your garden or kept indoors for natural decorative appeal during the cozy winter months.
Other tree options that can work for the holidays and after are bonsai, olive, magnolia, and, money trees. Simply add a tree skirt or lightweight ornaments, and it’s getting to look a little more like Christmas.
DIY tabletop Christmas tree
If you have a little time and want to get creative, these trees are pretty easy to make. The basic instructions are the same for whatever size tree you want. The smaller the tree, the faster and easier it will be to construct. Petite trees are so sweet and can be tucked into so many unexpected spots. Larger trees, on the other hand, allow you to create a completely custom look based on your choice of container, decorations, and color scheme.
How to make a tabletop Christmas tree
What you need:
Floral foam
Dish/plate
Tape
Clipper
English Boxwood
Assorted evergreens
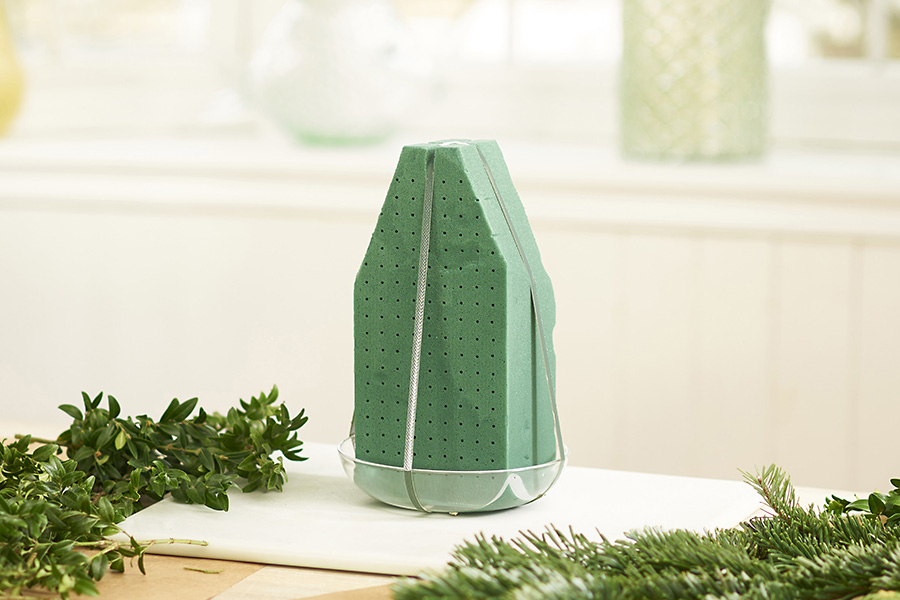
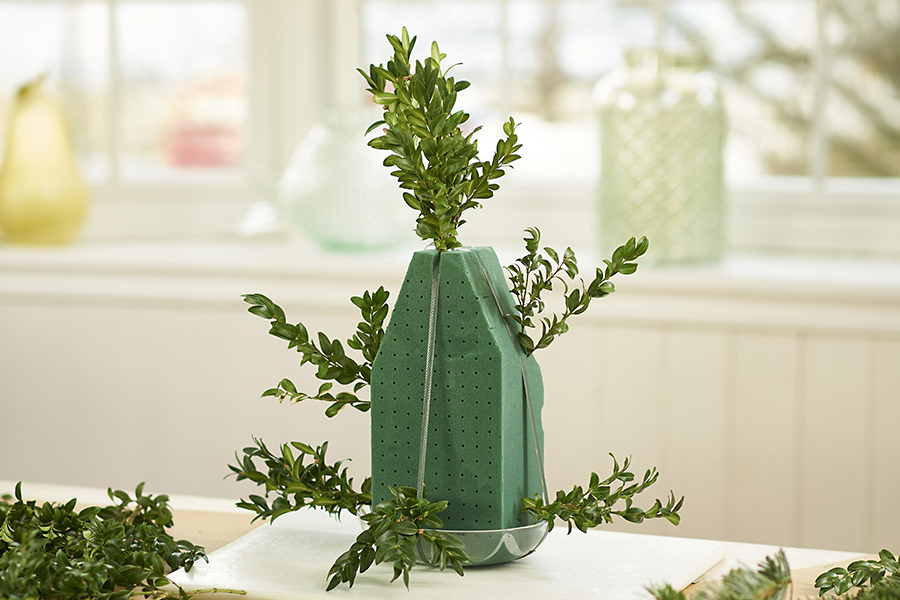
Step 1: Set up your floral foam
Cut the corners from one end of the foam as shown; fill your sink with water; and place the foam into the water, allowing it to become totally soaked through. Tape the foam into a plate/dish. You can use any waterproof container as the base and put the foam directly into your chosen container before creating the tree. Or you can create the tree using a smaller base, like the one in the image, and then place the finished tree into a decorative container.
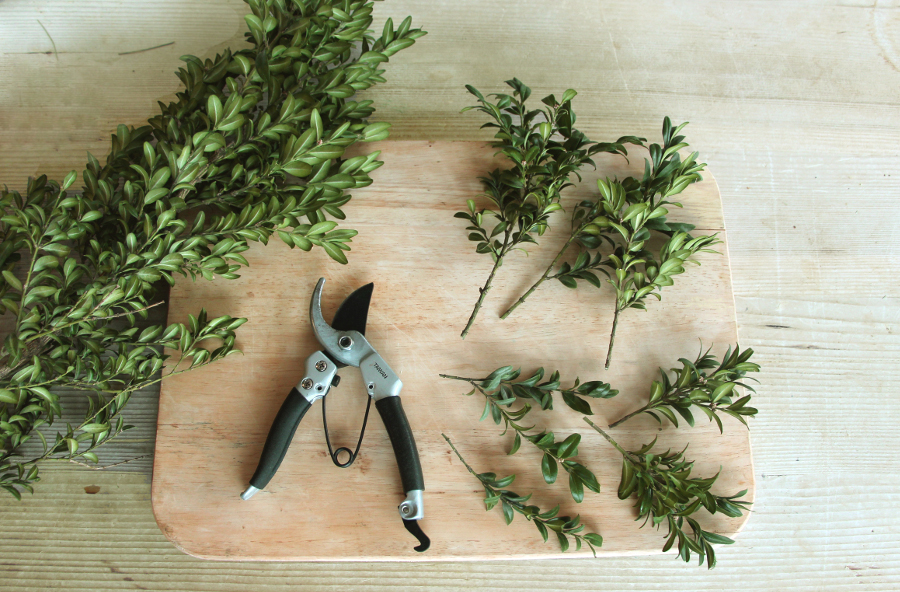
Step 2: Prepare your greens
Boxwood is the main green that I used for the tree, and I accented it after the main shape was created, filling in with other assorted evergreens such as cedar, pine, and balsam.
Before starting, cut the greens off of the main branch into smaller pieces of varying lengths ready to insert into the foam.
Step 3: Arrange your greens
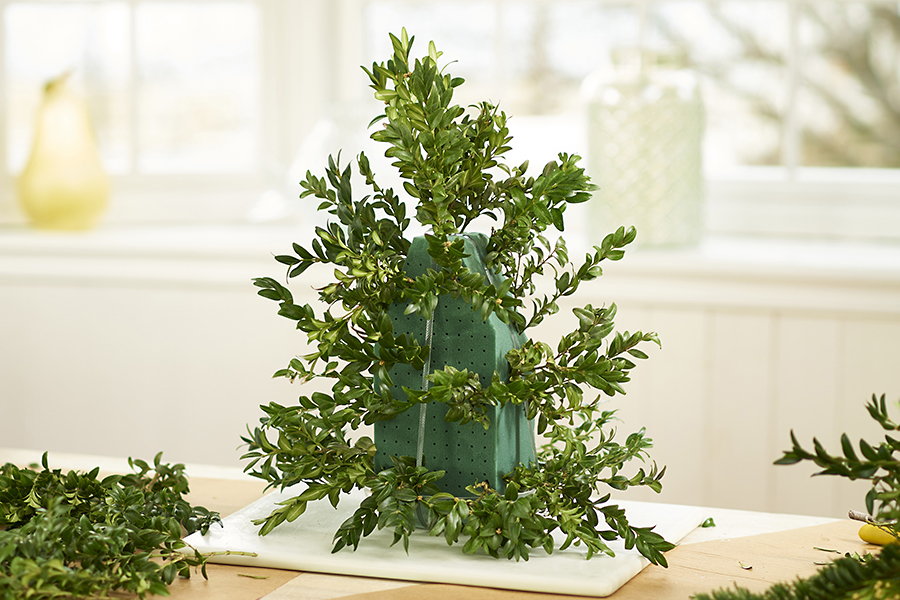
Start by inserting a taller pre-cut piece of boxwood at the top to create your basic height. Do the same at the bottom and the sides. This gives you the base shape of your tree.
Step 4: Fill in your tree
Continue adding pieces of boxwood, turning the tree as you go, until you have filled in the whole tree.
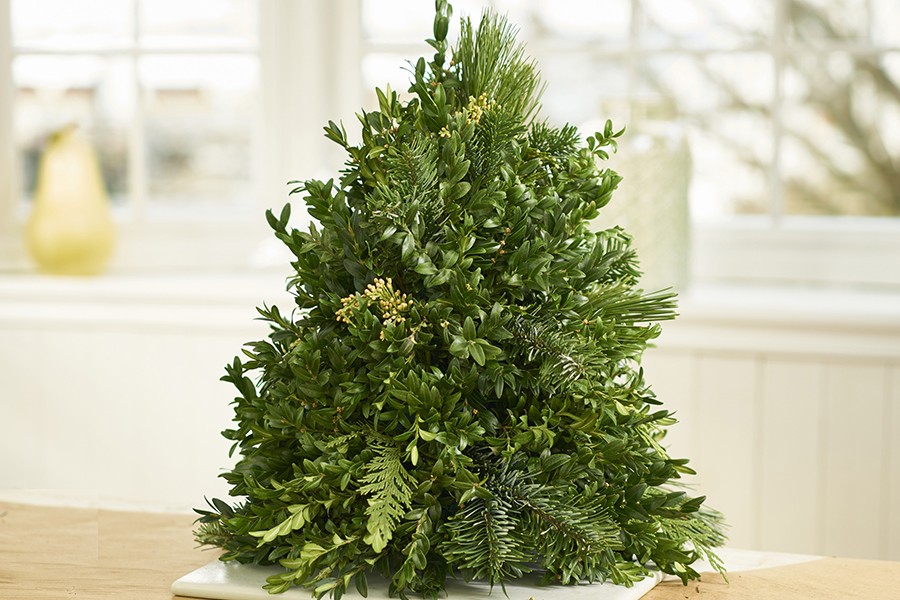
Step 5: Accent with various evergreens
I like to add a few sprigs of other evergreens for two reasons. The first is that evergreens such as balsam and pine add wonderful fragrance. I find it adds visual interest as well.
Tabletop Christmas tree decoration ideas
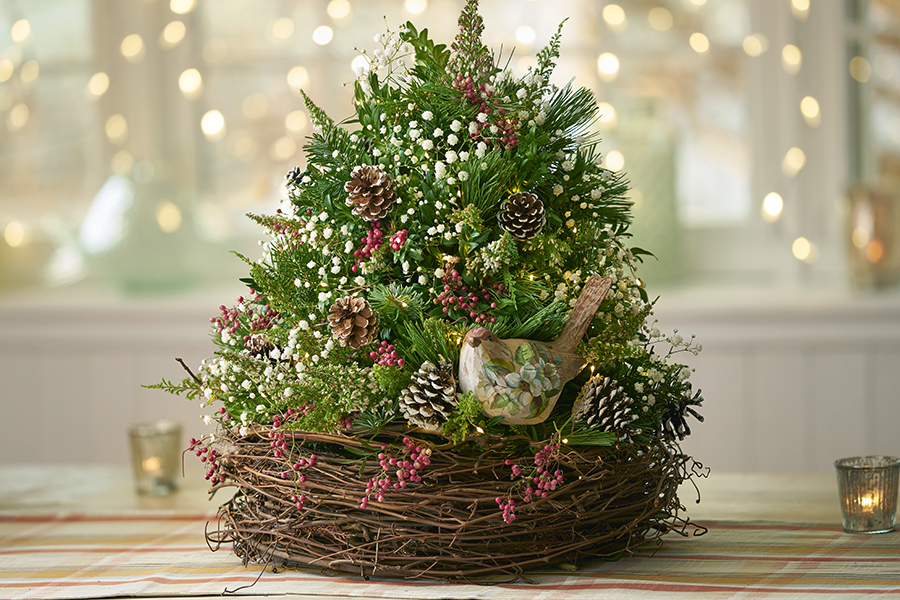
At this point, your tree is ready to decorate! Because this tree is actually a “flower arrangement,” you can easily use fresh-cut flowers as a primary decorating feature. Just give your chosen flowers a fresh cut and insert them directly into the foam; they will stay fresh for up to two weeks at least. I like to use fresh flowers that will dry nicely too, such as baby’s breath (which looks like snowflakes), pepper berries, and heather.
Here, I nestled my Christmas tree arrangement into a large bird’s nest basket and added white heather, baby’s breath, and pepper berries.
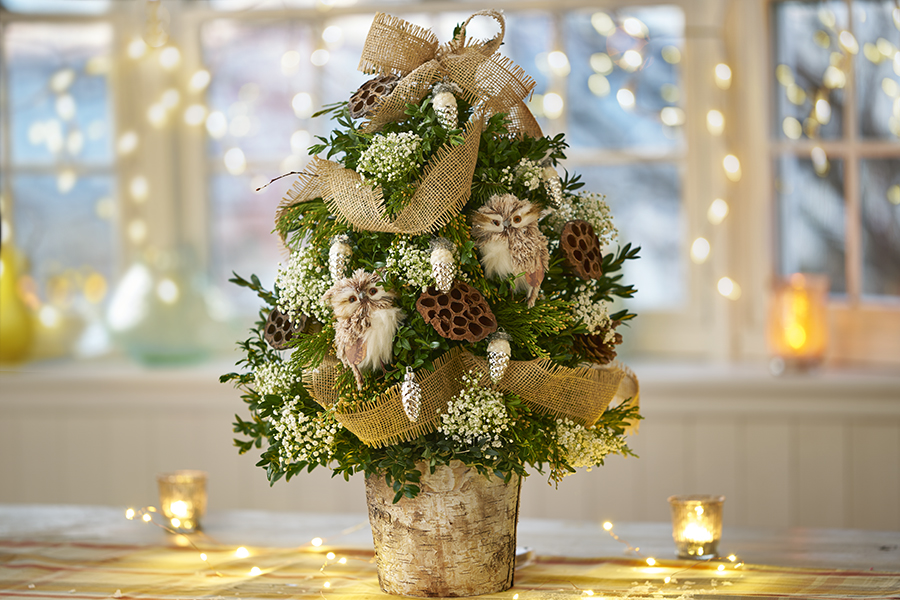
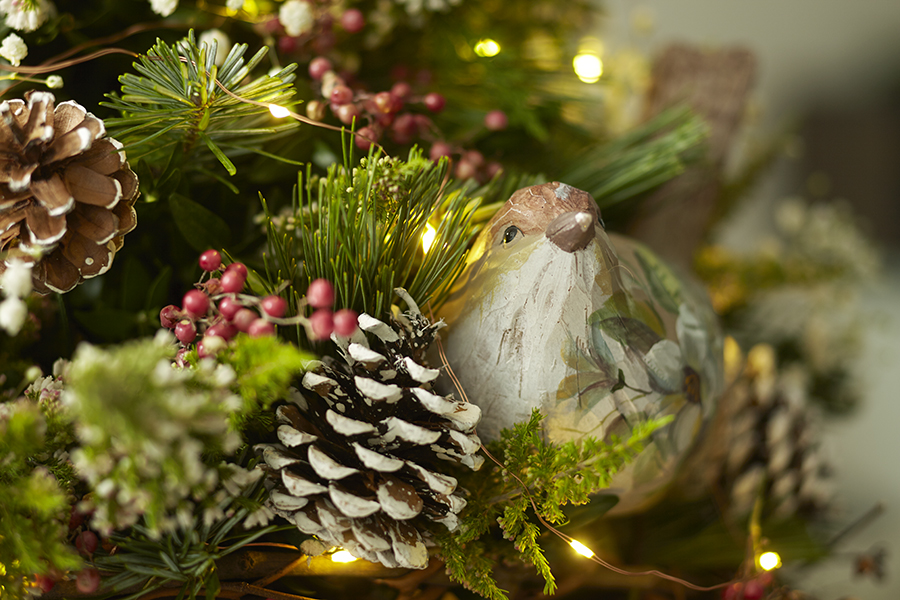
In keeping with the woodsy feeling, this is the same basic tree arrangement placed in a natural birch container. The decorations include dried pods, baby’s breath clusters, vintage silver pine cone ornaments, and burlap ribbon garland.
The theme really comes to life with the addition of these faux snowy owls. Owls are on-trend, and this is an easy way to include them in your holiday decorating.
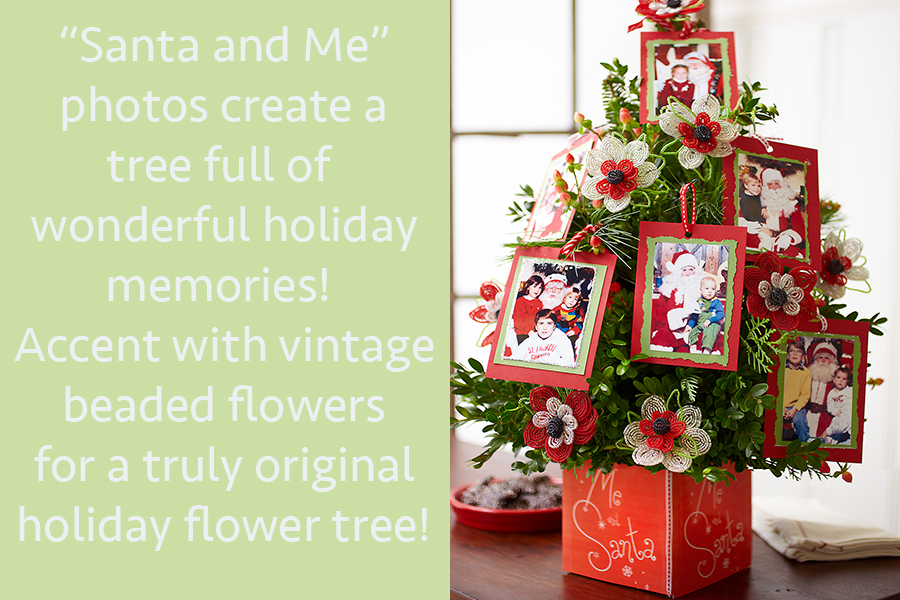
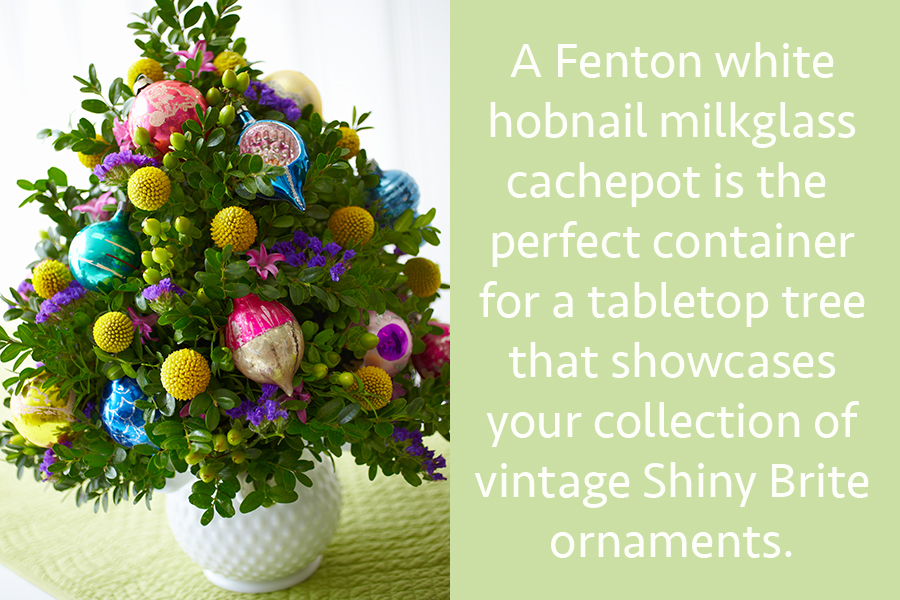
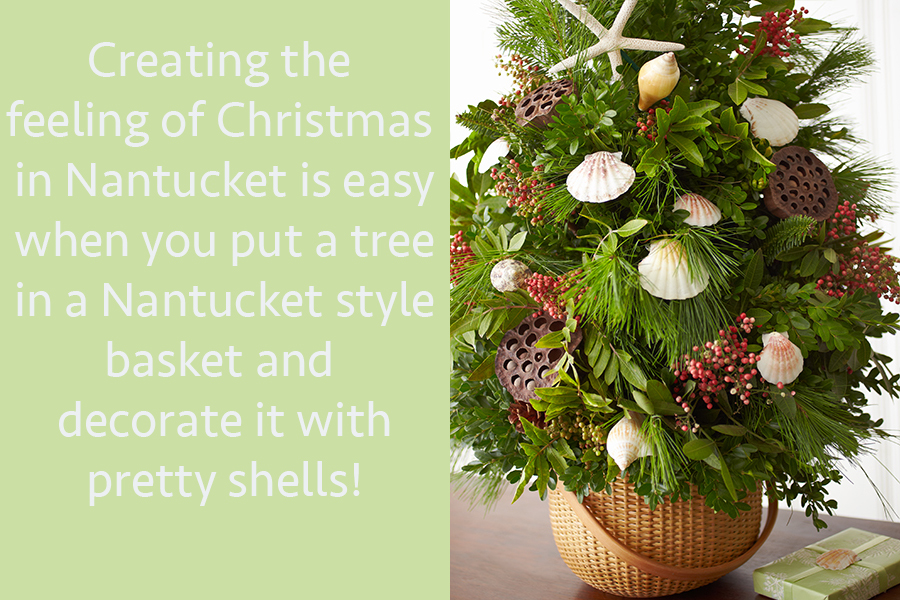
I have created and decorated so many different trees over the years, and I find that I never run out of new ideas. Here are a few more examples to inspire you to create one of your own and start a new tradition. It’s also a great way to give a truly personalized gift!
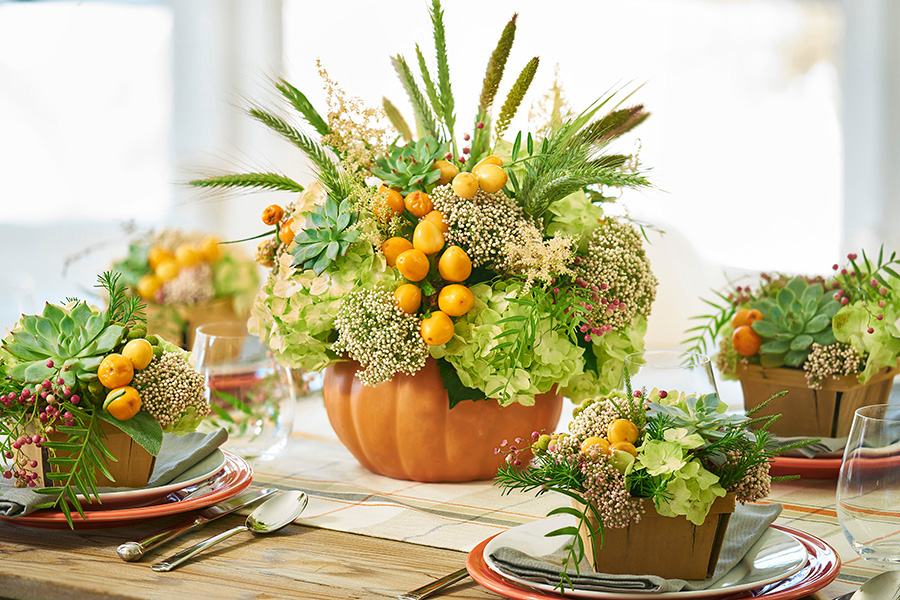
Not all of us have the time or materials on hand to make elaborate centerpieces or place settings around the holidays. Never fear: I’m sharing with you some of my favorite ideas for decorating and entertaining this Thanksgiving. Whether you are hosting the big event or just having a few friends over during the long holiday weekend, these ideas are really easy and add that extra touch that your get-togethers always have!
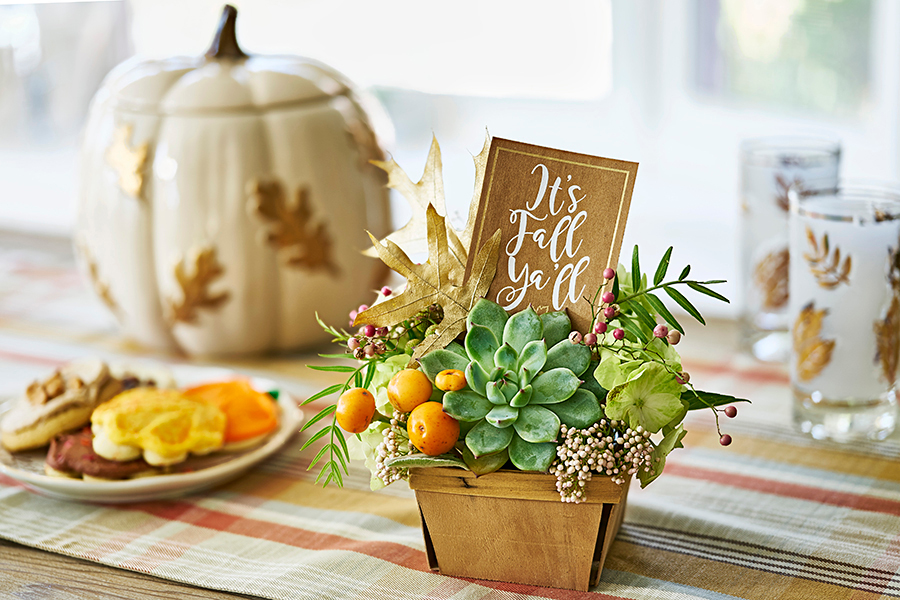
I have a few season-specific decorative pieces that I reuse every year, such as this gorgeous ceramic pumpkin. I filled mine with a farm-fresh palette of flowers, grasses, peppers, and succulents.
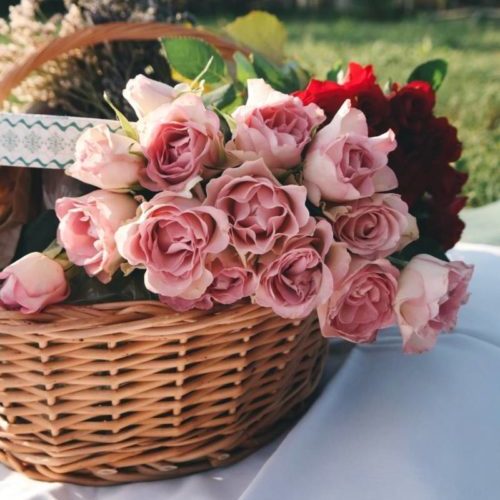
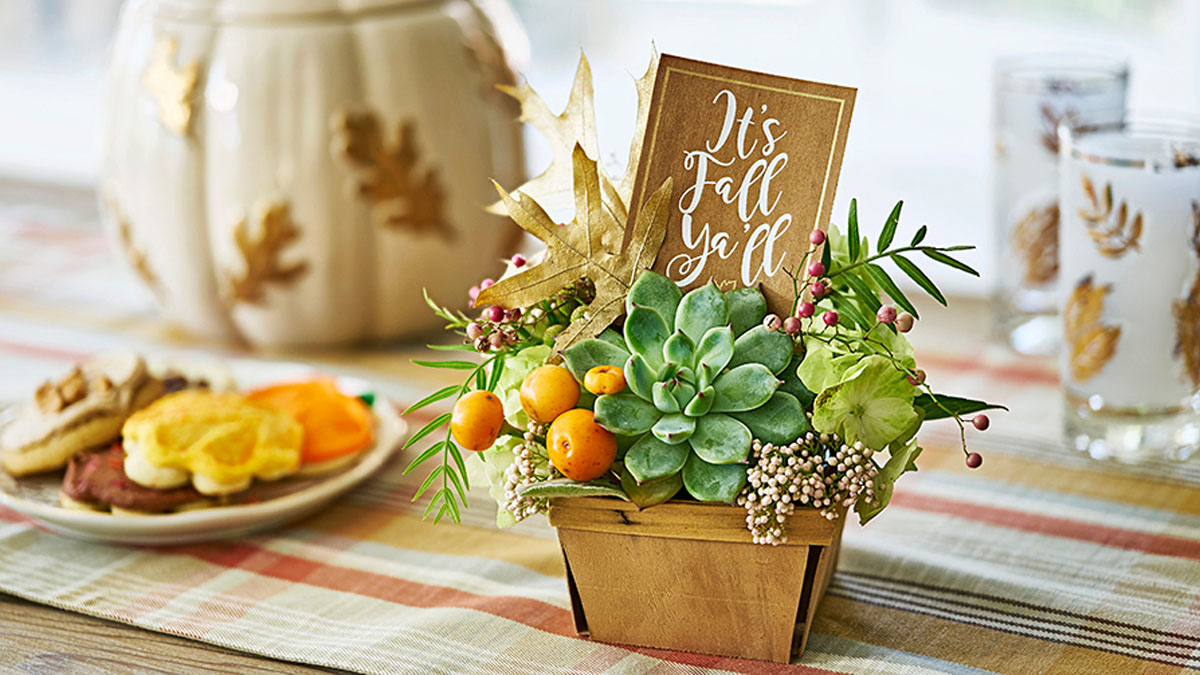
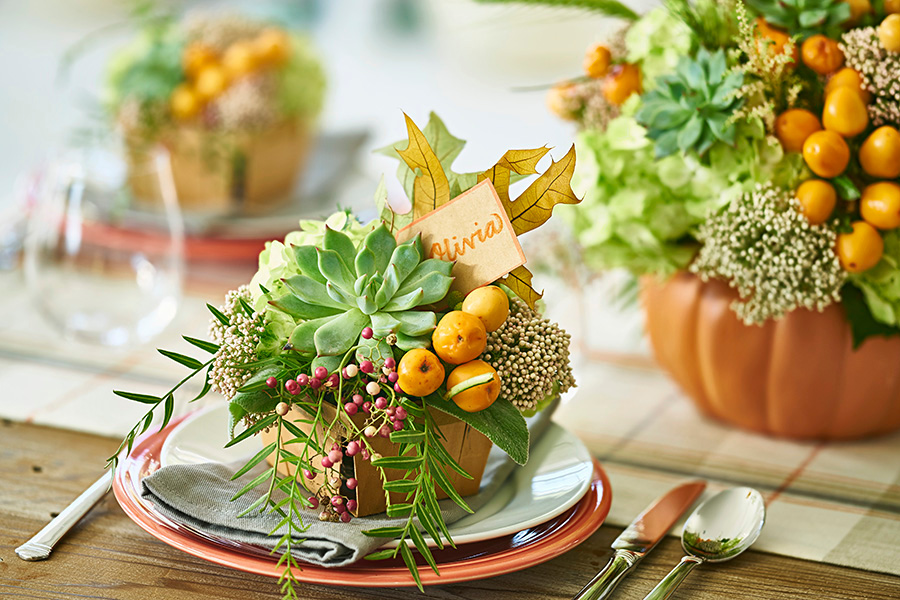
Staying with the farm-fresh theme, a great way to create a stunning tablescape is to set vintage berry baskets filled with similar floral on each plate. These arrangements look almost good enough to eat! Add a bit of personalization simply by slipping a place card in among the florals and greenery.
I find these little berry baskets to be the perfect size to use as multiples as I did on the dining table or to add just the right festive touch on the dessert or buffet table.
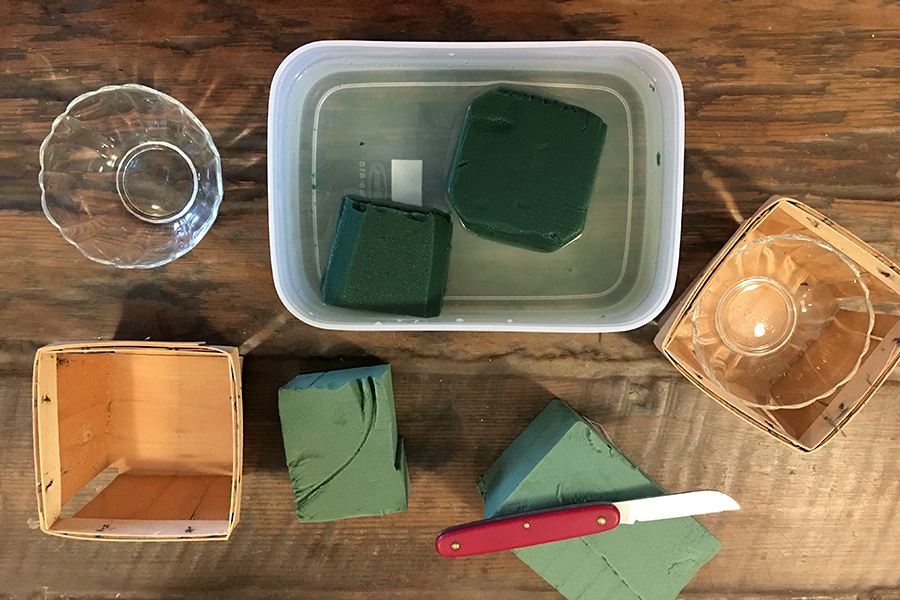
Just line the basket with a small dish, bowl, or can. Cut a piece of floral foam to size and thoroughly soak the foam before placing it in the dish. The foam will make it easy to create your piece, as it holds each insertion in place and provides hydration to keep your flowers fresh.
Guests will be so enamored of these handmade Thanksgiving decorating ideas that you can give them as gifts once the meal is over. It will add to their list of what to be thankful for.
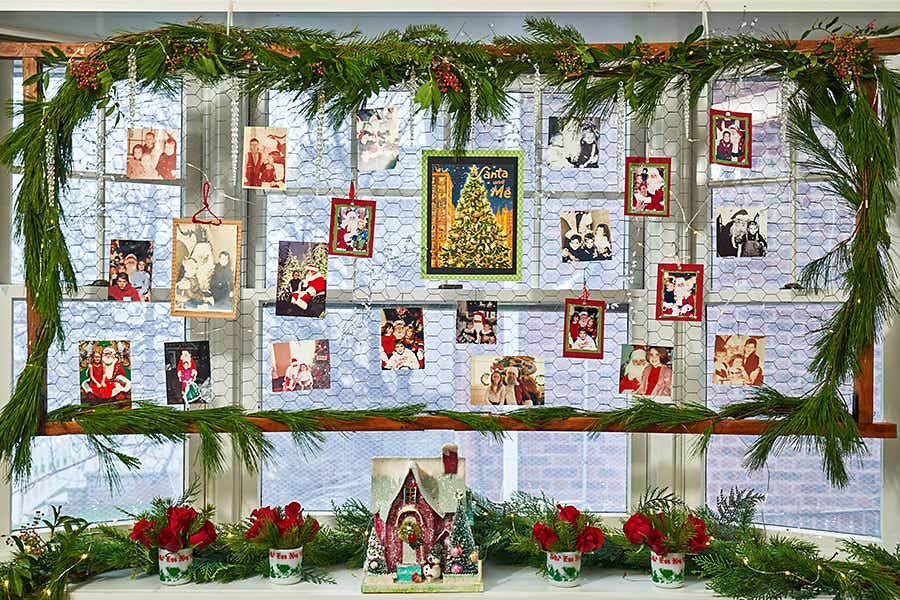
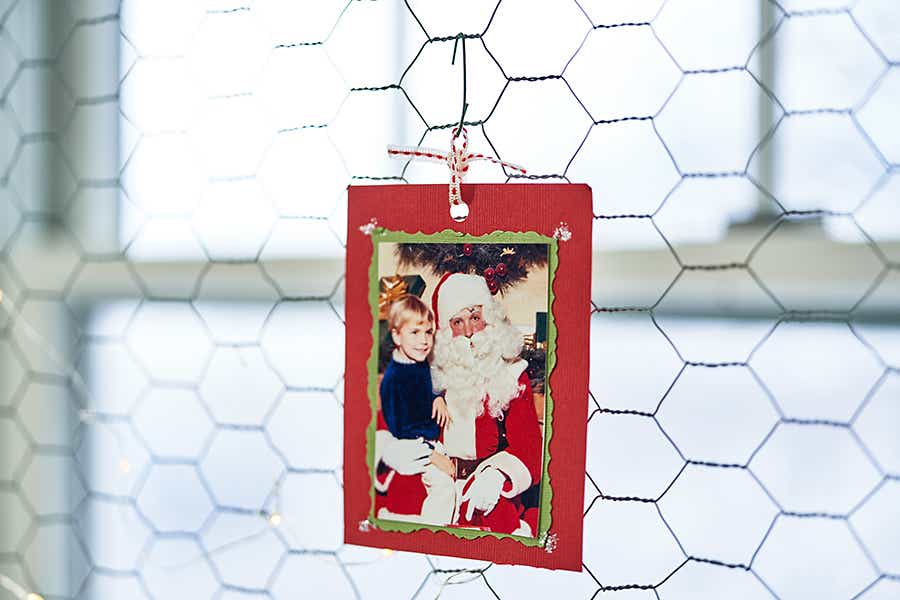
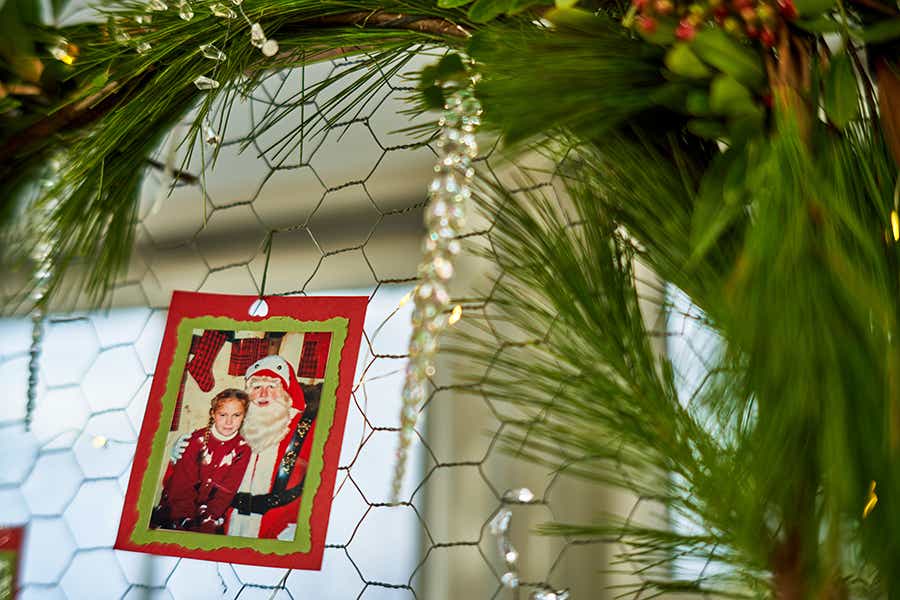
In my home, Christmas decorating is about honoring the past in the most creative of ways. My latest project was a “Santa and Me” DIY photo display that was fun and easy to make. Below I share step-by-step instructions so you can create your own beautiful display to warm hearts and light up the holiday season!
What you’ll need to create your own holiday DIY photo display
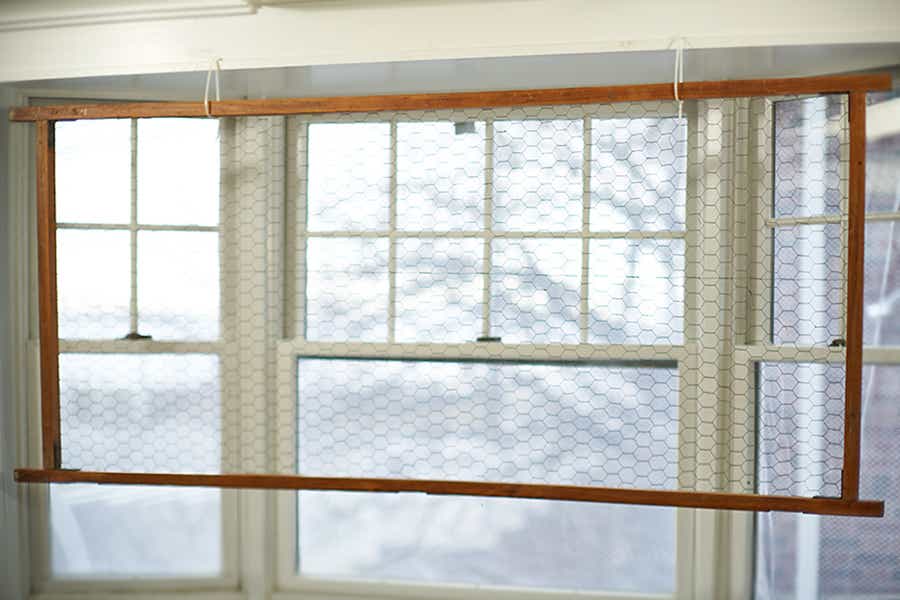
For me, it all started with an old room divider I found in a barn sale a few years ago. Originally, I bought it to use in the décor for my daughter’s wedding, thinking it would be great for displaying all our family wedding photos.
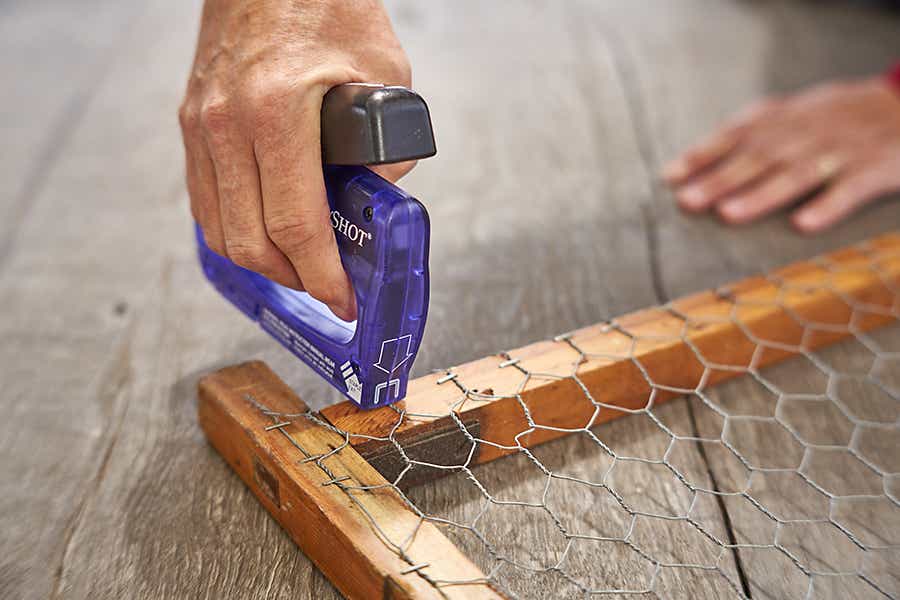
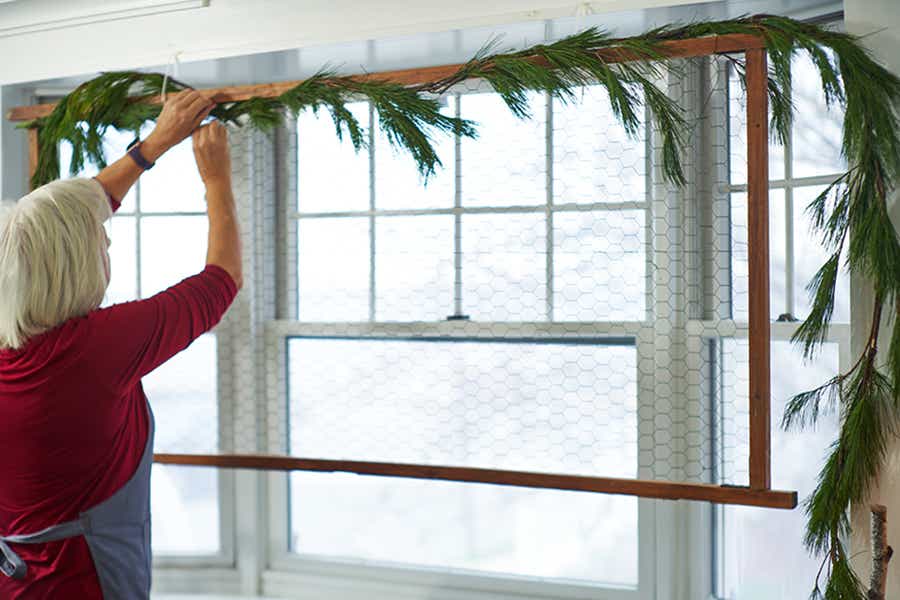
To begin, I ripped off the old fabric on each frame. Next, I attached chicken wire to the back of each panel using a staple gun.
Fortunately, I have a bay window that the panel fit perfectly into when hung horizontally. Because it’s so lightweight, I was able to hang it using zip ties and a staple gun.
To start this process, I stapled one zip tie into a piece of molding.
Then, I added another zip tie, and then attached the screen.
To get a better glimpse of how easy the process is, check out the video below!
Now for the fun part…
Decorating your holiday photo display
There are so many little details that go into taking this idea from drab to fab.
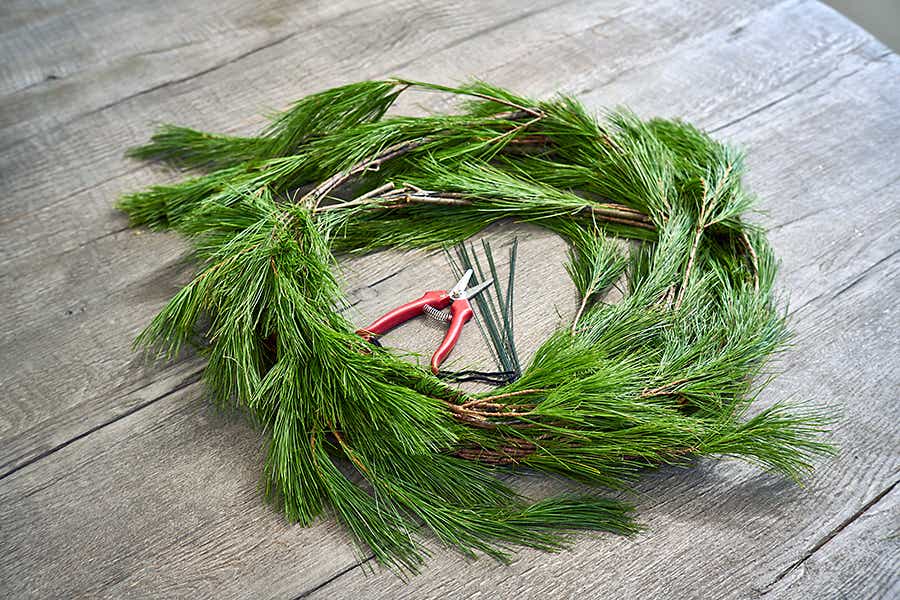
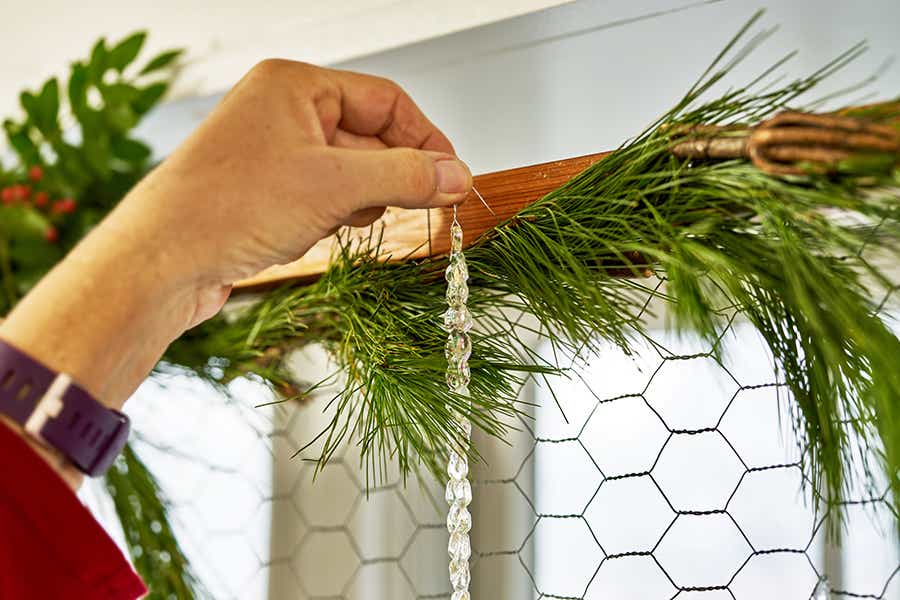
For a festive look, you’ll need white pine roping, or garland.
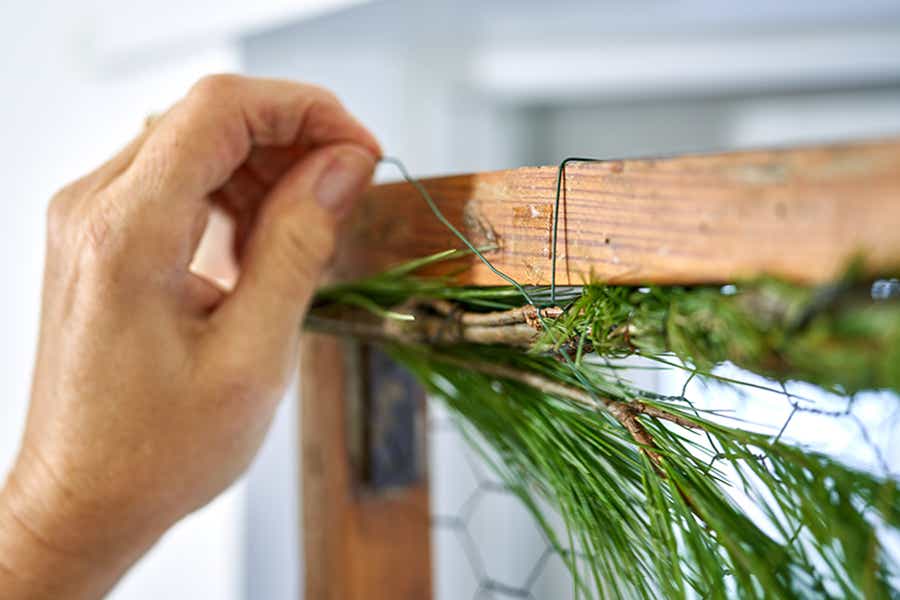
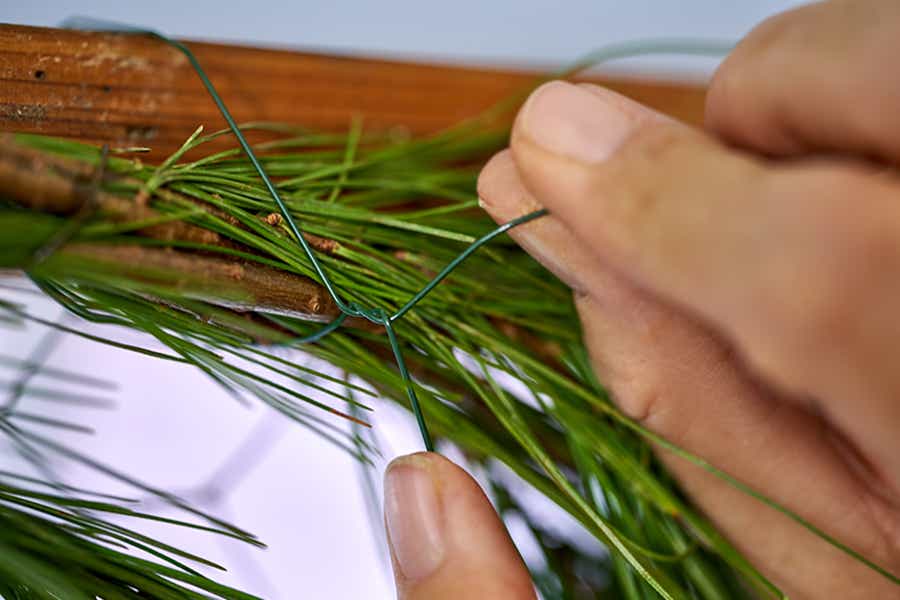
Next, you’ll attach it to the frame with pieces of wire.
Just a few twists will hold it in place.
Continue attaching the pine roping all around the frame.
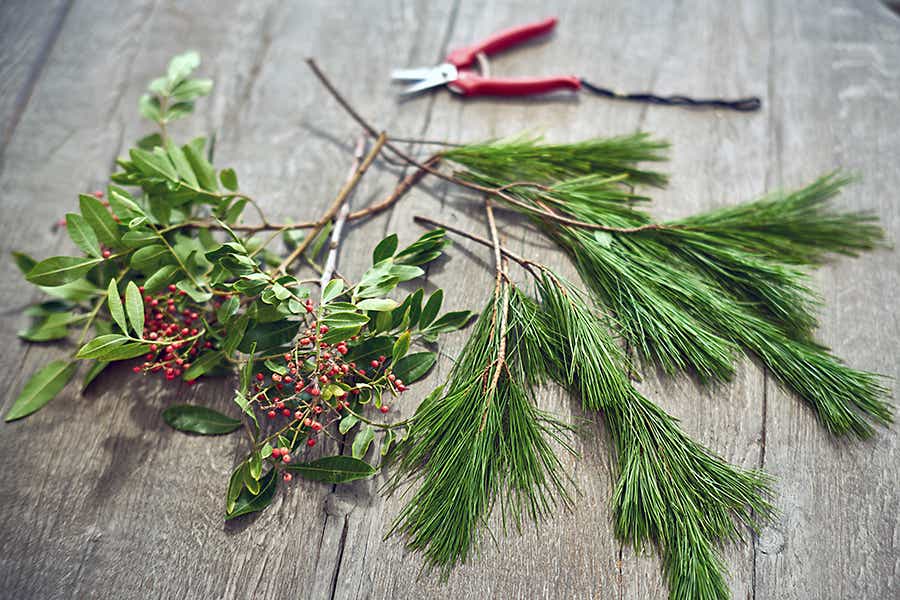
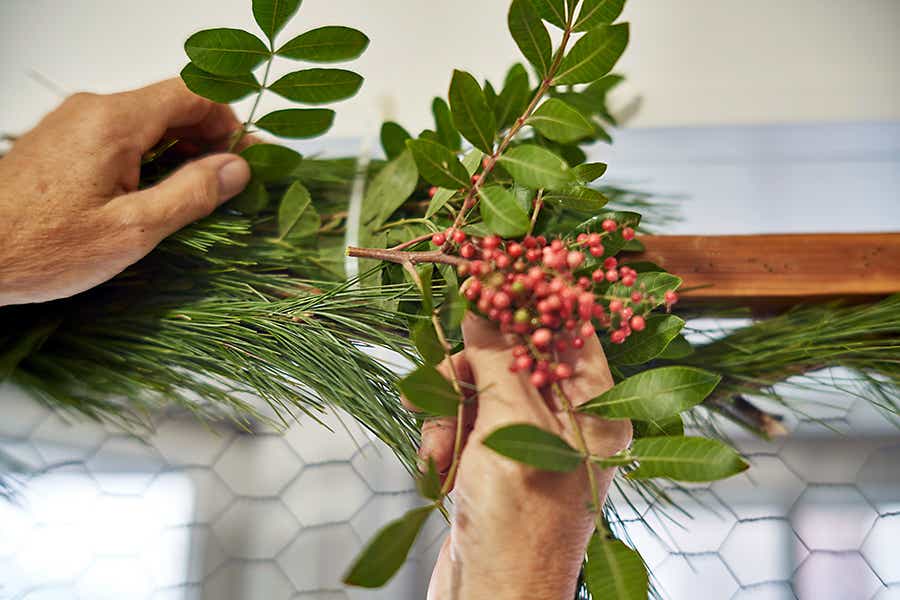
Remember to make it yours! You can add additional sprigs of pine as well as other winter greenery, such as pepper berry and balsam, or fir.
Just insert the short pieces between the pieces of garland already attached to the frame.
I like using pieces of pepper berry because they add a nice pop of color and texture.
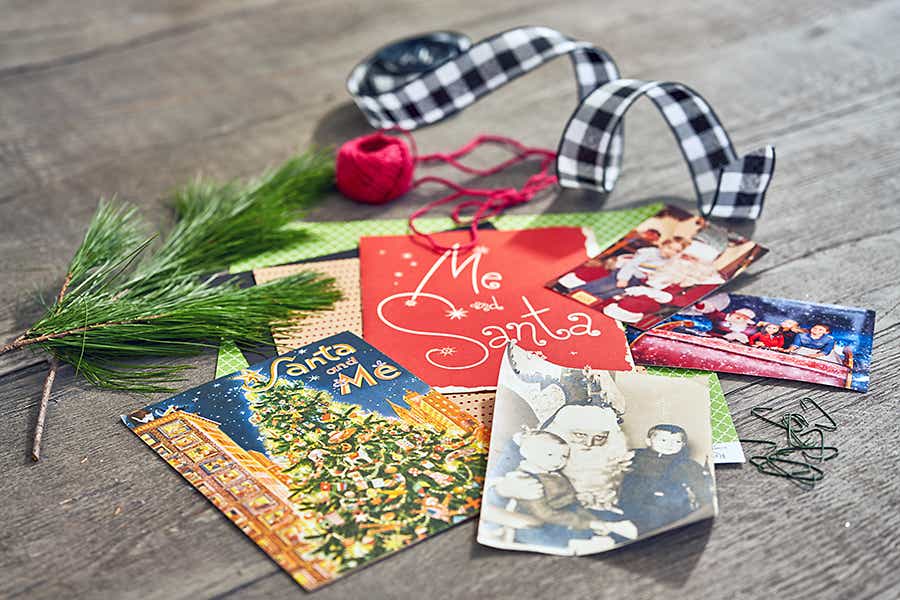
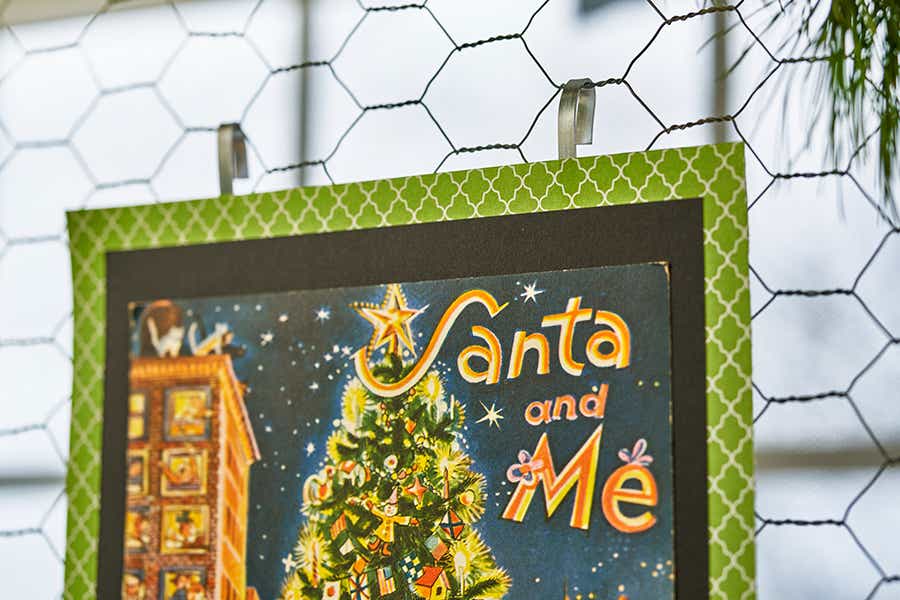
Now for the sentimental value. Gather your family’s “Santa and Me” photos that you have saved all these years. I even have some of the original card holders that came with the photos back in the day! You’ll need some ornament hooks, but holiday-themed papers and ribbons are nice too. You can do as much or as little crafting with the photos as you want.
I started attaching each photo to cardstock, decorating it, and using a hole puncher and ribbon before hanging with the ornament hook. After a while, I simply started sticking the ornament hook right through the photo and hanging it up.
I used larger width bendable wire, cut to size, and glued it to the back of the vintage “Santa and Me” photo holder.
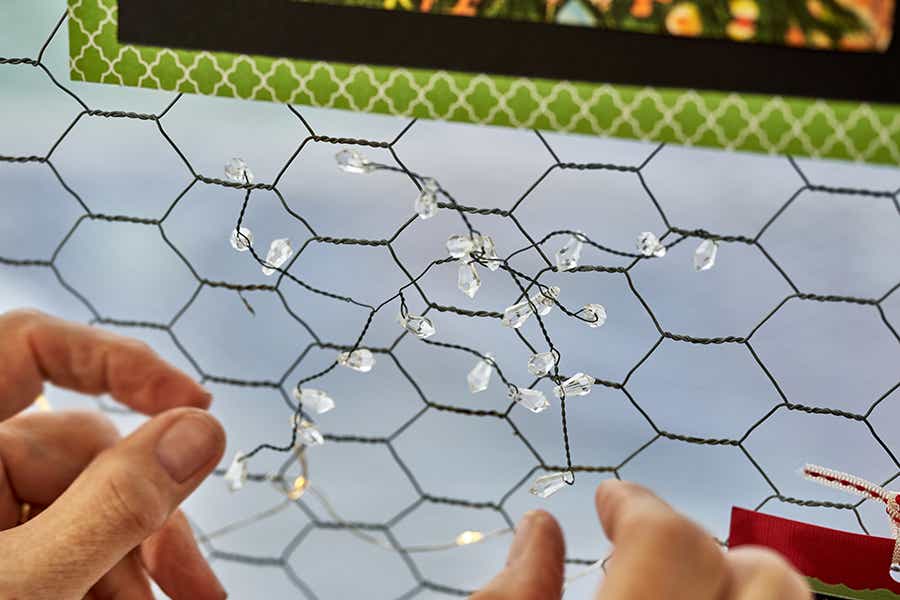
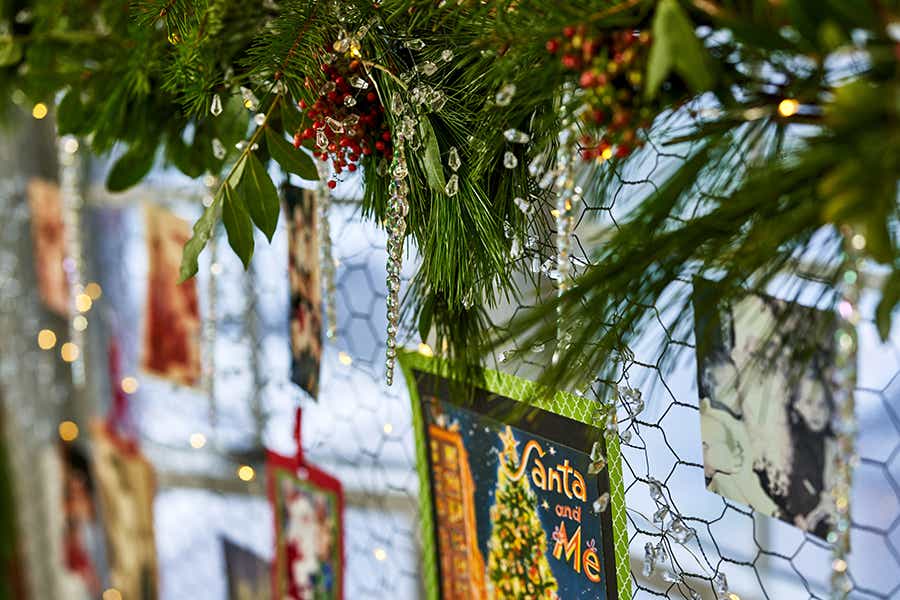
The only other decorations I on my display are small battery-operated twinkle lights and clear crystal acrylic pieces.
It’s easy to attach these wired elements by just pinching the wire and wrapping it around a piece of the chicken wire base.
For a fresh wintry look, use ornament hooks or small pieces of wire to hang acrylic icicles across the top of the frame.
I love the effect you get by adding just a little bit of sparkle.
The acrylic icicles add a whimsical, twinkling, charm while keeping everything light and airy. During the day, the sun shines through, and when the sun sets and the lights come on, it’s magical!
The best part is that you get to enjoy your Christmas memories and are able to share them with all your friends and family during holiday visits. I have photos from my childhood and my husband’s childhood, my children’s visits with Santa through the years, and now my grandkids’ too! As a matter of fact, check out the one of me and my brother, Jim McCann. Who knew that Jim would one day start a business that would help people connect with all the important people in their lives, not just at Christmas but every day!
Not everything about Halloween needs to be spooky and scary — it can also just be fun and colorful, and full of sweets and smiles.
Here is a simple DIY craft idea celebrating that perennial Halloween favorite, the candy corn.
This project starts off very basic so that even the littlest trick or treater can do it, and can be scaled up and personalized to entertain tweens and beyond.
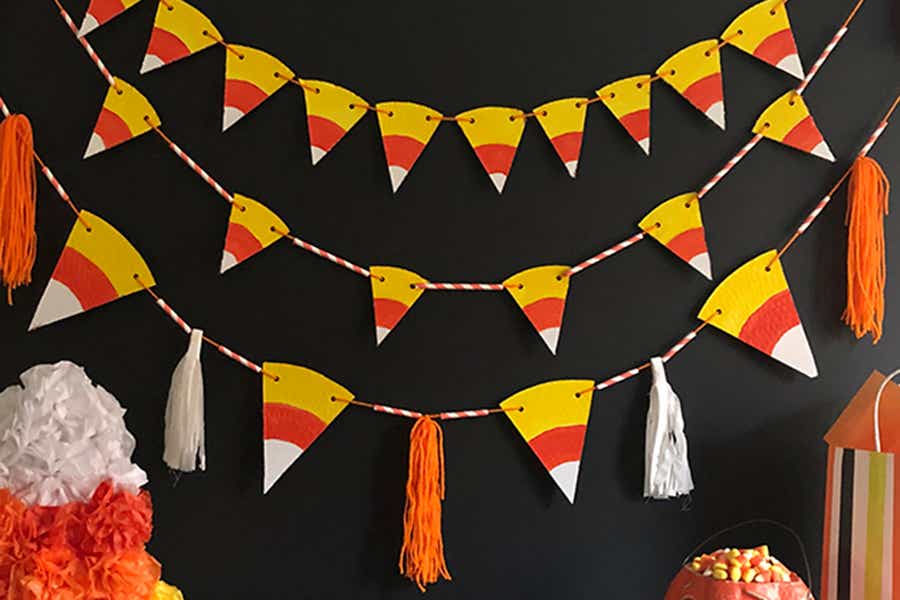
Candy corn garland
Making this Halloween craft keeps the kids entertained and barely costs a thing. And, after Halloween is over, you can recycle the whole thing — no guilt about producing extra waste, and you don’t have to pack it up and find somewhere to store it all year.
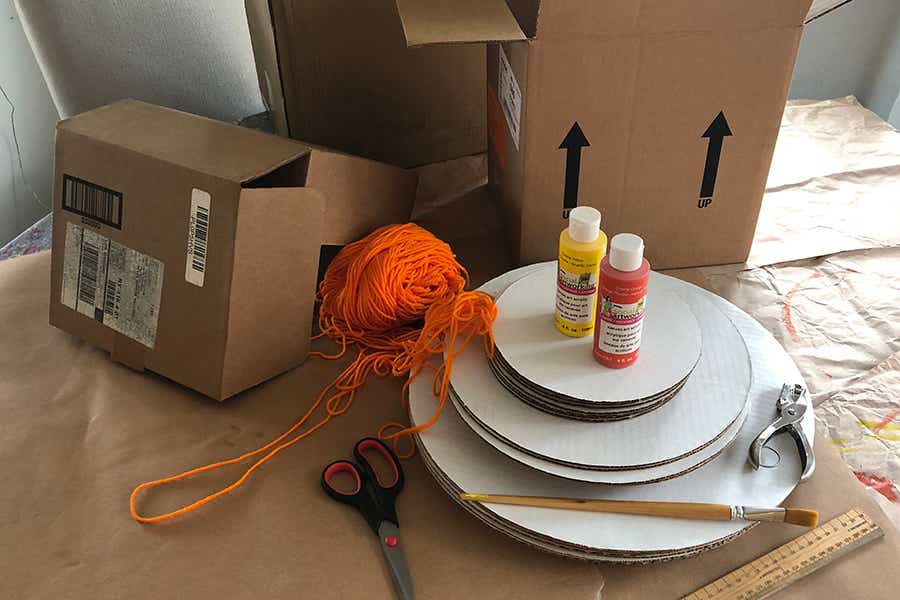
Materials needed for candy corn garland
Cardboard boxes
Paint or markers
String or ribbon
Hole puncher
Scissors or straight edge cutter
Instructions for making candy corn garland
The steps for this candy corn garland are the same as the ones I used for the patriotic-themed garland I made for Memorial Day. The only difference is it is painted differently.
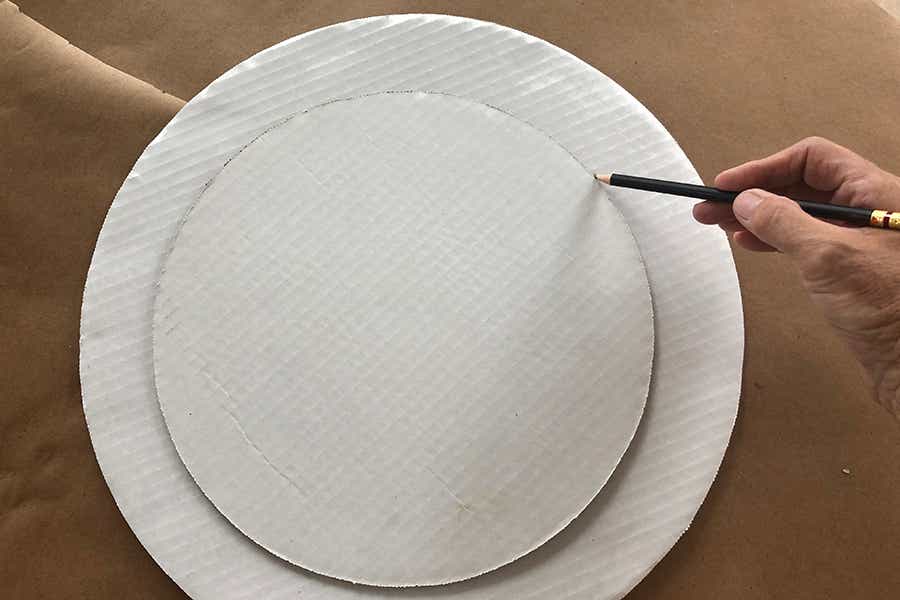
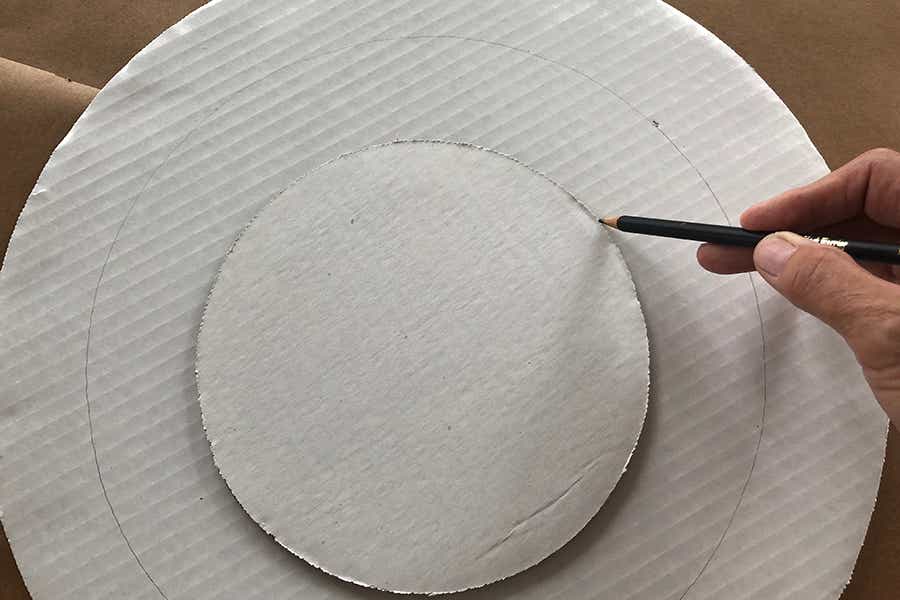
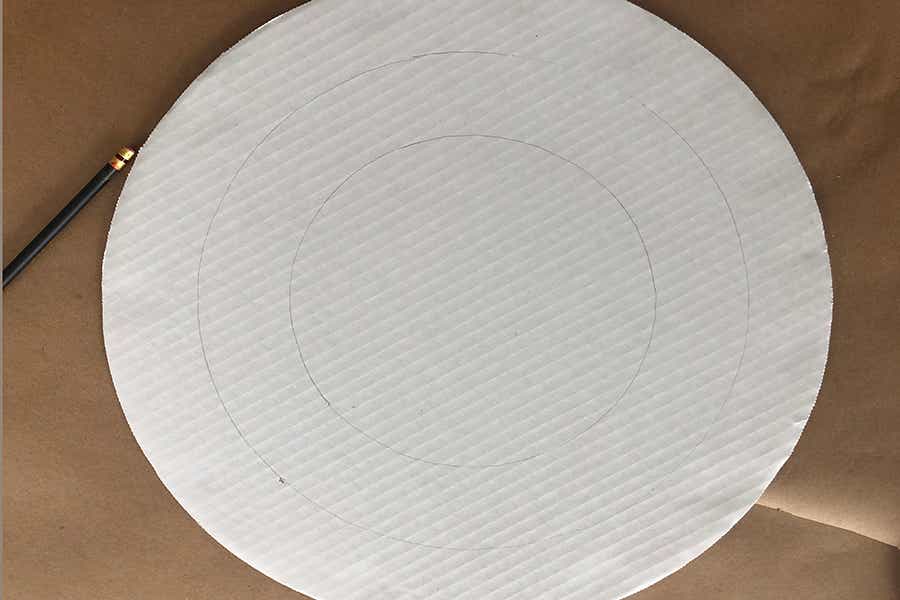
Cut out a large circle from the cardboard box and, using a pencil, draw two smaller concentric circles inside it. (I was fortunate that one of my daughters operated a baking business out of my house and I had corrugated cake boards in my attic. And the fact that the boards were white meant I only had to paint the orange and yellow sections!)
Repeat the process making more circles. You can make them all the same size or mix it up with larger and smaller ones.
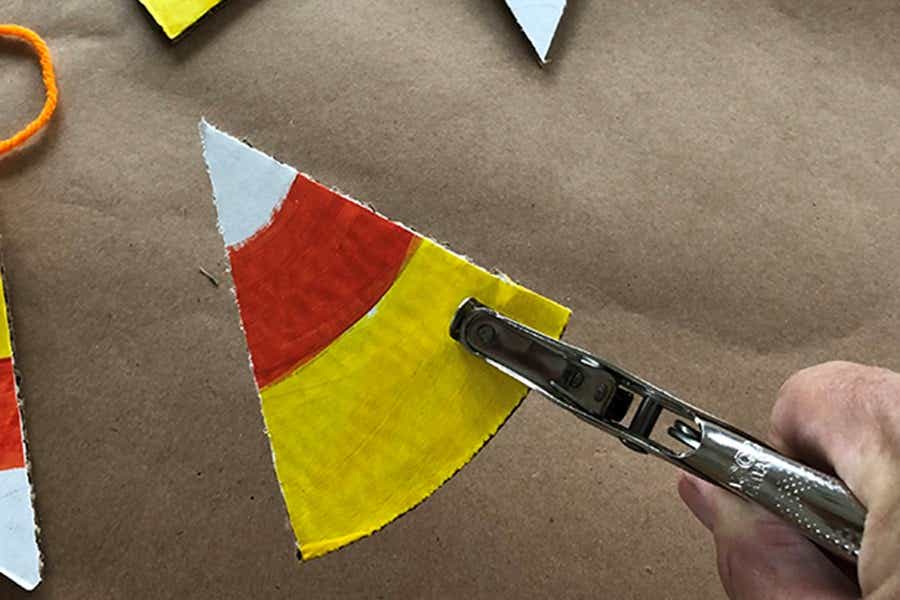
Paint or color the outermost ring yellow, the middle ring orange, and the innermost ring white (if necessary).
Once the paint dries, cut the circle into triangle — just like a pizza!
Use a hole puncher to punch two holes in the wider end of each triangle.
Lace yarn, twine, or ribbon through the holes on the triangular pieces.
Once you have the basic steps down, you can improvise as you see fit. Let the older kids design their own garlands, adding tassels made from yarn or fabric, or add paper straws cut to the desired length in between the candy corn. The possibilities are only limited by your imagination!
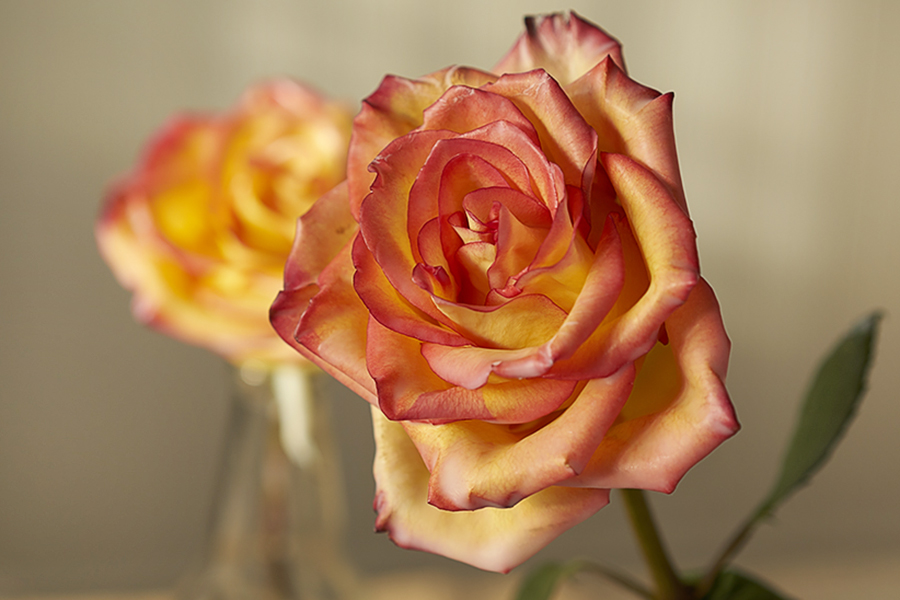
You can make your beautiful fresh-cut roses last longer than you ever imagined by dipping the open blooms in melted wax. The best time to preserve flowers with wax is at the very end of their shelf life — after you have enjoyed their beauty for over a week — when the rose is in full bloom.
I have waxed roses many times over the years using paraffin wax. Now that soy wax is readily available, I decided to give that I try…and I’m glad I did! Soy wax is a completely natural and renewable resource, has a lower melting point, and cleans up easily, with just soap and water. And soy wax is so versatile that you can melt it in the microwave!
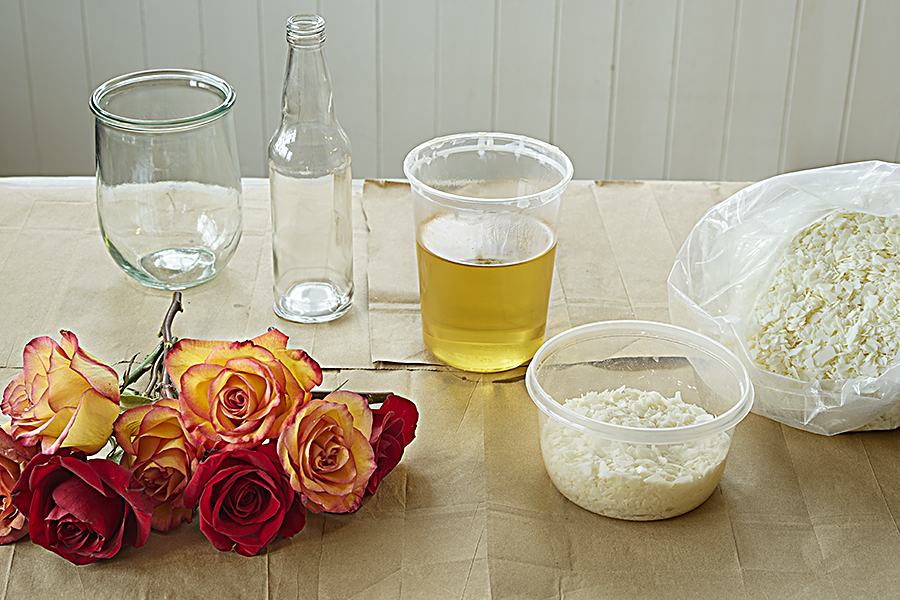
What you need to preserve flowers with wax:
Open roses
Microwave-safe container
Soy wax flakes
Candy thermometer (optional)
Empty bottles or vases or wax paper
Steps:
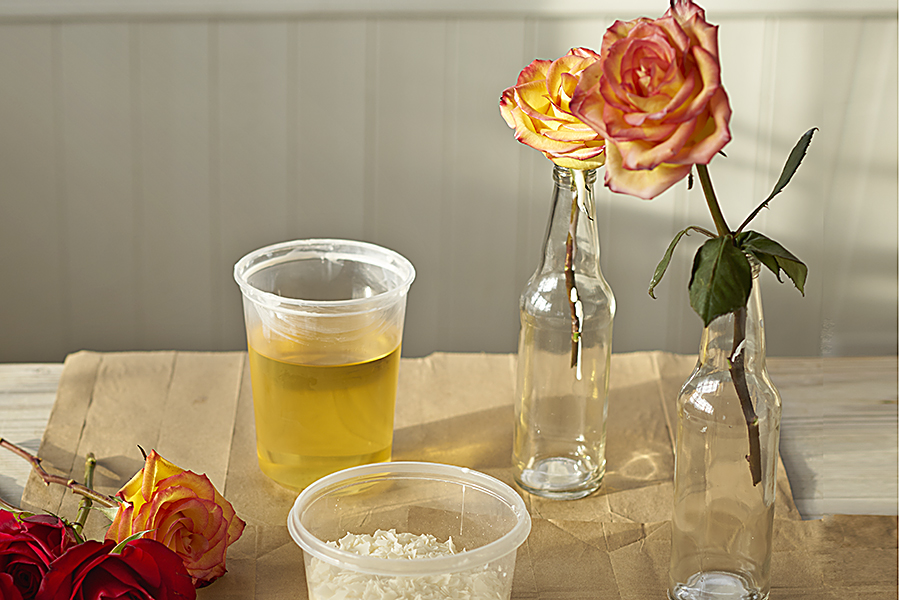
Cut the stems of your roses to about 8 to 10 inches long to make it easy to dip the heads into the wax. Then, place the stems into your bottle or vase to cool. Be sure to put scrap paper on your work surface, including under the bottles, to catch dripping wax.
Fill the microwavable container all the way to the top with the wax flakes and microwave for 2 minutes. After 2 minutes, take the container out of the microwave and stir the melted wax with a disposable plastic spoon. If there is still any white/un-melted wax, return the container to the microwave for another minute and repeat. Also: As the wax melts, you might find that you need to add more flakes. Go ahead and stir them into the container, and continue the melting process.
Once all the wax is melted, you can start dipping. Place the wax container on a protected surface and have your bottle or vase ready to place the dipped roses in for cooling. You can also place the dipped roses on wax paper to cool, but they will keep their shape better if they cool while upright.
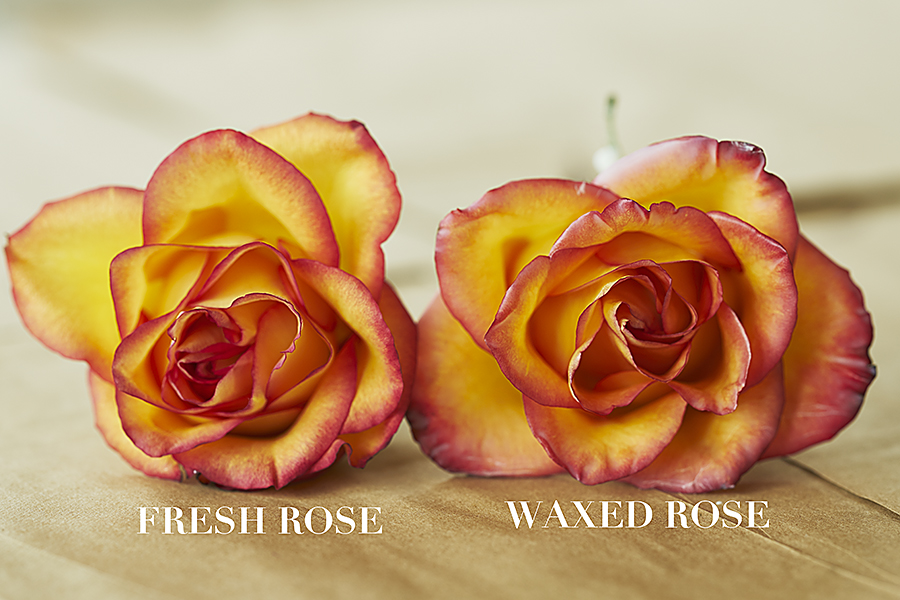
Note: Your wax should be at about 100° F. (You can measure the temperature with a candy thermometer.) I found that melting the wax in short increments of time will keep it from getting too hot. I waited a minute or two after removing my wax from the microwave to start dipping. You can tell that your wax is getting too cool if it starts to get cloudy looking and appears cloudy on the rose petals as well. The goal is to make your rose look so lifelike that it’s impossible to tell that it has been dipped in wax!
If you have many flowers to wax, you can continue to melt as you go along, using the same container and adding more wax flakes as needed. When you’re done, cover the wax container so you can use again at another time. You can preserve many different varieties of flowers and foliage with this method!
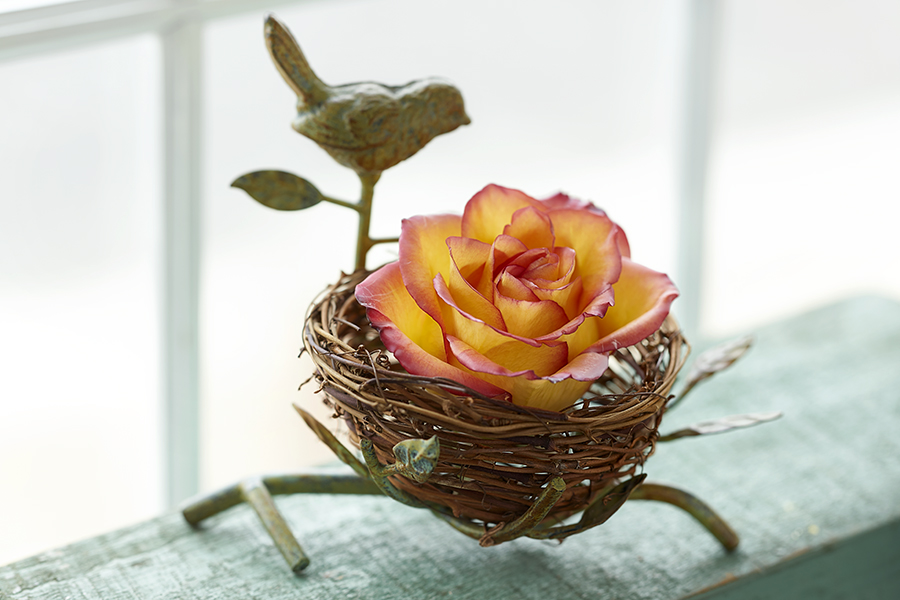
2 ideas for enjoying your waxed roses
After the wax has completely cooled, cut the stem off so that you can cradle the rose in this sweet bird’s nest dish.
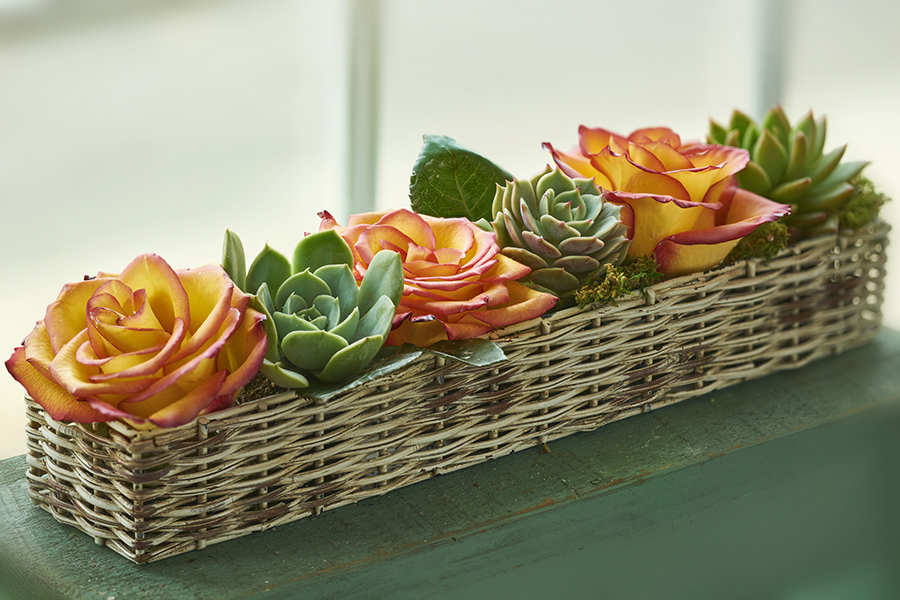
I love this arrangement! I simply alternated waxed roses and baby succulents to create a modern centerpiece as carefree as it is beautiful.
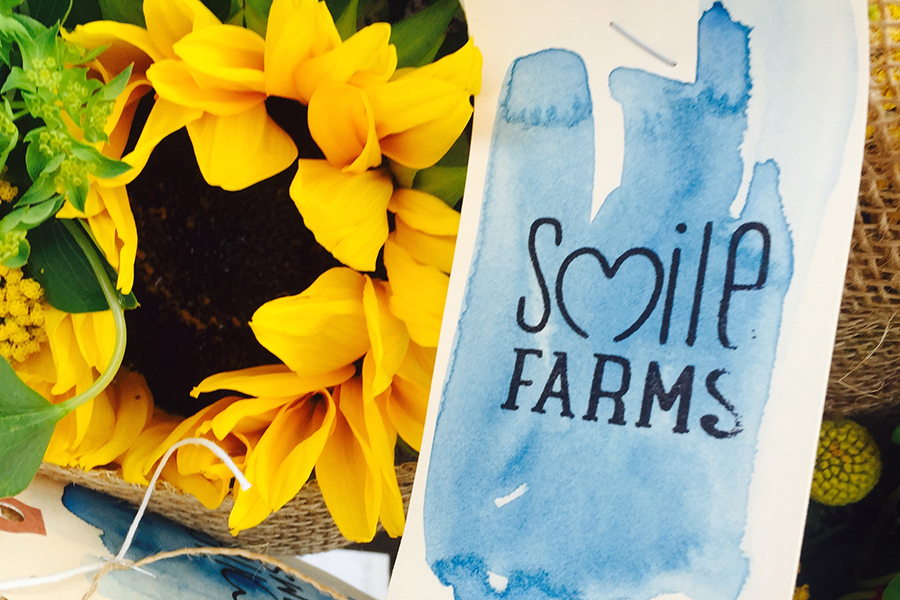
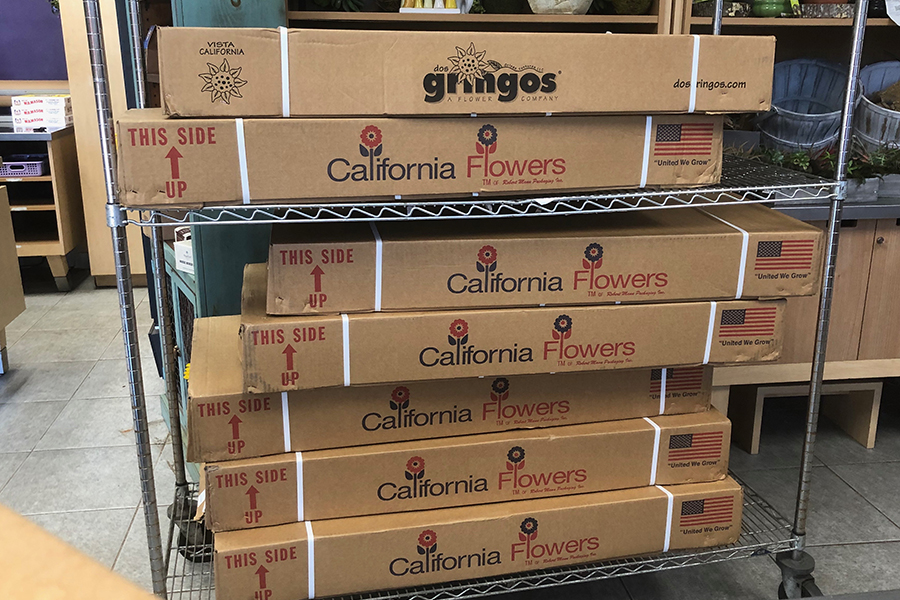
I wanted to share a just a few of the smiles that were created during a recent Sunflowers for Smile Farms fundraiser. The fundraiser came about when the owner of Dos Gringos, a flower farm in California that 1-800 Flowers is proud to partner with, reached out to me about some extra sunflowers they had. It was at the beginning of the quarantine and everything was on hold – but the flowers were in bloom and ready for harvesting!
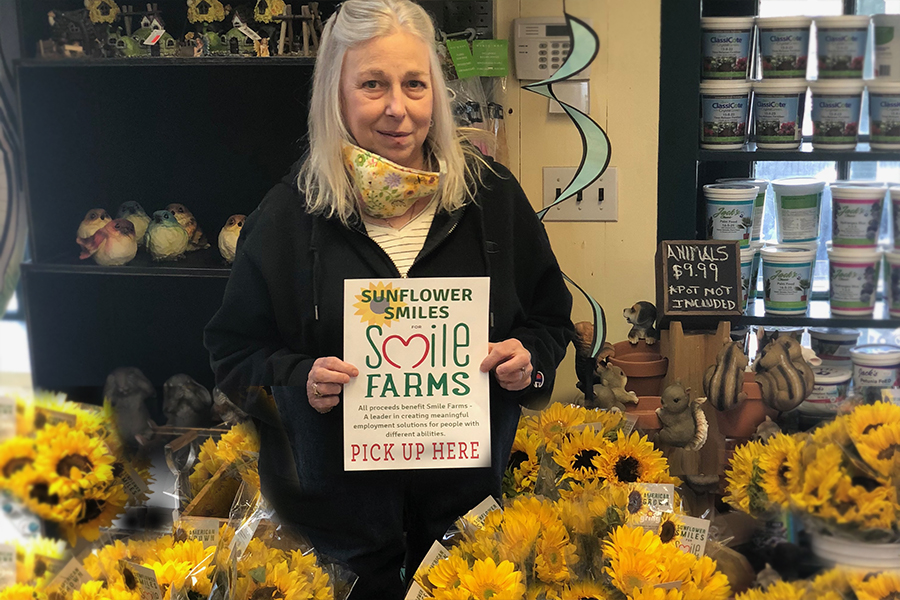
At the same time, the big annual fundraising event for Smile Farms, Inc. had just been canceled due to the pandemic. Smile Farms is the signature philanthropic partner of 1-800 Flowers and my brother Kevin is a farmer at Smile Farms at IGHL. So, when I got that call from Dos Gringos, I knew exactly what we could do with those sunflowers!
The sunflowers were cut on the farm in San Diego and shipped to the 1-800 Flowers store in Carle Place where they were given a fresh cut and put in buckets of water for hydration.
We had multiple pick up locations, including Smile Farms at IGHL (thanks Joni Lynn for your help) as well as the 1-800 Flowers Carle Place store.
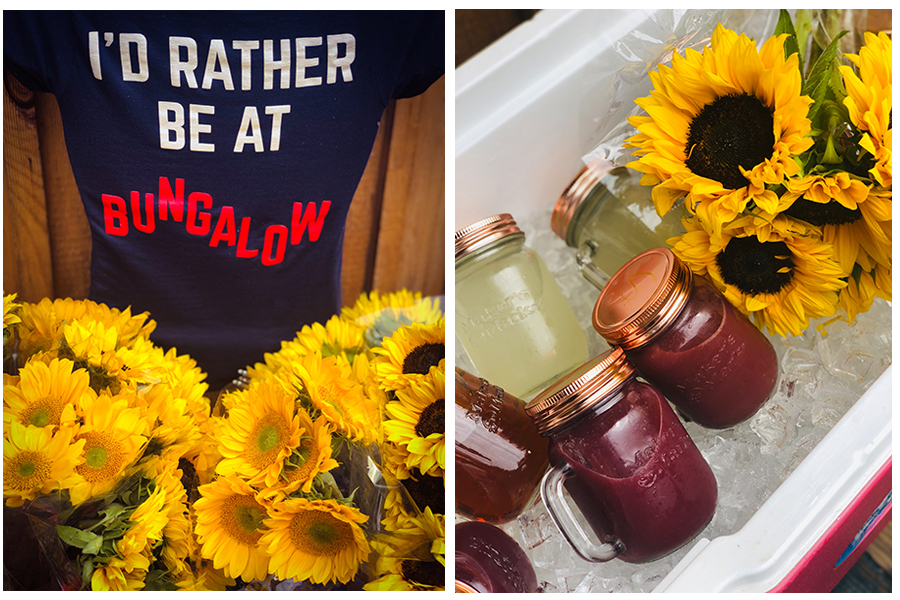
But the location that really rocked was Bungalow Bar in Rockaway Beach. The team at Bungalow Bar, led by GM Katy Bree, never says no to a good cause! And Rockaway is the most generous, supportive, community that you will find anywhere!!
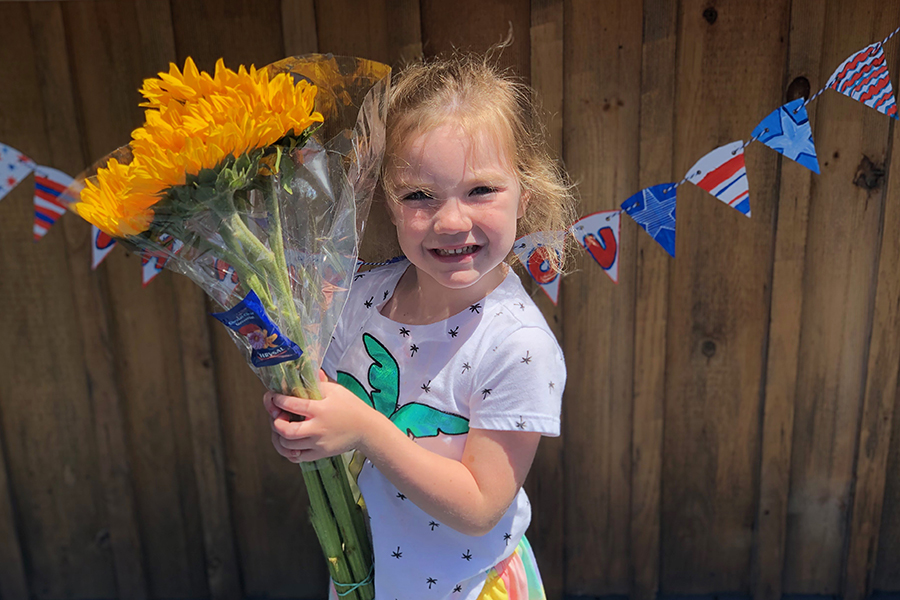
One of the lucky recipients of a sunflower bouquet was my brother Kevin, who I mentioned is a farmer at Smile Farms at IGHL. Kevin lives in one of IGHL’s group homes. As we all know quarantining can be stressful but a delivery of pizza and sunflowers sure can help bring some smiles to the day!
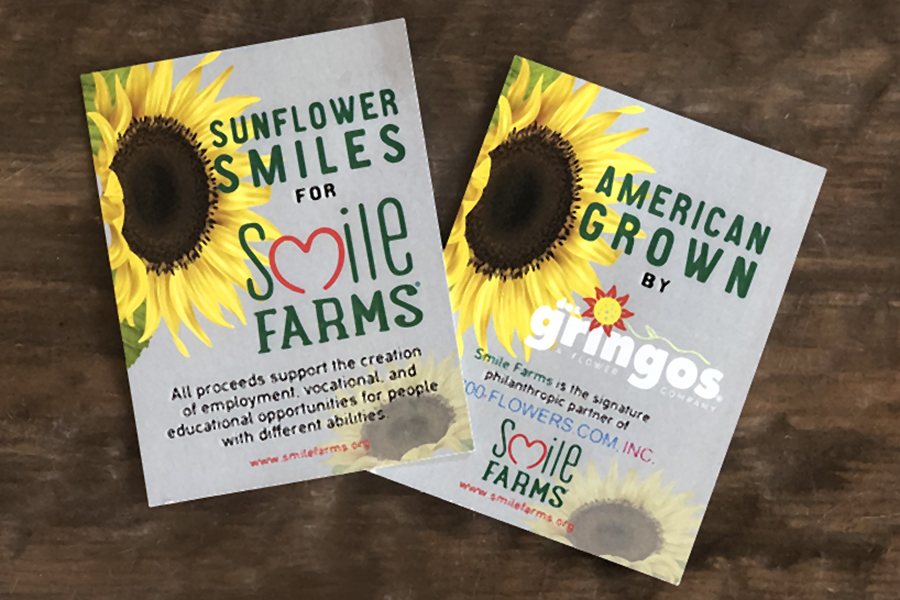
With the sunflower bouquets priced at a bargain $10 a bunch, many people bought multiple bunches so that they could share the smiles!! As you can see from these photos, sunflowers and doing good make people happy!