How to Paint Flowers on Wine Glasses

DIY: How to Paint Flowers on Wine Glasses

Whether you’re making these wine glasses with friends, for a friend, or for yourself, you are sure to have fun letting your creative side come out!

Add a personalized touch to ordinary wine glasses by painting flowers on them to make them extraordinary. Not only are these hand-painted wine glasses easy to make, but they’re pretty inexpensive too, which makes them great gifts if you’re on a tight budget.

Choose the flowers and colors of your choice to make them extra special for birthdays, holidays, or just because. Now, roll up your sleeves because we’re about to dive into Flower Wine Glass Painting 101!
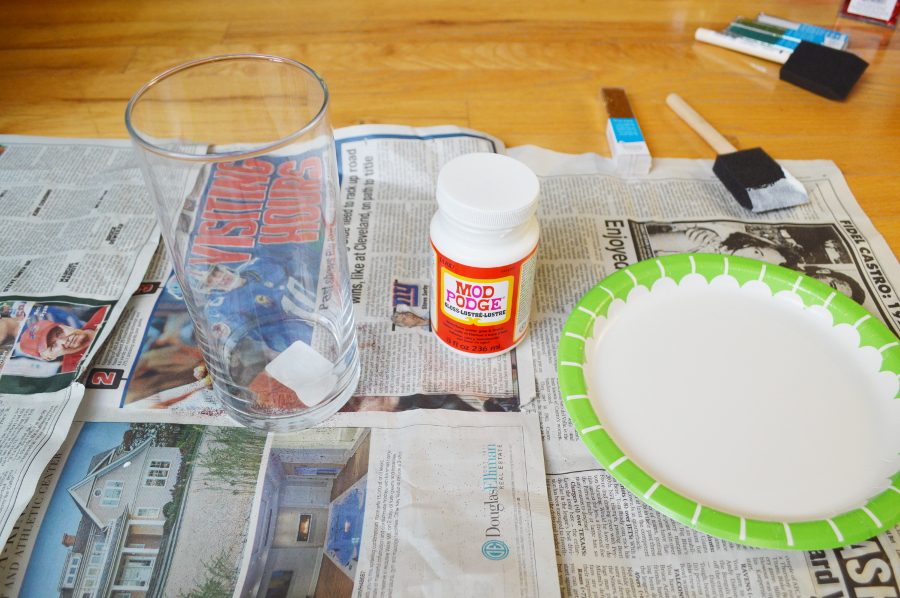
Supplies

hand painted wine glasses with supplies for Flower Wine Glass Painting
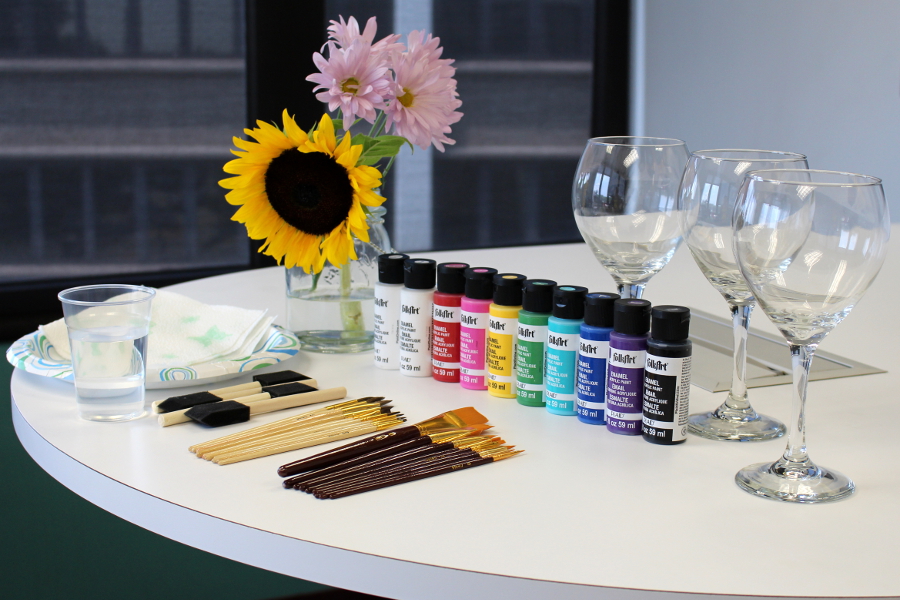
  • Enamel paint (Make sure it is specifically for glass products!)
  • Variety of paintbrushes
  • Clear wine glasses (washed and dried)
  • Cup of water (for cleaning your brushes)
  • Paint palette or paper plate
  • Paper towels, napkins, or rissues

Directions

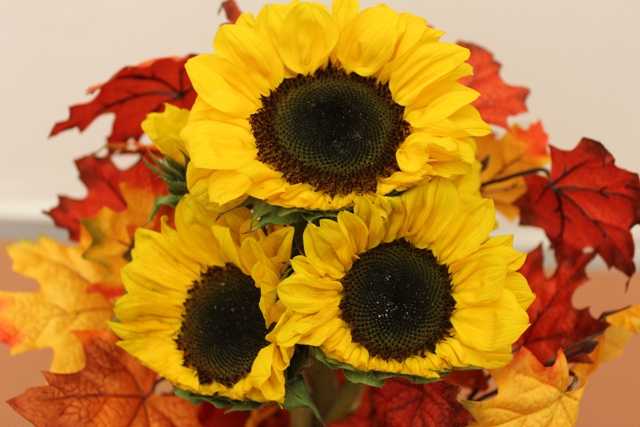
Step 1: Get inspired with real flowers

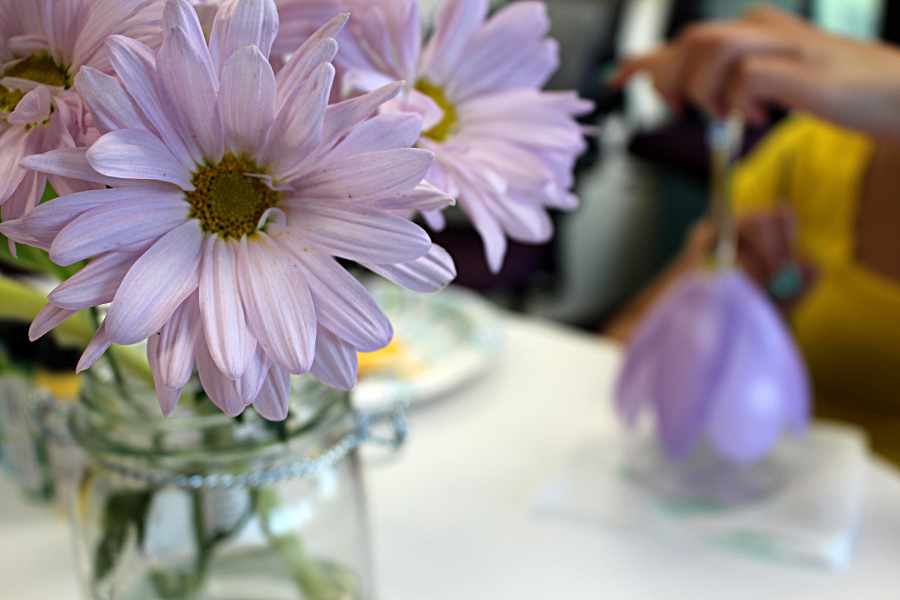
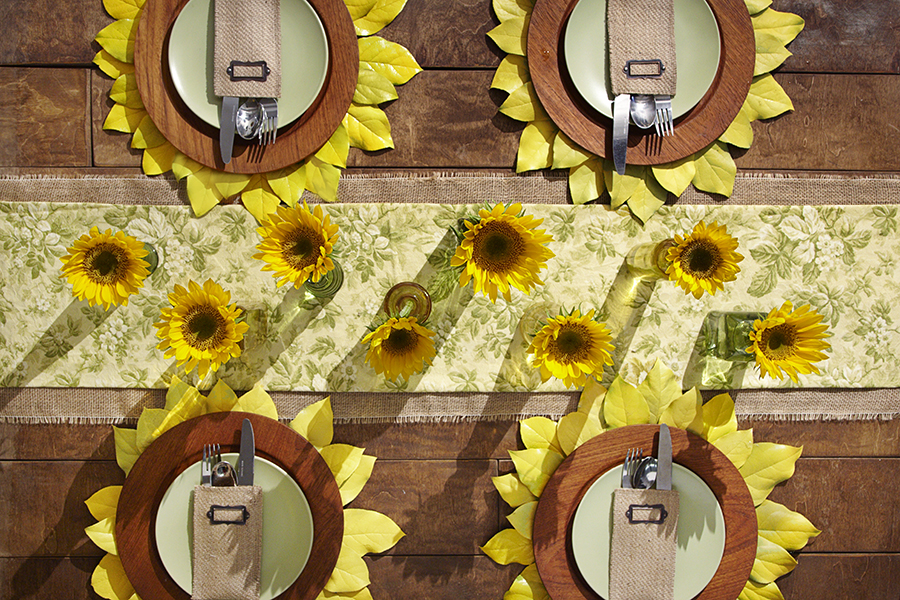
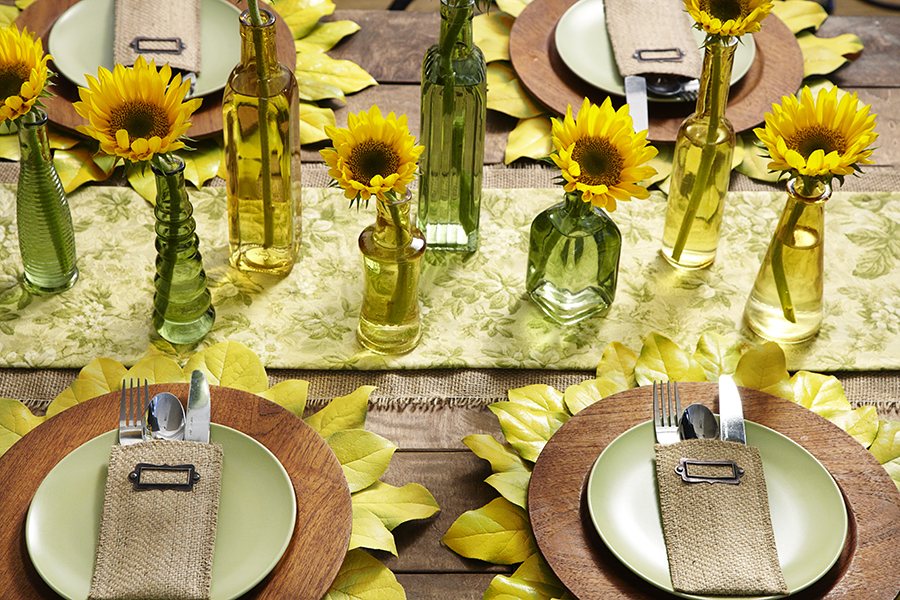
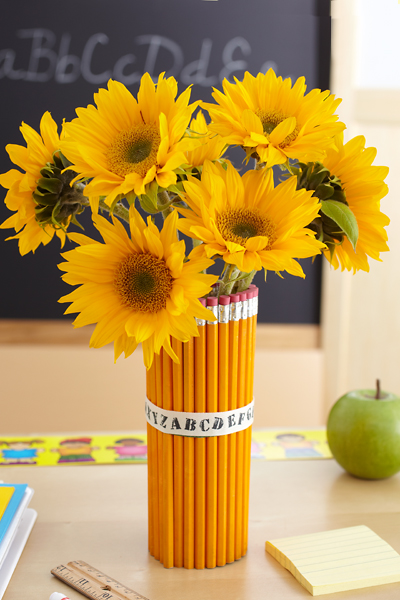
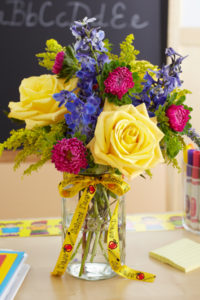
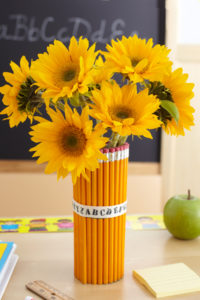
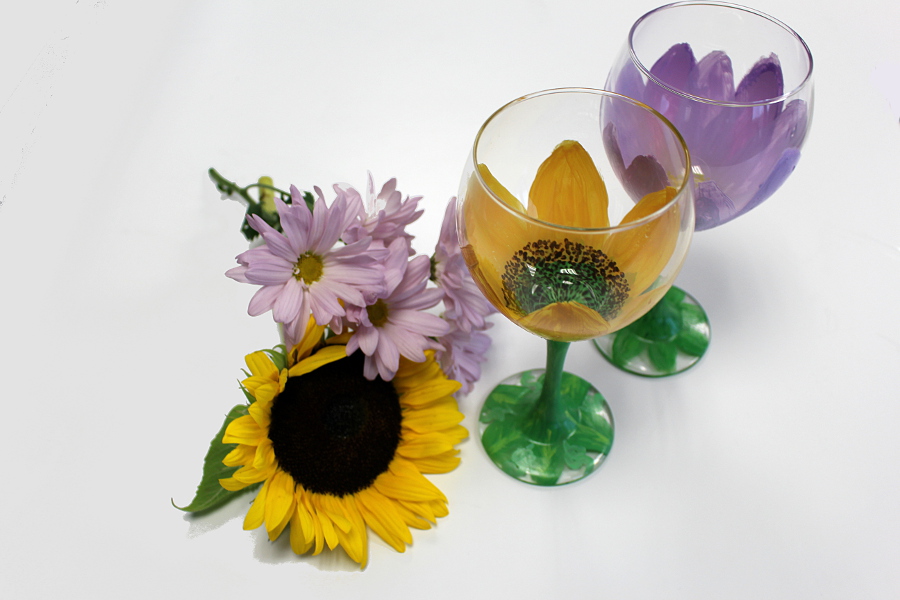
Before starting, think about which flowers you would like to paint on your wine glass. You can use flowers from outside, browse flowers online, or get some stems from your local florist. I was inspired by beautiful yellow sunflowers and lavender daisies.

Step 2: Create your work station

hand painted wine glasses with painted wine glasses work space

Now that you’ve decided what flower(s) you want to use, select paint colors to match. You can get whatever colors you like, but the primary colors are essential for mixing, while black and white are important for lightening and darkening. As mentioned above, make sure your paint is glass-product friendly. If you are unsure, ask a sales associate at your local craft shop.

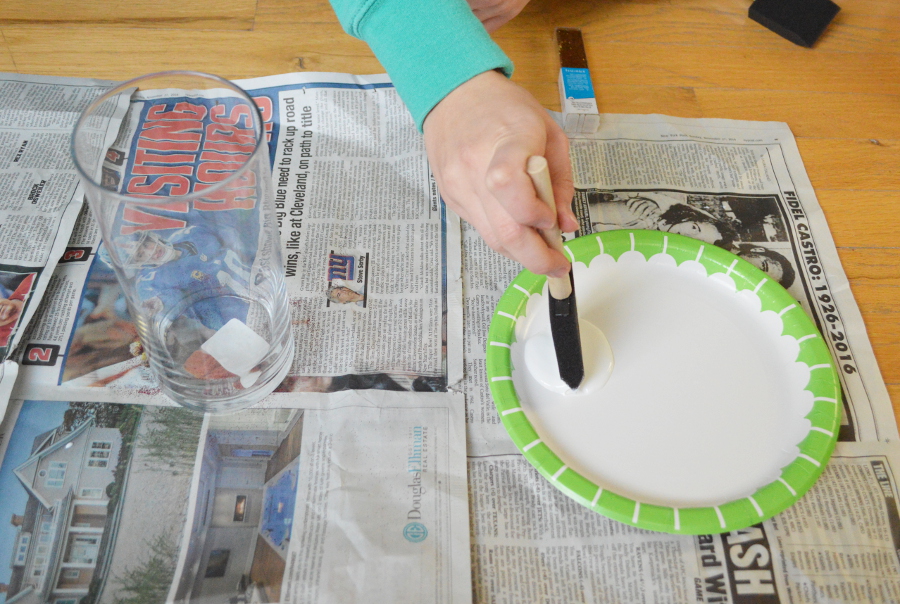
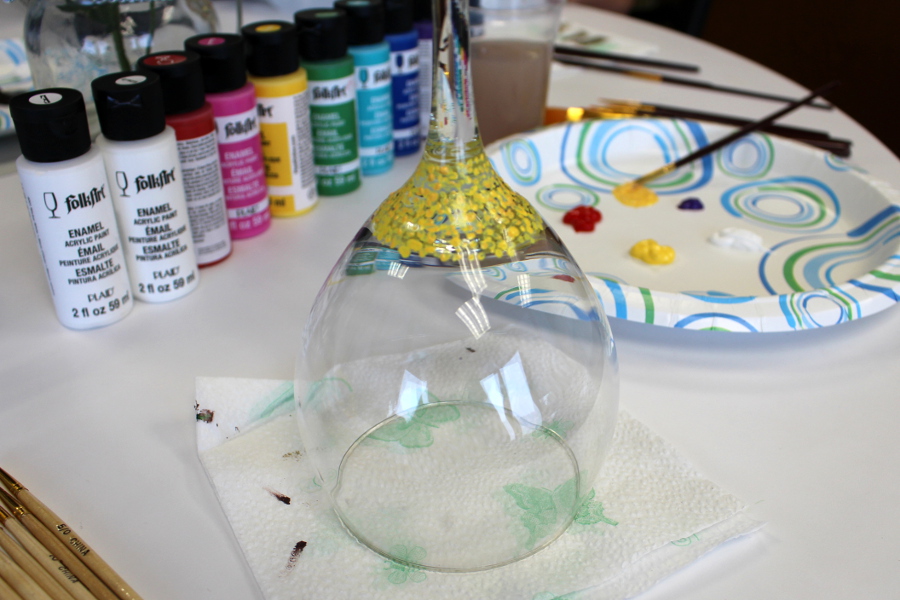
Step 3: Organize your paint

Pour a small amount of each color onto your paint palette. (Hint: A paper plate works just as well.) Make sure to have colors for the flower petals, center, and stem. It’s also a good idea to add white and black in case you want to lighten or darken your colors. Once you’ve created your color palette, set your wine glass upside down onto a paper towel (napkins or newspapers are fine, too) to keep paint from getting onto your work surface. You will also want to keep paper towels handy to wipe off your paint brush as needed after dipping it in water or paint.

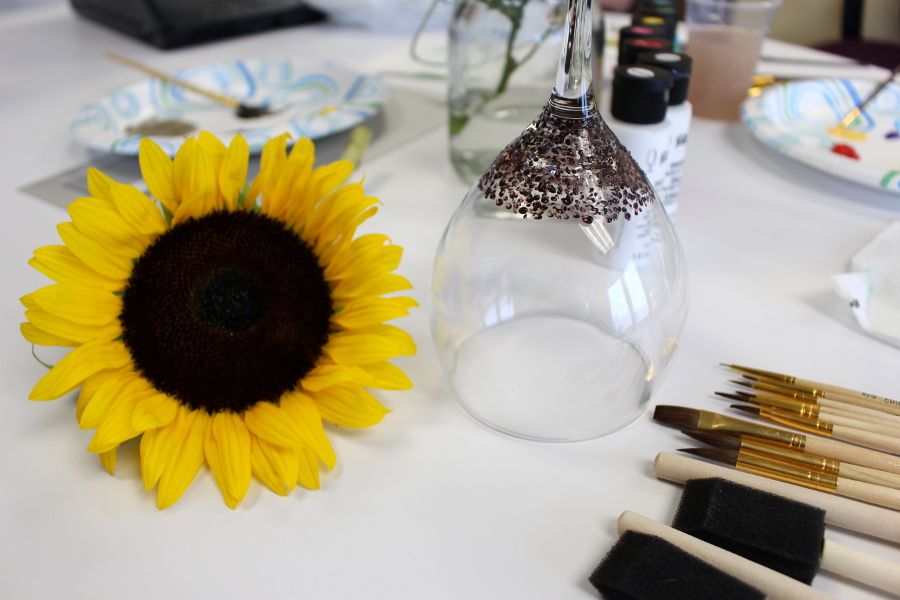
Step 4: Paint the center of your flower

Select the color you will use as the center of your flower. Feel free to mix colors to get the shade you want. We mixed red and purple to get the perfect shade of brown for the center of our sunflower, but brown paint will work just as well.

hand painted wine glasses with Painting the center of the flower using a small brush and creating dots

Using a small pointed brush, make tiny dots where the stem meets the bowl of the glass. Make the dots as big or small as you want to represent the flower you’re creating.

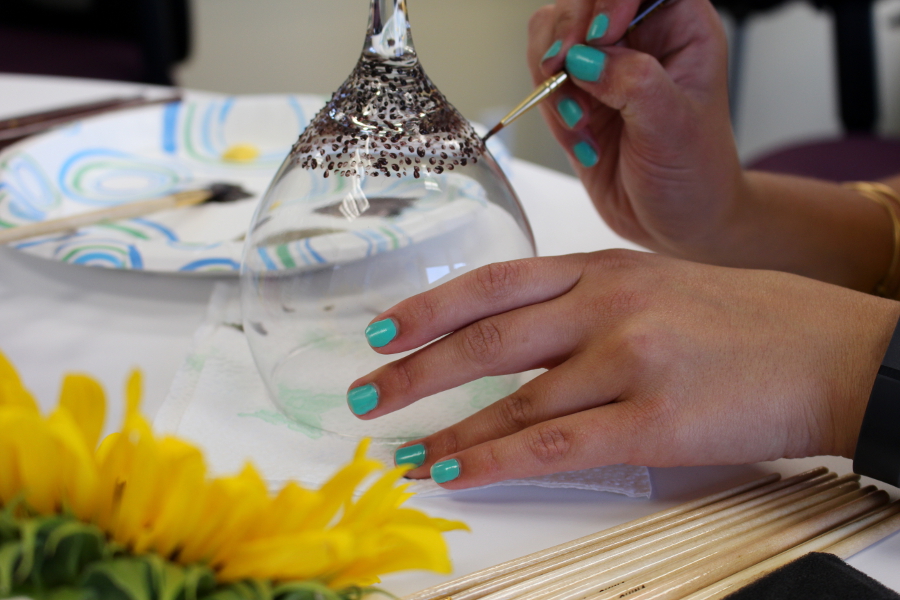
Different flowers will have different centers. For example, I added more dots to my sunflower glass than the daisy glass since sunflowers have very large centers.

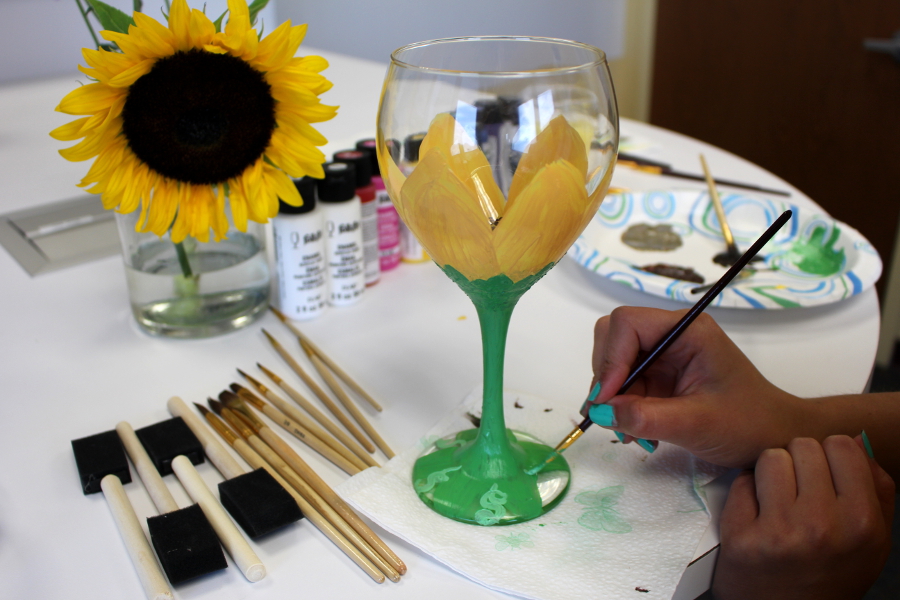
Step 5: Add the flower petals

Once the dotted center has dried (feel it gently with your finger tips to make sure), you can start painting your flower petals. You can paint the petals completely over the dotted center, halfway over, or not at all.

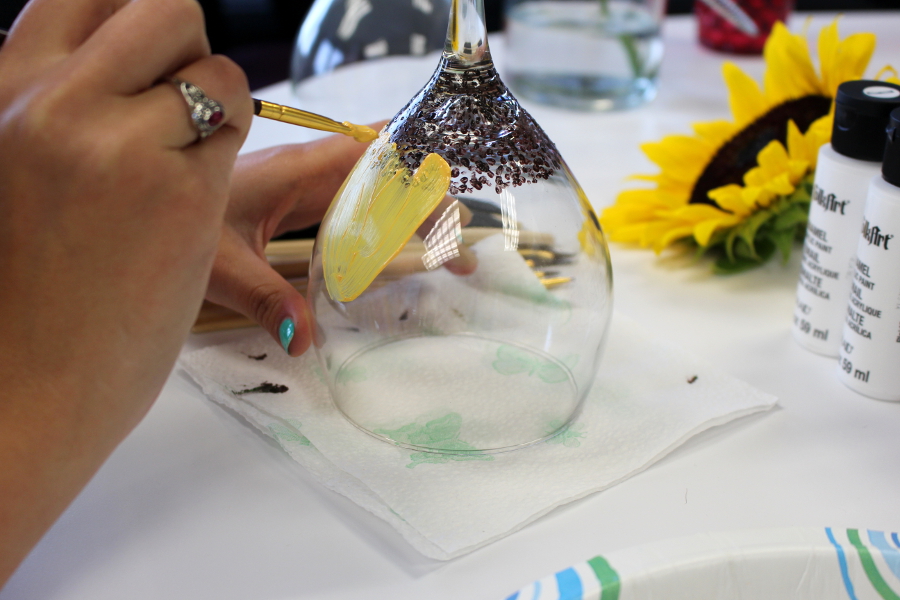
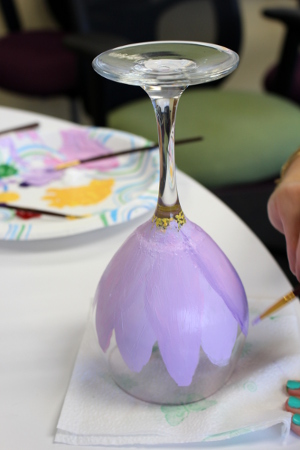
For the sunflower, I painted shorter, wider yellow/orange petals. For the purple daisies, I painted longer, thinner petals.

Feel free to overlap petals or add streaks for a cool color accent. While you’re painting the petals, keep in mind what the glass will look like from the inside.

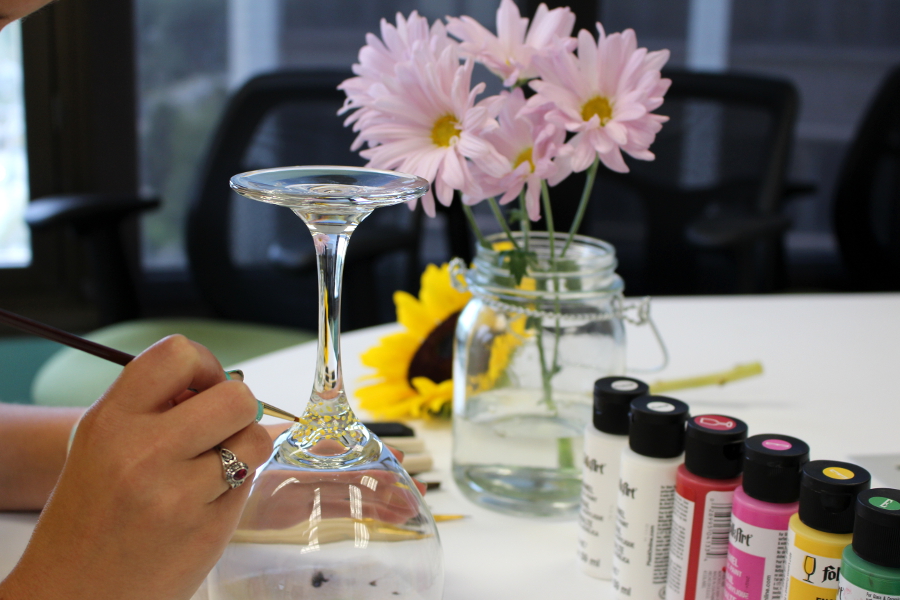
Step 6: Add a green stem

hand painted wine glasses with Stem Wine Glass Painting

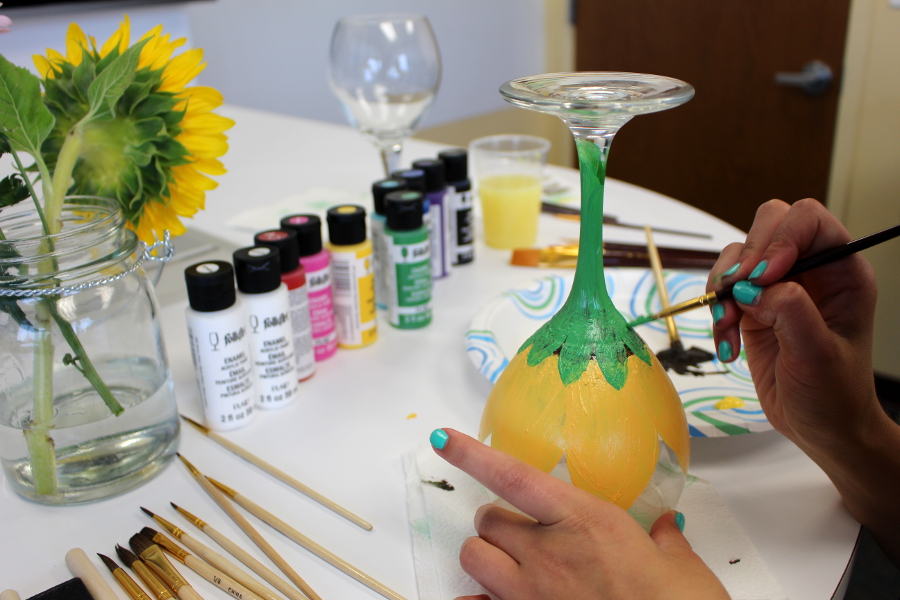
Using your favorite shade(s) of green, paint the stem of the wine glass for your flower stem. Most flowers have green petal-like “leaves” underneath, so you will want to cover the “bowl” of the glass with that. Let the leaves cover the ends of some of your flower petals as well.

Step 7: Add leaves to the wine glass base

hand painted wine glasses with Decorations on the stem for sunflower wine glass

Carefully flip the glass right-side up and paint the base of the glass with leaves or decoration of your choice. This is also a great place to add a name or short message for an extra personal touch.

Step 8: Let your wine glass dry

hand painted wine glasses with painted wine glasses with flowers

The enamel paint should dry pretty quickly, but make sure to give it a few hours before you start using the glass.

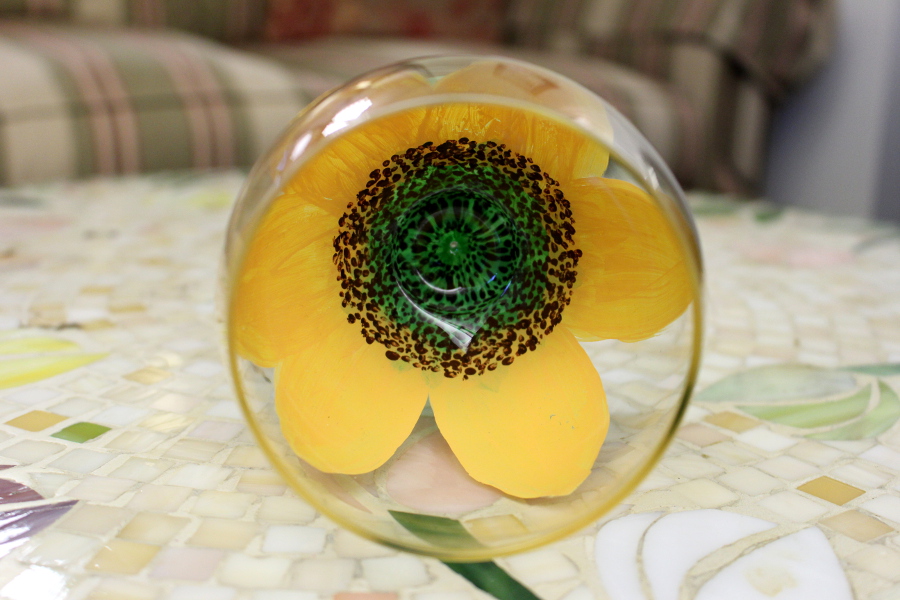
Step 9: Pour yourself a drink!

Nice job and congratulations on creating a beautiful wine glass. Now it’s time to toast to your masterpiece! If it’s a gift, wrap it up with a bottle of wine or bouquet of flowers that matches your wine glass flower design.

Thanksgiving Craft Idea for Kids: Sunflower Turkeys

thanksgiving craft idea with Thanksgiving Bouquet of Sunflower Turkeys
Click to enlarge

Are your kids looking for something to do on Thanksgiving while they wait patiently (or, more than likely, impatiently) for the food to be put out? This Thanksgiving craft will keep the little ones busy while you cook up a delicious feast for the family and give you an adorable centerpiece that your guests will rave about as they gobble down their food!

Materials

  • Construction paper (or colored cardstock or foam)
  • Scissors
  • Glue
  • Sunflower bouquet (The Harvest Glow Bouquet is the perfect arrangement to use for this craft.)
  • Googly eyes or candy eyes

Instructions

How to Cut a Turkey out of Construction Paper

Step 1

Cut out the shapes shown above using brown, orange, red, and yellow construction paper. (You can also use cardstock or foam for sturdier turkeys.)

Step 2

Glue the shapes together to create the head and body of the turkey, and then attach the googly eyes to complete the face. Repeat steps 1 and 2 to create one turkey for each sunflower in your bouquet.

How to Make a Construction Paper Turkey
Trimmed Sunflowers for Sunflower Turkey

Step 3

Trim the bottom petals of each sunflower, leaving only a rainbow-like arch of petals at the top of the sunflowers. That way, the flower petals look like turkey feathers.

Step 4

Glue one construction paper turkey to the center of each sunflower to create a festive Thanksgiving bouquet.

How to Make a Thanksgiving Turkey With a Sunflower

Although this Thanksgiving craft is intended for kids, guests of all ages will admire these cute sunflower turkeys. They help to create a festive Thanksgiving bouquet that will fit in well with the rest of your turkey day tablescape.

Sunflower Decor Ideas

The sunflower is a symbol of happiness, strength, loyalty, and adoration. Because the sunflower always turns its face to the sun, it has also come to symbolize faith and the constant search for light, or enlightenment. All in all, it is one of the most beloved flowers on the planet.

Its overwhelming popularity also makes it a popular choice for decorating. These two sunflower decor ideas are the perfect way to incorporate the irresistible beauty and warmth of the sunflower into your next summer get-together.

Vintage sunflower tabletop

sunflower decor with Sunflower Tablescape with DIY Placemats

This fall-themed tabletop features vases and placemats that play into the sunflower theme, and can be assembled in mere minutes.

Use antique single-flower vases

For an updated twist on a traditional centerpiece, line an assortment of vintage-style green and yellow bottles, each holding a single sunflower, down the center of the table. This creates a garden of sunflowers with their faces looking up at the sun!

How to make sunflower placemats

Sunflowers come in many different colors and sizes, from mini to giant. These super-size sunflower placemats make a big impact and are so easy to make!

Materials

sunflower decor with Supplies for DIY Sunflower Placemats
  • Cardboard circle (approximately 10 inches in diameter)
  • Salal leaves (20 to 25 leaves in various sizes; fake leaves can work too for a longer-lasting placemat)
  • Glue
  • Yellow spray paint
  • Brown paint
  • Sponge

Instructions

Step 1

Cut one cardboard circle for each placemat. (This is a good use for old cardboard boxes!) Each circle should be about 10 inches in diameter. I used a dinner plate as a template to trace a circle onto the cardboard, which worked perfectly. Use the sponge to add brown paint to your circle, leaving a bit of the original cardboard color showing through to create a textured look for your sunflower center.

sunflower decor with DIY Sunflower Placemats
Step 2

Cut all the salal leaves from the stem and spray paint them yellow. Once they have dried, glue the wider end of the larger-sized leaves to the edge of the cardboard circle.

Step 3

Glue the smaller leaves between each of the larger leaves.

With fresh salal leaves, the sunflower placemats can be made a day or two before you plan to use them. Keep them flat and in a cool place.

These super fun sunflower decor ideas will help set the mood at a summer party and add a brightness and whimsy to the proceedings. After all, everyone is happier around sunflowers!


An ad for 1800flowers' flower subscription service

How to Make Back to School Flowers to Start Their School Year Off Right

back-to-school-flowers-mason-jar

Back to school flowers can help everyone start the new school year off on the right foot! According to research conducted at Rutgers, The State University of New Jersey, the presence of flowers triggers happy emotions, heightens feelings of life satisfaction and affects social behavior in a positive manner far beyond what is normally believed. “Flowers bring about positive emotional feelings in those who enter a room,” said Dr. Haviland-Jones. “They make the space more welcoming and create a sharing atmosphere.”

Here are some creative ideas that you and your child can put together the day before school starts. Your child might be a little nervous about the first day of school and spending time with you; putting a floral or plant gift together for the teacher will relax them and get them excited about giving their new teacher such a beautiful gift.

How to make a pencil vase with flowers

pencil-vase

Can a teacher ever have too many #2’s? This adorable vase is just a clear beverage glass covered with unsharpened #2 pencils. Place a rubber band around the glass and insert the pencils between the glass and the rubber band until the entire glass is covered. Hide the rubber band with a fun school themed or colorful ribbon. Add about 2 inches of water into the glass (easier for transporting), but make sure the teacher knows they should add more water as soon as possible to keep the flowers fresher longer. Sunflowers are perfect long lasting flowers, but you can use any flowers. Flowers picked from your garden are great too!

Garden fresh flowers for the teacher

Keep it simple and fresh by cutting a few stems of flowers from the garden and placing them in a mason jar. Bring your child into the garden with you and let him or her pick out the flowers. There’s no right or wrong here — any flowers cut from a garden will look good together. I love this natural look! It reminds me of my grammar school days, when kids would bring flowers to the teacher. A few stems of garden roses wrapped with a little aluminum foil seemed to have magical powers for both the giver and the receiver!

DIY Roses and Rosé Wreath

This summer, everything is coming up pink! And that means lots of fabulous party décor in that trendiest of colors. This roses and rosé wreath is a particularly pretty — and pink — way to display your wine while keeping it chilled at the same time.

a photo of roses and rosé wreath on a table

If you don’t have your own rose garden or a blooming rose bush, don’t worry — roses are abundant this time of year, and they’re priced right.

Roses and rosé wreath

What you’ll need

  • Oasis floral foam wreath base
  • Fresh cut roses
  • Fresh foliage
  • Shallow dish
  • Pedestal dish (for elevated display)
a photo of a roses and rosé wreath with  a shallow dish for the base

Soak the floral foam wreath base thoroughly. Then, place a shallow dish, such as a pie plate, on top of the pedestal dish, and put the foam wreath on the pie plate.

Start by creating the wreath shape with various sprigs of foliage. I was able to cut enough branches from the trees and shrubs in my backyard to use in this project!

a photo of a roses and rosé wreath with pushing leaves into floral foam

Because the wreath is elevated, make sure that you insert your lower branches into the foam on an angle so they hang over the dish.

a photo of a roses and rosé wreath with covering wreath base with flowers

Before inserting your roses, cut the stems to about an inch long so that the stem fits nicely into the foam without going all the way through. You want the bottom of the stem to stay in the foam so that it will be continuously hydrated.

Continue filling in with greenery and roses until you have completely covered the wreath base.

a photo of a roses and rosé wreath with bottles of wine in the wreath

When you’re ready to serve and enjoy your favorite rosé — mine is this delicious pinot noir rosé from Harry and David — fill the center dish with ice and add the bottles to keep them chilled between pours.

a photo of a roses and rosé wreath with a faux rose wreath

Want an even simpler version of this? Use a faux rose wreath instead. Place the wreath on the table, add a bowl filled with ice in the middle, and then fill it with a bottle of delicious, refreshing pink rosé!

Or meet in the middle and do a little of both.

Start with the pretty faux wreath base and add a few cuttings of fresh flowers and greenery to really make it pop!

As long as you want the roses to look beautiful for just a few hours, you don’t even need to worry about hydration — they’ll look great for the entire party. After the rosé is gone, you can remove the fresh cut roses and place them in a petite vase, and enjoy them for a few more days.

Apple Vase for Rosh Hashanah: Celebrate the Jewish New Year With This Sweet DIY Decoration

apple vase with diy apple vase

Looking for the perfect Rosh Hashanah centerpiece or accent? Take inspiration from the star of the menu — apples — and turn them into wow-worthy décor in a few simple steps!

Using just a knife and flowers, we turned this go-to Rosh Hashanah treat into a conversation-starting decoration. After creating your apple flowers, you can turn this DIY idea into place cards for a table setting (just tie a nametag around the apples), a juicy and vibrant centerpiece, or sweet accent pieces when you spread several throughout the room.

As this is a vase made from a fresh fruit, it is best to make these beauties the night before or morning of, if possible. Each apple takes about five minutes to make.

Supplies for fresh apple vase

  • Fresh apples (we used Granny Smith and red delicious)
  • Knife
  • Water
  • Scissors

Directions for fresh apple vase

apple vase with carving an apple
  1. Use a knife to carve an opening at the top of your apple. The carving should be a minimum of 1 inch, with a maximum varying based on the size of your apple. Your hole should be large enough to fill with a bit of water and a small piece of flower stem but small enough that you are not fully reaching the bottom skin of the apple.
apple vase with pouring water in apple
  1. Once your apple is carved, carefully fill it with water. Leave a bit of room at the top of the apple so the water does not spill over when you add the flower.
apple vase with cutting flower
  1. Trim your flower down so the stem fits the size of your carving and the flower head sits comfortably on the top of the apple.
apple vase with finished diy apple vase
  1. Now, your fresh apple vases are ready to show off!

How to Make a Flower Crown

Floral crowns seem to be blossoming everywhere you turn these days… and with good reason! They’re delightfully charming, they’re romantic, and they can be worn anywhere from a wedding to a birthday celebration to a music festival. They’re also surprisingly easy to make. There are just a few basic steps to creating your own amazing flower crown!

I’m going to show you how to “wire and tape” using a single floral variety (in this case white waxflower) that can be worn on its own.

And how easy it is to take it up a notch simply by gluing in your choice of additional flora (and even “fauna”)! You can also do a combination of wiring and gluing. Wire the larger flowers and glue the smaller ones. So let’s get started!

Suggested Flowers:

You can pretty much use whatever flowers/foliage you desire. And you can also make the crown as ornate or as simple as you prefer. I like to use flowers that air dry nicely and that are not too heavy or delicate. I also like to have a mix of sizes and shapes. This image shows a nice basic assortment to use as a guideline.

Flower Crown Ingredients

Tools:

The tools required are also pretty basic: clippers; wires; floral tape; and adhesive. My wire of choice for the base is called binding wire. It is a 26-gauge paper-covered wire that’s both strong and malleable.

DIY Flower Crown Tools

Step by Step:

Begin by preparing all of your flowers and foliage. Cut all the stems very short—about 1.5″—and strip any foliage from the end of the stems.

Prepare Flowers & Foliage

You will be gathering a few of the small sprigs of waxflower that you have just prepared by cutting them from the larger multi-lateral stem and stripping off any remaining foliage, then wrapping them with the floral stem wrap. I find it easier to pre-cut small pieces of the floral wrap (about 2″ long) from the roll before starting the wrapping process.

Cut Floral Wrap

Using floral stem wrap can take a little getting used to, in part because it does not feel sticky to the touch. It is a self-sealing material that sticks to itself as well as the flower stems.

Floral Wrap

Hold the top of the wrap with one thumb while twisting, wrapping, and moving down the stems with the other hand.

How to Use Floral Wrap

The key is to wrap it as tightly as possible.

Wrapping floral wrap around flowers

When you get to the end, just pinch off any remaining tape.

Prepared Flowers

You’re now ready to create your crown. If you know specifically who you’re making the crown for, measure around their head and add an additional 6 inches. This will be the length you should cut the wire to. Generally speaking, 20-22″ for the floral will create a crown that fits most people. Leaving 3″ of wire at each end allows you to adjust to a perfect fit when you are done.

Measure Flower Stems

Hold your first flower cluster against the wire, 3″ from the end.

Bind Cluster to Wire

Securely bind the cluster to the wire using the stem wrap, pulling it tight as you wrap it around the wire.

Add Second Cluster of Flowers

Add the next cluster, slowly overlapping the previous one.

Continue Adding Clusters

Continue until you have reached your desired length.

At this point, you can simply tie off the two ends of the wire to create a finished wreath.

Or you can add ribbon to each end. The two pieces of ribbon can then be tied in a bow when placed on the head. Not only does it look pretty, but it allows more flexibility for fitting and placing the crown where you want it. Some people like to wear the crown low on the forehead, while others like it more on the back of the head.

Add ribbon to end of crown

Before I show you how easy it is to make this wreath even more spectacular by simply gluing additional flowers onto this already beautiful base, let me show you how to wire a larger flower, such as a rose.

How to Wire a Rose Step 1

Cut the stem of the rose to 1-2″.

Cut a 4″ piece of 18-22 gauge wire.

Put wire through rose stem

Thread the wire through the rose base and fold each side down and twist.

How to wire a rose step 2

Fold each side down to be parallel to the stem.

Attach each rose to the base of the crown the same way that you attached the clusters of waxflower.

After attaching a few clusters of waxflowers, place a wired rose bud, slightly overlapping the last cluster.

Attach rose to flower crown

Secure by wrapping the floral tape around the stem and the base wire.

Wrap floral tape around stem

Wrap around all of the wired stem.

Wrap floral tape around all of the wire stem

Continue this pattern of waxflower and roses.

Gluing flowers to the crown:

Cut accent flowers short

Cut the pieces of accent flowers very short.

Dip stems into hot wax

Dip the very end of each flower into the hot wax.

Insert between waxflowers and roses

Insert between the waxflower and the roses.

Continue with all of the accent flowers until you’re happy with the way your crown looks!

There will probably be a few fine strands of glue left on your crown. These will magically disappear if you go over the crown with a hair dryer set on low.

Use a hairdryer to get rid of hot glue strings

Another tip to prolong the life of your floral crown is to spray the finished product with Crowning Glory. This isn’t necessary, but it can help.

Help preserve the flower crown with crowning glory

A light mist is all you need. You can also refrigerate the finished crown until you are ready to wear it.

Spray crown with crowning glory flower preserver

Here’s another way to creatively finish the crown. Twist and secure the end of each side and attach a decorative hair accessory, like this beautiful starfish clip.

Flower crown with starfish

Here’s another way to creatively finish the crown. Twist and secure the end of each side and attach a decorative hair accessory, like this beautiful starfish clip.

Now that you know the basic techniques, let your inner flower child bloom and make your own one-of-a-kind floral crown!

5 Ideas for Mother’s Day Décor Ideas with Flowers

The series “Seasonal Design” covers home decor and how flowers elevate an environment. Flowers are always a great way to decorate your home. These ideas for Mother’s Day flower decorations with make mom feel like the special woman she is.

A mother’s heart always welcomes hugs and kisses — that’s a given — but on her special day why not show her how much you care by putting in a little extra effort? Take those fresh flowers you’re getting her and use them to make a gorgeous and heartfelt decoration for her home. It’s the perfect way to bring new life and energy to her space, and the permanence of the piece will remind her of your thoughtful gesture for years to come.

These five ideas for Mother’s Day flower decorations will both wow mom and dress up her home at the same time.

1. Personalize pots

mother's day flower decorations with flowers in a mug

While the fresh blooms you buy her may not last forever, putting them in a pot or vase that she can use all year long will brighten her home. Purchase several different pots, planters, and vases of varying sizes. This will let Mom mix and match around the home later, and will give you a chance to include a Mother’s Day plant with a little more staying power.

Now, take your pots and cover their exterior with a layer of chalkboard paint or black paint specially formulated to give you a flat, matte appearance. Then, decorate them using either chalk, for temporary messages that can be updated, or paint markers in bright colors that will pop against the black background. You can coordinate the colors and designs to create a fun display or make each one different so Mom can use them throughout her home.

2. Wake her up to a bedside arrangement

Give Mom a surprise by arranging a basketful of flowers or flowering plants on her bedside table. Take cues from her bedroom decor, picking up the colors from her bedding, curtains, or throw pillows in her Mother’s Day arrangement. Then, choose a basket, bucket, or vase that will pull it all together. This will let Mom enjoy her flowers long after Mother’s day has ended.

mothers day flower decorations peonies

3. Add a vintage touch

If Mom loves antiques as much as she loves flowers, then take a quick trip to your local antique store or flea market and get thinking outside the box — or, in this case, the flower vase. Look for vintage porcelain in which to arrange your bouquet, or get creative and place your gift in an old watering can, wooden box, or basket lined with plastic, or even a birdhouse. Whatever vessel you choose, your gift should be unique, whimsical, and encompassing of Mom’s passions.

4. Perennial flower plant for the porch or patio

It’s nice to receive flowers, but it’s even better to receive them again and again, year after year. If Mom loves to garden, consider purchasing her a set of sprouted bulbs to plant herself. Or, if she doesn’t have a green thumb but loves flowers, get her a hardy perennial plant that doesn’t require much care and she can enjoy on her front porch for years to come. Examples of these include paperwhites and hyacinth.

5. Make the bathroom flourish

Flowering plants do more than look nice and brighten a home; they also clean the air of the room they’re in. So, how better to brighten Mom’s bathroom than with a hanging flowering plant? Look for low-light plants like calla lilies, and place one in a decorative hanging basket or planter. Screw a hook to the ceiling, and give Mom something that will leave a lasting impression within the room.

Make the Holidays Sparkle with DIY Glitter Vases

One of the best things about the holiday season is decorating! From Christmas trees to holiday lights to menorahs and more, there are SO many ways to make your home festive and welcoming.

diy-glitter-vases-table

Of course, decorating with holiday flowers is our absolute favorite. I love to add a bit of sparkle during the holidays (especially New Year’s), and these glitter vases are super easy (and fun!) to make. Friendly advice: Try not to throw the glitter everywhere or you’ll spend months cleaning it up. I tell you this based on personal experience (you’re welcome).

Supplies for DIY glitter vases

diy-glitter-vase-supplies
  • Glass vases
  • Glitter (I used red, gold, and white)
  • Ribbon
  • Mod Podge
  • Foam brush
  • Plates
  • Clear spray sealer (optional)
  • Tape or glue

How to make DIY glitter vases

  1. Prepare your work area by putting down paper towels, newspaper, etc., to ensure easy clean-up. Don’t underestimate the ability of glitter to get EVERYWHERE.
  1. Pour a little Mod Podge onto your plate. Take your foam brush and add the Mod Podge to the bottom of the vase (or wherever you want to add your glitter). Pro tip: Use tape to make a straight line or stripes.
add glitter to mod podge
  1. Hold your vase over another plate and sprinkle the glitter all over the Mod Podge. Excess glitter will fall onto the plate. 
  1. Once the Mod Podge/glitter has dried, put another layer of Mod Podge over the glitter or use a clear spray sealer. 
  1. Glue or tape a ribbon where the glitter ends to give it a smooth line and make it a bit more festive. 
  1. Add water and flowers, and display in your home. How easy was that?! 
Exit mobile version