Mother’s Day DIY Gift: Personalized Wine Bottle

Mom is one busy lady. Have you seen her lately? She makes Superwoman look lazy. She’s a teacher, cook, homemaker, and everything in between. That’s why, this Mother’s Day, get her something she actually wants (and deserves)…wine!
For the ‘half glass full’ mom

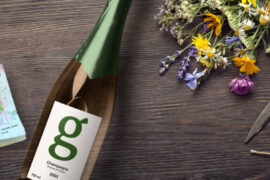
Getting together with my mom and sister for a casual glass of wine is one of my greatest pleasures in life. So, this year, I’m surprising my mom with an in-person happy hour with her favorite bottle of rosé. For the perfect Mother’s Day DIY gift — and for an added layer of surprise and personalization — I turned the rosé bottle into a keepsake we can drink from and then repurpose.
Mothers Day DIY Gifts personalized wine label

Creating your own DIY Mother’s Day wine bottle

I created a custom rosé bottle label for her in Adobe Photoshop and replaced it with the label on the bottle. If you don’t have Adobe Photoshop (or aren’t confident in your Photoshop skills), you can always order a personalized wine label online. Many styles and designs are available!

If you go the DIY route, all you need is sticker paper to turn a simple wine bottle into a personalized gift for mom.

Here’s how I did it.

Make it personal to make it special

I used a photo of the two of us to really make it personal. For an inspirational touch, I asked my mom to share her favorite quotes from women that inspire her and included those on the bottle as well.

I wanted this gift to be something special that we could use (aka drink) together, but I also wanted my mom to be able to keep it after and repurpose it as a vase. If you’re looking for something personalized and creative to share with a special person in your life, I highly recommend this Mother’s Day DIY gift.

Supplies you’ll need for DIY Mother’s Day wine bottle

Mothers Day DIY Gifts mom with wine and dog

Steps to create your personalized wine bottle

  1. Soak the bottle in a vase full of water. Then, remove the label. (Tip: Soak the bottle overnight for easier removal. You should be able to just peel it off.)
  2. Create your custom bottle label on the computer or by hand (just make sure to do it on sticker paper), or order one online.
  3. Print your custom label onto sticker paper and cut it out.
  4. Measure your cut-out label and decide where you want it to go on the bottle.
  5. Peel the back part of your label off and stick your personalized label onto your bottle.

Additional gift ideas to go with the personalized wine bottle

You’ve given Mom her favorite wine with a sweet personalized label, and that’s pretty special. But even after the wine is gone, this gift keeps on giving! Mom can use the keepsake wine bottle as part of her entertaining décor, a unique wine bottle vase, or a unique “pitcher” for water.

Does Mom love her personalized wine bottle? Check out these other accompaniment DIY gift ideas.

Mother’s Day Crafts for Kids: DIY Photo Flowers With Free Printable Template

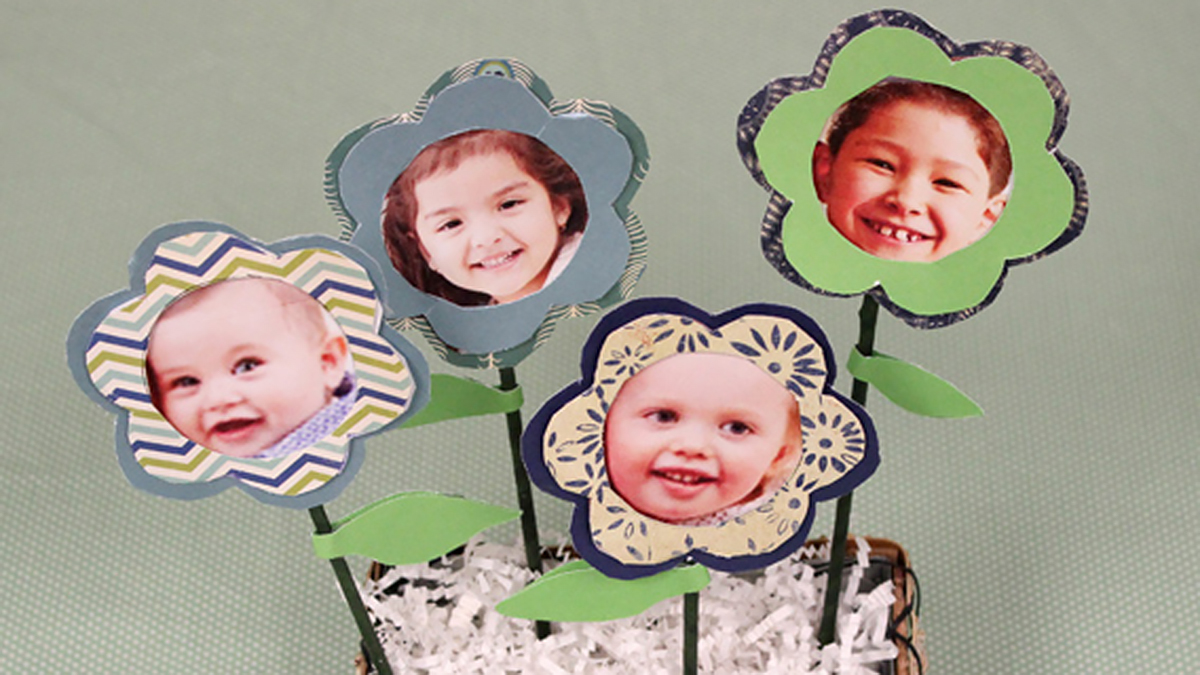
Our series “Get Crafty” gives you the inspiration for creating inventive DIY projects during the holidays and year-round. Let the children make their own homemade Mother’s Day craft with this creative DIY photo flowers idea that will touch mom’s heart.

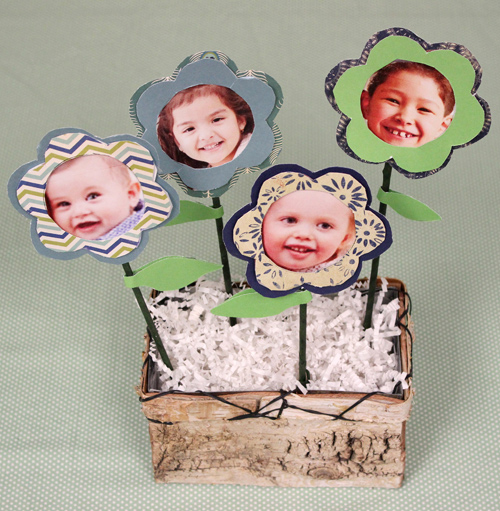
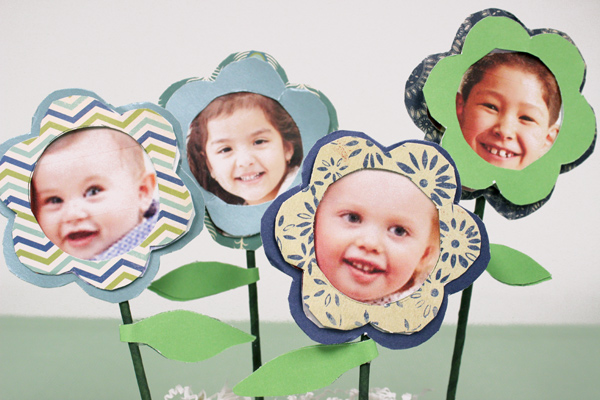
a photo of diy photo flowers

Move over macaroni frames, there’s a new DIY Mother’s Day craft in town! And it’s not only fun to make but easy, too.

Using our photo flower stencil template, some scrapbooking paper, scissors, and a bit of glue, we created creative and colorful DIY photo flowers. They’re the perfect kid-friendly complement to those stunning Mother’s Day flowers you plan on getting Mom.

Let the kids get creative by picking out their own patterned paper and colors. They’ll love letting their personalities shine in this personalized Mother’s Day gift idea.

And Mom will think it’s just the sweetest present she’s ever received.

Supplies for DIY photo flowers

  • Photo flower template (download here)
  • Scrapbook and construction paper in various colors and patterns
  • Scissors
  • Glue
  • Floral tape
  • Tape
  • Lollipop sticks or similar
  • Photos

Directions for DIY photo flowers

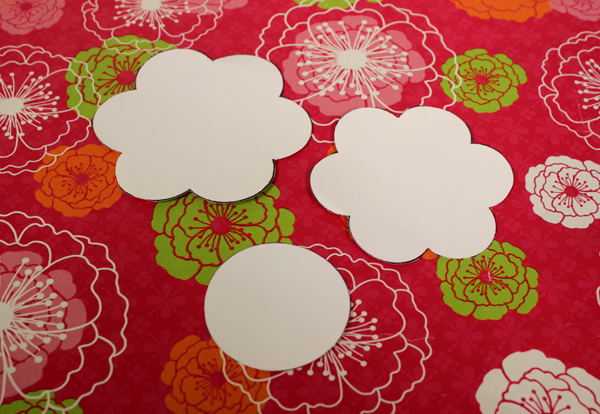
a photo of dit photo flowers: flower stencil cutout

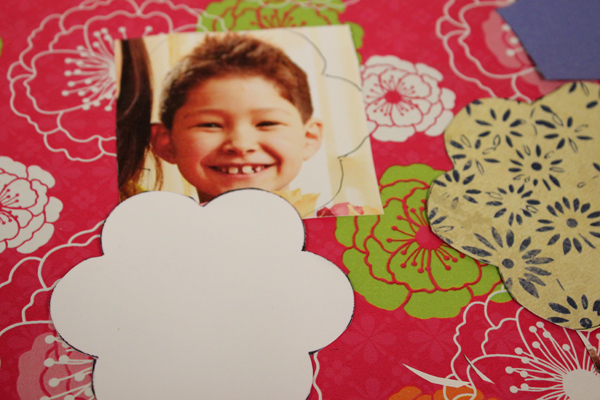
Load your printer with a sheet of cardstock; download and print the photo flower stencil template. Cut out the shapes to use as stencils. Set aside.

a photo of diy photo flowers: tracing flower shape on photo

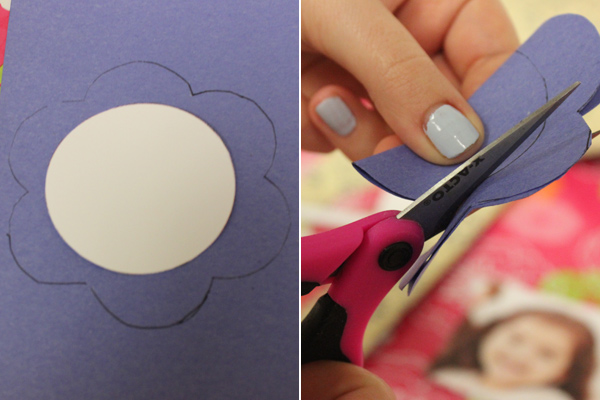
Now, prepare the photograph. If are using an existing photo, trace the smaller flower on the photograph and cut out the shape. If you plan on printing your child’s photo, crop the area you wish to use to 3.5 inches by 3.5 inches. Print on high-quality photo paper for best results. Once printed, use the smaller flower to trace the shape and cut out the photo.

a photo of diy photo flowers: cutting out the flowers

Take the larger flower and trace it onto the color/pattern you’d like to appear on the outermost layer of the flower. Cut out and set aside.

Then, take the smaller flower and trace it onto the color/patterned paper you would on the middle layer of the flower. Trace the circle stencil in the middle of the smaller flower shape. Fold in half and cut out the circle shape from the flower to create an open space.

a photo of diy photo flowers: faces in the flowers

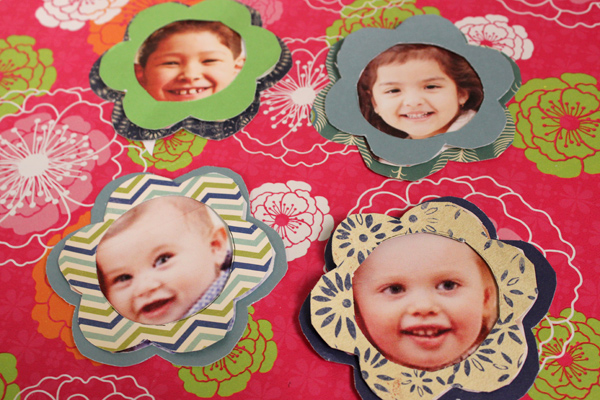
Once you have all the shapes cut out, place a few drops of glue onto the largest flower. Take your first photo and glue it down. Once it’s dry, add a few drops of glue to the smaller flower and place it on top of the photo.

a photo of diy photo flowers: making the flower stems

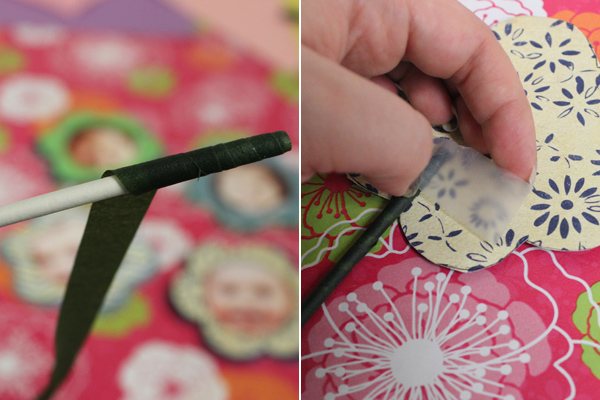
To make the stems, grab your stick and wrap it in floral tape. (The tape is naturally slightly sticky so no further glue is necessary.) Once fully wrapped, tape the stick to the back of the flower.

a photo of diy photo flowers: finished flowers

Optional: Fold a piece of green construction paper in half and cut out a folded leaf shape. Add glue to one half of the leaf and hug it around the newly created stem.

Mother’s Day Flower Craft for Kids: Sunflower Wheel of Appreciation

Our series “Get Crafty” gives you the inspiration for creating inventive DIY projects during the holidays and year-round. Show Mom just how special she is by surprising her with a Sunflower Wheel of Appreciation! Read on to learn how to make this DIY Mother’s Day craft. 

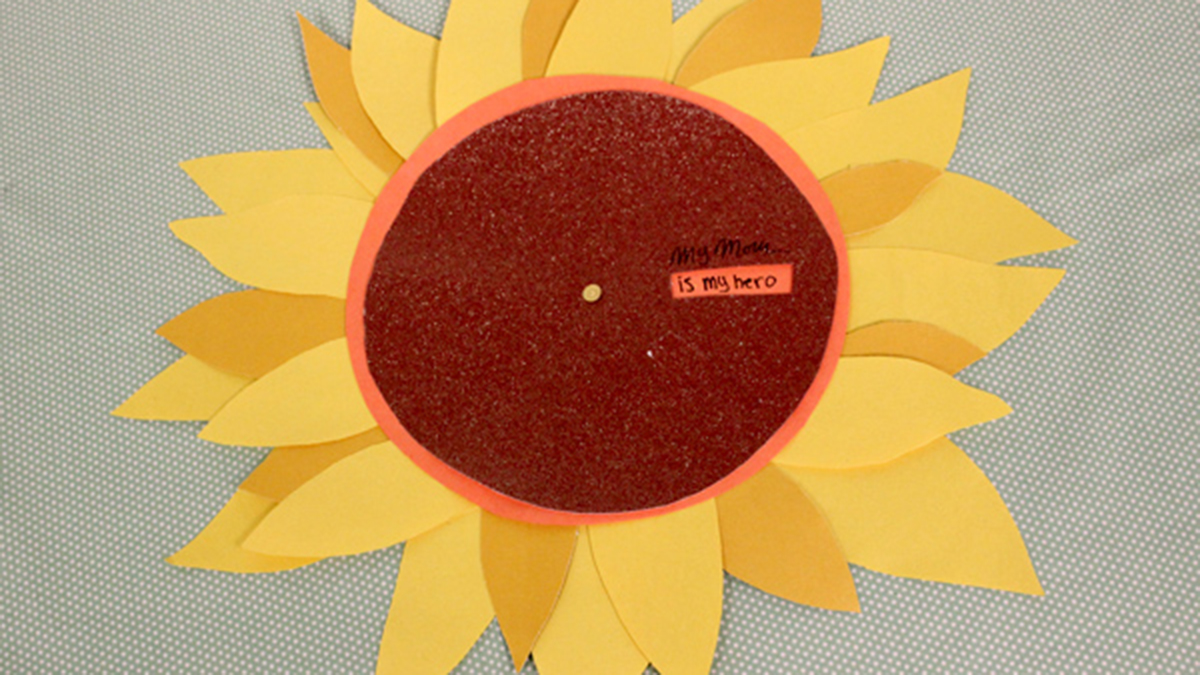
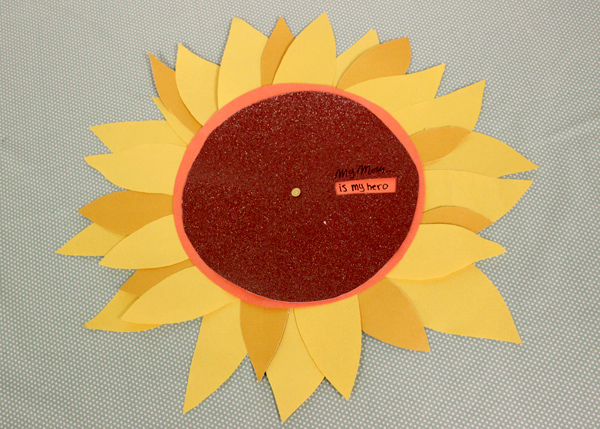
a photo of a sunflower wheel of appreciation

Mom does it all. She cooks, cleans, consoles, and even coaches us through life’s toughest moments. To show Mom just how special she is, make her this Sunflower Wheel of Appreciation to go along with her Mother’s Day flowers. This creative DIY Mother’s Day craft is blooming with compliments that are sure to make Mom smile.

We chose to craft ours to resemble a sunflower, but you can get creative and mix and match colors and shapes to replicate Mom’s favorite flower! Think white and yellow for a beautiful daisy or pink and white for a stunning lily.

Supplies for Sunflower Wheel of Appreciation

  • Cardstock in 2-4 different colors (We used brown, orange, and two shades of yellow)
  • 1 paper plate
  • Scissors
  • Glue
  • 1 fine tip marker
  • Paper fastener

Directions for Sunflower Wheel of Appreciation

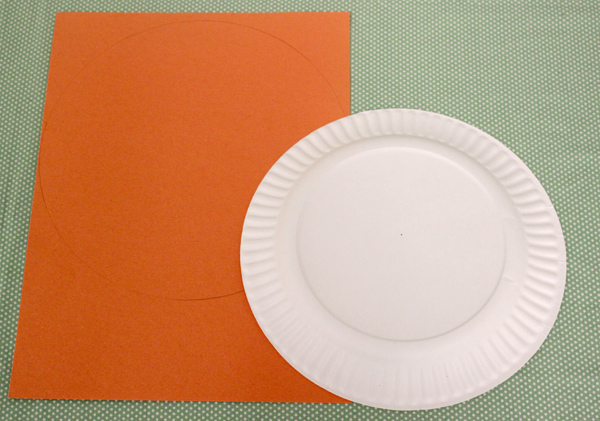
a photo of a sunflower wheel of appreciation: tracing paper plate

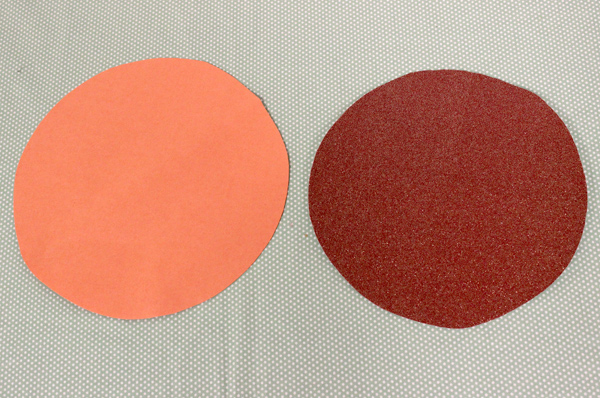
Trace the paper plate onto the piece of cardstock that will become the bottom of the wheel.

a photo of a sunflower wheel of appreciation: two paper circles

Then, trace a circle shape just a bit smaller than the first shape on a piece of different-colored cardstock. If you need a stencil for this part, bend the paper plate in half and trim the ends just a bit. The result will have scalloped edges but will suffice for creating the general circle shape.

a photo of a sunflower wheel of appreciation: cutting out and tracing rectangle

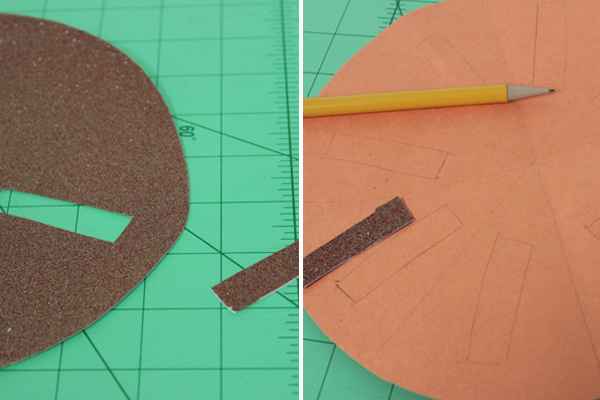
Use scissors or an X-Acto knife to cut out a rectangular shape on the smaller circle. Take the cut-out rectangle shape and use it to create a border for your text on the larger circle. This will assure your text stays within the boundaries of the box.

a photo of a sunflower wheel of appreciation: writing the messages


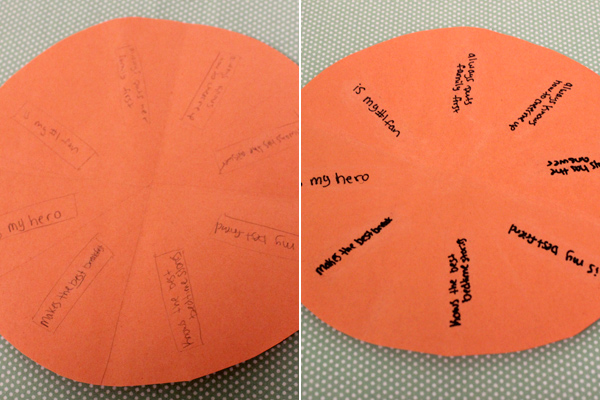
Once you draw your rectangular borders, use a pencil to write a message for Mom in each one. Then, use a marker to go over the letters to make the words pop. Erase any stray pencil markings.

a photo of a sunflower wheel of appreciation: petals

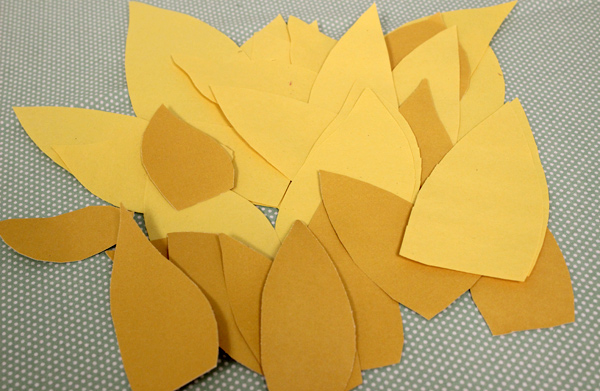
Now, take the cardstock you plan to use for the petals and cut out several petal shapes in varying sizes (they don’t need to be perfect). We used two shades of yellow, but you can stick to just one and still come out with a wow-worthy project.

Apply glue to the wide ends of the petals and stick them to the back of the larger circle.

To complete the wheel, position the smaller circle in the center of the larger circle and seal in the middle with the paper fastener.

Now, give your Wheel of Appreciation a spin and let your Mom know why she’s the best in the world!

a photo of a sunflower wheel of appreciation: mom is my hero message

My Mom…is my hero

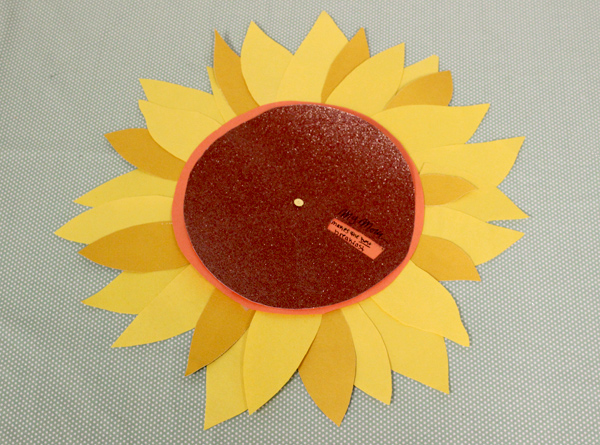
a photo of a sunflower wheel of appreciation: mom makes the best breakfast message

My Mom…makes the best breakfast

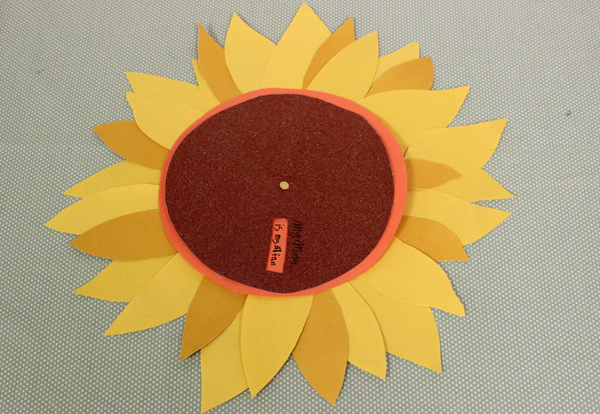
a photo of a sunflower wheel of appreciation: mom is my number 1 fan message

My Mom…is my #1 fan

Mother’s Day Crafts for Kids: DIY Candy Bouquet

Our series “Get Crafty” gives you the inspiration for creating inventive DIY projects during the holidays and year-round. Your Mom is one of a kind, so she deserves a truly original Mother’s Day gift. Here’s how to make her a gorgeous DIY candy bouquet.

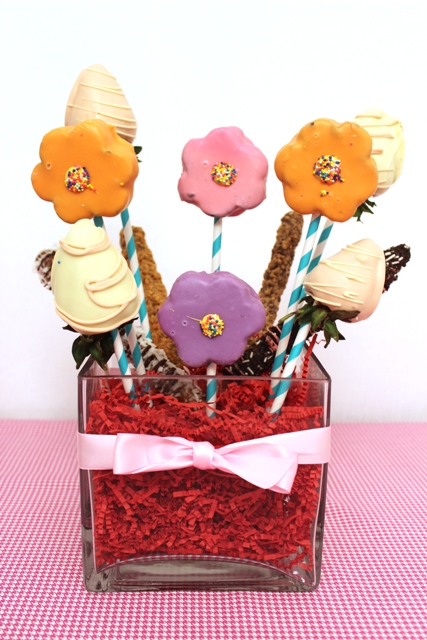
DIY Candy Bouquet for Mother's Day

No one is sweeter than Mom. If she were a food, she be a sugar cookie covered with buttercream frosting and sprinkles. So, while you’re waiting for her fresh Mother’s Day flowers to arrive, get creative and make her a truly original arrangement entirely out of sugary treats!

This gorgeous DIY candy bouquet takes only a few minutes to put together (no baking required!) and is a Mother’s Day craft that no chocolate-loving mama can resist.

Here’s a step-by-step tutorial on how to make one for your mom. After all, she deserves only the very best.

Materials for a DIY candy bouquet

Instructions for a DIY candy bouquet

1. Cut a piece of Styrofoam so that it fits snugly into your vase. Push the Styrofoam block into the base of the vase.

2. Fill the vase with crinkled filler paper in the color of your choice. Make sure to completely cover the top and sides of the Styrofoam so that the white color doesn’t peek through.

3. Pierce different-sized lollipop sticks into the Styrofoam in the spots where you want your candy flowers to go. Using both small and large lollipop sticks will give your arrangement height and dimension.

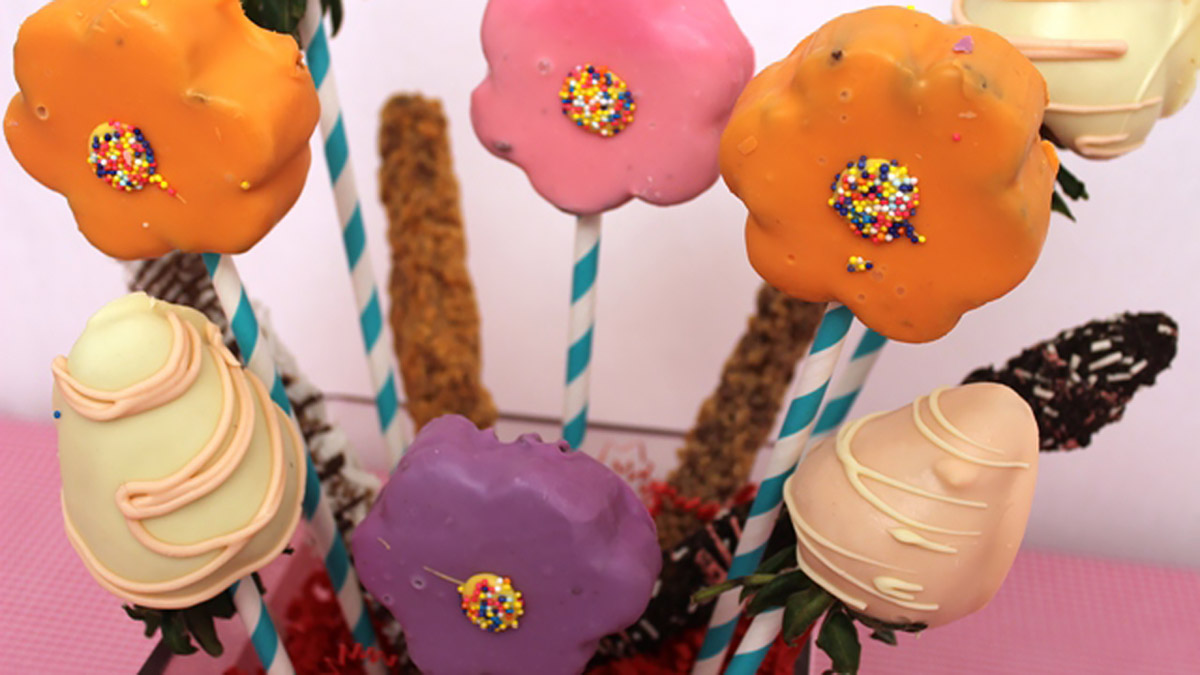
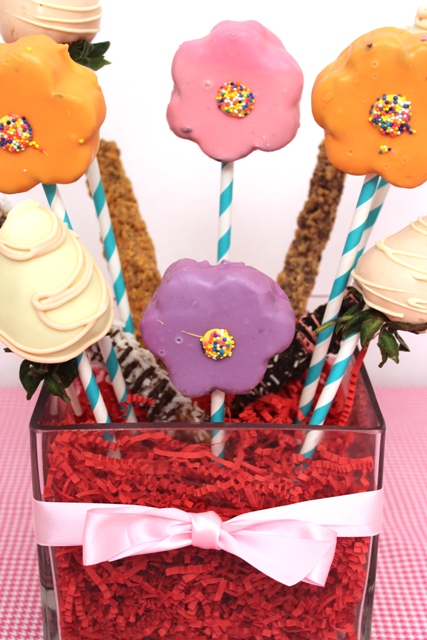
Close-Up of Mother's Day DIY Candy Bouquet

4. Stick one green candy-striped straw into the base of each mini brownie cake and chocolate-covered strawberry. Then, take the skewered brownies and strawberries and start arranging them in the vase by placing them on top of the lollipop sticks, just like a flower head. (The lollipop stick should go into the hole at the bottom of the straw.) This will securely anchor the treats to the Styrofoam and hold them up straight.

5. Take a few candy bar pretzels and stick them straight into the filler paper to fill up any empty spots in the vase.

6. Tie a ribbon around the vase to make your sugary bouquet more realistic!

If you’re not the DIY type, don’t worry. You can still show your mom how sweet she is by sending her a delicious, readymade Mother’s Day fruit bouquet instead. It’s overflowing with Mom’s favorite fruit, and it will hook her up with her chocolate fix, too!

DIY Hot Air Balloon Floral Centerpiece

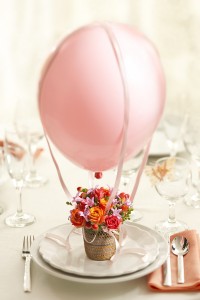
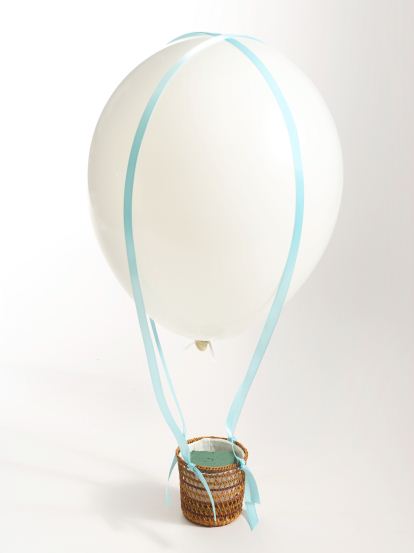
Pink and Orange Floral Hot Air Balloon Place Setting and Centerpiece

Mom does so much for the family throughout the year: No matter how long her to-do list is, you know you can always count on her for anything. Because she means so much, let her sit back and enjoy herself on Mother’s Day, and show her how appreciated she is. Treating your mom to a nice brunch is the best way to make her feel like a queen bee: Since you’ve already taken care of everything, Mom doesn’t have to lift a finger. To make her day even more special, pick a fun and truly original theme for your luncheon: DIY hot air balloon decorations!

This beautiful hot air balloon decoration adds a whimsical take-me-away touch to any Mother’s Day table setting. As soon as she sits down, Mom will feel like she’s floating among the clouds without a care in the world! This Mother’s Day craft is really simple to make, so you can make a big, loving statement with minimal effort. Here’s how to make a DIY hot air balloon decoration for Mom on Mother’s Day!

Materials needed for DIY hot air balloon decoration

  • Basket or container
  • Plastic cup or glass votive
  • Petite flowers, berries, and/or foliage
  • Floral foam
  • Ribbon
  • Balloon

How to make a hot air balloon floral arrangement

How to Make a Hot Air Balloon Arrangement
  1. First, choose a container that you’ll use as the basket for your hot air balloon. A votive or a small can covered in fabric is a great option if you want to make a smaller place setting. For a centerpiece, a basket in the size of your choice works perfectly. For our place setting, we used a rattan votive holder.
  2. If your container isn’t already waterproof, line it with a plastic cup or a glass votive holder so the flowers won’t leak when you water them.
  3. Use a piece of floral foam to arrange some petite flowers, berries, or foliage in the container, or just arrange them right in the container filled with water. Because you’re using a small container, lateral blooms are best to use: One stem has multiple bunches of tiny flowers that you can cut off to create a smaller arrangement. We used spray roses and hypericum berries for our arrangement, and we placed individual hyacinths in between for a fragrant accent.
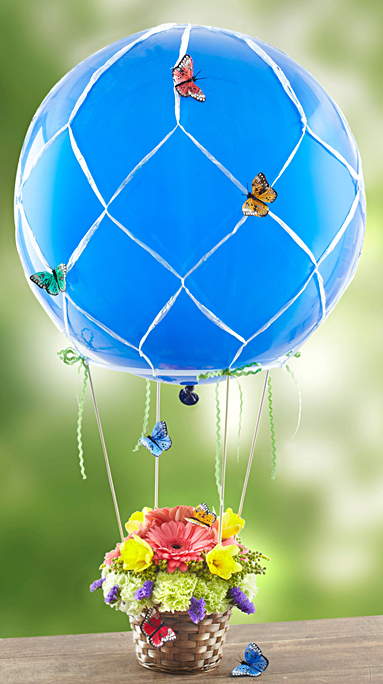
Butterfly Hot Air Balloon Arrangement
  1. There are two different ways you can make the hot air balloon:
    With helium:
    Fill a balloon with helium and criss-cross some ribbon around the balloon in a netted pattern. Use some adhesive tape to keep the ribbon in place on the balloon. Take the loose ends of the ribbon at the bottom of the balloon and tie them onto the container or around some of the flowers.
    With air: If you don’t have access to helium, blow up the balloon with air and tie a clear straw around the base of the balloon. Anchor the straw into the arrangement, then tie the ribbon around the balloon and tuck the strings into the arrangement or the corners of the container.
  2. Personalize the arrangement just for mom by adding your own unique touches. You can use our design as inspiration! We chose a pink balloon for Mother’s Day because it’s such a beautiful feminine color, and it’s perfect for spring. For the flowers, we went with bold, trendy colors like orange, hot pink, and lavender. This mix of classic and modern hues gives the arrangement a look that’s soft yet vibrant. But you can choose your own color palette, from blues and greens to reds and yellows. Decorating the balloon netting with small accents, such as butterflies or rhinestones, is also a great idea and gives your hot air balloon a sweet finishing touch.

DIY Mother’s Day Flower Gift: Rose Bouquet Accented with Succulent ‘Flowers’

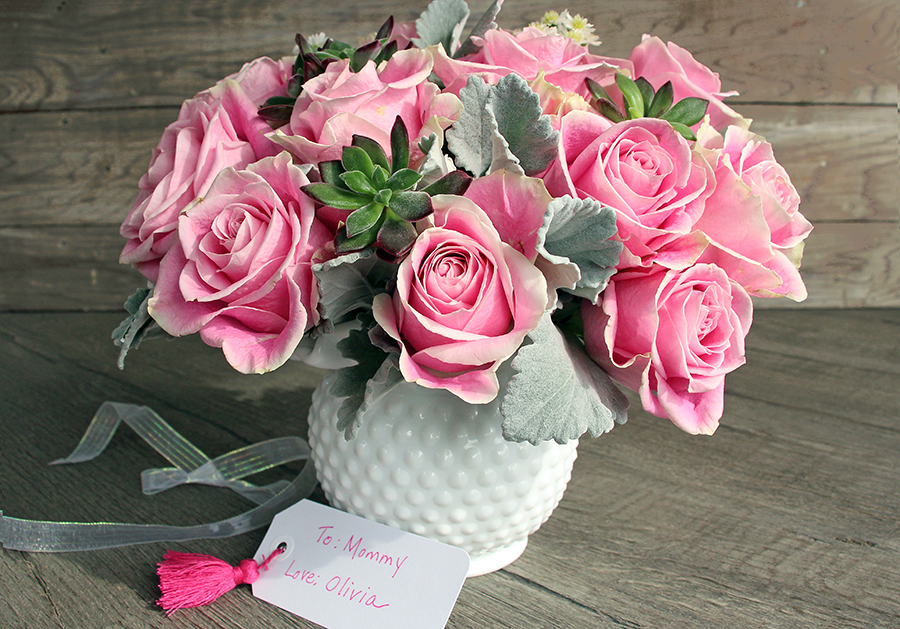
DIY Mother's Day Flower Gift with rose bouquet in cachepot

I love putting the right combination of flowers and container together to create a gift that speaks to a person’s heart. This time it spoke to my heart as well because I was creating a DIY Mother’s Day flower gift for my granddaughter to give to her mom, my daughter-in-law, Lina.

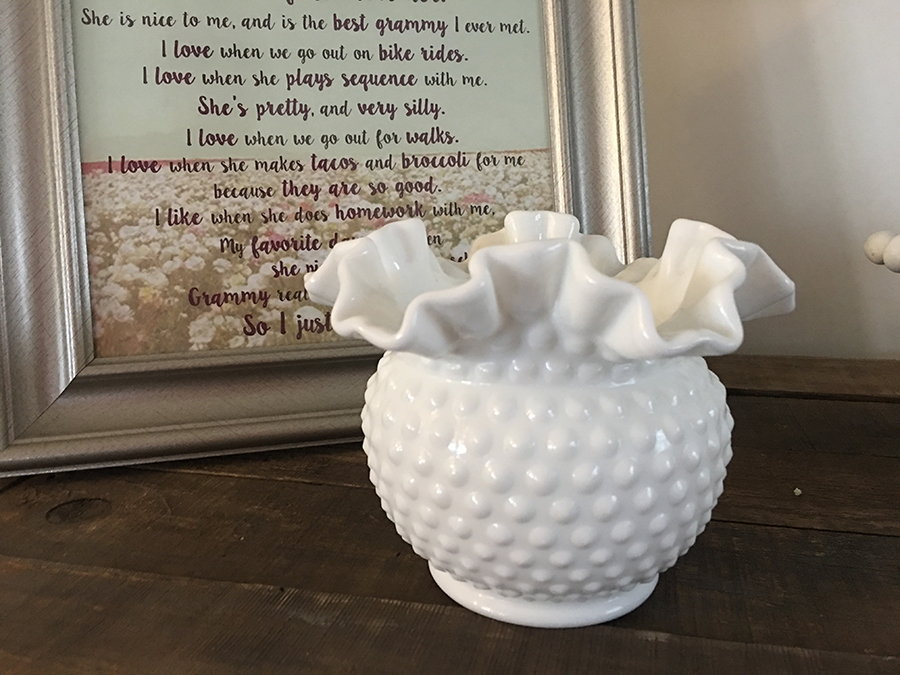
Lina and I both love objects with a story and history, and she has always admired my collection of Made in America hobnail milk glass from the Fenton® company!

DIY Mother's Day Flower Gift with cachepot

I have given Lina a few pieces over the years, including this cachepot. It’s one of my favorite shapes and sizes. It looks stunning filled with fresh-cut flowers and just as fabulous when empty with an LED votive light inside. It gives the milk glass a pretty warm glow.

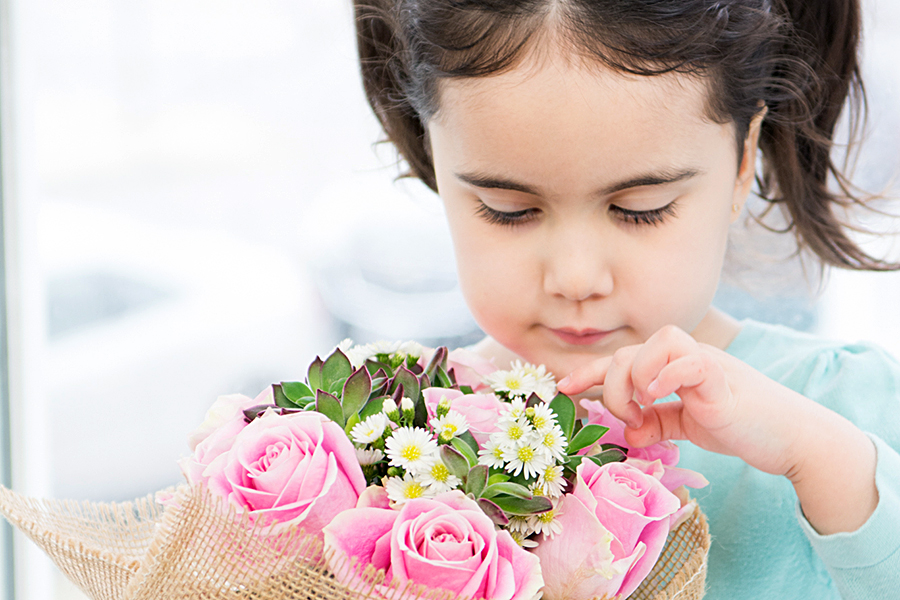
DIY Mother's Day Flower Gift with girl holding flower arrangement

Once we chose the container, it was time to choose the flowers for our bouquet. Olivia knows what she likes, and pink is her favorite color!

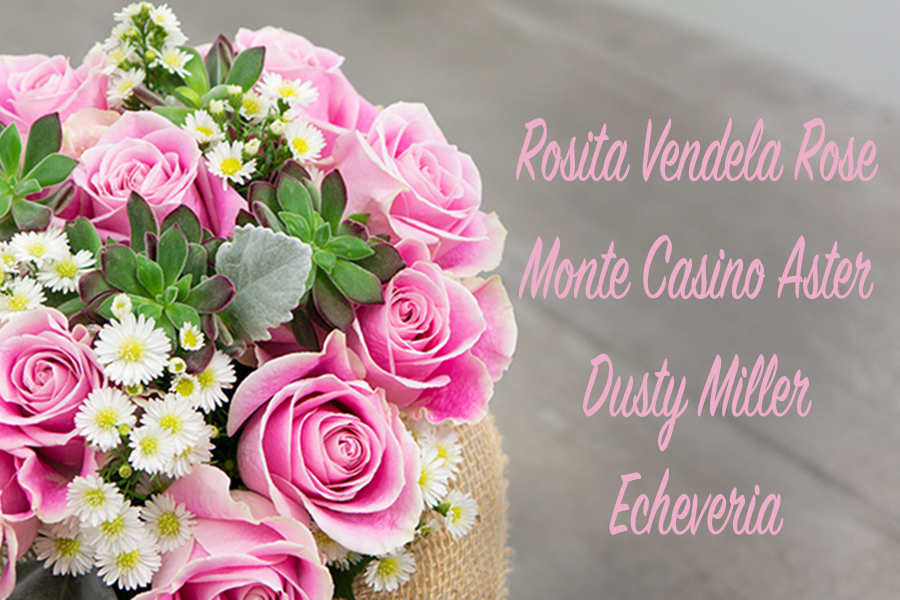
DIY Mother's Day Flower Gift with rose bouquet

The Rosita Vendela rose is so beautiful and has a vintage vibe to it, so I thought it would make the perfect focal flower. We complemented that look with a few stems of dusty miller and monte casino. The finishing touch — and one that I know Lina is going to love — is the addition of cut succulents. An obsession with succulents is another thing Lina and I have in common!

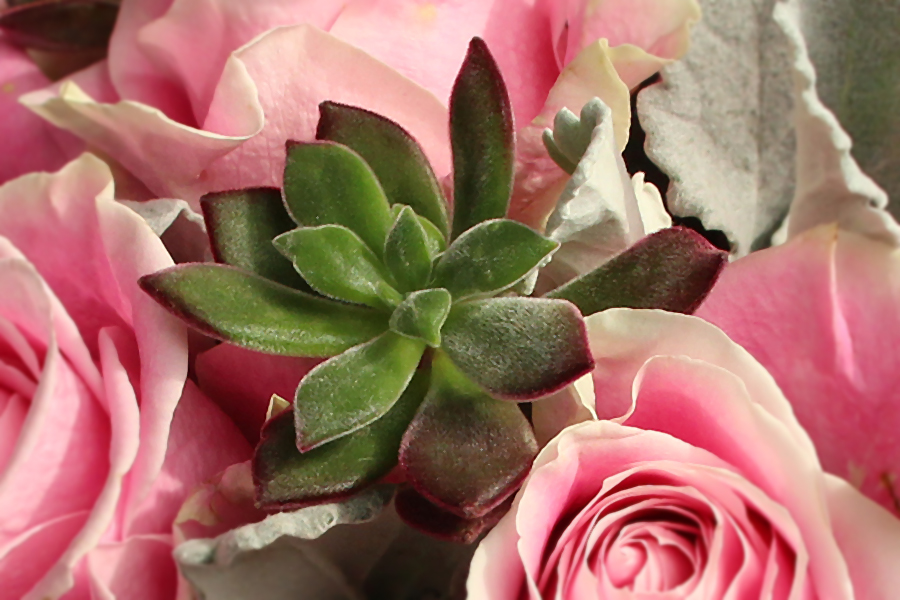
DIY Mother's Day Flower Gift with closeup of succulent flower

This succulent is a variety called Echeveria Devotion.

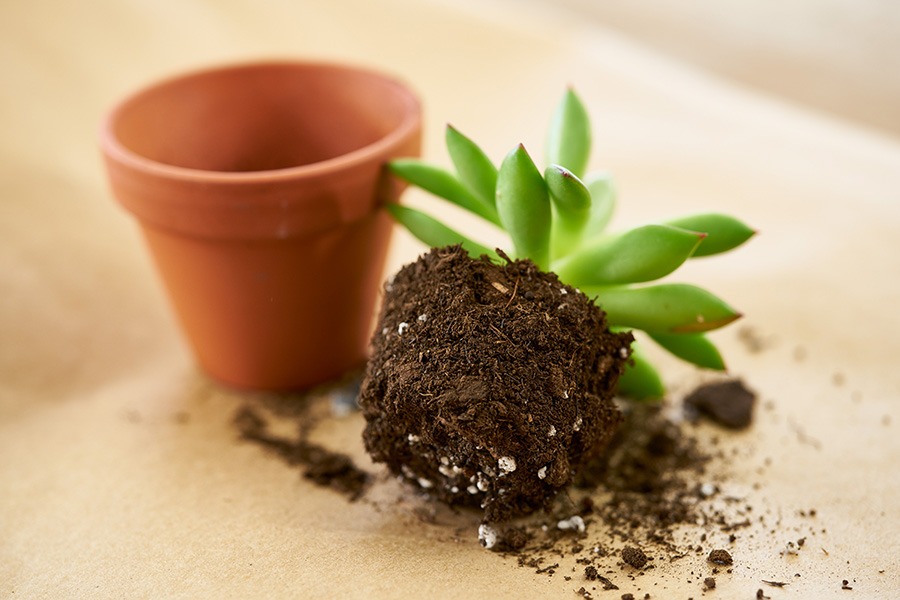
Here’s how easy it is to turn a potted succulent into a fresh-cut flower that can be used in a bouquet.

DIY Mother's Day Flower Gift with succulent out of pot

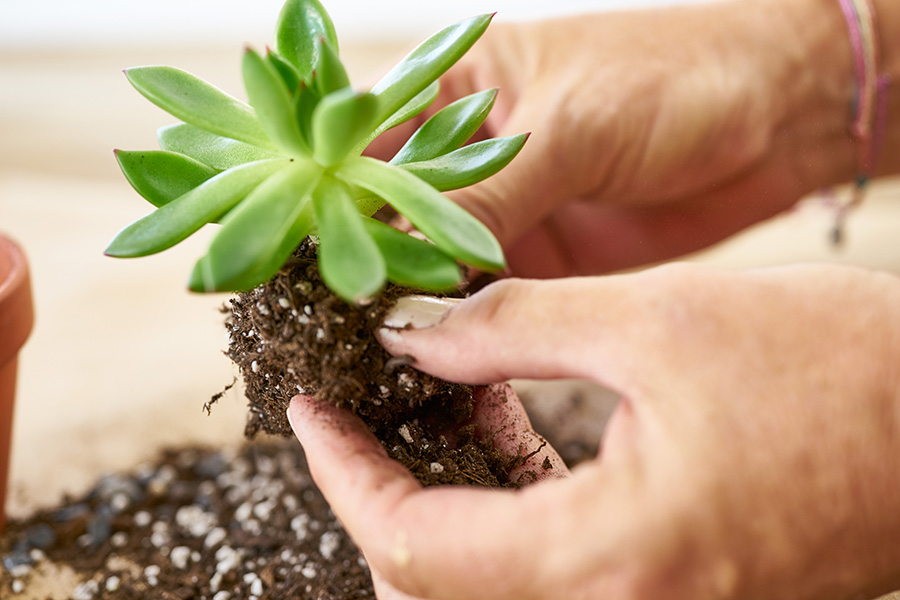
1. Remove plant from pot. For smaller to average size bouquets, use 2-3” potted succulents.

DIY Mother's Day Flower Gift with removing dirt from succulent roots

2. Gently remove dirt from the roots. You can even remove the roots entirely if you want without damaging the plant.

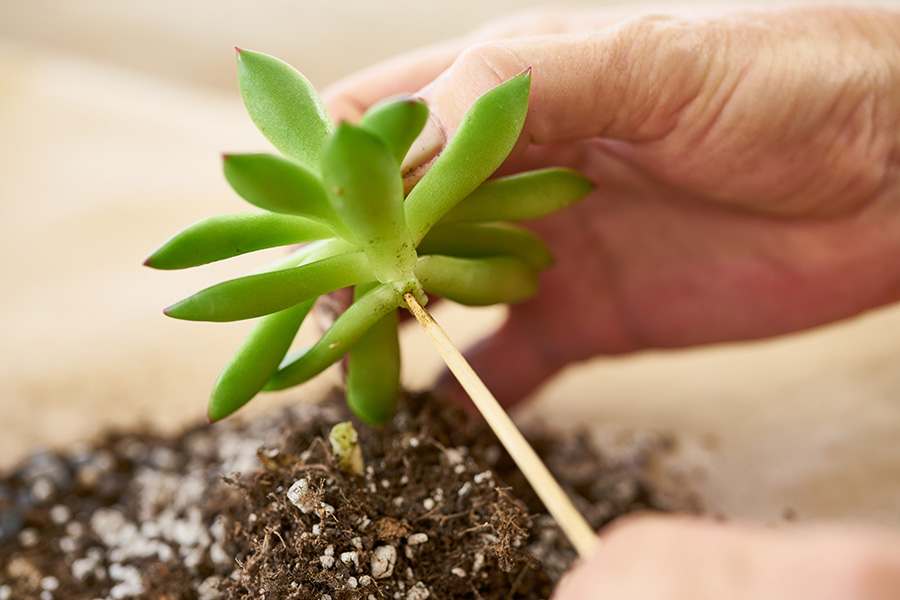
DIY Mother's Day Flower Gift with skewering succulent

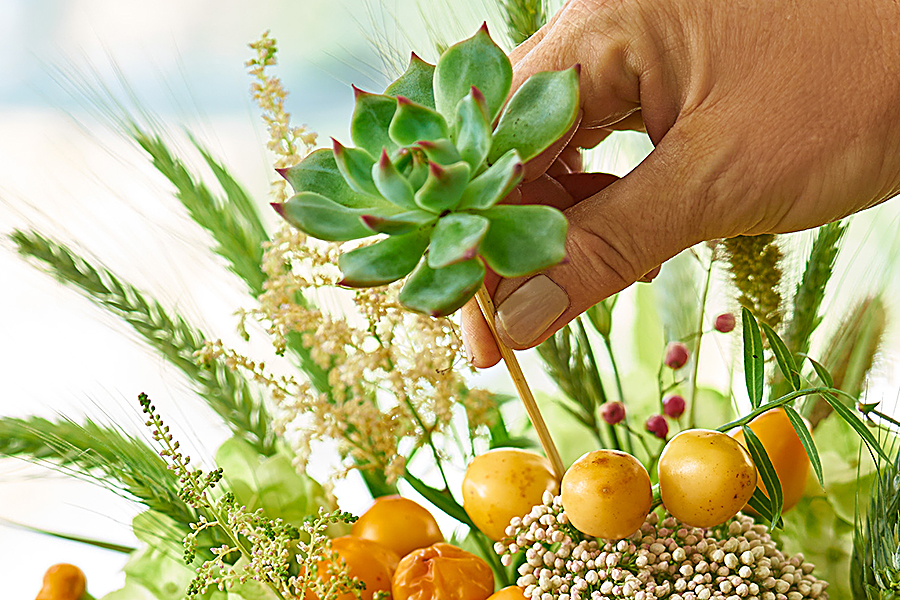
3. Insert a wooden skewer into the bottom of the succulent.

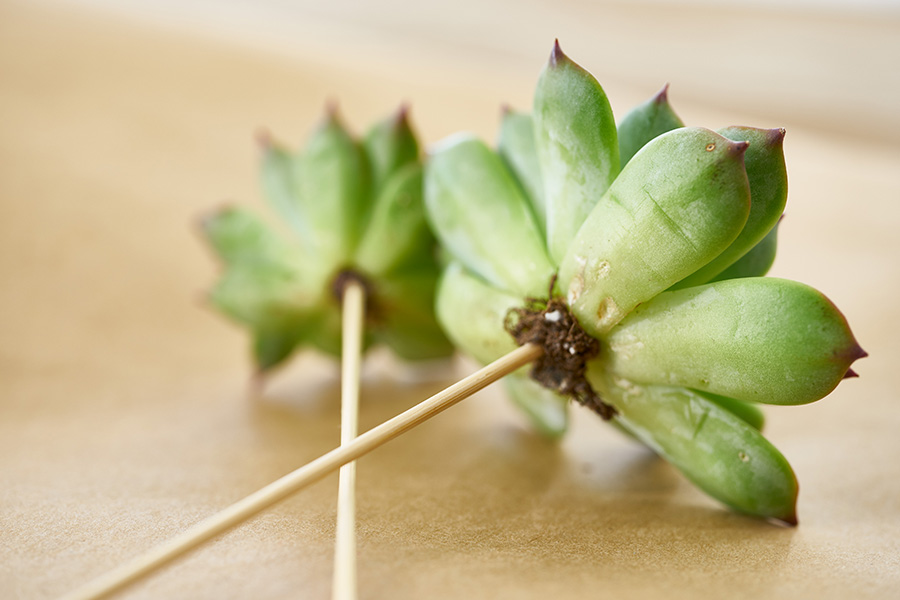
DIY Mother's Day Flower Gift with succulent flowers

That’s all it takes!

DIY Mother's Day Flower Gift with adding succulent flowers to bouquet

I find it works best if you create your bouquet or arrangement first and then insert the succulents. The surrounding flowers will help support the extra weight of the cut succulent. They will look beautiful for weeks and can then be re-rooted.

DIY Mother's Day Flower Gift with girl holding rose bouquet

We added a simple burlap wrap, pretty ribbon, and card that Olivia accented with a bright pink tassel to create the perfect DIY flower gift for Mother’s Day that not only speaks to the heart but totally melts it!

DIY Mother’s Day Gift Idea: Wood-burned Birch Vase

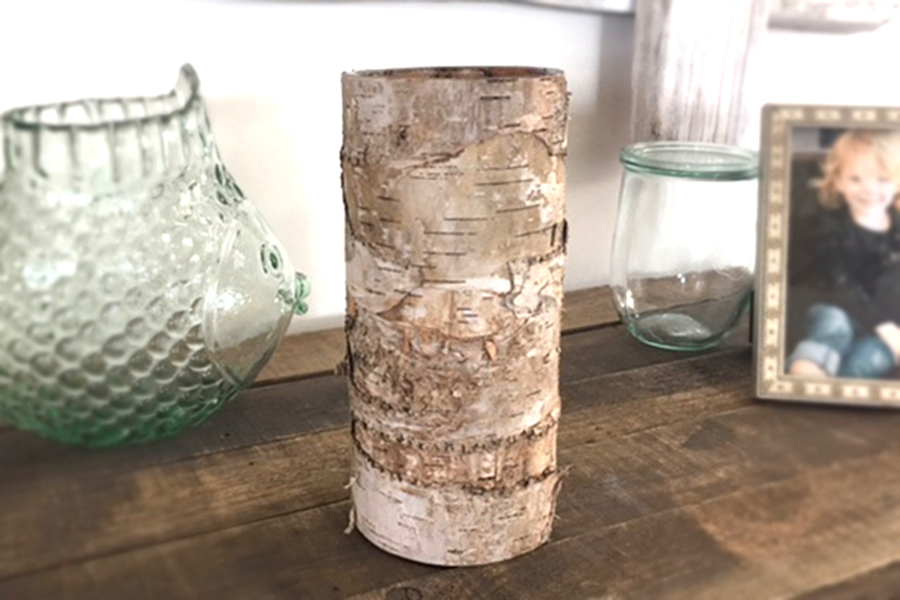
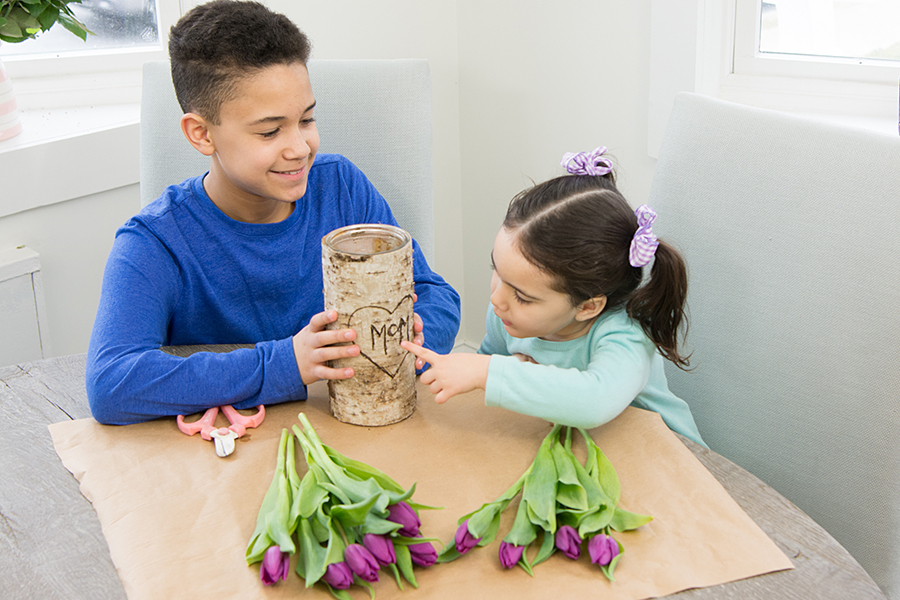
My grandson Manny was so impressed with a post I did showing how to use a wood-burning pen to personalize a birch container that he asked me to help him make one as a DIY Mother’s Day gift idea for his mom. Of course I said yes!

diy mother's day gift idea with piece of birch

I chose a tall cylindrical-shaped vase for him to work with because it is the perfect shape to fill with beautiful spring tulips.

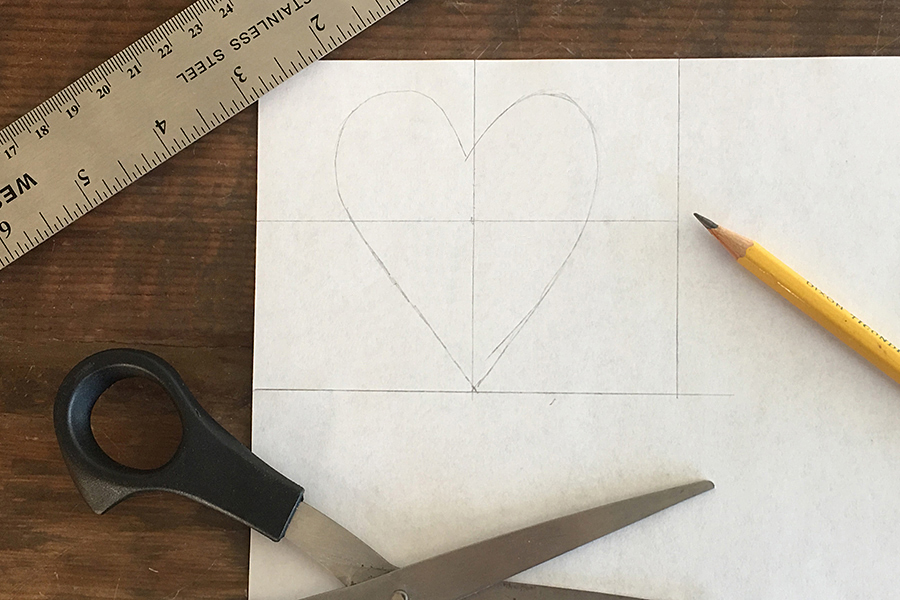
diy mother's day gift idea with drawing heart on paper

We started by making a template for the heart.

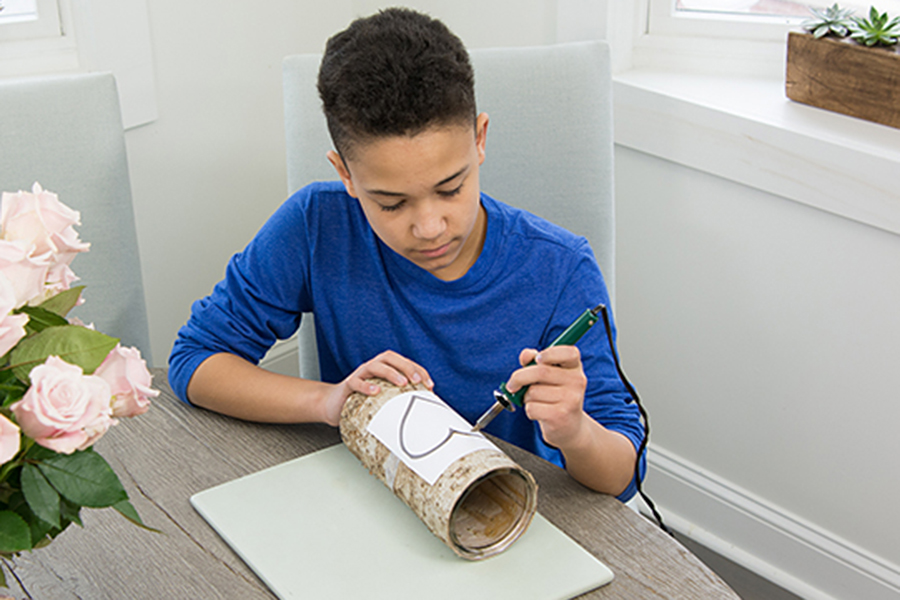
diy mother's day gift idea with drawing heart on birch

Manny used the template to create the basic guide.

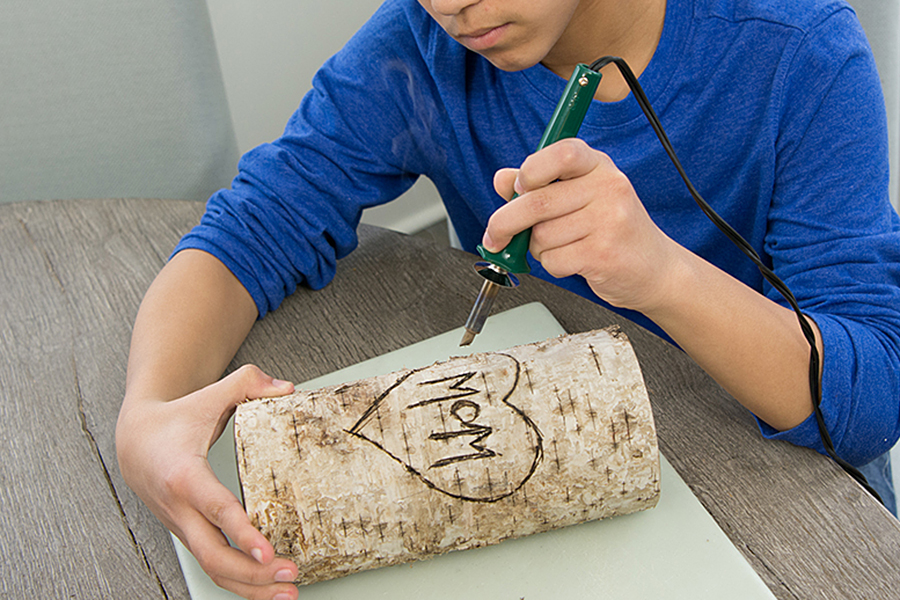
diy mother's day gift idea with burning heart design on birch

Then we removed the template and started to fill in and fill out the lines to create definition. It’s better to go over the design lightly multiple times.

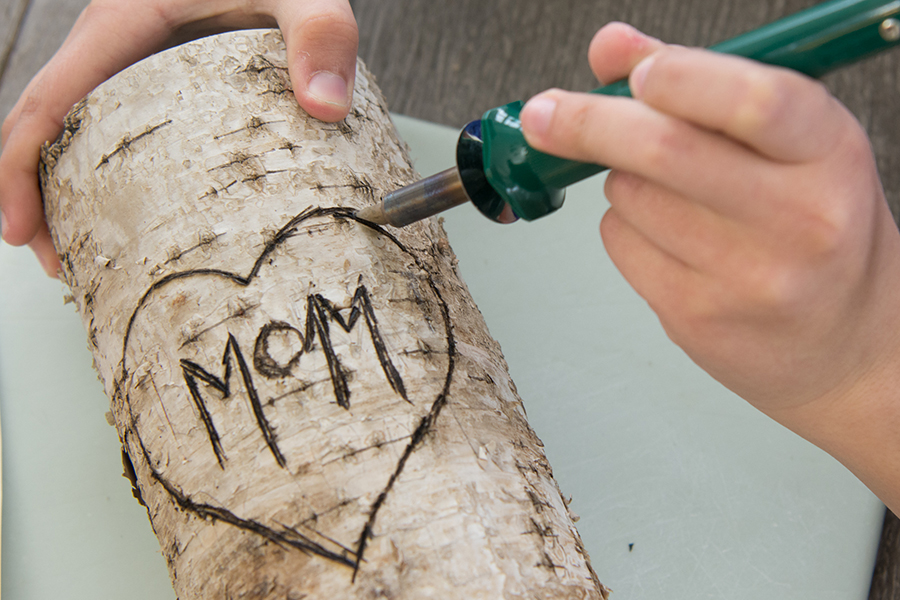
diy mother's day gift idea with burning birch with pen

Tip: Keep going over the same area with the pen until you are happy with how it looks.

diy mother's day gift idea with kids holding birch vase

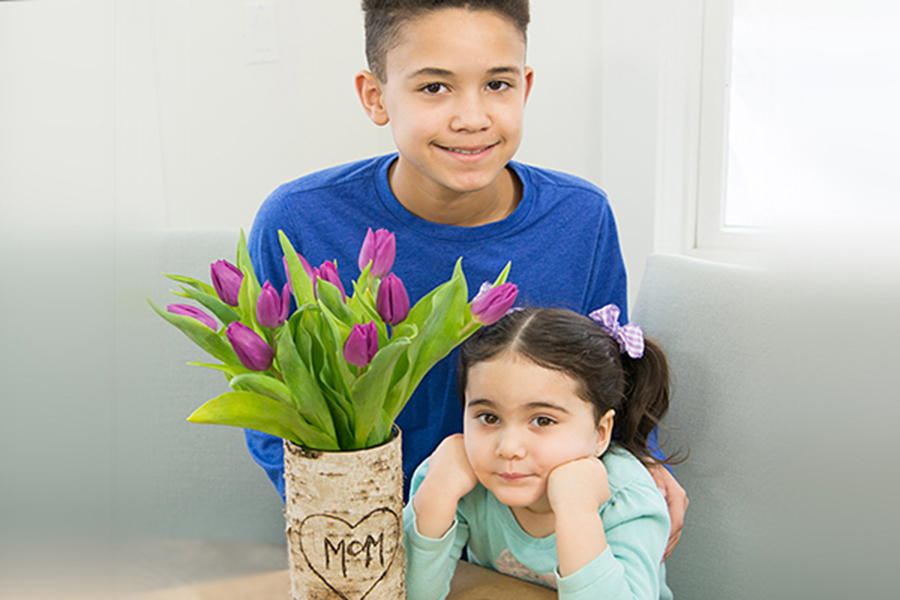
Once Manny was satisfied with the wood-burning job he did, it was time to make the arrangement…with a big assist from little sister Olivia!

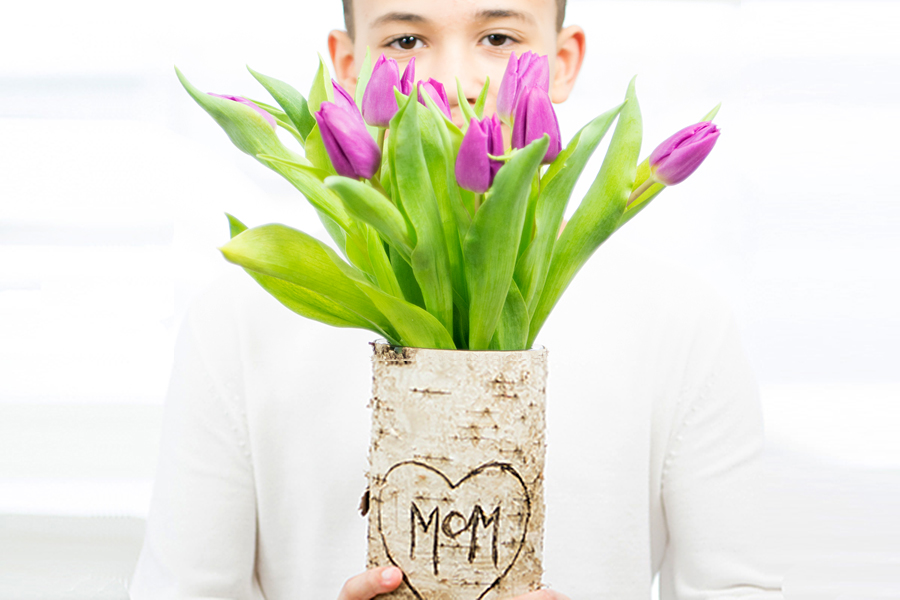
diy mother's day gift idea with birch vase filled with flowers

Tulips are the perfect flower for children to work with because they’re so easy to arrange. Simply fill the vase with clean, fresh water, give the stems a cut, and place them in the vase one at a time!

diy mother's day gift idea with by holding birch vase

A job well done…and a DIY Mother’s Day gift idea that Mom will truly love!

DIY Mother’s Day Gift: Succulent Mug Planter

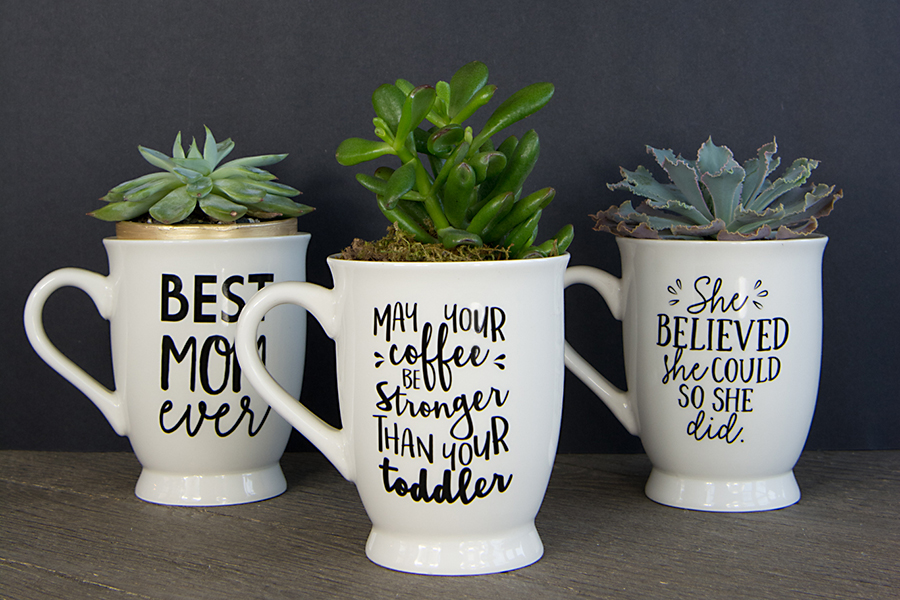
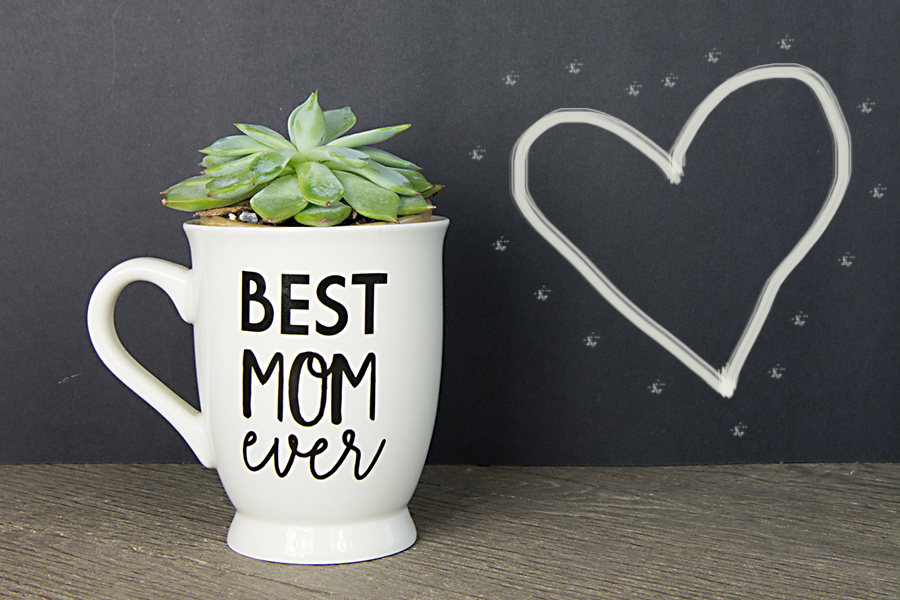
DIY Mother's Day Gift with succulent mug planters

As easy as it looks to use a Sharpie® to give your mom’s DIY Mother’s Day gift that personal touch, it just might not be your thing.

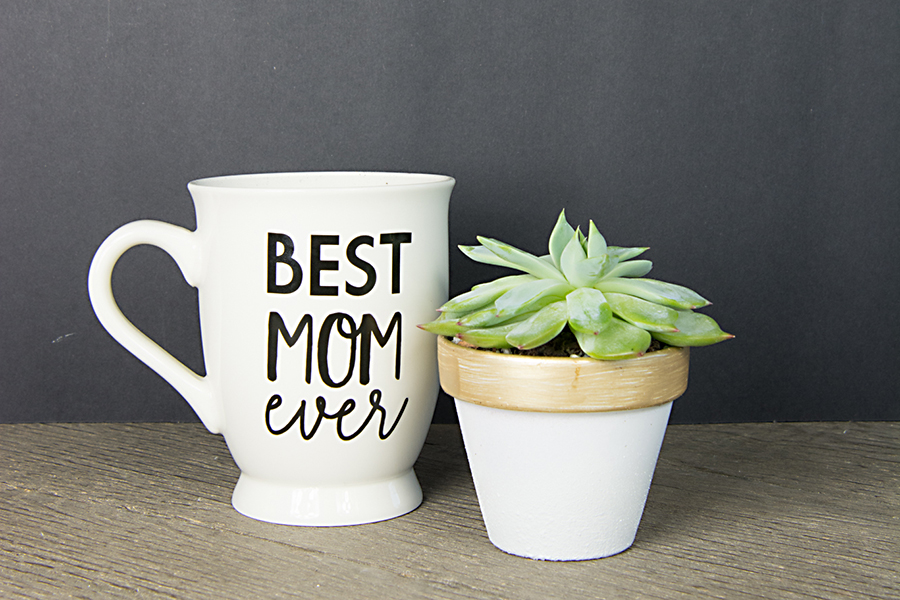
DIY Mother's Day Gift with mug and succulent

Well, here’s a super cute and super easy solution. Pick up some Mother’s Day coffee mugs and personalize them for every mom you know. I immediately thought of so many mom friends that I wanted to surprise with a DIY Mother’s Day gift on their special day!

DIY Mother's Day Gift with succulent in mug

But, of course, I couldn’t just let them sit there empty, could I?  Not when a 3-inch potted succulent fit so perfectly in the mug.

You could also transplant the succulent directly into the mug, but I like the idea of using the mug as a gift within a gift. It gives the recipient the choice of using it as a planter or for their oh-so-necessary cup of morning caffeine!

Make it Personal: Your Mom, Your Story

The hottest plant in home décor by far is the succulent I have a bit of an obsession with them (that’s a whole other story, and some day I’ll tell you about it!), but right now I want to show you a few easy ways to use a succulent garden to make DIY succulent craft specifically for your mom.

diy succulent craft with succulent garden

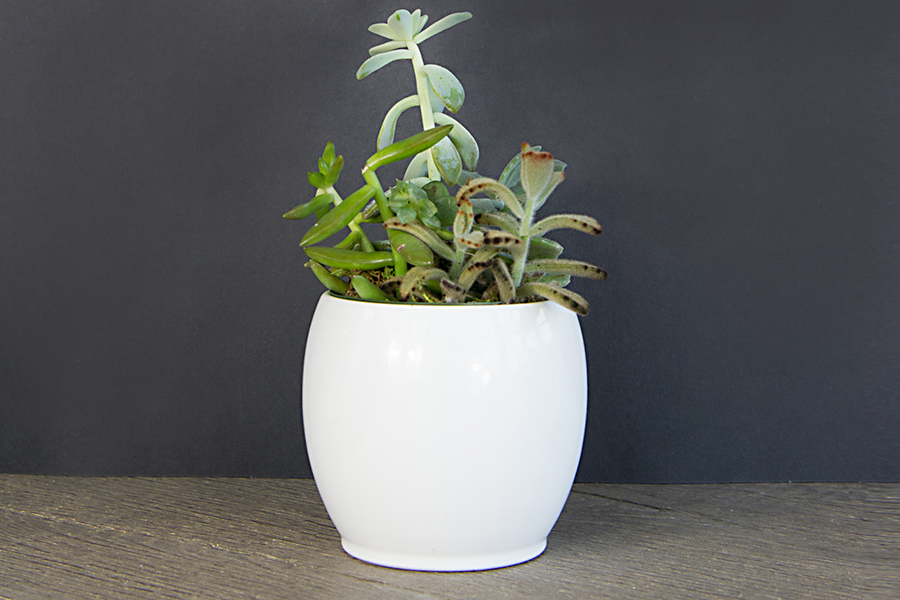
Start with a pre-made succulent garden in a clean, simple container.  The succulent garden is perfect for this project.

diy succulent craft with sharpie

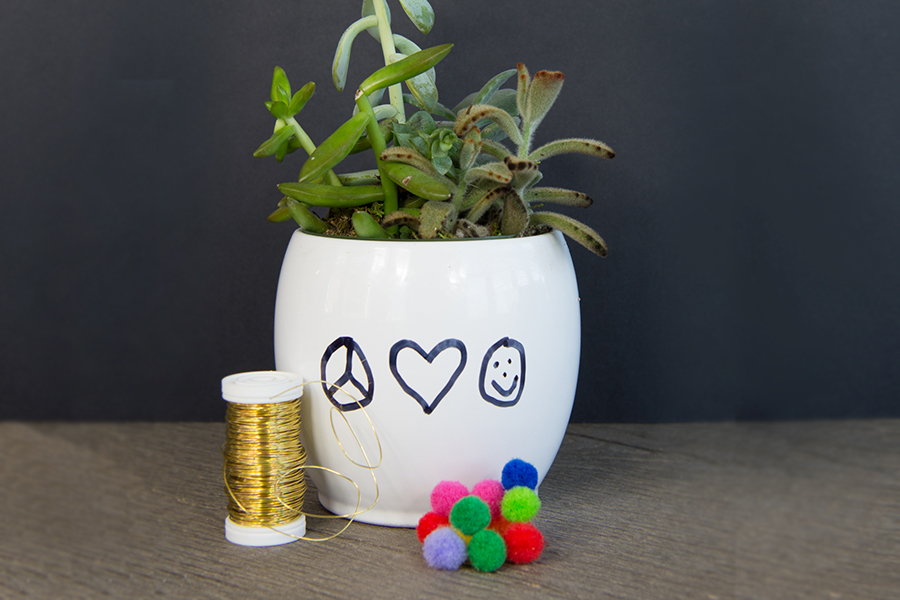
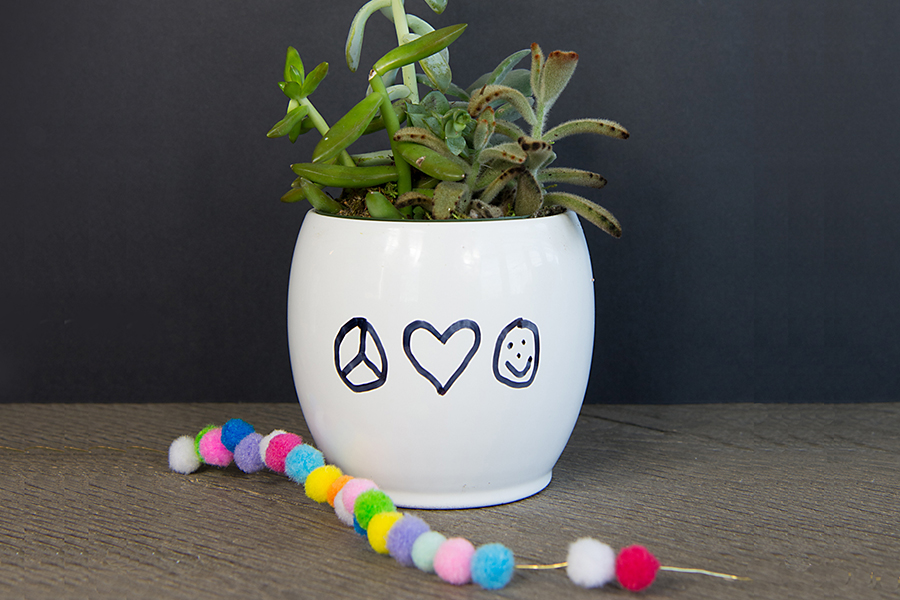
For a gift from a young child, you can go as simple as having them write a special message for mom directly on the container. I worked with my granddaughter, Juliette, on this project and let her do her thing. “Peace, Love, and Happiness” has been our special thing since she was very little!

diy succulent craft with wire and pom poms

But she wasn’t done there. We have done a few projects together with pom-poms. They are such fun and make any project pop.

diy succulent craft with pom poms on wire

Instead of gluing, she used a thin gold wire, cut to size to be able to wrap around the container, and threaded the pom-poms, alternating the colors.

diy succulent craft completed

Doesn’t it look adorable? Perfect for a desk or bedside table!

diy succulent craft with vintage flowers

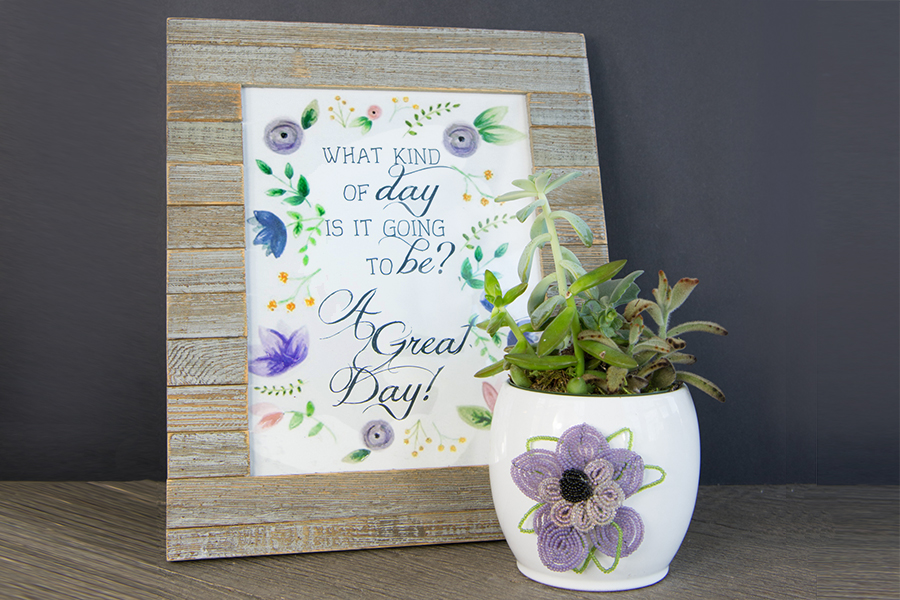
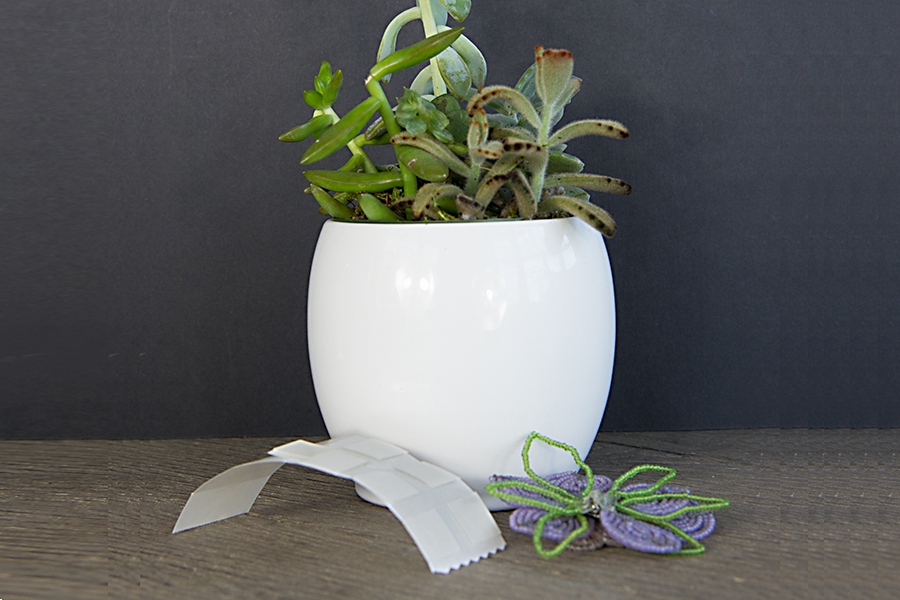
Another way to make this succulent garden one of a kind is to add an embellishment. I have a collection of vintage beaded flowers that I picked up years ago. I’ve been using them to add that special touch to many DIY projects ever since.

diy succulent craft with completed with vintage flowers

This one couldn’t be easier to do. Using your adhesive of choice, attach the embellishment directly to the container. I used U-Glue Dashes by Oasis.

I love how the vintage beaded flower changes the look of the modern container. I especially like the way the succulent garden works so well with a previous Mother’s Day gift that I cherish dearly!

I’ve been asking my kids every day for the last 30 or so years, “What kind of day is it going to be? A great day!”  My daughter Meggie had it made into a hand-painted, framed piece of art!

Exit mobile version