How to Create Romantic Florals With Shabby Chic Founder Rachel Ashwell

The series “Seasonal Design” covers home decor and how flowers elevate an environment. In this story, we speak to Shabby Chic® creator Rachel Ashwell about how to create romantic floral designs for spring, or any time of year.

romantic florals with Rachel Ashwell arranging white flowers

Rachel Ashwell created one of the most popular design styles of all time — the global phenomenon known as Shabby Chic®. But, for her, it’s more about the emotion than the look. “The secret to life is the feeling,” she says. “Knowing what you feel and being conscious of that, whether in a space, in your clothing, or with a person, is everything.”

And in her iconic designs of soft, floral upholstery fabrics, weather-worn furniture, and vintage pieces, she creates the feeling of serenity with an ethereal, dreamlike quality.

That otherworld feeling flows from her mantra of “beauty, comfort, and function,” a filter that applies to everything in her solo store in Santa Monica, California, and her signature brands sold at leading retailers. Though known since 1989 for overstuffed, oversized, unwind-here soft furniture and fabrics and a white and pastel palette, Ashwell insists she is not a design trendsetter or even an interior designer.

Instead, her style has a “timeless, traditional neutrality about it” she says. Layering multiple looks like incorporating vintage flea-market finds like a gold mirror or crystal chandelier with an overstuffed chair is her unique way of telling a story through design. In her aesthetic, one can also see — and feel — her English countryside roots and love of Los Angeles, where she mostly lives.

Where Rachel Ashwell finds inspiration

Ashwell considers herself a highly sensitive and soulful person. “The escape of beauty is a very important element in my life.” Whether that’s a sojourn to her native English countryside or a stretch of time in a Malibu surf shack, she finds the enduring beauty of nature soothing. Flowers are a huge part of that inspiration, whether found in a beautiful old chintz fabric, a teeming floral garden, or a chandelier with crystal-shaped flowers.

Flowers enrich my soul and inspire my sense of beauty.

Rachel Ashwell

And then there are Ashwell’s romantic floral arrangements. They combine a soft nostalgia with classic tradition. She says she has a “spiritual connection to the beauty of blooms.”

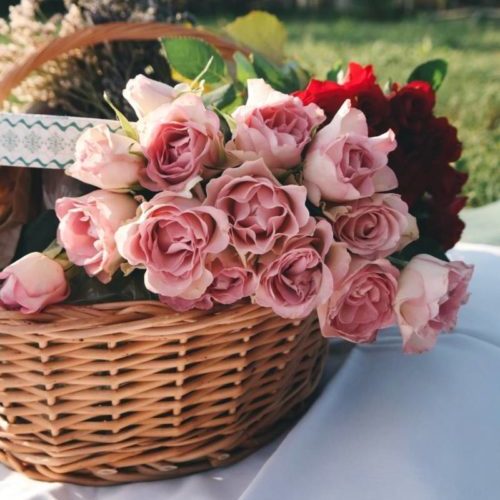
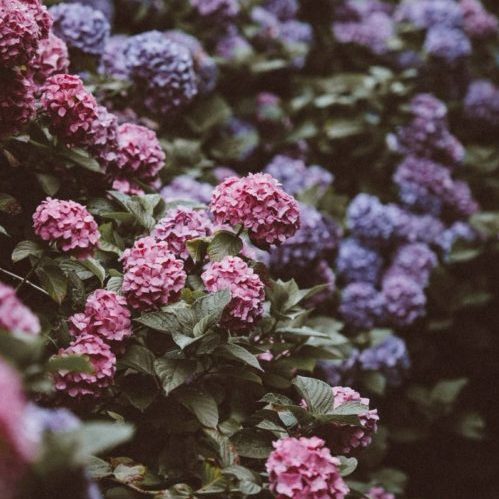
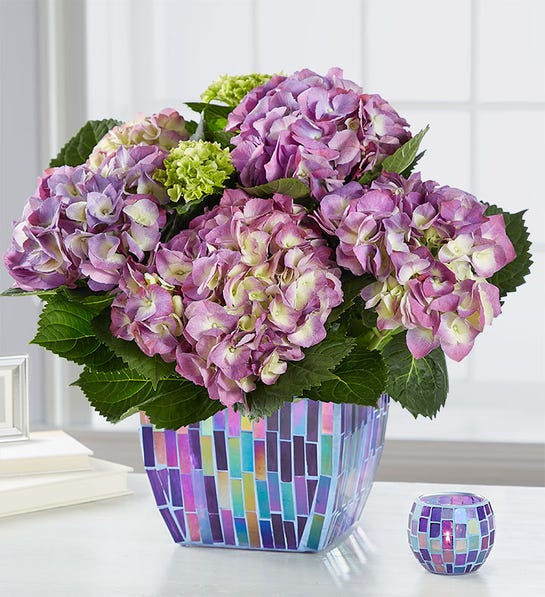
Her garden in Santa Monica is “a heaven on earth of a mass of blooms,” she says, filled with English garden roses, sweet lavender, billowy hydrangea, and fragrant gardenias. Certainly “atypical now in a neighborhood of easy-care lawns and drought-resistant shrubs,” in LA, but consistent with her palette of pale pinks, pastel blues, and white and her feeling of sanctuary. And she believes we can all benefit by bringing in the feminine, soft, and romantic by way of flowers. “Flowers enrich my soul and inspire my sense of beauty.”

Here are Rachel Ashwell’s tips for creating, placing, and enjoying a romantic floral arrangement.

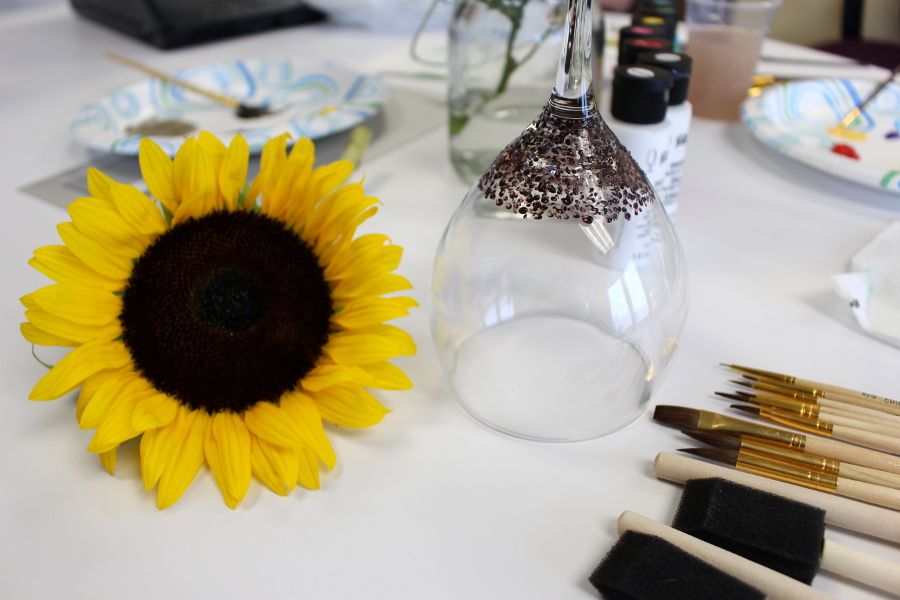
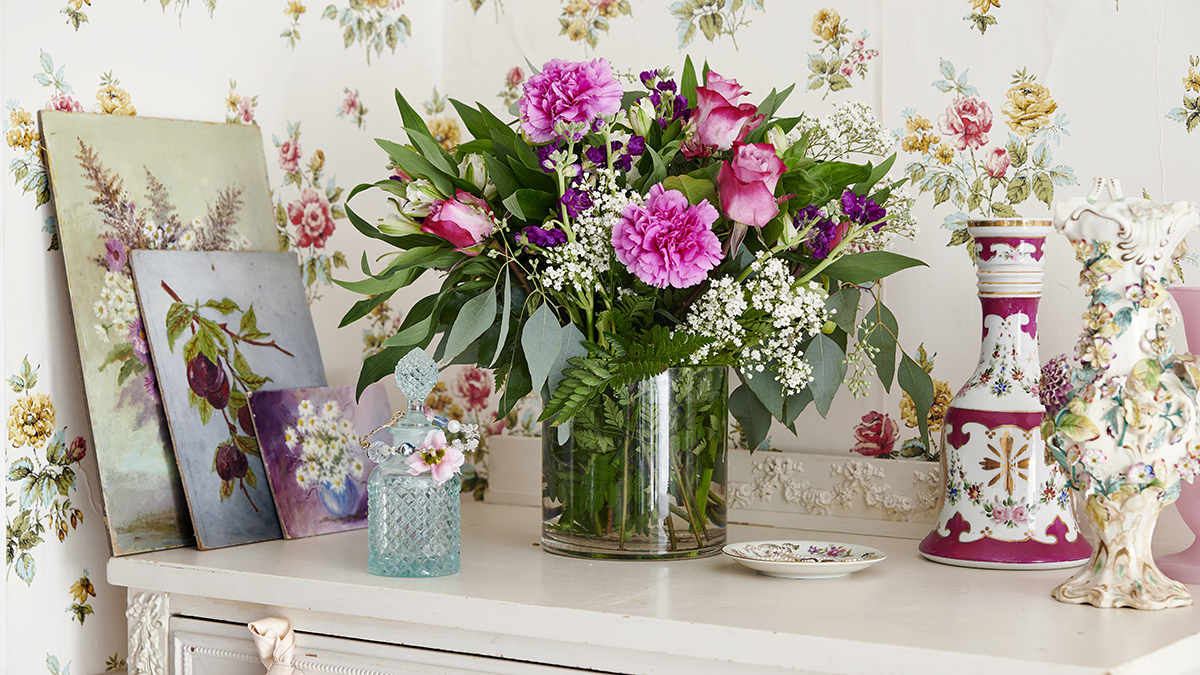
Finding the right floral vase

romantic florals with flower arrangements by Rachel Ashwell

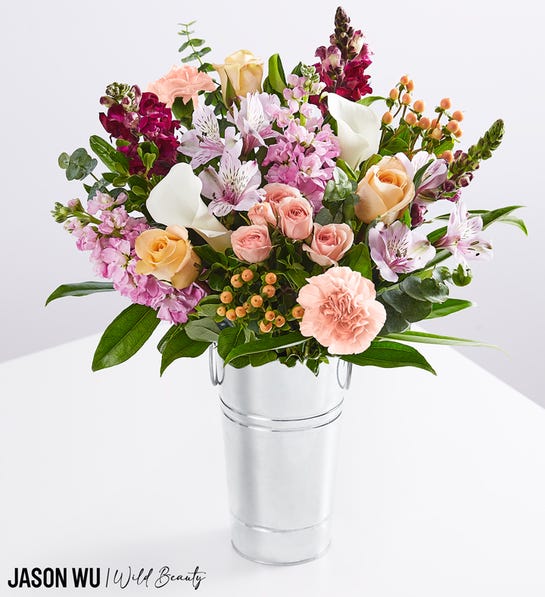
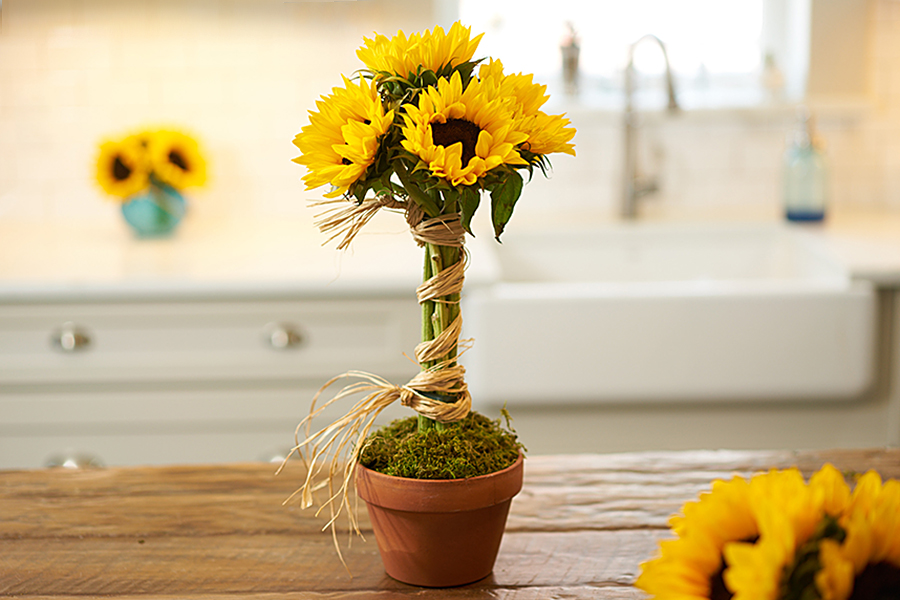
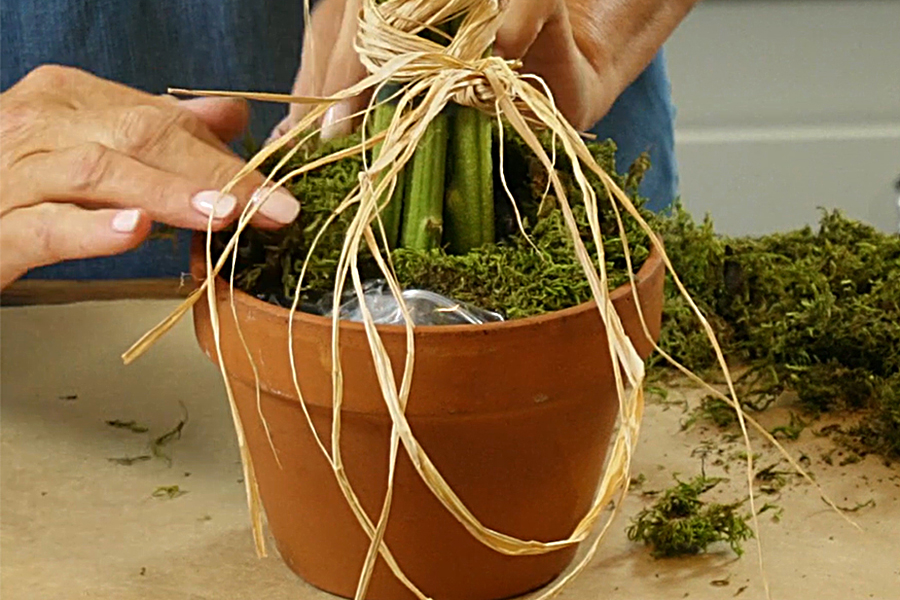
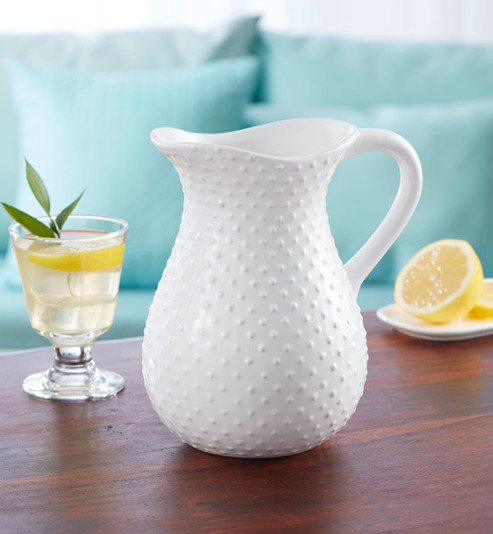
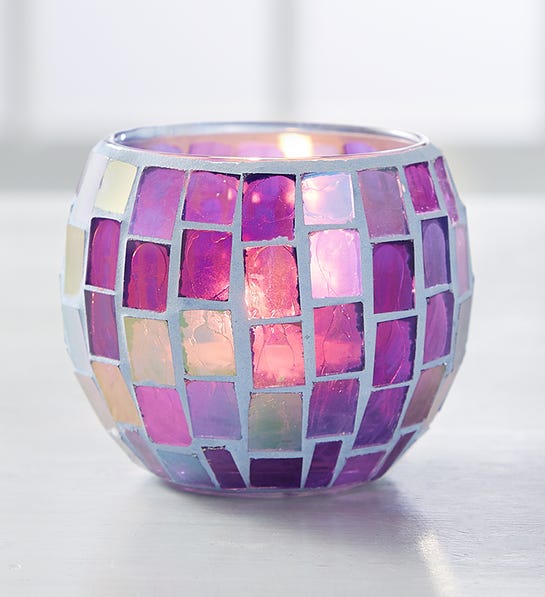
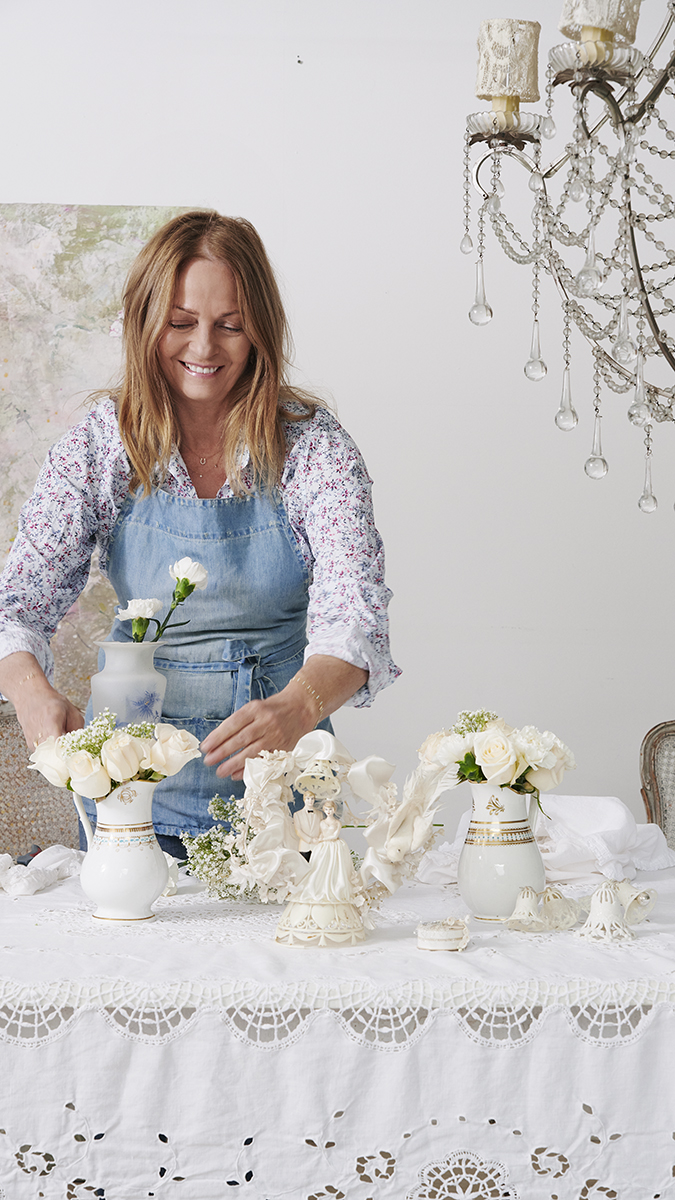
There is no “right” way to pair a vase with an arrangement, Ashwell says. But she does believe the beauty of the vase is an essential feature of the result. “The vase is the starting point, whether it’s a jam jar or ornate vintage vase, there’s no judgment. It just has to be lovely.”

Ashwell scours flea markets and thrift stores all over the world, and online marketplaces for her vases and says not to be afraid to repurpose something old or unique. “In a thrift store, you might find a teapot without a lid for $5, so long as it doesn’t leak.” If you find an older vase with cracks, you can always insert a glass liner. The main thing is to think outside of the box (or vase) and have confidence.

Romantic floral arrangement tips

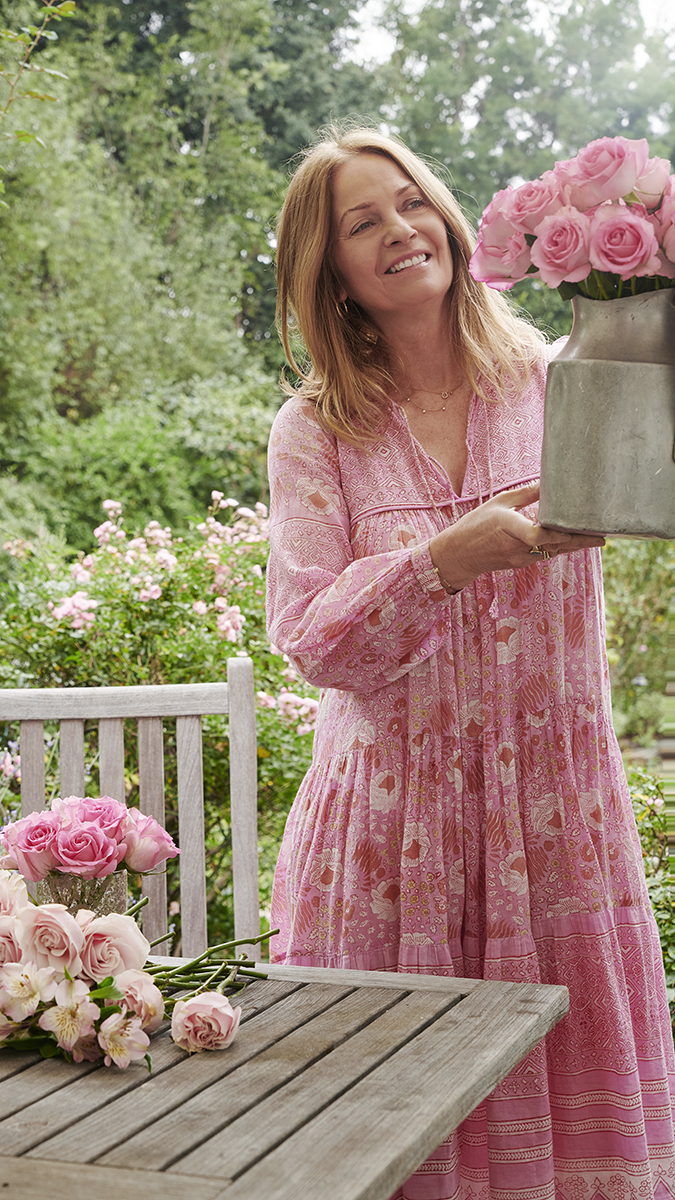
Once the vase is chosen, Ashwell relies on her intuition to arrange it.

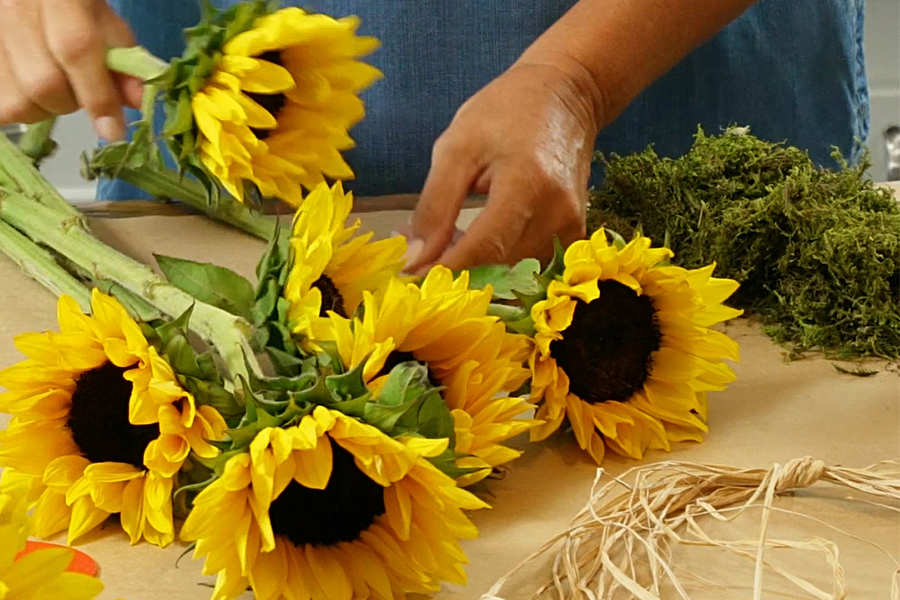
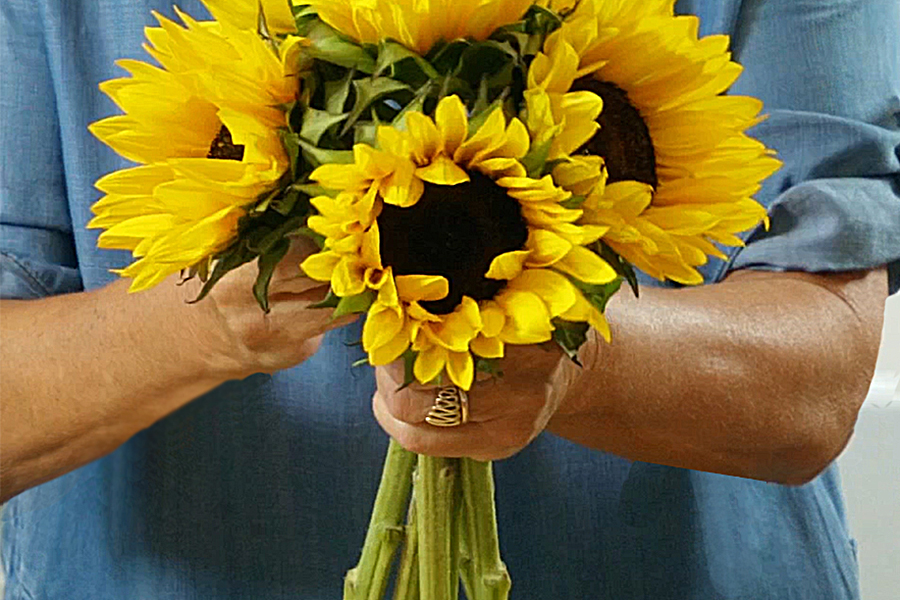
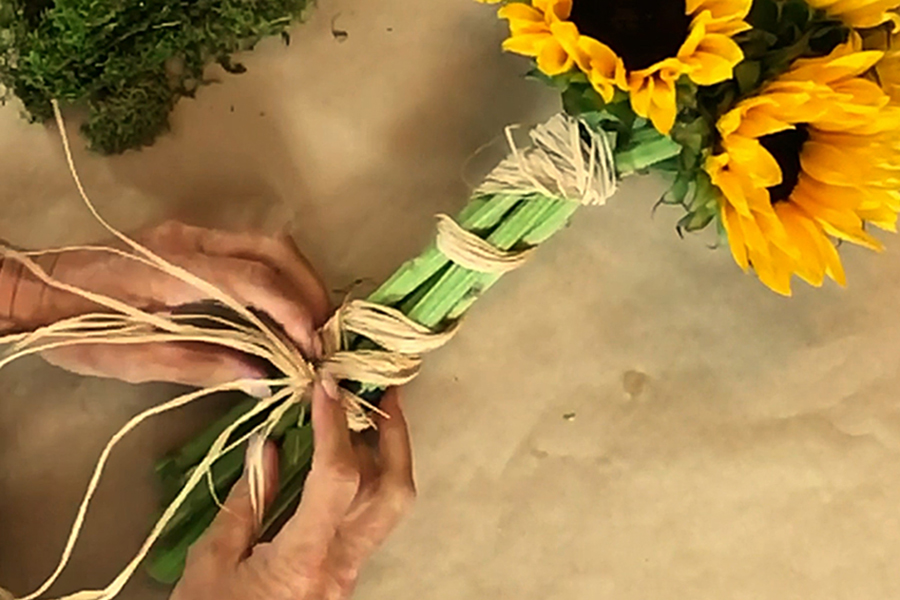
“I’m a flower plopper,” she says, meaning she truly plops the flowers into the vase. “When flowers come into my life, even a $10 bouquet from the supermarket or free from the alleyway [this is a very typical thing in LA to go into an alleyway and pick branches, blooms or citrus from trees that overhang into the alleyway], plopping enables me to be more spontaneous.”

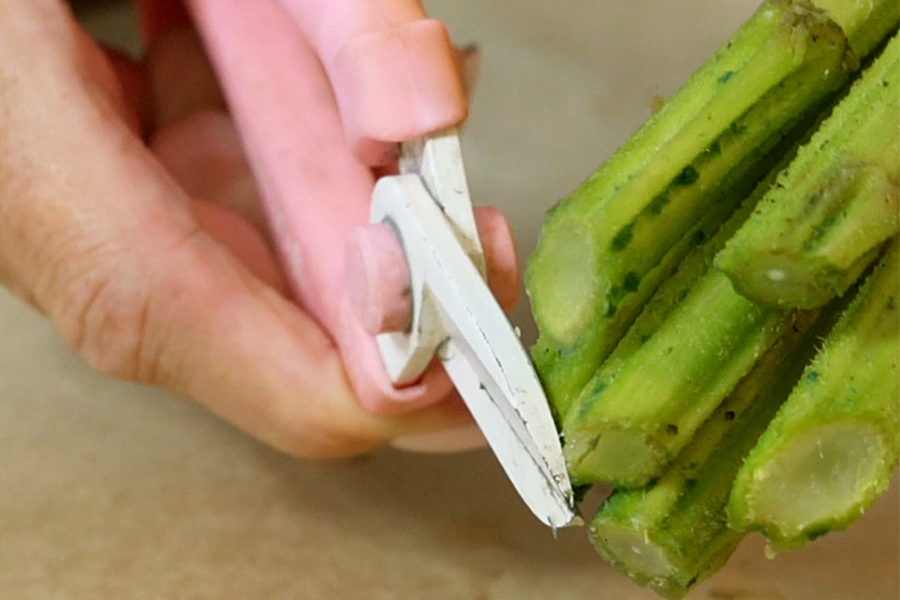
Before the plopping begins, she tends to remove the green leaves, especially with roses, so the look is focused on the blooms. “I’m all about the heads of the roses,” Ashwell says. “For the most part I cut the leaves all the way down, so just the heads or buds are exposed.”

romantic florals with purple and white flowers

Where to place a floral arrangement

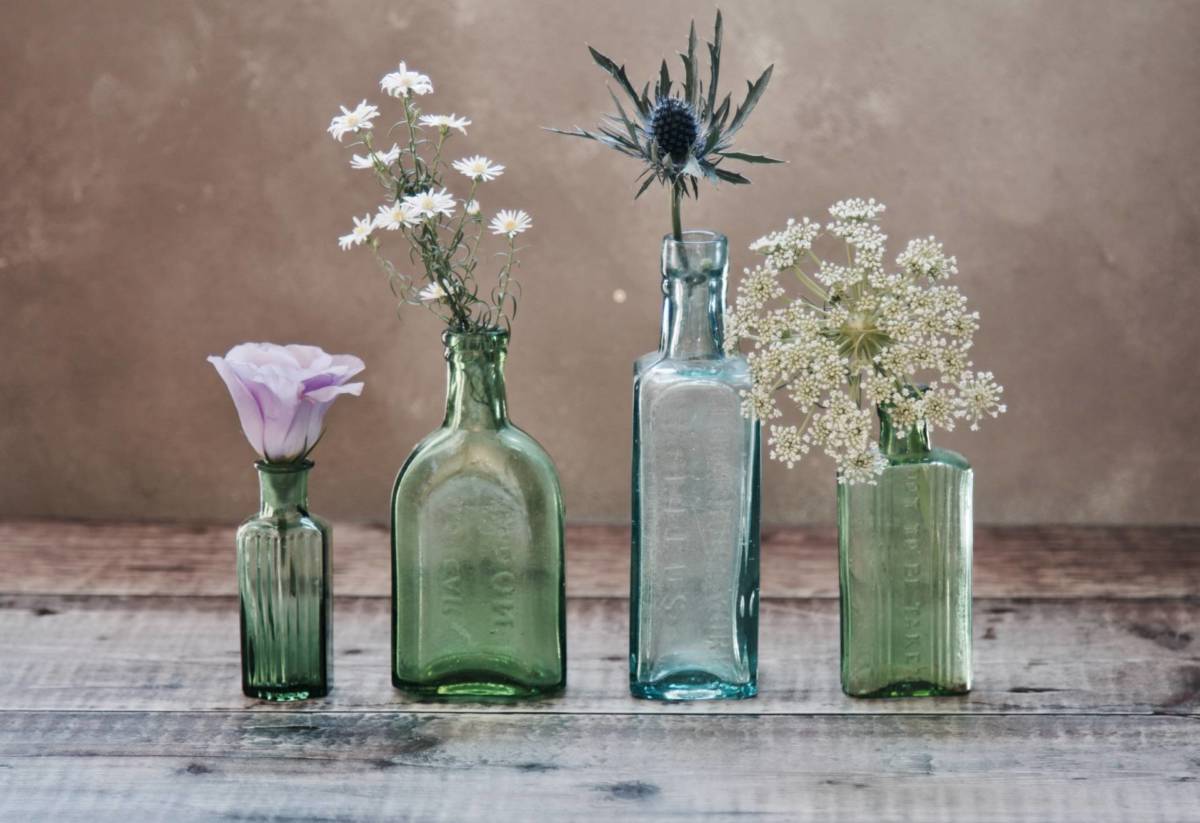
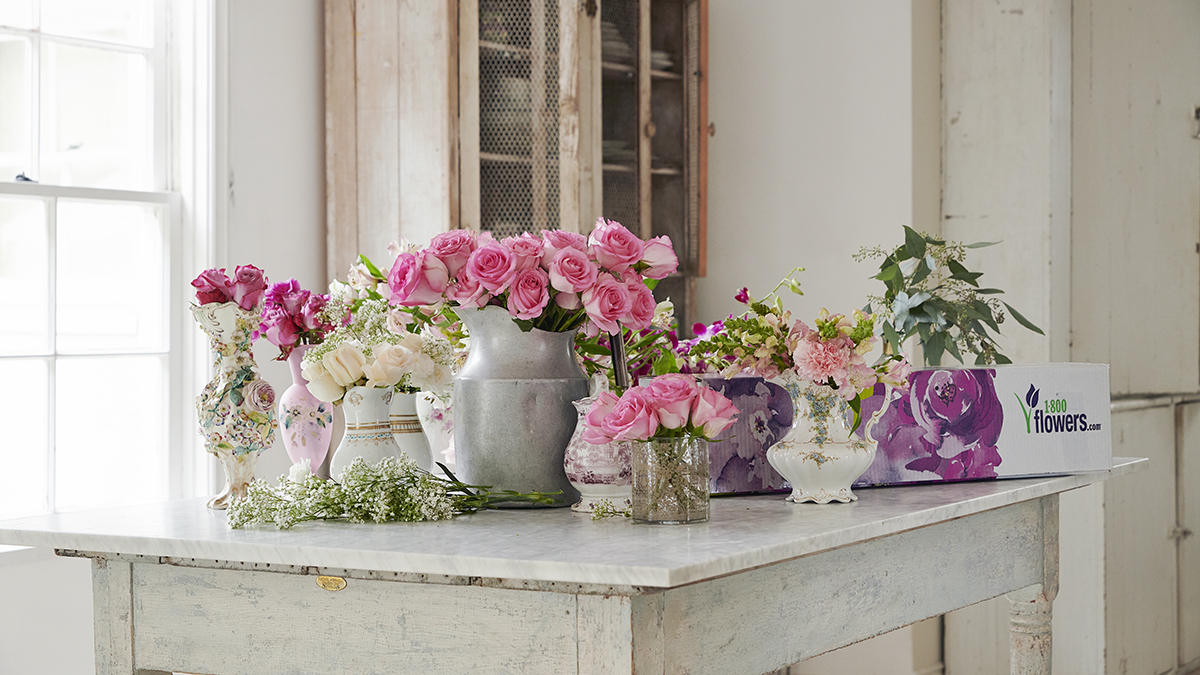
Ashwell then studies the space and finds the right place for her arrangements. If you’re having a dinner party, Ashwell says “You don’t need a three-foot vase on a dining room table. I prefer to do clusters. I love nothing more than six little vases on a dinner table, then everyone gets to take one home.”

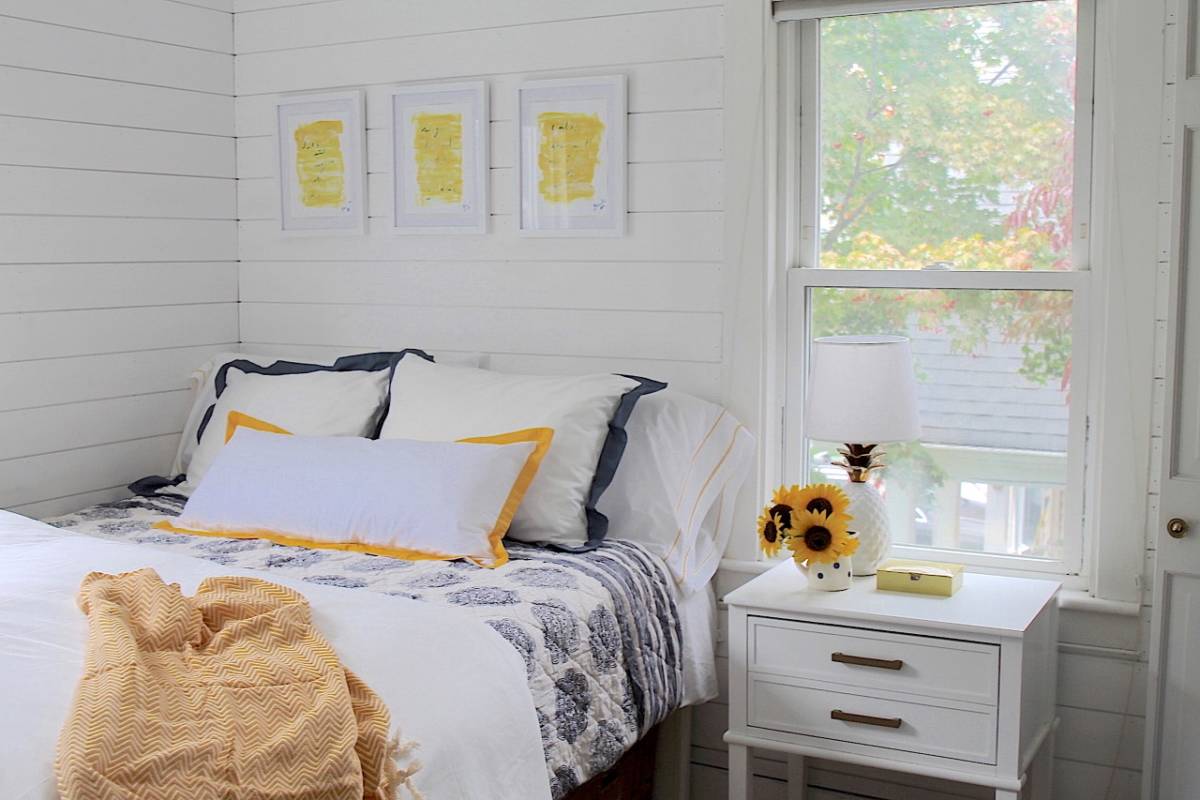
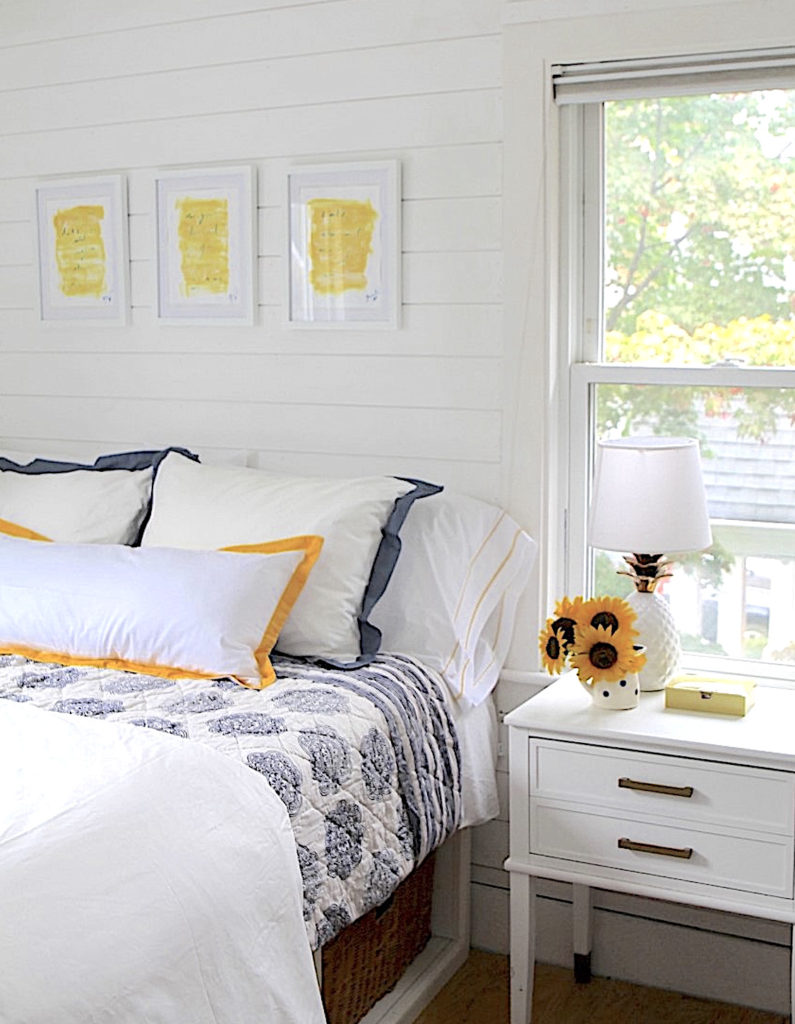
She also suggests placing flowers where you wouldn’t usually, like a stairwell or hallway that doesn’t get any love or attention. She likes flowers where she spends a lot of time, by her desk or on a windowsill above the kitchen sink. “Flowers have their personalities. A beautiful arrangement can fit in anywhere.” Ashwell often places an arrangement by her makeup mirror in her bathroom too.

romantic florals with Rachel Ashwell floral arrangement

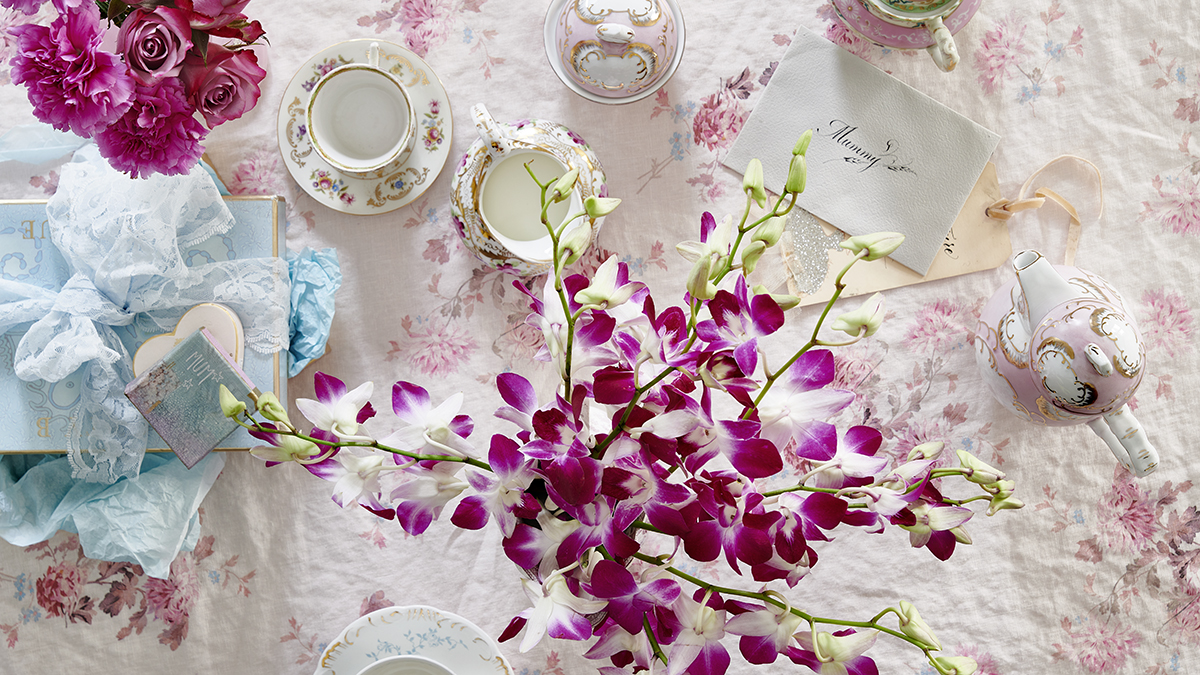
How to choose a floral color palette

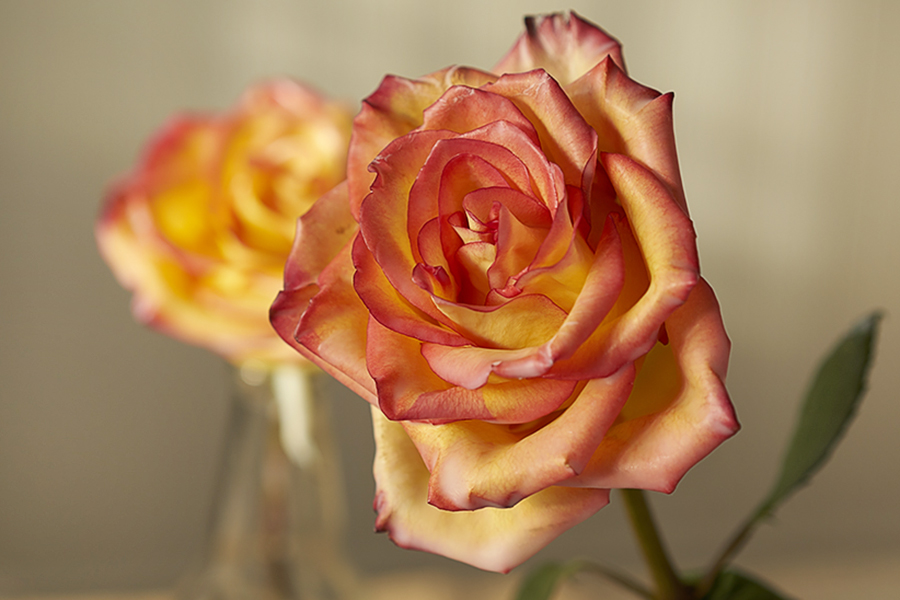
Her florals naturally flow into her color scheme of pastels and pinks. “It might sound kind of wacky,” says the Shabby Chic® creator, “but I don’t pay too much attention to the palette around me.” Sometimes she brings in yellow roses but avoids bright, bright red. “For me, it’s too startling.” She says the main point is to focus on the beauty of the flowers and the vase selection.

romantic florals with Rachel Ashwell holding jug of flowers

Feel free to rearrange the arrangement

Ashwell is a fan of rearranging an arrangement to suit your taste. “Sometimes it’s perfect and you love it the way it is, other times you might want to tweak it till you absolutely adore it,” she says. “I tend to loosen up arrangements. I trim a lot of the green stems and leaves off. I like more air in the vase.” You can also end up with two or three displays out of one bouquet.

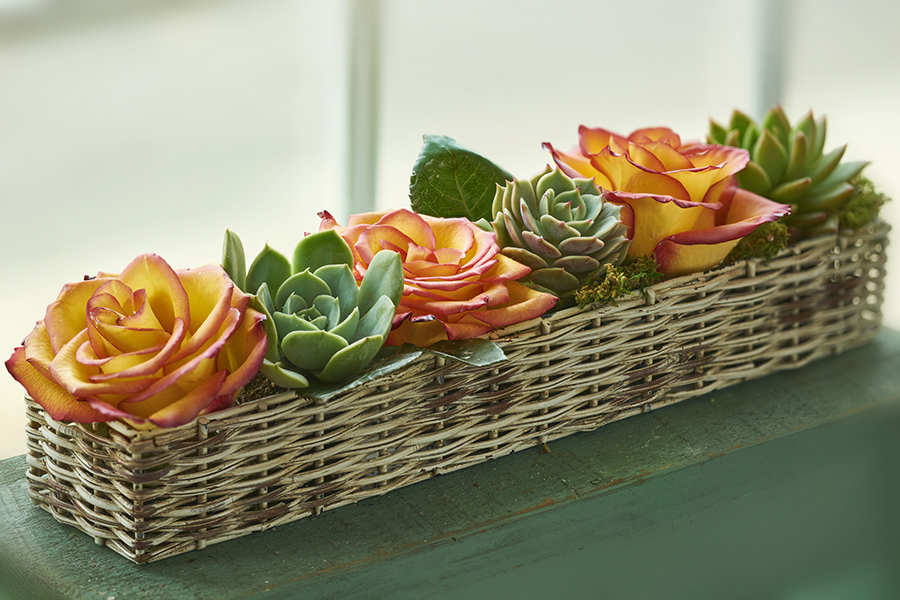
Best flowers for a romantic floral arrangement

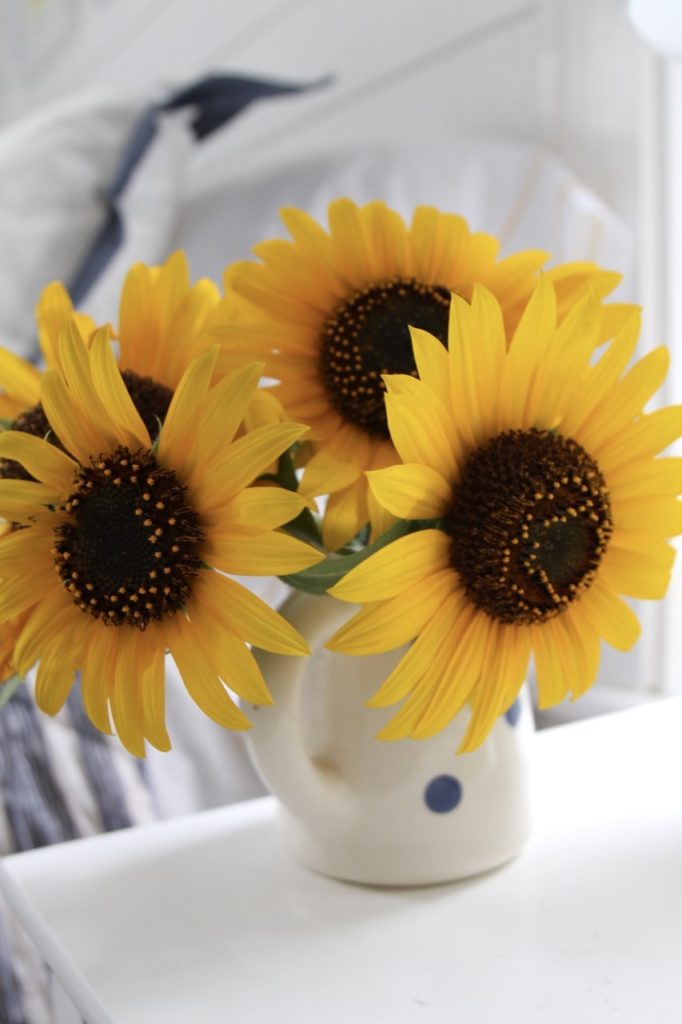
Ashwell doesn’t consider herself a flower snob. “I go to the supermarket, I grab things, I love carnations — white and pink, but not red,” she says. She also loves peonies, hydrangeas, lisianthus, ranunculus, and roses as part of the Shabby Chic® aesthetic. “Sweet peas that are fleeting lovely things, and lilacs when they are around.”

The optimism of nature

A compelling reason to immerse oneself in florals is something the eye cannot see, but the heart can feel, according to Ashwell. At a time when so many of us are feeling stuck in a state of world-weariness, bringing nature inside is vital, she says.

“It’s just a reminder this too shall pass. Nature is the biggest teacher of that. We embrace the beauty when it’s in bloom, acceptance on its way out, and patience when it’s dormant. Above all, nature is hopeful.”

Why We Love Cottagecore Flowers

The series “Seasonal Design” covers home decor and how flowers elevate an environment. In this story, we feature the cottagecore flowers associated with the cottagecore lifestyle.

Once upon a time, we were tiny humans listening to stories about woodland folk who lived in cozy thatch cottages and found wild berries and mushrooms to eat in the forest. That blissful feeling can be ours even as overly stressed adults, simply by accenting our home with the flowers of cottagecore: sublime arrangements of blooms that speak of country roads, cozy fireside, and cottage gardens.

Cottagecore, a design aesthetic, and lifestyle trend are all about the quest for natural surroundings that make you happy and reduce feelings of anxiety. It embraces a life that is harmonious yet floral, serene yet colorful, simple yet lush.

“The desire for traditional blooms has emerged with the onset of the pandemic as people are looking at life and recalling the past when life was less challenging and less complicated,” notes Valerie Ghitelman, vice president of product development, sourcing, and design at 1-800-Flowers.com. “Farm life and country garden-style flowers have gained popularity as generations are spending more time at home in search of a simpler more complete lifestyle.”

Certain flowers hold the magic key to the cottagecore look, from alstroemeria (Peruvian lilies) to sunflowers. They cheered us in the picture books of our childhood and now they evoke the wonder and contentment of pastoral life within our homes and office spaces.

Quintessential flowers you’ll love

Which cottagecore flowers speak to our quest for a simple, comfortable, and oh-so-beautiful life? They are the ones you can picture growing in the abundant gardens you’ve always wanted — fortunately, there are many blooms to fill the bill! “Garden roses, tulips, dahlias, hydrangeas, and spray roses all possess vintage flair and appeal to those who enjoy a traditional old-world style,” Ghitelman says.

Here are just a few to remember for the delightful cottagecore decorating:

Picture of roses in basket

Roses: Hands down the most beloved flower on Earth, roses never stop delighting with their amazing softness and unique shape. You always know it’s a rose no matter who you are or where you come from, and that familiarity is what cottagecore comfort is all about. And that scent!

Picture of cottagecore hydrangeas

Hydrangeas: The fluffiest blooms in the garden, hydrangea typically present in hues of sky-blue and rose pink. They grow generously in all kinds of gardens and conditions; the perfect companion to cottage life. Surround one large bloom with a handful of smaller flowers for an instant bedside or bathroom arrangement. They’re so joyful, you can even arrange hydrangeas on their own!

Vase of lilacs

Lilacs: Lilac shrubs have been prized for their fragrance and color since ancient Greek times. They were often planted around homesteads and today, more than 100 years later the same hardy shrubs can be spotted long after the farmhouse itself disappeared. Lilacs speak of old-fashioned backyard gardens, with a small table set for tea.

Delphiniums: Although they come in numerous colors, delphinium flowers are best known for their blue variety, a dramatic deep periwinkle that is virtually irresistible. The blossoms are dainty and droopy, matching perfectly with other classic flowers like roses, alstroemeria, and carnations.

Daisies: The Jo March of flowers, daisies are playful, get those giggles, and perhaps can be a part of some light mischief. They are a quintessential country flower that can make an old coffee can look divine. Though they and are equally gorgeous gussied up and throw joy to any environment.

Picture of snapdragons
Snapdragons

Snapdragons: Another old-fashioned staple, snapdragons are ideal cottagecore blooms. They come in an astonishing variety of colors and feature charming bell-shaped flowers that cluster in abundance at the head of the stem. Snapdragons add a bit of height to rounded bouquets for a hand-gathered effect.


Our favorite cottagecore flower creations

Whether you are just getting started with your quest for a more beautiful life or you just want a few simple touches to give your home a cottage flair, floral accents are the perfect place to start. Here are a few of our suggestions:

The quintessential pumpkin with its round shape and jaunty stem evoke the beloved harvest time of communities around the world. Whether fall or any other season, a charming ceramic pumpkin bursting with flowers is a great way to brighten the apartment or home.

Teeming with cottage flowers and lots of interesting greenery grown sustainably on eco-friendly farms, bouquets like this unstructured beauty feel like they were hand-gathered.

Use wide-mouth vases that are a bit on the short side. Cut flowers will look more like a bunch of flowers growing in a garden this way. This ethereal bouquet is punctuated by vividly blue delphinium, one of our favorite cottagecore flowers.

Combining plenty of textures and colors captures the spirit of cottagecore. The pale-pink Mason jar in this sweet Confetti Bouquet has a pleasing honeycomb pattern (and would make a cute kitchen utensil holder later on!) It pairs well with a profusion of yellow alstroemeria, peach roses, and red hypericum.

Wreaths are symbols of eternal life and have become beloved beacons of welcome on front doors over the years. The standard circle gets a lovely refresh as a heart in this luscious wreath festooned with preserved pink hydrangea and myrtle branches. With its handmade look, the wreath will lift the hearts of all who see it.

Simple meets lavish in this colorful mix of cottage-style flowers. The weathered-looking box container keeps everything real and provides an appealing contrast to the mass of flowers inside. Perfect for that cottage outdoor party with friends!


Is Cottagecore what you’re longing for?

You know you’re a fan of cottagecore flowers if:

1. Your TikTok feed is full of happy women tending to their cutting gardens or flower farms out in the country.

jason wu wild beauty

2. Most of your screen time is spent gazing at homes with cascades of fresh flowers like dahlias, roses, hydrangea, and lilac. Bonus points for a sleepy cat sunning herself next to a vase of sunflowers.

3. Your favorite movies include The HolidayMoonrise KingdomLittle Women, and Pride and Prejudice (think: the re-proposal scene).

This yearning for pastoral beauty and a return to simpler times is a time-tested way to cope with the stress of modern life. It mirrors the emergence of Rustic Style, a mid-19th century aesthetic of the primitive, handmade, and untamed that rejected excess and overly formal design.

4. Generous profusions of mixed flowers with variegated greenery get your vote as favorite floral arrangements.

Weary workers in industrialized society responded enthusiastically to the new movement, learning to slow down and enjoy the fruits of nature and hand-craftsmanship as their agrarian ancestors once did. Wealthy families turned their formal gardens into landscapes containing wild masses of flowers and vines, punctuated by rustic arbors and handmade benches.

Does this sound like the look and lifestyle you love? Fortunately, there are lots of ways to enjoy the cottagecore life, starting with simple floral arrangements that enhance your home and even your office cubicle.

Live your best cottagecore life and you’ll find yourself stopping to smell the roses much more often!

Christmas ad with stockings

Create a Guest Bedroom Visitors Won’t Want to Leave

Good news if you enjoy having friends and family stay overnight: This season your guest bedroom can be revamped so it’s more than a place to store that unused exercise equipment (ahem). In fact, as entertaining for the holiday season ramps up, it’s the perfect time to show your spare bedroom a little love.

guest bedroom tips with bed that shows guest bedroom tips.

The design of a guest bedroom can be a challenge, since your guest’s comfort has to be front and center, and you want them to feel at home. It should have a balance of cozy touches while also being clutter-free. Use a hotel room as inspiration when creating the ideal guest sanctuary: The best hotels masterfully address a visitor’s needs while adding welcome personal touches like flowers and spa robes. Here are simple guest bedroom tips for creating a well-designed and comfortable haven:

1. Design

Start planning your guest bedroom by finding inspiration in your go-to social media home decor feeds and interior design magazines and on websites. Create a mood board of your favorite styles, then begin by sourcing needed pieces or finding ways to use what you have to create the desired look. Don’t want to shell out for a major redesign? Simply update existing furnishings with a thorough clean and fresh paint.

2. Edit the room

The uncluttered design of a hotel room spotlights the amenities on offer. Use the minimalistic hotel design formula as inspiration for your guest room’s scheme. Keep the room pared down to essential furnishings (no personal knickknacks that make a guest feel like, well, a guest), and make sure all accessories serve a function or add decorative detail, like plants.

3. Furnishings and accessories

If you are buying new furnishings, it’s important to consider style and organization. End tables are handy for added storage if they come with drawers, and they are essential for placing a bedside lamp, glass, notepad, and clock. Perhaps consider a television set for late-night viewing. If you have room, include a desk to create a makeshift workplace. An empty closet and bureau are also essential so guests can stow their belongings, and a lined trash bin is another must. Add a stunning piece of wall art to anchor the room, selecting a piece with colors or patterns that match the room’s design. A unique ottoman is perfect for placing a suitcase or as impromptu seating.

Pro tip: A full-length mirror is useful for guests, and mirrors also add to the design, create the illusion of more space, and brighten the room.

4. Keep to your home’s design

The itch to experiment with trends in your guest bedroom design is enticing, but don’t create a look that’s a complete departure from your home’s style. It would appear out of place if you have an edgy, ultramodern room in a traditional home, for example. The best way to sample trends is with artwork, linens, and other nonpermanent accents.

5. Linens

Bedding is an opportunity to add color, pattern, and comfort to the room. Choose linens that are both durable and cozy. “There are so many great bedding options available now that you can affordably buy quality sheet sets,” says Jodi Lahaye, owner of Hedgehouse, which sells fine linens. “I’m not a slave to thread count, but 200 is where I start, and Egyptian cotton percale is my favorite.”

Boost the bed’s comfort factor by including a variety of sheets and blankets for a layered, relaxing feel. A throw at the foot of the bed brings in a warm detail. And talking of warmth, keep an extra blanket stashed in the closet in case temperatures drop and there isn’t a thermostat for your visitor to adjust.

6. Pillows

guest bedroom tips with striped Euro-sized pillows

Since your guest bedroom may have limited space, create a hybrid seating/sleeping area using the bed. Back to that hotel room: Their beds are made with two or three rows of different-size pillows. Follow their lead, and place the larger pillows against the headboard followed by standard-size pillows, with a decorative pillow in the front. A variety of sizes adds comfortable options and also creates a decorative effect. Here’s a handy pillow size guide to help you place orders:

Euro: 26″ x 26″

King size: 20″ x 36″

Standard size: 20″ x 26″

Decorative throw pillow: From 12″ x 12″ to 18″ x 18″

Lumbar: 14″ x 22″

7. Towels

guest bedroom tips with sunflowers in a guest bedroom

Provide a full set of towels, which includes a finger, hand, and bath towel. If the guest is staying more than one night, have a laundry basket for used towels. An added luxury: Keep a hotel-grade bathrobe and reusable slippers in the closet.

Pro tip: Heat towels in the dryer, so guests have warm towels when they arrive.

8. Fresh flowers

We’re willing to bet that the first detail a guest will notice when they arrive is a stunning flower arrangement. Flowers are that added detail that shows care, thought, and an appreciation for beauty. They’ll also make for a great conversation piece and stunning prop in your photos together.

9. Lighting

Keep window shades open. Natural sunlight creates an inviting space and makes the room appear larger. Supplement with a good overhead light and bedside lamps. Window treatments let guests adjust the light to their preference.

Pro tip: Clean windows with a mixture of vinegar and water. Just spray onto the windows and use newspaper to rub away the solution. It removes the smudge!

10. Spa experience

Let your guests indulge in a spa experience. Provide a spa kitcandle, and diffuser to encourage relaxation. Interested in massages? If you know of a local masseuse who makes house calls, provides their cards or contact information — it could prompt a fun activity!

11. Snacks & beverages

Leave a tray with nourishing light bites and beverages. Travel works up an appetite, and guests will appreciate the beautiful arrangement of delicious snacks. A combination of both healthy foods and a sweet chocolate treat appeals to even the finickiest of eaters.

guest bedroom tips with throw bed

12. Leisure amenities

Store classic entertainment pieces like puzzles, games, reading materials, and notepads out of the way in the bottom drawer of a bureau or media cabinet. Let guests know that they are welcome to use and enjoy them.

13. Creative sleeping quarters

Expecting a large number of guests who need to be accommodated? Be creative with your space and design alternative sleeping quarters that are inviting and cozy. Sure, the air mattress is a convenient option over the spare sofa, but some may want to sleep on something with a little less bounce. A comfortable, grown-up option is a feather throw bed strewn with large soft pillows. “I’m always referring to the throw bed as the Swiss Army Knife of home textiles,” says Lahaye of Hedgehouse, which is known for its ultra-comfy throw beds with durable washable covers in simple striped patterns or denim.

Pro tip: Add string lights above the bed for an enchanting effect.

14. House notes

In a notebook, pad, or emailed document, list important information such as Wi-Fi codes, rules (and quirks) of the home, and any helpful details, like suggestions for cool coffee shops or parks and museums. This simple gesture will help your guests feel both at home and on vacation. They may feel so pampered, don’t be surprised if they ask for another invite!

An ad for 1800flowers' flower subscription service

How to Make a Sunflower Topiary

How to Make a Sunflower Topiary

Sunflowers are one of the most popular flowers out there, and for good reason. Their shape and bright yellow, orange, and red petals are symbolic of the sun. These instantly recognizable flowers symbolize radiant happiness and all things positive.

Many different varieties of sunflowers exist, as do ways to use these flowers to decorate your home. The topiary design is an easy way to display these cheerful blooms. You can use this one design technique to create many different looks and styles, depending on the size and shape of the sunflowers you use, whether you incorporate foliage and other floral varieties, and any accessories you add, such as ribbon, raffia, etc.

The container you use contributes to the final look, too. A terra cotta planter gives a nice rustic garden look, while a white ceramic wine cooler, such as the ones pictured above, feel brighter and lighter.

Making a sunflower topiary is easier than it looks. Here’s what you’ll need:

Materials

  • Container (if the container isn’t waterproof, you’ll need to use a liner, such as a plastic bag)
  • Floral foam
  • Sunflowers (at least six stems)
  • Waterproof tape
  • Raffia or ribbon
  • Moss

Instructions for making a sunflower topiary

sunflower topiary with fitting foam in container

Cut a piece of floral foam to fit the size of your container and soak thoroughly before placing it in the pot. If the container you’re using isn’t waterproof (this terra cotta pot has a drainage hole on the bottom), you’ll need to line it first. A plastic bag will do the trick.

sunflower topiary with choosing sunflowers

Choose six long-stem sunflowers with similar size heads.

sunflower topiary with gathering sunflowers

Gather the sunflowers in your hand, one by one, with one in the middle and the other five placed around and slightly below the middle one.

sunflower topiary with wrapping stems

Using waterproof tape, wrap the stems together first at the top of the stems right under the heads of the sunflowers…

sunflower topiary with wrapping stems again

…and again near the bottom of the stems.

sunflower topiary with covering tape with raffia or ribbon

Use raffia or ribbon to cover your tape and to add a decorative touch.

sunflower topiary with wrapping bouquet with ribbon

Continue bringing the ribbon down to the bottom of the stems to wrap the bouquet together tightly.

sunflower topiary with cutting stems

Cut the bottom of each stem on an angle.

sunflower topiary with inserting stems into foam

Insert the stems into the wet foam.

sunflower topiary with covering foam with moss

Cover the foam around the stems with moss. You can also add additional flowers, fruit, or other decorative elements.

sunflower topiary with finished topiary

And that’s it! Your finished sunflower topiary is ready to be displayed.

Remember to add water to your sunflower arrangements daily, and they’ll stay fresh for about a week.

10 Ways to Reuse a Vase After the Flowers Are Gone

There’s no better feeling than being surprised by a bouquet of flowers. Unfortunately, the blooms of celebratory flowers and just-because bouquets don’t last forever. Once the flowers are past their prime, all that’s left is a memory and a vase. If you’re an avid flower recipient, you may have quite the collection of vases to show for it. But the life of a vase doesn’t have to end when the flowers are gone. You can repurpose of vase and make it your next coin jar, kitchen utensils holder, or bookend. Think of the vase as decorative and functional storage, and you’ll find good use for it.

Some vases, like many found at 1-800-Flowers.com, are designed with an afterlife in mind, says Valerie Ghitelman, Vice President of Product Development. “Most of our floral vases are created exclusively by us and cannot be found anywhere other than 1-800-Flowers.com,” she says.

“A vase with repurpose value makes the gift special and so much more meaningful to the recipient,” she says. “These types of containers have added value and versatility. They’re ‘keepers’ not only because they have another use, but because it is a fond memory and a reminder of the special person who sent them this exceptional gift.”

How can you repurpose a vase?

Rather than storing your vases in a closet or throwing them away, you can give them a new and practical life in your home.

An empty vase for serving drinks

A flower vase with a handle makes it easy to carry a bouquet and show it off to family and friends. Once the flowers are gone, these vases can easily serve a new purpose as pitchers for water, lemonade, tea and other drinks.

The Timeless Treasure Pitcher, for example, elegantly suggests Southern charm with a Swiss-dot pattern that wraps around the soft curves of the container. Designed in partnership with Southern Living magazine, it perfectly complements the original bouquet and its afterlife as a drink pitcher. The food-safe container also includes a simple recipe for Southern Sweet Tea.

“This is one of my favorite after-use vases because the design and the recipe blends so well together and it feels like a gift that keeps on giving,” Ghitelman says.

Repurposed vases for potpourri

Wilting flowers mark the beginning of their next journey as preserved petals and potpourri. Start by choosing flowers that will hold their color once dried. Good candidates include lavender, peonies, and roses. Steep the petals in an essential oil inside the vase for a long-lasting, natural scent for your home. The gray-washed wooden cube of our Coastal Breeze bouquet is the perfect place to store your potpourri. Its gray-washed wooden cube features soft, natural tones and textures, for a seamless addition to your coffee table or bookshelf.

Flower memories kept alive as a birthday keepsake

There’s nothing like receiving a beautiful bouquet on your birthday. Once the birthday festivities end and your flowers wilt, turn your leftover vase into a keepsake of all the mementos you received from loved ones. The vase included in the Happy Birthday Present Bouquet is a great place to keep handwritten cards or printed photographs. It’s the shape of a present complete with rainbow polka dots and a bright bow. The ceramic vase will bring you back to your birthday every time you open it. “Each handcrafted piece of art celebrates the special people and the most meaningful moments in our lives,” tells Ghitelman.

A glass vase reused as a candle holder

Empty vases as candle holders

Give your candles some glamor with any cylinder-shaped vase. Add an LED candle to the Yellow & White Delight Bouquet for a accentuated look for your home. This is a design hack for adding a hint of luxe to your home. “A lovely home décor accent that provides a lifetime of elegance and charm,” says Ghitelman.

A special vase creates an extraordinary nightlight

Colorful glass make up many vases, like the Majestic Mosaic Hydrangea’s vase, which can be used as purely decorative or as a nightlight. “This distinctive vase can be used as an elegant tea light holder, where the light radiates from the inside creating a magnificent display of color,” explains Ghitelman. The colorful tiles will illuminate when you put in a LED candle and turn it on in the evening.

Reuse a vase to save your spare change

Prevent loose change from ending up in the crevices of the sofa and in random corners of the house by allocating a vase as the designated coin jar. Take your coin jar to the next level by labelling it with a long-term savings goal such as a travel destination or big purchase. This activity works especially well with graduation flowers since the recent grad will need a place to start stocking up on savings. Any large vase from the collection, such as this congratulatory rose plant, will provide plenty of space for a savings stash.

‘Tis the Season for Décor

Sending and receiving flowers for the holidays is a wonderful way to spread the spirit. Just like the flowers, many of our vases reflect the holidays. “This luxurious holiday gift can hold wrapped candies or precious ornaments and can be a treasured décor piece for many years to come,” says Ghitelman.

Empty vases to support your own personal spa

Upgrade your self-care routine by filling up a vase with your favorite bath salts. A clear fishbowl vase, like the one that comes with the Smiling Surprise Bouquet, will function best in a bath setting for easy access.

This way, you’ll spruce up your tub décor and have bath salts at your disposal next time you wind down. Check out this lavender bath set, replete with bathing essentials, for the ultimate spa experience.

Repurposed vases can add glamor to your bookshelf

The vases that aren’t so easy to take items in and out of make for great bookends — especially if you love the designs. The Blush Posy Bouquet, for example, features an exclusive peach quartz mason jar with a unique honeycomb design. It makes for a decorative piece to style your shelves. Fill up your vase with marbles, seashells, or sand to give it some additional weight against the books.

Put fruit on display in a repurposed vase

Another use for the fishbowl vase is a container for your fresh fruit. Put in your apples, bananas, and pears to grab and go. More air circulation will maintain fruit freshness. This repurpose is aesthetically pleasing and practical for your kitchen.

Can’t find a new use for a favorite vase? You can always refill it with a fresh set of blooms. Buying flowers for yourself is a great form of self-care and an empty vase is the perfect excuse to do so. In fact, treat yourself every month to fresh flowers through our subscription program.


An advertisement for monthly subscriptions from 1-800-Flowers.com

Keep the Memory of Your Family Reunion Alive With This DIY Spider Plant Activity

The series “Get Crafty” features handy how-to guides that will help you tap into your passion for crafting and show you how to make all kinds of fun and inventive creations. Craft expert Julie Mulligan will provide a step-by-step tutorial for the creation process.

Who doesn’t love a good party favor, especially one that conjures up happy memories? Get creative at your next family reunion by making a parting gift for each family member in attendance.

One idea is to make individual baby spider plants by taking cuttings from a “mother” plant. As each guest departs, present them with the latest “family member” and ask them to share photos throughout the year with the rest of the family. This way, everyone can see how fast the little plants are growing.

If you’d rather not use a spider plant, then you can choose any number of other houseplants that are easy to propagate, such as pothosprayer plants, and umbrella trees.

I find spider plants easy to create new plants from, as they’re continuously producing “baby” plants on their own. You just need to snip and root!

How to propagate a spider plant

Follow these steps to propagate a spider plant.

1. Look for a “baby” that has a nice nodule formed where it’s attached to the mother plant. Then, snip as close to the nodule as possible.

2. To form roots, place the cutting directly in either soil or water. You’ll be able to see the roots forming when you start with water, which can be exciting.

3. As for giving your plant a “home,” you can use various kinds of inexpensive and recycled containers. The small plastic condiment containers you get with take-out food are the perfect size.

4. If you’re already a plant parent, then you may have some two-inch plastic pots; if you’re not, they’re very inexpensive. Before filling the pots with soil, jazz them up with a little creative decoration. Keep it simple, using a paint marker to write directly on the pots.

5. You can also use strips of the bandanas with which you made the garland, cut them to size, and glue them onto the pots.

6. Don’t worry about perfection; these pots are only a temporary home for the plants until they have established a root base. Once that happens, you’ll need to replant them in a larger pot with more soil. Before long, you’ll be able to start making new plants from this cutting!

I’m sure you’ll find this DIY activity is a great way to make a family connection and keep the love growing.


Plant-Gift-Guide-Blog-banner-1

Halloween Crafts: Candy Corn Garland

Not everything about Halloween needs to be spooky and scary — it can also just be fun and colorful, and full of sweets and smiles.

Here is a simple DIY craft idea celebrating that perennial Halloween favorite, the candy corn.

This project starts off very basic so that even the littlest trick or treater can do it, and can be scaled up and personalized to entertain tweens and beyond.

Candy corn garland

Making this Halloween craft keeps the kids entertained and barely costs a thing. And, after Halloween is over, you can recycle the whole thing — no guilt about producing extra waste, and you don’t have to pack it up and find somewhere to store it all year.

halloween crafts with materials for candy corn garland

Materials needed for candy corn garland

  • Cardboard boxes
  • Paint or markers
  • String or ribbon
  • Hole puncher
  • Scissors or straight edge cutter

Instructions for making candy corn garland

The steps for this candy corn garland are the same as the ones I used for the patriotic-themed garland I made for Memorial Day. The only difference is it is painted differently.

halloween crafts with Circle
  1. Cut out a large circle from the cardboard box and, using a pencil, draw two smaller concentric circles inside it. (I was fortunate that one of my daughters operated a baking business out of my house and I had corrugated cake boards in my attic. And the fact that the boards were white meant I only had to paint the orange and yellow sections!)
  2. Repeat the process making more circles. You can make them all the same size or mix it up with larger and smaller ones.
halloween crafts with painted circles
  1. Paint or color the outermost ring yellow, the middle ring orange, and the innermost ring white (if necessary).
halloween crafts with cut circles
  1. Once the paint dries, cut the circle into triangle — just like a pizza!
halloween crafts with hole-punched wedges
  1. Use a hole puncher to punch two holes in the wider end of each triangle.
halloween crafts with yarn strung through wedges
  1. Lace yarn, twine, or ribbon through the holes on the triangular pieces.
halloween crafts with candy corn garland

Once you have the basic steps down, you can improvise as you see fit. Let the older kids design their own garlands, adding tassels made from yarn or fabric, or add paper straws cut to the desired length in between the candy corn. The possibilities are only limited by your imagination!

halloween crafts with candy corn sodas and cocktails

And when the decorating is done, treat the little ones to a candy corn soda pop and yourself to a candy corn cocktail!

How to Preserve Flowers with Wax

How to Preserve Flowers with Wax

You can make your beautiful fresh-cut roses last longer than you ever imagined by dipping the open blooms in melted wax. The best time to preserve flowers with wax is at the very end of their shelf life — after you have enjoyed their beauty for over a week — when the rose is in full bloom.

I have waxed roses many times over the years using paraffin wax. Now that soy wax is readily available, I decided to give that I try…and I’m glad I did! Soy wax is a completely natural and renewable resource, has a lower melting point, and cleans up easily, with just soap and water. And soy wax is so versatile that you can melt it in the microwave!

What you need to preserve flowers with wax:

  • Open roses
  • Microwave-safe container
  • Soy wax flakes
  • Candy thermometer (optional)
  • Empty bottles or vases or wax paper
a photo of wax flowers with ingredients for wax roses

Steps:

  1. Cut the stems of your roses to about 8 to 10 inches long to make it easy to dip the heads into the wax. Then, place the stems into your bottle or vase to cool. Be sure to put scrap paper on your work surface, including under the bottles, to catch dripping wax.
  1. Fill the microwavable container all the way to the top with the wax flakes and microwave for 2 minutes. After 2 minutes, take the container out of the microwave and stir the melted wax with a disposable plastic spoon. If there is still any white/un-melted wax, return the container to the microwave for another minute and repeat. Also: As the wax melts, you might find that you need to add more flakes. Go ahead and stir them into the container, and continue the melting process.
a photo of wax flowers with a wax rose cooling upright in a bottle
  1. Once all the wax is melted, you can start dipping. Place the wax container on a protected surface and have your bottle or vase ready to place the dipped roses in for cooling. You can also place the dipped roses on wax paper to cool, but they will keep their shape better if they cool while upright.
a photo of wax flowers with a wax rose vs. fresh rose

Note: Your wax should be at about 100° F. (You can measure the temperature with a candy thermometer.) I found that melting the wax in short increments of time will keep it from getting too hot. I waited a minute or two after removing my wax from the microwave to start dipping. You can tell that your wax is getting too cool if it starts to get cloudy looking and appears cloudy on the rose petals as well. The goal is to make your rose look so lifelike that it’s impossible to tell that it has been dipped in wax!

If you have many flowers to wax, you can continue to melt as you go along, using the same container and adding more wax flakes as needed. When you’re done, cover the wax container so you can use again at another time. You can preserve many different varieties of flowers and foliage with this method!

2 ideas for enjoying your waxed roses

a photo of wax flowers with a wax rose in birds nest display

After the wax has completely cooled, cut the stem off so that you can cradle the rose in this sweet bird’s nest dish.

a photo of wax flowers with wax roses and succulents

I love this arrangement! I simply alternated waxed roses and baby succulents to create a modern centerpiece as carefree as it is beautiful.

How to Paint Flowers on Wine Glasses

DIY: How to Paint Flowers on Wine Glasses

Whether you’re making these wine glasses with friends, for a friend, or for yourself, you are sure to have fun letting your creative side come out!

Add a personalized touch to ordinary wine glasses by painting flowers on them to make them extraordinary. Not only are these hand-painted wine glasses easy to make, but they’re pretty inexpensive too, which makes them great gifts if you’re on a tight budget.

Choose the flowers and colors of your choice to make them extra special for birthdays, holidays, or just because. Now, roll up your sleeves because we’re about to dive into Flower Wine Glass Painting 101!

Supplies

hand painted wine glasses with supplies for Flower Wine Glass Painting
  • Enamel paint (Make sure it is specifically for glass products!)
  • Variety of paintbrushes
  • Clear wine glasses (washed and dried)
  • Cup of water (for cleaning your brushes)
  • Paint palette or paper plate
  • Paper towels, napkins, or rissues

Directions

Step 1: Get inspired with real flowers

Before starting, think about which flowers you would like to paint on your wine glass. You can use flowers from outside, browse flowers online, or get some stems from your local florist. I was inspired by beautiful yellow sunflowers and lavender daisies.

Step 2: Create your work station

hand painted wine glasses with painted wine glasses work space

Now that you’ve decided what flower(s) you want to use, select paint colors to match. You can get whatever colors you like, but the primary colors are essential for mixing, while black and white are important for lightening and darkening. As mentioned above, make sure your paint is glass-product friendly. If you are unsure, ask a sales associate at your local craft shop.

Step 3: Organize your paint

Pour a small amount of each color onto your paint palette. (Hint: A paper plate works just as well.) Make sure to have colors for the flower petals, center, and stem. It’s also a good idea to add white and black in case you want to lighten or darken your colors. Once you’ve created your color palette, set your wine glass upside down onto a paper towel (napkins or newspapers are fine, too) to keep paint from getting onto your work surface. You will also want to keep paper towels handy to wipe off your paint brush as needed after dipping it in water or paint.

Step 4: Paint the center of your flower

Select the color you will use as the center of your flower. Feel free to mix colors to get the shade you want. We mixed red and purple to get the perfect shade of brown for the center of our sunflower, but brown paint will work just as well.

hand painted wine glasses with Painting the center of the flower using a small brush and creating dots

Using a small pointed brush, make tiny dots where the stem meets the bowl of the glass. Make the dots as big or small as you want to represent the flower you’re creating.

Different flowers will have different centers. For example, I added more dots to my sunflower glass than the daisy glass since sunflowers have very large centers.

Step 5: Add the flower petals

Once the dotted center has dried (feel it gently with your finger tips to make sure), you can start painting your flower petals. You can paint the petals completely over the dotted center, halfway over, or not at all.

For the sunflower, I painted shorter, wider yellow/orange petals. For the purple daisies, I painted longer, thinner petals.

Feel free to overlap petals or add streaks for a cool color accent. While you’re painting the petals, keep in mind what the glass will look like from the inside.

Step 6: Add a green stem

hand painted wine glasses with Stem Wine Glass Painting

Using your favorite shade(s) of green, paint the stem of the wine glass for your flower stem. Most flowers have green petal-like “leaves” underneath, so you will want to cover the “bowl” of the glass with that. Let the leaves cover the ends of some of your flower petals as well.

Step 7: Add leaves to the wine glass base

hand painted wine glasses with Decorations on the stem for sunflower wine glass

Carefully flip the glass right-side up and paint the base of the glass with leaves or decoration of your choice. This is also a great place to add a name or short message for an extra personal touch.

Step 8: Let your wine glass dry

hand painted wine glasses with painted wine glasses with flowers

The enamel paint should dry pretty quickly, but make sure to give it a few hours before you start using the glass.

Step 9: Pour yourself a drink!

Nice job and congratulations on creating a beautiful wine glass. Now it’s time to toast to your masterpiece! If it’s a gift, wrap it up with a bottle of wine or bouquet of flowers that matches your wine glass flower design.

Exit mobile version