How to Make a DIY Christmas Stocking to Add Holiday Cheer to Your Home

When I was asked to write an article about making DIY Christmas stockings, the first thing I did was to go to my favorite fabric store and head straight for the clearance remnant table.
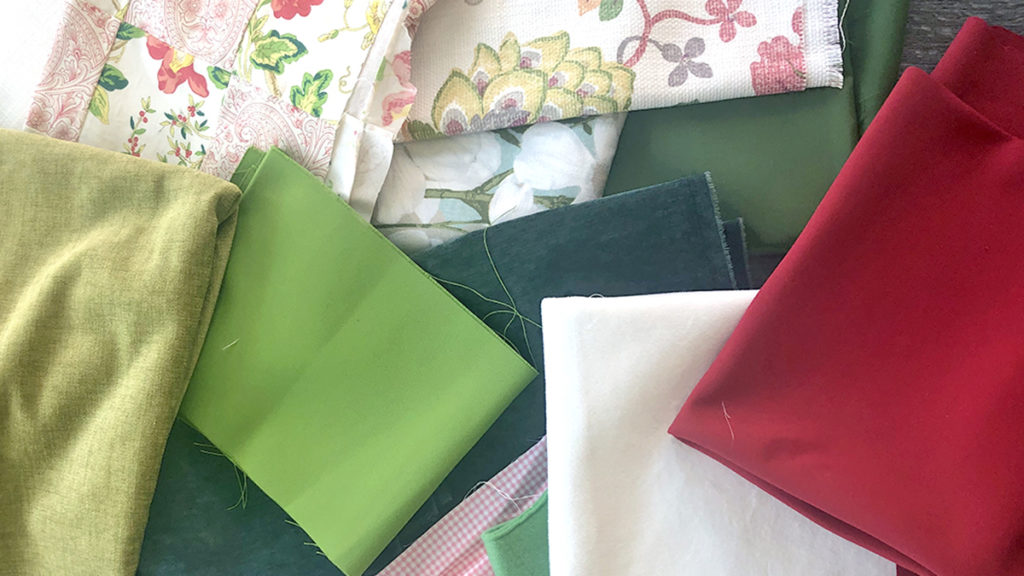
diy christmas stocking with fabric remnants

I picked up the holiday color “trinity” — red, white, and green — as well as various prints and florals that just spoke to me. I knew I wanted to show how to make a basic Christmas stocking, but I also wanted to inspire creativity, to make you, the reader, go beyond what’s expected and design a stocking that matches your own personal style.

I started with a basic red stocking with white cuff. I am not a sewer and do not own a sewing machine, so I decided to make the stocking using glue — both hot glue and fabric glue. Easier said than done! Here’s how it went.

Making a basic Christmas stocking

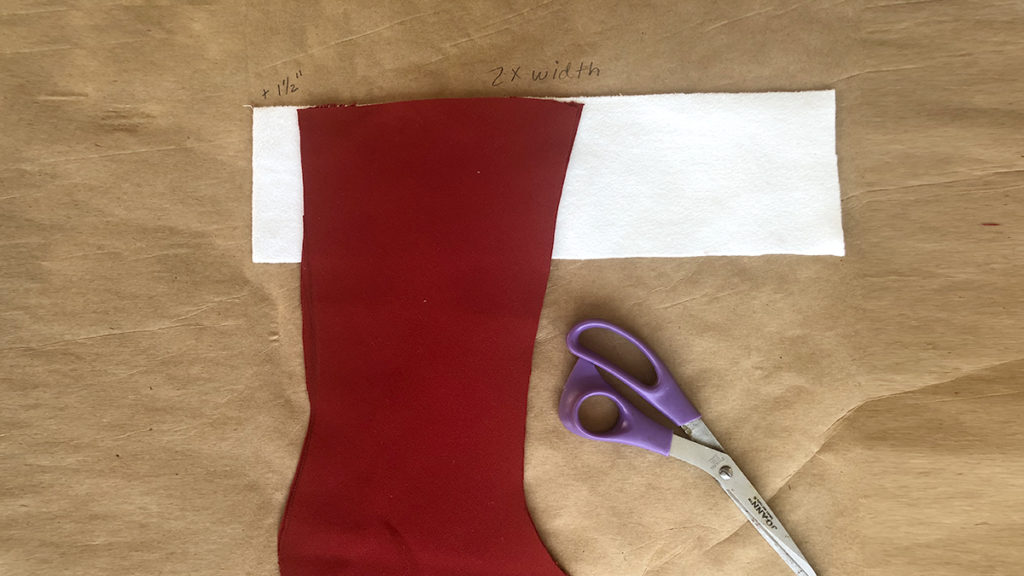
diy christmas stocking with Christmas stocking template
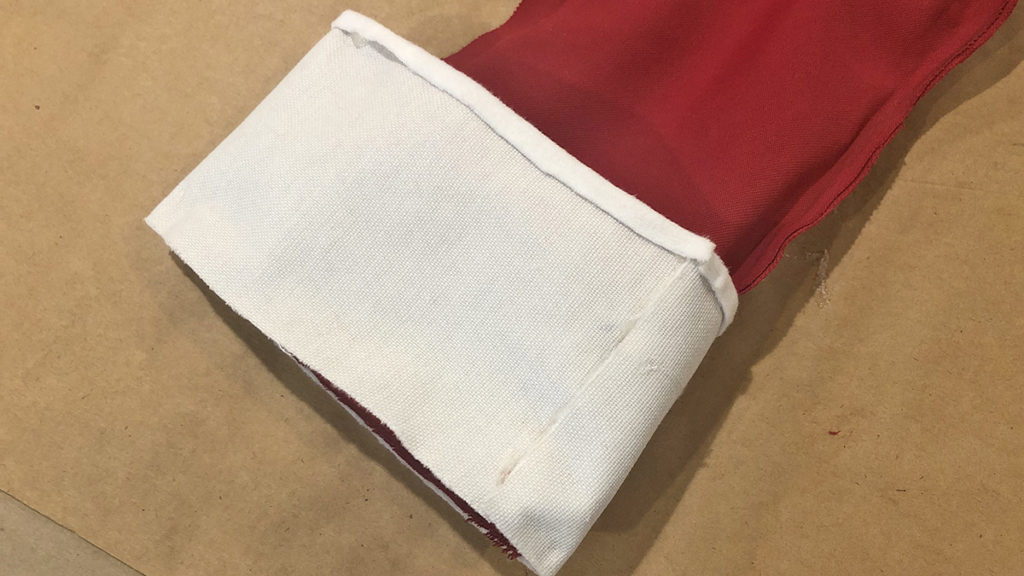
diy christmas stocking with Christmas stocking cuff
Click images to enlarge
DIY Christmas stocking with hemmed cuff

Using an old Christmas stocking, I created a stocking template that you can download here. This stocking measures 7 inches wide at the top and 14 to 16 inches high. Don’t feel like your stocking has to be these same dimensions — make your stocking any size you want!

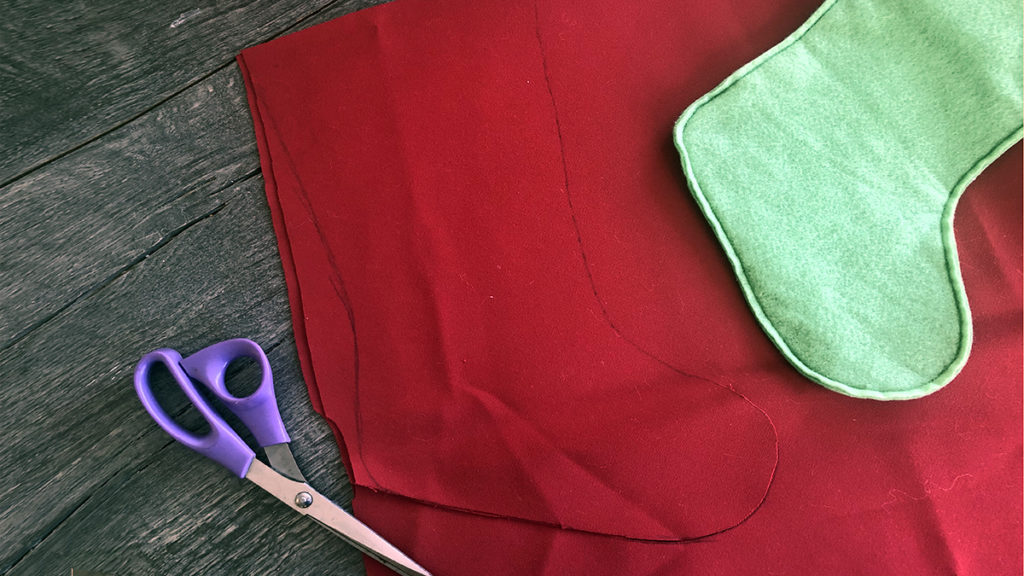
  1. Trace the stocking template onto your fabric.
  2. Use a sharp scissors to cut out the stocking. You will need two pieces of fabric. Before cutting, fold the fabric so that you can cut both pieces at the same time.
  3. After cutting the two stocking pieces, place them right side together.
  4. Sew or glue the edges together, except for the top, with about a quarter-inch seam.
  5. Cut the material you are using for the cuff. The length should be two times the width of the stocking at the top plus another 1 1/2 inches. The height should be between 3 and 4 inches. If you are using a material that will need to be hemmed, add an additional quarter inch on the top and bottom.
  6. Hem the cuff, if necessary. Glue or sew the cuff with the right side against the wrong side of the stocking along the top edge only. Remember, your stocking is inside out at this point.
  7. Turn the stocking right side out and roll the cuff down.
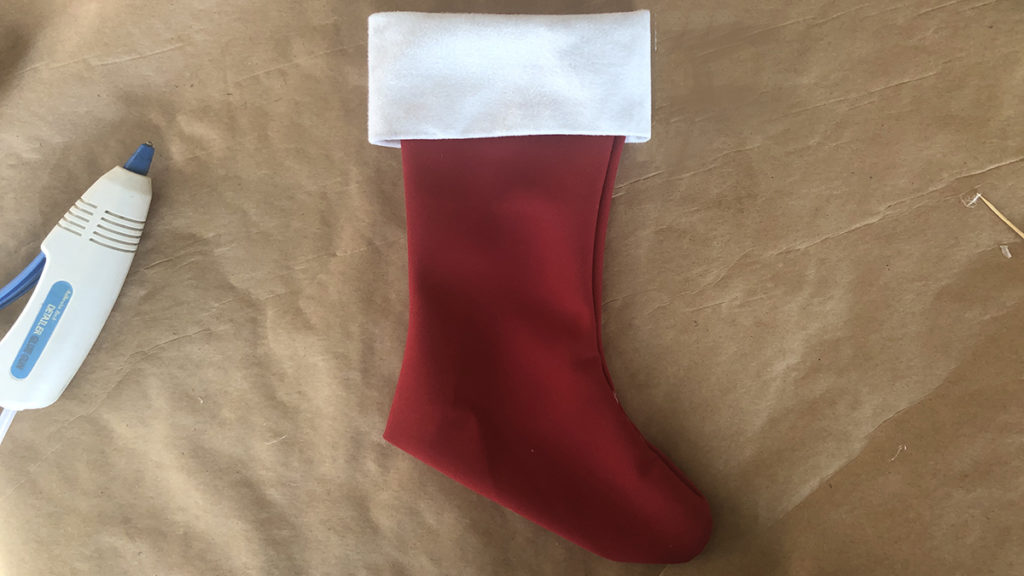
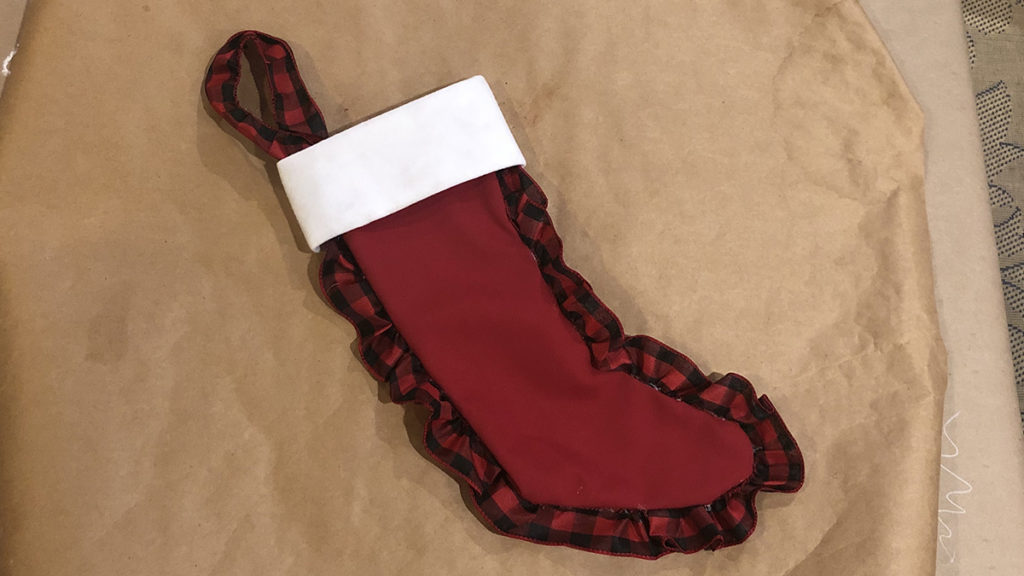
DIY Christmas stocking finished

This is your basic stocking. However, I felt it was a bit plain looking, so I used a buffalo plaid wired ribbon to add some personality to it.

Embellishing a basic Christmas stocking

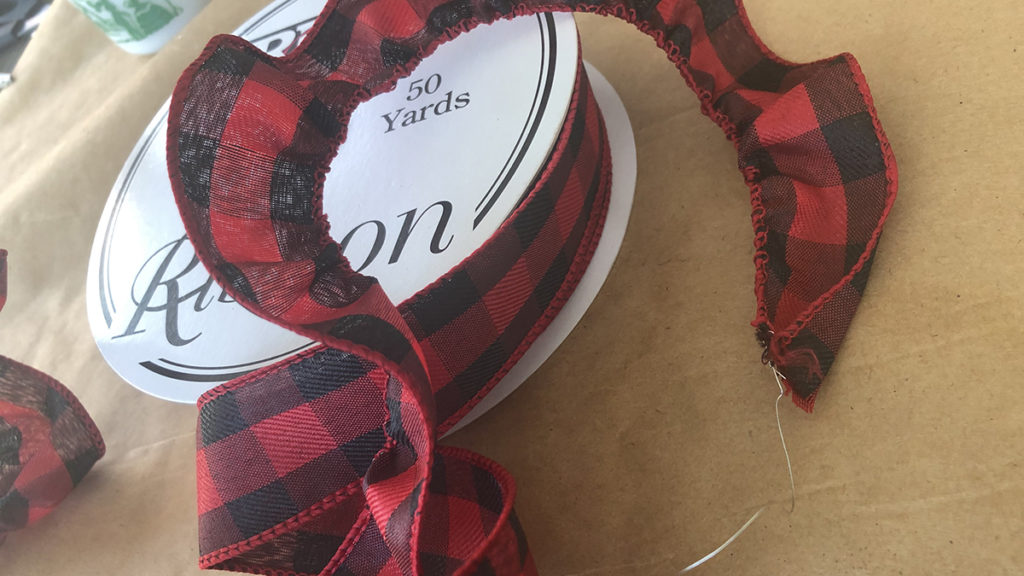
diy christmas stocking with buffalo plaid wired ribbon
DIY Christmas stocking with ruffled ribbon
Click images to enlarge
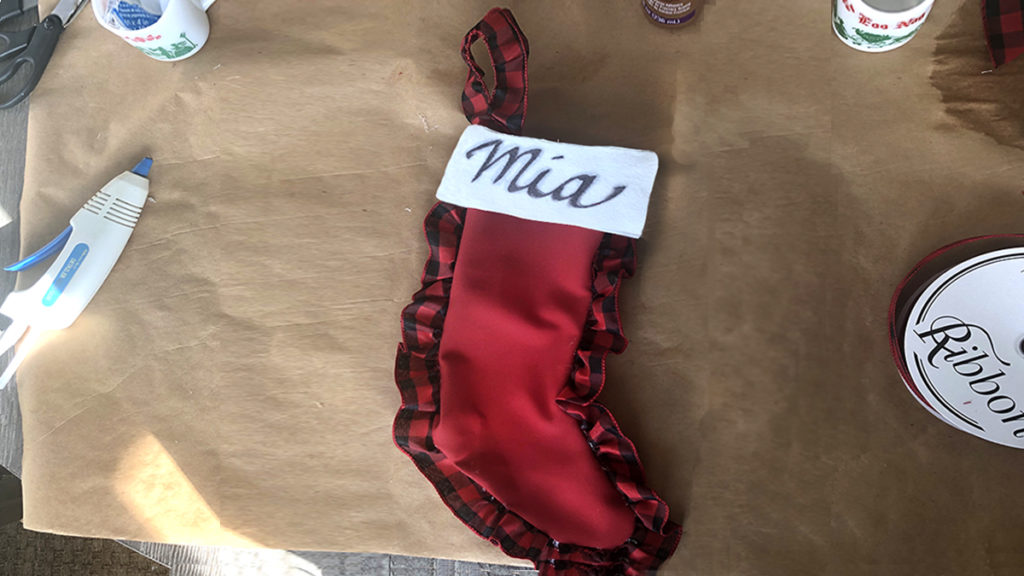
DIY Christmas stocking with name on it

To make a ruffled edge, simply hold the end of one of the wires and keep sliding the ribbon down the wire on that one side. Keep doing this until you have the length of ribbon you need.

I attached the ruffled ribbon all along the edge of the stocking using a glue gun. I also made the loop for hanging from the same ribbon.

At this point, I thought it needed a little more personalization, so I added a name on the cuff. If you want to create your own custom stocking but don’t have the time, you can always order one online.

While making this stocking using only glue was fairly simple, I decided that sewing the stockings would be faster and easier, and make them more secure and functional. However, as I said before, I am not a sewer, so I called my good friend, Ann, who is a master quilter, for assistance. She was happy to help, and it turned out to be a great afternoon of holiday crafting and spending time together.

Making a mini Christmas stocking

We decided to do two stocking sizes: a traditional size and some minis that would be great for gift cards.

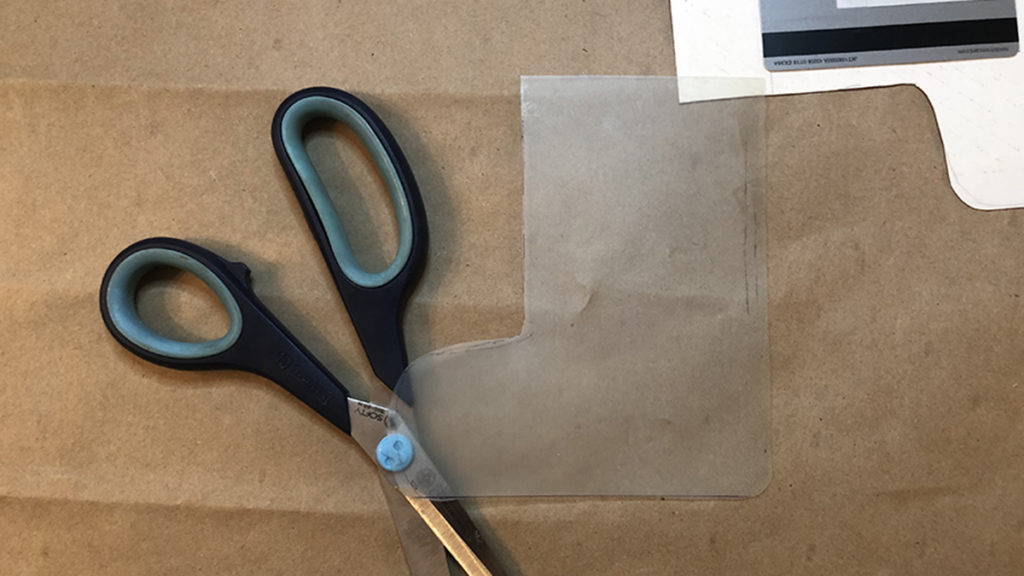
DIY Christmas stocking template
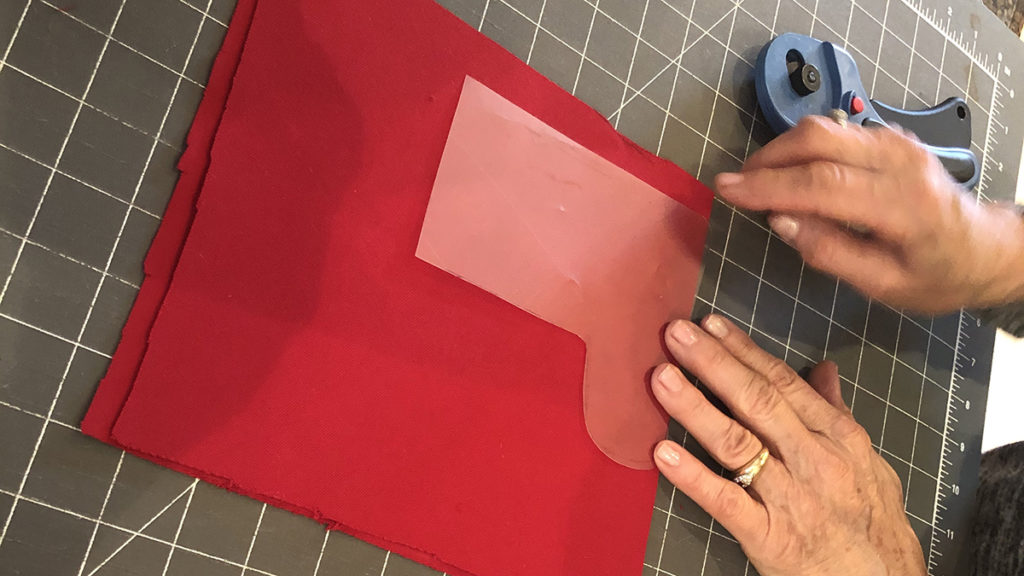
DIY Christmas stocking with tracing shape on fabric
Click images to enlarge
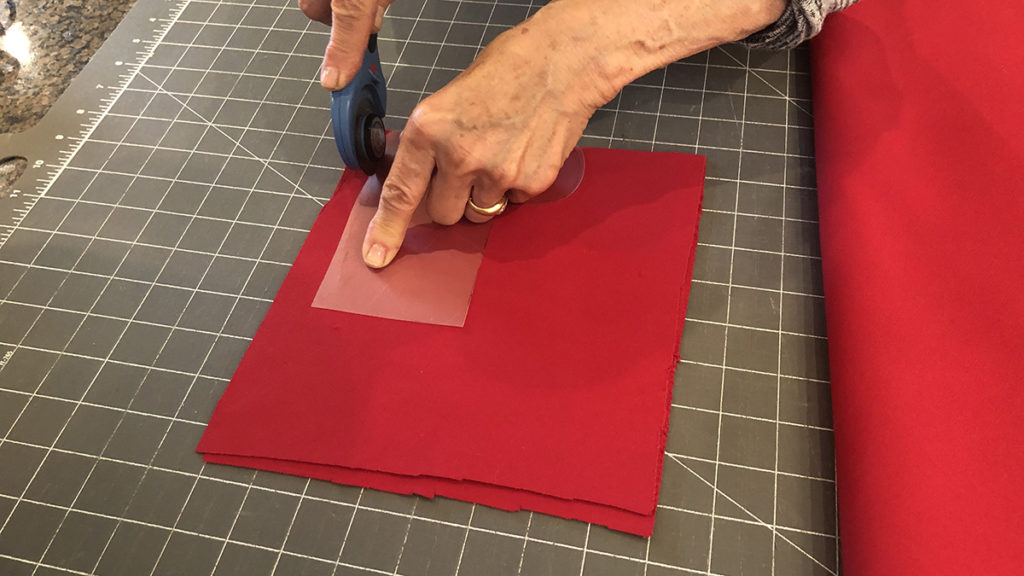
DIY Christmas stocking with cutting out shape

No matter the size you choose, you still need to start with a template. I used a credit card/gift card as a guide and drew the finished size that I wanted the mini stocking to be. Next, I created the final template that is a quarter inch larger all around to allow for the seams. Then, I followed the same steps as above.

Place the template on two pieces of fabric and cut both pieces at the same time.
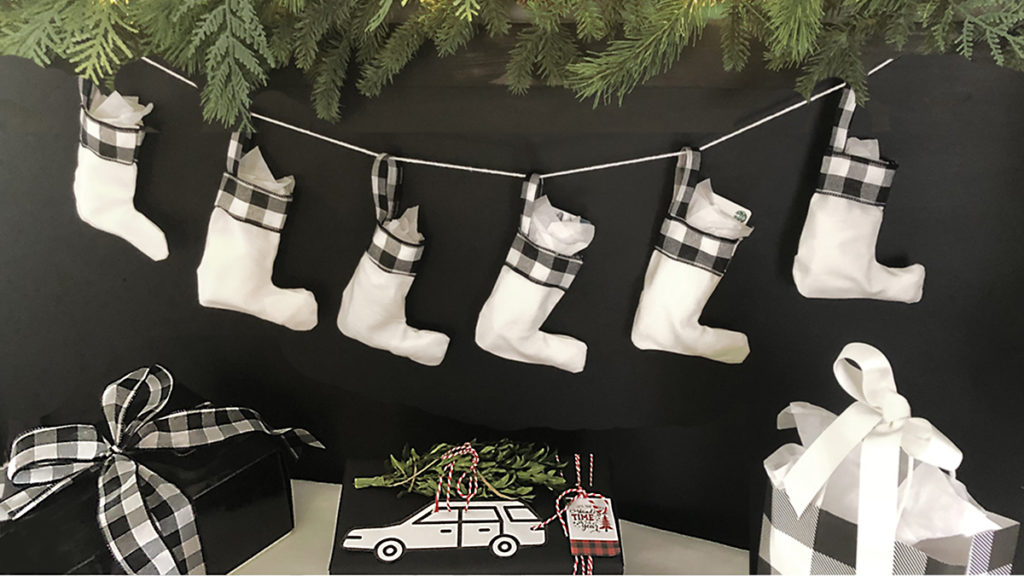
diy christmas stocking with white stockings with black and white buffalo plaid ribbon cuffs

How adorable are these? We went all out on the buffalo plaid, making both red stockings with red and black ribbon cuffs, and white stockings with the black and white buffalo plaid ribbon cuffs. For both versions, we used the same ribbon for the loops.

I will definitely incorporate these mini stocking gift card holders into my wrapping plans this and every year!

More DIY Christmas stocking design ideas

Next, I laid out all the beautiful fabric remnants I bought and had fun putting these fabulous combinations together. Holiday stockings are just one more way to customize your holiday decorating or gift giving. Who said stockings need to be traditional? Why not have them match your style, maybe even using the same fabric as your pillows or curtains?
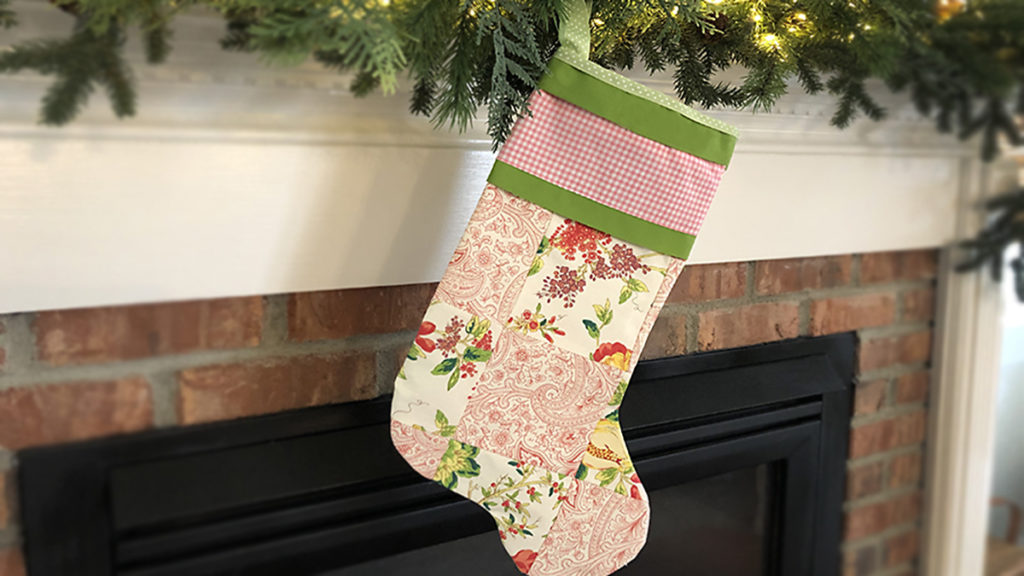
DIY Christmas stocking hanging from mantle

This stocking would be perfect as a gift bag for my quilting friend, Ann. I love the layering we did using both fabric and ribbon for the cuff.
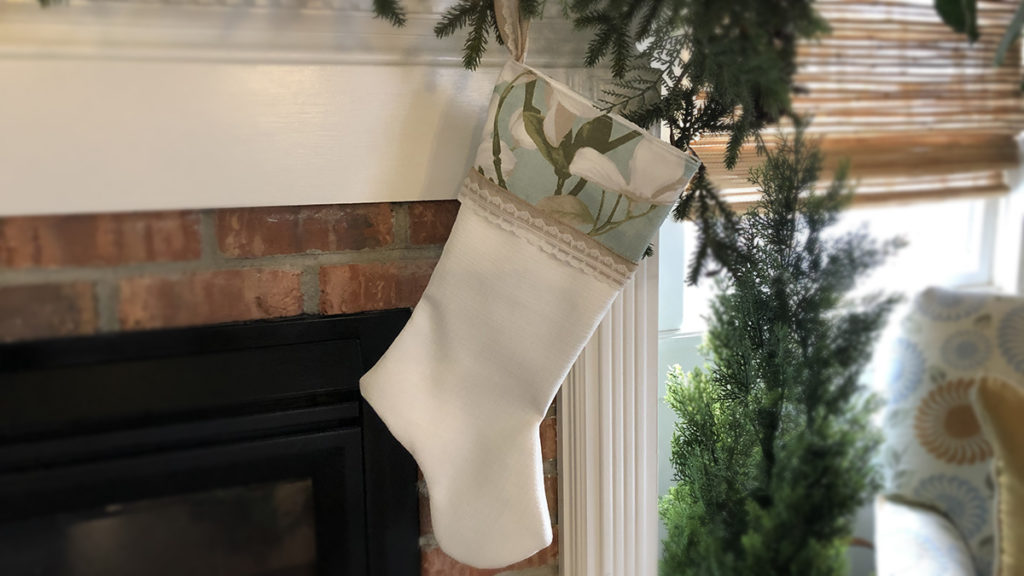
DIY Christmas stocking modern looking

This version is so pretty and modern looking. Adding the burlap and lace ribbon trim on the cuff adds just a touch of rustic to an otherwise elegant stocking.
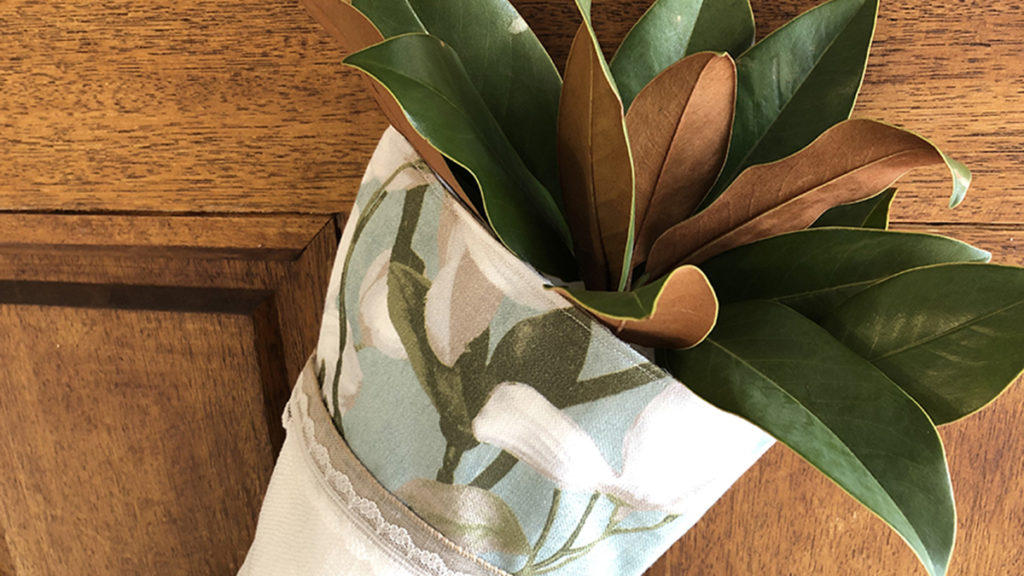
DIY Christmas stocking with magnolia leaves

How great does it look on a front door brimming with magnolia leaves?
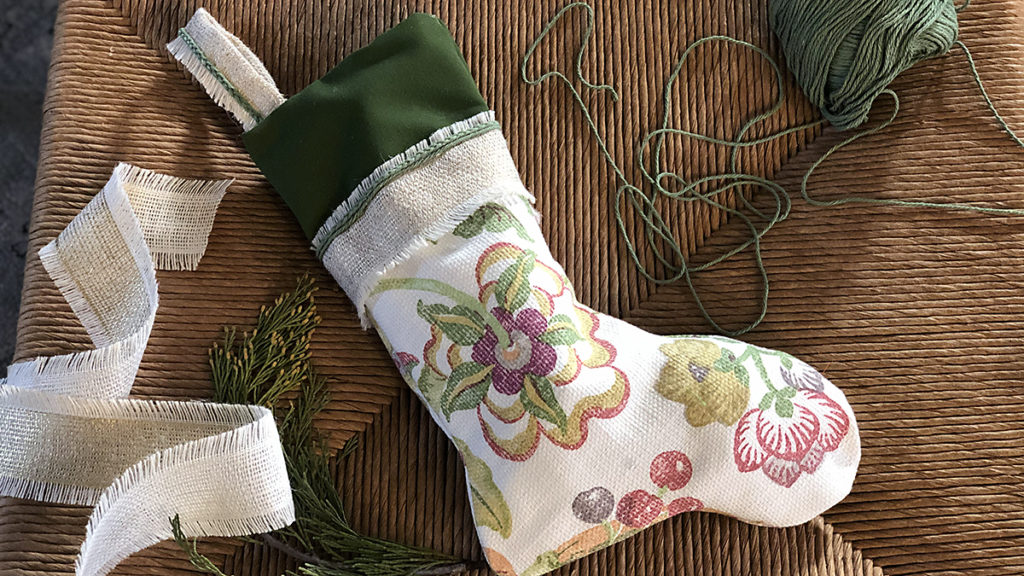
DIY Christmas stocking with materials

There’s something about all the texture in this combo that just did it for me! Again, it’s all in the details. Braiding the green yarn before gluing it to ribbon edging just brings it to the next level.

Ann and I had so much fun creating these beautiful stockings, and we hope they inspire you to try making some of your own.

I found the right combination for a detailed and structurally sturdy stocking was sewing the main portion and gluing the details. Find the method that’s right for you and remember — just have fun with it!
DIY Magical Unicorn Decorations

Unicorns love to party — that’s one thing I love about them. So, to maximize the magical effect of these mythical creatures, I came up with these two DIY unicorn decoration ideas for my next get-together.

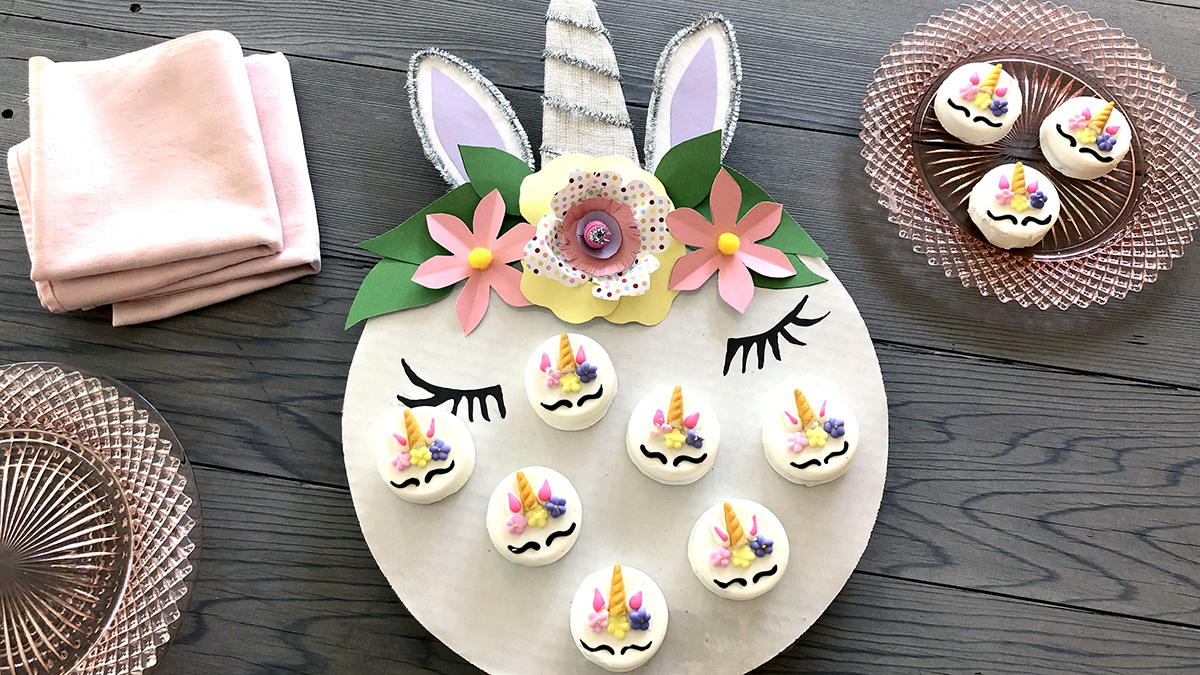
Unicorn party platter

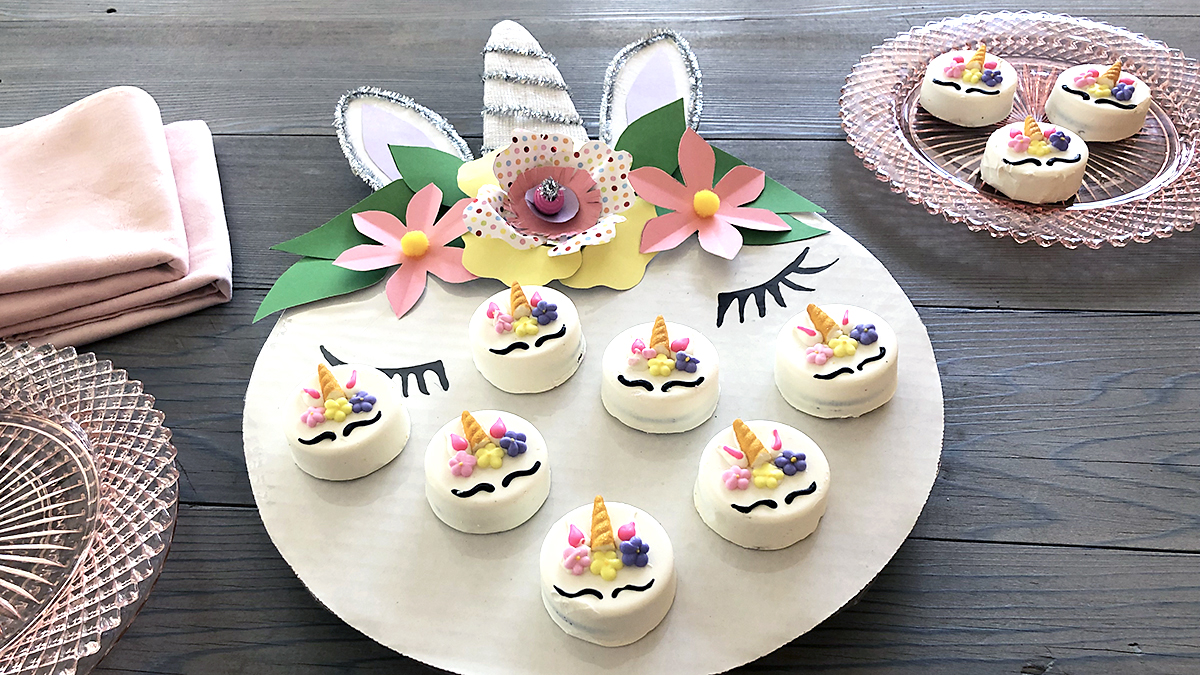
An adorable unicorn party platter is perfect for serving Unicorn Dipped Oreo Cookies, or any other unicorn-themed snacks you might have (unicorn truffle cake pops, anyone?).

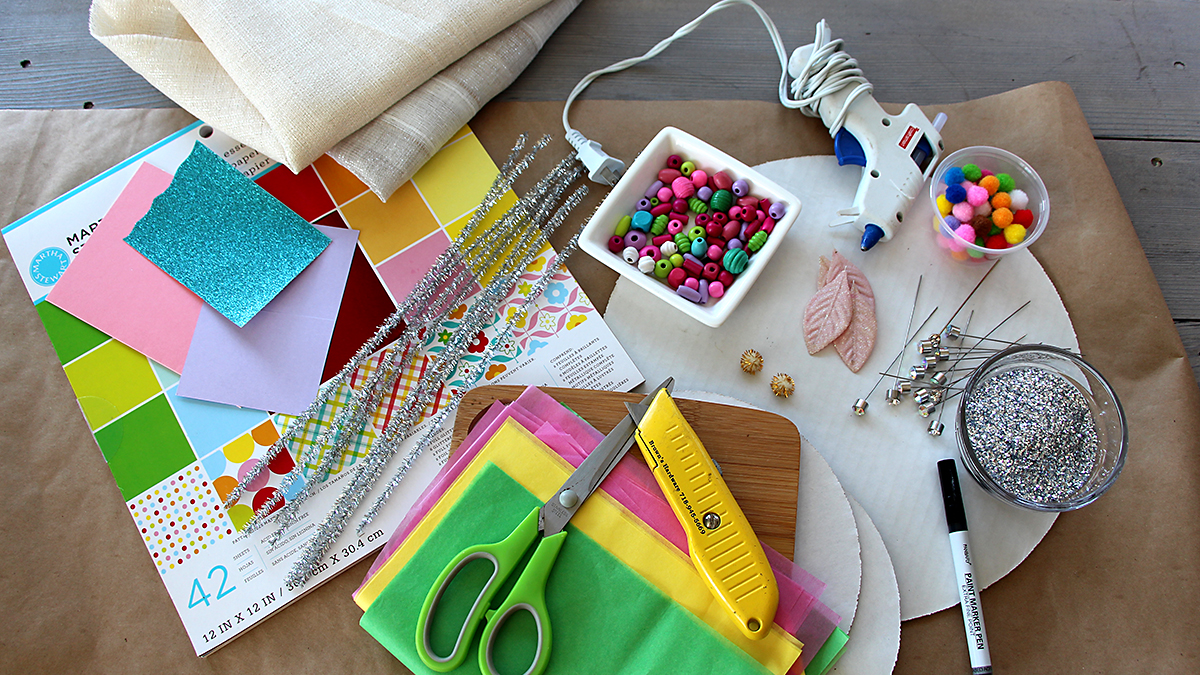
Before you start to make your platter, you need to gather your “stuff.”

unicorn decorations with unicorn party platter materials

It has become my goal in life to GET RID OF STUFF! And let me tell you, that’s not easy for a “stuff person” who writes a lifestyle blog. So, the first thing I did was go through all my craft stashes and gather anything that looked “unicorn-y” — in other words, bright and sparkly! Besides cardboard and decorative paper, I also got out scissors and glue.

I’m proud to say I didn’t have to buy anything for this project; I just looked around my house and saw what I already had that I could repurpose in new and interesting ways.

What you’ll need

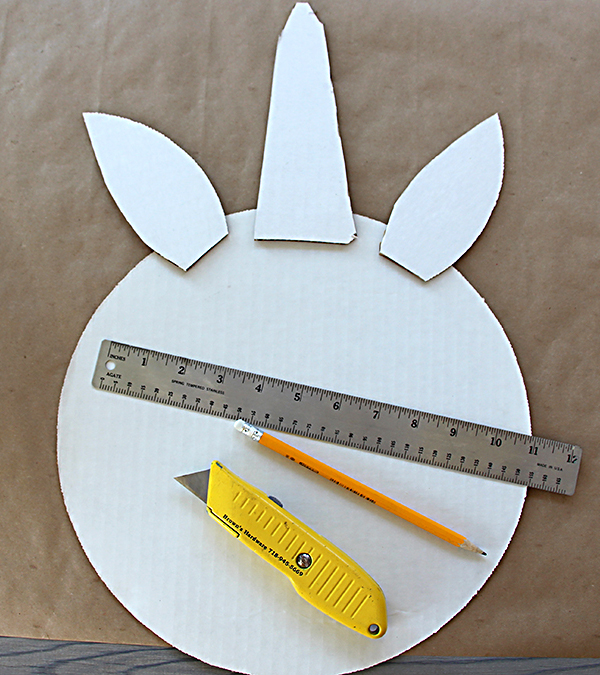
  • Template for the eyes, ears, and horn.
  • Enough cardboard for:
    • 1 12-inch round for face
    • 2 ears, 2 inches x 4.5 inches each
    • 1 7-inch horn

I still have a few cardboard cake plates left over from my daughter’s stint as a baker, so I used those. If you don’t have something like that, just grab one of the many cardboard boxes I’m sure you have lying around from all the deliveries you’ve gotten lately. If you don’t have cardboard with a white side, you can always paint it or cover it with white paper before assembling.

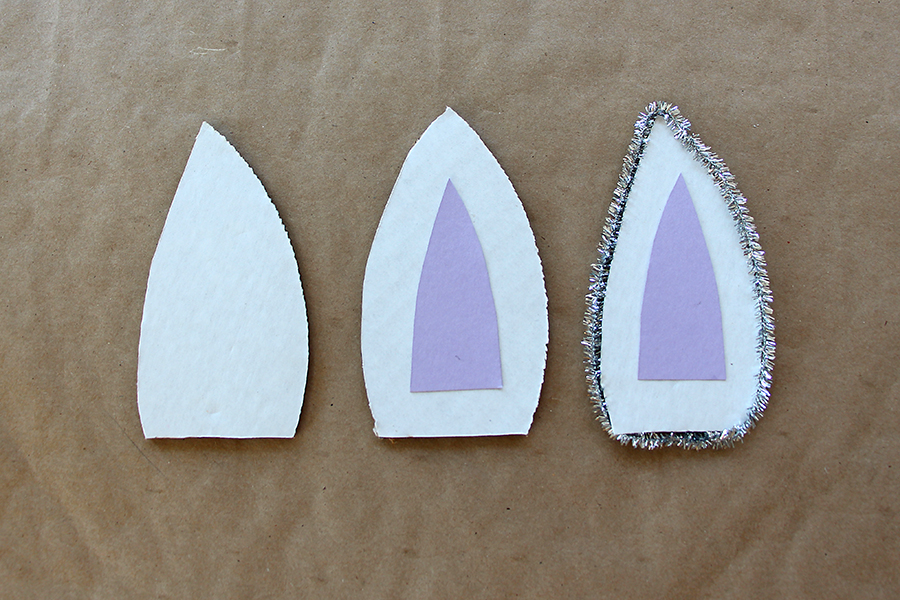
To add character to the ears, I cut out a smaller piece in a nice lavender paper to add to the center of the ear. Then I used hot glue to add a silver sparkly pipe cleaner all around the edge.

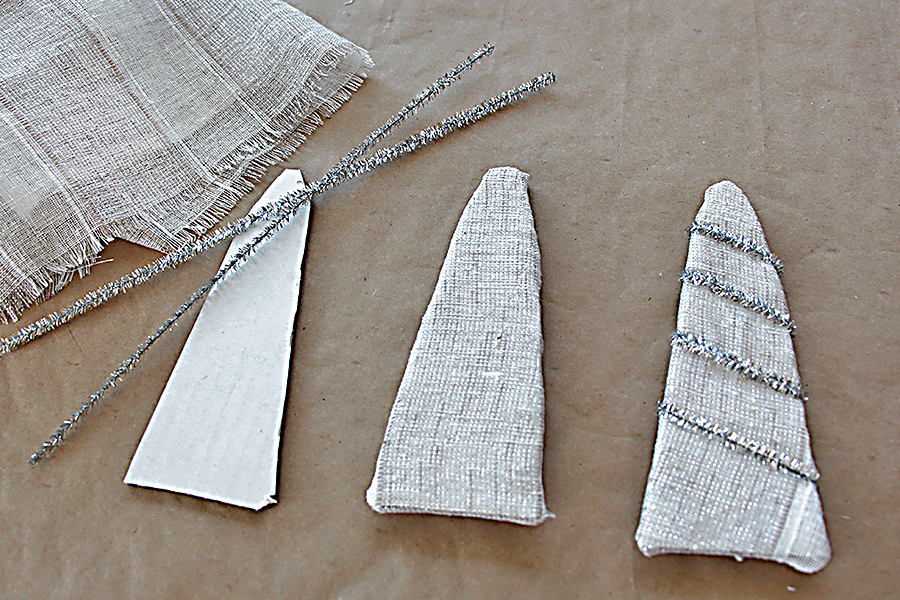
I covered the horn with a scrap of sparkly fabric left over from a Christmas stocking project. I cut the fabric slightly larger than the horn and wrapped it around, glued it in the back, and then wrapped the horn with two silver pipe cleaners.

unicorn decorations with flower template

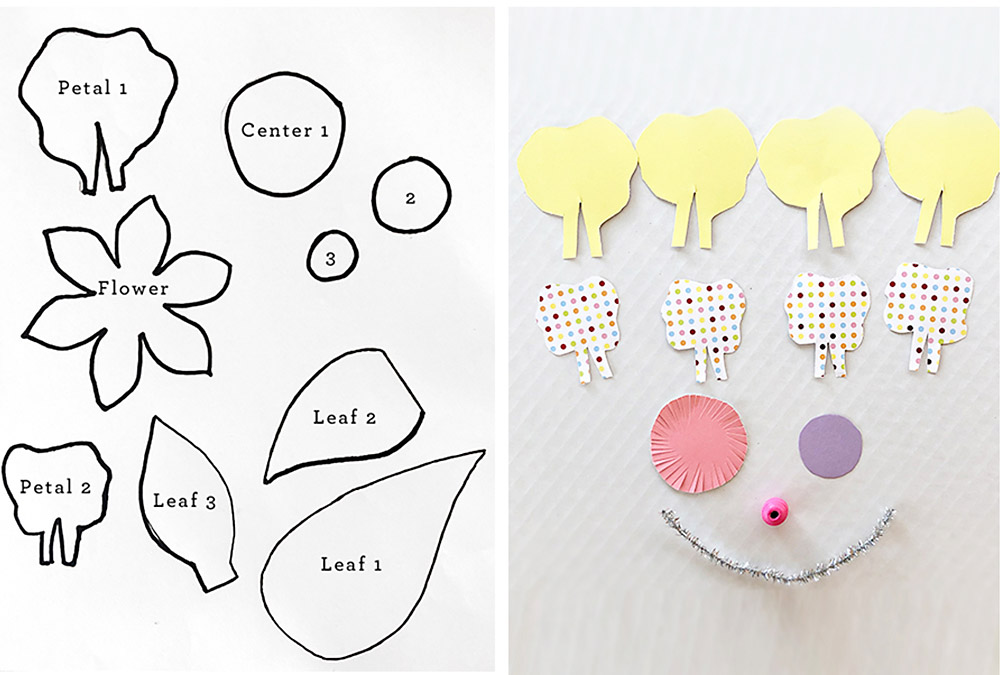
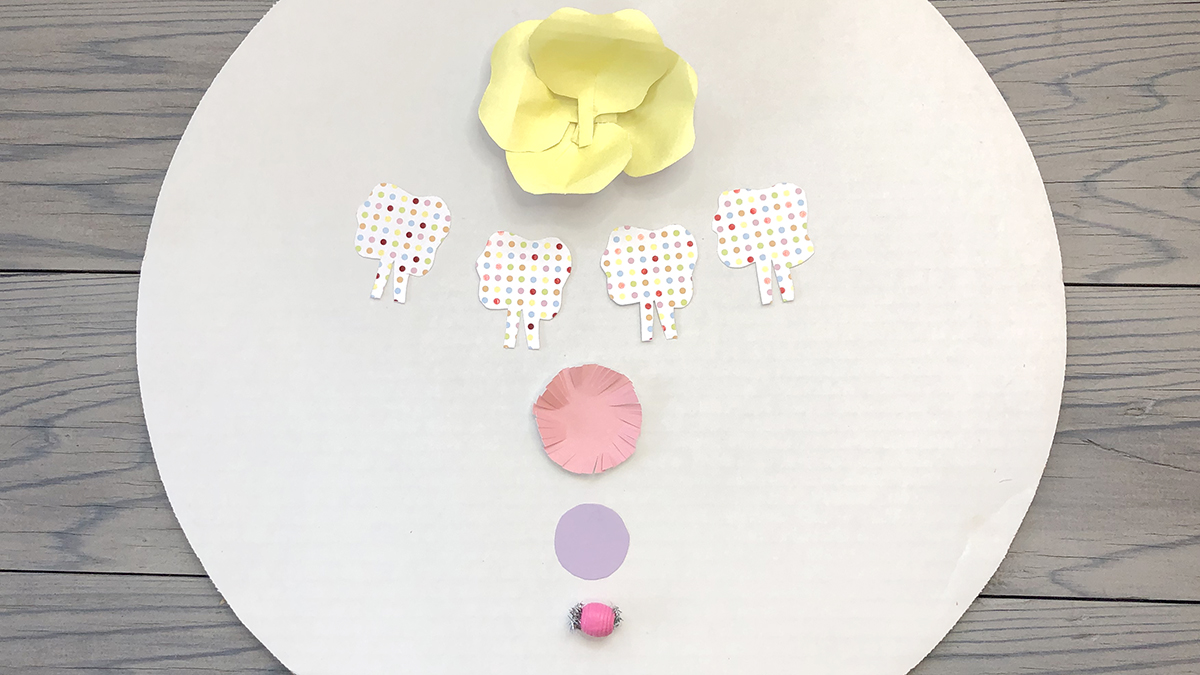
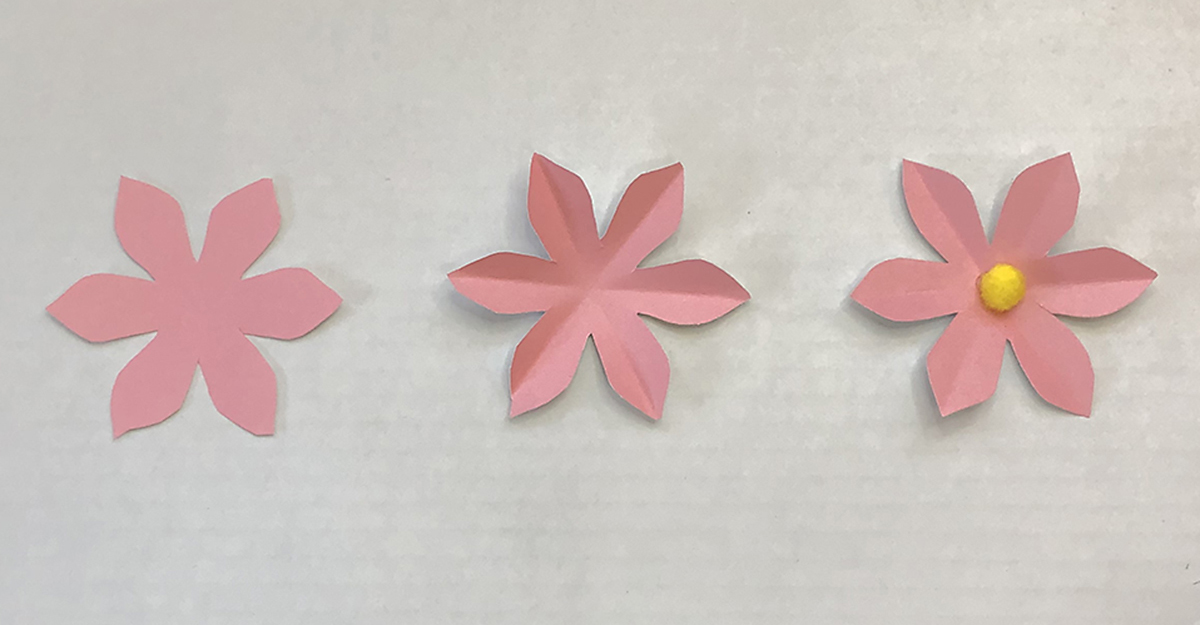
Using the flower template, cut out all the pieces needed to make each flower. Make sure to use different colors for each part of the flowers and green for the petals.

Assembling the first flower

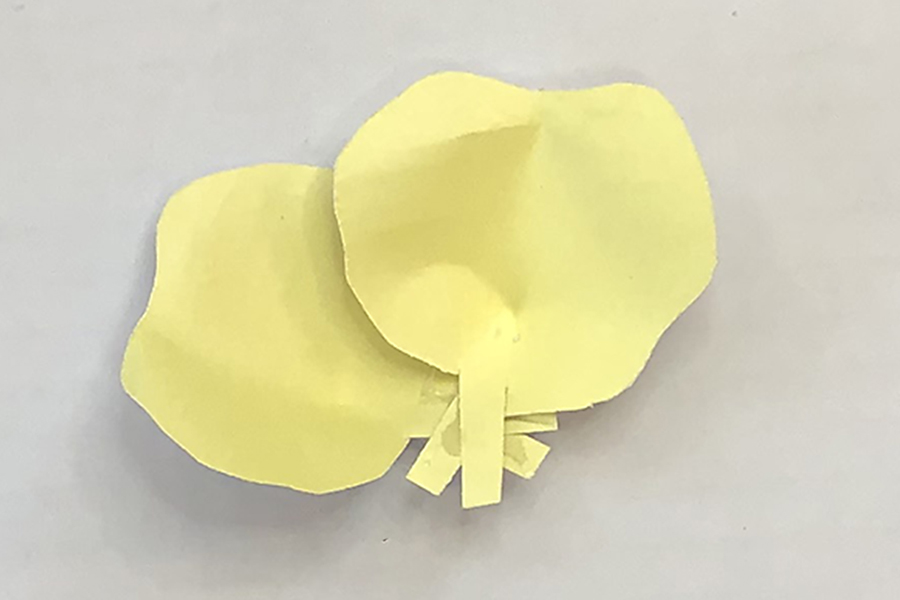
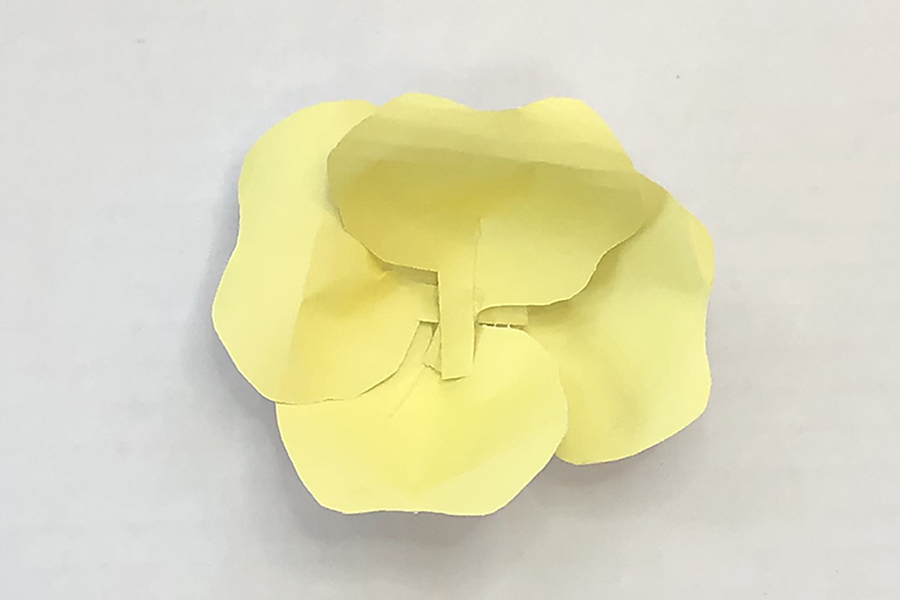
Starting with the large petals, dab a small amount of glue onto one side of the stem and gently bend the other stem to overlap the glue. Press and hold to secure. Do this to all four petals.

Assemble the first layer of the flower by overlapping…

…and gluing the petal stems together as you go.

unicorn decorations with polka dot paper

Repeat this step with the smaller petals. I chose a polka dot paper to add a little whimsy.

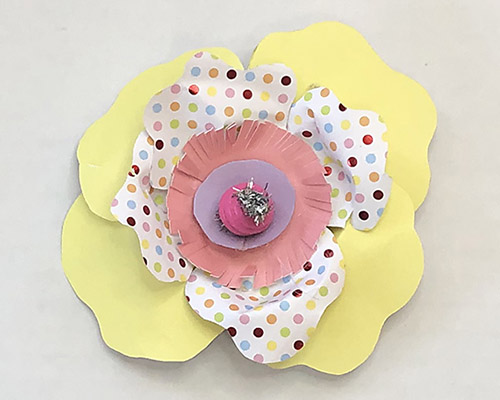
Then, glue each layer on top of the next in the following order:

  1. Large petals
  2. Smaller petals
  3. Large center circle (that I fringed the edges of)
  4. Medium-size center circle
  5. Smallest size center

Again, for a bit more pop, I used a wooden bead with a sparkly pipe cleaner laced through the center. Remember: Use what you have and be creative.

Creating the second flower

unicorn decorations with folded flowers

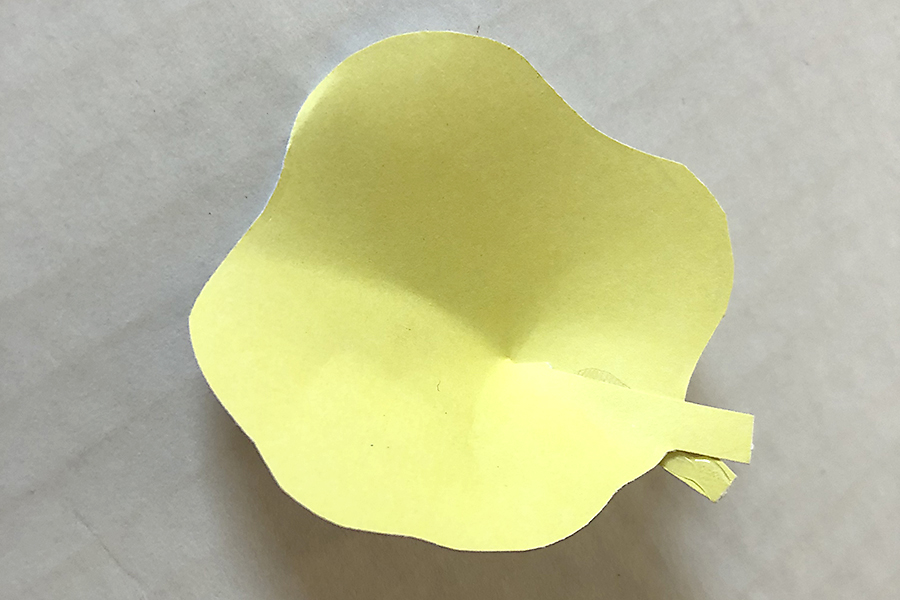
The other flower on the template is a single layer with a pom-pom center. To add more dimension to this flower, add a crease to each petal by simple folding the flowers in half three times.

Assembling the unicorn party platter

unicorn decorations with drawn on unicorn eyes

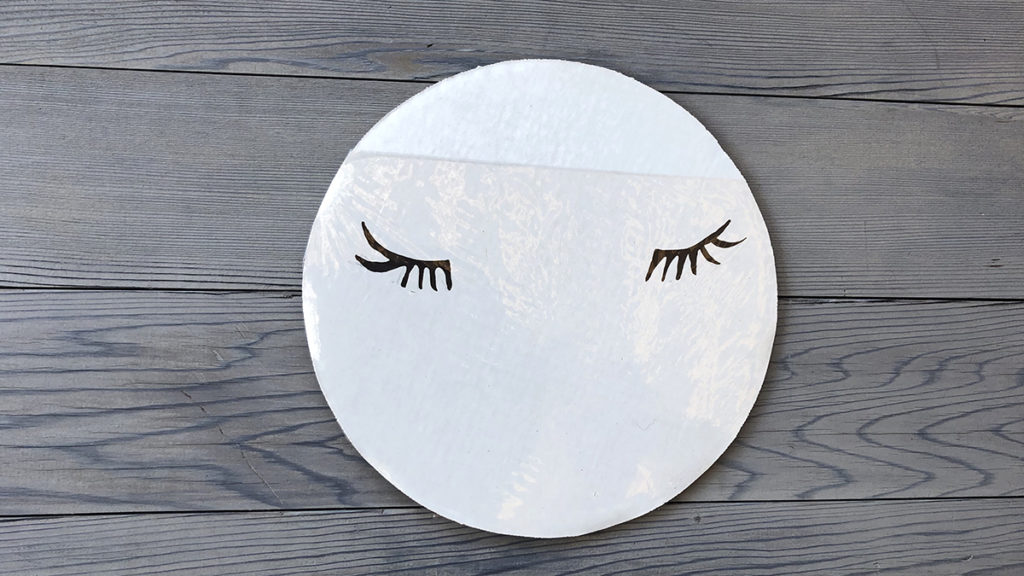
With a black marker, draw eyes on the face using the template as a guide.

unicorn decorations with cellophane unicorn head

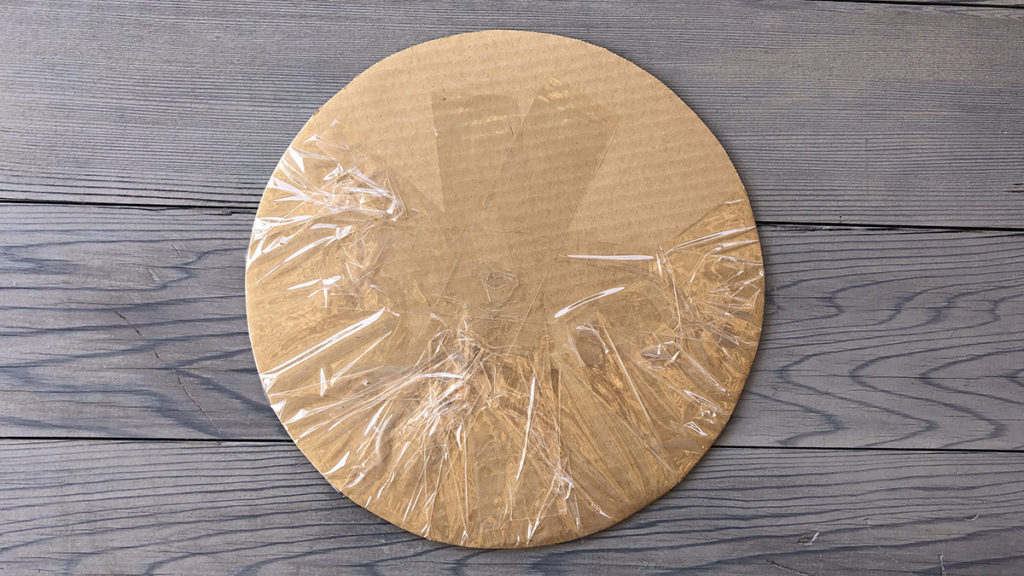
Cover with a piece of clear protective cover, such as cellophane, plastic wrap, or clear contact.

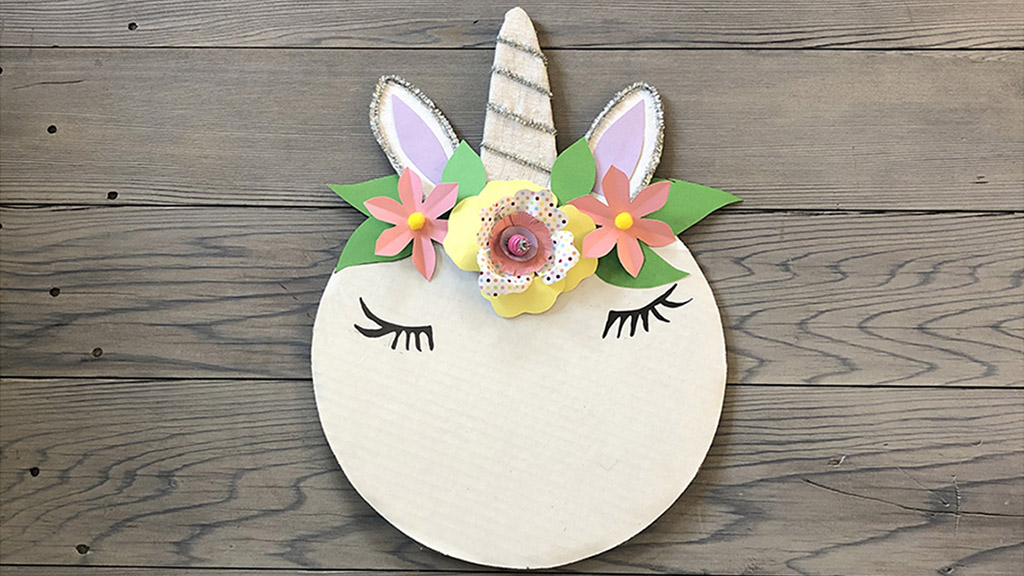
Glue the horn on, then the ears, then the large center flower, then the green leaves — three on each side — and, finally, the two smaller flowers on either side of the center flower.

unicorn decorations with unicorn party platter with place setting

How adorable is that! I really love the way it turned out. And the fact that I made it using bits and pieces of things I already had is my kind of upcycling!

This platter is perfect for serving sparkly unicorn cupcakes, too!

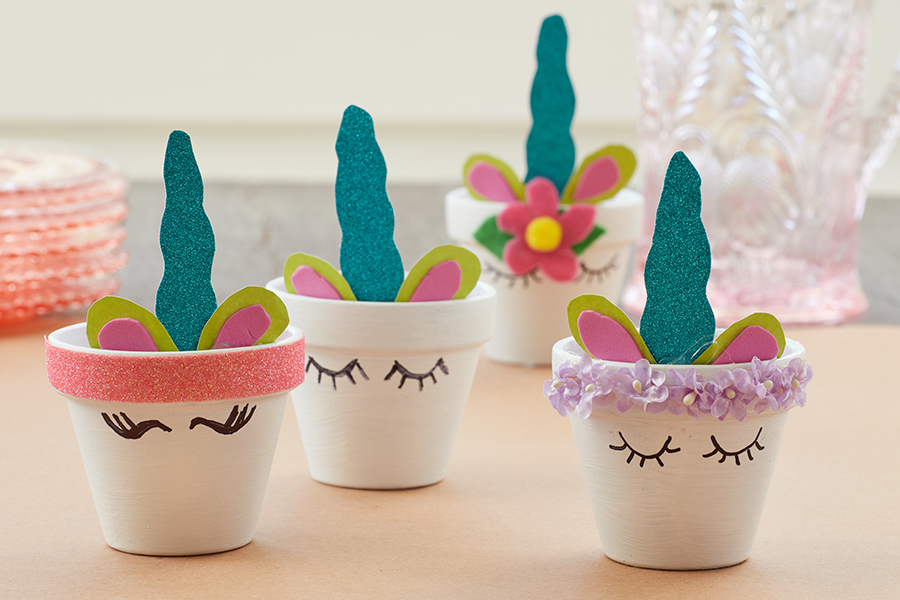
Mini unicorn planters

unicorn decorations with mini unicorn planters

These mini unicorn planters will take the decor at your unicorn birthday party to the next level. They have a gazillion different uses and, as most of my projects are, are very easy to make. They are a fun project to do with little kids, too.

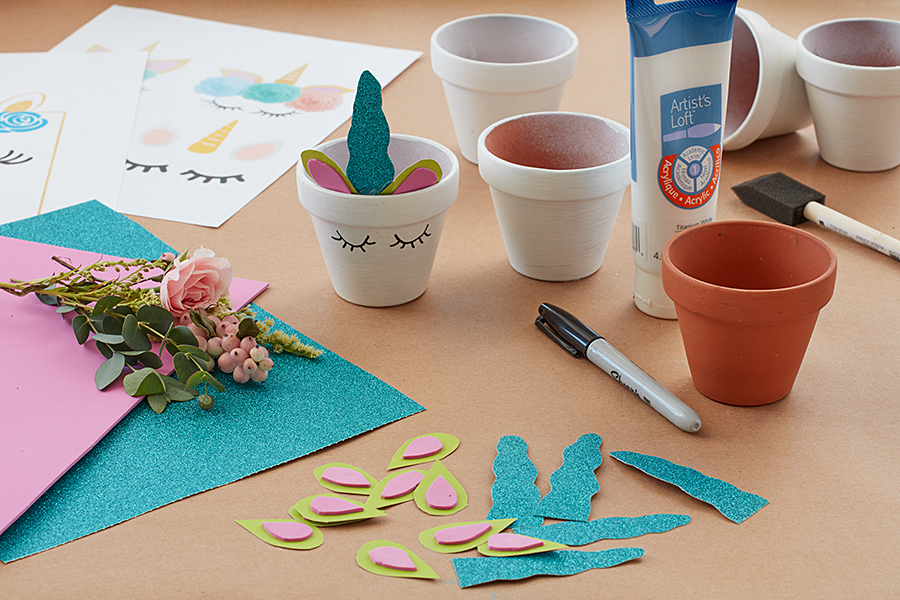
unicorn decorations with materials for mini unicorn planters

What you’ll need

  • Mini clay pots
  • White paint (acrylic, spray paint, any kind will do)
  • Paint brush
  • Craft paper and foam sheets (in various bright colors, and one with sparkles)
  • Decorative elements (washi tape, faux flowers, sparkles)
  • Black permanent marker

Instructions

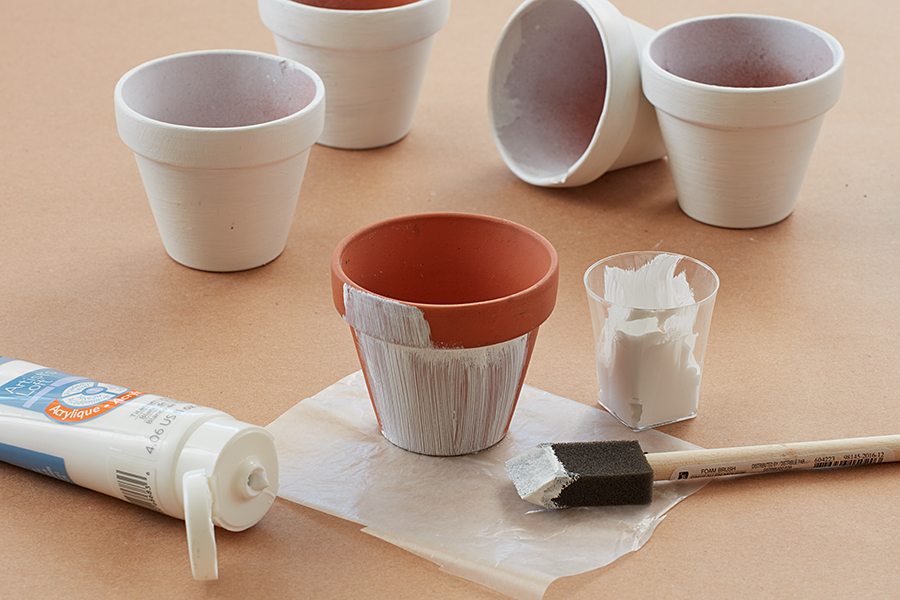
unicorn decorations with painting a mini clay pot

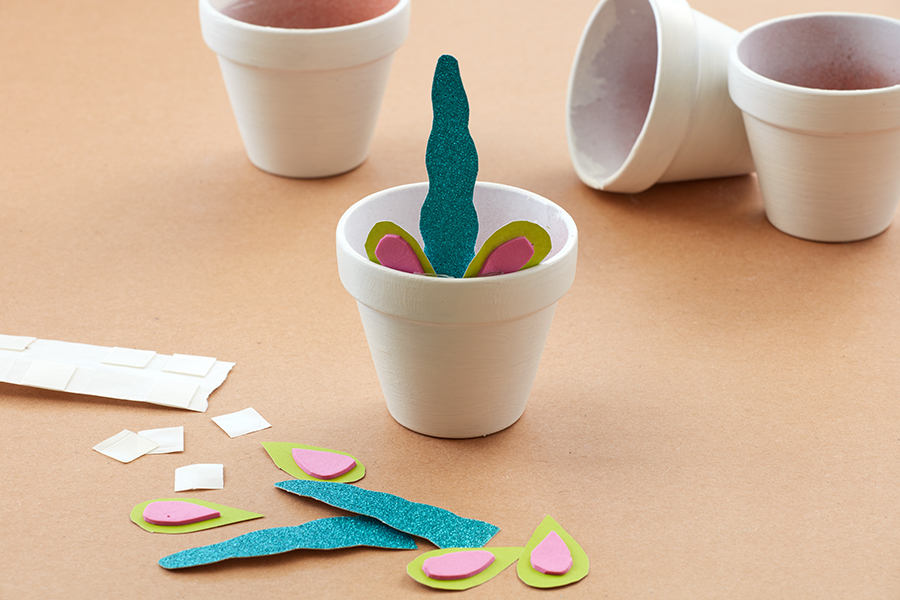
Paint all the pots.

unicorn decorations with gluing horn and ears in pot

Cut out the horn and ears, and glue them to the inside rim of each pot.

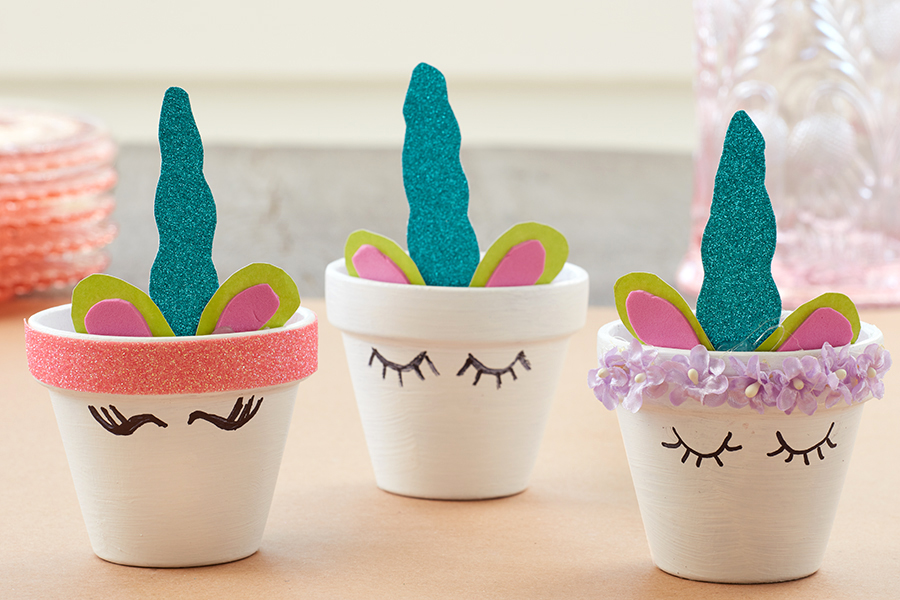
unicorn decorations with mini unicorn planters with decorated rims

Decorate the rim to add a fun pop of color.

Then, draw flirty little unicorn eyes under the rim on either side of the horn using a black permanent marker. You can find many templates online from which to draw inspiration. I like to do them freehand because, just like snowflakes, no two unicorn’s eyelashes are exactly the same!

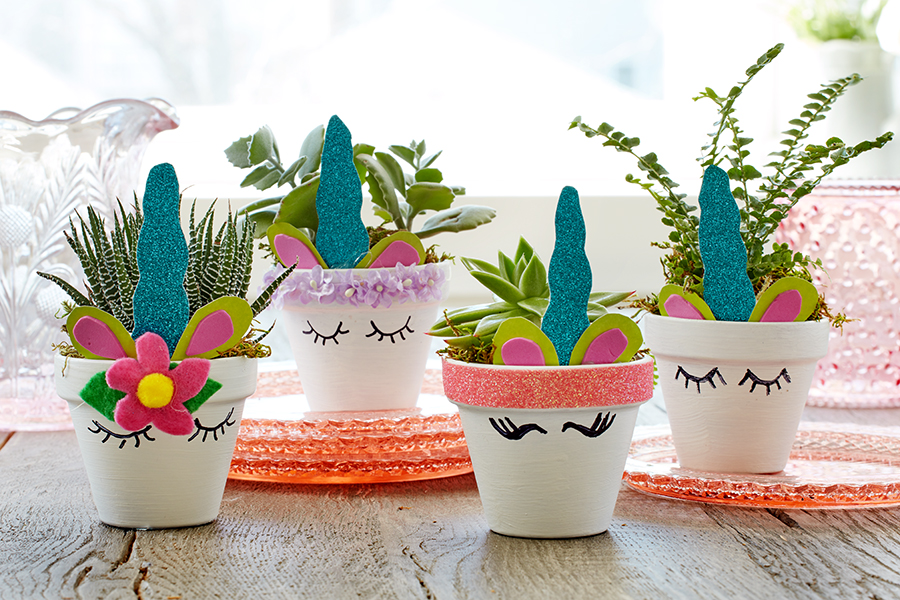
unicorn decorations with mini unicorn pots filled with plants

I filled my uni-pots with mini plants: one cactus, two succulents, and one fern. They would look amazing with fresh flowers as place settings or filled with candy for a sweet take-home gift.

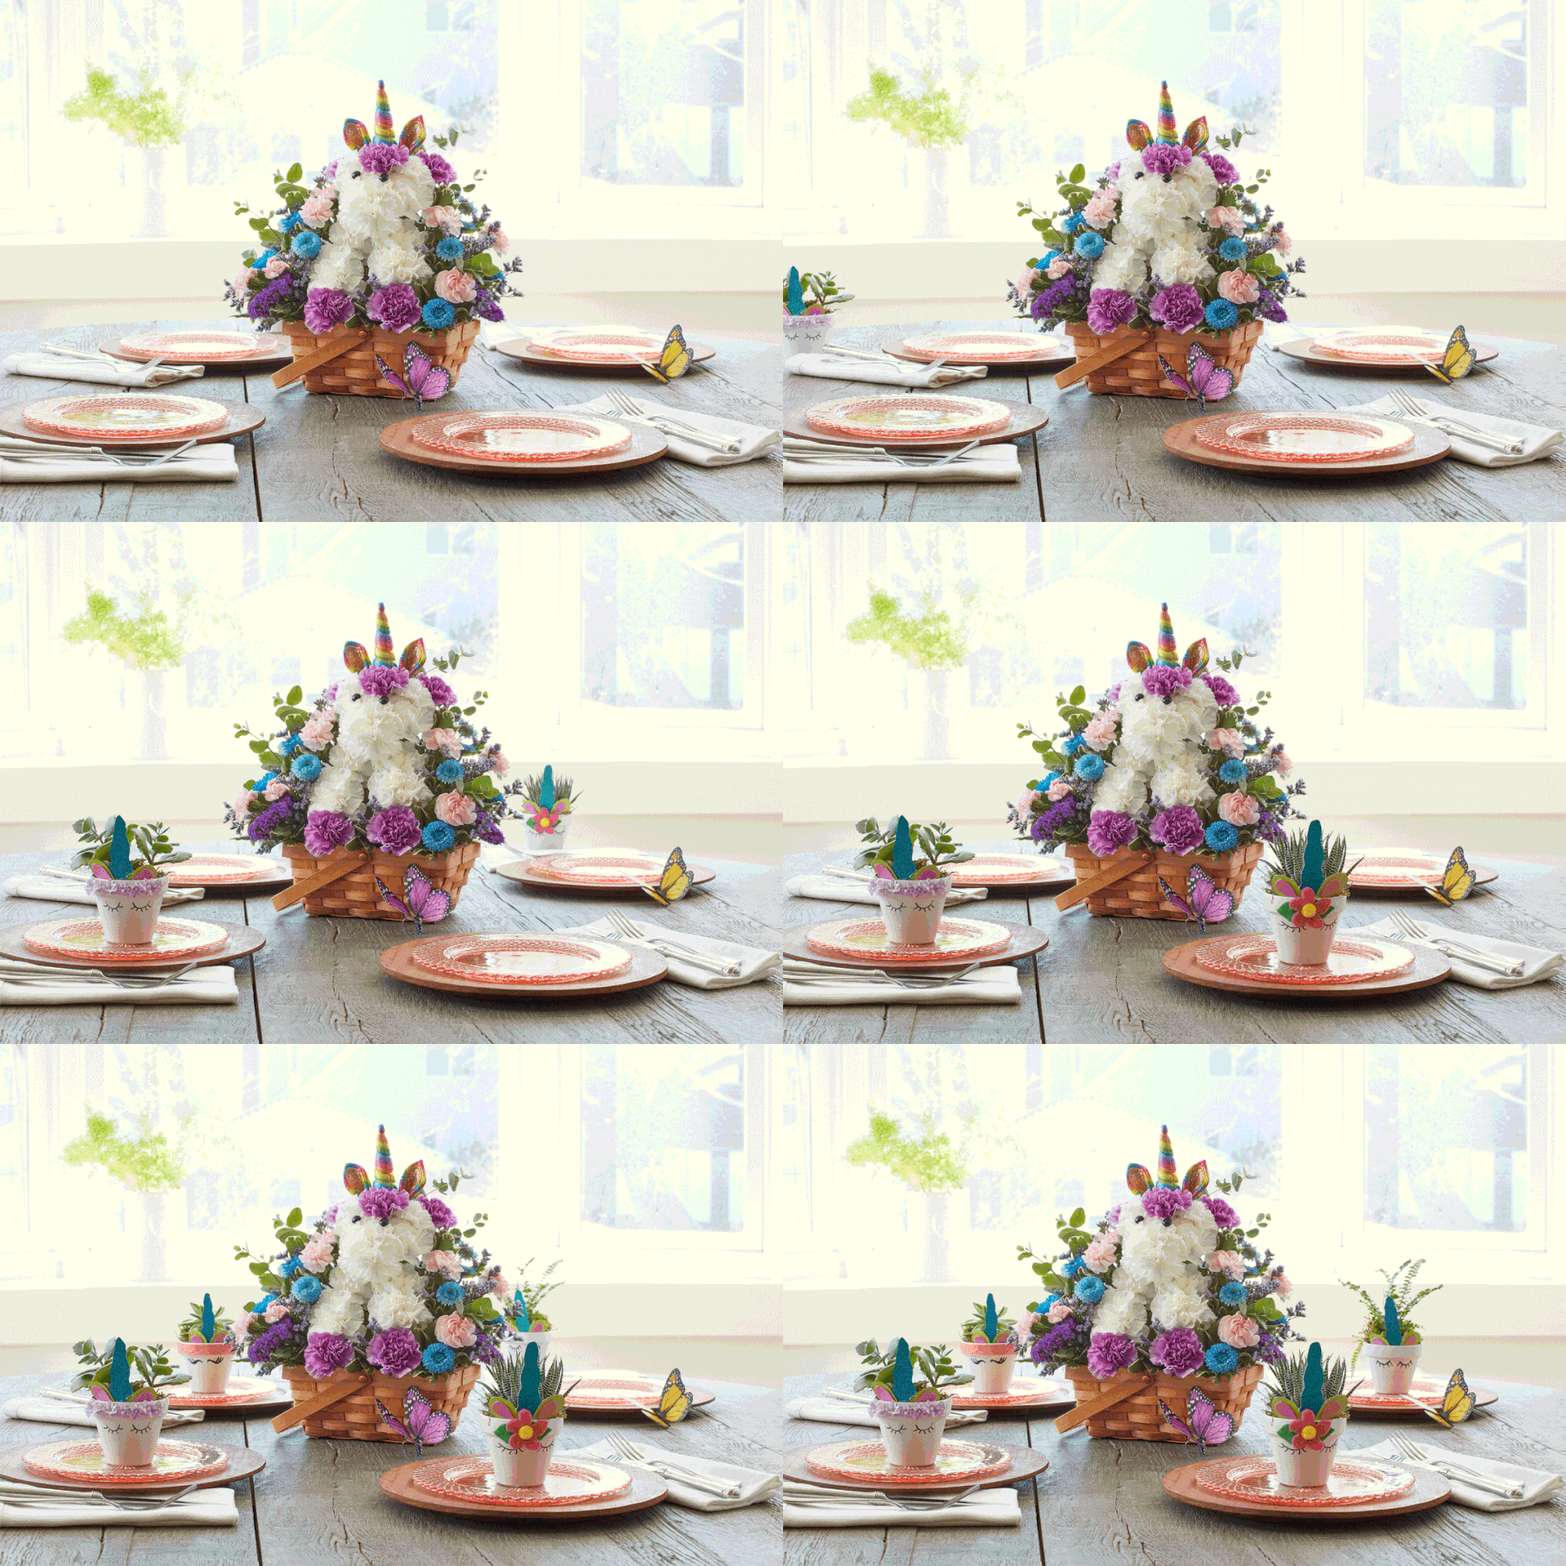
unicorn planters and floral arrangement

These planters are the perfect complement to the Enchanting Unicorn™ floral arrangement, one of the most popular gifts in the Enchanting Unicorns collection. Pair them at your next magical unicorn party, and your little one will be over the moon!

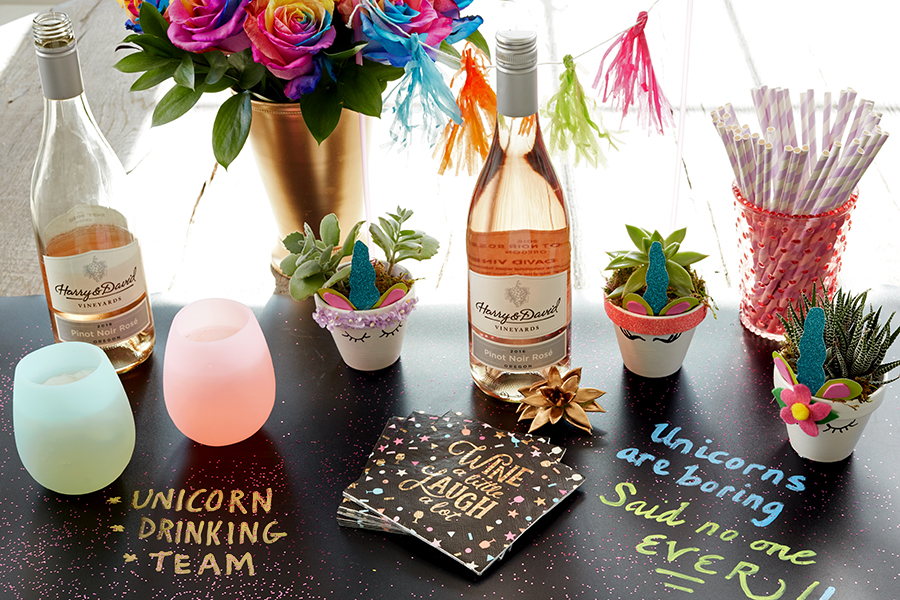
unicorn decorations with mini unicorn planters with wine and kaleidoscope roses

But unicorns aren’t just for little girls — they’re for everyone! I heard their favorite type of wine is, in fact, rosé. Pop open a bottle at your next unicorn-themed party and let the good times flow.

Have a magical day!

Rosé Sangria and Other Ways to Enjoy Roses During Summer

What are the first two things that come to mind when you think of summer? A lot of folks might say “sun and surf” or “grill and chill,” but if you ask me, it’s roses and rosé! And I’m not talking about Lauren Zima’s recap show for Bachelor Nation.

For me, summer is about celebrations and relaxation. Flirty and frivolous, rosé is the perfect beverage to enjoy on a sun-kissed balcony, at a bustling beachside bar, or while dining al fresco on a warm summer evening. Add the overwhelming fragrance and stunning beauty of rambling roses and you have the perfect storm of summer perfection!

Woman with glass of rose

Here are three ways to enjoy roses and rosé this season.

Rosé sangria mojito cocktail

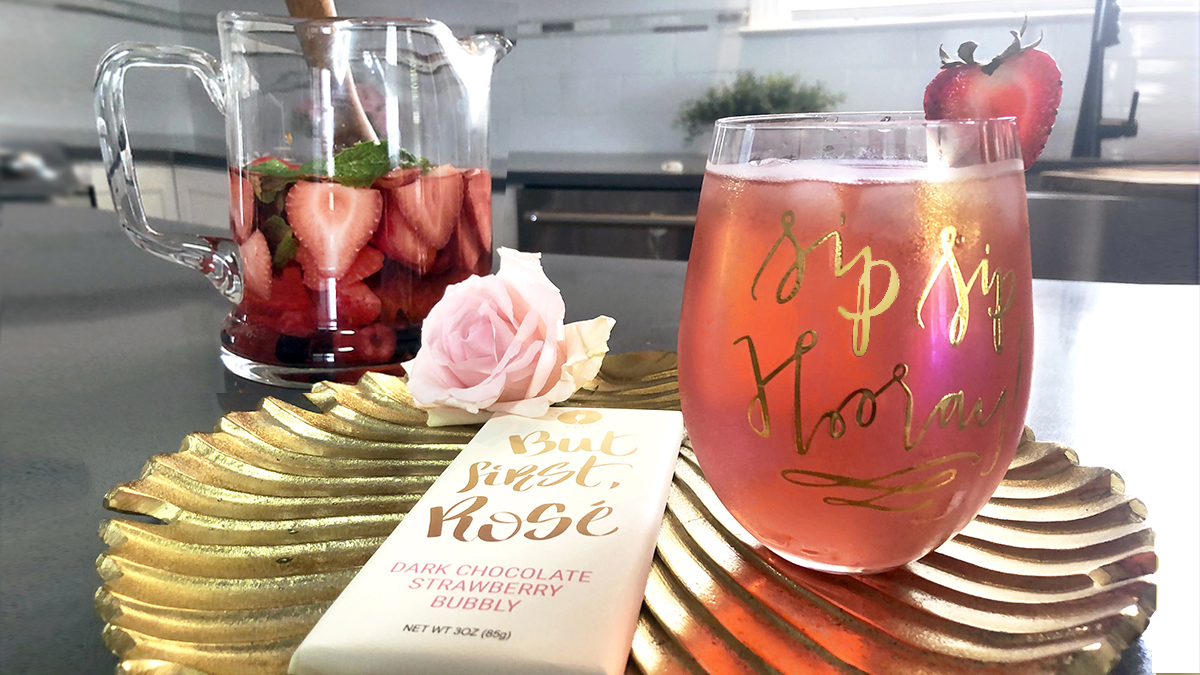
Rosé is extremely versatile and can function as a base for your favorite cocktail, adding lovely flavors like strawberry, raspberry, and citrus. I wanted to create a summer cocktail that was light, with layered flavors, but not sweet. What I came up with is a cross between sangria and a mojito.

This rosé sangria mojito is a more grown-up cocktail. If you prefer your drinks on the sweeter side, you can add some simple syrup to the mix or use a sweetened cranberry juice instead of the flavored seltzer.

This drink pairs perfectly with the chocolate strawberry bubbly bar or dark chocolate sparkling rosé cordials that come with the Girls Night In Rosé Gift Basket. Just mix it up, pour it into the “Rosé All Day” stemless wine glass, and you’re ready for any celebratory occasion!

Rosé Sangria Mojito Cocktail

Prep Time 5 minutes
Cook Time 10 minutes
Chill time 1 hour
Total Time 1 hour 15 minutes

Ingredients:

  • 1 bottle rosé
  • 1 can cranberry seltzer
  • 2 cups rum
  • ½ cup strawberries, plus more for garnish
  • ½ cup raspberries
  • ½ cup blueberries
  • Fresh mint

Instructions: 

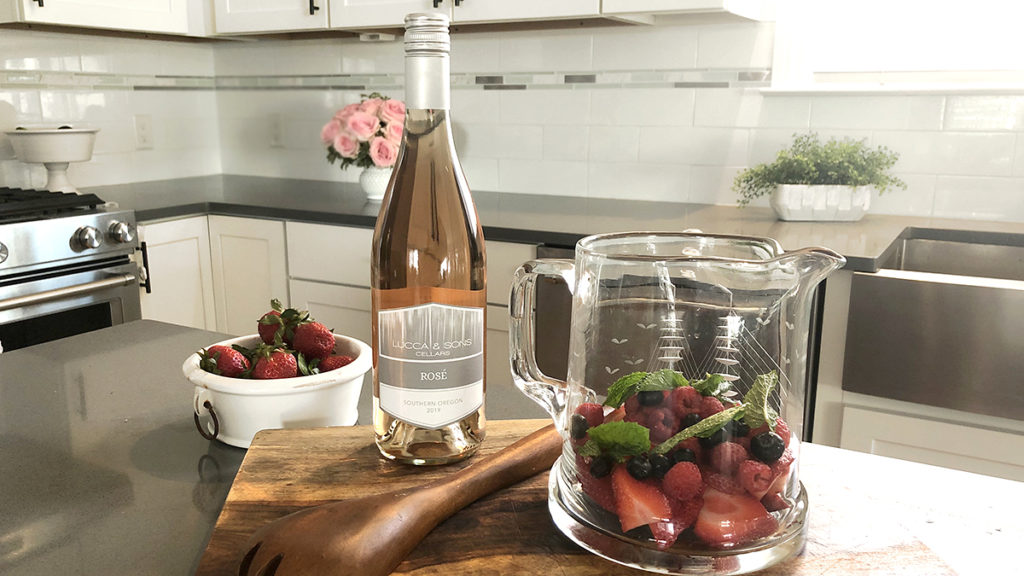
  • Wash all the berries. Remove the tops of the strawberries and cut into slices.
  • Add all the fruit to the pitcher, along with a few sprigs of fresh mint.
    Photo of rosé sangria with a bottle of rosé and a pitcher of fruit
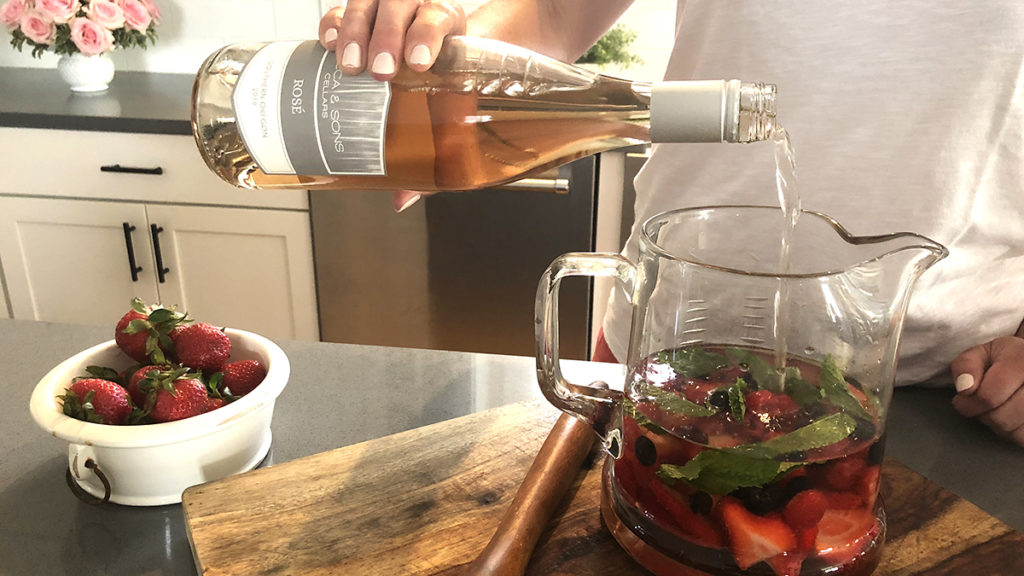
  • Add two cups of rum, the bottle of rosé, and a can of cranberry seltzer.
    Photo of rosé sangria with pouring a bottle of rosé into a pitcher of fruit
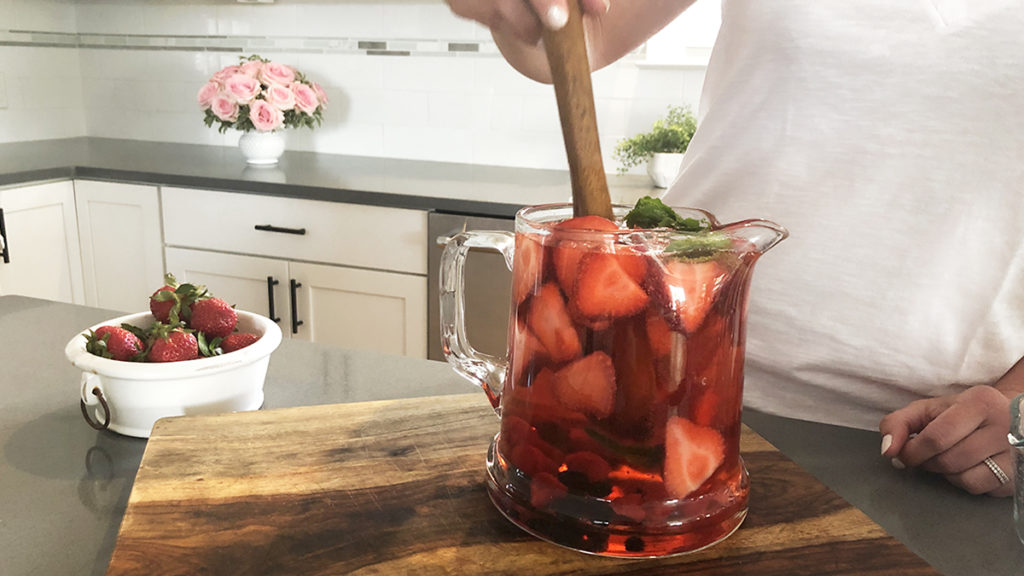
  • Stir to mix all the ingredients together and refrigerate for about an hour.
    Photo of rosé sangria with stirring the pitcher of fruit and sangria
  • When ready to serve, pour in a glass over ice and garnish with a strawberry slice.

DIY roses and rosé wreath

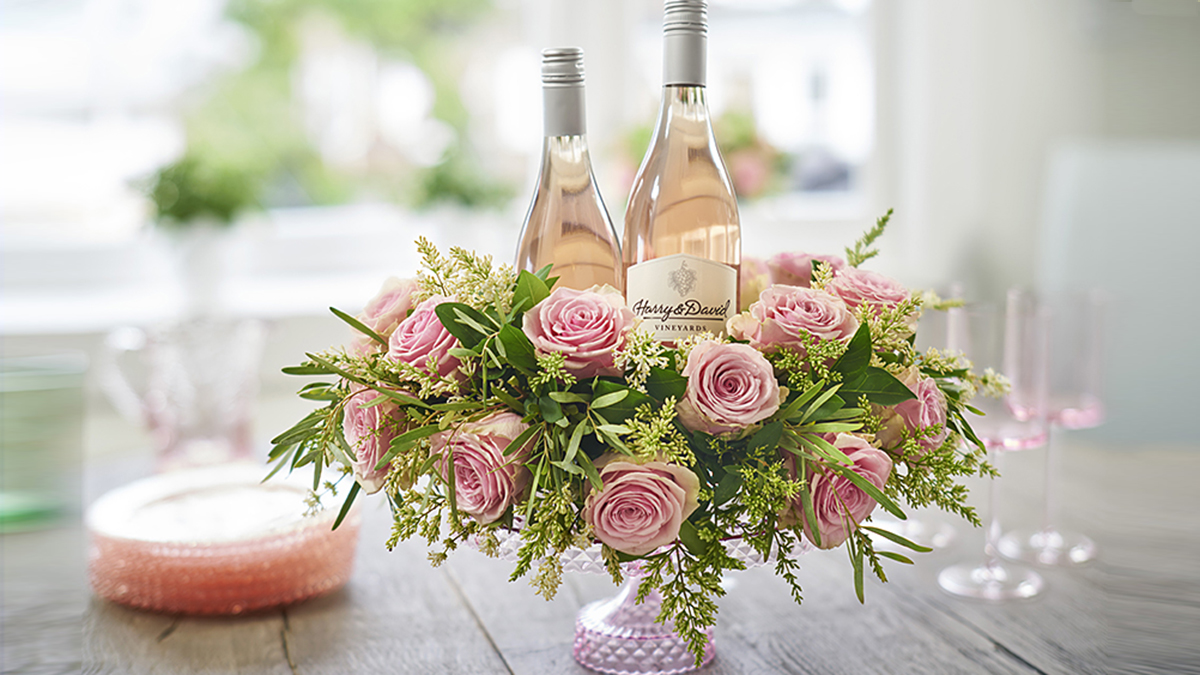
This summer, everything is coming up pink! And that means lots of fabulous party décor in that trendiest of colors. This roses and rosé wreath is a particularly pretty — and pink — way to display your wine while keeping it chilled at the same time.

a photo of roses and rosé with a diy roses and rosé wreath

If you don’t feel like going all out, there’s a version of this you can make with a faux rose wreath. Or, meet in the middle and do a little of both.

DIY Father’s Day Gifts for the Beer-loving Dad

Not sure what to plan for Dad this Father’s Day? How about organizing a beer tasting event in his honor! Thanks to an increasing appreciation for quality beer production, new breweries are popping up all over the place. In fact, there’s a good chance you have one right in your neighborhood or close by. Check with your local establishment and see if you can do a DIY Father’s Day gift with an event right at the brewery. Leaving the beer to the experts gives you more time to focus on the decorations and fun details that make Dad feel loved and honored for all he does!

Some places near where I live serve only beer and not food. If that’s the case by you, and you have to bring in your own munchies, I’ll let you in on a little secret: Cheese goes with everything! Harry and David has some fantastic gourmet foods available featuring various artisanal cheeses and other savory snacks in its Father’s Day gift collection. Choose one to bring along to the tasting, or send one to someone special that you can’t be with to let them know how much you care.

DIY Father’s Day gifts: flowers

For me, it’s not a celebration without flowers, and that holds true for Father’s Day, too. It’s a fact that flowers make people feel good, and dads are no exception.

Here are a few DIY Father’s Day gifts to bring the beauty of flowers to your beer tasting celebration.

Upcycled beer bottle vases with sunflowers

A photo of diy father’s day gifts with upcycled beer bottles

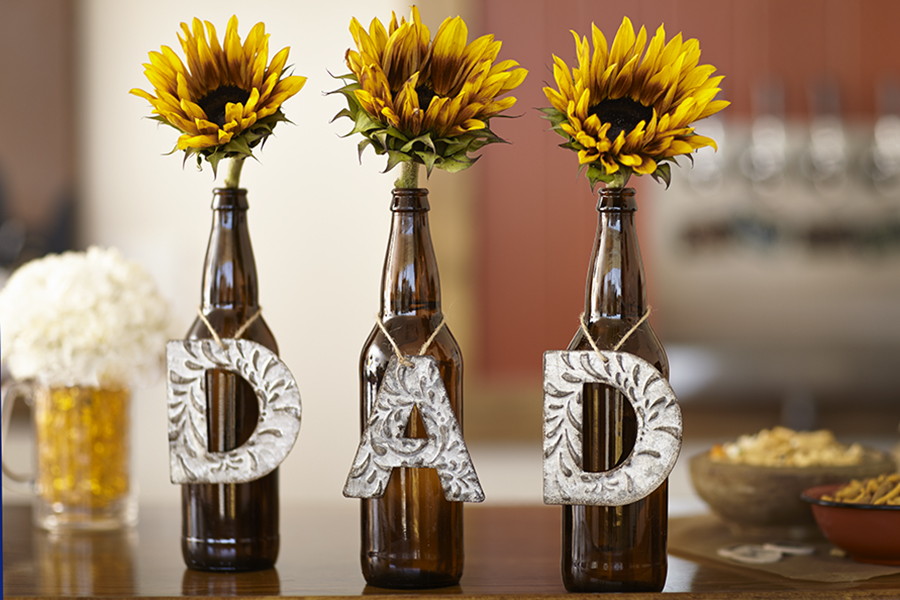
How perfect are these sunflowers?! The bright and bold beauties are one of my favorite summer flowers. The individual tin letters are inexpensive and available at craft stores everywhere. Use recycled amber beer bottles for the vases. Wash them out to make sure they are clean of any residue, and then fill them with water. Loop a letter around the neck of each bottle and put a single sunflower in each one, making sure to first cut the bottom of the stem at an angle.

A photo of diy father’s day gifts with a beer bottle vase

A single sunflower and chalkboard hangtag are the perfect decorative touches. They make this bottle of beer a great DIY Father’s Day gift and party decoration!

A photo of diy father’s day gifts with beer bottle vases

An even simpler way to display flowers for Dad is to look for brand names and/or labels that speak to the occasion, such as Big Daddy IPA, or your dad’s personality, like, perhaps, Rebel. There are so many great beer bottles out there to choose from. Use these on a buffet table, as a centerpiece, or anywhere that can use of little pop!

Beer mug o’ blooms

A photo of diy father’s day gifts with mug o' blooms

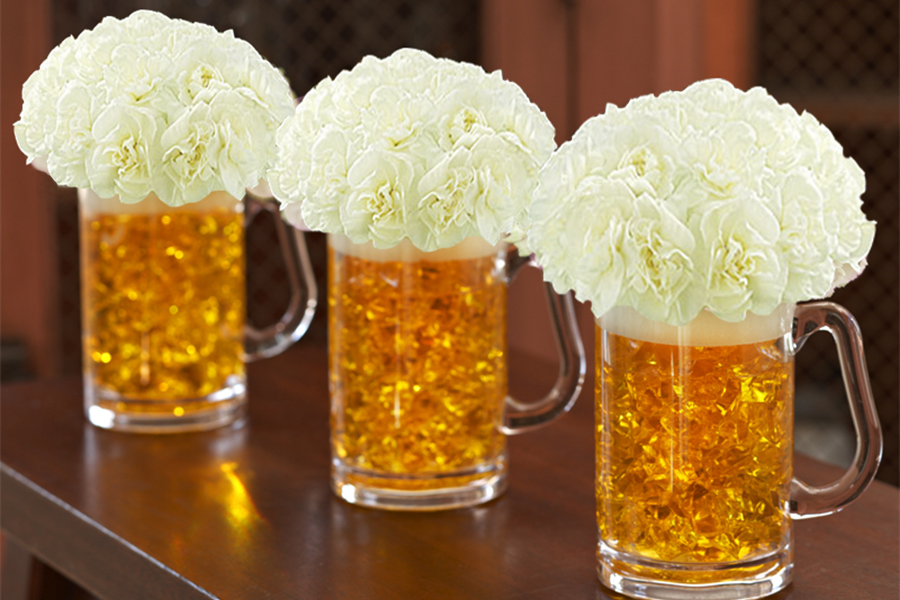
This beer mug floral arrangement is as easy to put together as it is fun to admire. It incorporates carnations, and is a great decorative idea to make for Father’s Day, St. Patrick’s Day, or any other occasion when beer is on the menu.

Check out the step-by-step instructions for this DIY Father’s Day craft that looks so cold and refreshing you almost want to drink it. (But don’t! It’s made of acrylic ice rock crystals.)

DIY Father’s Day fun and games: How well do you know dad’s taste in beer?

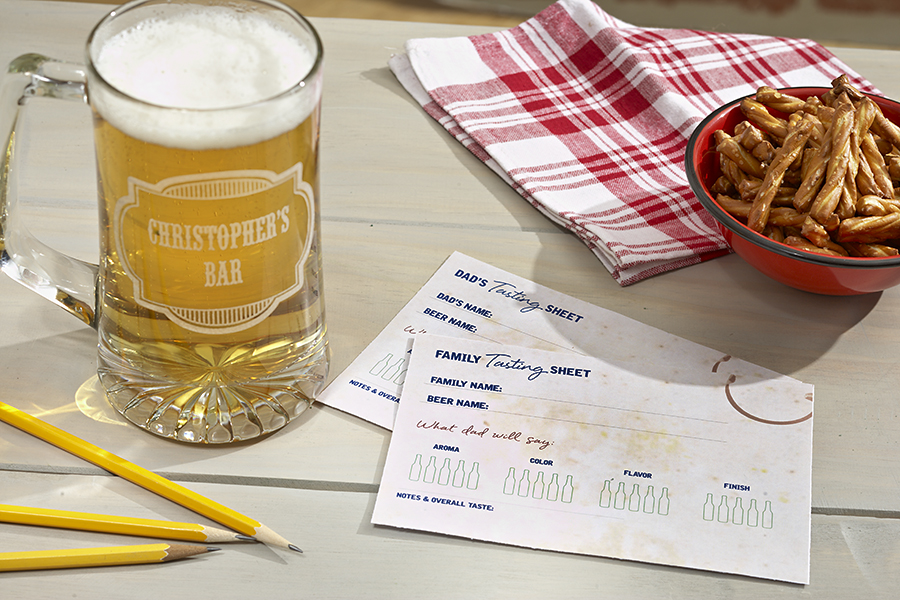
Here’s a game that everyone at the party can play together. It’s a blind taste test and a guessing game, and all you need is these printable beer tasting sheets (and some beer!). Dad uses one tasting sheet to rate each of the special craft beers you get for him, and the rest of the family uses the other to decide how they think their dad will rate each beer.

A photo of diy father’s day gifts with beer, pretzels, and a beer tasting sheet

After the blind taste test, someone gathers the answer sheets and determines, based on the number of matching answers, which family member knows Dad’s taste in beers the best!

DIY Father’s Day gift idea: Beer cap magnets with personal photos

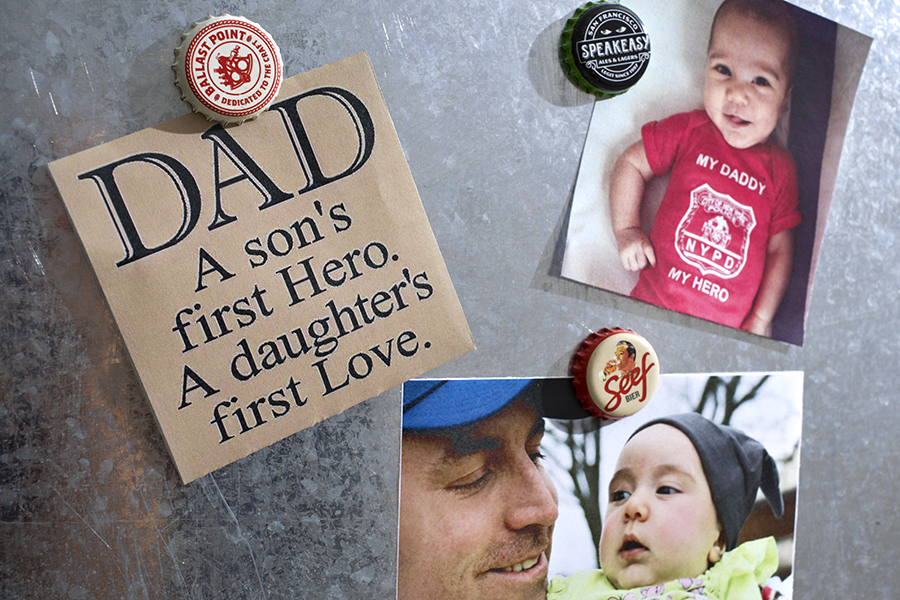
Adding personal touches makes a celebration seem that much more intimate. I love incorporating photos into crafts whenever possible. A cute way to display photos for your dad’s beer tasting is to use galvanized sheets or bulletin boards and magnets made from beer bottle caps.

A photo of diy father’s day gifts with beer cap magnets with photos

These couldn’t be easier to make. You only need three things besides the bottle caps, and everything is available at your local crafts store.

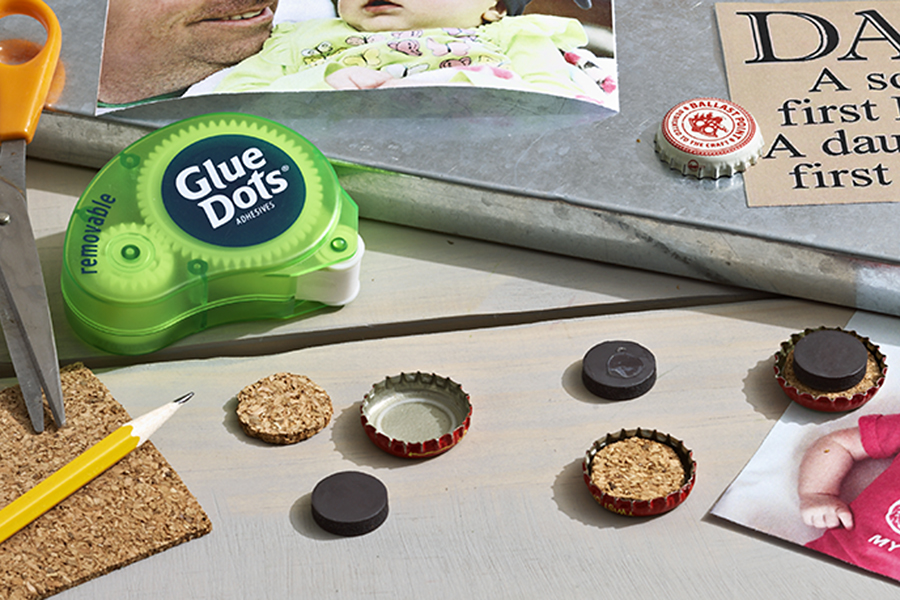
beer cap magnets

What you need

  • Bottle caps
  • ¾” round magnets
  • ¾” cork circles
  • Glue or glue dots

What to do

  1. Put a glue dot on the cork circle and attach it to the bottle cap.
  2. Put a glue dot on the magnet and attach it to the cork circle you just attached to the bottle cap.

That’s it!
Personalized barware

If you don’t fancy yourself the crafty type but still want to get your beer-loving dad something that shows you care, check out the personalized barware items available on 1-800-Flowers.com.

Cheers to all the dads out there!

Father’s Day Craft Ideas: How to Make a Photo Plant for Dad

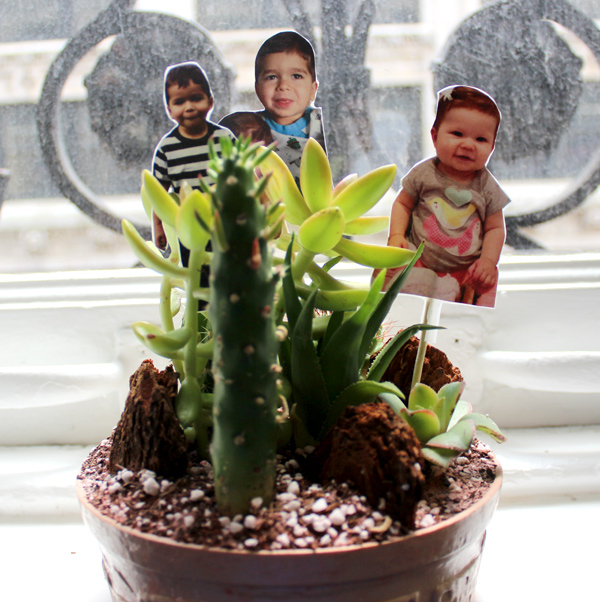
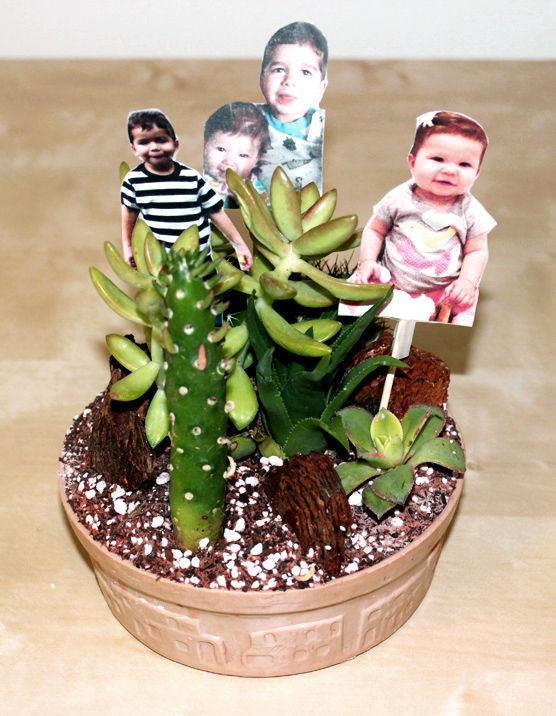
a photo of father's day photo plant

Dad works hard, and while he’s putting in long hours at the office, he could always use a reminder of his loved ones back home (or in the next room, in the case of a home office). Give him something to add some flair to his workspace with a Father’s Day photo plant.

For this project, I used a ready-made cactus dish garden, but you may choose to build your own dish garden or terrarium from scratch. Likewise, I also used clear adhesive mailing labels, but any type of clear adhesive paper, such as contact paper, will do.

The photo picks took about 10 minutes to create from start to finish. You can use photos of the kids, the dog, or the whole family! If Dad is a sports fan, why not throw a baseball or soccer ball into the mix? Get creative and wow him with a Father’s Day craft idea that blends both his loving family and his unique personality.

Supplies for a Father’s Day photo plant

  • Terrarium or dish garden
  • Photos
  • Photo editing software
  • Photo paper
  • Clear adhesive paper
  • Scissors
  • Wooden skewers

How to make a Father’s Day photo plant

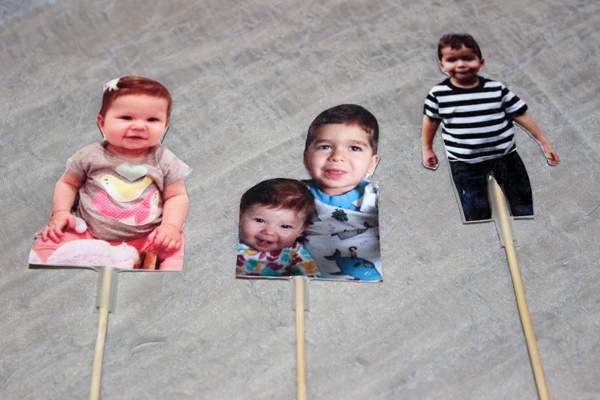
  1. Open the photos in your photo editing software. Since I used pre-sized clear labels, I resized and cropped my photos to fit (mine were 2 inches by 4 inches). Choose a size that will work well with your terrarium. When you have your photos cropped and ready, print them out on photo paper.
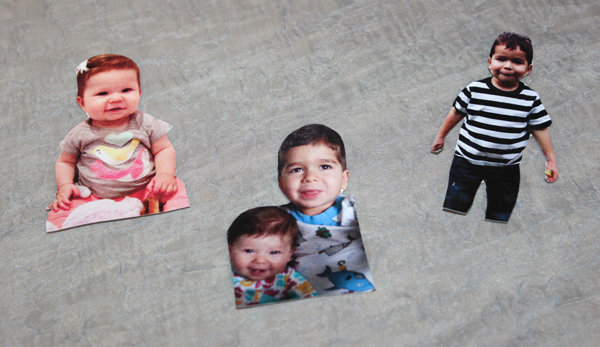
a photo of father's day craft ideas with photo cutouts
  1. Carefully cut your photos out.
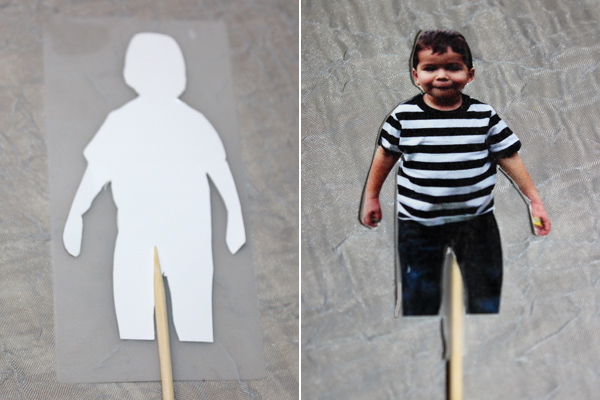
a photo of father's day craft idea with laminated photos
  1. To make the “laminated” photo picks, take a piece of clear adhesive paper and lay it down on the table. Take one of your photos and carefully place it backside up. Put a bamboo skewer in the bottom center of the photo. Now, add another piece of clear adhesive paper to seal the photo. Use your nail to rub out any air bubbles. Then, use scissors to cut off the extra clear adhesive paper.
a photo of father's day craft ideas with all photos laminated
  1. Use this method for all of your photos until you are left with a few “laminated” photo picks.
a photo of father's day craft ideas with a completed terrarium
  1. Now, simply stick the picks into your photo terrarium. You are now ready to wow Dad with this creative Father’s Day craft idea!

Father's Day banner

Father’s Day Crafts: DIY Gift Bags for Dad

A photo of diy gift bags

Father’s Day is a holiday when Dad finally gets to sit back, spend quality time with his family, and be pampered like the king he is. And no one is more excited to shower their reigning hero with gifts more than his children!

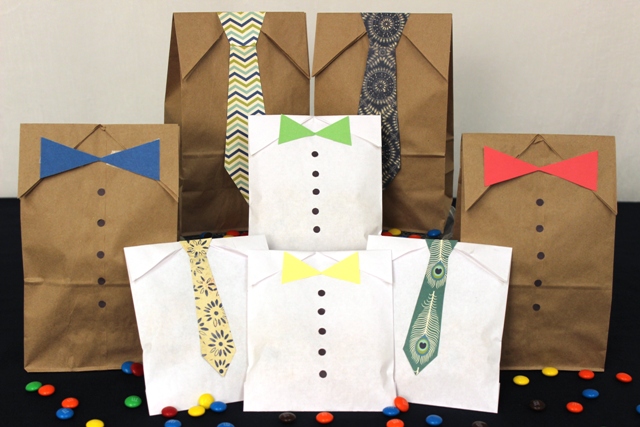
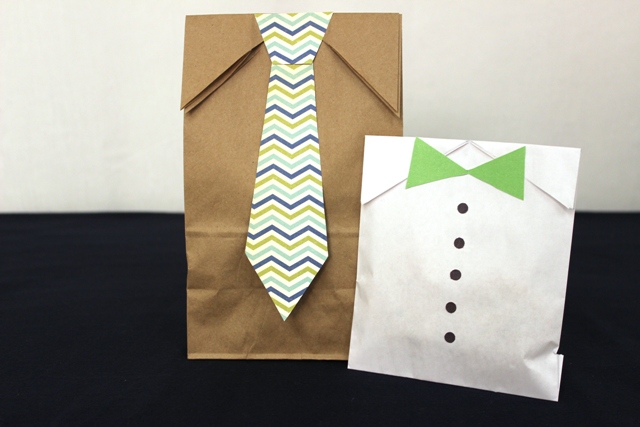
These adorable and easy-to-make DIY gift bags look like Pop’s favorite button-down shirt and necktie — and inside they hold the most delicious Father’s Day snacks. Best of all, with just a little help from you, your kids can make them.

What you need to make Father’s Day DIY gift bags

  • Paper lunch bags or candy bags
  • Patterned cardstock or scrapbook paper
  • Black construction paper
  • Father’s Day tie and bowtie template
  • Scissors
  • Ruler
  • Pen or pencil
  • Double-sided tape
  • Glue stick
  • Dad’s favorite snacks

How to make Father’s Day DIY gift bags

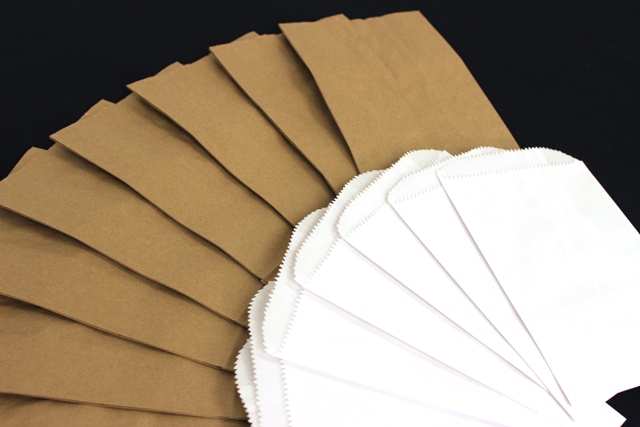
A photo of diy gift bags with Brown Paper Lunch Bags and White Paper Candy Bags
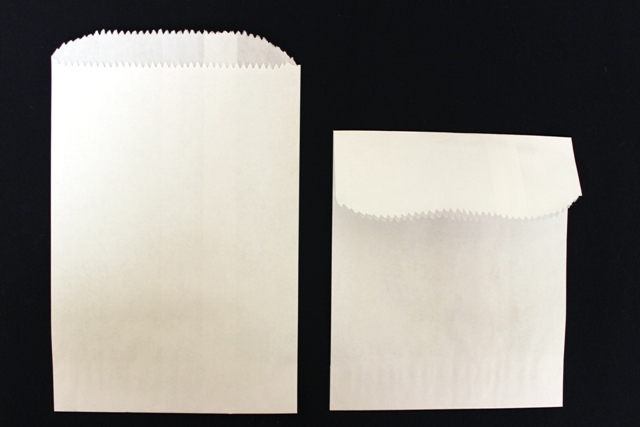
  1. Find the perfect-sized paper bag to hold your Father’s Day treats. Brown paper bags or mini candy bags in any color work just fine, and you can never go wrong when you pick the color of Dad’s favorite button-down shirt! Standard white is a good option, too.
A photo of diy gift bags with Folded Paper Bag to Create a Collared Shirt
  1. Lay a bag flat on the table, with the opening of the bag at the top. Fold the mouth of the bag down about 3 or 4 inches, depending on how big you’d like the collar of the shirt to be.
A photo of diy gift bags with Traced Lines on a Paper Bag to Create a Collared Shirt
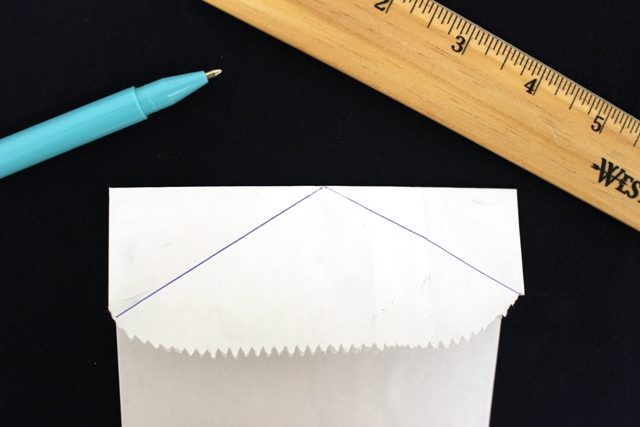
  1. Using a ruler and a pen, draw a diagonal line from the bottom-left corner of the bag’s flap to the center of the top of the flap. Draw another diagonal line from the bottom-right corner of the flap to the same top center point. Once you’re done, the lines will make the shape of an inverted “V” on the flap.
A photo of diy gift bags with Trimmed Paper Bag to Create a Collared Shirt
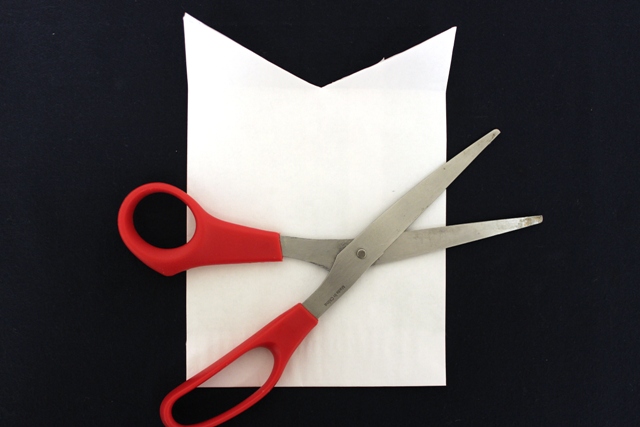
  1. To cut out the triangle shape in the center, take a pair of scissors and follow the lines on the flap.
Ties Cut out From Cardstock
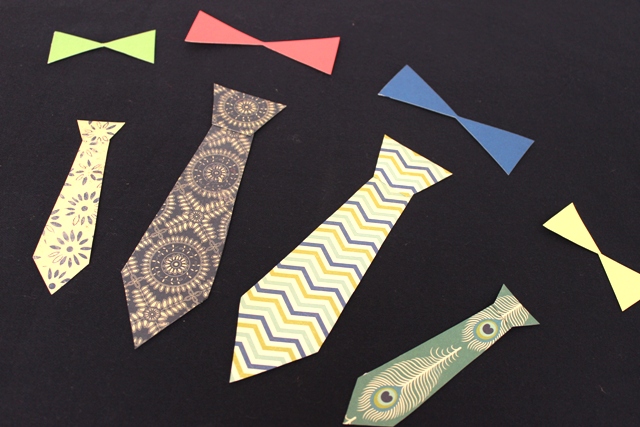
  1. Print this Father’s Day tie and bowtie template onto a piece of patterned cardstock or scrapbook paper. Pick Dad’s favorite tie shape and carefully cut out the shape from the cardstock. (To make sure the tie fits on your paper bag, we gave you two sizes of ties in our template: large ties for lunch bags and small ties for candy bags.) To create the buttons for the shirt, cut out tiny circles from black construction paper.
Candy Bag Filled With Cookies
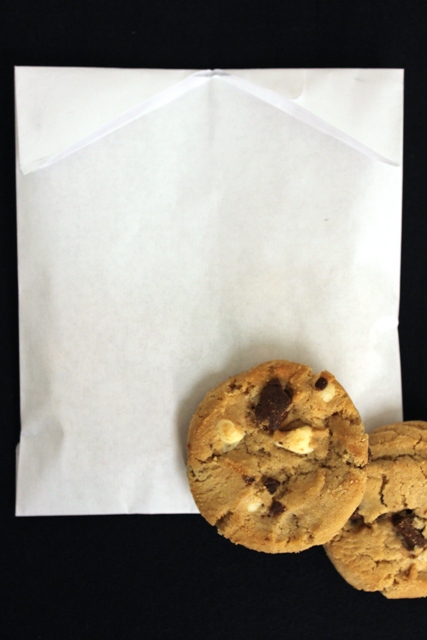
  1. Open the paper bag and fill it with some of Dad’s favorite snacks, such as gourmet cookies, pretzels, mixed nuts, candy, or popcorn. Fold the collar back down and seal it by placing two pieces of double-sided tape on the inside of the collar and attaching it to the face of the bag.
A photo of diy gift bags with Gift Bags Decorated With Paper Ties and Buttons
  1. Place a piece of double-sided tape on the back of the cardstock tie cutout and attach it to the bag, right at the top of the collar. Then, using a glue stick, glue the black construction paper buttons in a line going down the center of the bag, right below the tie.

And, finito! Faux formalwear stuffed with Dad’s favorite foods. It’ll be a Father’s Day to remember for Pops!

Father's Day banner

DIY Father’s Day Card for Kids

A photo of diy father’s day card

Store-bought cards are fine, but to show Dad how much you truly care, make him a DIY card for Father’s Day. All you need are paper, glue, and markers to compete this kid-friendly craft that is sure to put a smile on Dad’s face.

Pair this creative card with a delicious homemade brunch or slip it into the amazing Father’s Day gifts you prepared for him. He’ll really appreciate this simple yet sweet statement and will love showing it off to friends and coworkers!

Supplies for DIY Father’s Day card

  • Cardstock or similar weight paper; 2 sheets in one color and 1 sheet in a second color/pattern
  • Glue or tape
  • Pencil
  • Markers
  • Scissors

Directions for DIY Father’s Day card

A photo of diy father’s day card with tracing a hand
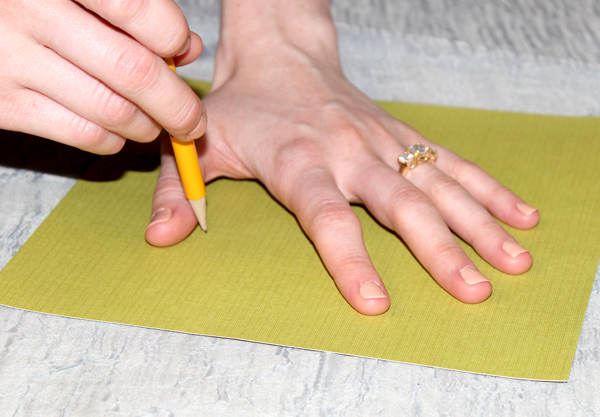
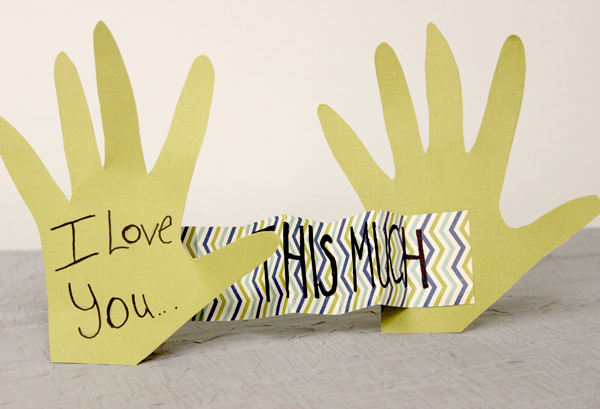
  1. Start by tracing your hand on the paper using a pencil. Use the scissors to cut out the shape. Do this for the second sheet of paper as well.
A photo of diy father’s day card with writing an I Love You message
  1. Use a marker to write “I love you” in pencil on one of the paper hands. Then, trace the text with marker and erase any stray pencil lines.
A photo of diy father’s day card with the message inside the card
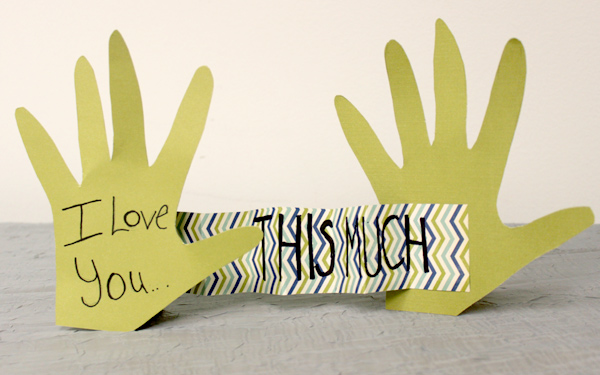
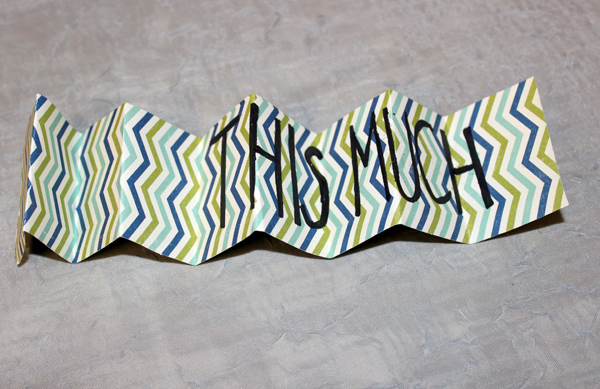
  1. Now it’s time to create the inside of the card. First, cut a long strip out of the third sheet of paper. Then, fold the strip accordion style. Use a thick marker to write the words “This Much” on the accordion-folded strip.
A photo of diy father’s day card
  1. Using glue or tape, add the adhesive to each end of the accordion strip. Attach the hands to the strip, making sure both hands are facing the same way. Now your card is ready to give to Dad!

Father's Day banner

Father’s Day Crafts: How to Make a DIY Planter for Dad

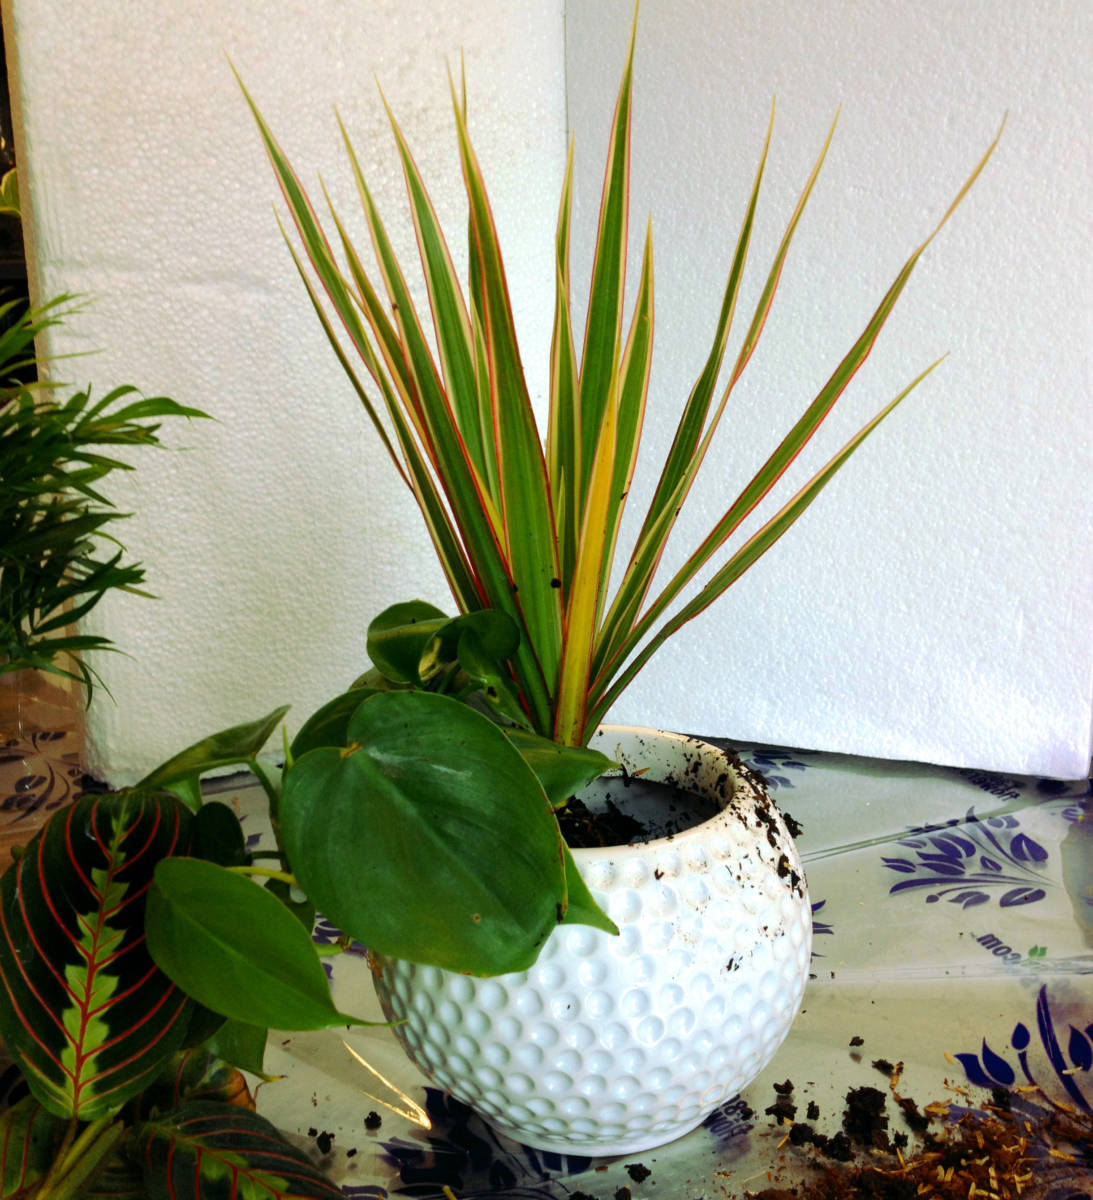
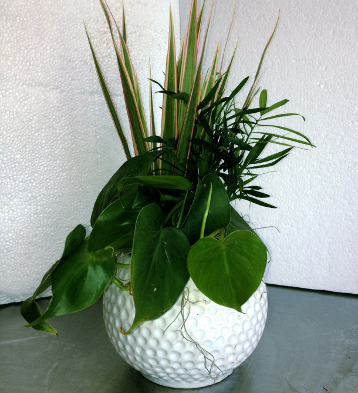
A photo of father’s day crafts with a DIY Father's Day Planter

It’s always nice to buy dad something for Father’s Day, but making him something you know he’ll love is an extra special touch. If you’re looking for a Father’s Day craft that fits dad’s personality, why not try this unique planter? All you need are just a few plants, soil, and a container!

Materials needed for DIY Father’s Day planter

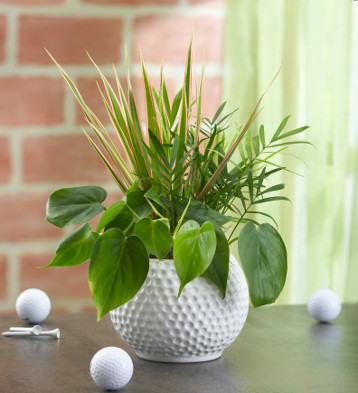
  • Ceramic container (I used a golf ball planter, but feel free to be creative!)
  • Soil
  • 3-4 plants of different height, preferably a type with vines, such as philodendron.
    • Plants we used include:
      • Tricolor marginata
      • Philodendron
      • Mini palm
      • Spanish moss

How to make a DIY Father’s Day planter

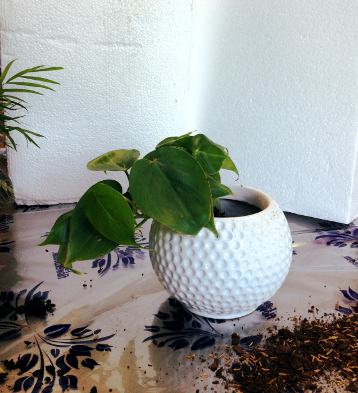
  1. Take your container and fill it one-tenth of the way full with potting soil. (The amount will depend on the depth of the container.)
  2. Place your plants, one at a time, in the container. Use the plant with vines first to one side, the tallest to the back or center of the planter, and the shorter plant to the opposite side.
  3. Add soil, compacting as you go. Compact or compress the soil around the individual plants to get rid of air pockets.
  4. Lightly water the plant.
  5. Add your Spanish moss as a finishing touch to the completed planter.
  6. Give this fun Father’s Day craft to dad and watch him smile with joy!

Note: Plants are easier to work with when the soil is dry. Therefore, if you’re able to, get them a couple of days in advance. If you are not sure how to take care of it, refer to our plant care section.

Hope you and your dad have an amazing Father’s Day!

6 Easter Egg Designs for the Whole Family to Try

We’ll show you how to tap into your passion for making all kinds of fun and inventive creations in our “Get Crafty” series. Use these Easter egg designs to create the most beautiful Easter eggs you ever did see!

Decorating Easter eggs is a time-honored tradition. This activity is a great way to bond with your family members and spend quality time with the ones you love.

But it doesn’t have to be all fun and games. Add a competitive element to your Easter egg decorating this year by staging a contest to see which member of your household can create the most stunning-looking Easter egg designs. All you need are some eggs (bet you didn’t see that coming) and some everyday household items, such as nail polish, Kool-Aid, stickers, and glitter. When you’re done decorating, vote for your favorites and offer prizes (you can’t go wrong with Easter chocolates!) in different categories, such as most colorful, wackiest, most bedazzled, and most original.

Here are some creative recipes for decorated Easter eggs you can use to wow your family.

Polka dot Easter egg designs

A photo of Easter egg designs with polka dot easter eggs

You’ll need:

  • Hard-boiled eggs at room temperature
  • Vinegar
  • White or light-colored crayons
  • Food coloring dye assortment
  • Bowls
  • Tongs or slotted spoon
  • Rubber gloves

Directions:

Start by drawing polka dots on the hard-boiled eggs with the crayons. Next, mix a half cup boiling water, 1 teaspoon vinegar, and 10 to 20 drops of food color in a cup. Repeat this process until you fill all the cups with the desired colors. Use tongs or a slotted spoon to dip the hard-boiled egg in a cup for 5 minutes. Remove the egg from the dye and allow it to dry completely. Repeat until you have a set of polka dot Easter eggs.

Kool-aid Easter egg designs

A photo of Easter egg designs with kool aid easter eggs

You’ll need:

  • Hard-boiled eggs at room temperature
  • Containers of Kool-Aid liquid
  • Paper towels
  • Baking sheet
  • Metal cooling rack

Directions:

Line the baking sheet with layers of paper towels, and then place the metal cooling rack on top. Next, arrange the hard-boiled eggs on the cooling rack. Using one flavor of Kool-Aid at a time, gently squeeze the Kool-Aid liquid over the eggs in a random pattern. Let dry for 10 minutes, and then flip the eggs over on the metal rack to add another layer of color as needed. Allow the eggs to dry completely for another 10 to 15 minutes.

Note: If you use powdered Kool-Aid, mix with less water than the package calls for to create a more concentrated dye. Then, use a spoon to drizzle the Kool-Aid mixture over your eggs.

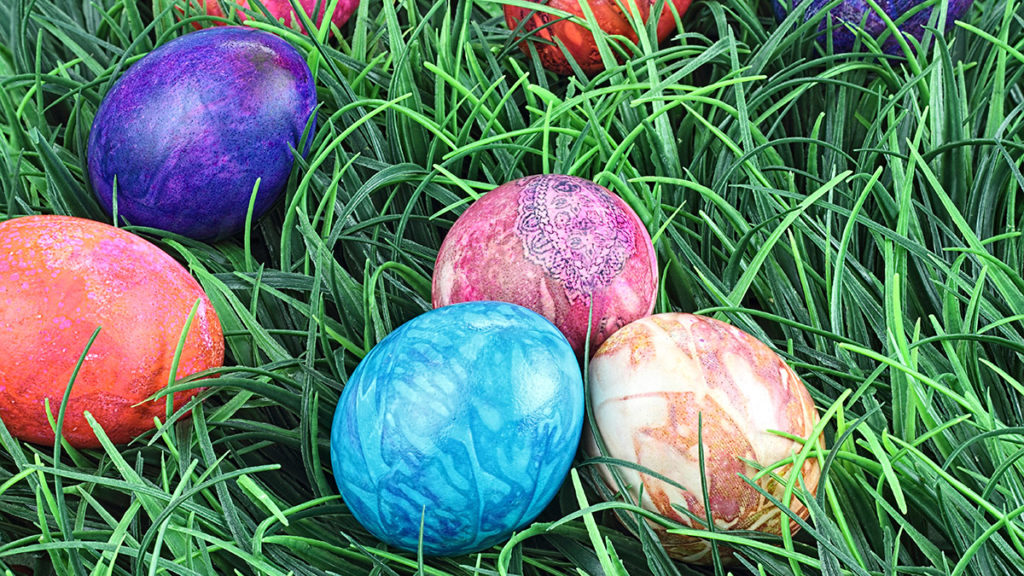
Marbled Easter egg designs

A photo of Easter egg designs with marbled easter eggs

You’ll need:

  • Hard-boiled eggs at room temperature
  • Whipped cream
  • Food coloring dye assortment
  • Baking sheet
  • Spatula
  • Toothpicks
  • Rubber gloves
  • Paper towels

Directions:

Start by filling your baking sheet with whipped cream until it’s about 1 inch thick. Smooth it out with a spatula. Next, drip food coloring onto the cream. The more colors you use, the brighter your eggs will be. Using a toothpick, swirl and marble your food coloring droplets across the whipped cream.

Put on rubber gloves, and then take a hard-boiled egg and roll it in the cream, coating it completely. Carefully place the egg on a paper towel to dry for at least 20 minutes. When dry, wipe the remaining cream off with a clean paper towel to reveal your colorful marbled patterns!

Stamped Easter egg designs

A photo of Easter egg designs with stamped easter eggs

You’ll need:

  • Hard-boiled eggs at room temperature
  • An assortment of stamps and stamp pads
  • Rubber gloves
  • Hair dryer
  • Floral temporary tattoos
  • Metallic tattoos or stickers
  • Easter-themed stickers

Directions:

Start by putting on rubber gloves. Using a plain hard-boiled egg, press a small stamp evenly across the egg’s surface. Repeat as needed for a patterned design. Set the ink by using a hair dryer and blowing it dry on the lowest setting. You can also swap out the stamps for spring-themed temporary tattoos, metallic flash tattoos, or stickers.

Tie-dye Easter egg designs

A photo of Easter egg designs with tie-dye easter eggs

You’ll need:

  • Hard-boiled eggs at room temperature
  • Disposable coffee filters
  • Twist ties
  • Food coloring dye assortment
  • Spray bottle filled with water
  • Paper towels
  • Rubber gloves

Directions:

Start by putting on rubber gloves. Next, wrap a coffee filter around an egg and secure the filter with a twist tie. Drip a few drops of food coloring on the outside of the filter and let them soak for a minute. Repeat with as many colors as you’d like. Using the spray bottle, wet the coffee filter, making sure it fits snugly around the egg. Place on a paper towel for 15 minutes, and then unwrap the egg and rinse with cold water.

Nail polish Easter egg designs

A photo of Easter egg designs with nail polish easter eggs

You’ll need:

  • Hard-boiled eggs at room temperature
  • A variety of nail polish colors
  • Small bowls
  • Rubber gloves
  • Drying rack or stand
  • Glitter (as needed)

Directions:

Start by filling the bowls halfway with water. In each bowl, add a small amount of a single color of nail polish. Put on the rubber gloves, and then take a hard-boiled egg and swirl it around the water/nail polish mixture. Set on a drying rack until dry. You can re-swirl the dried hard-boiled egg into a different nail polish bowl to add another layer of color. Set back on the drying rack until completely dry. If you don’t have glitter nail polish, you can sprinkle glitter on the eggs as they dry for extra sparkle!

Easter banner ad
Exit mobile version