Unicorns love to party — that’s one thing I love about them. So, to maximize the magical effect of these mythical creatures, I came up with these two DIY unicorn decoration ideas for my next get-together.
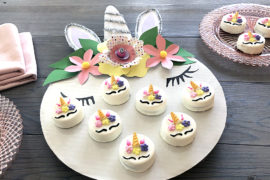
Unicorn party platter
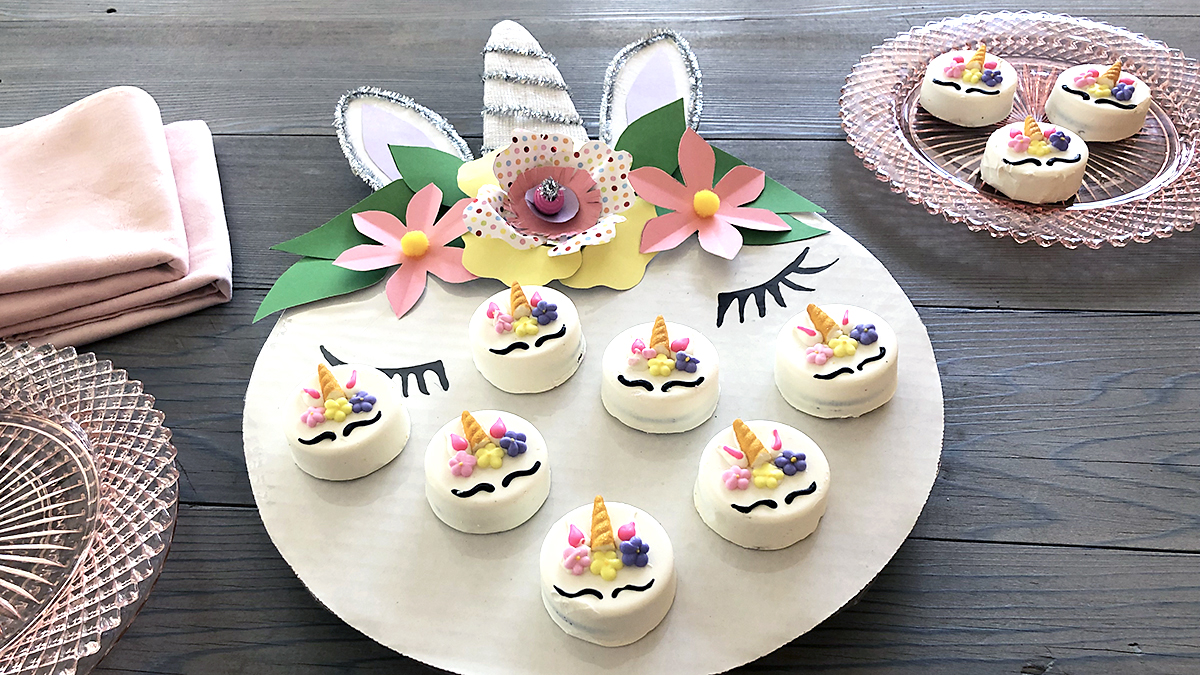
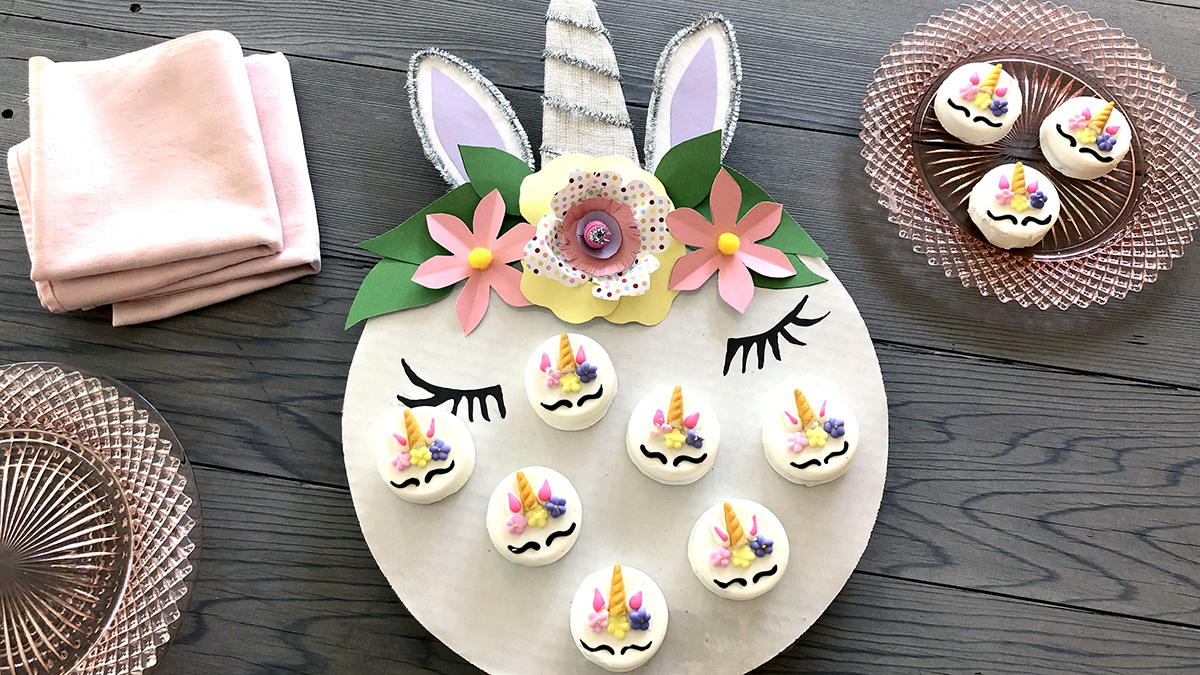
An adorable unicorn party platter is perfect for serving Unicorn Dipped Oreo Cookies, or any other unicorn-themed snacks you might have (unicorn truffle cake pops, anyone?).
Before you start to make your platter, you need to gather your “stuff.”
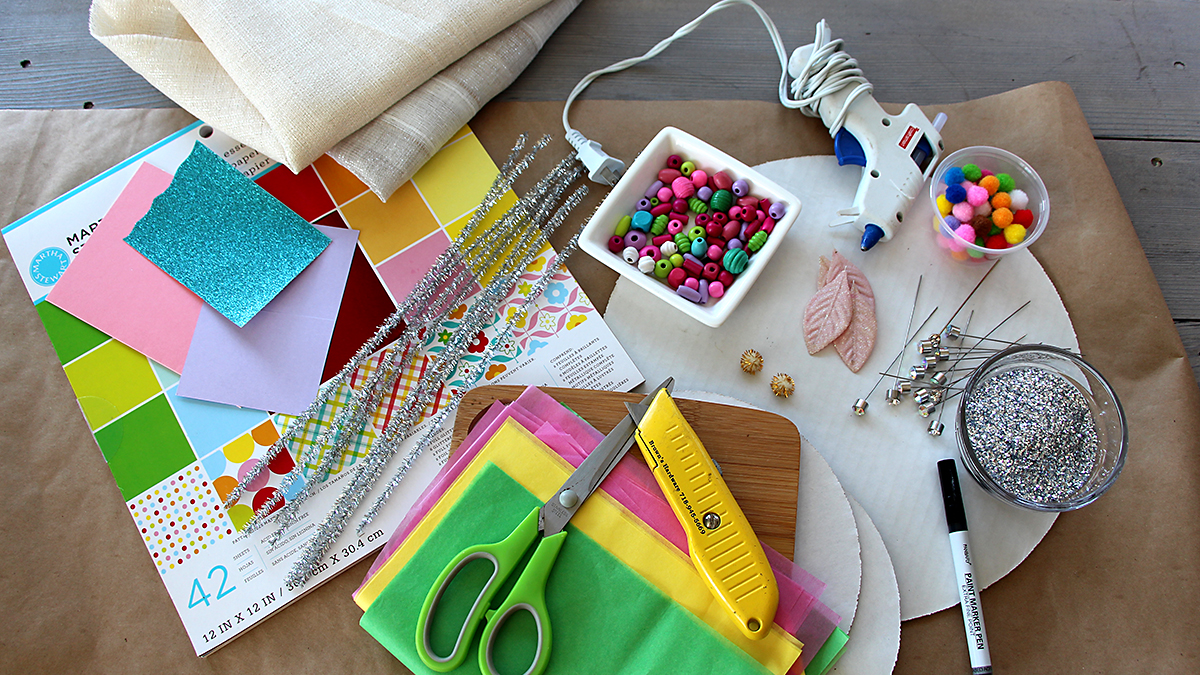
It has become my goal in life to GET RID OF STUFF! And let me tell you, that’s not easy for a “stuff person” who writes a lifestyle blog. So, the first thing I did was go through all my craft stashes and gather anything that looked “unicorn-y” — in other words, bright and sparkly! Besides cardboard and decorative paper, I also got out scissors and glue.
I’m proud to say I didn’t have to buy anything for this project; I just looked around my house and saw what I already had that I could repurpose in new and interesting ways.
What you’ll need
- Template for the eyes, ears, and horn.
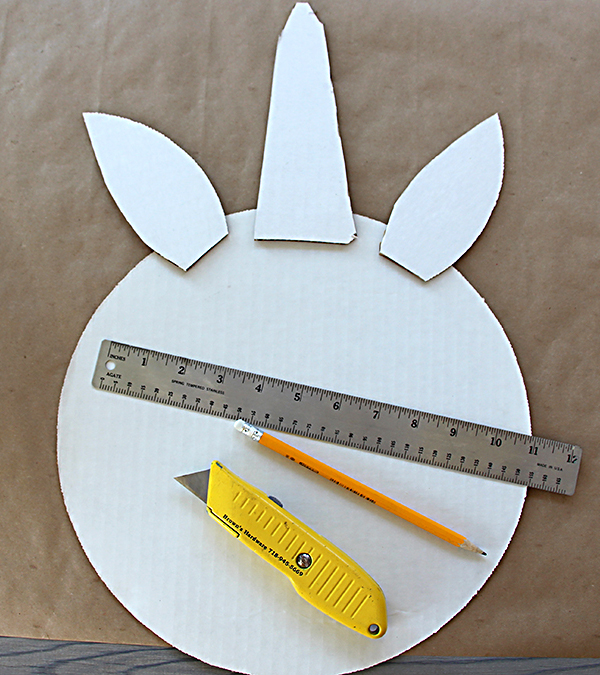
- Enough cardboard for:
- 1 12-inch round for face
- 2 ears, 2 inches x 4.5 inches each
- 1 7-inch horn
I still have a few cardboard cake plates left over from my daughter’s stint as a baker, so I used those. If you don’t have something like that, just grab one of the many cardboard boxes I’m sure you have lying around from all the deliveries you’ve gotten lately. If you don’t have cardboard with a white side, you can always paint it or cover it with white paper before assembling.
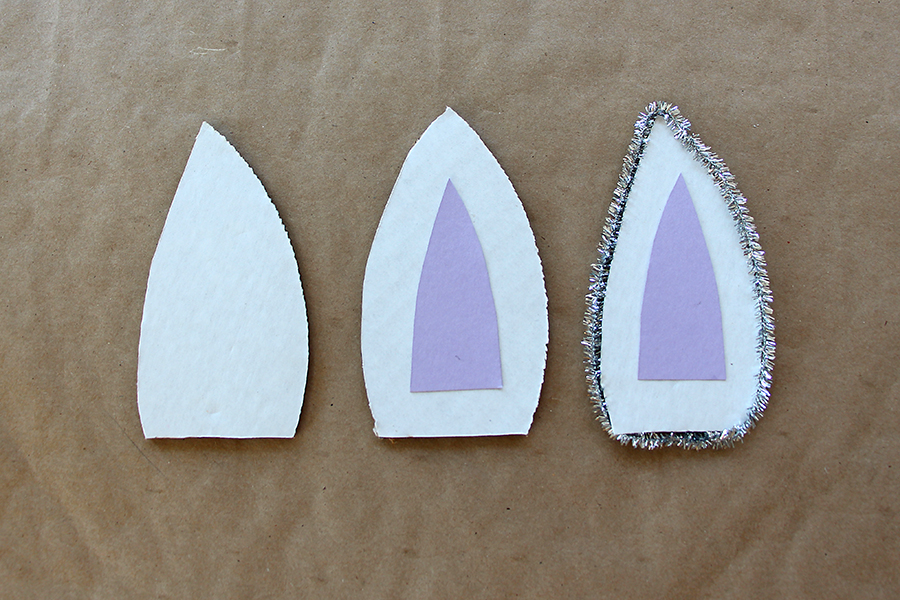
To add character to the ears, I cut out a smaller piece in a nice lavender paper to add to the center of the ear. Then I used hot glue to add a silver sparkly pipe cleaner all around the edge.
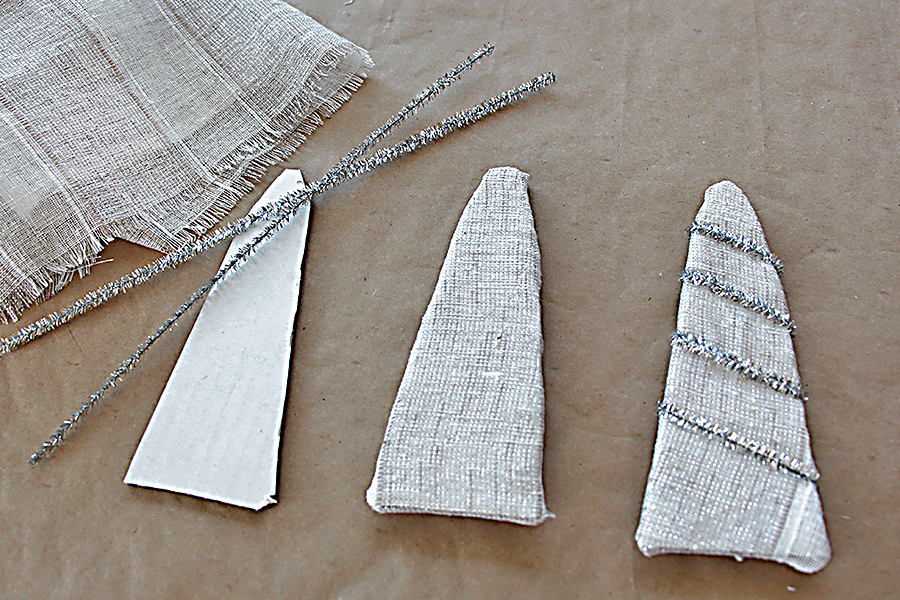
I covered the horn with a scrap of sparkly fabric left over from a Christmas stocking project. I cut the fabric slightly larger than the horn and wrapped it around, glued it in the back, and then wrapped the horn with two silver pipe cleaners.
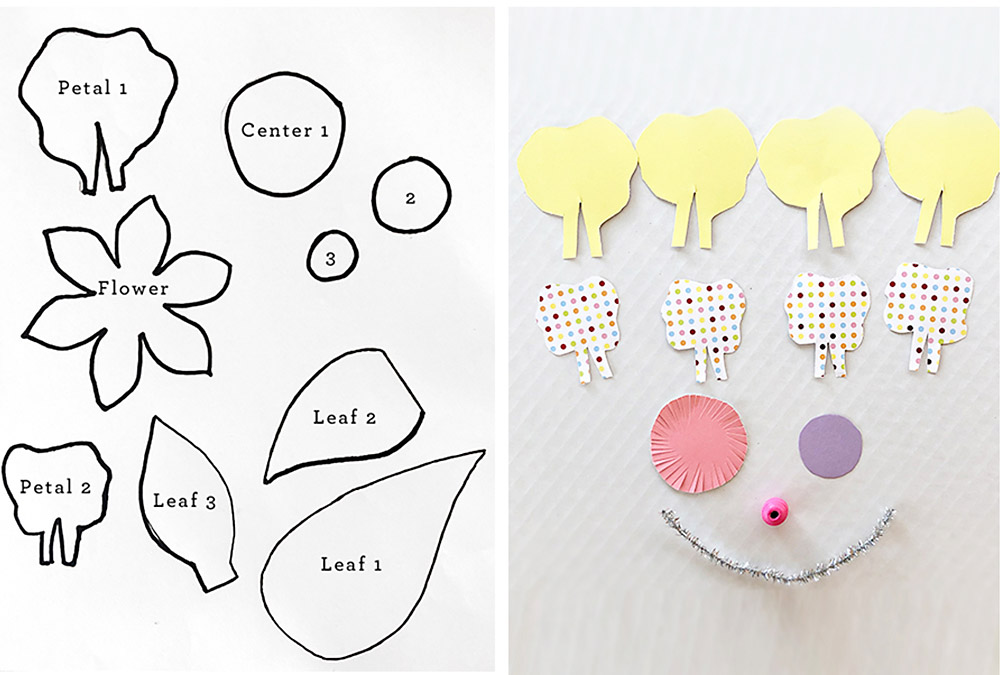
Using the flower template, cut out all the pieces needed to make each flower. Make sure to use different colors for each part of the flowers and green for the petals.
Assembling the first flower
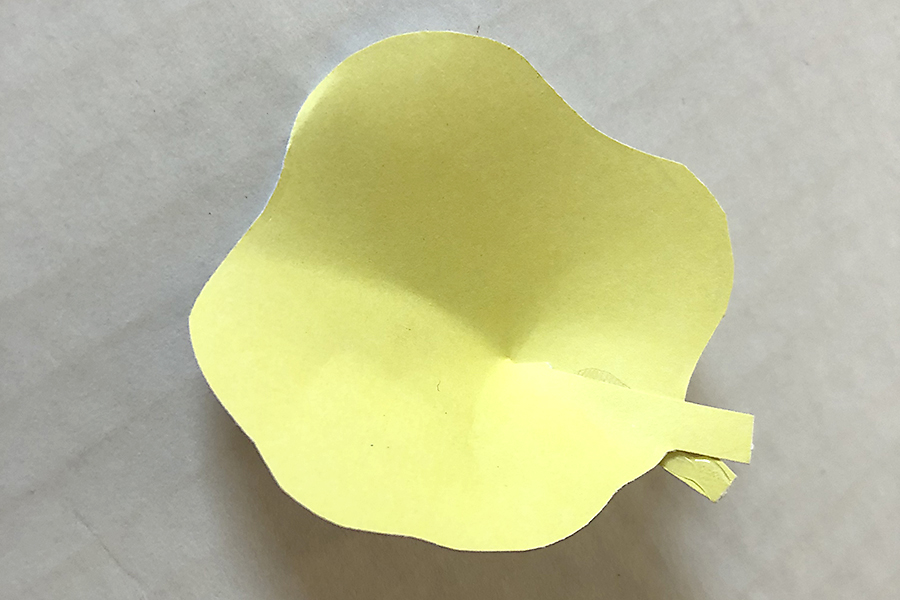
Starting with the large petals, dab a small amount of glue onto one side of the stem and gently bend the other stem to overlap the glue. Press and hold to secure. Do this to all four petals.
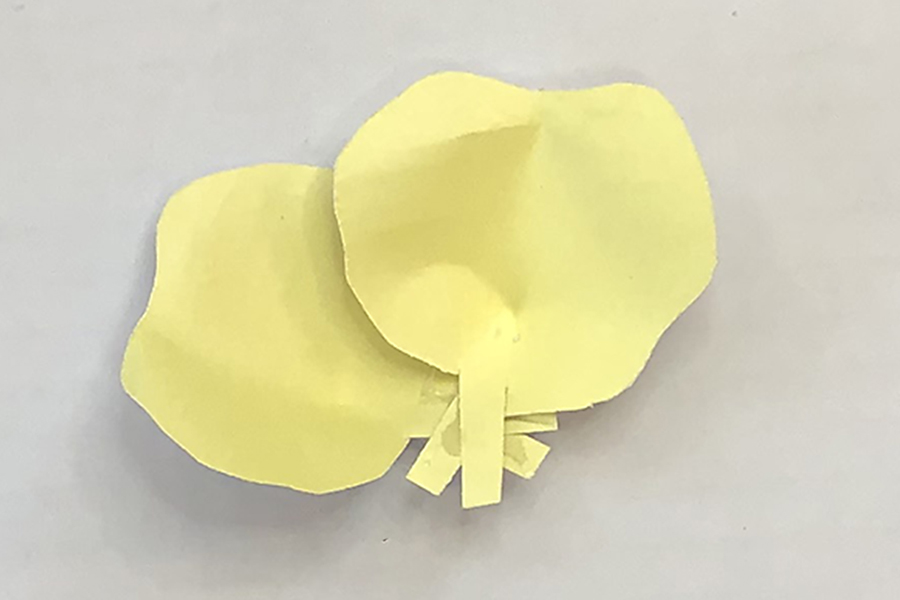
Assemble the first layer of the flower by overlapping…
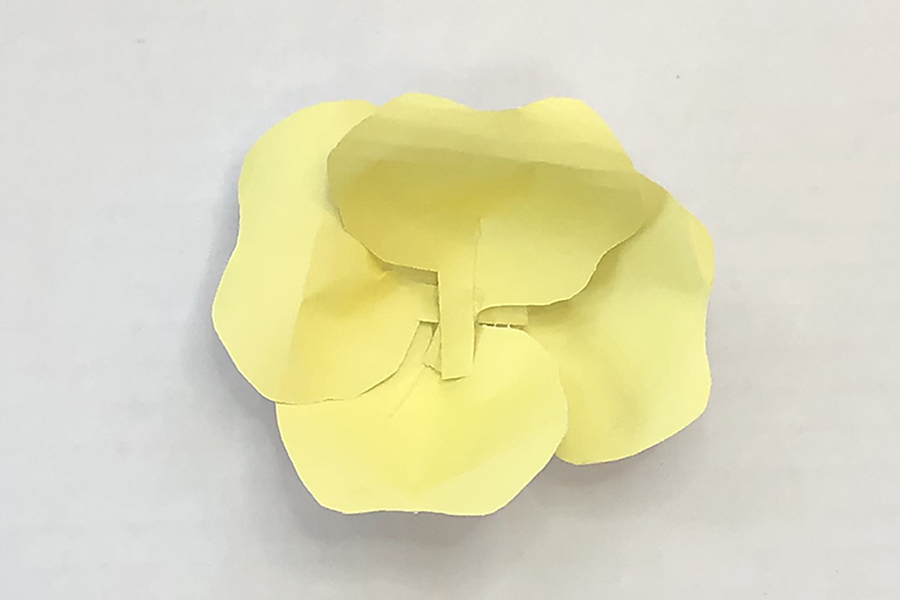
…and gluing the petal stems together as you go.

Repeat this step with the smaller petals. I chose a polka dot paper to add a little whimsy.

Then, glue each layer on top of the next in the following order:
- Large petals
- Smaller petals
- Large center circle (that I fringed the edges of)
- Medium-size center circle
- Smallest size center
Again, for a bit more pop, I used a wooden bead with a sparkly pipe cleaner laced through the center. Remember: Use what you have and be creative.
Creating the second flower
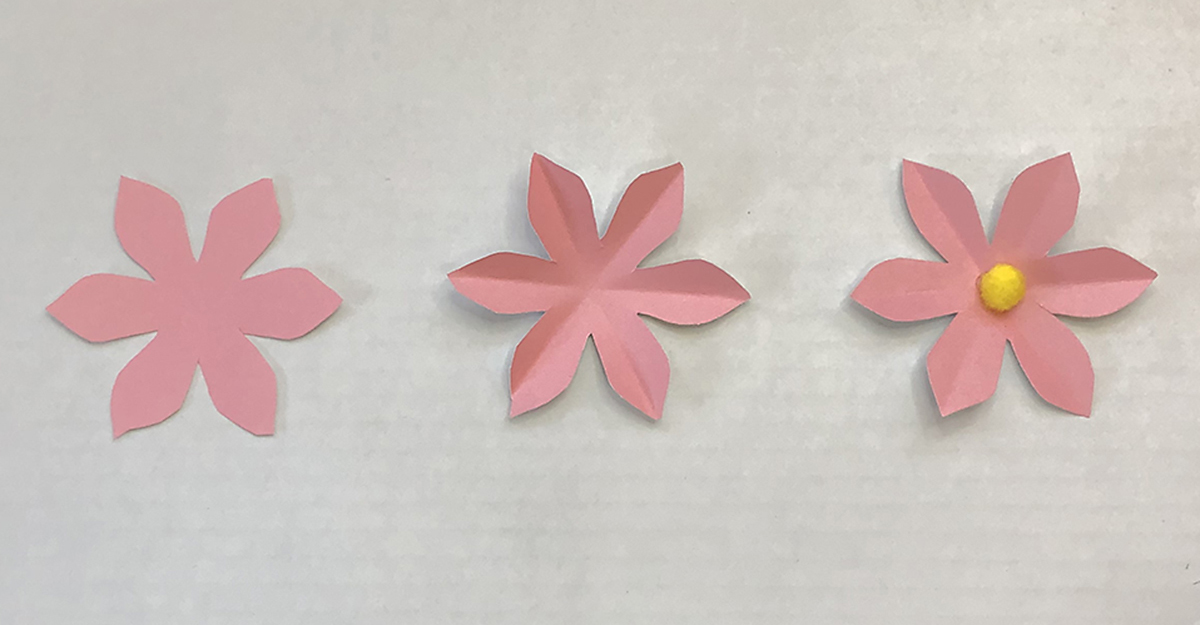
The other flower on the template is a single layer with a pom-pom center. To add more dimension to this flower, add a crease to each petal by simple folding the flowers in half three times.
Assembling the unicorn party platter
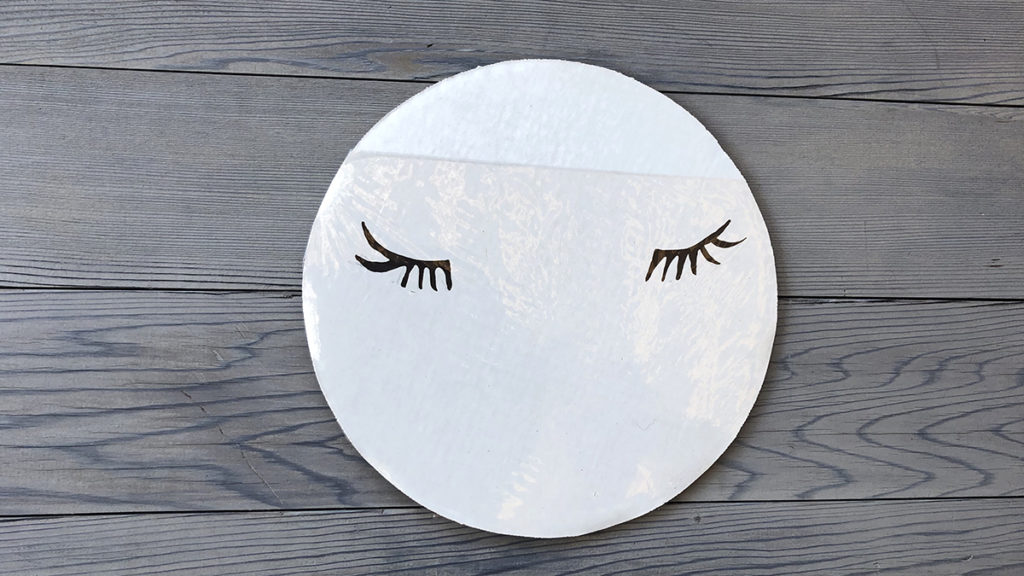
With a black marker, draw eyes on the face using the template as a guide.
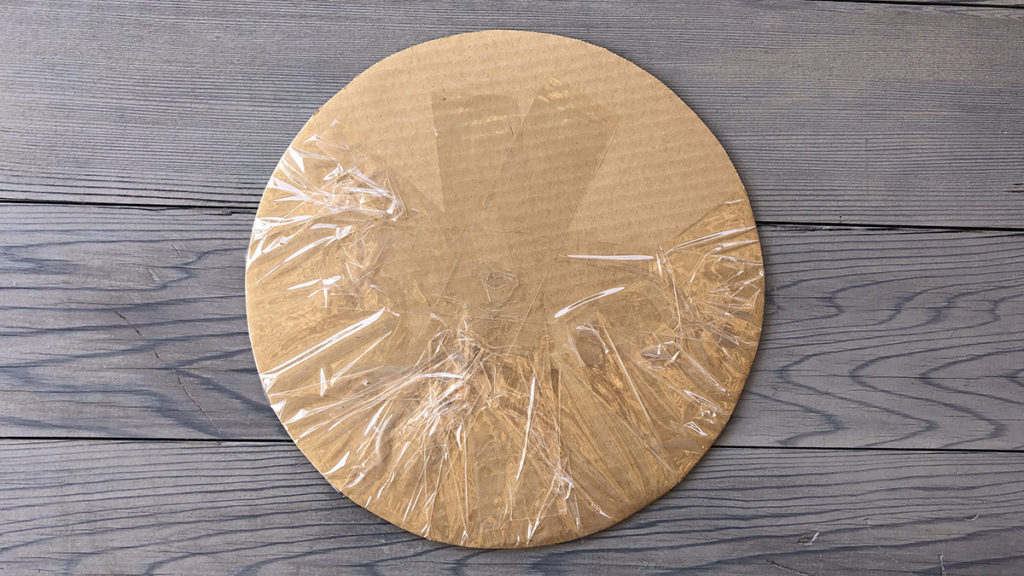
Cover with a piece of clear protective cover, such as cellophane, plastic wrap, or clear contact.
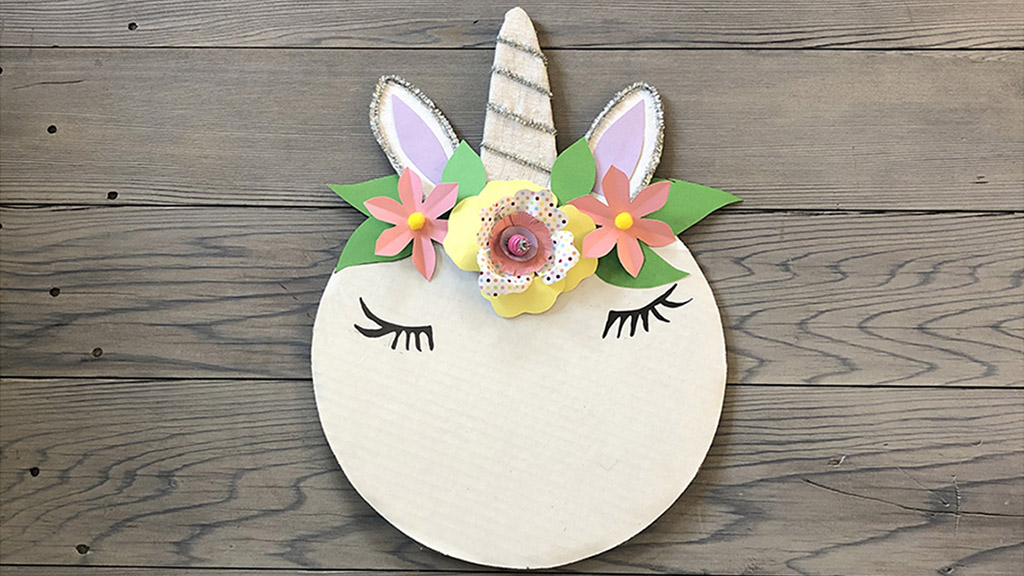
Glue the horn on, then the ears, then the large center flower, then the green leaves — three on each side — and, finally, the two smaller flowers on either side of the center flower.
How adorable is that! I really love the way it turned out. And the fact that I made it using bits and pieces of things I already had is my kind of upcycling!
This platter is perfect for serving sparkly unicorn cupcakes, too!
Mini unicorn planters
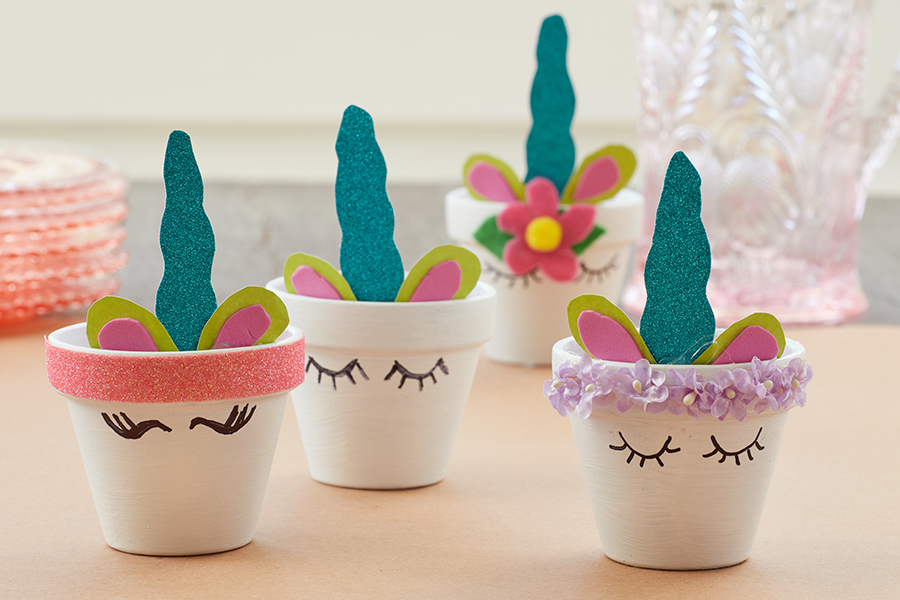
These mini unicorn planters will take the decor at your unicorn birthday party to the next level. They have a gazillion different uses and, as most of my projects are, are very easy to make. They are a fun project to do with little kids, too.
What you’ll need
- Mini clay pots
- White paint (acrylic, spray paint, any kind will do)
- Paint brush
- Craft paper and foam sheets (in various bright colors, and one with sparkles)
- Decorative elements (washi tape, faux flowers, sparkles)
- Black permanent marker
Instructions
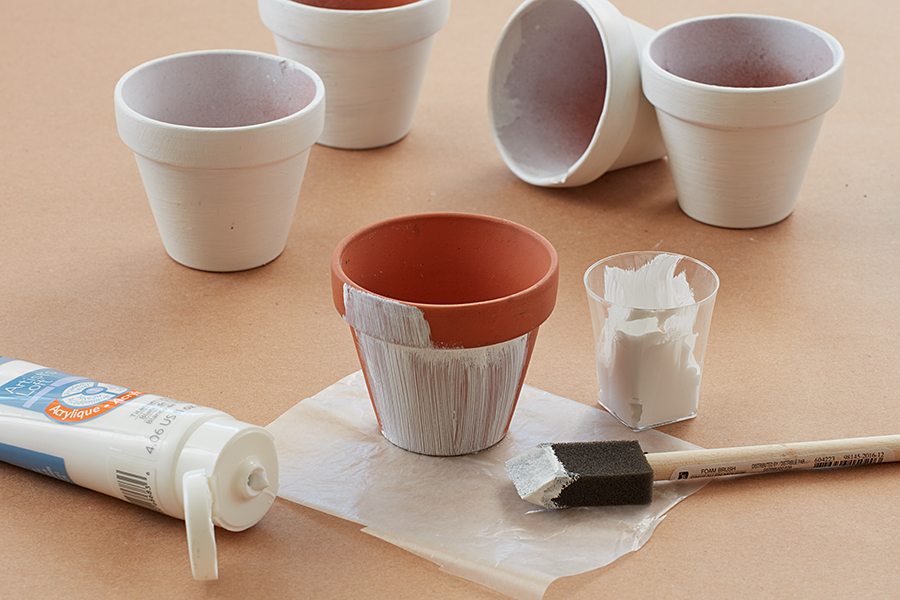
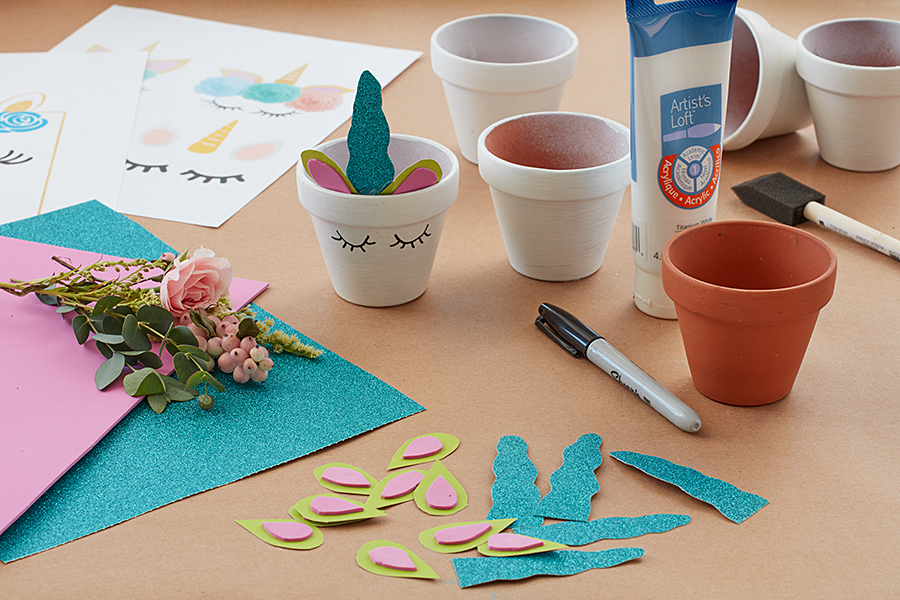
Paint all the pots.
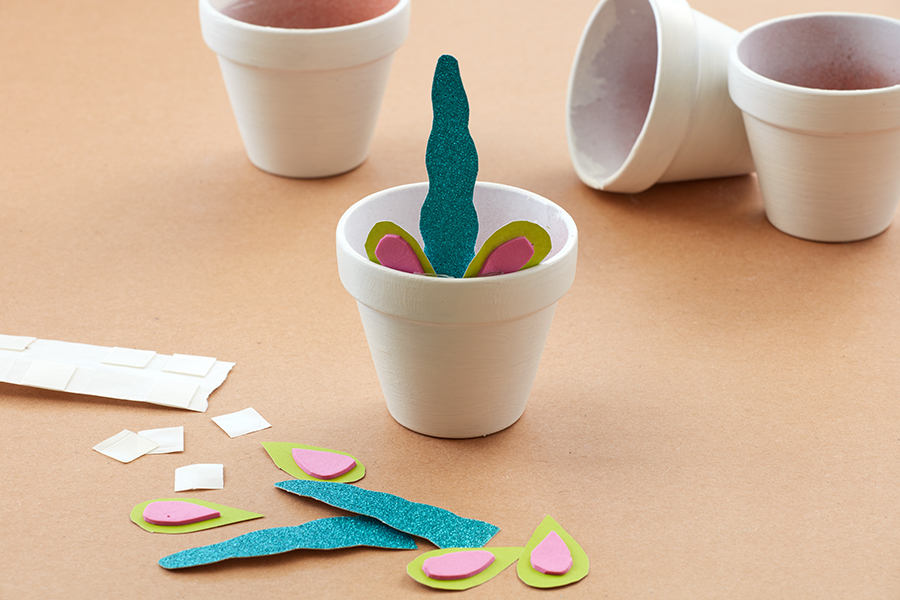
Cut out the horn and ears, and glue them to the inside rim of each pot.
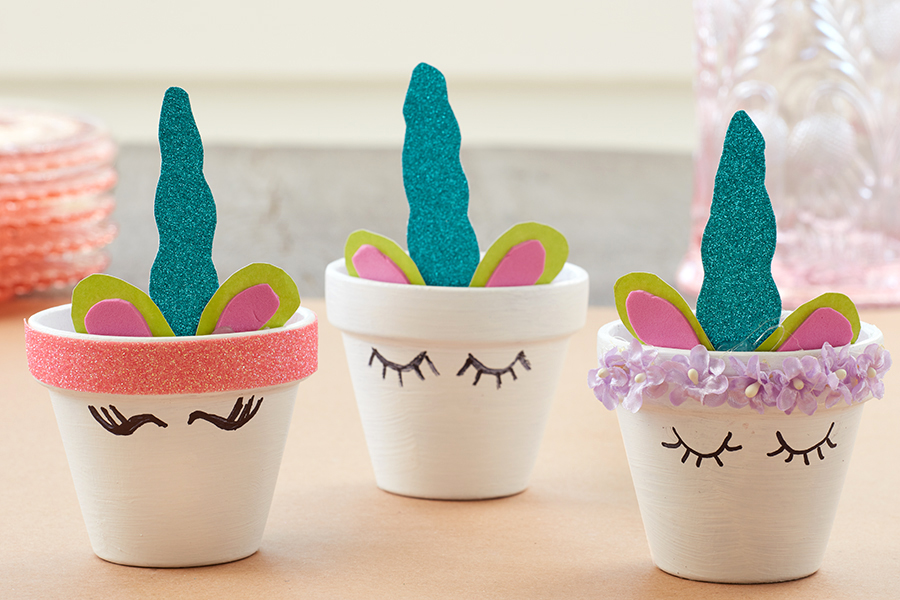
Decorate the rim to add a fun pop of color.
Then, draw flirty little unicorn eyes under the rim on either side of the horn using a black permanent marker. You can find many templates online from which to draw inspiration. I like to do them freehand because, just like snowflakes, no two unicorn’s eyelashes are exactly the same!

I filled my uni-pots with mini plants: one cactus, two succulents, and one fern. They would look amazing with fresh flowers as place settings or filled with candy for a sweet take-home gift.
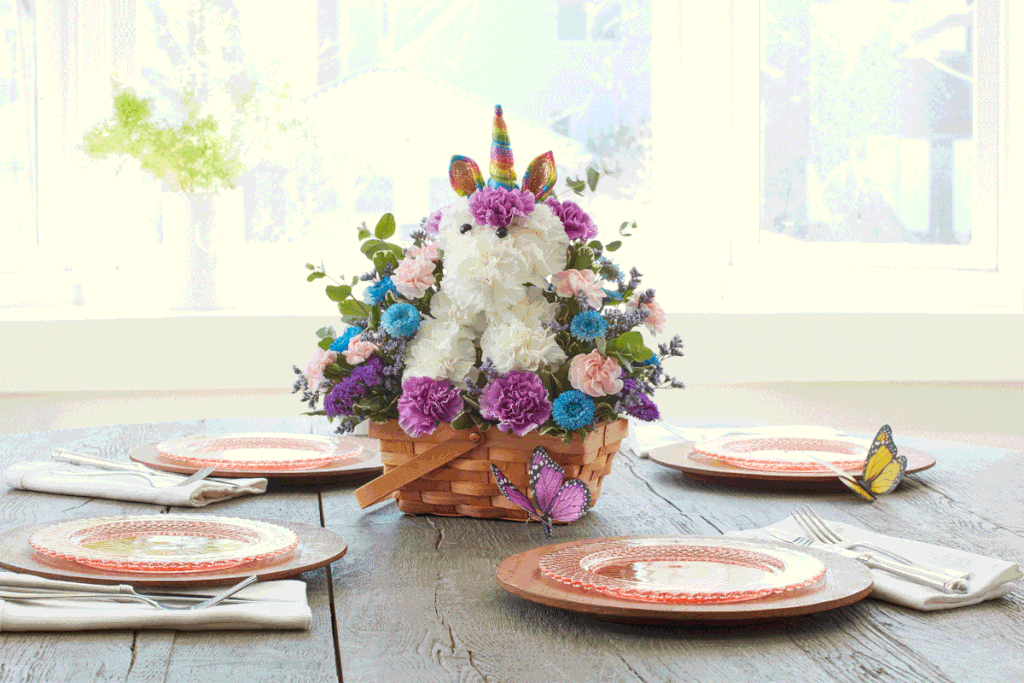
These planters are the perfect complement to the Enchanting Unicorn™ floral arrangement, one of the most popular gifts in the Enchanting Unicorns collection. Pair them at your next magical unicorn party, and your little one will be over the moon!
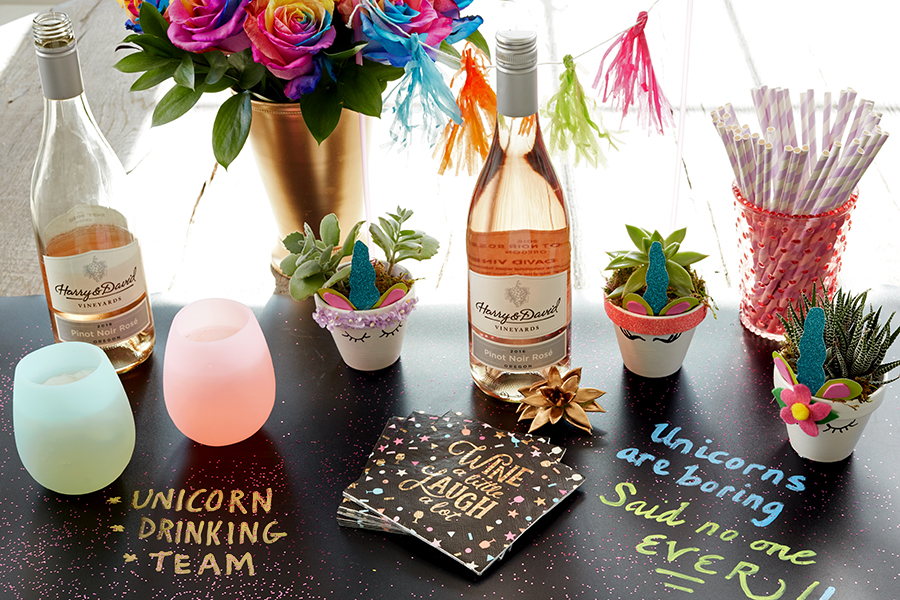
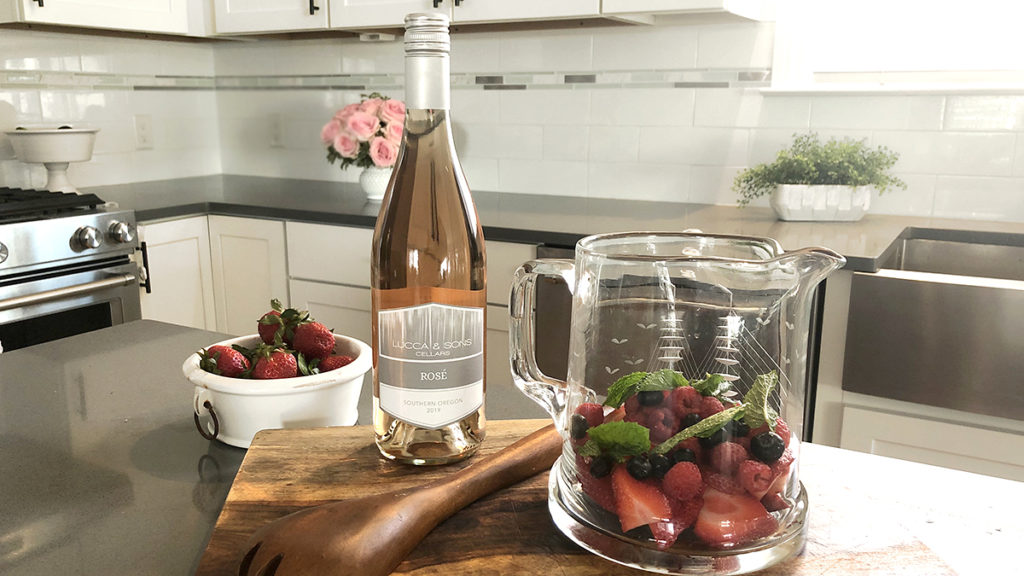
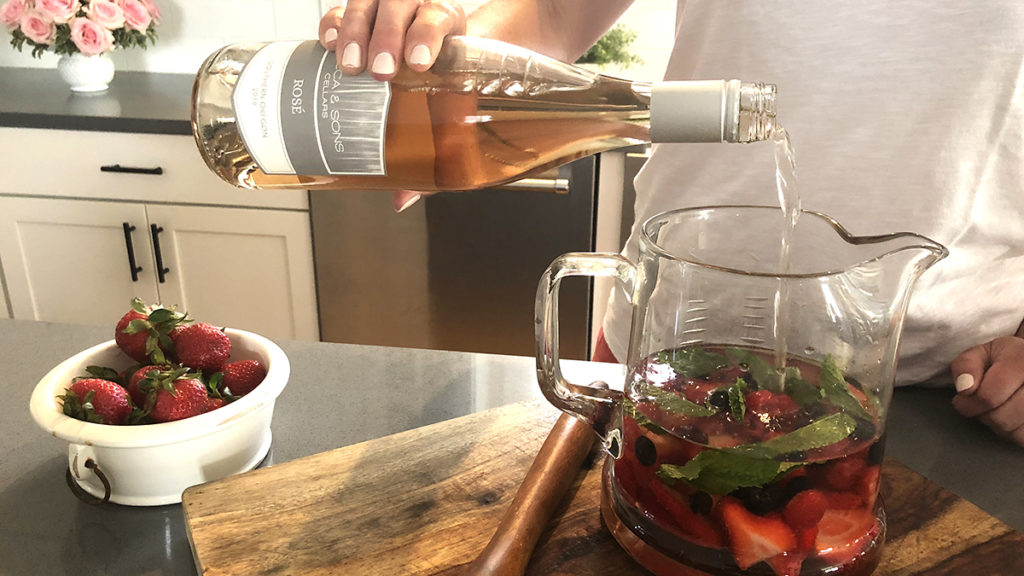
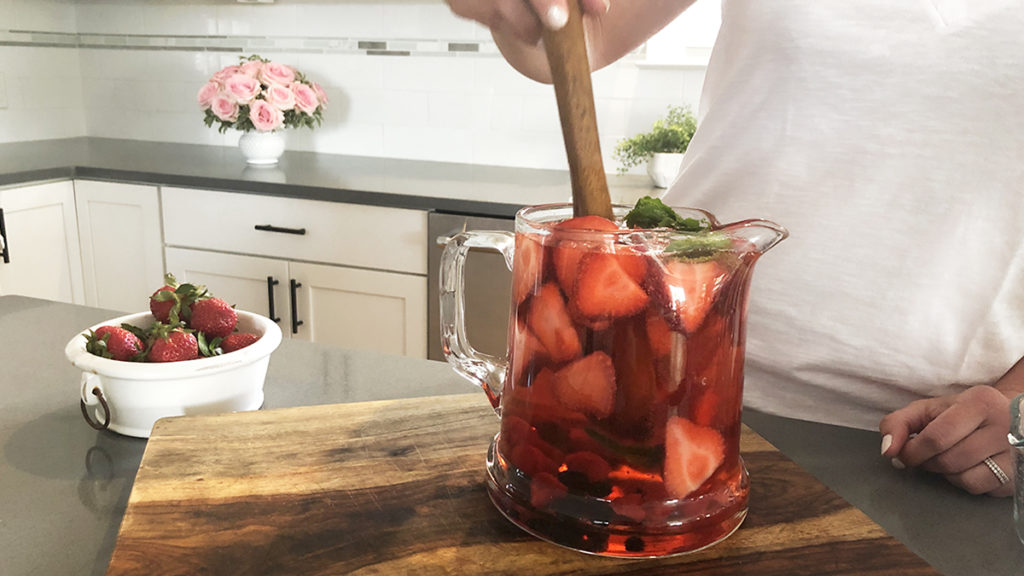
But unicorns aren’t just for little girls — they’re for everyone! I heard their favorite type of wine is, in fact, rosé. Pop open a bottle at your next unicorn-themed party and let the good times flow.
Have a magical day!