Mother’s Day DIY Gift: Personalized Wine Bottle

Mom is one busy lady. Have you seen her lately? She makes Superwoman look lazy. She’s a teacher, cook, homemaker, and everything in between. That’s why, this Mother’s Day, get her something she actually wants (and deserves)…wine!

For the ‘half glass full’ mom

Getting together with my mom and sister for a casual glass of wine is one of my greatest pleasures in life. So, this year, I’m surprising my mom with an in-person happy hour with her favorite bottle of rosé. For the perfect Mother’s Day DIY gift — and for an added layer of surprise and personalization — I turned the rosé bottle into a keepsake we can drink from and then repurpose.

Mothers Day DIY Gifts personalized wine label

Creating your own DIY Mother’s Day wine bottle

I created a custom rosé bottle label for her in Adobe Photoshop and replaced it with the label on the bottle. If you don’t have Adobe Photoshop (or aren’t confident in your Photoshop skills), you can always order a personalized wine label online. Many styles and designs are available!

If you go the DIY route, all you need is sticker paper to turn a simple wine bottle into a personalized gift for mom.

Here’s how I did it.

Make it personal to make it special

I used a photo of the two of us to really make it personal. For an inspirational touch, I asked my mom to share her favorite quotes from women that inspire her and included those on the bottle as well.

I wanted this gift to be something special that we could use (aka drink) together, but I also wanted my mom to be able to keep it after and repurpose it as a vase. If you’re looking for something personalized and creative to share with a special person in your life, I highly recommend this Mother’s Day DIY gift.

Supplies you’ll need for DIY Mother’s Day wine bottle

Mothers Day DIY Gifts mom with wine and dog

Steps to create your personalized wine bottle

  1. Soak the bottle in a vase full of water. Then, remove the label. (Tip: Soak the bottle overnight for easier removal. You should be able to just peel it off.)
  2. Create your custom bottle label on the computer or by hand (just make sure to do it on sticker paper), or order one online.
  3. Print your custom label onto sticker paper and cut it out.
  4. Measure your cut-out label and decide where you want it to go on the bottle.
  5. Peel the back part of your label off and stick your personalized label onto your bottle.

Additional gift ideas to go with the personalized wine bottle

You’ve given Mom her favorite wine with a sweet personalized label, and that’s pretty special. But even after the wine is gone, this gift keeps on giving! Mom can use the keepsake wine bottle as part of her entertaining décor, a unique wine bottle vase, or a unique “pitcher” for water.

Does Mom love her personalized wine bottle? Check out these other accompaniment DIY gift ideas.

The Art of Floral Design: 9 Expert Flower Arranging Tips

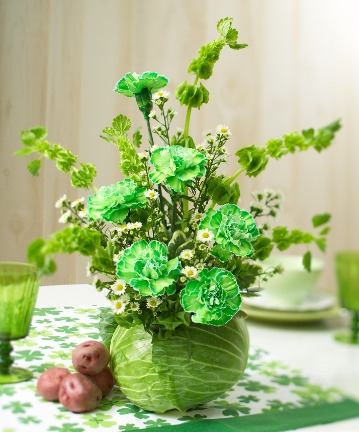
Your tulips are bursting forth from the ground, or maybe your fall rose bushes are in full bloom. Of course, you want to capitalize on this sudden emergence of natural beauty springing up around you and snip a few choice blossoms to keep around the house. Or perhaps you’ve received several bouquets and want to create a combined look for your entryway. But you want to do your precious petals more justice then just throwing them in a vase and calling it good. So, how can you keep your floral cluster vibrant for a week or longer and make it a bit more eye-catching?

flower design arranging red roses

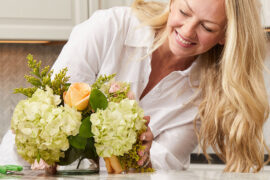
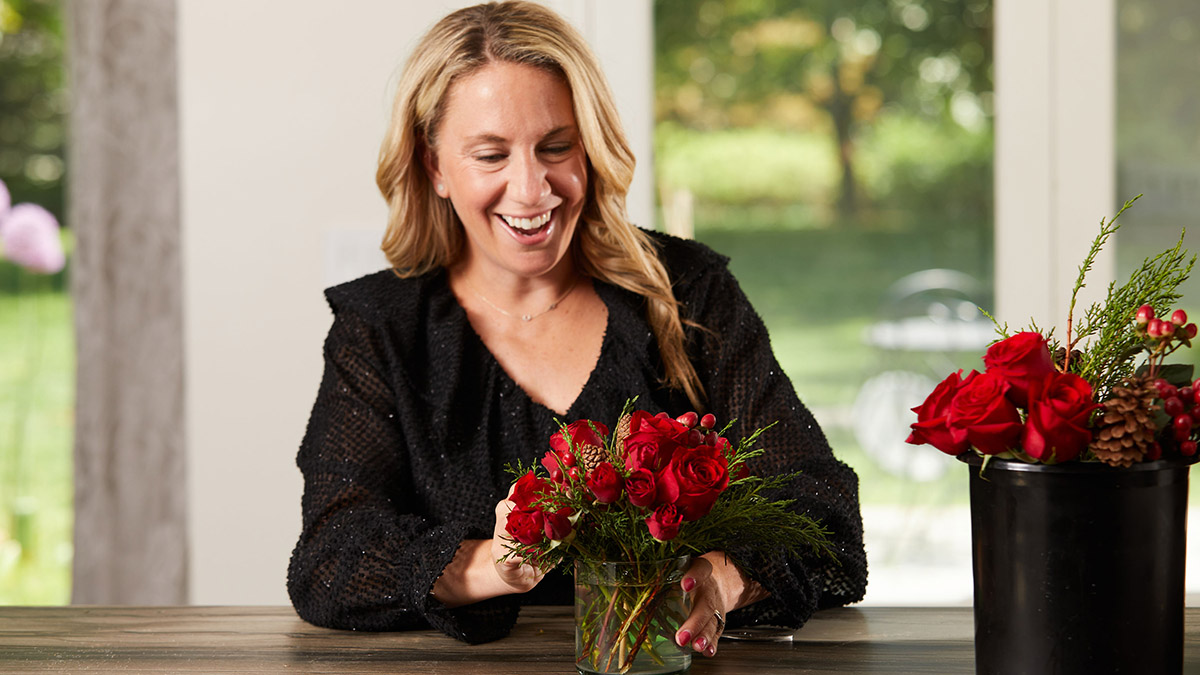
You’re ready to take flower arranging to heart. Betsy Karetnick, founder of The Portable Garden, has taught thousands of people how to arrange flowers, first hosting radio shows on SiriusXM for Martha Stewart and later joining Alice’s Table, where she hosts virtual workshops. (All Alice’s Table events include a kit so you can participate).

Here are nine of Karetnick’s best tips on how to create your own distinctive arrangements that will look beautiful in your home — and last.

1. Think ahead

Before you gather your flowers, think about the spots in your house where you want to add color or interest. Do you have an empty mantel? The height and shape of your arrangement will depend on placement. Also, consider the vases you’ll use, as that will dictate how many flowers you need.

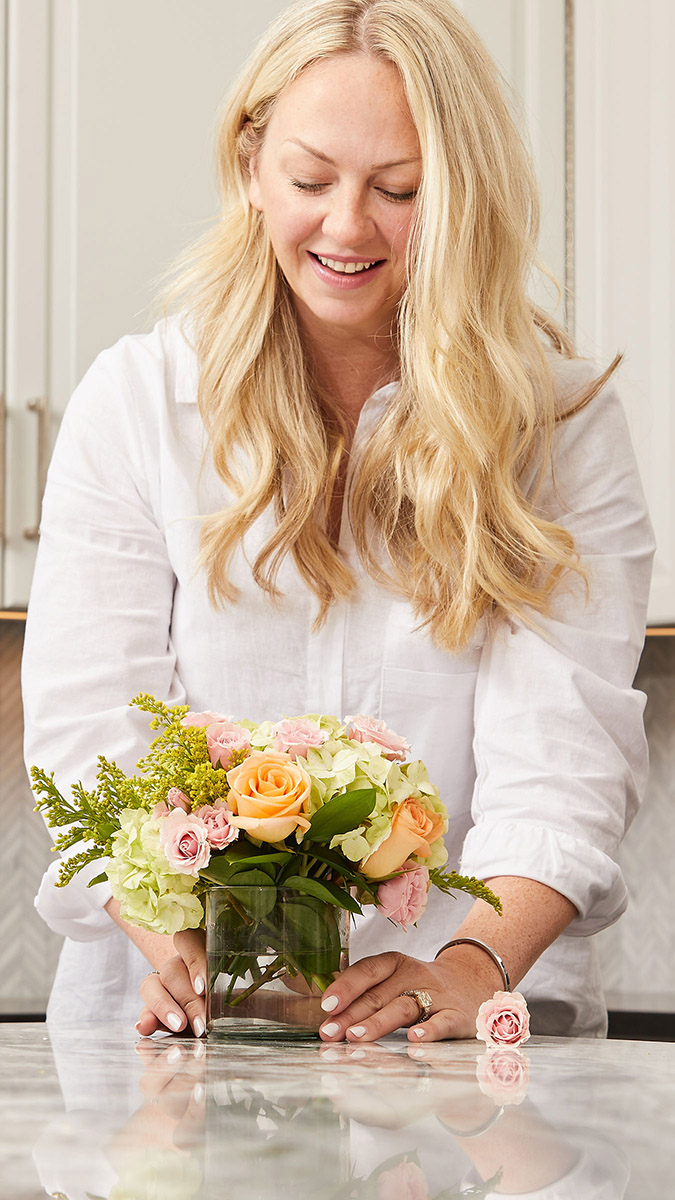
2. Choose your palette

In a home with neutral colors, your floral palette options are as varied as nature. On the other hand, if certain colors stand out in your home décor, your flowers can enhance them. With a deep green velvet sofa, for example, you might choose light, pastel flowers to create contrast on a coffee table.

Complementary colors often work well, too. Remember that it’s not boring to stick with one color — red roses would complement your green couch. You might try several kinds of red flowers and play with texture. “It’s sometimes easier to pick flowers if you’re working monochromatically,” Karetnick says.

betsy karetnick mug

Now, looser-style arrangements that create balance are very in vogue.

betsy karetnick

Founder, The Portable Garden and Alice’s Table host
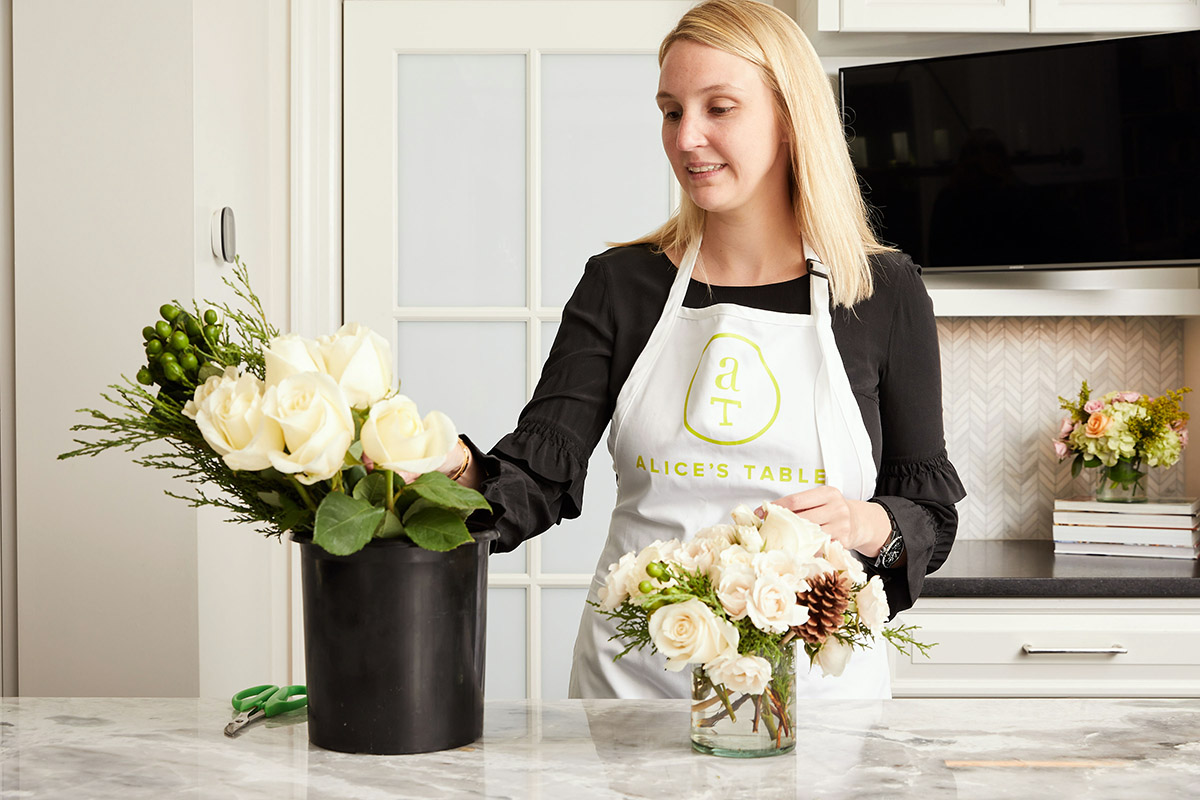
3. Know your vase

A classic cylinder vase with a thin neck is simplest. “I always say, try to keep the diameter of the vase a little bit smaller. It’ll save you money, because you’ll use less flowers, and it will save you angst, which is even better,” Karetnick advises. Square vases require more skill on the flower arranger’s part.

4. Give your blooms a bath

Skipping preparation is a common mistake. Your flowers need a bath when they arrive in your home. Well-hydrated flowers last longer. “When you get flowers, they’ve already traveled from somewhere, even from your own backyard,” Karetnick notes. They’ve begun to dry out, and the stem has formed a scab where it was cut. “A dry stem can’t drink,” she explains.

flower design flower bath

You may have heard the advice to cut at least a couple of inches from the stems, at an angle. This step allows the flowers to absorb water. For cutting, Karetnick recommends an ARS bypass shear. “You’ll buy one for your lifetime,” she says. The precise, sharp cut promotes hydration.

Florists often submerge all their flowers in a bucket and cut them under the water. Dilute flower food into the water and let the stems drink for at least an hour, or even overnight. Tap water is fine, as long as it’s room temperature. When you’re ready for flower arranging, use a new packet of food and water for the first day. “Once they’re really hydrated, they’re very forgiving,” she notes.

Roses and hydrangeas can be especially tricky and may need as much as 3 to 5 inches cut. For most arrangements, the water should fill at least two-thirds of the vase. For flowers with straw-type stems, such as tulips, use less water or the stem may disintegrate quicker.

5. Keep them hydrated

Water evaporates, so add new water daily. After two or three days, “I will take the flowers out and hold it like a bride bouquet. Swish off the container to clean it with fresh water, and add new room temperature water. I don’t add more food. And I will put the flowers back in and, if I have time, I’ll give them a quarter-inch snip at the bottom so they’re drinking with a fresh cut,” she says.

An ad for 1800flowers' flower subscription service

If you have tight blooms that haven’t yet opened fully — and some sunlight — you’re in luck. These blooms will flourish if you put them in last, higher up. In the next days, they should start to open.

6. Location, location, location

You knew where your vase would go — and now, with arrangement, you can make the most of that spot. On a side table or coffee table, aim for more width, roughly twice as wide as the vase. For a dinner table vase, put your elbow on the table and create a right angle. If your arrangement is below the top of your fingers, it will be below eye level and people can see each other across the table.

To add drama, put a tall vase in an entryway or a corner of a desk — but plan ahead when you are cutting the stems. In a 5-inch container, you need stems that are at least 7 inches long.

flower design admiring work vertical

7. 360 degrees or front facing?

Keep in mind the angles from which your flowers will be seen. Turn the arrangement around as you work. If you are filling a spot against a wall or mantel, with a vase only visible from the front, use taller flowers in the back to create a cascading effect as the eye travels downward. In a front-facing arrangement, use fewer flowers. Good news: You might have enough for a second vase!

8. Aim for balance

A bouquet with one kind of flower can be lovely: No two flowers are alike. Put a bloom of similar size on both sides to create balance. But you can use as many as five or six varieties, creating balance by size and with color, using, for example, red flowers on each side.

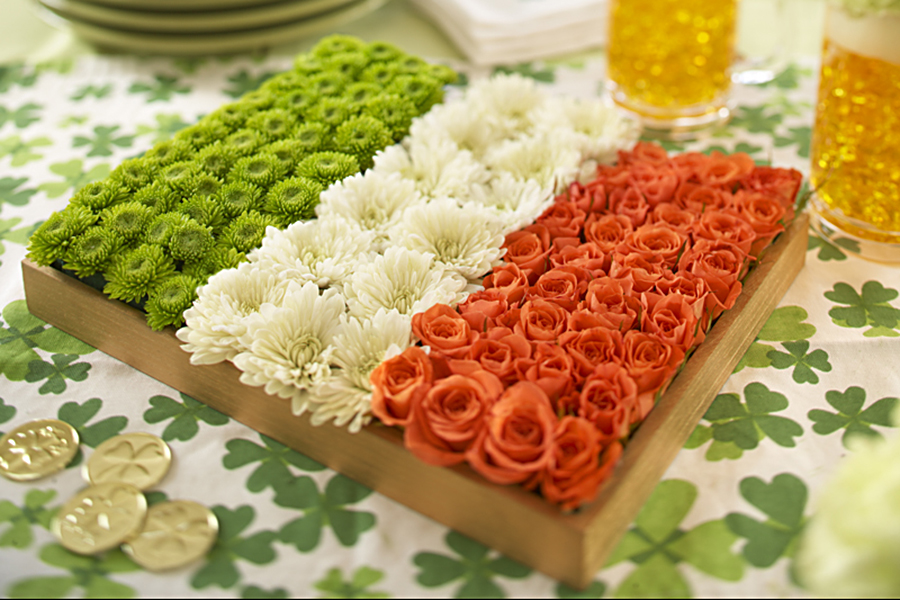
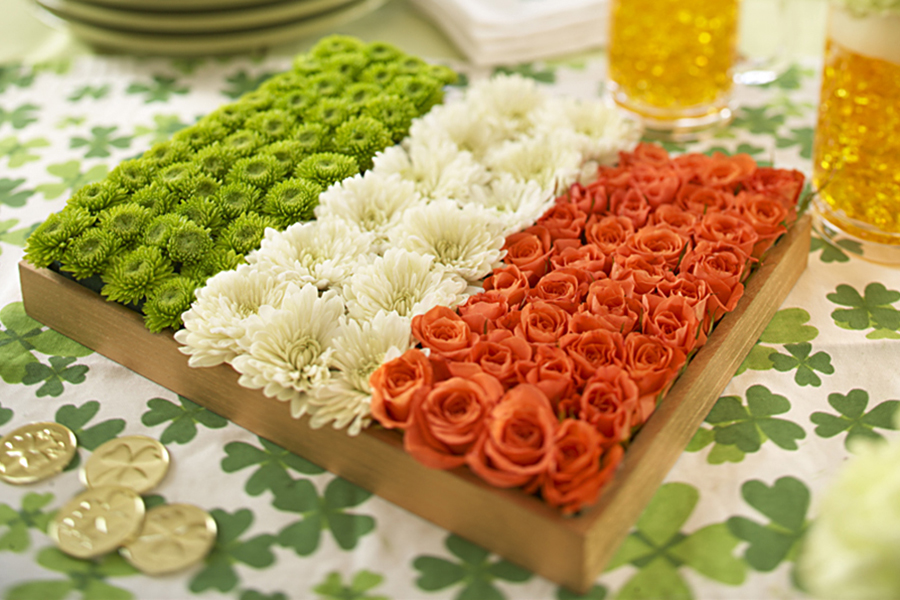
Also balance by height. In a pavé arrangement, all the flower heads are close together at the same height, creating a “kind of carpet effect.” This is common in powder rooms or side tables because these arrangements are naturally lower. “It was very popular for a long time,” Karetnick notes. “Now, looser-style arrangements that create balance are very in vogue.” For a modern look, experiment by cutting stems to different lengths to create a sense of movement.

9. Try floral tape

This specially designed tape is an old florist trick — but be sure to get the waterproof kind. “Make a grid like a tic-tac-toe board but with smaller boxes,” Karetnick says. This will allow you to experiment, putting stems in and taking them out, and angling them so you can make a wider arrangement with fewer flowers. Secure the grid edges by wrapping the tape around the rim of the vase. Floral tape is “just terrific,” she says.

Whatever you decide, make sure you’re having fun. Your flowers are already perfect and beautiful; with arrangements, we’re only adding another touch. Enjoy.

DIY Memorial Day Crafts the Whole Family Can Make

Memorial Day is the unofficial start to summer. It’s a time for families to be outside enjoying the fresh air, sunshine, and freedom we have in this country. This freedom, however, comes at a price. On Memorial Day, we honor all the brave men and women who have served in the U.S. Armed Forces and made the ultimate sacrifice so that we can live free.

Depending on the ages of your little ones, you may be challenged to find things for them to do while also conveying the meaning of this holiday. Here are two simple DIY Memorial Day crafts using recycled materials to keep kids busy and happy on this important day.

Making patriotic-themed red, white, and blue decorations gives you a chance to have some fun while teaching your children about Memorial Day and why it’s important to acknowledge the sacrifices made for our country.

DIY Memorial Day craft No. 1: Memorial Day wreath

DIY Memorial Day Crafts with Memorial Day wreath

One way to get crafty with all those cardboard shipping boxes you have lying around is to create a red, white, and blue Memorial Day wreath out of them. It’s easy to make, and all ages can get in on the patriotic fun.

Of course, you’ll need more than just cardboard to get started…

Materials needed for Memorial Day wreath

  • Scissors
  • Straight edge cutter
  • A package of red, white, and blue tissue paper
  • White yarn
  • Various size plates
  • A pencil
  • String, ribbon, or yarn to create a hook for hanging
DIY Memorial Day Crafts with cardboard circle cutout

You’ll need two different-sized plates to create your wreath outline. I used a cardboard cake round and a plate to cut out the inside of the circle.

DIY Memorial Day Crafts with medals

Since I save so many knick-knacks for future projects, I had a few plastic gold medals on red, white, and blue ribbons left over from a “Family Olympics” day. The ribbons were just what I needed for this wreath. If you a have red, white, and blue ribbon, it will add an extra patriotic pop to your Memorial Day wreath.

DIY Memorial Day Crafts with Ribbon on wreath cutout

To add the ribbon, I simply cut off the plastic gold metal and tied it around the base of the cardboard wreath before adding the tissue paper flowers.

DIY Memorial Day Crafts with Ribbon on wreath cutout

When tying the ribbon, you don’t need to make a bow. Just loop the ribbon around the cardboard to create a loop for hanging.

How to Make a Tissue Paper Flower

To make the tissue paper flowers, take five large pieces of a single-color tissue paper and cut them into layered pieces that are 5 inches wide by 10 inches long. Watch the video above to see how to fold the tissue into an accordion, staple it in the middle, and separate and fan out each individual piece on either side of the staple.

For reference, I made:

  • Three blue tissue paper flowers
  • Five white tissue paper flowers
  • Five red tissue paper flowers
DIY Memorial Day Crafts with Tissue paper flower on wreath cutout

To get the tissue paper flowers to stick, use any type of adhesive that will keep them in place. I used a hot glue gun, as I find it easy and fast to work with. If you are doing this with young children, stick with craft glue or glue dots.

DIY Memorial Day Crafts with Tissue paper flowers on wreath

Then, attach the three blue flowers on the top left of the wreath.

Next, add and alternate the red and white flowers to represent the stripes of the American flag.

DIY Memorial Day Crafts with Starbrusts on Memorial Day wreath

To make the American flag’s stars, use white yarn to create little starbursts that can be nestled and glued into the “petals” of the blue tissue paper flowers.

DIY Memorial Day Crafts with Hanging Memorial Day wreath

Follow these steps and you’ll have a beautiful homemade Memorial Day wreath. You can hang your wreath on your front door — if it’s protected from the elements — to acknowledge and send a message of thanks to the fallen service members and their families.

DIY Memorial Day craft No. 2: Memorial Day garland

This idea for a festive Memorial Day garland is made from materials that you probably already have around your house.

Materials needed for Memorial Day garland

  • Cardboard boxes
  • Paint or markers
  • String or ribbon
  • Hole puncher
  • Scissors or straight edge cutter

You can make the garland any size you want. I decided to do 4-inch triangles.

diy memorial day crafts with red white and blue triangles

I cut out enough triangles to spell out “Thank You” and added additional triangles decorated in patriotic colors to complete the garland.

This is a great DIY Memorial Day craft for kids. Let them use their imagination to decorate the individual triangles.

diy memorial day crafts with kid painting triangles

It’s also fun to do together, and I like that it can be worked on in stages. Whenever you have the time or feel like chilling out, just sit down and paint or draw a few designs.

Once you have all the triangles decorated and have punched two holes at the top of each one, simply lace a string (twine, ribbon, jute, etc.) through each triangle.

diy memorial day crafts with wrapping string with tape

I found it helpful to wrap the end of my string with a piece of Scotch tape; it made it easier to thread through the holes. I also laid out all the triangles on the table in the order they should go in, before starting to connect them to create the finished garland.

diy memorial day crafts with memorial day garland

I am thrilled with how this DIY Memorial Day craft turned out and how easy it was to do. And the fact that it created a second life for all the extra cardboard I had makes me very happy. I’ll be doing these garlands for birthdaysFourth of Julyanniversaries, etc.

Take a little time this Memorial Day to reach out to a veteran or a family of a vet with a simple “Thank you for your service.”

Happy Memorial Day!


Memorial Day Banner

St. Patrick’s Day Decor: 2 DIY Ideas with Flowers

St. Patrick’s Day brings together unique colors, and color combinations, that you don’t get to play around with much during the rest of the year. Here, we offer two St. Patrick’s Day decor ideas with flowers: A centerpiece that mimics the Irish flag and a floral arrangement constructed from symbols of the holiday: green carnations, cabbage, and potatoes.

st. patrick's day decor with irish flag made from flowers

Irish flag centerpiece

Creating a centerpiece modeled after the Irish “tricolour” — as the flag of Ireland is frequently referred to — is very easy and will last for a few weeks. This works out great for anyone (like me) who likes to celebrate St. Patrick’s Day for the entire month of March!

The simplicity of the flag’s design of three colors in three equal parts makes it easy to recreate in flowers. The meaning behind it, however, is deep and captures the desire for peace during conflict. Here is what each color of the flag represents.

Green

Green is a color long associated with Ireland and Irish republicanism. Back in the 1700s, the Society of United Irishmen, who were predominantly Catholic, launched a rebellion to end British rule, resulting in the creation of an independent Irish Republic.

st. patrick's day decor with Saint Patrick's Day parade with Irish flag

Orange

Protestant King William III led an army that defeated the Catholics, led by King James, in the Battle of the Boyne in 1690. King William was known as William of Orange because he came from the Principality of Orange. More than 100 years later, the Northern Ireland-based Orange Order, a Protestant supremacy group, was formed. Over time, orange came to represent Protestant British unionists.

White

Between the two opposing colors of green and orange is white, which represents peace and the hope of a lasting truce between the two sides.

The flag represents the ideal that every Irish person has a place in Ireland regardless of political association or ethnicity.

Flowers you’ll need

  • Green button poms
  • White cushion poms
  • Orange spray roses

How to make it

  1. Choose a shallow rectangular container that is either waterproof or can be lined with plastic.
  2. Soak a few bricks of floral foam in a sink or bowl of water.
  3. Cut the foam to fill the entire container. The foam should sit just at the height of the container.
  4. If you’re transporting your centerpiece to another location, use waterproof tape to secure it to the container; otherwise, it’s not necessary.
st. patrick's day decor with irish flag floral foam container
  1. Cut each individual flower from the main stem, leaving only about 1-1½” of stem to insert into the foam.
  2. Measure and mark the foam into three equal parts.
  3. Starting at one side, insert each flower in that colorway, one at a time, directly into the foam. Continue until you have finished the three color sections of the flag.
  4. Spritz your flag with water and add water to the tray/container every few days to keep it fresh.

Tip: An easy way to add water to the container is to slip a few ice cubes between the flowers. They’ll melt and keep the foam moist!

st. patrick's day decor with beer mug flowers

Looking for another fun craft to make for March 17? Nothing says St. Patrick’s Day like a big old mug of “beer”!

St. Patrick’s Day DIY floral arrangement

What better way to decorate your house this March 17 than with this easy-to-make DIY St. Patrick’s Day floral arrangement!

st. patrick's day decor with green floral arrangement

Materials needed

  • 1 large head of cabbage
  • 6 green carnations
  • 6 stems of Bells of Ireland
  • 2 stems of monte casino
  • A small piece of floral foam
  • Paring knife
  • Plastic cup
  • A few red potatoes (optional)

Instructions

  1. Carefully cut out the top of the cabbage (about a 2-by-2 hole) with a paring knife, cutting at least 2 inches deep.
  2. Cut a plastic cup to fit into the hole, making sure it sticks out at least a half inch above the opening in the cabbage.
  3. Place the soaked foam in the cup so it is at least 1 inch higher than the cup. Note: Make sure to use the plastic cup because the floral foam and cabbage together are not aroma friendly.
  4. Starting at the top, place your first Bells of Ireland into the floral foam (about 1-1/2 times the height of the cabbage). Continue to add the bells in a triangular shape.
  5. Add the green carnations.
  6. Complete your arrangement by adding the monte casino as filler.

Optional: We added some potatoes alongside our arrangement, so feel free to accent your St. Patrick’s Day flowers with some spuds at the base of the cabbage.

How to Make a DIY Christmas Centerpiece

christmas centerpiece ideas with christmas centerpiece floral craft

When Christmastime comes around, it’s easy to get into the holiday spirit. From Christmas decorations to the gleeful melodies of Christmas music and carols to the festive holiday foods, there’s so much to love about the season.

And to make your Christmas even more special, we’ve created an easy-to-follow guide to making your very own floral DIY Christmas centerpiece in just a few easy steps. Your handmade Christmas centerpiece will not only impress guests but will look amazing next to Christmas dinner!

Before you start, we should point out that you can make the centerpiece without the flowers first to make it last longer. Then, when Christmas nears, add the flowers a day or two before to have your floral centerpiece extra fresh for the holiday!

Materials for DIY Christmas centerpiece

  • Floral tray (We used a round floral tray, but you can use anything that mimics that shape…even a round soup bowl!)
  • Floral foam
  • Water
  • Tapered candle (We used a 15-inch red candle.)
  • Knife or clippers
  • Floral wires
  • Floral sticks
  • Millimeter balls clusters
  • Pine cones
  • Holiday greens (We used cedar, variegated holly, balsam, white pine, and sugar pine. You may be able to find some of these on nearby trees.)
  • Flowers (We used white cushion pom poms and red mini carnations.)

Instructions for DIY Christmas centerpiece

  1. Cut the floral foam to fit the shape of your tray.
  2. Set the cut piece of foam in water for about five minutes, until it is completely saturated. If your floral foam has holes, which is actually preferred, place the foam in the water holes side down. The trick is to let the foam sink to the bottom, to allow it to absorb the most water possible.
Christmas centerpiece ideas with floral foam in water
  1. Place the soaked foam snugly into your floral tray.
  2. Add the candle to the center of the foam. You can use a candleholder or not.
Christmas centerpiece ideas with adding greens to foam
  1. Now, add your greens to the floral foam. A helpful tip: Look at the centerpiece as an extension of the table. Start low so the greens just about hit the table, and then work your way up to build the arrangement. With how long the needles of the white pine (aka sugar pine) are, we thought this was a good green to start with. After filling the base with sugar pine, we added the rest of the greens: balsam, cedar, and then variegated holly.
Christmas centerpiece ideas with adding pine cones and millimeter balls
  1. Next, add the pine cones and millimeter balls. So these elements can stand out in the arrangement, place them on sticks, securing them with wire. Do this by wrapping the wire around the pine cone and then wrapping the same wire around a stick, until the pine cone is secure. Then, do the same with the millimeter balls. (In all, we created six pine cones and six millimeter ball clusters on sticks.) Add the pine cones and millimeter balls on sticks to the arrangement, making sure you spread them out to achieve a good balance.
Christmas centerpiece ideas with placing flowers
  1. Now it’s time to add the flowers. Do this in whatever order you prefer. We started with the white cushion pom poms and then added red mini carnations, making sure to create a nice balance of red and white alongside the greens for an extra festive look.
  2. Inspect your centerpiece for any “bald” spots or areas that are lacking. Add your leftover greens, flowers, or decorations as you see fit to fill these empty spaces and create the fullest centerpiece possible.
  3. Once you’re happy with your Christmas centerpiece, place it on the table and admire it!

Very Merry Modern Christmas Centerpiece

Here’s another Christmas centerpiece idea. It’s called the Very Merry Modern Christmas Centerpiece, and it uses noble fir, cedar, and white pine for greenery; green hydrangea, and red and white spray roses for flowers; and pine cones, hypericum, and ornaments for accents. The materials are pretty much the same as above, only instead of a long tapered candle, it features a glass cube vase in the middle with a tea light candle or flameless candle inside.

Watch the video below to learn how to make this Christmas centerpiece that will wow your guests!

DIY Very Modern Christmas Centerpiece

How to Make a DIY Christmas Stocking to Add Holiday Cheer to Your Home

When I was asked to write an article about making DIY Christmas stockings, the first thing I did was to go to my favorite fabric store and head straight for the clearance remnant table.

diy christmas stocking with fabric remnants

I picked up the holiday color “trinity” — red, white, and green — as well as various prints and florals that just spoke to me. I knew I wanted to show how to make a basic Christmas stocking, but I also wanted to inspire creativity, to make you, the reader, go beyond what’s expected and design a stocking that matches your own personal style.

I started with a basic red stocking with white cuff. I am not a sewer and do not own a sewing machine, so I decided to make the stocking using glue — both hot glue and fabric glue. Easier said than done! Here’s how it went.

Making a basic Christmas stocking

diy christmas stocking with Christmas stocking template
diy christmas stocking with Christmas stocking cuff
Click images to enlarge
DIY Christmas stocking with hemmed cuff

Using an old Christmas stocking, I created a stocking template that you can download here. This stocking measures 7 inches wide at the top and 14 to 16 inches high. Don’t feel like your stocking has to be these same dimensions — make your stocking any size you want!

  1. Trace the stocking template onto your fabric.
  2. Use a sharp scissors to cut out the stocking. You will need two pieces of fabric. Before cutting, fold the fabric so that you can cut both pieces at the same time.
  3. After cutting the two stocking pieces, place them right side together.
  4. Sew or glue the edges together, except for the top, with about a quarter-inch seam.
  5. Cut the material you are using for the cuff. The length should be two times the width of the stocking at the top plus another 1 1/2 inches. The height should be between 3 and 4 inches. If you are using a material that will need to be hemmed, add an additional quarter inch on the top and bottom.
  6. Hem the cuff, if necessary. Glue or sew the cuff with the right side against the wrong side of the stocking along the top edge only. Remember, your stocking is inside out at this point.
  7. Turn the stocking right side out and roll the cuff down.
DIY Christmas stocking finished

This is your basic stocking. However, I felt it was a bit plain looking, so I used a buffalo plaid wired ribbon to add some personality to it.

Embellishing a basic Christmas stocking

diy christmas stocking with buffalo plaid wired ribbon
DIY Christmas stocking with ruffled ribbon
Click images to enlarge
DIY Christmas stocking with name on it

To make a ruffled edge, simply hold the end of one of the wires and keep sliding the ribbon down the wire on that one side. Keep doing this until you have the length of ribbon you need.

I attached the ruffled ribbon all along the edge of the stocking using a glue gun. I also made the loop for hanging from the same ribbon.

At this point, I thought it needed a little more personalization, so I added a name on the cuff. If you want to create your own custom stocking but don’t have the time, you can always order one online.

While making this stocking using only glue was fairly simple, I decided that sewing the stockings would be faster and easier, and make them more secure and functional. However, as I said before, I am not a sewer, so I called my good friend, Ann, who is a master quilter, for assistance. She was happy to help, and it turned out to be a great afternoon of holiday crafting and spending time together.

Making a mini Christmas stocking

We decided to do two stocking sizes: a traditional size and some minis that would be great for gift cards.

DIY Christmas stocking template
DIY Christmas stocking with tracing shape on fabric
Click images to enlarge
DIY Christmas stocking with cutting out shape

No matter the size you choose, you still need to start with a template. I used a credit card/gift card as a guide and drew the finished size that I wanted the mini stocking to be. Next, I created the final template that is a quarter inch larger all around to allow for the seams. Then, I followed the same steps as above.

Place the template on two pieces of fabric and cut both pieces at the same time.

diy christmas stocking with white stockings with black and white buffalo plaid ribbon cuffs

How adorable are these? We went all out on the buffalo plaid, making both red stockings with red and black ribbon cuffs, and white stockings with the black and white buffalo plaid ribbon cuffs. For both versions, we used the same ribbon for the loops.

I will definitely incorporate these mini stocking gift card holders into my wrapping plans this and every year!

More DIY Christmas stocking design ideas

Next, I laid out all the beautiful fabric remnants I bought and had fun putting these fabulous combinations together. Holiday stockings are just one more way to customize your holiday decorating or gift giving. Who said stockings need to be traditional? Why not have them match your style, maybe even using the same fabric as your pillows or curtains?

DIY Christmas stocking hanging from mantle

This stocking would be perfect as a gift bag for my quilting friend, Ann. I love the layering we did using both fabric and ribbon for the cuff.

DIY Christmas stocking modern looking

This version is so pretty and modern looking. Adding the burlap and lace ribbon trim on the cuff adds just a touch of rustic to an otherwise elegant stocking.

DIY Christmas stocking with magnolia leaves

How great does it look on a front door brimming with magnolia leaves?

DIY Christmas stocking with materials

There’s something about all the texture in this combo that just did it for me! Again, it’s all in the details. Braiding the green yarn before gluing it to ribbon edging just brings it to the next level.

Ann and I had so much fun creating these beautiful stockings, and we hope they inspire you to try making some of your own.

I found the right combination for a detailed and structurally sturdy stocking was sewing the main portion and gluing the details. Find the method that’s right for you and remember — just have fun with it!

DIY Magical Unicorn Decorations

Unicorns love to party — that’s one thing I love about them. So, to maximize the magical effect of these mythical creatures, I came up with these two DIY unicorn decoration ideas for my next get-together.

Unicorn party platter

An adorable unicorn party platter is perfect for serving Unicorn Dipped Oreo Cookies, or any other unicorn-themed snacks you might have (unicorn truffle cake pops, anyone?).

Before you start to make your platter, you need to gather your “stuff.”

unicorn decorations with unicorn party platter materials

It has become my goal in life to GET RID OF STUFF! And let me tell you, that’s not easy for a “stuff person” who writes a lifestyle blog. So, the first thing I did was go through all my craft stashes and gather anything that looked “unicorn-y” — in other words, bright and sparkly! Besides cardboard and decorative paper, I also got out scissors and glue.

I’m proud to say I didn’t have to buy anything for this project; I just looked around my house and saw what I already had that I could repurpose in new and interesting ways.

What you’ll need

  • Template for the eyes, ears, and horn.
  • Enough cardboard for:
    • 1 12-inch round for face
    • 2 ears, 2 inches x 4.5 inches each
    • 1 7-inch horn

I still have a few cardboard cake plates left over from my daughter’s stint as a baker, so I used those. If you don’t have something like that, just grab one of the many cardboard boxes I’m sure you have lying around from all the deliveries you’ve gotten lately. If you don’t have cardboard with a white side, you can always paint it or cover it with white paper before assembling.

To add character to the ears, I cut out a smaller piece in a nice lavender paper to add to the center of the ear. Then I used hot glue to add a silver sparkly pipe cleaner all around the edge.

I covered the horn with a scrap of sparkly fabric left over from a Christmas stocking project. I cut the fabric slightly larger than the horn and wrapped it around, glued it in the back, and then wrapped the horn with two silver pipe cleaners.

unicorn decorations with flower template

Using the flower template, cut out all the pieces needed to make each flower. Make sure to use different colors for each part of the flowers and green for the petals.

Assembling the first flower

Starting with the large petals, dab a small amount of glue onto one side of the stem and gently bend the other stem to overlap the glue. Press and hold to secure. Do this to all four petals.

Assemble the first layer of the flower by overlapping…

…and gluing the petal stems together as you go.

unicorn decorations with polka dot paper

Repeat this step with the smaller petals. I chose a polka dot paper to add a little whimsy.

Then, glue each layer on top of the next in the following order:

  1. Large petals
  2. Smaller petals
  3. Large center circle (that I fringed the edges of)
  4. Medium-size center circle
  5. Smallest size center

Again, for a bit more pop, I used a wooden bead with a sparkly pipe cleaner laced through the center. Remember: Use what you have and be creative.

Creating the second flower

unicorn decorations with folded flowers

The other flower on the template is a single layer with a pom-pom center. To add more dimension to this flower, add a crease to each petal by simple folding the flowers in half three times.

Assembling the unicorn party platter

unicorn decorations with drawn on unicorn eyes

With a black marker, draw eyes on the face using the template as a guide.

unicorn decorations with cellophane unicorn head

Cover with a piece of clear protective cover, such as cellophane, plastic wrap, or clear contact.

Glue the horn on, then the ears, then the large center flower, then the green leaves — three on each side — and, finally, the two smaller flowers on either side of the center flower.

unicorn decorations with unicorn party platter with place setting

How adorable is that! I really love the way it turned out. And the fact that I made it using bits and pieces of things I already had is my kind of upcycling!

This platter is perfect for serving sparkly unicorn cupcakes, too!

Mini unicorn planters

unicorn decorations with mini unicorn planters

These mini unicorn planters will take the decor at your unicorn birthday party to the next level. They have a gazillion different uses and, as most of my projects are, are very easy to make. They are a fun project to do with little kids, too.

unicorn decorations with materials for mini unicorn planters

What you’ll need

  • Mini clay pots
  • White paint (acrylic, spray paint, any kind will do)
  • Paint brush
  • Craft paper and foam sheets (in various bright colors, and one with sparkles)
  • Decorative elements (washi tape, faux flowers, sparkles)
  • Black permanent marker

Instructions

unicorn decorations with painting a mini clay pot

Paint all the pots.

unicorn decorations with gluing horn and ears in pot

Cut out the horn and ears, and glue them to the inside rim of each pot.

unicorn decorations with mini unicorn planters with decorated rims

Decorate the rim to add a fun pop of color.

Then, draw flirty little unicorn eyes under the rim on either side of the horn using a black permanent marker. You can find many templates online from which to draw inspiration. I like to do them freehand because, just like snowflakes, no two unicorn’s eyelashes are exactly the same!

unicorn decorations with mini unicorn pots filled with plants

I filled my uni-pots with mini plants: one cactus, two succulents, and one fern. They would look amazing with fresh flowers as place settings or filled with candy for a sweet take-home gift.

unicorn planters and floral arrangement

These planters are the perfect complement to the Enchanting Unicorn™ floral arrangement, one of the most popular gifts in the Enchanting Unicorns collection. Pair them at your next magical unicorn party, and your little one will be over the moon!

unicorn decorations with mini unicorn planters with wine and kaleidoscope roses

But unicorns aren’t just for little girls — they’re for everyone! I heard their favorite type of wine is, in fact, rosé. Pop open a bottle at your next unicorn-themed party and let the good times flow.

Have a magical day!

Rosé Sangria and Other Ways to Enjoy Roses During Summer

What are the first two things that come to mind when you think of summer? A lot of folks might say “sun and surf” or “grill and chill,” but if you ask me, it’s roses and rosé! And I’m not talking about Lauren Zima’s recap show for Bachelor Nation.

For me, summer is about celebrations and relaxation. Flirty and frivolous, rosé is the perfect beverage to enjoy on a sun-kissed balcony, at a bustling beachside bar, or while dining al fresco on a warm summer evening. Add the overwhelming fragrance and stunning beauty of rambling roses and you have the perfect storm of summer perfection!

Woman with glass of rose

Here are three ways to enjoy roses and rosé this season.

Rosé sangria mojito cocktail

Rosé is extremely versatile and can function as a base for your favorite cocktail, adding lovely flavors like strawberry, raspberry, and citrus. I wanted to create a summer cocktail that was light, with layered flavors, but not sweet. What I came up with is a cross between sangria and a mojito.

This rosé sangria mojito is a more grown-up cocktail. If you prefer your drinks on the sweeter side, you can add some simple syrup to the mix or use a sweetened cranberry juice instead of the flavored seltzer.

This drink pairs perfectly with the chocolate strawberry bubbly bar or dark chocolate sparkling rosé cordials that come with the Girls Night In Rosé Gift Basket. Just mix it up, pour it into the “Rosé All Day” stemless wine glass, and you’re ready for any celebratory occasion!

Rosé Sangria Mojito Cocktail

Prep Time 5 minutes
Cook Time 10 minutes
Chill time 1 hour
Total Time 1 hour 15 minutes

Ingredients:

  • 1 bottle rosé
  • 1 can cranberry seltzer
  • 2 cups rum
  • ½ cup strawberries, plus more for garnish
  • ½ cup raspberries
  • ½ cup blueberries
  • Fresh mint

Instructions: 

  • Wash all the berries. Remove the tops of the strawberries and cut into slices.
  • Add all the fruit to the pitcher, along with a few sprigs of fresh mint.
    Photo of rosé sangria with a bottle of rosé and a pitcher of fruit
  • Add two cups of rum, the bottle of rosé, and a can of cranberry seltzer.
    Photo of rosé sangria with pouring a bottle of rosé into a pitcher of fruit
  • Stir to mix all the ingredients together and refrigerate for about an hour.
    Photo of rosé sangria with stirring the pitcher of fruit and sangria
  • When ready to serve, pour in a glass over ice and garnish with a strawberry slice.

DIY roses and rosé wreath

This summer, everything is coming up pink! And that means lots of fabulous party décor in that trendiest of colors. This roses and rosé wreath is a particularly pretty — and pink — way to display your wine while keeping it chilled at the same time.

a photo of roses and rosé with a diy roses and rosé wreath

If you don’t feel like going all out, there’s a version of this you can make with a faux rose wreath. Or, meet in the middle and do a little of both.

Father’s Day Craft Ideas: How to Make a Photo Plant for Dad

a photo of father's day photo plant

Dad works hard, and while he’s putting in long hours at the office, he could always use a reminder of his loved ones back home (or in the next room, in the case of a home office). Give him something to add some flair to his workspace with a Father’s Day photo plant.

For this project, I used a ready-made cactus dish garden, but you may choose to build your own dish garden or terrarium from scratch. Likewise, I also used clear adhesive mailing labels, but any type of clear adhesive paper, such as contact paper, will do.

The photo picks took about 10 minutes to create from start to finish. You can use photos of the kids, the dog, or the whole family! If Dad is a sports fan, why not throw a baseball or soccer ball into the mix? Get creative and wow him with a Father’s Day craft idea that blends both his loving family and his unique personality.

Supplies for a Father’s Day photo plant

  • Terrarium or dish garden
  • Photos
  • Photo editing software
  • Photo paper
  • Clear adhesive paper
  • Scissors
  • Wooden skewers

How to make a Father’s Day photo plant

  1. Open the photos in your photo editing software. Since I used pre-sized clear labels, I resized and cropped my photos to fit (mine were 2 inches by 4 inches). Choose a size that will work well with your terrarium. When you have your photos cropped and ready, print them out on photo paper.
a photo of father's day craft ideas with photo cutouts
  1. Carefully cut your photos out.
a photo of father's day craft idea with laminated photos
  1. To make the “laminated” photo picks, take a piece of clear adhesive paper and lay it down on the table. Take one of your photos and carefully place it backside up. Put a bamboo skewer in the bottom center of the photo. Now, add another piece of clear adhesive paper to seal the photo. Use your nail to rub out any air bubbles. Then, use scissors to cut off the extra clear adhesive paper.
a photo of father's day craft ideas with all photos laminated
  1. Use this method for all of your photos until you are left with a few “laminated” photo picks.
a photo of father's day craft ideas with a completed terrarium
  1. Now, simply stick the picks into your photo terrarium. You are now ready to wow Dad with this creative Father’s Day craft idea!

Father's Day banner
Exit mobile version